What is the best floor for a cottage? Floor installation in a private house: varieties, installation, personal experience. How to waterproof and insulate a floor
Read also
The comfort of living in a private house largely depends on how correctly the floors are assembled. A variety of materials can be used to install the basement floor. But most often, floors in country houses are assembled from boards. Quite rarely, but still sometimes they are made of concrete. Recently, various types of self-leveling mixtures have become very popular.
Wooden covering
Using boards is the best answer to the question of how to make a floor in a private home. The wooden covering looks very impressive, is practical, highly maintainable and lasts a long time. To install such a floor, you will first need to prepare the following materials:
- Edged board with a thickness of at least 2.5 cm.
- Waterproofer. You can take a very thick plastic film or roofing felt.
- Thermal insulator. The most suitable option for floor insulation is rigid mineral wool slabs. However, you can also take more expensive polystyrene foam. Also, floors in country houses are often insulated with sawdust or expanded clay.
- Beams for logs are purchased only if these elements have not been installed during the construction of the house. In any case, their thickness should be at least 15 cm.
- Vapor barrier. This material will prevent the insulation from getting wet due to condensation forming from the side of the room.
You will also need to prepare a hammer or screwdriver, nails and screws, and steel angles.
Wood flooring assembly
So, let's see how to properly make a floor in a private house from boards. In order to install a wooden covering, the first step is to carefully level the ground. Next, a thin layer of sand is poured. You can skip this step if you wish. Then roofing felt is laid. The overlap between strips should be at least 15 cm.
The distance between the lags should be equal to the width of the insulation. Mineral wool slabs are installed by surprise. A vapor barrier is placed over it. The overlaps in this case must be at least 15 cm. The vapor barrier can be secured with slats (two per joist on either side).
At the final stage, the boards are installed. They should be well dried and planed on top. In addition, they must be treated with an antifungal compound. When assembling, the boards should be adjusted as closely as possible to each other. Otherwise, during operation, gaps may form between them, the floor will begin to creak, etc.
Which varnish to choose for wood
You can finish plank floors using almost any means. For example, polyurethane varnishes are very popular. Their advantages include, first of all, environmental friendliness and the fact that they are not afraid of even very serious loads. It is also quite common for floors to be coated with acrylic-based products. They are not very resistant to various types of mechanical stress, but they are easy to apply and are very inexpensive. You can use alkyd, quick-drying varnish or very durable epoxy to cover a wooden floor.
Ceiling above the ground floor
Many owners of suburban areas are interested, among other things, in the answer to the question of how to properly install a floor in a private house with a basement. In this case, the wooden covering is assembled using approximately the same technology. The only difference is that you will first need to fill the boards from below, from the basement side. On them, just like on the ground, a waterproofing material is laid, and then insulation.
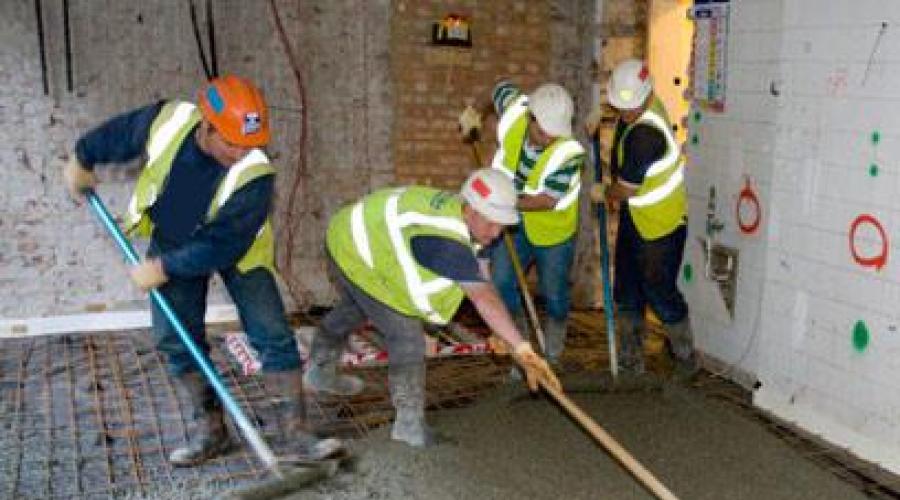
How to make a concrete floor in a private house
This option can also be used in a country building. Most often, concrete floors are made in utility rooms of the house. They are filled in as follows:
- A shallow pit (10 cm) is dug in the room.
- Its bottom is leveled and compacted with a hand roller.
- Sand is poured in a layer of 5 cm. It also needs to be compacted.
- A reinforcing mesh is laid on wooden blocks.
- Beacons are displayed.
- The concrete mixture is being poured.
It is better to start laying the solution from the corner farthest from the door. It is advisable to do the filling in one step.

Poured concrete floors will gain strength no earlier than in two weeks. After this period, you can start walking on them. However, heavy furniture or household appliances should be brought into the room no earlier than after a month.
Finishing
Of course, just a concrete surface is not only unsightly, but also not very convenient. Therefore, such floors are usually topped with tiles or thick linoleum. The second option is also used in living rooms, if for some reason concrete floors are poured in them. Tiles, like in a city apartment, are used to decorate the toilet, shower room, hallway and kitchen. They attach it with special glue.
It is better to lay special linoleum on a concrete floor - with a warm underlay. Fixing it on a cement surface will, of course, be quite difficult. Adhesive tape is definitely not suitable in this case. Therefore, the canvases can simply be laid loosely, securing them with plinths around the perimeter. Sometimes linoleum is also glued to concrete using a special mastic.
Warm floor
“What is the best way to make a floor in a private house?” - the answer to this question is, of course, ambiguous. Using boards or concrete mixture is a simply wonderful solution. However, the so-called “warm floors” are still considered the most convenient and practical. Concrete screed in the residential premises of a country building is often done precisely during their arrangement. In this case, dense slabs of insulation specially designed for such systems are installed on the sand. Then pipes are laid on them according to the scheme. Next, everything is filled with concrete mixture.

Composition of cement mortar
Thus, you now know how to make a warm concrete floor in a private house. When performing this procedure, it is important to use properly prepared cement mortar. If for a regular concrete floor, in addition to sand, crushed stone is also taken as a filler (in the proportion 1x3x1), then when pouring pipes for a “warm floor” system, it is not used. In this case, the percentage ratio of binder and filler should be 1x3 or 1x4.

How to pour a concrete floor on a basement floor
So, we have figured out how to make a floor in a private house. Now let's see how you can arrange the flooring in the basement. In this case, it is very important to pay maximum attention to waterproofing. Instead of sand, it is better to line the bottom of the pit with crushed stone.
Otherwise, the answer to the question of how to make a floor in the basement of a private house is extremely simple. Filling is done in the same way as in rooms. If, for example, a car is to be driven into the basement, the reinforcement must be tied as strong as possible. The rods for it are taken with a thickness of at least 12 mm.

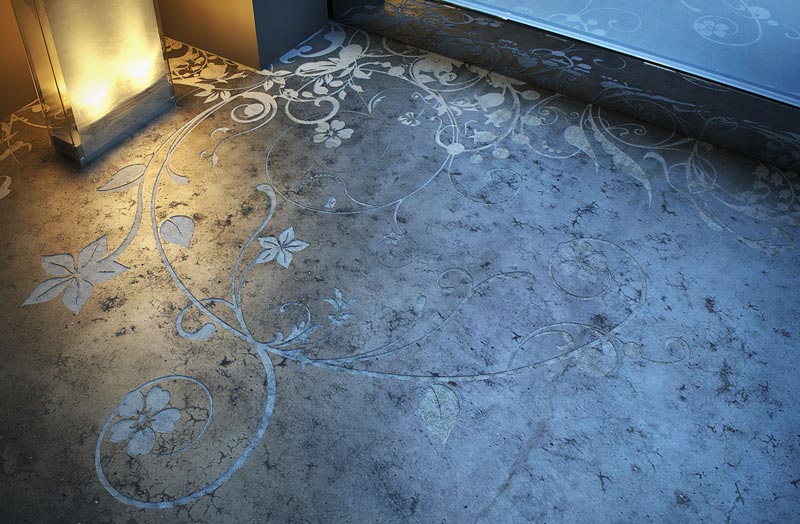
Self-leveling coating in a private house
Next, let's see how to make a floor in a private house using a special self-leveling mixture. This method of installing coatings in country buildings has recently become very popular. It is easier to make such a floor than even a concrete one. In addition, self-leveling coatings, unlike cement screeds, can be very beautiful.
So, how to make a poured floor in a private house correctly. This operation is performed as follows:
- A concrete base is being made. The method of filling it is no different from that described above.
- The surface of the finished screed is dust free. If the concrete floor was poured a long time ago, it will most likely need to be touched up.
- The surface is being primed.
- Using a hammer drill, the filling mixture is diluted with water.
- The solution is applied to the primed base in small portions and carefully leveled.
- Immediately after pouring each portion, the solution must be passed with a needle roller to remove bubbles.
The finished floor should be covered with plastic film. In this case, it will gain strength better.

As you can see, using a self-leveling mixture is a very good answer to the question of how to make a floor in a private house. A photo of such a coating with a 3D pattern, presented a little lower, clearly demonstrates its attractiveness and reliability. You can make such a coating, including with your own hands.
3D self-leveling floor
The pouring technology in this case will be the same as when arranging a simple polymer coating. But in this case you will need to make two layers. A base coat is first applied to the prepared screed. Next, a mosaic is laid out from pebbles or some artificial materials. You can also use a pattern on self-adhesive film. In this case, the base base is pre-primed.
At the final stage, the finishing layer of the polymer floor is applied. After it has gained sufficient strength, it should be varnished.

Well, we hope we have answered the question of how to make floors in a private house in sufficient detail. The methods for assembling them may vary depending on the materials chosen. But no matter what method the home owners choose, everything must be done carefully, adhering to the required technology. In this case, the floors will last as long as possible and will look neat.
Finishing the floor is one of the last stages of renovation in an apartment or private house. It can be carried out using various materials, each of which has advantages and disadvantages.
Depending on the purpose of the room, there are certain requirements for materials:
- Hallway. A room with high foot traffic, in which a large amount of dust and dirt accumulates. The flooring should be as durable and non-marking as possible.
- Bathroom. In this room, the flooring is constantly in contact with water, so the material must be moisture resistant and easy to clean.
- Kitchen. Here you also need a material that is not exposed to moisture and does not absorb fat.
- Balcony. The conditions in such a room are close to those on the street, so the products must be resistant to low temperatures and humidity.
- Living room. This is a room with a high foot traffic, so the main characteristic of the material is mechanical strength.
- Bedroom. In this case, the floor covering must be environmentally friendly.
- Children's room. The material must combine the characteristics of the products for the two previous premises.
This material is used for laying floor coverings in rooms for any purpose. Linoleum was especially popular during the Soviet Union; now it is not so widespread, but still holds certain positions.
 Linoleum - accessibility and ease of care
 Advantages:
- A wide range of. The flooring material is made in various colors and may have patterns and ornaments on the front. Modern rolled materials imitate the surface of stone, wood, parquet and so on.
- Moisture resistance.
- Mechanical strength.
- High rates of sound and heat insulation.
- Simple installation and subsequent maintenance.
Among the disadvantages, it should be noted that the plasticity is too high; dents remain on the linoleum after furniture and other heavy objects. Some models emit harmful substances, this can be determined by a strong chemical smell.
Another classic floor finishing option. Most often, the material is used for arranging floor coverings in kitchens and bathrooms.
 Ceramic tiles – environmentally friendly and durable
 The positive aspects of tiles include:
- Resistant to chemicals, water, ultraviolet radiation and abrasion.
- Wide range of shades and sizes of products. Materials are also produced that imitate the color and texture of natural wood, stone and others.
- Easy to care for.
- Health safety.
Tiles are considered an almost ideal option for floors in the house, but the material is cold, which makes it unpleasant to walk on barefoot. Some types become slippery when wet, and the tiles are also quite fragile and easily crack when hit or dropped by an object.
Wood is now experiencing a new wave of popularity. With its help, floors are laid in rooms for any purpose, including kitchens.
 Plank flooring – nobility and a feeling of comfort
 Advantages:
- Noble appearance.
- Environmental friendliness.
- Feeling of comfort and coziness.
- Possibility of use in almost any interior and combination with other materials.
Among the disadvantages, exposure to water should be noted, so it is necessary to take measures to protect the coatings. Because of this, finishing floors requires more time and money. The ability to absorb moisture makes the wood very fragile; spilled juice, tea or coffee will leave a mark on the coating.
Wood also requires regular sanding, since over time burrs appear on the surface. In addition, high-quality natural materials are quite expensive. If they are not processed correctly, they can swell or dry out, leading to deformation. Don't forget about rodents and insects that prefer to live in such an environment.
 Cork flooring – naturalness and warmth
 Such flooring materials allow you to create a truly original coating. The products are made from cork tree bark, so they are completely natural and environmentally friendly.
- Comfort when walking barefoot.
- The coating is non-slip and non-marking.
- The cork is well protected from moisture.
- The material is easy to care for.
- Wide range of colors and textures.
Disadvantages include low mechanical strength and short service life. In addition, cork requires subsequent finishing with varnish, so such floors cannot be called budget.
 Laminate – a wealth of choice and ease of care
 These products were invented to replace natural wood. Some of its characteristics are significantly higher than those of wood:
- Laminate is available in a very wide range. It can imitate shades of almost all types of wood, natural stone, fabric, leather, and so on.
- The material is warm, in addition, a “warm floor” system can be installed underneath it.
- Easy to care for.
- Moisture resistance.
- Relatively low cost.
- Ease of installation (products are equipped with locking systems, making them easy to install).
Despite the fact that there are models with a moisture-proof coating, it is better not to use laminate for the kitchen or bathroom. You will also need to lay a layer of waterproofing. It should be noted that the laminate is quite fragile: prolonged contact with water and mechanical stress leave marks on it. In addition, during installation there is a risk of damaging the locking joints, so products must be purchased with a reserve.
 Porcelain tiles - durability and practicality
 This material is very similar to ceramic tiles, but is produced using slightly different technology. At the same time, it resembles natural stone. In the modern world, porcelain stoneware products are popular due to the following advantages:
- The strength of porcelain stoneware is rated 9 out of 10.
- Surfaces can last up to 50 years.
- Does not emit harmful substances when heated or wet.
- Easy to care for.
- Resistant to sunlight and water.
- Does not burn and does not support combustion.
- A wide range of.
The main disadvantage is the high cost, and this applies to prices of both materials and installation work. Polished porcelain tiles are too slippery for use in kitchens and bathrooms. In addition, it is cold, so it needs to be heated. In some cases, it is impossible to cover the floor with such material due to its heavy weight.
Self-leveling floors
 Self-leveling floor – aesthetics and uniqueness
 This type is considered relatively new; it has not yet gained popularity among users, but it has a number of undeniable advantages:
- The presence of polymer compounds in the composition ensures high moisture resistance, so it is easy to wash.
- Self-leveling floors can last about 20 years.
- There are no seams on the surface, making it look aesthetically pleasing. This same feature protects the coating from the appearance of fungus.
- Attractive appearance.
Disadvantages include the high cost of the material and the need for serious preparatory processes. In addition, the coating cannot be repaired locally. That is, if the floor crumbles in some place, you will have to completely remove the coating and fill in a new one.
Concrete
Previously, concrete was used only for arranging floor coverings in utility rooms, garages, and so on. Nowadays, concrete screed is very often the basis for other products: parquet, laminate, tiles and others. But modern methods of pouring and grinding make it possible to create a perfectly smooth, visually attractive coating (as can be seen in the photo) and absolutely inert to water. In addition, the floors are strong and durable.
 Concrete floor - strength and durability
 Among the disadvantages is the large weight of the material, so it cannot be used in wooden houses. Also, obtaining a perfectly smooth surface requires specialized construction equipment and qualified operators to maintain it. Another drawback is the complexity of the work.
On a note! If the floor is finished with concrete, then it is subject to mechanical stress. Despite its strength, the material can crumble if an object falls on it from a height.
Once this material was the main product for construction, but now it is considered a sign of prosperity and luxury. The fact is that the stone itself is cheap, but its processing requires high-tech, and therefore very expensive, equipment and consumables.
 Natural stone – presentable and practical
 Among the advantages it should be noted:
- High mechanical strength.
- Resistance to almost any influence (precipitation, sun, shock).
- Almost unlimited service life.
But natural stone also has disadvantages:
- Considerable weight, which makes it difficult to work with; it is not suitable for all floors.
- The stone is cold, so you will have to install a “warm floor” system.
- The installation process will be quite expensive.
- The material requires special care.
Another material for flooring, which has been known to mankind since antiquity. It is also considered expensive because it is quite difficult to install. It is made of glass or natural stone.
 Mosaic – elegance and uniqueness
 The main advantage of mosaic is that it is possible to finish even curved surfaces, while you can create any patterns and designs using multi-colored elements. For ease of installation, manufacturers pre-attach mosaic fragments to the mesh, forming a pattern. The master can only glue it to the floor. In terms of its performance properties, mosaic resembles tiles.
Among the disadvantages, the high price of the material itself and the work involved in its installation should be noted. In addition, mosaic tiles will not suit modern interiors; they look better in a classic or antique style. It should also be noted that only an artist or a person with developed taste and imagination can handle the installation of mosaics on their own.
Polyvinyl chloride
Products from this material are produced in the form of tiles with an adhesive base or a locking connection. There are also cheaper varieties that need to be laid on a layer of tile adhesive. Modern polyvinyl chloride coatings are produced in a wide range of colors. Previously, tiles made from this material were also used for laying floor coverings; many remember these blue and green squares; now the products look more aesthetically pleasing.
 Polyvinyl chloride tiles - a wealth of choice and moisture resistance
 Among the advantages it should be noted:
- Easy and quick installation.
- Easy to care for.
- High sound insulation characteristics.
- Wide range of colors, shapes and sizes.
- Long service life.
Despite the above advantages, there are also disadvantages:
- High requirements for base preparation. The rough coating must be perfectly smooth, otherwise all defects will be reflected on the tile over time. It is also important to take into account that the humidity of the base cannot be higher than 5%.
- Before covering the floor with such material, it is necessary to keep the tiles in the room for several days so that they adapt to the conditions. In addition, each manufacturer indicates temperature and humidity conditions that must be observed during installation.
- Changes color and deteriorates when exposed to sunlight.
- PVC is a synthetic material, so it emits harmful substances when burned. As for fire safety, it also leaves much to be desired.
This is a fairly popular option for finishing floor surfaces. It is a soft and warm material with long or short pile, which is laid on a prepared base and covered with a plinth. The result is a covering that resembles a regular carpet, but which covers the entire area of the room.
 Carpeting – comfort and sound insulation
 Advantages:
- Relatively low cost.
- Comfort and coziness.
- Wide range of design solutions.
- Long service life and resistance to various types of influences.
- High level of sound insulation.
Negative qualities include:
- Cheap product options are not protected from the negative effects of ultraviolet radiation.
- Highly hygroscopic and susceptible to water.
- Accumulates debris and dust.
- Difficult to care for.
- Light-colored products are very easily soiled.
- Requirements for foundation preparation. Under the carpet there must be a layer of reliable waterproofing.
Last on the list, but not least, is the flooring option. It is a high-quality and at the same time elite coating. Performance indicators directly depend on the type of wood used in manufacturing, as well as production and processing methods.
 Parquet – durability and feeling of warmth
 If we talk about the positive aspects of parquet, it is necessary to note:
- Attractive appearance. Like other products made from natural wood, parquet boards look noble.
- Long service life. If installed correctly and sanded regularly, the coating can last approximately 30–40 years.
- High thermal insulation qualities. In warm regions, there is no need to install insulation under the parquet.
Minuses:
- Susceptibility to various deformations. In the summer season, wood expands and contracts in winter, so expansion joints must be left when laying.
- High price. Parquet is significantly superior to laminate or linoleum in this indicator.
- The need for regular repairs and replacement of the protective varnish layer.
 Parquet is one of the best types of flooring, but due to the high cost of the material and work, it has not gained much popularity
 A huge number of different materials are suitable for finishing floor coverings. Craftsmen even use coins or cardboard to decorate floors. Most products can be installed yourself to save some money on hiring specialists. But there are also those that require qualifications and the use of professional tools.
In this material, we will talk about how to make a floor in a private house. First of all, you need to decide on the floor design. The design of the floor is determined by the way the house is used, for example, in a country house you can lay a single plank floor, but in a full-fledged residential building you should have a floor with insulation.
How to make a floor in a private house from boards
The floor is made of planks in one layer. It is the simplest flooring option. This design is suitable exclusively for summer buildings or housing in warm countries. If the building design stipulates that floor beams are mounted in the walls, then the distance from one beam to another is most often too large to immediately lay the boards.
To provide the necessary strength, you will need to lay joists. If you plan to install the floor on top of the support pillars, then the placement of the beams can immediately be made as required.

Now, logs are laid on top of the supporting beams, which are set strictly horizontally; for this, wooden spacers and wedges are used. After checking the location of all the joists with a level, they need to be attached to the beams using nails, and then the floorboard should be nailed to them.

Floor made of two layers of planks
Installing such a floor will require significantly greater costs and effort, but this is compensated by a reduction in heat loss. It is better to use coniferous wood for the construction of the subfloor. To save money, you can use a non-edged board or slab.

Most often, thermal insulation is installed in the space from the rough to the finished floor.

As thermal insulation, you can use expanded clay, a mixture of clay and sawdust, or straw. Naturally, you can also use modern materials - polystyrene foam or extruded polystyrene foam. For thermal insulation, a finished floor (tongue and groove board) is laid.
Concrete floor
The concrete floor is installed in several stages:
- First of all, marking is done. Here it is better to use a laser level. After installing it, he will mark the walls in the right places for the future floor. To mark the level in the center of the room, threads are pulled from the marks in the walls.
- Next we make gravel backfill. This is the insulation in your floor. The ground should be cleared of plants to prevent them from growing through the floor. After this, drive in the stakes so that their level does not reach the level of the future floor by 100 mm. The backfill starts from the wall opposite the door. After filling the entire area, the gravel is leveled and compacted, and the pegs are removed.

- At the next stage, sand is poured, compacted and leveled.
- Proper waterproofing plays a huge role; moisture insulation of a concrete floor is usually done with polyethylene film, the thickness of which is at least 250 microns.
- Next, we fill. First of all, you should set a level of beacons, which are used as wooden or metal slats, the distance between which is from 1 to 1.5 m. The upper edge of the slats should be in contact with the stretched threads. Then, the rope markings are removed.
- Now the space between the slats is filled with concrete, from the end of the room to the door. After this, the concrete is leveled using a rule.
After the concrete has “set,” the slats should be dismantled and the voids filled with mortar. To level the mortar in the cracks, use a “grater” under the plaster. After this, the floor is covered with plastic film for a month. It is better to periodically moisten the concrete. This will make it possible for the concrete to gain maximum strength.
Pouring a floor in a private house - instructions
To pour a concrete floor yourself, you do not need any special construction skills. The main thing here is to prepare the necessary consumables and calculate their quantities. If this is done, then filling the floor in a private house will be effective and simple.

Don’t forget, installing a durable and level concrete floor is the key to quality installation of any floor covering.
To carry out quality work, you must use:
- vibrating rammer;
- roofing felt;
- plastic film;
- expanded clay;
- foam boards;
- reinforced mesh;
- restrictive slats;
- building levels.
Work procedure or instructions for pouring a floor in a private house
- 1. First of all, you need to prepare the base surface for the future concrete floor. To do this, the top layer of soil must be removed to the required depth. Make an effort to ensure that the plane is as even as possible. Now, it must be compacted using broken bricks or crushed stone. A vibrating rammer will help you with this. If you do not have the opportunity to use such a tool, and you need to arrange the floor in a small area, then compaction can be done manually.

- 2. At the next stage of work, waterproofing and thermal insulation should be installed. It is most rational to use roofing felt for these purposes. If you want to save a little money on installing insulation, and you are sure that the groundwater level will never reach the floor in your house, then floor insulation can be done by laying several layers of a material such as ordinary plastic film. Here your personal preferences and financial capabilities play the main role.
- 3. When the waterproofing is completely installed, you should begin laying the heat-insulating material. For these purposes, you can use expanded clay or foam boards. Although this material is being used less and less, glass wool can also be used to create a heat-insulating layer. When insulating a concrete floor, take a responsible approach to the process of calculating the amount of consumables, otherwise, performing such repairs can cost you dearly.

- 4. Now, you can begin the process of filling the floor with mortar. Concrete is laid on top of the prepared surface from the end of the room opposite the door, while gradually moving towards the beginning of the room. The use of limit rails, which are set in accordance with the floor level, will help you in this process. It is very important here to strengthen the final layer with a metal frame. To carry out reinforcement, a regular chain-link mesh can be used. Using these actions, you can increase the impact resistance of the top layer.

- 5. Well, now we can proceed to the final stage. Here you will need to carefully make a screed using a leveling layer of cement, which has been diluted with water, until it turns into a liquid slurry. For these purposes, you can use a special leveling mixture, which is freely sold in specialized stores.
Video - pouring a floor in a private house
Do-it-yourself flooring in the house
If you are planning to do the flooring in your home yourself and don’t know how, then the information below will definitely help you with this.

The most responsible approach should be taken to installing the floor in a building in which year-round living is planned, since the comfort and appearance of the room depend on how correctly this work is performed.

What knowledge should you have before installing flooring?
The cost of installing flooring is influenced by several factors, and first of all, what type of flooring you plan to install. There are methods by which floors are laid, and the most common of them are:
- Arrangement of the floor from boards in two layers;
- Arrangement of the floor in one layer;
- Arrangement of the floor in which support pillars are used.
The use of each method is associated with both positive and negative aspects. The most inexpensive option is to install a single floor. The low cost is explained by the fact that when using this method, the material consumption is not high, and installation is simple - even a novice builder can do this work. But the thermal insulation properties of such floors leave much to be desired, for this reason, in winter, establishing a comfortable temperature in the room will not be an easy task.
To ensure warmth in your home in winter and year-round comfort, it is recommended to install double floors. To make this type of floor, use an uncut board (for the bottom layer) and a tongue and groove board (for the outer layer).

Naturally, this type of flooring will be more expensive, since it will require more materials. However, the level of technical and operational properties of a double floor covering will be higher than that of a single floor covering.
If we talk about installing a floor on top of support pillars, this technology is relevant in houses that are built in areas with a high groundwater level. This design makes it possible to protect your home from the harmful effects of moisture.
And finally, before installing flooring, it is better to consult a specialist. By following these steps, you will select the most functional flooring option for your home and save on materials.
A wooden floor on joists makes it possible to avoid without the use of reinforced concrete floors or other concrete foundations, the cost of construction of which is quite high.
Effective ventilation of wood on joists in a private house - a necessary and mandatory condition for the reliability and durability of the structure.
Wooden floor on posts along joists
The figure shows a design option for a wooden floor on joists in a private house with an underground space.
The space under the floor is formed by the fact that the logs are laid on fairly high columns of brick or concrete blocks. This design allows you to raise the floor level of the first floor with a minimum volume of backfilling the basement space with soil.
Here the basement and basement space under the floor are outside, outside the thermal envelope of the house, and will be cold.
To ventilate the underground space, vents are made in opposite external walls, above ground level - through holes covered with a metal mesh to protect against rodents. The same openings should be in the internal load-bearing walls.
Air movement under the floor occurs mainly due to wind pressure.
In winter, there is a danger of soil freezing in the underground space, which can lead to heaving soils causing the floor to move relative to the walls.
To prevent freezing, it is recommended to close the vents for the winter and insulate the base.
However, deterioration of ventilation as a result of closing the vents leads to the accumulation of moisture in the insulation and wooden parts - reducing the thermal resistance and durability of these elements.
It must be said that such a device for underground space has been used in private construction for a long time. The design was not originally designed for the use of effective floor insulation.
In houses with weak floor insulation in winter, part of the heat from the room penetrated into the underground space and warmed it, preventing freezing, but increasing heat loss.
Modern floor insulation practically blocks the flow of heat into the subfloor from the premises.Freezing of the subfloor can only be prevented by saving ground heat.
Given modern requirements for energy saving, a cold underground ventilated through vents is not the best option. It is still used rather by inertia.
 Scheme of effective underground ventilation in the basement of a private house through an exhaust duct
 To ventilate the subfloor of a private house or cottage, it is beneficial to use effective ventilation through an exhaust duct. This ventilation scheme is the only correct option for a house with an insulated base or basement.
How to make a wooden floor on posts
In old books and construction regulations you can find floor designs on posts using NOT effective heat-waterproofing materials.
Modern floors on joists in a private house do this
The support columns are laid out from ceramic bricks or concrete blocks. The distance between adjacent columns along the log (span) is recommended to be no more than 2 m. The base of the column can be a layer of compacted crushed stone with a thickness of 50-100 mm, spilled with bitumen mastic. Or, instead of mastic, a waterproofing film is used.
The top of the columns is leveled to one level with a solution. If the solution thickness is more than 3 cm. The masonry mesh is embedded in the solution. The top of the posts is covered with a sheet of waterproofing material.
Wooden beams are laid on the waterproofing layer. The distance between adjacent joist beams (lag pitch) is determined by their cross-section, as well as the load-bearing capacity and rigidity of the overlying floor layers - sheathing, subfloor, finishing coating. Typically, a step convenient for laying standard mineral wool insulation slabs between joists is taken, about 600 mm.
For the above-mentioned lag pitch and span between the columns, taking into account the thickness of the insulation and sheathing, with normal floor loads, the lag cross-section is sufficiently 100-150x50 mm. A galvanized steel mesh is attached to the bottom of the logs lying on the posts. Instead of a mesh, you can nail boards or slats with a thickness of at least 20 mm.
A windproof, highly vapor-permeable film is laid on top of the mesh (boards) and logs.
This film prevents makes it difficult to carry away insulation particles by air flow (dust formation), but does not prevent the evaporation of moisture from the insulation and wooden parts.
A sheet of windproof, vapor-permeable film is laid on top, across the joists, and lowered on both sides of each joist until it rests against the steel mesh so that a tray is formed between the joists. The film is stapled to each side of all joists.
Mineral wool insulation is laid in the formed channel between the joists on the windproof film. You can do without a windproof film if you use special insulation boards with a compacted windproof layer for the bottom layer.
How to determine the thickness of floor insulation
The thickness of the floor insulation is selected according to calculation, providing standard heat transfer resistance R = 4-5 m 2 o K/W. If the base is not insulated, then the thickness of the floor insulation is determined from the condition that the temperature of the space under the floor is equal to the temperature of the outside air. The recommended thickness of mineral wool insulation in this case is no less than 150-200 mm.
For a house with an insulated foundation and plinth, the thickness of the floor insulation can be reduced so that the sum of the heat transfer resistance of the plinth + floor is no less than the standard (see above).
How to calculate the thickness of floor (floor) thermal insulation
A sheathing of bars with a thickness of at least 50 mm is laid across the joists. Another layer of insulation is placed between the sheathing bars. This two-layer insulation design ensures that the insulation covers the cold bridges through the joists. The distance between the sheathing bars is chosen in the range of 300-600 mm., a multiple of the width of the subfloor covering slabs.
This two-layer design of the floor base (joists + sheathing bars) allows you to conveniently place both insulation boards and floor covering slabs (CBF, plywood, etc.).
The insulation with the lathing on top is covered with a vapor barrier film. The joints of the film panels are sealed. The junctions of the film to the walls are connected to the waterproofing of the walls and the same is sealed.
It is recommended to select the thickness of the sheathing bars at 25-30 mm. greater than the thickness of the top layer of insulation. This will allow, by lowering the film on both sides of each sheathing bar, to create a ventilated gap between the vapor barrier film and the floor covering.
Vapor and thermal insulation with penofol
Instead of the top layer of insulation and vapor barrier film, it is more profitable to lay penofol - a foamed polymer covered with aluminum foil, 10 mm thick. mm. (also available under other trade names).
Penofol must be laid with the aluminized side up, towards the ventilated gap, across the sheathing bars and lowered on both sides of each bar. After this, penofol is nailed to each side of all the bars with a stapler so that a gap of 3-4 is formed between the aluminized surface and the floor slabs cm.. The joints of the penofol panels are sealed with aluminized adhesive tape. A layer of penofol will provide heat transfer resistance equivalent to a layer of mineral wool with a thickness of 40 mm., and the necessary vapor impermeability.
Subfloor boards are attached to the sheathing bars on top of a vapor-proof film or penofol. Instead of boards, slabs are more often used: cement-bonded particleboard (thickness > 22 mm.), plywood (> 18 mm.), etc. Sheets and slabs are placed with the long side on the sheathing bars. Spacers are secured under the short side between the sheathing bars. All edges of the laid sheet must be supported - a block or spacer.
The use of polystyrene foam and polystyrene foam boards as insulation is not recommended. Such slabs serve as a barrier to moisture, which is always contained in the wood of the floor. By preventing moisture from escaping from the wood, foam insulation shortens the service life of wooden floor parts. In addition, mineral wool insulation, due to its better elasticity, adheres more tightly to the joists than polystyrene foam.
To protect the underground space from ground moisture, it is advisable to cover the entire surface of the soil with a waterproofing film (and not just under the posts, as in the figure). The joints of the covering panels are sealed. The junction of the film to the walls must be connected to the waterproofing of the walls and also sealed. The floor posts lie directly on the film.
As a result, we obtain a ventilated underground space, limited by sealed shells - on top (vapor barrier) and below (waterproofing).
Such an underground space protects the house not only from moisture and cold, but also from penetration into living spaces.
Floor with joists on intermediate walls
In modern floor designs, joists are located at a short distance from each other, which makes it possible to use lumber of a smaller cross-section, and therefore cost, and also to conveniently place insulation boards.
Instead of brick columns, it can be advantageous to rest the logs on intermediate walls laid across the logs at intervals of about 2 m. Bricks or blocks in the wall are laid using the honeycomb masonry method, half a brick thick, leaving increased gaps of 1/4 brick in the vertical joints for ventilation of the underground space. If the wall has a height of more than 0.4 m., then no less than every 2 m. length of the wall, lay out pilasters - brick-thick columns to increase the stability of the wall.
If the lag step is no more than 600 mm. and span less than 2 m., then the cross-section of the wooden log is enough to be 100x50 mm.
Wooden floor on the ground on joists
Another option for a wooden floor along joists in a private house is shown in the following figure:


Here, unlike the first option, the floor level is raised to the required height by filling the base with compacted soil.
Ventilation of the floor is carried out due to the movement of air under the influence of the draft of the ventilation duct.
Warm air is taken from the room and through the ventilation holes in the baseboards and the gap between the subfloor covering and the wall enters the space between the joists. Next, the air enters the ventilation duct.
To ensure ventilation of the underground space, baseboards with holes are used or baseboards are installed with a gap between them and the walls.
In order for the air to move more or less evenly under the entire surface of the floor, the gap for air passage is made of different widths - the farther from the ventilation duct, the wider the gap (2 cm.). Near the ventilation duct, no holes are made in the baseboards or gaps between the wall and the floor covering (or the gap is sealed with tape).
It is important to understand that in this ventilation option, unlike the first, the underground space is located inside the heat-protective shell of the house and must be warm. The outer shell of the subfloor must have a heat transfer resistance no less than the wall of the house. Otherwise, the flow of warm air from the room may lead to condensation on the subfloor parts.
Make the layer of bulk soil thicker than 600 mm. Not recommended. Pour the soil and carefully compact it in layers no more than 200 thick. mm. It is still not possible to compact the fill soil to the state of natural soil. Therefore, the soil will settle over time. A thick layer of fill soil can cause the floor to settle too much and unevenly.
The waterproofing film is laid on a leveling layer of sand with a thickness of at least 30 mm. The joints of the film panels are sealed. The junctions of the film to the walls must be connected to the waterproofing of the wall and also sealed.
Thermal insulation is laid on the waterproofing.
In this option, it is better to use polymer insulation boards - polystyrene foam (expanded polystyrene). The thickness of the insulation is 50-100 mm., since the ground temperature under the house is always positive.
If the walls and basement of the house are not insulated, then along the external walls a width of at least 800 mm. a thicker layer of insulation should be laid, 150 - 200 mm.
In a house with multi-layer external walls with insulation on the outside, to eliminate the cold bridge bypassing the insulation of the walls and floor, the outside must be insulated(see picture in the first part of the article).
The floor joists rest on low pads made of brick or concrete blocks.
If extruded polystyrene foam boards (XPS, penoplex, etc.) are used as thermal insulation, then the logs can be laid on pads cut from these boards.
A gap of 3-5 should be provided between the thermal insulation and the wooden floor joists. cm. for free air movement.
According to building regulations, there is one restriction on flooring. Since the space under the floor is ventilated through a natural ventilation exhaust duct, it is prohibited to make the final floor covering from combustible materials: boards, parquet boards and panels, etc. Or a non-combustible base should be provided under them, for example a prefabricated screed made of plasterboard, gypsum fiber sheets or a subfloor made of cement bonded particle boards.
In this option, the joists and other floor elements are in better humidity conditions than in the first case.
In this design, the ventilation duct serves to ventilate not only the subfloor, but also the rooms of the house. About what needs to be done to save heat emitted by the ventilation system,
Floors, soils and foundations
Ground floors are not connected to the foundation and rest directly on the ground under the house. If it is heaving, then the floor can “go on a spree” under the influence of forces in winter and spring. To prevent this from happening, the heaving soil under the house must be made not to heave. The easiest way to do this is the underground part
The design of pile foundations on bored (including TISE) and screw piles involves the installation of a cold base. Insulating the soil under a house with such foundations is a rather problematic and expensive task. Floors on the ground in a house on a pile foundation can only be recommended for non-heaving or slightly heaving soils on the site.
When building a house on heaving soils, it is necessary to have an underground part of the foundation to a depth of 0.5 - 1 m.
 |
| In a house with external multilayer walls with insulation on the outside, a cold bridge is formed through the base and load-bearing part of the wall, bypassing the insulation of the wall and floor. |

 Source: http://otdelkaexp.ru

