Which stair railings are cheaper? Installation of handrails on stairs, walls - mounting options. The final stage of production - painting
Read also
When constructing enclosing structures for stairs, different materials and technologies can be used. If fencing is needed for a staircase in a private house, it all depends on the desires and financial capabilities of the owners. Metal structures are a popular solution, because they are highly durable and can elevate the interior.
The process of making fences from metal with your own hands is more difficult than from wood. This requires the appropriate tool and at least minimal skills in working with metal. But the result will be different depending on better side. Metal stair railings will last for decades, with minimal maintenance. And the appearance of such structures can be simply unique.
What materials can be used to make metal railings
They are considered the most valuable. Besides that forged elements They have the strength and durability characteristic of metal structures; they also give the interior solidity and status. There is only one problem - the complexity of manufacturing. Only a professional can forge a full-fledged fence with his own hands, and finished goods quite expensive. But forged elements can complement others well metal constructions– welded, for example.
Steel railings are no less popular. They are durable and can withstand heavy loads. If you know how to use welding machine and a grinder, then you can build fence posts, patterned filling, and handrails from steel with your own hands. The appearance of stainless steel or painted black steel will suit the most different interiors. When you manufacture steel fencing yourself, you have the opportunity to save money.
Aluminum railings are prefabricated structures. Aluminum is softer than other metals; under significant loads it deforms. But for fencing a simple staircase for a home, it may be the most suitable option. Aluminum parts are much lighter than steel ones - transportation and assembly of fences made from them is not difficult to do with your own hands.
Safety standards
Having decided to make metal fencing with your own hands, you need to pay attention to safety issues. There are standards for the following railing parameters:
- the optimal height is from 90 cm to 1 m;
- the load that the railing must withstand is 100 kg/m;
- the distance between the balusters is from 10 to 15 cm.
- handrail diameter, optimal value – 5 cm;
- the gap between the wall handrail and the wall is at least 10 cm.
In addition, the integrity of the handrail is important, as well as the absence sharp corners and burrs, which can easily injure your hand. The handrail shape is usually chosen to be round; this option is the most convenient to use. In general, the recommended values determine not only the safety of the structure, but also the comfort of its use. For example, a railing of a specified height not only protects a person from falling, but also allows him to feel comfortable holding on to them when descending or ascending.
How to attach metal stair railings
Mounting options depend on the parameters of the ladder and its location. If the span runs along the wall, then the fences can be mounted on the wall. Actually, from the railing to in this case Only the handrails remain. Do-it-yourself installations are easy, and eliminating much of the stair railing reduces overall costs.
In another case, fence posts are installed on the steps. This is the most common solution; it is suitable for almost any staircase structure. The posts to which the handrail is mounted are attached to the outer edges of the treads.
The most reliable is considered to be fastening to the ends of the steps. This type of fastening, called lateral, is used, for example, when one does not want to narrow the useful span area. But you need to keep in mind that this method is expensive and labor-intensive. In addition, if the staircase has several flights, then the distance between parallel flights should be at least 20 cm.
Aluminum option
Like most metals, aluminum has a number of important qualities that allow it to be used for the manufacture of stair railings. First of all, this:
- corrosion resistance;
- durability;
- strength;
- resistance to low and high temperatures, as well as temperature changes.
It should be noted that aluminum is lightweight; it sets it apart from other metals. In many cases, softness can also be considered an advantage - aluminum parts can be easily given the desired shape.
The process of assembling and installing aluminum railings is not particularly difficult; everything is done using conventional fasteners. Even an untrained person can assemble and install stair railings from ready-made aluminum parts with his own hands.
Concerning appearance aluminum fencing, today widespread received railings made of anodized aluminum. Such material is externally indistinguishable from of stainless steel. Anodizing increases the wear resistance of aluminum and improves its appearance - you can give the material different shades: gold, silver, nickel and others.
For decoration aluminum structures cold bending technology can be used. In this way, you can create, for example, rounded elements to fill the space between racks.
Cold bending of metal
Prefabricated aluminum railings for concrete stairs
The parts from which aluminum railings are assembled can be purchased at hardware store, and do-it-yourself assembly will save some money. The following components will be needed:
- racks with a diameter of at least 4 cm;
- crossbars with a diameter of 16 mm;
- handrail, diameter – 5 cm;
- hinges for fixing the handrail;
- connecting parts and holders for crossbars;
- additional fasteners and fittings - anchors, glazing beads for racks, decorative plugs, filling, etc.
The guardrails will be attached to the steps. To do this, markings are first made - it is necessary to determine the location of the racks on the stairs. It is recommended to place the racks in the middle of the steps with a distance of 35–50 mm from the edge. Then holes for anchors are drilled, depth - 10 cm.
The resulting recess is first filled with a special adhesive. This is done in order to mix the glue with the dust remaining after drilling. The anchor is inserted, rotated and removed. The recess is again filled with glue and the anchor is inserted again.
Then the anchor needs to be drilled at the points above which the glazing beads will be located. This is done for mounting with self-tapping screws; the stand is also drilled in the appropriate places. Next, the stand is put on the anchor, but not secured - the height may need to be adjusted.
A flange is put on it through the top of the rack; it serves as an additional fastening and should be located at the bottom. Hinges are attached to the upper ends of the posts. A handrail is mounted on them - it is placed on hinges, adjusted in height and fixed with self-tapping screws.
Advice!
If the staircase design includes several flights, then the handrails are connected to each other by rotating elements.
Do-it-yourself assembly and installation of aluminum railings.
How to weld a railing
Welded structures stair railings are the cheapest option. The raw material for the manufacture of fencing is rolled metal - tubes, angles, rods, fittings, etc.
A common option for manufacturing metal fences is to create a solid frame. When making such a structure with your own hands, you need to take into account that the frame will be raised above the steps by 10 centimeters. Having decided on the height and distance between the posts, parts of the required sizes are cut using a power tool. Assembly begins with laying out the frame and minimal tackling. You should not weld tightly right away.
The next step is to reinforce the frame. Internal vertical jumpers are welded. After making sure that the resulting structure is not distorted, you can carry out the final welding of all its elements. To increase the strength characteristics of the frame, it is recommended to weld the seams on both sides.
The last step is to add 10cm posts to the bottom of the frame. The lower parts of these posts must be equipped with plates. To attach to the steps of the stairs, holes are drilled in the plates.
Welding stainless steel railings.
Finishing
The production of welded stair railings is completed by treating their surface. If stainless steel was used as the material, then you only need to clean the weld seams.
Treatment of black steel and iron surfaces also includes the application of a primer and subsequent painting. This can be done after installing the railing on the stairs.
Advice!
But it is advisable to clean the welding seams before installation, since after installation some areas may become difficult to access.
From modern technologies It should be noted polymer coatings. Their use makes the metal more resistant to wear and corrosion, and also increases the decorative value of the product.
The assembly of the staircase railings is completed by installing the handrail. Not everyone knows how to fasten a handrail, how to do it correctly, reliably and discreetly. We will describe some common methods for wooden and metal stairs here.
Attaching a handrail to the balusters of a wooden staircase
It turns out that wooden railings are the most difficult to make. That's because there are a lot different ways and techniques for working with wood and there are almost no ready-made solutions, since each staircase is individual and has its own characteristics. For example, attaching a handrail to balusters can be done using dowels, self-tapping screws, nails, bolts, special ties (zipbolts), and glue. In addition, you can “mount” the railing directly on the balusters and posts, but there are options with an additional strip, which is sometimes called a “rail rail.” And all of these are the “correct” ways to connect the posts to the handrail. We will talk about how to do this in this section.
First of all, cut a piece of the handrail to the required length. This can be a fragment from one support pillar to another, a piece for the entire span - from the upper/lower pillar until the moment of turning. It all depends on the design of the staircase. If there are joints between two fragments, they must be processed well, achieving a perfect match. Then the handrails for the street must be coated with protective impregnations, and then painted/varnished. Afterwards you can deal with the issues of attaching the handrail to the stairs.
How to trim balusters for installing handrails
After installing the balusters on the steps, their tops are at different levels, and without trimming the handrail cannot be installed on them - it does not fit like that. To install the support handrail on the stairs, it is necessary to cut the upper part of the racks at a certain angle. This angle is determined by the steepness flight of stairs, and it does not need to be calculated. It is determined “on the spot”.

To find the cutting angle of the balusters, you can use a thread stretched between the support posts. We tie it at the same distance from the tops of the pillars, which are installed at the top and bottom of the span. Where, according to the plan, the lower border of the handrail will pass. Using this stretched thread, we draw a line with a pencil onto the tops of the posts. Instead of thread, you can use or you can temporarily secure a guide (any flat strip).

This is how it should turn out - the staircase railings are ready for installing handrails
We got the line, now we saw off the tops of the columns on the stairs strictly along it. Next, you can continue attaching the handrail to balusters or posts.
Allow me one piece of advice: if for the subsequent installation of the railing you need to drill holes for dowels or studs, it is better to do this before trimming. This makes it easier to find the center, easier to hold the drill perpendicular. After the holes are made, you can take a saw/jigsaw and file along the intended markings of the rack.
Connecting balusters and railings with dowels and threaded rods
Let's consider one of traditional ways: fastening the handrail using dowels or pins. For this type of connection, it is necessary to make matching holes in the handrail and staircase railing posts. If you install studs, you can screw them into the holes made in the center of the balusters and install the handrail in the position in which it should stand. After checking that everything is in place correctly, walk along the handrail, tapping each baluster with your fist. protruding ends metal studs will leave a mark on the back of the handrail. Remove the handrail and mark the resulting marks with a marker/pencil for reliability. Now you can drill the holes. With this method of marking the handrail, there are almost no problems with its “fitting” into place.
The second option for marking the handrail for installing pins and dowels is carried out before they are installed in the balusters. First of all, we put the cut piece of the handrail in place. Then, with a pencil, mark on both sides where the balusters are installed. Before making marks, check the distance between adjacent posts below and near the handrail. If they match, everything is fine, we put marks; if not, we adjust the position of the rack and only then make marks. Adjustments are needed to ensure that all the staircase supports are vertical. This will make the railing more secure.
After all the balusters are marked, remove the handrail. WITH reverse side The marks we made are worth it. We draw diagonals between the pairs of lines that outline the baluster. We put a mark at the place where they intersect. Here you will need to drill a hole for a dowel or pin. We find the centers on the balusters in the same way (if there are no holes in them yet). As you understand, with this method of marking the handrail for the railing, problems can arise - the slightest inaccuracy and the handrail does not fit into the post. The good news is that the baluster can be moved within certain limits. As long as it is not fixed, there is a certain freedom, and this can be used when installing the railing. Just move it so that the tenon fits into the groove. In general, you know how to attach handrails to dowels.
To make the installation of the railing more reliable, in addition to dowels or studs, you can coat the connection with glue. This will make the structure more rigid and extend its service life without backlash.
With an auxiliary bar - support rail
Agree that the most easy installation handrails on balusters - through screws or nails. What stops you from making such a decision? An overly unsightly result in the form of fastener caps that spoil the whole look. But there is a very similar method that guarantees a good appearance of the stair railings. An auxiliary bar is used, which is also called a bolster.
The auxiliary strip is cut with a tenon, which mirror image repeats the shape of the groove at the bottom of the handrail. The flat side is placed on sawn balusters and fastened through (screws or nails - your choice). Don't forget to check the distances between adjacent posts.
Then the upper part of the support is coated with glue and the handrail is “planted”. All. There are no traces of fasteners on the front of the handrail, everything is holding together. The only thing that needs to be taken into account is that the height of the handrail turns out to be slightly larger, since the thickness of the auxiliary plank is added (if the plank is wooden, this is at least 2-3 cm).
There is another way to attach the handrail to the support rail - with small nails or self-tapping screws from below, at an angle. But with this fastening, the caps are visible. They can be disguised using one of the known methods, but it will take a long time...
The easiest way is to screw it with self-tapping screws
As you know, over time, wooden railings become “loose” due to the fact that under load they wobble, the wood fibers become crushed, and play appears. To reduce the possibility of play, when fastening through a plank, two or more screws/nails can be used for each baluster. This will make the handrail mount more rigid.
Also, for greater reliability, the bar can be made of metal. Any thin metal will do. Be it steel or aluminum. But then it will be necessary to either cut the bar to fit the size of the recess in the handrail, or modify the groove so that the handrail fits well on the structure. And one more thing: if the plank is metal, you need to find a universal glue that glues wood and metal well. This handrail mount for stairs is simple, beautiful, and reliable. Suitable for those who decided to make a stair railing with their own hands for the first time.
For spikes of different shapes
It is possible to install a wooden handrail without metal fasteners: with spikes and glue. Spikes are cut at the top of the balusters. Under them, recesses of the same shape are formed in the handrail. Tenon/groove shape - any. It can be a rhombus, a rectangle, a circle, an oval. The main thing is that the tenon and groove match perfectly. This can be achieved by making a template and repeating it exactly on each fragment. Minimum height the tenon is 2.5 cm, so the height of the handrail cannot be less than 4.5 cm.
After a tenon is formed on each baluster and a groove is cut in the corresponding place on the handrail, they are glued. When installing the handrail on the balusters, they can be shifted slightly to align the holes. You can use the installed handrail after the glue has dried (the time is on the package).
Connection between handrail and support post
Often the handrail does not go on top of the post, but is connected to its side edge. How to connect the handrail and the post in this case? The easiest way is to, after cutting the handrail at the desired angle, fasten it with self-tapping screws or nails driven in at an angle. The disadvantages are obvious - the fastener heads are visible.
There is another way - to use a zip bolt, which consists of two movably connected studs and a gearbox. For its installation, a technological hole is required, which is made in the lower part of the handrail. It is then covered with a plug to match the wood and it becomes almost invisible. The second advantage of such a connection: it can be tightened (to a certain extent) if suddenly a backlash appears.
You also need to drill holes for the studs under the zipbolt - one in the post and one in the handrail. The technological hole is usually made in the handrail. It is positioned so that it is possible to tighten the thread under the gearbox (the length of this thread is usually 10 mm). The depth of the holes is the size of the studs (from the joint to the edge), the diameter is 1-2 mm less than the diameter of the stud.
Studs are installed in the drilled holes. It is screwed into the post and simply inserted into the handrail. A gearbox is installed in the prepared technological hole, in which there is a hole for a hex key (6 mm). We rotate the gearbox so that it is convenient to use the key. Turn the key and tighten the thread, pulling the handrail to the post. This must be done after the balusters are connected to the handrail. By attaching the handrail to the post, you can assume that the railing is installed.
Installing handrails on prefabricated metal fencing
In general, assembling handrails from metal (stainless, nickel-plated, chrome-plated) pipes is similar to a construction set. There are pipes different diameters, decorative elements for them, and a whole set various fastenings. The railings are assembled from all these parts. That’s why they are called “prefabricated”. When deciding how to attach handrails to metal balusters/posts/racks, your task is to choose those elements that suit your task better than others or that you like more than others.
To connect metal posts/balusters to the handrail, there are special ends that are attached to a round/square/rectangular pipe on one side and to the handrail on the other. There are models different types. You just need to find the most suitable one, choose the one you need: according to the size of the racks and the type of handrail.
In metal prefabricated fences, handrails can be different:
- round metal pipe;
- profile (rectangular, square) metal pipe;
- plastic handrail (round, oval or original shape);
- wooden of any profile.
Under each of these handrails there is a fastening, and usually more than one. Choose what you like. They are easy to fasten with clamping bolts. But, for reliability, and if the thickness of the metal allows, you can weld all the connections of the two metal parts. - it’s not an easy thing, but if you know how to handle a welding machine, nothing is impossible. Welding takes more time, but such fastening of the handrail will be very reliable.
When connecting elements metal stairs with plastic or wood, you must use the fasteners recommended by the manufacturers. Additionally, you can glue the joints with universal glue. True, in the case of stainless steel, there is no particular point in this: the adhesion will be very low. But still…
Attaching a handrail to a welded or forged stair railing
A wooden handrail is usually placed on a forged or welded fence. In its lower part, a cut is made according to the dimensions of the upper lintel of the finished fence. The seating depth of the handrail is about 2 cm. More or less is possible - it depends on your desire. The railings are connected to the handrail with self-tapping screws, which are screwed through the holes in the upper lintel. It is important to choose the length of the fastener: it should be slightly (at least 5 mm) less than the height of the handrail so that the screw does not stick out on the surface.
In this case, installing a handrail on the stairs is simple:
There is also the possibility of gluing a wooden handrail to welded or forged metal railings. When choosing a glue, you need to make sure that it can connect wood and metal. For external stairs (on, for example), you must also pay attention to the range of operating temperatures. Otherwise there are no difficulties:
- apply glue according to instructions;
- press the parts, secure with clamps;
- leave until the glue dries;
- remove the clamps.
To securely attach a handrail to a steel staircase, you can use both of these methods. One does not interfere with the other.
Methods for attaching a stair handrail to a wall
A handrail is attached to the wall if the width of the steps on the stairs exceeds 120 cm. The second handrail is made of the same material and the same shape as on the balusters, but it is attached to the wall.
To mount the handrail on the wall, there is a whole range of fastenings - brackets - for different profiles (round, oval, shaped). On one side of the fastener there is a round or square fragment with flat surface and holes made in it. We install this part on the wall. We select fasteners depending on the material from which the wall is made. We use self-tapping screws if the walls are wooden, dowels for walls made of concrete and brick, and special dowels for fastening to lightweight concrete.
The number and size of fasteners for installing a stair handrail on a wall are selected based on reliability considerations. Manufacturers make at least four holes on each bracket. Here are four self-tapping screws/dowels/nails for each and we install them. When choosing a length, it is better to proceed from the considerations “the longer, the better.” Still, the wall handrail can bear a significant load, so it’s better to be safe than to fly down...
The second part for wall mounting of stair railings - where the handrail itself is attached - can be different. Under round pipes there may be a ring of a certain diameter; there is usually a flat platform under rectangular or square handrails. This part of the stair handrail bracket also has holes so that the railing can be secured. And in this case, the number of fasteners should be equal to the number of holes (for the same reasons).
There are brackets for wall mounting of handrails with different angles of inclination. They are chosen based on their own ideas about convenience and the planned height of the support. There are also telescopic models that allow you to set the distance to the wall and/or the angle of inclination. There are also end wall brackets, which, while fixing the edges of the handrail, also decorate them.
The number of brackets depends on the length of the handrail. Usually one element is placed at the edges, and between them a calculated number, with a distance of 40-60 cm. The lower the load-bearing capacity of the wall, the more often we install wall holders for railings


- Definition
- Types of fencing
- Calculation of fences
- Height
- Width
- Distances
Stair railings ensure safety of movement along the stairs when ascending and descending. Railings and balusters complete the design of the march and emphasize the style. Railings and fences can be ordered ready-made or made yourself.
Definition
The railing is vertical structures, installed along the edge of the flight of stairs. They ensure the safety of people when ascending and descending. The railing consists of several elements:
- Handrail is the upper part on which a person’s hand rests when moving.
- Balusters are vertical posts that support the handrail. The outermost stand is a cabinet. Handrails are attached to it at the bottom and top of the flight.
- Horizontal slats (string) - fencing under the handrails - are located parallel to the movement of the march. Replace balusters.
- Fastening system – elements for fixing the fence.
Basic functions of railings and balusters
Fences must be installed on flights of stairs longer than 4 steps. There may be no railings on the stairs on the wall side, but there must be railings on the free side.. The elements are fastened securely so that the structure can perform its main functions:
- Support. Stair lifts have different angles of rise. People with different physical training overcome these obstacles. Stair railings should help people climb of different ages, weight and physical ability to distribute the load on the legs when ascending and descending.
- Safety. Properly designed ladders not only provide stability for the climber, but also prevent falls in the event of loss of balance.
- Decor. Stair railings decorate the flight and emphasize the style. When choosing the design of wooden and metal handrails, it is important to combine them with the surrounding space.
Types of fencing
Stair railing can be made from different materials and have different shape, therefore, these structures are classified according to several criteria.
Fences can be:
- metal;
- wooden;
- polymer;
- glass;
- concrete;
- combined.
Metal railings and fencing posts are made from aluminum or forged steel. The former are distinguished by impeccable shine and smoothness, the latter have decorative properties, since they are made according to individual sketches.

Wooden railings are most often found in private homes: they are warm to the touch, smooth, fit into any interior, and are affordable.

Polymer fences are made of hard plastics that are installed on special fasteners. Compared to other materials, polymer is the cheapest.

Glass fencing is installed in public buildings: in shopping and office centers. They are made from tempered glass.

Concrete barriers are suitable for entrance buildings and on main staircases. Elements are cast from concrete in a factory, sometimes right on the construction site.

Combined fencing combines several materials. The most common option is to install wooden railings on forged or aluminum balusters.

Handrails also differ in installation method:
- A separate profile (tube, shaped profile, rectangular) is a product that is attached to the fence structure with special parts.
- Balusters and railings are a classic option for arranging stair railings. They are attached to each other and fixed on the flight of stairs.
- Modular ones consist of ready-made blocks (baluster or fence + handrail + fasteners). They are assembled in accordance with the march plan on the spot.
By location, metal, plastic and wooden railings can be:
- external, they are installed on the street. The main requirement for materials for manufacturing is resistance to weather conditions;
- Internal fences in premises can be made of any materials.
Calculation of fences
To make reliable railings, they must be calculated correctly
Height
The height of the wooden handrail is the main value that must be determined to ensure safety. According to regulatory construction documents, the height of the railings should be:
- 0.9 meters for public buildings and residential buildings;
- in areas where a fall from a height of more than 5 meters is possible, it is necessary to fasten fences with a height of 110 cm;
- stair railings in a house or building with special requirements can be located at a height of 0.7 meters;
- in children's institutions, handrails are installed at a height of 0.5 meters.
For institutions where there is a flow of children (schools, kindergartens), double fences of 0.9 and 0.5 meters are usually installed parallel to each other at a distance of up to 10 cm. This ensures comfortable movement for children and adults.

The height of the railings in a private house may not correspond to the norm; individual determination of this parameter is allowed. To calculate the ideal height, stretch your arm forward when descending a flight of stairs. Then measure the distance from your palm to the step. This is the ideal height for you.
Width
The width of the railing should be such that you can grab the handrail. According to the standard, they are produced in widths from 30 to 70 mm; larger sizes are also used for main staircases.
How to determine the width of the handrails that is comfortable for you: in case of a possible fall, the handrail should be comfortable to grab onto without the risk of injury.
Distances
The reliability and strength of the structure largely depend on the distance between the balusters.
- The number of balusters and their parameters are determined by the size and weight of the handrail. When using flexible or heavy railings, balusters should be installed on the stairs so that the profile does not sag or excessive loading of the supports occurs. If spans of more than 15 cm are formed, it is necessary to install a protective string parallel to the railings.
- In the classic version, balusters are installed on a wooden staircase at each step, sometimes several at once.

- For children's institutions, it is necessary to install supports on each step every 15-20 cm to prevent children from falling.
Manufacturing of wooden fences
For a dacha or private home, you can design and manufacture fencing yourself. This will allow you to get custom railings that match the home owner’s design. The cost of a homemade product is significantly lower than that of a purchased product.
Step-by-step plan for making a structure with your own hands.
Step 1. Drawing up a plan diagram
If the house already has finished staircase without fencing, design must be made based on its plan. If construction is just beginning and interesting idea the railing is already there, then the flight of stairs can be adjusted to these wishes.
A plan is created that takes into account:
- height of the staircase railing;
- type and pitch of balusters;
- railing width
Step 2. Select wood for making components
For the production of balusters and handrail profiles they use different breeds trees:
- The most durable wood is beech, ash and oak. It has a pleasant structure and an expressive cut.
- Coniferous wood - spruce, pine, larch - is common and inexpensive.
It is undesirable to use soft deciduous wood to create fences - the products shrink greatly and become deformed when drying, becoming covered with cracks.
The normal moisture content of wood that can be used for making railings and balusters is 12–18%.
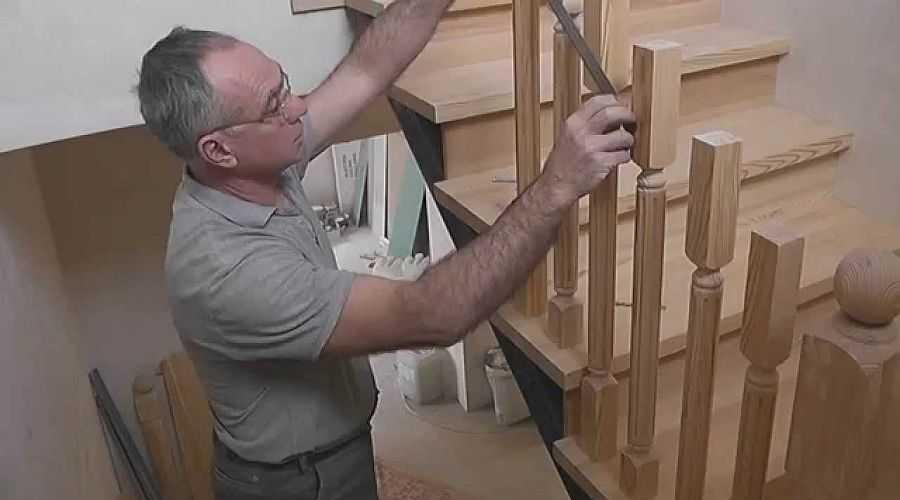
Step 3. How to make balusters
The method is determined by their shape.
They can be:
- flat;
- voluminous.
To make flat balusters you will need processed boards. Hand saws and carving tools are used to create a pattern on them. There are many examples, some ideas can be gleaned from the photographs presented.


To make a three-dimensional baluster you will need a lathe. On rotating equipment, the desired pattern is cut out using various chisels and knives. A milling machine will help you achieve a deeper, asymmetrical design that cannot be done on a lathe.


Step 4. Making handrails
To make a handrail, you will need a rectangular or round piece of different lengths:
- corresponding to the span, if its length is small.
- the span length can be divided into 2-3 parts for ease of manufacture and installation of the fence.
For a spiral staircase, the workpiece must be rounded by turning or the length divided into many elements in order to connect them later glue method. Only the end of the handrail can be rounded.
Processing of workpieces:
- We grind square beams, round and smooth the corners. The width of the railing should be convenient for gripping with a brush, the average is 6 cm. A rectangular blank can be given a relief: cut grooves along the beam to make it easier to grip, decorate them small details, but everything should be smooth, without sharp corners and burrs.
- To obtain a round handrail, we turn a square-section blank with cut edges on a lathe. You can add a slight relief, but it should be smooth.

There is another way to make handrails - gluing boards, if not suitable material. To do this, take boards of the same length, glue them together and then completely dry glue, the resulting semi-finished product is processed using the methods listed above.
Step 5. Attaching the balusters to the steps
Installation of balusters on a wooden staircase can be done in two ways:
- Self-tapping screws and bolts.
- Glue method.
We will not consider the second option due to its dubious effectiveness; masters use it in special cases. You will definitely need glue if the railing was made from separate fragments that need to be joined.
Before proceeding with installation, markings are made on the steps where the balusters will go. The master tells more about this process in the video:
To attach the balusters to the handrails, you will need screws or self-tapping screws 80 mm long, 10 mm in diameter and washers.
For fastening you need:
- Drill a hole for the screw in the step according to the markings.
- Prepare the same hole in the baluster.
- Place a washer on the screw and drive it from the bottom of the step.
- Attach and secure the stand.
The upper and lower end posts are attached in the same way with a screw, but welded to the embedded part on the landing.
When the installation of the balusters is completed, the guide is attached to them with clamps at the level of the handrail. Appropriate marks are made on the posts with a pencil along which the cut will be made.
To avoid damaging the secured wood, wooden pads should be installed under the clamps.
Cuts according to the marks can be made on a miter saw; other tools will not give an even cut at the desired angle.

This process can be clearly seen in the video:
After installing the balusters, we prepare the handrail. Using the previously installed guide, we measure the angle of contact between the handrail and the outer post, and cut it off on the prepared product. Then we make a groove for the mounting plate. We take its width as the diameter of the ends of the balusters, and its height as 5–10 mm. We attach the plank to the balusters fixed with clamps and a beam using self-tapping screws, recessing the head into the material of the plank.
Using a jigsaw, we cut out a recess in the handrail for the bar. It will have a depth of 5–10 mm and a width equal to the width of the slats attached to the balusters. How to do this, look at the video:
All that remains is to fix the handrail on the rail. To do this, we launch the fastening elements from the bottom of the rail, attracting the prepared product with a little force. The stair railing is ready! We invite you to watch a short video summary.
If you plan to build a house with several floors, Special attention given to the stairs. It should be reliable, comfortable and beautiful, maybe even concrete. It also needs to be positioned correctly. Today, staircase manufacturers present a huge selection of staircase structures, which vary in type of fastening, style and size. Quite often, interior designers, when developing the style of a room, start from the appearance of the staircase. For this reason, the staircase in the house can be considered the main decorative element.
Having figured out where and how the staircase should be located in the house, you can think about what style it will be made in. The most important attribute of stairs is the railing. They are necessary to ensure comfortable and safe movement around stairwells. They also serve as a stylish decoration and the main design element responsible for style. Most often, railings are made of natural wood.

For their manufacture, different types of wood are chosen, such as:
- Pine;
- Nut;
Not only its attractiveness, but also its durability depends on which wood is chosen. To choose good material, it is worth listening to the advice of the masters. They advise choosing a breed with less resin content. It is also worth paying attention to the degree of dryness of the wood.
If the staircase structure is made of poorly dried material, in the future this threatens to warp the staircase. Wood should be chosen depending on the complexity of the original result. If the design requires a lot of carved elements, soft woods that are easy to work with are best.
Properly selected wood will serve for a very long time, and will also add special charm to the interior over the years. Wooden railings, in addition to their appearance, saturate the house with a special aroma.
Attaching handrails to wooden stairs
Fastening the railings after installing the frame is very important process which cannot be done without following the basic rules. The basis for wooden railings are vertical posts or posts that are installed along the outer edge of the steps.

Depending on the staircase design, the railings are attached:
- On the horizontal surface of the steps;
- On the vertical surface of a bowstring or stringer;
- On the inclined upper edge of the bowstring.
In order for the railings to be securely fastened, they are fixed at at least two points. The fastening itself should be done carefully, because wood is a very malleable material, and one wrong movement can lead to the formation of cracks and chips.
In order to attach the railings, use:
- Galvanized self-tapping screws;
- Dowels;
- Galvanized studs of different sizes.
Regardless of which fastening is chosen, the work must be carried out according to all the rules, otherwise the railing will not hold securely. Each type of fastening requires its own tools and a certain method, so all the nuances should be thought through in advance.
Correct installation of railings on a wooden staircase
Installing railings requires certain skills and knowledge, maybe the ArtCam program. When using a certain type of fastening, you should not forget about the peculiarities of working with this or that type of fastening.

Features of working with:
- Self-tapping screws - the railings are installed using a screwdriver at an angle of 45 degrees. The screw head must be recessed into the hole by approximately 8 mm. Afterwards, they hide it with a kind of wooden cap, which is attached with glue. After installation, the mounting points are carefully sanded and coated with a special varnish.
- With a dowel. This type of fastening is a wooden cylinder. In order to install railings with this mount, holes are required in the columns and steps. To do this, you need to drill holes with the diameter and length of the dowel. The dowel can be coated with glue beforehand, this will ensure a monolithic connection. If the dowel fits tightly, then the job was done correctly. This method of fastening is considered the most reliable.
- With stiletto heels. The advantage of fastening with galvanized studs is the deep connection of the parts, which provides more robust construction. The recess for this type of fastening is drilled along the axis of the column. In order for the pin to fit strictly horizontally, the column must be placed on the drill. It is best to carry out this process on a table, adhering to safety regulations. The pin is screwed in with a key.
Posts for wooden stairs
In other words, posts are vertical posts on which railings are attached. They perform the functions of supporting the railing, the origin of design, and decoration.
Wooden poles are made using three main technologies and are:
- Point - considered the most common type, which is made on a special lathe using cutters;
- Milled ones are distinguished by screw threads;
- Carved ones are made on computer controlled machines.

Entrance pillars are mounted at the beginning and end of the staircase structure, as well as in the corners of staircases. As a rule, the pillars have the same appearance and style, but differ in height and cross-section. Quite often, the posts are made from the same type of wood as the railings themselves.
Wood is considered the most universal material, from which you can create original things. On wooden pillars stairs can be cut out in various patterns and ornaments. All elements of the staircase, made in the same style, create a unique monolithic structure that will attract admiring glances.
Carved pillars for stairs
Carved pillars for stairs are a wonderful decorative element, which is the central element of the entire staircase composition.
There are several types of making a carved pillar:
- A special case. These are the so-called point pillars. The result is a product made from timber, which is processed by several machine lines. To begin with, the foundation is formed using lathe. Afterwards they form a drawing from the artist’s drawing. The drawing is clear and realistic.
- Symmetrical design. They are distinguished by two identical parts. Made from a single piece. Afterwards they are glued together from two mirror parts. This assembly allows the production of carved pillars from MDF.
- Exclusive. The name itself suggests that these pillars are made by hand. Made from a single piece according to unique drawings. They have a high price.

Making carved pillars is a painstaking process. Artists present to everyone possible options depicting animals, ethnic motifs, intertwining plants, etc., they often have a massive appearance.
Carved pillars will look great in a house with large area with a classic interior.
We make wooden railings for the stairs with our own hands
Having certain knowledge and skills, you can make handrails for stairs with your own hands. First, you need to determine the dimensions of the staircase structure. In order for the stairs to be as comfortable and safe as possible, you should look into the prescribed building codes, which state that the height of the handrail should be from 0.7-0.9 m. A reliable handrail should fit comfortably in the hand to ensure a strong grip in case of a fall.
Having understood the safety precautions, you can proceed to the stages of manufacturing the railings:
- Design drawing, calculation of height, distance between posts, required amount materials and fasteners;
- Marking places for mounting racks;
- Manufacturing or purchasing poles and railings;
- Installation of railings;
- Varnishing of railings and finishing with decorative elements.

If the house has a recess device wooden products, you can make railings, racks, pillars yourself. The advantage lies in the originality of the model, which will only be in one copy, making the staircase design special. To make railings, you can use bars that have different sections. All supporting elements stairs may vary in shape. For example, the entry posts can be square, and the support posts can be round. Using thin bars, you can arrange the elements crosswise.
For self-made you will need:
- Milling and grinding machine;
- Grinder and jigsaw;
- Screwdriver and drill;
- Clamps;
- Construction knife;
- Brush;
- Ruler and pencil
Making handrails with your own hands is very entertaining and interesting job, the end result of which will not leave you indifferent.
Making railings for wooden stairs (video)
To summarize, it can be noted that the manufacture of railings for street and home stairs requires certain skills and knowledge. To make a ladder, you need to select quality material which will allow the product to serve for a long time.
Examples of railings for wooden stairs (photo)


