How to seal boots: fixing annoying little things. How to remove glue from suede: simple methods Other methods for removing glue
Read also
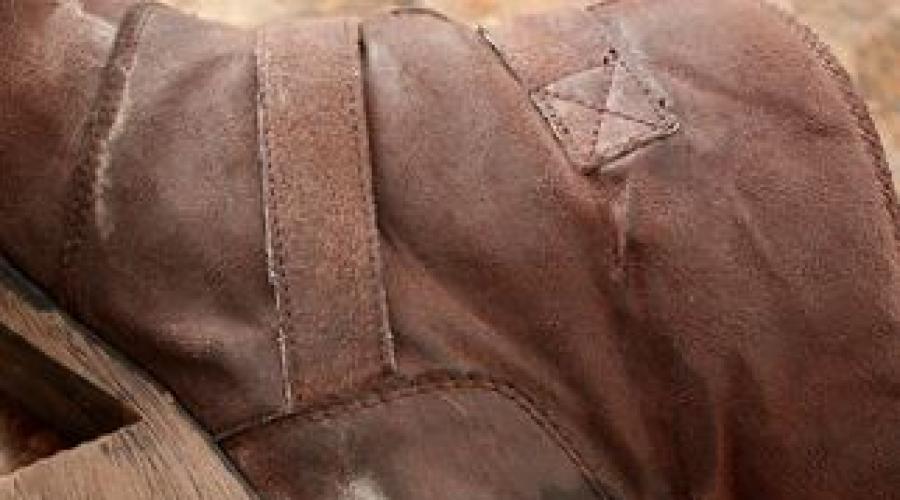
Products made from suede require careful handling, as it is a very delicate and capricious material. However, even with careful care, various stains and dirt may appear on suede products. It is especially difficult to remove traces of glue from suede at home.
First you need to carefully (with a knife or blade) remove excess glue. This will greatly facilitate further work on cleaning the product.
Petrol
To do this, you need to moisten a dry cloth in gasoline and wipe the contaminated areas with it. But this method will only help when the stain is completely fresh. If the glue has already set, you can try to remove the stain with paint remover or a specialized glue solvent. These products are sold in building materials stores. It should be remembered that suede should not be overly wetted.
Acetone
You need to lightly moisten a napkin in it and gently rub the stains. You can also use any nail polish remover. Acetone is not as effective as gasoline, but it is gentler on suede and helps maintain its good appearance.
Ammonia
To get rid of old stains, use a 5% solution. You need to soak a piece of foam rubber or fabric with this product and wipe off the dirt.
Fresh glue stains can be removed with plain hot water (only the dirt is wetted, not the whole thing) or a cosmetic product for removing false eyelashes. According to some women, this product even removes traces of superglue.
What will help restore the product?
Steam enhances the impact of all of the above. The suede product is kept over steam for 7–10 minutes, after which it is wiped with one of the products and the glue is carefully removed.
After using any alkaline product, the product must be treated special grease for nubuck and suede. This will not only extend the life of the item, but will also help restore the properties of the material. After cleaning, it is advisable to use a special with a brush or eraser to lift the lint. You can also hold the item over steam again, this will improve the appearance of the suede. In conclusion, the product must be applied water repellent spray.
Thus, there are a lot of ways to remove glue from suede items. Well, if you can’t remove glue stains at home, you can always go to dry cleaning.
“And they are still fighting for the honorary title of a house of high culture and life!” - said Anton Semenovich Shpak to the search dog in the immortal comedy “Ivan Vasilyevich Changes His Profession.”
You will not find information on what to do if your suede jacket is stolen in this article. But you can find out! Let's find out!
Suede is a soft, velvety leather made by fat tanning (to give the material elasticity and strength) from the skins of small animals.
Suede is a very thin and delicate velvety leather that absolutely does not tolerate walking through dirt, dust or in rainy times. At the same time, she won’t like the dazzling summer sun either! How to care for such capricious material?
 5 stages of suede care.
- After each walk, suede shoes should be cleaned with a special suede brush.
- Dirt that the brush cannot remove can be removed with a special suede eraser. It will also return the velvety feel to the material that was crushed during wear.
- Serious stains can be removed with a foam suede cleaner.
- Moisture-repellent sprays and gels help avoid unnecessary contamination.
- Suede paint can restore the color of shoes.
How to renew suede at home?
If the suede did not receive proper care during wear, and you don’t want to spend money on restoring it in dry cleaning, then you can use methods for updating suede at home.
What will you need? The following means:
- laundry soap (or baby soap);
- sodium bicarbonate (baking soda);
- high fat milk;
- semolina;
- ethyl alcohol (or kerosene);
- ammonia;
- wire brush;
- suede care products (paint, brush and water-repellent impregnation);
- soft dry cloth;
- talc (or baby powder);
- sponge;
- magnesium sulfate (magnesia);
- turpentine.
Step 1. Make your shoes clean again
Dust and surface dirt must be removed from the suede using a dry sponge or a special suede brush (you can also use a branded suede eraser or a simple school eraser).
If the shoes are in poor condition, then you need to clean them with soapy water. To do this, rub the sponge with laundry soap, slightly wet it and lather thoroughly. In this case, it is the foam that is the cleaning agent. Apply it to the suede and rub it with a brush. Avoid getting the material excessively wet!
Another way: instead of soap, you can use washing powder or any other detergent.
Important! Movements when processing suede should be in different directions. This will raise the pile and make further cleaning of the shoes easier.

Step 2: Remove stains
Semolina will help remove stubborn dirt. To do this, you need to cover the stain with semolina, then gently rub it with a wire brush.
If the stain cannot be removed, first hold the area of the stain over steam, and then repeat the procedure again.
Tip: the easiest way to arrange a “steam bath” for suede is over a boiling kettle (near its spout). You should not use a saucepan because the total surface of the water emitting steam is too large. You may get burned!
Step 3. Fat stains
To remove greasy stains, apply talc to the stained area and leave it on for a quarter of an hour. Shake off any remaining talc. Soak a dry cloth in alcohol or kerosene, and then wipe the dirty area (on top of the applied talcum powder). The procedure should be completed with standard shoe cleaning with a suede brush.
Tip: greasy stains can be easily removed with dishwashing detergent. Apply it to the stain, leave for a quarter of an hour and wash off with a damp cloth.
Step 4. Bald patches
Method 1. You can get rid of bald spots on suede! To do this, you need to mix soda and milk (1 teaspoon and 3 tablespoons, respectively). Use a soft dry cloth to absorb the resulting product and treat the bald spots. After 5 minutes, repeat the procedure, after which the shoes should be left for 30 minutes.
Important! Do not wet the suede too much; like any leather, it is afraid of excess moisture.
After time, the shoes must be combed with a rubber brush.
Method 2. Ammonia and warm water will help restore the structure of suede at home. The ingredients must be mixed in a ratio of 1:4, after which the surface of the shoe must be treated. This method is also good for.
Step 5. Drying
After completing the procedures, you need to thoroughly dry the shoes. To do this, stuff it with unnecessary paper and leave it to dry naturally.

Avoid drying in direct sunlight and near heating devices!
Tip: Do not use newsprint as padding material, as the ink may leave marks.
Step 6. Restore color
The ideal way to restore the color of suede is to use a special paint. If you don’t have one on your farm, you can use:
- coffee grounds (will help restore the color of dark shoes);
- a mixture of fat milk, magnesia, turpentine and talc in equal quantities.
These products must be applied to the entire surface of the shoe and left for a while. In the case of coffee grounds, this is 12 hours or a day. The milk mixture should be kept for no more than an hour. Then you need to comb the suede with a brush and dry thoroughly.
Step 7: Post Processing
Dried shoes should be brushed again and treated with moisture-repellent impregnation.
Store suede products in their original packaging. It is highly not recommended to put suede shoes in a plastic bag: this can lead to an unpleasant odor and the formation of mold.
On a note
- Each stage of cleaning should be accompanied by complete drying of the shoes.
- Suede is afraid of moisture, and it takes an average of 20 hours to dry completely, so it is not recommended to wear suede shoes every day.
- You can polish suede using a lint-free, dry cloth.
- In order to restore heavily worn suede, you need to use dry cleaning services.
All you need to live gracefully and comfortably is a pair of suede shoes... Three pairs.
Mother of two children. I have been running a house for more than 7 years - this is my main job. I like to experiment, I constantly try different means, methods, techniques that can make our life easier, more modern, more fulfilling. I love my family.
It is very easy to tear a leather jacket. There can be many reasons - you got caught in a vehicle, touched a sharp object with your sleeve and pierced the skin, or even worse - cut it. But don't be upset. A leather jacket can be repaired at home.How to seal a hole in a leather jacket?
A wide variety of surface bonding materials are now available. To glue unnoticed flaws on a leather jacket, the glue must have the following characteristics:- be elastic;
- have excellent viscosity;
- dry quickly;
- be heat resistant;
- be resistant to water, fats and oils.
Some people like nairite glue, which is somewhat reminiscent of honey, because it sticks well. Very often, liquid leather is used when gluing products. It is convenient to work with because it does not harden within 20 minutes, so you can always correct any defects.
You will learn more about which adhesives are best to use when working with leather in the video:
A leather jacket is torn: how to seal it with Moment glue?
It often happens that a piece of a jacket is torn out and a hole appears. But don't worry, everything can be fixed. Before you begin repairing a leather jacket, you need to prepare materials and tools. You will need:- glue "Moment" for shoes. Rubber is better, it is more elastic (all others harden when dry);
- a piece of leather or suede, you can take from an old glove;
- scissors;
- brush;
- toothpicks;
- solvent to degrease the surface to be glued;
- leather paint;
- heavy object or hammer.
- You must first glue the patch on the inside of the jacket, providing access to the torn area from the wrong side.
- It is advisable to find a place in the lining where you can slightly rip the fabric and get to the hole.
- Take an old glove, cut a piece out of it and glue it on the inside of the hole, then press it firmly with a heavy object. The flap can be any color, as it will not be visible.
- After the patch has dried from the inside, you will need to work on the front part. Here, it is advisable to match the leather to the color of the jacket, but you can also take a completely different color if you have leather dye available. The flap must be precisely matched to the shape of the hole, the edges must meet completely. To make them match for better alignment, you need to add a little more glue and tighten the edges.
- After everything is glued, you will need to paint over the flap, this will make it less noticeable. This is done carefully using leather paint.
- The last step is to sew up the lining.

How to seal a cut on a leather jacket?
Very often, when you get caught on a nail and suddenly pull your hand away, you get a cut. It can be carefully sealed in such a way that it will be almost invisible to prying eyes. It is better to work on a well-lit table with enough free space. Let's look at the step-by-step repair of a jacket with a cut:- First, you need to turn the jacket inside out and take a good look at the lining fabric. It is necessary to find a place on the lining where there is an external seam.
- After finding it, you need to prop it up and use your hand to find the cut on the inside of the jacket.
- In order for the patch to adhere well, the inside of the cut area needs to be degreased with a solvent.
- Then choose a leather or suede flap larger than the cut by a few centimeters.
- Lubricate the inside around the cut with glue; it is advisable to treat the flap with this composition as well.
- You need to let the glue dry on the surfaces, this will take about 20 minutes.
- You can do the procedure again - apply glue and let it dry.
- As soon as the glue has dried a little, you need to attach the flap to the surface coated with glue and press it onto the jacket.
- Then turn it right side out, try to pull the cut edges as close to each other as possible, using a toothpick and smearing the edges with glue.
- Next, you need to level the area with the patch on the table and press it down with a weight. Leave the leather product for a day until the glue dries completely.
- After the glue has dried, the edges can be tinted with paint.
- Then carefully sew up the lining again.

Don't worry about the cut coming apart again; it most likely won't happen in this area.
How to seal a leather jacket with liquid leather?
This method is good if there is a cut on your leather jacket. Thanks to liquid skin, this place can be repaired, the damage will be almost invisible. To work you will need:- medical bandage;
- a small spatula that can be cut from an old money card into a strip about 1 cm wide, with the end slightly pointed.
- A piece of bandage slightly larger than the damage (a few millimeters) is cut out of the bandage.
- Liquid skin is applied to the front side of the cut using a spatula, and a piece of bandage is applied to it as tightly as possible. It must be fully stretched, lightly lubricated with liquid leather.
- Allow to dry for about 10 minutes. Afterwards, another layer of liquid skin is applied again using a spatula.
- Delayed for 3 hours. By this time everything will dry and the glued area will be invisible.
How to seal a leatherette jacket?
Replacement jackets can be repaired in the same way as leather ones, but not any glue will work in this case. For example, if you lubricate a leatherette jacket with “Superglue,” it can ruin the product - instead of repairing it, a new hole will appear, since the glue can corrode the material. Therefore, we need to look for safer methods.It is best to use non-woven tape as it is a very thin material.

The tape is used like this:
- Apply the material to the inside of the leatherette.
- Place a layer of gauze on top.
- Use an iron.
Under the influence of steam, the tape will straighten out and stick well to the surface. The result is an almost invisible patch.
Video: How to seal a leather jacket?
The video describes in detail how to glue a cut on a leather jacket at home:So, if a leather jacket that you really like is torn, there is no need to buy a new product - everything can be fixed even at home. You won’t spend much time, the only thing is that you need to choose the right glue, be patient and start repairing your favorite leather product.
Foamiran is a smooth decorative material, which is foamed rubber of varying porosity and thickness.
Foamiran is sold in rolls or sheets. It has a suede-like feel, which is why it is often called plastic suede.
This relatively new material has won the love of many needlewomen. This is because it is very plastic, easily expands and contracts when exposed to high temperatures.
Thanks to these properties, you can make many interesting handicraft figures from plastic suede using a glue gun or special glue.
What to do if you don’t have a glue gun - glue for foamiran
The best glue for working with foamiran– this is silicone glue, as it can be used with a glue gun, which is very convenient.
But if you don’t have this tool on hand, you can use other types of glue to work with plastic suede:
- Cosmofen CA 12 (COSMO CA-500.200). It grips many different materials, quickly fixes the surfaces to be glued, has high strength, is resistant to external atmospheric influences, high and low temperatures, and does not contain dyes. It is used in the production of toys, processing of rubber, including foamiran, plastics, making jewelry and in many other industries. The cost of a tube weighing 20 g: 99 rubles.
- PVA White Glue from Leeho. It does not deform the surfaces being glued, does not soak the paper, has a thick consistency and white color, and becomes transparent after drying. Does not contain toxins. Used in cardmaking, quilling, scrapbooking and many other types of creativity. Excellent gluing of paper, cardboard, wood and fabric. Suitable for gluing various decorations to foamiran. It has two different dispensers at both ends: for spot application and for applying glue over a large area. The cost of a tube weighing 28 g: 50 rubles.
- Moment Crystal. A clear, quick-fix adhesive solution suitable for both soft and hard materials. Used for gluing rubber, PVC, paper, plastic, foam rubber, cardboard, wood, metal, glass and ceramics. Cost of a 30 ml tube: 58 rubles.
As mentioned just above, it is most convenient to use a glue gun to assemble foamiran parts.
But when using it for foam, you need to know the rules for working with it:
- Before starting work, insert the glue rod into the special hole in the heat gun;
- Plug the tool into a power outlet;
- Heat the gun for 5-7 minutes;
- Carefully pull the trigger - if glue starts to come out of the nozzle, it means it has melted and is ready for use;
- Unplug the heat gun from the outlet for 5 minutes if you do not use it for a while;
- Apply glue evenly and in small quantities to the foamiran, gently pressing the trigger;
- Do not touch the melted glue while working with it, otherwise you may get burned;
- When finished, unplug the gun and let it cool down;
- Wipe off any remaining adhesive with paper or cloth.
How to make a rose from foamiran master class
To create a rose from synthetic suede you will need the following materials:
- Foamiran of any color;
- Strong-hold foamiran flower glue or glue gun;
- Toothpick;
- Regular dishwashing sponge;
- Wire;
- Beads;
- Scissors.
VIDEO INSTRUCTION
Let's get started:
- On paper, draw three circles that will differ from each other with a diameter of 1 cm;
- Using scissors, cut out the petals from the resulting circles and make them wavy along the edges;
- The smaller the circle, the fewer petals you draw on it;
- Take a sheet of plastic suede;
- Trace the petal shapes on it using a toothpick so as not to stain the material with a pen or pencil;
- Cut petals from foam;
- Bend them into bubbles. They are easy to make from beads glued to hairpins;
- Heat the iron to the starting temperature;
- Attach the petals to the sole of the iron;
- When the material heats up, it will deform on its own - at this moment it must be removed from the sole;
- Place the heated foamian on the sponge and press it inward in the center of the petals;
- It is recommended to stretch the edges of the petals - this way they will become more like a real flower;
- Deform the middle of the petals. To do this, heat it and press it with bubbles - the harder you press, the more closed the bud will be;
- Do the same operations with the other petals;
- To connect them, put a bead on the wire, then twist its edge so that the bead does not fall out;
- Make small holes in the middle of the petals with scissors;
- Pull the wire into the middle of the circle of the smallest petals;
- Apply glue to the area where the wire passes;
- Lower the bead to the gluing area and press it with the petals;
- Bend the petals slightly and apply a little more glue mixture;
- Press them down so that the center of the rose is slightly closed;
- Do the same with the other rows of petals;
- Place all subsequent petals so that they fit slightly on top of the previous ones;
- The last row can be lightly pressed against the core - then you will get a blooming, lush rose.
By making several of these roses you can create a luxurious topiary. Foamiran is an easy-to-use material from which you can create the most beautiful flowers and other handicraft materials.
For home handicrafts, crafts and souvenirs. To fasten natural leather and leatherette, adhesives with completely different compositions are used - based on rubber and polyurethane, polyamide, perchlorovinyl and polyvinyl acetate substances. It is worth understanding their features and rules of use.
Genuine vs faux leather
Leather is a high quality natural material, very durable and wear-resistant. Subject to operating conditions and good care, leather will last for many years without losing its original appearance and structure. During the dressing process, different thicknesses and textures are achieved, the skin is dyed and tinted in different colors.
Natural material is used for sewing clothes, shoes, hats and accessories, for upholstering furniture and making decorative items. Leather products are comfortable to wear and durable. The upholstery is practical and comfortable, looks great in the office and at home.
Advice! Genuine leather, especially soft and thin, is easily damaged; an artificial alternative is better able to withstand mechanical stress.

Artificial leather has adopted all the external characteristics of its natural counterpart. However, the performance characteristics of leatherette are significantly lower. Fabrics that imitate leather are much cheaper and easier to care for, taking on any shade and texture. The strength and durability of artificial leather and suede is practically not inferior to natural material, but synthetics are less resistant to negative environmental factors: humidity, high and low temperatures, and changes in these indicators. The latest high-quality imitation leather products include eco-leather, a two-layer material that is resistant to abrasion and tearing.
General properties of leather glue
When it becomes necessary to glue the skin, you should choose compounds that are easy to apply and do not flow. It is important that the seam is elastic and durable, not deforming under pressure, compression and stretching. If during operation the finished product will come into contact with the environment, it is necessary that the glue be resistant to moisture, ultraviolet radiation and oxygen, cold and heat, and temperature changes.

What kind of glue should be used for leather:
- elastic and waterproof;
- with good flexibility and toughness;
- resistant to oils and fats;
- cold-resistant and heat-resistant.
Advice! Working with leather glue should be carried out on a clean and dry surface, previously degreased for better adhesion of the adhesive to the base.
When dealing with shoes, bags, outerwear and hats made of genuine leather, craftsmen most often use rubber-based adhesive mixtures. They lie flat and are easy to adjust if necessary.
The textile, furniture and footwear industries require polyurethane or perchlorovinyl adhesives labeled "leather and suede". Such compositions provide a flexible seam that can withstand different operating conditions.

How to glue natural and artificial leather
When repairing leather products, a patch is usually used, which is fixed at the site of damage from the outside or inside. For reliable and long-term fastening of the patch, the glue must be thick and viscous, preferably transparent, set quickly and have an elastic structure after drying.
Types of glue suitable for fastening leather and leatherette, fixing additional parts:
- « ». It has a light shade and thick consistency, is easy to work with, and dries quickly. Nairite compounds are often used in the repair of shoes and various leather goods.
- PVA for leather. It applies well, dries quickly, leaves behind a film that is resistant to temperature and mechanical influences, moisture and sunlight for a long time.
- The consistency is viscous and elastic, used for durable gluing of leather and leatherette to each other. Convenient for joining cuts and restoring leather clothing and accessories.
- Universal and fast “Moment”. It is used for small volumes of work and requires fast and precise movements, as it instantly adheres materials. It is better to remove excess substance immediately, since when dried, traces of second glue are difficult to remove.
- . This composition is suitable for connecting materials of different structure and quality to each other, including leather and eco-leather. The peculiarity of using silicone glue on the skin is that for high-quality hardening, the skin must first be stretched and securely fixed until the adhesive seam dries completely.

When working with genuine leather, suede and faux leather, dressmakers often use adhesive tapes for leather or thick fabric. Especially when a leather item needs to be folded or a zipper needs to be replaced.
Liquid skin, how to work with it
A new product used in tanning, tailoring clothes and shoes, making hats and leather accessories is a special industrial composition - liquid leather. The substance allows you to replace a section of leather fabric with a new one without patches. This greatly simplifies the repair and restoration process, reduces the cost of the service and speeds up the achievement of results.

Liquid leather allows you to mask scratches, cuts, and cigarette marks as unnoticed and quickly as possible. The substance is applied directly to the damage and left until completely dry, and then sanded to give a natural texture.
Advice! If it is necessary to restore a large area, you will need a special fabric backing onto which liquid leather will be applied.
Any glue, including for leather, is accompanied by instructions indicating the order, features and conditions of working with the adhesive composition. First, the master must familiarize himself with useful information about the purchased glue and safety measures, the application method and the time for complete hardening. Only then will the result of gluing work be reliable, high-quality and durable.