How to level the walls of a log house. Leveling and straightening walls in a log house. How to level walls with plaster
The problem of crooked walls is one of the most common not only in apartments, but also in private houses. Straightening and straightening log surfaces is undoubtedly difficult, unlike timber or brick ones, but it is possible. It should also be noted that the house is subject to subsequent cladding, since after the procedures, the area remains unpresentable, the log house loses its former beauty. How to level the walls in a log house - simple instructions for amateurs below.
Causes of curvature of walls

If we talk about log cabins, then the cylinder can also be subject to bending, like a wild whip with bark, although to a lesser extent. This is due to violations of technology, the degree of dryness of raw materials and its processing from the penetration of moisture and the effects of sunlight. More details:
- The fastening of each crown is a precisely verified construction technology. The length of the fixing dowels should be such that it is enough with the remainder to connect two crowns. Through holes in adjacent logs must be drilled so that the fasteners protrude 10-15 cm from each side.
The spacing of the dowels is from 50 to 60 cm. If you do more, the log will twist and defects cannot be avoided. And the frequent arrangement of holes can split the log and longitudinal cracks on the whip will appear too quickly.
- Logs with natural humidity should be selected for construction - up to 12%. If you purchase absolutely dry raw materials, then cracks during fixation will become commonplace - the whip will lose its viscosity.
A raw log can take a thousand years to shrink and at the same time change its shape right in the log house. And this is also not conducive to straight walls.
- Treatment. The worse it is, the better the logs absorb moisture, and in the heat they lose it. Frequent changes can constantly change the shape of the logs and thereby bend the walls.
This effect can be prevented if you pay attention to the wood in terms of insulating it from moisture. To do this, after construction, the walls are treated with protective compounds that prevent natural precipitation from the outside and steam from the inside from penetrating into the depths of the logs.
Alignment methods
There are only two of them - mechanical and decorative. Both should be used for best results. So, how to straighten the walls of a log house using available methods:
Mechanical method of leveling log walls using metal corners
- For work, special steel plates with identical holes on each pair of elements and threaded rods are purchased. The cross-section of the studs must be at least 1 - 1.5 cm. The location of the structures must be not only in places of curvature, but also at the opposite end of the wall to bring them into the same condition.
- Using a drill, mark the location of the holes for fasteners and make through holes with a diameter smaller than the cross-section of the pins. Then hammer in the studs with a sledgehammer and put on the corners.
- The logs are pulled together using threaded nuts, alternately guided by the crowns, which do not cause any criticism. The protruding ends of the rods are cut off with a circular saw with a diamond wheel.
The method is good for single defects. That is, if a single log stands out from the overall picture. For large violations, you must first use jacks, otherwise leveling the walls of a log house will not have the desired effect.
A decorative way to correct wall unevenness
It is used primarily indoors using drywall. Why is it recommended to do it mechanically first?
This is obvious - under the decorative cladding, the process of subsidence of the walls will continue, and the day when the whips will begin to break the drywall is not far off. So, if all manipulations with jacks and corners are completed, but the house has lost its attractiveness, proceed as follows:
- They impregnate the wall with protective compounds, having previously cleaned it of dust, debris and dirt - this is an accumulation of pathogenic bacteria for wood, which should be removed immediately. If the caulk causes complaints, then they get rid of it and insert a new one.
- A vapor barrier film is attached to the inside of the logs - vital activity from the inside allows for the production of a large amount of moisture, which will have nowhere to go except to accumulate in the wood. A foil membrane is best suited for this purpose; it is attached with the shiny side out.
- Next, repairing the walls of a log house begins with installing sheathing for attaching drywall. It is worth choosing a wooden beam, preferring it to a metal profile. Everyone remembers that the temperature difference between materials can cause condensation, and this is detrimental to the log.
- A house made of solid logs with a cross-section of 25 cm or more does not need to be insulated, so the sheathing will create excellent opportunities for hiding communications under the cladding - pipes, cables and other things. But if during operation there was a problem with maintaining temperature, then you should not neglect the insertion of foam boards or basalt wool into the sectors.
- If you decide to do cladding on all planes, then finishing the walls with plasterboard in a log house starts from the ceiling. It's all about shrinkage - pressure starts at the top and, possibly, damage to the skin. The sheets are cut into convenient squares or rectangles and fastened with self-tapping screws to the profiles.
You should not join drywall - a gap of 3 mm will become a necessary technological action due to constant shrinkage. It is better to fill the seams with elastic putty, then the sheets will move without fractures or other defects.
In this way, the walls in the log house are aligned. The essence of such repairs is simple and accessible to craftsmen of any level.
Wood is a natural product and a high-quality building material. It creates excellent ecological housing construction projects.
But there are situations when the walls of wooden houses can have significant unevenness. In this case, you need to move away from originality a little, and level the walls.
The principles of such work can cover multiple ways. In modern conditions, there is a capacious material base to choose the appropriate material.
Wooden houses are being built using a variety of materials. With their help, the walls are prepared for finishing. Thanks to the use of various materials, the walls of a wooden house acquire an aesthetic appearance and create a comfortable atmosphere.
Immediately before leveling the log walls identify the most problematic areas and irregularities, as well as bending of corners and uneven joining of adjacent logs.
If there is already old decoration on the walls, it needs to be removed and clean the surface of any nails or old screws that could interfere with alignment with new materials.
To re-align the walls, necessary:
- Treat the surface with antiseptic substances to prevent wood rotting, the appearance of fungi and insect pests;
- When the antiseptic layer has dried, you need to apply it to the surface install chipboard boards. Alignment will be carried out to them;
- As leveling materials drywall may be suitable. It can be attached directly to chipboard if the surface is flat. If the surface has slopes, it is best to use the frame method of attaching drywall, which consists of metal profiles;
- When the installation of drywall is completed, You can proceed to putty work.

Walls are leveled with plywood without the use of building mixtures. The maximum that can be done is to cover the surface of the plywood with paints and varnishes to give it shine and an aesthetic appearance.
The advantage of plywood over plasterboard in strength and resistance to mechanical stress, but working with plasterboard is much simpler and easier.
Plywood is used as a finishing material inside country houses, in garages, outbuildings, and storerooms. For fastening plywood it is necessary to mount the frame.
You need to use plywood thickness not less than 6 mm, maximum 9 mm. Using thinner sheets may cause them to warp. Thicker sheets must be mounted on a reinforced frame, which is expensive.
Indoors with high moisture you need to use plywood treated with an antiseptic. Using ordinary plywood in such places can soon lead to curvature of the surface.
To process plywood sheets, you need a special tool - a jigsaw, with which plywood is trimmed. It is attached to the frame with wood screws (if the frame is wooden) and metal (if the frame is metal).

A log house consists of a set and joining of wooden blanks of the same thickness and parameters. But there are cases when logs, under the influence of internal and external microclimates may shrink, losing the evenness of its styling.
Another reason for uneven walls in a log house may be foundation shrinkage. This can be avoided by using screw piles to strengthen the foundation.
Existing unevenness can be smoothed out two ways:
- Frame method. You can use a wooden or metal frame. The space between the frames can be filled with mineral wool or another type of insulation. You can put sheets of plasterboard, wooden plywood, chipboard or OSB boards on the frame. It depends on the preferences of the owners and further finishing work;
- In a frameless way. Drywall is not suitable for this because it is not durable. It is best to sheathe the wall with OSB boards. They are durable and can be puttied.
Also watch a useful video about leveling a wooden wall
From the author: Hello, dear readers. As is already clear, you have found yourself on a construction portal, which discusses in detail all the work related to the finishing of premises and the installation of household units. But, you know, there is one topic that is most popular - how to level the walls with your own hands.
Well, if we need to fix it, we’ll fix it. And today we will explain to you how to do this in the best possible way. But we will have to work hard, because we will consider the option of high-quality work, and not a blunder in half a day.
Alignment Methods

In order for you to quickly achieve the desired result, you need to not just learn how. You need to be aware of all existing alignment methods, and for your information, there are quite a few of them. Let's list them all and give some comments on them. So, they are as follows:
- dry plaster is a leveling method in which there is no need to work with liquid plaster. It consists of covering the wall with plasterboard. Such sheets are placed on a pre-fabricated frame made of a metal profile, less often of a wooden one. Of the advantages of this method, the most striking is that it becomes possible to lay wiring without gating, you can easily hide heating pipes or exhaust corrugation, and most importantly, the entire structure can be erected in a matter of hours, provided that you have a laser level. Among the disadvantages, we can mention that such “plaster” eats up a certain amount of space, and the specific value of this figure depends entirely on the initial curvature of the walls. Another noticeable fact is that at the end of the work you get a room with ideal angles and proportions, which is very difficult to achieve with other types of alignment. And here’s another thing worth noting: such work costs a small amount of money. If we talk about the final cost, then this method is in second place, and what is in first - read on;

- Beacon plaster is a type of finishing where you have to work with liquid mixtures. They are applied to the wall using a rule that runs along pre-set beacons - these are special metal guides that are pre-installed in the required measured plane. One of the advantages you can immediately highlight is the cost of the work, but don’t flatter yourself, not everything is going smoothly here either. Yes, this method takes the first place in terms of cheapness, but only if we talk about working with a solution of sand and cement, which is not so simple. But if we consider a more simplified method - working with store-bought, dry gypsum plasters - then the cost of the work will be enormous, more precisely, 40 percent more expensive than if you worked with drywall. Well, one of the advantages I can also mention is that you won’t “bite off” practically anything from the space of the room, and the surface turns out to be much stronger, and, therefore, more practical. By the way, the downsides here are even worse, namely: the work is very labor-intensive, dirty, multi-stage, which wastes a huge amount of time: you either need to mix half a ton of mortar with a hammer drill, or find a concrete mixer, and setting up beacons, especially if there is no laser level, is simply terrible;
- - a more simplified view of the above work. With this leveling method, everything is, of course, easier to do. If you look at things realistically, it takes almost half as much time as using lighthouses. There’s just one bad thing here - the result is ambiguous. And I’m talking about the most important criterion, namely the evenness of the walls. Let's be honest: if you have bare walls, that is, just masonry with nothing on it, if we are talking about a garage or a basement, or maybe a country house, then I agree, this work makes sense. But if you want to save a little time on displaying beacons in your apartment, while your walls are already plastered and they are not flat, then I will say this: with this method you will only make things worse. Indeed, in 70% of cases you can only repeat an already existing relief. And the remaining 30% are those people who have “gotten their skills” over many years of practice, which you are not;
- under tiles - a type of leveling in which the main determining factor is your intentions regarding the consumption of tile adhesive. If you want to spend very little of it, but at the same time lay the tiles very efficiently and without problems, then you should align the wall with beacons. Rather, it will be possible to get by with a simplified option, that is, a gypsum plaster mixture, because, most likely, we are talking about a bathroom where not so much of it will be needed. You can also think about the option of laying tiles on drywall. In this case, it will lie very flat, and at the same time it becomes possible to hide all the pipes and communications in a box, which is also covered with tiles. This is the method I most often use myself when a client wants to renovate a bathroom in a European style;
- for painting - and here is the most terrible type of leveling. I will say this: if you have a chance to do this work efficiently, it is only with the help of drywall. In other cases this is unrealistic. So, look, the whole difficulty is that the slightest, even microscopic, flaw will be visible on a painted wall under artificial lighting! Every missed grain of sand will be noticeable, like a cobblestone. Now imagine how the unevenness will be visible? That's right there, the real Everest, casting its shadow from the light bulb. This shadow will be cast by everything that does not correspond to the initial, ideal canvas. You shouldn't rely on luck. In general, remember once and for all: if you need to level for painting, then only perfectly aligned drywall, only expensive high-quality spatulas, a good, expensive mixture. In any other cases you will get nonsense;
- lining - well, at least everything is simpler here. Also one of the types of alignment. It consists of attaching a wooden or metal frame to the base wall, and then screwing the lining onto it. The work is simple if you have such a miracle as a laser level. If you need to carry out similar work in a wooden house, then, for me, this is the best option, because you do not have to make a heavy mineral layer, which will become an extra load on the already fragile wooden base. And in some cases, you can do without a frame altogether, adjusting the evenness by placing special glazing beads;
- siding panels - there is such a method, or rather, a material. In fact, this is almost the same as lining, only they are designed to work on the facades of buildings and are mounted only on a metal frame. It looks fantastic, the properties are simply gorgeous. They are attached with screws in combination with special secret locks. As a result, you get a very beautiful, smooth surface that will serve you for many decades;
- decorative alignment - and this is already exotic. This includes the production of any decorative coatings, work with which is also considered leveling, but only indirectly, because such mixtures and compositions do not level the wall, but mask imperfections and flaws;

- combined, or as it can also be called - multifunctional. Basically, this is work, but here we are not just sheathing the walls, but in addition to the evenness of the walls, we also get soundproofing + insulation characteristics. This is achieved by laying a special material in the space between the wall and the drywall, be it polystyrene foam, glass or basalt wool.

Now you are aware of all the methods that exist. And which one you choose depends only on your local conditions and the budget you have. Now let's move on.
Material selection
Well, we have decided on the methods, and now the question arises: what should we use to level it? Let us answer it briefly for you. So, you can do this with the following materials:
- a mixture of cement and sand - one might say, industrial, or, in a less loud word, large-scale. Large-scale work can be done with this mixture, for example, simultaneous plastering of walls in all rooms of the apartment. Moreover, in a thick layer, be it plastering the facade of a building or something else, where the final weight of the mixture used is more than 300 kg;

- gypsum plaster mixture - intended for small-scale work: finishing slopes, small straightening under tiles in the bathroom, sealing chipped plaster after checking it for peeling. After all, if you are going to finish the wall with a material that requires a solid base, for example, Venetian plaster, then you will have to check the existing plaster layer to see if it is moving away from the main wall. At the same time, you knock down the exfoliated areas, and it will be most convenient to plaster the resulting “craters” with just such a mixture. In general, if you have work to do with a total dry mix equivalent of less than 300 kg, that is, 6-7 bags, then you are in the right place;
- decorative plaster mixtures - as you already understood, if you don’t want to level, then we turn to this material and simply mask the defects. I assure you, it won't be visible. For such purposes, you can use either ordinary cement, for example, for a coating called a fur coat, or an expensive polymer composition, for example, for making a beautiful structural layer;
- dry plaster - as you may have guessed, we are talking about drywall. Typically, such sheets have dimensions of 1200 × 2500 mm, the thickness can be ceiling (9.5 mm) or wall (12.5 mm). It is worth choosing such a material based not only on its thickness, but also on its resistance to moisture. There are moisture-resistant ones - usually such canvases are green - and standard ones, which have a gray cardboard color;
- putty mixtures - but this is not quite plaster, but still the walls are leveled with it. We are talking about ordinary putty, and it doesn’t matter whether it is polymer or gypsum, I have now collected all types under this section. But remember, they have one fundamental difference from plaster mixtures - a layer no thicker than 15–20 mm can be applied to a wall or ceiling. It all depends on the density. If you make it thicker, it will inevitably slide and, after hardening, will resemble a hilly area, and the hills will be more or less regularly round in shape, and not wavy. These are much more difficult to seal, so remember this difference. If you need to work with such material, then after applying a layer of the correct thickness, wait for it to dry completely, prime and repeat application.
Preparation of tools and premises

What we will talk about in this paragraph directly depends on the chosen method of leveling the walls. In my opinion, it would be best to consider the option of using cement plaster, since it is both the cheapest and most versatile.
Because, for example, for a bathroom with very crooked walls, which they are in 70% of cases, the use of gypsum mixture is irrational, because on average 10-15 bags are spent on such a small room. And you only need 2-3 bags of cement. Do you understand the difference?
Well, if you decide for yourself that you will use a different method, then simply enter your request into the search bar of our website, there you will find any necessary information on all other methods, which we will not consider here. And now to the instrument.
Here is the list:
- a concrete mixer is the most important thing in this matter. Of course, it’s not so easy to get one, although now everyone is renting them out. Moreover, they bring it, and even lift it up to the floor. And the use of such a solution pays for its daily rent for literally 4 bags of the ready-made mixture;
- plastic or metal basin - you will need it if you decide to save on a concrete mixer. In principle, if you get a metal bath (Soviet nickel-plated, these came with a curved side and a volume of 60 liters), then this is an excellent option, in which, in extreme cases, you can do without a concrete mixer;
- perforator with a whisk - for mixing the solution. Of course, if you decide to work without a concrete mixer. And please, do not think that you can get by with a household drill with a power of 1 kW, it will burn out in the first batch. This is not easy for a 2 kW hammer drill. Of course, the ideal option is a construction hand mixer, but in everyday life it is rarely found;
- bubble level at least 1 meter long;
- a long two-meter rule with a level in the middle;
- the rule is one meter or one and a half meters, this is what we will use to pull the solution along the beacons. The above is not suitable for this purpose, it is extremely difficult to work like this, and the result begins to limp;
- a spool of nylon thread, this is for the case if there is no laser level;
- laser level - for setting beacons. You know, if you can still spare money on renting a concrete mixer, then this is not worth it. If you decide to do such work without proper experience, then after the first hour you will greatly regret it, and after the fifth you will still run to look for a laser. Naturally, I am now talking about high-quality display of beacons. If this is done with an error of approximately 2–4 mm, then just a level with a rule and a plumb line will suffice. And if you want to do everything perfectly evenly, then this is what happens: with a nylon cap it will take you at least half a day, or even a whole day, and with a laser - a maximum of an hour;
- buckets for mortar and trowel. Instead, you can use an old unnecessary spatula 10–15 cm wide;
- malka or, as it is scientifically called, trowel - for the final formation of a smooth surface of the applied solution;
- roller with tray for applying primer to the wall.
That's all with the tool. Let's finally move on to the room itself. So, all the initial work consists of this:
- We clear the room of all possible pieces of furniture and interior. We remove pictures and shelves from the walls, take out household appliances. If the heating radiators are connected through an American union nut, then we even unscrew them and take them out. If we encounter problems, for example, with the piano, then, as a last resort, we move it to the center of the room and carefully cover it with film;
- We lay greenhouse or construction film over the entire surface of the floor, unless, of course, we want to mercilessly spoil it. Remember, the solution is alkaline, it corrodes both your hands and the paint; even a thin layer of metal can seriously warp over a long period of time. Therefore, if we don’t want to re-cover the flooring - it doesn’t matter whether it’s wood, linoleum or laminate - we cover it;
- remove wallpaper from the walls, if any. This must be done to the very foundation, without missing a single piece of paper, because it is in this place that your plaster will begin to come off in 5–10 years. But if there are nails or dowels in the wall, and at least 10 cm of mortar will be placed on them, then we leave them, they will not be superfluous, but on the contrary, they will play a good role in adhesion of surfaces;
- we turn off the voltage in the room or, if yours is not divided into groups, in the entire apartment with a central power supply from the meter;
- We remove all sockets and switches, insulate the wires and hide them in the hole. Exposed live parts must strictly not be left, as you will definitely come under voltage. I even remember cases where I had to make a connection in a layer of plaster. That is, first I connected the wire, then insulated it well, but when I started plastering, I started to “twitch” slightly. Water seeped through the electrical tape, and the entire layer of solution began to shock. The tension had to be relieved for the entire duration of the work, completely. So, better do this in advance;
- apply a deep penetration primer to the walls;
- We set up beacons. I understand that you have a question: how to do this? After all, in fact, this is the most important task on our entire journey. So, our portal is dedicated to this very topic, go to it, everything is described in detail there;
- We wait for the beacons to dry and prime the “pyramids” that lie at their base.
This is where the most difficult work is completed, let's describe how we can do the rest.
Mastering the plastering process

I don’t know about you, but I really like this stage of work. Doing all this is not difficult, the process does not take too much time and always marks the end of the “dirty” work, after which the most pleasant and interesting things begin. Well, to put an end to all this confusion with leveling the walls in the apartment, follow these steps in the order listed below.
- All work begins with diluting the solution. You know, I guess you didn’t follow the path of least resistance and decided to stir the solution with a hammer drill. Okay, pour a bucket of cement and two buckets of sand into your trough or basin, and sifted sand, this is important. By the way, this proportion is ideal. If you do not need such a durable layer, you can add not two, but three buckets of sand. But this should be done with cement, the grade of which is not lower than 300, but if the grade of your cement is 200, then you cannot do this, otherwise everything will crumble in 5 years.
- As soon as everything you need is in the trough, take a spatula and start mixing this dry mixture, doing it as thoroughly as possible.
- We fill a bucket of water and add 50 ml of the cheapest shampoo you could find. Stir with a stick. Oh yes, you know, I’ve seen so many times that they don’t take cold water, but turn it all on together, both cold and hot, so that the bucket fills up faster. But you can’t do this! Remember, no matter what solution you make, do not dilute it with hot water. This causes the binding components to curl up into lumps, and everything can go down the drain.
- Pour half a bucket of water with shampoo into the trough with the mixed dry mixture, turn on the hammer drill with a whisk and start stirring. We continue to add water until we get a solution of the desired consistency. It should be so thick that it does not slide off the wall, but not too dry that it crumbles.
- We take a spatula or trowel and begin to throw the mortar onto the wall with “slaps”, energetic and strong. This must be done with an obligatory force so that even the splashes fly off. If you don't do this, there's a good chance you'll get poor traction. Apply the solution in approximately one line. Apply about 5-6 of these cape lines to get approximately 50-60cm of mortar applied to the wall.
- Take the rule and from the bottom up, with slightly sinusoidal movements, begin to pull it, naturally, leaning on the beacons. You will see that this will not be as easy to do as you expected - that’s okay, that’s how it should be. After you run it for the first time, there will be a bunch of solution left on the rule. So, distribute it over the same surface, passing it along the beacons again.
- Do you see how you still have holes? Take your trowel again, only this time scoop up not so much, and again, vigorously fill these holes. Done? Back to the rule and to the stretch.
- Did you apply a meter and a half? Great, now take the same rule and start trying to rip off all the mortar with a strong movement from top to bottom. You won't be able to remove much, but you'll still have at least something left on it. This is done because, whatever one may say, the solution slips a little. By the time you walk one and a half meters, its top layer has already set a little, and as soon as you “rip” it off, it will no longer crawl down.
In this way you have to level all the walls in the house. Yes, by the end of the work your arms will be very tired, especially you won’t be able to lift them up, but that’s okay, it’s just out of habit. That's all, friends. The walls are smooth, you didn’t spend a lot, you can do everything according to our template pretty quickly, but what more could you want?
And in conclusion, I would like to remind you: we do not write installation instructions, we publish only introductory articles, the main purpose of which is to bring you up to date. So look, we are not responsible for your actions. By the way, it’s good to read, but it won’t hurt to watch either, so in addition, check out the video on the topic. Good luck!
In many regions of the Russian Federation, housing construction is intensively developing, including individual houses and cottages.
A wooden house made of timber or logs has a number of features, one of which is gradual shrinkage, which occurs within 1-3 years after completion of construction.
After this period, the owner is faced with the question of how to level the walls in a wooden house quickly and efficiently and carry out general repairs while spending a moderate amount of money?
The most affordable way to carry out repairs is to level the walls using plasterboard slabs.
For installation of drywall, a special technology is used, which allows the work to be carried out quickly and efficiently.
When using the frame sheet method, a number of preparatory operations are first performed:
- the walls on which the drywall will be attached are cleaned of traces of old finishing, fasteners, nails, and screws are removed
- then the walls are thoroughly cleaned of dust and dirt
- all cracks and chips are eliminated by puttying
- the wall is coated with a special composition for thorough drying
- markings are made for the profile and guides for their further installation
- To add rigidity, a horizontal profile is marked
Particular attention should be paid to work in the kitchen, bathroom and toilet. By covering the walls with plasterboard, it becomes possible to hide the pipes, heating communications system and external electrical wiring.
It is necessary to take into account the air humidity in the premises, since plasterboard slabs are susceptible to high humidity. At temperatures below +10*C, working with drywall is prohibited.
When installing GKP, a metal profile is most often used. During installation, 2 options are mainly used:
- Option 1: Installation of a rack-mounted metal profile
- Option 2 profile using the ceiling method.
To ensure proper installation of the profile, careful measurements are taken and the working surfaces are marked. The guide profiles are fastened at a distance of 500 mm from each other.

To fasten the profile to the wall, hangers are used (at the rate of 3 pieces per 1 m of profile).
The racks are mounted with a pitch of 600 mm, but in case of complications, the pitch can be reduced to 400 mm.
To strengthen the frame, horizontal jumpers are used.
After completing the installation of the frame, the plasterboard sheets are fastened using self-tapping screws with a set spacing for fastening of 250 mm.
After completing all the work on fastening the sheets, all seams are taped with a special tape and covered with putty.
For work in the bathroom, special moisture-resistant sheets are used.
But to maintain the required level of humidity in the bathroom, you need to install a special electric fan.
When installing plasterboard sheets, thermal insulation is installed at the same time. Foam boards, mineral wool and sheet cork can be used as insulators.
Doing the work yourself
All work on leveling the walls can be done with your own hands, using materials produced by Russian enterprises. When asked how to level the walls in a wooden house with your own hands, you can accurately thaw it using finishing panels.
The material for finishing walls can be finishing panels, which are divided into:
- moisture resistant
- non-moisture resistant
Moisture-resistant finishing panels include:
- natural wood panels
- plastic panels
- plywood laminated on both sides
Non-moisture resistant materials include:
- cork panels
- chipboard panels
- MDF panels
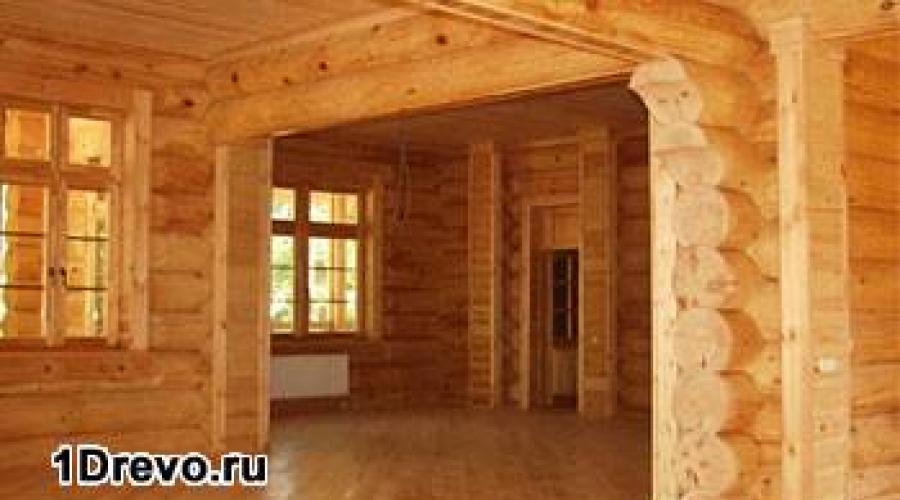
Decorating the walls inside the house

The main flaw of a log house is uneven walls
Finishing is widely used inside the house using wooden forcing, which is an environmentally friendly material and is excellent for decorating the interior of the house.
The internal walls of the house are lined with clapboards, giving the home special comfort and coziness. Particularly notable is the block house finishing material - a facing board that imitates the appearance of a log house.
The walls of the house are finished with block house cladding boards, imitating the decoration inside a village hut made of logs.
The technologies used for the manufacture of finishing boards ensure the durability and resistance of the material to environmental influences. The decoration of a house made using a block house will last for many years while maintaining the color of the wood.
The choice of material for wall decoration depends on many factors, including the preferences of the house owner, who, in order to carry out repair work, must have information on how to level the walls in a wooden house from the inside, combining the two factors of efficiency and quality.
Several conditions are the most important for repairs: the cost of the material, the colors offered, the texture of the material and performance characteristics.
Most home owners make their choice, noting natural materials, preferring to use them for decoration, taking into account one of the main qualities - the environmental friendliness of natural wood, which has minimal impact on the environment. You can watch the video about finishing a wooden house from the inside:
Read also:
-
 Covering walls with plasterboard in a wooden house -...
 -
 Fastening drywall to a plastered wall,…
Before proceeding with the leveling of the log house, it is established why such structural changes occurred, since without eliminating the main cause of the distortion of the walls and ceilings, carrying out work to eliminate defects will not make sense.
Distortion in the designs of wooden structures appears for the following reasons:
- natural movement of the soil, leading to the inability of the foundation to support the increased load on it in one place or in several simultaneously;
- loss of strength of the lower crown, corner elements of the connection, which occurred as a result of incompetent installation or the beginning of the process of rotting of the initially untreated timber;
- technological errors made during assembly - failure to use dowels, saving on other important structural elements;
- possible obstacles to the natural, uniform shrinkage of the erected structure;
- uneven shrinkage of the main part of the house and the associated extension.
In practice, two methods of correcting distortions are used: mechanical and decorative.
2 ways to level a log house
If the cause of structural changes was the loss of foundation strength, and the house sank, then before starting work, the sagging section of the wall is lifted using jacks, observing the mandatory rules:
- to reduce the load on the jacks, furniture and equipment are removed;
- lifting must be carried out with at least two jacks;
- The jacks are raised one by one to a height of no more than five centimeters.
After the settled section of the wall is raised, the bearing capacity of the soil and the foundation are restored. Next, the curvature is eliminated. The main material for mechanical alignment is a metal angle made from metal plates of suitable sizes. The sides of the corner are equipped with mounting holes, and threaded steel studs secure it to the wall, ceiling, and other structural elements.
Corners are installed both at the place of curvature and opposite, to give symmetry. The corner installation technology is standard. A hole is drilled in the wooden surface of the beam, the diameter of which should not exceed the circumference of the pin being driven in. The corner is installed on studs and fixed with nuts that regulate the degree of tightness of the logs, which eliminates the design from any distortions that may arise.
The decorating method is used for minor curvatures of the walls, provided that the main structural elements of the house building are intact. This method is also used after alignment using metal corners to hide the visual consequences of misalignment.
Drywall is used as a material to give an aesthetic appearance to the log house. Before starting work, antiseptic and fire retardant treatment of wooden surfaces is carried out. At the next stage, a vapor barrier is installed to prevent moisture from penetrating the wood from the rooms. Plasterboard sheets are installed on the sheathing. If necessary, insulation and sound insulation are laid, communication pipes and wiring are laid out.
Craftsmen recommend installing sheets of drywall at intervals of three millimeters. To fill the gap, elastic putty is used. After installing the drywall, they begin decorative finishing that corresponds to the intended interior and purpose of the room.
The craftsmen of the company “Finishing the Log House” will level the log house efficiently and quickly, after first identifying the causes of the curvature, they will take the necessary measures to correct the defects.