How to increase the system font in Windows 7. Change the font size to “seven”. Installing new fonts
Read also
Today, the overwhelming majority of monitors support Full HD resolution, i.e. 1920x1080, which leaves users with mixed feelings. Of course, the overall picture has become better, transitions between pixels are not visible, and watching movies on such a monitor is a pleasure. On the other hand, the inscriptions in the system with the standard Windows font are quite problematic to read and you have to peer almost close to the monitor to make them out. Therefore, many users began to wonder whether it is possible to change the standard Windows font. The answer is, of course, this is possible, and in several ways. We warn you right away: this is done differently on different operating systems; the largest number of methods is present in Windows 10, since it is now actively supported. Let's look at all the ways.
Despite the fact that the share of Windows 7 is gradually decreasing as a result of users switching to Windows 10, a certain number of users really like this OS and are in no hurry to upgrade. In this regard, we will tell you about two ways to change the font size in Windows 7: you can do this from the control panel and from the context menu. Let's look at each of them in more detail.
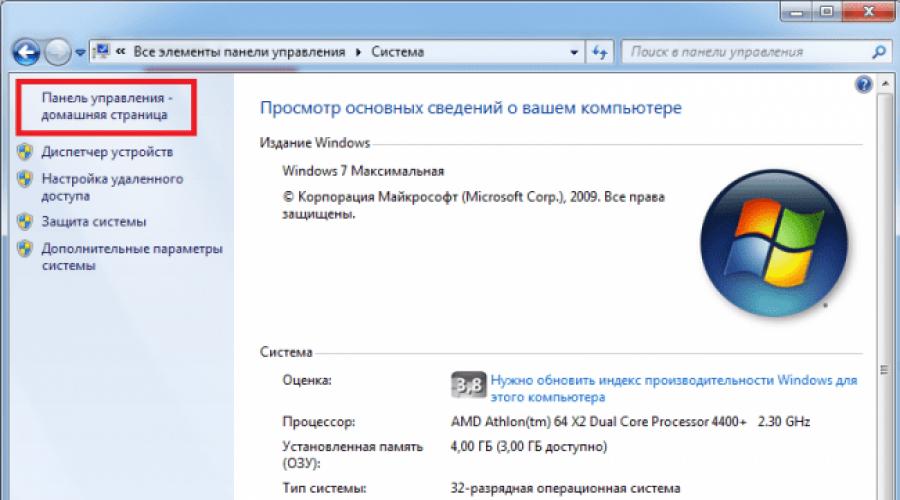
- First, open the control panel. To do this, double-click on “my computer”, after which the corresponding window will appear.
- Select “system properties”. This will take us to the settings window.
- You need to open the “control panel...”.

- You can display the item you are interested in on the screen by switching the view to small/large icons.

- After that, find the “screen” category in this list and click on it.

- You will see 3 preset scales in the system, from which you are asked to choose: 100%, 125% and 150%.

- After applying the changes, you will need to restart your computer for them to take effect.

But you don’t have to use these preset scales at all, but create your own within 100-500%.
- You just need in the same place where you selected the scale there is a not very noticeable “different font size” option.

- A scale like a ruler appears, where you need to place the mouse pointer by moving the mouse left and right with the left button held down until you get a font that suits you.

- After clicking OK, you will notice that another option appears with your selected scale.

- Application of the changes is again achieved by restarting the computer. As a result of these actions, the font size throughout the system will be changed.
If you frequently increase or decrease font scaling, it will be faster to do this through the context menu.
- First, right-click on an empty space on the desktop.
- From the list that appears, select “screen resolution”.

- You will be taken to the screen for changing monitor settings, where you need to select “Make text and other elements larger or smaller.”

- You will be taken to the already familiar window for changing the scale, just like using the control panel, only faster.

Another way to change the font size is to use the built-in Windows utility, Magnifier.
- First, of course, you need to launch this application. You can find it in the “start” menu by entering “magnifier” in the “search programs and files” field.

- Left mouse click to open it. A menu will appear as in the screenshot below.

- Using the settings, you can change the scale and other parameters. The area will move following the cursor.
- To enlarge a certain part of the screen, you just need to place the mouse in the place where you need it and you will get a screen enlargement in that place.
The scale here increases from 100 to 1000%. This tool is designed for nearsighted users and can also be used during presentations to highlight a specific piece of eran. The tool works on top of all windows, and therefore can be used not only on the desktop.
Windows 8 Text Scaling
Since the system came out after Windows 7, Microsoft did not have time to significantly change the way fonts are enlarged in Windows 8, so this process is similar to the process for Windows 7. The only nuance is that it is now possible to change the font size for each element individually, as can be seen in the screenshot below.
Enter the required parameters and click the “Apply” button. The new font size will be applied after you restart your PC.

Windows 10 font sizes
The listed methods, suitable for Windows 7 and 8, are also suitable for Windows 10, but in the latest update to Windows 10 (version 1809 October 2018 Update), it became possible to change the font without having to change the scale of other system elements, which is much simpler, but to Unfortunately, this applies to the entire text of the system at once, and not to individual elements, as can be applied using scaling.
In order to use this method, you need:
- Go to Start - Settings (you can do this with the Win + I key combination) and launch “Ease of Access”.

- In the “Display” menu at the top, you need to select the required font size (as a percentage of the current one).

- Click “Apply” and after some time the settings will be applied.

After this, the font size of almost all elements of system programs and most third-party programs, for example, in Microsoft Office, will change.
Enlarge font in browsers
Unfortunately, even if you changed the system font, this, unfortunately, will not affect browsers in any way, where the font will remain small. The font in the browser is enlarged by scaling; to do this, hold down Ctrl and click on + (plus) to increase or - (minus) to decrease the page scale. Also, instead of plus and minus, you can roll your mouse wheel up and down respectively. The main disadvantage of this method is that for each page you will need to change the scale again, that is, the settings will be reset.

Changing the font using System Font Size Changer
- As soon as you start the program you will be prompted to save the current text size. They will be saved in a .reg file and in order to restore the previous settings, you only need to double-click on the file and agree to make changes to the registry.

- This program will allow you to change the size of each individual element. If you set the value to “Bold”, the text of the selected element will be bold.
- Title Bar- Window titles.
- Menu- Menu (main menu of programs).
- Message Box- Message windows.
- Palette Title- Panel names.
- Icon- Signatures under the icons.
- Tooltip- Hints.
This utility allows you to change the font sizes of the following elements:
The utility can be downloaded from the official website of the developer
There is also a program Winaero Tweaker, which allows, in addition to changing font sizes in Windows 10, also selecting its type and color.
As you already understood, increasing the font size on a PC is a fairly simple process. You just need to follow our instructions. Of course, a similar effect can be achieved by reducing the screen resolution, but we strongly advise you not to do this. This way you remove some of the useful space on the screen, and your eyes get tired much faster.
Found a typo? Select the text and press Ctrl + Enter
Many have noticed that on modern computers/laptops, icons and fonts have become smaller, although the diagonal has increased, this is due to the fact that the screen resolution has increased. In one of my previous articles I wrote How to enlarge (reduce) desktop icons in Windows , in this same article I will continue this topic and describe in detail the process of increasing/decreasing the font size and the scale of windows on a computer/laptop.
Enlarge font in Windows XP.
In order to change the font size in Windows XP, there are two ways:
1 Method. Right-click on an empty desktop field and select "Properties" from the context menu.
Select the "Design" tab and in the field Font size select the required size.

2 Method. To use this method, insert the Windows XP installation disc into the DVD drive. After that, right-click on the desktop and select "Properties".
In the menu that opens, open the "Options" tab and click the "advanced" button.

In the "General" tab, select the font magnification scale.

If you want to specify your magnification factor, select "Special parameters" and indicate by what percentage to enlarge the font.

For the settings to take effect, you must restart the computer.

Increase/decrease font, scale in Windows 7.
To change the font and scale of windows in Windows 7, you need to right-click on an empty field of the desktop and select "Screen Resolution".

In the window that opens, select "Make text and other elements larger or smaller."

After this, you will be given a choice between how much to mutilate the font and other elements. Specify which item suits you and click the "Apply" button.

If you would like to change the font to your ratio, select "Other font size (dpi)".

After that, indicate by what percentage you would like to increase the font and window size in Windows 7.

After this, you need to re-login ("Start" - "Log out"). Please note that this procedure will close all applications; close all applications before clicking Quit Now.

Increase/decrease font, scale in Windows 8/8.1.
Right-click on your desktop and select Screen Resolution.

In the properties window that opens, select "Change size of text and other elements."

Using the slider you can change the size of text and windows. If you want to change any specific parameter, such as Window Title, Menu, select the appropriate parameter and specify the size. At the end, don't forget to click "Apply".

As you can see, changing the font size or window scale in Windows is quite simple and easy, regardless of the version of Windows XP/ 7/ 8.
When working on a high-resolution monitor, you can often encounter the problem of small icons, unreadable names and inscriptions. Agree, looking closely at each letter when approaching the screen is a dubious pleasure. In addition, my eyes get tired much faster. What to do? There is a solution - increasing the font.
Let's look at instructions for Windows 7, 8, 10, and we'll also include Internet browsers as a bonus.
Method for Windows 7
You will have to spend a little time and go into the system settings. Follow the steps:If you are not satisfied with the proposed scale templates, then it is easy to adjust it to your needs. For this:

Easy way for Windows 8
This system is not as popular among users as the “seven” system, but we will still consider the scheme of actions here. Move the slider to the desired position and click “Apply”.
 Easy way for Windows 10
Interestingly, in system build 1703, the text scaling feature is no longer available. You can only change the size of all elements at once, and that’s another thing. Therefore, a third-party utility, System Font Size Changer, is used, which does not even need to be installed.Download and run the program. You will be prompted to save the current settings to a reg file, which is best to agree to in order to return to the standard settings if necessary.
After this, the window of the application itself will appear, where, by placing a marker on the item and moving the slider, the size of the individual text component changes.

The utility is in English. Here is the translation of the fields:
Select the desired values for each element and click the Apply button. The system will notify you that the changes will take effect after a reboot. Therefore, the result will be visible the next time you start Windows.
For internet browsers
Have you often come across a page in your browser where the font is very small, making the information unreadable? Don't rush to look for another site. It's easy to increase the size of the letters. There are 2 ways.Using Hot Keys
While in the browser window, hold down the Ctrl key and scroll the mouse wheel forward/backward (or use the + and - buttons). You will notice that the font has become larger or smaller. You can return everything to its original form using the combination Ctrl+0. These commands are valid for any browser.
Changing the scale through settings
The options menu also allows you to change the size of the letters. Let's look at an example for Google Chrome.  The procedure in other browsers is similar.
Now you know how to enlarge fonts in Windows and Internet browsers. The problem of poorly readable inscriptions will be a thing of the past.
There are still people alive who had to deal with operating systems without a GUI (graphical user interface). In these systems, the problem with fonts was permanent.
It arose both when trying to view documents, when “crackers” appeared on the screen instead of normal text, and when trying to make fonts that were more pleasing to the eye.
The character space in DOS had a fixed size, and the screen surface could display no more than 25 x 80 (200 in total) letters. With various tricks it was possible to double this number - at the expense of losing the quality of text perception. Manipulations with graphic screens required serious programming knowledge and were inaccessible to the average user.
Only the birth of an OS with a graphical interface made it possible to solve this problem - to make fonts extensible.
There are a few things to note about font sizes in Windows. The easiest way to adjust the size is in applications specifically designed for displaying text. Examples of such applications are text editors and other office suite programs. Changing the desktop font or the size of letters in application windows is not so easy.
True, you can install a Windows theme that displays large fonts, but this is a half-hearted solution. Increasing the font size may be necessary for people with not very good eyesight, and using a magnifying glass for viewing is extremely inconvenient. The advent of high-resolution monitors made watching movies more comfortable, but hardly improved the desktop experience.
The letters on the desktop began to look too small. This note is written specifically to teach you how to manipulate these dimensions.
So, how to increase the font size on a Windows 7 computer?
Two ways to increase size
The first method allows you to enlarge the desktop font and labels under shortcuts. How to adjust the size using it? This is done like this:

If for some reason none of the proposed options suits you, then try another method. In the left pane of the same screen properties window there is the inscription “Other font size”. Click on this inscription and you will see another size selection window, like this.
Some users are not satisfied with the type and size of the font that is displayed in the operating system interface. They want to change it, but don't know how to do it. Let's look at the main ways to solve this problem on computers running Windows 7.
Let’s say right away that this article will not consider the ability to change the font inside various programs, for example, Word, but rather its change in the Windows 7 interface, that is, in windows "Conductor", on "Desktop" and in other graphic elements of the OS. Like many other problems, this problem has two main types of solution: through the internal functionality of the operating system and using third-party applications. We will look at specific methods below.
Method 1: Microangelo On Display
One of the most convenient programs for changing icon fonts to "Desktop" is Microangelo On Display.
- After you have downloaded the installer to your computer, run it. The installer will be activated.
- In the welcome window "Installation Wizard" Microangelo On Display click "Next".
- The window for accepting the license agreement opens. Switch the radio button to position "I accept the terms in the license agreement" to agree to the terms and conditions, and click "Next".
- The next window requires you to enter the name of your username. By default, it is pulled from the user OS profile. Therefore, you don’t need to make any changes here, just click "OK".
- Next, a window opens indicating the installation directory. If you have no compelling reason to change the folder where the installer suggests installing the program, then click "Next".
- In the next step, to start the installation process, click "Install".
- The installation procedure is in progress.
- After its completion in "Setup Wizard" A message indicating the successful completion of the procedure is displayed. Click "Finish".
- Next, run the installed Microangelo On Display program. Its main window will open. To change the icon font to "Desktop" click on the item "Icon Text".
- The section for changing the display of icon signatures opens. First of all, uncheck "Use Windows Default Setting". This will disable the use of Windows settings to adjust the display of shortcut names. In this case, the fields in this window will become active, that is, available for change. If you decide to return to the standard version of the display, then it will be enough to check the above checkbox again.
- To change the font type of elements to "Desktop" in the block "Text" click on the drop-down list "Font". A list of options opens, where you can choose the one that you think is most suitable. All adjustments made are immediately displayed in the preview area on the right side of the window.
- Now click on the drop down list "Size". Here is a selection of font sizes. Choose the option that suits you.
- By checking the checkboxes "Bold" And "Italic", you can make the text appear in bold or italics accordingly.
- In the block "Desktop" By moving the radio button, you can change the shade of the text.
- For all changes made in the current window to take effect, click "Apply".


As you can see, with the help of Microangelo On Display it is quite simple and convenient to change the font of graphic elements of the Windows 7 OS. But, unfortunately, the ability to change only applies to objects located on "Desktop". In addition, the program does not have a Russian-language interface and its free period of use is only one week, which many users perceive as a significant drawback of this option for solving the problem.
Method 2: Change the font using the Personalization feature
But in order to change the font of graphic elements in Windows 7, it is not at all necessary to install any third-party software solutions, because the operating system assumes solving this problem using built-in tools, namely the function "Personalization".
- Open "Desktop" computer and right-click on an empty area. Select from the drop-down menu "Personalization".
- The image editing section on the computer opens, which is usually called a window "Personalization". At the bottom of it, click on the item "Window color".
- The window color changing section opens. At the very bottom, click on the inscription "Additional design options...".
- A window opens "Window color and appearance". This is where you will directly configure the display of text in Windows 7 elements.
- First of all, you need to select a graphic object whose font you will change. To do this, click on the field "Element". A drop-down list will open. Select in it the object whose display in the label you want to change. Unfortunately, not all elements of the system can be changed in this way. For example, unlike the previous method, acting through the function "Personalization" we cannot change the settings we need to "Desktop". You can change the display of text for the following interface elements:
- Message window;
- Icon;
- Title of the active window;
- Tooltip;
- Panel name;
- Inactive window title;
- Menu bar.
- Once the name of the element is selected, various options for adjusting the font in it become active, namely:
- Type (Segoe UI, Verdana, Arial, etc.);
- Size;
- Color;
- Bold text;
- Setting italics.
The first three elements are drop-down lists, and the last two are buttons. After you have made all the necessary settings, click "Apply" And "OK".
- After this, the font in the selected operating system interface object will be changed. If necessary, you can change it in the same way in other Windows graphic objects by first selecting them in the drop-down list "Element".


Method 3: Adding a new font
It also happens that in the standard list of operating system fonts there is no option that you would like to apply to a specific Windows object. In this case, it is possible to install new fonts in Windows 7.


There is another method for adding a new font to Windows 7. You need to move, copy or drag the object with the TTF extension downloaded to the PC to a special folder for storing system fonts. In the OS we are studying, this directory is located at the following address:
C:\Windows\Fonts

The last option is especially important to use if you want to add several fonts at once, since opening and clicking on each element separately is not very convenient.
Method 4: Change through the system registry
You can also change the font through the system registry. Moreover, this is done for all interface elements simultaneously.
It is important to note that before using this method, you need to make sure that the required font is already installed on your computer and is located in the folder "Font". If it is not there, then you should install it using any of the options suggested in the previous method. In addition, this method will only work if you have not manually changed the text display settings for elements, that is, the default option should be Segoe UI.
- Click "Start". Choose "All programs".
- Go to the catalog "Standard".
- Click on the name "Notebook".
- A window will open "Notepad". Enter the following entry there:
Windows Registry Editor Version 5.00
"Segoe UI (TrueType)"=""
"Segoe UI Bold (TrueType)"=""
"Segoe UI Italic (TrueType)"=""
"Segoe UI Bold Italic (TrueType)"=""
"Segoe UI Semibold (TrueType)"=""
"Segoe UI Light (TrueType)"=""
"Segoe UI"="Verdana"At the end of the code instead of a word "Verdana" You can enter the name of another font installed on your PC. It is this parameter that determines how the text will be displayed in system elements.
- Next click "File" and select "Save as…".
- A save window opens, where you must navigate to any location on your hard drive that you see fit. To complete our task, the specific location is not important, you just need to remember it. A more important condition is that the format switch in the field "File type" should be moved to position "All files". After that in the field "File name" Enter any name you see fit. But this name must meet three criteria:
- It must contain only characters of the Latin alphabet;
- There must be no spaces;
- At the end of the name you should write the extension ".reg".
For example, a suitable name would be "smena_font.reg". After that press "Save".
- Now you can close "Notebook" and open "Conductor". Go there to the directory where you saved the object with the extension ".reg". Double click on it LMB.
- The necessary changes will be made to the system registry, and the font in all OS interface objects will be changed to the one that you specified when creating the file in "Notepad".


If you need to return to the default settings again, and this also happens quite often, you need to change the entry in the system registry again, following the algorithm indicated below.

Method 5: Increase text size
There are times when you need to change not the font type or its other parameters, but only increase the size. In this case, the optimal and fastest way to solve the problem is the method described below.

As you can see, there are quite a few ways to change text inside Windows 7 interface elements. Each option is optimally used under certain conditions. For example, to simply enlarge the font, you only need to change the scaling parameters. If you need to change its type and other settings, then in this case you will have to go into additional personalization settings. If the required font is not installed on your computer at all, you will first need to find it on the Internet, download it and install it in a special folder. To change the display of labels on icons "Desktop" You can use a convenient third-party program.