How to install hinges on a door. Installation of hinges on interior doors. The most affordable DIY methods How to install door hinges
The hinge group of door fittings is presented on the market in a wide range. Let’s try to understand the variety of hinges and why overhead hinges are so popular. Since installing butterfly hinges on interior doors does not require knowledge of complex technological processes, this material will be especially useful for novice craftsmen.
Popular types of canopies
Canopies for interior doors are among the main elements of the door system. Without them, the entire structure can be considered useless. Today, the retail chain offers numerous types of loops with different characteristics. Therefore, before purchasing, you need to decide on the type and function that the door leaf will perform, as well as the direction of opening.
Butterfly overlays
This type of canopy has a simple design and is easily installed on the door leaf of interior doors. The appearance of the canopies resembles the wings of a butterfly when opened.
Mortise card
They are among the most common types of loops. They consist of two parts, which are attached to the structure with simple wood screws. They are buried into the end of the sash with screws. Loops are divided into universal, right and left. Therefore, when purchasing canopies, you need to know which way the door will open.

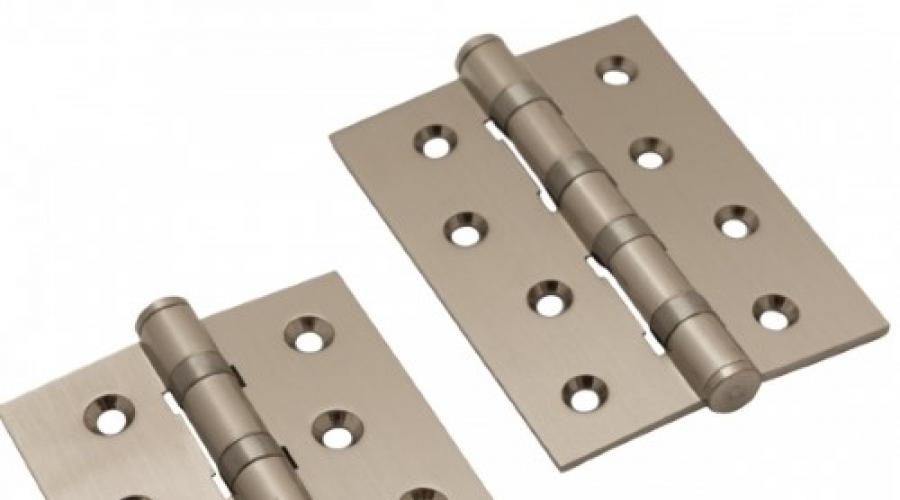
The universal type of hinge has two pairs of bearings. They are used on all sashes. They have a long service life.
Corner
Used in rebated door systems. It is not the plates that are attached to the central axis, but the corners.

This design crashes into the door end and is reinforced with self-tapping screws. Corner products provide the door with a tight rebate.
Hidden
They have a high degree of protection against “uninvited guests”. Hidden structures with a closer are installed directly on the sash and frame. To do this, notches of considerable depth are cut at the installation site. They are mainly used for entrance doors.

Installing a door with an overlay ensures camouflage of fasteners, an aesthetic appearance and eliminates cutting of hinges from the outside.
Screw-in
This species is significantly different from other analogues. It does not have the usual wings on the awnings, and the pins are screwed directly into the wooden door frame and leaf. Only the hinge remains visible. Screw-in hinges are usually installed on doors that have a rebate.

Double sided
They are installed on doors in places with high traffic.

Their design resembles card loops with three plates. On one of them there are two axes of rotation on the sides.
Overhead hinges: features and installation
They belong to the card type of loops and consist of two plates and a hinge. When open, the plates resemble butterfly wings, and when closed, one “wing” fits into the hole in the second half of the canopy. Thus, one plane is obtained, which becomes invisible. They are easy to install and do not require removal of wood from the door structure.
 It is better to choose the color of the hinges in the same tone as the door handles
 Installation requires precise selection of screws. The screws must be hidden in special grooves in the plates. Properly selected fittings will not interfere with the sash closing.
Since “butterflies” have an openwork design and are made of thin material, they are not recommended to be mounted on heavy reinforced doors.
There are two versions of awnings available: on the door with a rebate and classic. The first design provides a bend in the plate, which ensures that the door closes tightly.
Advantages of plates:
- have an aesthetic appearance;
- do not require special tools for installation work;
- The rotating mechanism practically does not break.
Butterfly hinges are not ideal mechanisms and have their drawbacks.
Disadvantages of awnings:
- fastenings are designed only for perfectly flat surfaces;
- low-quality metal material contributes to the deformation of the product under the weight of the door;
- It is impossible to remove the door from the awnings. Only by unscrewing the screws is it possible to replace the blade.
Correct installation of hinges without insertion
Today, non-mortise fastening remains in demand among consumers, which means that step-by-step instructions for installing canopies without forming a groove will make this process accessible to everyone.
To hang the sash on the doorway, the appropriate fittings are selected. Traditional hardware products include butterfly hinges.
To complete the work you will need the following tools:
- stationery knife;
- drill or screwdriver;
- self-tapping screws;
- drill.

Installation technology:

 Properly installed hinge
Mortise models: types and installation
Mortise hinges are similar in appearance to overhead awnings with a card structure. The difference lies in the method of fastening and detachable plates.

Popular types of such loops:
- Brass. They have an aesthetic appearance and are in great demand. There are two types of canopies in the retail chain: chrome-plated and polished.
- Brass plated. They are made from several alloys. To give an aesthetic appearance, brass, bronze and gold plating are used.
- Steel. The most reliable and high-quality type of fastening. They are not subject to grinding, therefore they have a long service life. To preserve the aesthetic appearance of the canvas, they are cut into the end of the door frame. The recess and configuration of the recess corresponds to the thickness and shape of the plates.

Inserting hinges into interior doors
To insert hinges into interior doors with your own hands, you will need canopies, a chisel, a hammer, screws, a screwdriver, a marking pencil, a tape measure, wooden wedges and a building level.

Work is done!
Interior doors are sold in stores without hinges, which are supplied as a set, so making the right choice of a product of the appropriate size is required simultaneously with the selection of suitable hinges. Installing overhead awnings will be one of the most suitable methods for installing hinges. To properly install hinges on interior doors, you need to select the optimal locations, marking them where the hinges will be located.
To install an interior door, a card hinge is most often used.
Installing hinges depending on the weight of the interior door
The use of card hinges when installing interior doors in our country is the most popular. Card hinges consist of two plates, called wings or cards, in which there are special holes through which the products are fastened with screws to the door.

The choice of hinge depends on the size and weight of the door.
Russian production of this type of hinge has been established since Soviet times. This type of product is quite ordinary, although its sizes are completely different. This type of hinge is no longer used when installing interior doors, since they are best suited for street fences or non-residential premises.
Five-inch products have 5 holes for screws on each of the cards, and four-inch products have 4 holes, which is why they are popularly called fours and fives. Selecting the required product of a certain size requires taking into account the weight of the door. Heavier doors are hung on large hinges, and lighter ones are hung on smaller ones. For very heavy ones, the use of three loops is suitable, as for light ones, which will raise their performance properties to a higher level.
How to correctly and accurately make markings for cutting holes for hinges

Markings for loops with dimensions.
There are two ways to make markings for attaching hinges. The first involves attaching a hinge to the door leaf, followed by tracing it with a pencil. Typically, doors are strengthened by two products, which are placed at the bottom and at the top, and the distance between them should be the same.
When installing the third hinge, it can be placed in the center or moved up. Before installation, special marks are made using a well-sharpened pencil. This can be done not only on the door frame, but also on the door leaf. You can make marks using the second method, above and below, by stepping back 15 - 25 cm from the edge of the canvas. After this, mark the places of fastenings.
When marking the locations of the holes, you should not confuse where the door is at the bottom and where the top is, taking into account how it will stand after it is attached to the hinges. If there are glasses at the door, you should pay special attention to their location.
In this case, the edge of the hinges is combined with the edge of the door leaf. If the fittings are hidden, then the placement must be carried out with the utmost precision and accuracy, since distortions should not be allowed when installing the mechanism.

Marking for the hinge can be done by placing it on the door leaf and tracing it with a pencil.
When the door frame is assembled and all the necessary dimensions are made, we proceed to installing the hinges where they are planned to be placed. The products should be placed in the places where they are fixed according to the marks, this will make it possible to imagine how they will look.
The location of the hinges will be similar to the first option, unless there are certain differences between the new and old interior doors. All dimensions are determined only when the interior door has been visually inspected. Installation of hinges on the door frame and door leaf is carried out taking into account the direction of door opening.
Correct selection of products and creation of a cut for wooden doors

Options for installing different numbers of loops.
Before purchasing hinges, you should find out what type of hinges you will need, that is, right or left. To do this, you need to stand near the opening where you need to install the interior door. The main thing is that she opens up to herself. It is important not to confuse the sides and not to stand so that the door opens away from you, which is not correct.
You need to open the door yourself, which will imply which side it opens on - left or right. If on the left, then you will need to select the left loops, and if on the right, then the right ones. This is easy to understand; it is important to then correctly determine the type of product required.
When choosing this type of product for fastening interior doors, it is important not to confuse them with each other, noting all the corresponding fastening points, that is, where and which hinge should be attached.
If the door is made of wood, then you should cut out a layer of wood from the door frame, taking into account the contour of the hinges, using a sharp knife. When making a thin cut, you should take into account the thickness of the loops. To make the cut more convenient, a corresponding vertical cut is made in the wood, taking into account the contour of the product. If you make only a horizontal cut, this may cause separation of excess sections of the wooden door leaf.

After marking is completed, a cut is made with a chisel or a special machine.
In a similar way, a slice is created on the canvas. If you use a chisel when creating grooves, this will lead to the fact that the canvas will be damaged.
Carrying out this work with a chisel is not possible, since it will take a lot of time, and the hole itself will not look neat. If the required groove has already been made in the corresponding part, then it is conveniently cut out using a chisel. If there is a knot on the canvas, the loop should be shifted, which is nothing to worry about.
When choosing hinges, you should remember that they may need to be dismantled if you need to bring furniture into the house. And removing the wings may be too complicated a procedure. Removing interior doors may require dismantling the right or left side of the door.
How to install hinges on interior doors correctly
To dismantle and install hinges, you will need the following types of tools to help make the whole job easier:

Correct installation of the loop is when the loop fits exactly into the groove; subsidence is allowed 0.1-0.5 mm.
- Screwdriver.
- Drill.
- Cutter.
- Thin drills.
- Awl.
A small circular saw can also be useful for installing mortise hinges; be sure to have a pencil or marker handy. The awnings must be disconnected before installing the hinges. The larger part of the canopy should be installed in the frame, and the smaller part - in the door leaf.
High installation accuracy will be ensured if you attach the door leaf to the door frame, which will allow you to trace the coincidence of the marks made for the purpose of inserting the hinges. It is very important to check for various deviations, since even with a minor mistake, a situation may occur in which the interior door opens and closes on its own, which will not be pleasant for the owners.
When placing the hinges on the inside of the fabric, you need to pay attention to where the hinges protrude. They should be facing the front side, that is, where the interior door will open.
How to properly use fasteners when installing hinges

Diagram of the device and fastening of the loop.
Next, you should fix the parts using self-tapping screws supplied in the same kit with hinges. Before screwing in the fasteners, you should align the holes and marks for them, which will prevent the wood from splitting during the process of screwing in the screws.
If it is necessary to insert hidden hinges for interior doors, then you will need to perform more complex procedures than when inserting conventional ones. Hidden fittings for doors require preliminary preparation of deep mounting holes. A hole is carefully cut along its exact contour using a milling machine.
One solution to the problem of inserting hinges correctly is to use mechanized tools, which require certain skills when working with them. The insertion of hinges begins after preparing all the tools and marking the door leaf and door frame.
When screwing the hinges with screws, it is imperative to ensure that the hinge does not go to the side. The screws are always tightened exactly in the center, making special marks in the form of dots with a pencil, and then marking them with an awl. This will prevent the screws from over-tightening the hinges during the tightening process.
If the door hinges are cut in correctly, they should be located at the same level. If a bulging loop is detected, then you must not be lazy and deepen the platform to the required level, but no more. Then, using a ruler, you need to check that the loop is seated correctly.
If the hinge pressed with a ruler protrudes, then after installation a large gap will form between the door frame and the leaf. Correctly installed internal hinges can ensure that the doors open at an angle of 180°. The load that the doors can withstand should be no more than 50 kg.
After this, the components of each loop are inserted together. When performing this operation independently, the door leaf is raised so that this allows you to determine the point of alignment of the canopies. Each bolt is then inserted into the correct hole with your free hand after the compound arms are positioned in the correct plane.
This installation stage is the most difficult, after which the location of the door leaf is adjusted, correlating it with the door. As a result, equal gaps are obtained between the door and the sash along the entire perimeter. The entire insertion process should be performed extremely carefully and carefully.
If a situation arises related to the choice of hinges for interior doors, then it is better to choose hidden canopies.
The hinges should be aligned to hold the door in the doorway. After aligning the hinges, they begin to insert the hinge pins, for which an assistant is needed.
Next, the doors are checked for smooth movement, and the latch is engaged on the door jamb along with the locking plate. If necessary, it is moved, if when closing the door it starts to make noise, then the metal tab is slightly adjusted.
As a rule, when buying a door, you purchase it ready-made with hinges already attached. But if you purchased a disassembled structure, then you will have to install them yourself. If you insert the hinges incorrectly and allow even a slight distortion, this will lead to unnecessary consequences in operation: the door will not close tightly or the lock pawl will not reach its place.
To carry out the replacement work correctly, you need to know in what sequence the door hinges should be installed with your own hands; in the future, this will help you avoid operational problems.
Loop selection
Before purchasing hinges, you need to decide which ones will suit your door; they are divided into three types.
- Brass. Such hinges are widely used because brass, due to its ductility, is easily processed: coated with chrome or polished.
- Brass plated. As a rule, such hinges are made of various alloys and coated with brass plating, as well as other compounds that imitate by similarity: chrome, bronze or gold.
- Steel. These are the most reliable and high-quality hinges, because unlike brass, the hinges of which wear off over time, steel hinges are not subject to this process, and therefore they can be considered eternal.

When choosing hinges, you need to take into account some factors that determine the duration of their operation.
Firstly, the weight of the door. Usually, two hinges are enough for one door, but if the door is made of solid wood, then it is correspondingly heavier, which means it is better to install three hinges.
Secondly, the bearings are in the hinges. This hinge design will not creak after long-term use.
Secondly, depending on the side of the door opening, the hinges can be left-handed and vice versa.
What you need for self-installation

- Loops.
- Chisel and hammer.
- Screws and screwdriver.
- Pencil for marking.
- Wooden wedges.
- Level.
We make markings and cut out seats

Hinges must be installed correctly with a distance of 20 or 25 cm from the bottom and top of the door. But at the same time, carefully inspect the surface so that there are no knots or chips in the areas of intended installation. If you screw a screw into such a place, it can split the box or go awry, which will not allow the hinge to be properly secured. If there are such places, then the fastenings need to be moved a few centimeters up or down.

First, we make markings on the door with a pencil. We place the loops in the places of intended fastening and circle them. Then we apply a chisel to the marking and carefully tap it with a hammer along the entire marking to cut out the outline of the loop. After this, you need to make several cuts along the length and, using a chisel on the side, make a recess.
If you make a recess larger than the thickness of the hinge, then when closing the door the other half will rest against the frame, which will subsequently lead to deformation and upholstery of the door.

The same procedure must be done with the second seat. Then, apply a loop and secure it with self-tapping screws. That's it, the door is ready, now you need to cut the hinges into the frame.
How to mark a box

This is where you'll have a little more difficulty mapping out the location. To do this, install the door in the frame and use wedges to fix it in the intended closing location. If there is a lock on the door, it will make the work much easier; you can close it and adjust the door. We place wedges under the bottom and use a level to bring it to the line.
The door in the frame must be adjusted both horizontally and vertically. If you do not position it horizontally correctly, the door will be placed askew and will not close well. A door that is installed incorrectly vertically will open on its own.
Having aligned all the corners, we make notes with a pencil in the places where the hinges come into contact with the box. Here it will not be possible to completely mark and therefore it is better to unscrew the hinges from the door again, outline their outline on the frame and screw it into place.
After this, you need to cut out the recesses for them in the same way as you did on the door. The rules are the same - the main thing is not to overdo it with depth. When you have everything ready, place the wedges under the bottom again, bring the door to the frame and secure it in place with self-tapping screws. Everything is ready, we check it for the quality of opening and are happy with the result.
To prevent the door leaf from cracking during fastening with screws, you need to make holes in the screw-in areas with a thin drill.

If you do not have the necessary tools or do not have the skills for such work, then you can purchase butterfly loops. They belong to the “no-cut” class and anyone can install them. The principle of operation is that when closed, the cards (the sides of the loops) fit into one another. Thanks to this, such hinges do not require insertion, and the gap in the closed position is small.
Video
For fastening and further operation of doors in furniture production, various types of hinges are used. If you bought a cabinet and decided to assemble it yourself, then you cannot avoid the process of installing doors on furniture hinges.
Figure 1. Furniture hinge design
The modern furniture market offers various types of door hinges, which include both four-hinged hinges and simply hinged hinges, which were very popular back in Soviet times. Today, four-hinged hinges are very popular, which are distinguished by their simple and reliable design, as well as easy installation. They have a high level of strength, which ensures an unlimited number of opening-closing cycles. Another significant advantage of such a mechanism is the ability to adjust it in 3 planes, which will allow you to align the cabinet doors without any problems.
The four-hinged hinge consists of the following elements (Fig. 1):
- cup;
- shoulder;
- mounting (reciprocal) plate.

The hinge is fixed to the furniture frame with a mounting strip, and with a cup - to the door. Self-tapping screws are used as fastening elements. The arm acts as a lever and connects the cup to the strike plate using a four-joint device. There is an adjusting screw in the cover of the bar, with which you can adjust the position of the door relative to the base.
According to the method of applying the sash to the body, the hinges are divided into:
- Invoices. They are used when the door covers the sides of the niche in which it is located. This method of fastening doors is the most popular, so it can be found on almost any furniture set.
- Semi-overhead. They are used when 2 doors fit onto the same side of a piece of furniture. Hinges of this type differ from others by a slight bend in the base, which provides a small distance between the two facades.
- Internal. They are used in the case of internal fastening of the facade, that is, the door does not cover the side of the niche in which it is placed, but is located inside it. The base of such hinges has a pronounced bend.
- Angular. Using such mechanisms, you can secure the doors at a certain angle.
Return to contents
Preparatory work
To install a furniture hinge on a cabinet with your own hands, you need to prepare the following tools:

Figure 2. Loop marking
- screwdriver;
- end mill with a diameter of 35 mm;
- ruler;
- building level;
- awl;
- pencil;
- self-tapping screws – 3.5x16 or 4x16 mm, 2 pcs. for 1 loop.
After preparing the tool, marking is made, which consists of marking the center of each hole for the hinges. Depending on the height of the door, as well as the placement of the height of the shelves, about 7-12 cm recede from the edge of the facade. If the door has large dimensions, then it is necessary to use not 2 hinges, but 3 or more. In this case, the step between the canopies must be at least 50 cm. The dependence of the number of hinges on the height and weight of the facade is presented in the table.
After marking the height, mark the centers of the holes from the edges along the width. For a standard door hinge, the distance from the edge should be approximately 21-22 mm (Fig. 2). When marking, you must ensure that after installing the hinges they do not come into contact with the cabinet shelves, because this will interfere with the normal functioning of the door.
When choosing an entrance door or an interior door, people rarely think about the functional significance of door hinges. It seems that the main thing is the beauty of the canvas, the reliability of the frame, the appropriateness of the design of the door block for the comfort of a living space and more. But do not forget that hinges play a big role in the operation of the door unit. The canvas itself is just a blank without properly selected canopies.
Installing hinges on an interior door depends on the correct selection of the required set of hanging fittings. Let's study this topic in more detail to know how to choose loops? How to install it yourself?
Hinges for interior doors: a choice for any occasion
You may have paid attention to racks of door hardware and may have noticed what a large selection of door hinges there is.
Hinges for interior doors differ in design, color, size, and material.
They differ in size, number of holes, variety of fasteners, and opening method. All this is no coincidence. Any hinge is designed for a specific type of door: wooden, metal, plastic. The main nuance is the weight parameter of the canvas. You can't hold a heavy metal door with two card hinges. This requires powerful welded elements. All door hinges are usually divided into the following types:
- Overlays - installed without any grooves or recesses.
 Overhead hinges are the easiest to install.
 Placed on the end of the canvas and the rack of the box. Can be solid or split. Often used for interior doors made of MDF, plastic, and paneling. The canvas should not be very heavy. If such canopies are chosen for installation on a solid wood door, it is better to take them in the amount of three pieces.
- Mortise - installed in a specific recess made in the canvas and box.
 Mortise hinges require more skill in working with power tools.
 This type is divided into hidden and partially recessed. What is the difference? Simple mortise hinges are inserted into a small recess that corresponds to the thickness of the hinge area. The recess can be made without a special tool, using only a chisel, chisel, or hammer. Hidden canopies should be deeply recessed into the canvas. The hole is created with a special saw or router. Such hinges are found on expensive interior doors; they can be used on entrance structures, which reduces the risk of uninvited guests entering the house.
- Screw-in - have special screws built into the platform.
 Screw-in hinges are rarely used for interior doors.
 The hinges are screwed into the canvas and the lightweight box only. Currently rarely used.
- Corner models - shaped like a corner, used to install a pendulum opening system.
 Corner hinges for hanging doors.
 Installed like regular card loops.
Based on the possibility of opening doors, hinges can be divided into three more groups:
- left - with the ability to open the door to the left;
- right - open the canvas only to the right;
- universal - open in any direction.
This feature is an important point when choosing hinged fittings for interior and entrance doors. You should navigate this way:
- stand facing the doorway;
- evaluate where the door will open - we take into account fire safety standards that the door should open forward in the direction of movement;
- For double-leaf and sliding doors, there are specific features of hinged fittings.
This concludes the classification of hinges for interior and entrance doors. Now you need to study the installation specifics of each model.
Installing hinges on interior doors: a brief overview of all methods
Installation of hinges on interior or entrance doors depends on the type of fittings chosen. The differences in the work algorithm are small, but it’s worth dwelling on them in order to know how to install the hinges with your own hands.
Installation of overhead hinges
This is the simplest, affordable canopy for self-installation. No special skills or equipment are required here. You need to prepare:
- canvas;
- door frame;
- set of hinges (screws provided by the manufacturer);
- screwdriver;
- drill;
- roulette;
- level.
Overhead loops can be detachable or solid. This must be taken into account during installation. It is easier to install a detachable hinge by making the correct markings. The main thing is not to confuse the upper and lower parts of the canopy. Otherwise, the canvas will not be able to stay on the box and will fly down. Check the operation of the loop before installation.
It is more difficult to install a solid hinge - it is necessary to combine the canvas and the box parallel to each other, at the same level.
- If the hinges are not universal, check that the door can be opened in the desired direction.
- Next, drill holes so that the timber does not crack if the door is made of solid wood.
- Screw the screws into the holes using a screwdriver with a special attachment.
- Check the operation of the door unit. If there is any imbalance, correct the defects.
Watch the video on installing the overhead hinge:
Installing mortise hinges on an interior door with your own hands
Mortise hinges require more time, skill, and tools to install. A mortise hinge, like an overhead hinge, can be detachable or solid, universal or on a specific side. The insertion can be carried out only to the thickness of the applied strip or set deep (secret loops).
You can install the first type of mortise hinge with your own hands. It is better to entrust hidden hinges to specialists if there is no special equipment available for excavating a deep groove. This is done with a milling machine.
Conventional mortise hinges require a chisel, chisel, or hammer for installation to make a small indentation in the product.
- Take a tape measure and measure the required distance to install the hinge in the door with your own hands. According to the standard, it is necessary to retreat 200–250 mm from the upper and lower edges. If you need to place a third loop, make a mark in the middle or slightly lift it up. Look at the diagram for installing hinges on a door according to the standard:
- Attach the canopy with a bar to the marking site and trace the outline with a simple pencil.
- Do the same with the second part of the loop.
- Now you need to use a chisel, hammer, or chisel to make a recess along the outlined contour to the size of the thickness of the plank. Perform this step slowly and carefully. If you remove more, the hinge will become skewed and the operation of the door will be disrupted. So take your time.
- Place the bar into the resulting recess. If the loop lies flush with the surface, you can proceed to screwing it.
- Drill holes for self-tapping screws in the required places.
- Tighten the screws, pulling the hinges tightly.
- Follow the same steps with the remaining awnings.
- Connect the frame to the leaf and check the movement of the interior door.
This completes the installation. More detailed steps for installing mortise hinges on a door can be seen in the video:
Hidden hinges are more difficult to install, but we will describe the sequence of actions in case you decide to install hinges on the door yourself. The sequence of actions differs little from the installation of simple mortise hinges.
You only need to have a milling machine to make the groove to the desired depth. The peculiarity of hidden hinges lies in the difference between the composite strips. The canvas mounted part is larger than the post mounted part of the box. Therefore, do not mix up the elements.
- Mark according to the sizing information provided above. Place the router where the hinge will be installed and make a recess.
- Check the depth of the groove by inserting a hinge element into it. Trim off any excess with a chisel. The bar must be completely recessed into the canvas.
- Perform the same manipulations on the door frame.
- Secure the elements with the screws included in the kit.
If all work is done correctly, the door will open and close smoothly. Watch a video about installing a secret hinge with your own hands:
Additional Information
Installation of awnings for interior doors can be carried out at different times:
- when purchasing a new door;/li>
- when replacing worn-out canopies on old canvas.
There are several ways to approach installation:
- if the door is new, then it is easier to install the hinges at the stage of assembling the door frame and together with the leaf;
- you can attach hinges after installing the door frame without a leaf. This is more difficult to do and requires skill;
- If you are simply replacing old awnings, then you don’t have to choose. Dismantling and installation must be carried out with an assistant in order to correctly adjust the level of the elements. The best way would be to buy hinges similar to the old ones and install them according to the old dimensions.
In any case, installing hinges on an interior door with your own hands will be justified by cost savings and new experience in repairs. Watch a video about installing hinges yourself in the story about installing interior doors.