How to decorate an ordinary kitchen in an apartment. How to decorate your kitchen interior with beautiful homemade crafts. Varieties of kitchen design
Read also
A modern kitchen is not only a place for cooking. This is a whole world, a reflection of the hostess’s soul, and, of course, it must be beautiful. The kitchen greatly influences the mood of the housewife herself, as well as her family members. It’s very good if you have enough money to do everything the way you want. However, sometimes they are needed for something more important. At the same time, I really want to change the interior. Decorating your kitchen with your own hands is creative and very exciting process, which will give you many pleasant moments. Just be patient and highlight free time. It’s very good if your household joins you. This way you will create a unique corner together.
Changing the walls
Kitchen decoration is a process that allows you to create something completely new, unlike anything else. It will be nice to invite friends to such a room for a cup of coffee, and you will be guaranteed praise and admiration. And in the evening it’s so nice to spend a few minutes in a corner you created with your own hands.
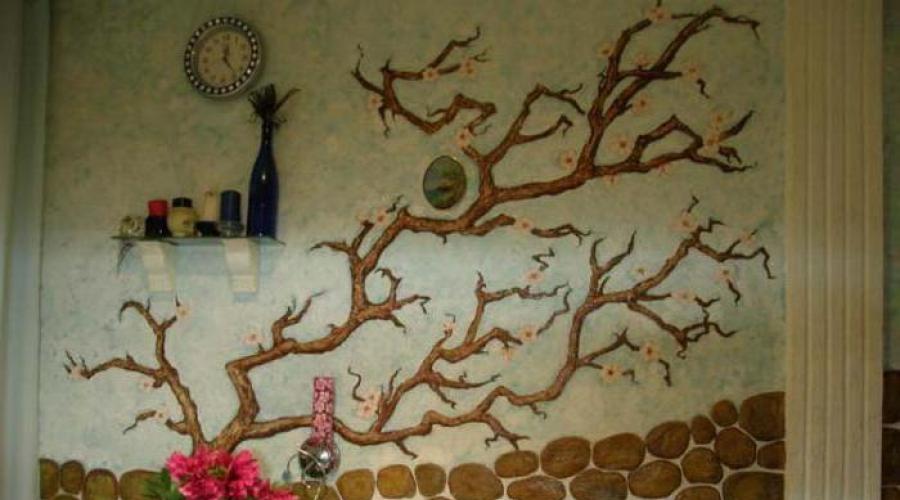
When decorating a kitchen, designers recommend starting with decorating the walls. To do this, it is not necessary to completely repaint them, just add bright details. If you have a friend who is good at drawing, you can make images directly on the wall covering. But the lack of artistic skills is not a problem at all. Today there are stencils that can compensate for this shortcoming. To save time, you can use stickers depicting a tea ceremony or other kitchen themes. However, there is important rule. Such delights are suitable only if the color of the walls is monochromatic. If you have a drawing, you can get out of the situation with paintings and panels.

Vivid details
The kitchen is not limited to the above-mentioned activities. Creative process You can continue even when the general idea has already been realized. Now all that remains is to place accents, add bright touches that will create a homely and relaxed style. A satin ribbon is perfect for this. It is needed not for bows, but for creating extremely convenient interior items. Take 1 meter of ribbons different colors. Now you will need to weave a complex openwork braid or plait. The lower ends are left hanging freely. Now the creation is fixed on the wall. Light hooks are hung on it, which can be used for hanging various souvenirs.
The scent of summer in your home
In the kitchen it can truly be magical activity. You just need to show a little imagination. You will need natural fabric. It can be satin or calico, any cotton fabric. Choose the color so that it matches the interior. We will sew decorative bags. The size of the products should not be large, because they will hang on a satin rope. You can fill them with different aromatic herbs. On the reverse side write the names (mint, currant, raspberry). You can decorate the bags using lace and make beautiful ties.

Updating the headset
Of course, we do not suggest throwing cabinets that have only lasted a few years into a landfill. This would be an unaffordable luxury for most families. The simplest self-adhesive film can work wonders. It is quite inexpensive and comes in a variety of sizes and colors. It can be glued to the entire surface of the headset or applied with bright stripes along the entire perimeter. Part external panels you can leave it without film and occupy this space with photographs that match the theme. As you can see, decorating a kitchen can be a great opportunity to test your creativity and, perhaps, realize yourself in the most unexpected way. You need to keep in mind that the film is short-lived, and after a couple of months you will have to change it again. Therefore, you can repaint the set in any color, and then varnish it in two layers.

Kitchen apron
For a long time, this part of the wall above the stove and countertop was neglected. It was tiled to make it easier to wash off the oil and dirt that stuck to it. However, today everything has changed. Modern projects suggest the presence glass aprons with beautiful images in the very different style. This could be an ornament Live nature, rivers and waterfalls, intricate hieroglyphs or cute inscriptions like “Have a great mood!” or " Have a good day! The morning begins here, so think about what you would like to see immediately after waking up.
However, all this splendor may have one big drawback. Such an apron will not be cheap and will require the removal of wall cabinets. What to do? You can make decorations for the kitchen interior yourself; for this you will need a special film for tiles. It will hold up equally well on plastic panels. And most importantly, if after a while you get tired of it, all you have to do is choose another one and update your kitchen.
In order to place the sticker in place, it must first be wetted and removed. protective layer. Then apply and carefully smooth with a sponge so that there are no bubbles.

Decorating the refrigerator
Until recently, it was believed that it must certainly be white as snow. Today this canon is becoming a thing of the past. The necessary unit is increasingly used as a panel for numerous notes, magnets, life-affirming slogans or prohibitory inscriptions (for example, “Do not eat after 6 pm!”). Why not use it to decorate a room? Many accessories can be placed on its surface. Kitchen decorations can be not only cute, but also very useful. To do this, turn your refrigerator into a writing board. Using self-adhesive film, you can set margins, and use magnets to secure special strips of paper for notes.
Don't like the idea? Then why not paint the front panel using aerosol can? If applying a picture is too difficult for you, then create a general background on which you can then stick pictures or magnets. The second option is preferable, since they can be constantly moved, thereby changing the design.
Kitchen Area
This is the place where your family will gather in the evenings for dinner or tea. And the more beautiful the table looks, the more enjoyable it will be for you all to spend time together. Original jewelry for the kitchen you can create it yourself; this does not require large financial expenditures at all. Go to a fabric store and choose the right color for your tablecloth. You don’t have to completely cover the entire table, but just make a colored “skirt” and cover the work surface with a light fabric tablecloth. The choice of them on sale today is very large. Napkins from thick fabric, tied with lace, will create an even more homely atmosphere.

Chair covers are another great option allowing you to complement the interior of the room bright details. Stools can be equipped with original ottomans, with a fluffy “skirt” and smooth surface for sitting. Chairs with backs can be even more interesting. An embroidered multi-layer applique that harmonizes with the tablecloth and napkins is perfect for the back. In general, this is not such a difficult undertaking - decorating the kitchen. With your own hands (the photos given in the article serve to a shining example) you can create real masterpieces! Take at least several sets of them so that you can easily wash them. Nobody bothers you to prepare different options for summer, spring, autumn and winter. By adding seasonally appropriate ikebana to the table, you can change the kitchen beyond recognition every time.
Curtains
Don’t forget about such simple and accessible decorative ornaments for kitchen. Of course, you can hang just white tulle. However, there are so many options today that it’s hardly worth dwelling on. The most magnificent interior looks dull if the window is not decorated properly. You can choose from ruffled fabric curtains that are rich and luxurious. Best suited for saving space roll options, string curtains and blinds. The latter provide the richest scope for imagination. All you need to do is take a can of paint and apply the design that matches the interior.

Updates at least every day
Curtains are a fairly expensive decorative element, so you won’t be able to change them often. However, no one is stopping you from making adjustments. To do this, you will need clips with which straight curtains can be turned into gathered models. These could be butterflies or flowers, bright pebbles. When you get bored with this option, you can assemble the curtains using bright wide ribbons.
As you can see, you can change the interior quite often without serious investments. It is enough to give free rein to your imagination and realize it in creativity.
Flowers in the interior
Women love bright colors and they strive to diversify even the most austere kitchen with a floral pattern. And indeed, if you do this wisely, then in this way you can revive the interior, make it more spring-like and sunny. It would be appropriate to take curtains with flowers, make a bright sticker on the refrigerator or on the apron. The most important thing here is to follow two rules:
- Don't go overboard with the variety of shades. Yellow, red, blue flowers- this is not for you, pick one thing.
- The abundance of tacky designs and floral prints is tiring and quickly becomes boring. Therefore, it is best if you place one large painting in a prominent place.

Living plants
Decorating the kitchen with flowers is a great idea, because, in addition to the decorative function, such decor also performs a useful one - it saturates the air with oxygen. However, it should be remembered that it is better to remove delicate and whimsical flowers away from here. The kitchen is often drafty and there is not an abundance of light. First of all, you need to think about the location of the plants:
- Few green pets can live long near the stove and sink. Here a splash of oil or soapy water, heat or dampness.
- Near a window - only if your hood is working. Otherwise, it will be constantly open, which is only acceptable in the summer.
- On a table or on the floor. It depends on the size of the kitchen. For a little one, only small, compactly located pots are suitable. If the area allows, you can buy small trees.
An excellent option would be unpretentious plants. These are ficus and aloe, crassula, anthurium, chlorophytum. The latter is also preferable because it perfectly purifies the air. The thick leaves of these plants can be wiped clean with a simple cloth.
Open shelves
One or two cabinets can be safely left without doors or glazed to be left there decorative items interior Beautiful plates and vases, boxes are a wonderful decoration for the walls in the kitchen. The photo allows you to appreciate how elegant and interesting it looks. If your set does not include open shelves, you can easily make them yourself. To do this, you only need a sanded board, corners and screws. You shouldn’t place too many items on a miniature shelf. Designers recommend the following selections:
- For a minimalist kitchen - glass and metal vases and cups.
- For a romantic kitchen in Provence style - a collection of wooden spice mills.
- For Scandinavian style- wicker baskets, bottles made of multi-colored glass.
- If you have big kitchen in the Art Nouveau or Rococo style, it is recommended to use elegant antiques to decorate the interior.

Original vessels for storing cereals
Such useful additions will serve you good service. Kitchen decoration (the photo conveys only the basic idea, you can modify it) should border on functionality. The result is both beautiful and convenient. What is the idea itself? To the bottom of the cabinet, which hangs over the tabletop, the lids from wide cans For bulk products and cereals The vessels themselves are filled with the appropriate contents, after which each one is screwed into place. It is best to choose transparent containers so that you can immediately see what you are taking.
Instead of a conclusion
As you can see, your kitchen can be beautiful, unique and modern. For this you do not need to involve professional designers, all you need is your desire and a little free time. Today we have presented a number real examples How you can turn an ordinary kitchen into something special. In fact, the list doesn't end there. Everything is in your hands, create and enjoy both the process itself and the result. And he will definitely make you happy!
The kitchen is the place where the whole family gathers, so it should always be cozy. If you want this room to look bright and stylish, we suggest you buy decor modern kitchen we have. We offer creative things that will both surprise and be useful in the household. Our online store is a real treasure trove of useful and original things that you will definitely love!
All the products you see in the catalog are of excellent quality and created by famous designers. When buying kitchen decor here, you can be sure that you will not find such things in standard stores in Moscow! To make it easier for you to make your choice, we have attached a photo to each product, as well as detailed description. All ideas are original and unique.
Product range
Here you will find original and useful things:
- piggy banks for wine corks that can be hung on the wall;
- original stool made of cardboard;
- decorate the interior beautiful board, where you can leave wishes and reminders;
- a very beautiful set of creative magnets and much more.
If you are looking interesting options design, elements that will create a pleasant atmosphere - all this can be found here. Price for kitchen decor ours is acceptable.
Even the most thoughtful and designer kitchen requires addition in the form interesting elements decor. Using simple methods applied arts, you can create unique items with your own hands and update slightly worn furniture in the kitchen.
Any kitchen requires additional decoration

Beautiful crafts you can make yourself

Any little thing can decorate the kitchen and create a pleasant atmosphere
How to make crafts for the kitchen with your own hands? You can always get decorating ideas by looking at the works experienced craftsmen. At the same time, perfect repetition is not required; you can add a touch of individuality by using decorative techniques as a basis.
Textile decor
To bring newness to the interior, sometimes it’s enough to sew new curtain or chair covers. With your own hands, using a needle, thread and fabric, you can create a unique kitchen atmosphere in a given style.

There are a lot of ideas for crafts, you can find examples on the Internet or give freedom to your imagination

Jars decorated with textiles will bring newness to the kitchen interior
The most common fabric products
|
DIY tablecloth |
To make it you will need a piece of fabric, sewing machine and perseverance. You can decorate it by finishing the edges with ribbons or lace. |
|
Chair covers |
You can complement the look with capes or pillows made from the same material. |
|
DIY potholders |
Sewing them does not take much time and helps create comfort in the kitchen. The patchwork technique is often used to make them. |
|
Curtains for windows |
Making a set of curtains will take a lot of time, but will justify the cost. They can become the highlight of the interior or its integral part. |
|
Patchwork style panel |
An original addition to the kitchen can be a picture made from scraps, assembled in a bizarre sequence. It will not only become a decoration, but will also take up empty space on a plain wall. |
It should be remembered that interior elements made of fabric will need to be washed quite often, so it is better to immediately take care of having several sets. For each season you can sew your own unique set.
And also, as a decoration, you can make decorative birds from fabric. They will require textile scraps of different colors and with different patterns, a pattern, a needle and thread.
According to the selected pattern, two parts of the bird are cut out, which will subsequently be sewn together and stuffed with filler. Two wings on each side, crest. All elements are sewn together and a rope or ribbon is attached. Such birds can be seated on a tree branch, pre-painted in the desired shade.

This doll will perfectly complement the kitchen interior

Any thing made independently will update the kitchen interior

Decorative elements made of fabric will have to be washed very often
Wall decoration
The need to decorate the walls may arise when they have one shade or there is a lot of empty space that creates the effect non-residential premises. Wall decor can range from stickers to paintings. dining area, from placing shelves to decorating with old dishes.
Fill up empty space with an open shelf that can hold painted plates, homemade vases or decorated bottles.
The apron between the countertop and the upper shelves can be updated using decoupage of existing tiles. Modern motifs will be relevant for a city apartment, and for country house You can use drawings with chickens - the guardians of the hearth.
Also, painted plates that are hung randomly or in a certain order will look appropriate in the empty space.
Stylized film stickers, which can be purchased ready-made or cut out, look good necessary elements on one's own.

You can make a cup hanger from wood

Wall decoration is necessary if it is completely empty
Decoration of furniture and equipment
If the kitchen has a small area or wallpaper with colorful designs, then you can start decorating the furniture. For these purposes, you can buy a film with a specific print or “decoupage” the facades of a kitchen unit.
Since technology has become an integral part of our lives, it should also participate in the decoration process. You can cover the hood or refrigerator with film or paint it yourself.

You can sew beautiful capes on chairs

Painted plates on an apron near the stove will look very nice

A vase decorated with artificial flowers and chestnuts will perfectly complement the interior
Furniture restoration
Restoration old furniture, which can still perform its functions, but has a shabby appearance, will require a significant investment of time and effort. But the result is worth it.
To give new life kitchen furniture you need to perform the following steps.
- Remove the doors and check the awnings for functionality. Replace if necessary.
- Clean the surface with sandpaper.
- Paint all parts in desired color. You can create an artificial aging effect.
- After the paint has dried, apply a layer of varnish (transparent, for baths and saunas), onto which a napkin with the selected pattern or a special decoupage card is glued.
- The picture is covered with a brush and varnish diluted with water (1:1) and leveled at the same time.
- After control opening with varnish and drying, the furniture is assembled and new handles are attached.
To restore a kitchen set with your own hands, you can use painting with further gluing curly elements from plaster.
Glass can be replaced with mirrors. This will visually expand the space and fill the room with light. Or decorate them with stained glass paints.
Using an old curtain and white enamel, you can create an interesting web design. A piece of fabric is attached to duct tape and paint the surface of the glass, then remove it.

This lamp will fit perfectly into the kitchen interior

Such a basket with flowers will excellent option kitchen decorations
Accessories and kitchen items
It’s nice to create crafts for the kitchen interior with your own hands and they can become a great gift for family and friends. Little things that create coziness can be done by knitting or sewing, decorating dishes and bottles.
Old bowls or cut-off ones wine bottles can act as a new chandelier for the kitchen. Containers from strong drinks can be used as candlesticks, decorated with the help of flowing paraffin.
Textile, stylized toys can become towel hangers if hooks are attached to them. Clothespins screwed to the wall are also useful for these purposes.

Flowers in the interior always bring positive energy

You can embroider covers for cups

You can make a craft for the kitchen with your child, he will be very interested in it
Hot coasters can be made from wooden clothespins:
- first they are released from the spring;
- glued in pairs;
- A snowflake is laid out from the blanks and coated with glue.
You can also create unique coasters from newspaper tubes.
- Newspaper sheets are cut into strips 10 cm wide.
- Twist it onto a skewer at an angle, securing the edge with PVA glue.
- The finished vine is twisted into a circle.
- Each turn is coated with glue.
- After drying, paint or decorate with a napkin.
The finished circles are coated with acrylic varnish and used.
Cutlery can be useful for making hangers or coasters for plates. To create an improvised hook, they are given bizarre shapes by bending the tines of the forks in different directions.
A plate stand made from a fork is made in a similar way, only the teeth are bent at right angles to its handle. The extreme ones are lifted up, and she herself is bent in an arc.
Spoons from an old set can be screwed in place of handles for kitchen shelves.

You can make smaller copies of dishes from cardboard

These stands will definitely come in handy in the kitchen.
Photo in the bank
DIY jar photography is easy to do and looks good on open shelves. To create it you will need a 0.5 liter jar, photo, sunflower oil. Liquid is poured into the container (to the limit), a picture (black and white) is placed and the lid is closed. A collection of photographs in oil will become a unique decoration that will surprise and delight guests.
Fresh flowers in a jar
To create an ever-living bouquet you will need:
- jar with lid;
- flower bud;
- glycerol;
- water.
The flowers in the jar are glued to the bottom, filled with a solution of boiled water with glycerin in a ratio of 1 to 2. The jar is tightly closed. In this composition, the bouquet can live for more than six months. It is better to use flowers with thick petals, as the liquid slightly discolors the buds. If the solution becomes cloudy, it can be changed.

Smaller copies of fruits make great decorations dinner table

You can make something like this on a textile napkin using coffee beans

Such paintings will fit perfectly into the interior of the kitchen.
Tableware decor: candlestick
Old cups are often used as a candlestick, into which melted wax is poured and a wick is placed in the center. For these purposes, you can paint old dishes in advance or make decorative threads with your own hands.
Glasses with jars can also serve as a candlestick. They are decorated with painting, decoupaged or wrapped with twine. After decorating, they are ready for use; all that remains is to put a candle-tablet inside.
Painted plates
You can decorate your dishes yourself by painting old plates. From dishes of different diameters, you can create a unique collection of miniatures that will serve as decoration for empty walls or shelves. To make them you will need:
- dishes;
- acrylic white paint;
- PVA glue;
- palette of multi-colored paints.
The improvised canvas is painted in a suitable shade. This can be achieved by adding paint of a certain color to a white base. Prime with glue and coat with varnish. The selected pattern can be applied to the dried workpiece. Children can also be involved in the work.

Try to make crafts that match the style of the kitchen

There are a lot of options for crafts for the kitchen
Provence style for the kitchen
DIY, French country style decor is not impossible. To recreate a similar design, you don’t have to buy new furniture. You can restore an existing one.
Floral motifs and birds are relevant for the Provence style. Colors must be pastel shades. Wooden floor and distressed white furniture, having non-standard, rounded shapes. The design should be delicate. The use of textile products is relevant.
Making your own kitchen decor is not difficult. The main thing is that the crafts match the style and color to the overall design of the room.
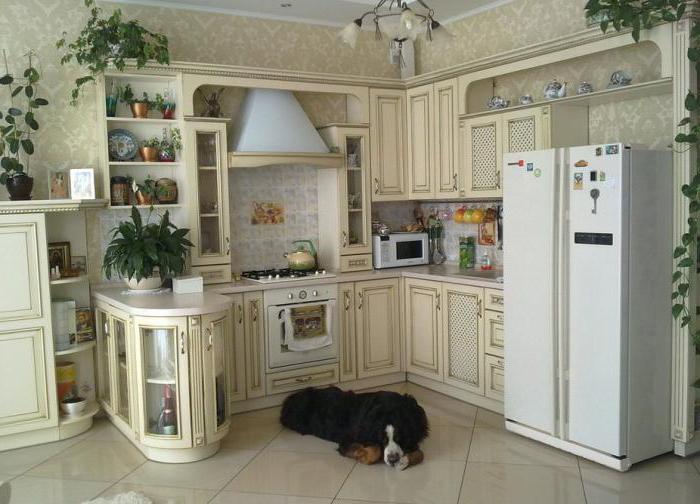
At all times, the design of the kitchen was the main thing, unlike other rooms. It is in this room that guests are received, so create own design and do not forget to take into account your wishes.
Whatever the size of the kitchen, it must have areas where: food is stored, washing, workplace, stove, dining table.

Ideas on how to arrange these zones are all different. Decorating a kitchen in an apartment light shades, helps to visually enlarge the space.

The kitchen set is purchased with ready-made sizes or made to order. Installed kitchen appliances, to help with food preparation processes.

Mounted working surface and a refrigerator. This frees up space for the sink, stove and all other furniture.

The door can be sliding or prepared arched design. Our article shows the most popular options and design solutions arrangement of this room.

Varieties of kitchen design
The modern design of the kitchen provides for the connection of this room with the rest, for example with the living room. Indeed, today, using a hood, and thanks to good ventilation, you can get rid of odors when preparing food.


More recently, they tried to block off the place where the work area was located from other rooms with partitions. And in the world of rapid development, the use of a bar counter is provided.

It is considered complete when there is a refrigerator next to it, dishwasher and drawers. There should be high chairs nearby near the tabletop. And on the other side they arrange work surfaces.

Stylish kitchen design will help highlight the overall design, and the room can fit perfectly into the overall interior.

Different kitchen design ideas
There are quite a lot of options for kitchen design and each of them is individual.

If you equip your kitchen area with shelves, you can create your own collection of dishes that will look good against the background of the general design idea. To make the room special, the work area is decorated with a mosaic apron and original hooks where you can hang towels.

If your kitchen does not have a pantry, then ideal option there will be drawers up to the ceiling. A writing board is placed on the doors. 
Facade finishing can be done on our own and not only working area, but also a refrigerator or pantry. It is better to build a microwave oven into kitchen set, or place it on a higher shelf.

The material for the countertop is selected from granite, it is not difficult to care for, and the sink should be spacious. For flooring They use tiles, they are easy to clean from dirt and dust.

The dining area is decorated with additional drawers where you can store dishes. The refrigerator is perfect place For decorative elements, the main thing is not to overdo it.


The room can be highlighted with a tablecloth with a pattern or ornament, a vase and various elements that will please your liking.

Decorating a small kitchen is sometimes a little more scrupulous because there is not much space, but you want to create a full-fledged room.

Arrangement kitchen interior happens very carefully. It is necessary to achieve comfort and at the same time take into account the interests of all family members. To decorate a kitchen with your own hands without having any idea how to do it, you just need to read the information in our article, and it can help you do everything right.

All you need is a little time and, of course, the desire to change something in your home.

Photos of the best kitchen design ideas


When your kitchen furniture has become dilapidated or you just don’t like it anymore, don’t rush to buy new ones, because, most likely, you can update it yourself. All you need for this is a couple of free hours or days, a well-thought-out idea for a remodel, some money and one of our instructions.
Method 1: Painting the kitchen with chalk paint
Do you want to update your kitchen set beyond recognition with your own hands? The best way To do this, repaint the facades with chalk (mineral) paint. Why chalk?
- The fact is that this type of paint has a thicker consistency and increased adhesive properties, due to which it fits perfectly on any surface - even on laminated chipboard/MDF. Moreover, chalk paints eliminate the need for tedious sanding and sometimes even without primer.
Chalk paints are also good because they give the painted surface a texture similar to that obtained when painting wooden surface. Therefore, even the most ordinary kitchen with film facades will look much more noble after such an “update”.
- In Russia and the CIS countries you can buy chalk paints from designer Daria Geiler, foreign manufacturer Annie Sloan, Kazakh Vernenskaya Manufactory, etc. You can also make chalk paints yourself using recipes that are easy to find on the Internet.
Here are some photo examples of kitchens before and after restoration.
Photo of a kitchen with film facades before and after painting with Daria Geiler paint. Here the author of the alteration restored the peeling film on the facade near the stove, and then painted the furniture without removing or sanding the film

Old kitchen with veneer cabinets before and after painting with Annie Sloan paint. By the way, in this kitchen even the tiled floor was painted with chalk paint, and the patterns on it were painted using a homemade stencil


Inspired? Then it's time for a master class.
To paint the kitchen you will need:
- Primer (special for chalk paints or alkyd if the furniture was painted with oil stain);
- Chalk paints (preferably with a 10% margin);
- Matte moisture-resistant varnish (acrylic or polyurethane).
Useful tips
- Material consumption is calculated following the manufacturers' recommendations. It is especially important to correctly calculate paint consumption. If there is not enough of it, you will have to repaint the remaining areas with paint from another batch, which, due to the nature of production, will be slightly different in tone.
- Which varnish is better - polyurethane or acrylic? To ensure that the kitchen coating can withstand extreme loads, it is safer to use polyurethane varnish. However, if you rarely cook and do not have pets, acrylic varnish is perfect, especially since it dries faster, does not have a strong odor and is cheaper.
- Brushes: two synthetic brushes for primer and varnish, as well as one natural or synthetic brush about 4 cm wide (a natural brush gives a more pronounced texture);
- Degreaser, such as white spirit;
- Sandpaper with a grain of 100–180 microns;
- Ladder;
- Film and masking tape (to protect non-paintable parts);
- Screwdriver;
- Gloves.
How to paint a kitchen set:
Step 1. Preparation
First you need to remove the handles from the facades. Floor, walls, apron, countertop, glass inserts, fittings and other surfaces that you do not want to paint should be covered with film and masking tape. Next, clean all parts from grease (preferably with a degreaser), stains and dust.
- Do the facades need to be removed? It is not necessary to do this, but it is more convenient to paint this way.

Step 2: Primer and/or sanding
Sanding old paintwork, film or lamination is not necessary, but it is necessary to treat it with a primer in 2 layers. In this case, each layer of primer must be allowed to dry, and then the primed surfaces must be sanded to even out the coating and enhance paint adhesion.
- However, if the lamination has a strong gloss, then it is advisable to remove its top shiny layer with fine-grained sandpaper– this will make the coating even stronger.
- If you are not too picky about the result (for example, if the kitchen is temporary, very old or got for free), then you can do without a primer. All you need to do is: wash the facades from grease, then paint them in 2-3 layers and finally cover them with 1 layer of varnish.
- Do you want to achieve the most even and durable coating? Then it’s worth sanding the surfaces after each layer of primer, paint and varnish (except for the finishing layers).
- Before starting work, test the paint on any object.
- If you want to save money, paint only the facades and visible parts of the frame, and internal walls and cabinet shelves can be painted cheaper or left unchanged.

Step 3. Coloring
Once the primer is dry, begin applying paint in 2-3 layers, allowing each layer to dry completely (one coat chalk paint It only takes about 30 minutes to dry.)
- It may take 5-6 coats to cover a dark finish with white paint.
Step 4. Varnishing
When the finishing coat of paint has dried, you can begin applying the varnish in 2-3 thin (!) layers with a synthetic brush (not used). It is advisable to allow each layer to dry completely for about 24 hours.
Step 5. Finally, we return the fittings and facades to their places.
Voila, old kitchen like new!

Method 2. Pasting facades with self-adhesive film
The fastest, most affordable and easy way restoration of kitchen furniture - design of its surfaces self-adhesive film(self-adhesive wallpaper). Unlike painting, gluing film is also good because it allows you to return the look of the kitchen to its original state after some time. For those who live in rented apartment or just loves change, this method of updating the kitchen will help out with a bang.
- The service life of furniture covered with film will be 2-3 years in good condition.
- This remodeling method is most suitable for kitchens with solid facades without panels or relief details.
Below are photos of kitchens before and after film restoration.


It is possible to cover the kitchen with film only partially. For example, one of the tiers, the back of the set, the base or panels. Examples of such kitchen remodeling are presented in the following selection of photos.


If the facades of your set have glass inserts, then you can decorate with film only back walls cabinets

You can cut out patterns and designs from vinyl “self-adhesive” tape.


By the way, you can use film to update your apron, table top or table top, and appliances.


If the refrigerator is not built into the set and does not fit into the interior of the kitchen, simply cover it and the furniture facades with film of the same tone


To remodel your kitchen you will need:
- Vinyl self-adhesive paper (with reserve);
- Sharp scissors and a breadboard knife;
- Ruler and centimeter;
- Squeegee for smoothing with hard and soft sides;
- Lint-free rags.
- Screwdriver.
How to cover a kitchen with self-adhesive film with your own hands:
Step 1. Using a screwdriver, remove the handles from the facades; if you wish, you can also remove the facades themselves - this will make it more convenient to paste them over.
Step 2. Wipe all surfaces, including the ends (!), clean and dry, especially paying attention to grease deposits - it is better to remove it with a degreaser.
Step 3. We begin to glue the film. Remove part of the backing from the film and attach the canvas to the facade, leaving a free 3-5 cm on the top and sides - we will later wrap this excess onto the edges. Take a squeegee and start smoothing the film, pushing out the bubbles, gradually going down and peeling off the backing. Movements should be smooth and slow. Having reached the lower edge of the facade, step back 3-5 centimeters from it and cut the canvas.
- If you wish, you can pre-cut the canvas to the size of the facade with an allowance of 2.5-3 cm (for facades of standard thickness).
- The film sets completely only after a few hours, so don’t be afraid to make mistakes - all mistakes can be corrected.
- If there are small bubbles left on the film, they can be carefully pierced with a thin needle and smoothed out again.
- You can purchase the film in 2 colors to create a stylish contrast: light top - dark bottom.
Step 4. Now that the facade is almost completely covered with film, let's work on the edges and corners:
- First, cut the corner portion of the loose film at 45 degrees as shown in the photo below. This way you will have two “wings” along the two edges of the façade.

- Now carefully wrap the free edge of the film over one of the edges and smooth it out. Next, wrap the remaining corner onto the adjacent edge of the facade as shown in the next photo, and cut off the excess.

- Cover the second edge with film in the same way, but this time cut the corner at a right angle.

- Finally, press the seams tightly and repeat the process on the remaining corners.

Step 6. Using the described method, cover with film all the front parts of the headset, visible areas of the frame and the base. If desired, you can decorate the shelves and interior walls of cabinets with vinyl. However, this is not at all necessary.
Step 7. On last stage put the facades back in place if you removed them, as well as the handles, making holes in the right places using a knife or awl.
You can also watch a visual master class on how to cover a kitchen with self-adhesive film in this video.
Method 3. Kitchen decoupage
Hand painting is very beautiful, but difficult or expensive. But even a beginner can decorate boring facades of a set or hide local damage (scratches, chips, stains, etc.) with drawings created using the decoupage technique. The result is guaranteed to be excellent! We offer ideas for kitchen decoupage in the following selection of photos.


Decoupage kitchen in shabby chic style


Decoupage buffet
Decoupage will help decorate not only the facades of the set, but also other kitchen furniture and even technology.


To work you will need:
- Three-layer napkins with a pattern or decoupage cards;
- 2-3 flat squirrel brushes (for applying glue and drawings on the glue, as well as varnish);
- Scissors;
- PVA glue;
- Pencil;
- Acrylic varnish (matte, glossy or with craquelure effect).
- For do-it-yourself kitchen decoupage, decoupage cards are more suitable than napkins - the designs on them fit perfectly together and can be large in size.
- The main thing in remaking furniture using the decoupage technique is right choice drawings. They should fit into the kitchen interior in color and style.

How to transform a kitchen using decoupage technique:
Step 1. First you need to degrease the selected area with alcohol or degreaser.
Step 2. Carefully separate the layer with the pattern from the napkin, then cut out the desired print from it. At this stage, you can “try on” the drawing on the facade and at the same time make a note where it should be located.
Step 3. Now apply PVA glue reverse side cut out design and apply it to the facade in in the right place. Next, carefully smooth the napkin with a brush, moving it from the center to the edges, and blot the excess glue and remove it with a slightly damp rag.
Step 4. Glue all the remaining napkins in the same way.
Step 5. If desired, the kitchen decoupage can be finished with hand painting. Once the glue and paints have dried, the design can be sealed using acrylic or polyurethane varnish in 2-3 layers (allow the drawing to dry completely between layers).
Some more useful information
- Do you want to turn minimalist kitchen with continuous facades in classical? This is possible by gluing moldings or carved parts onto them and then painting them following our instructions.

Also, before painting the headset, wall cabinets can be supplemented with figured brackets (they can be bought ready-made or cut out yourself), and the base can be supplemented with baluster legs.


- For best result it is worth approaching the “update” of the kitchen comprehensively and, if necessary, changing not only the color of the facades, but also table top With an apron , curtains, dining table and chairs.
- Sometimes the thirst for change can only be satisfied by replacing/painting furniture handles.

- Of course, before painting the kitchen or covering it with vinyl, it needs to be repaired: tighten/change the fittings, glue and iron the peeling film a little, polish the scratches, and fill the chips, cracks and holes from furniture handles with furniture putty.