How to lay plywood on a wood floor. Plywood under laminate - an ideal way to level the floor Plywood under laminate on a wooden floor

Read also
With all the variety of methods used to create the base of flooring, plywood for laminate flooring on a wooden floor is considered one of the most modern and technologically advanced solutions for arranging underlays for laminated flooring in residential premises.
Floor lamination technologies
The variety of laminate flooring solutions can be divided into two large groups, which differ from each other in the basis of the laminate itself:
- Rigid laminate - made on the basis of chipboard (chipboard) or fibreboard (fibreboard), involves laying on a pre-leveled surface or using leveling substrates. If laid on a pre-leveled surface, its curvature should not exceed 2 mm per linear meter. If the laminate is laid on special leveling substrates, they are able to compensate for unevenness to a large extent, and this depends on the thickness and material. As an example, a 5 mm thick polyurethane foam backing can compensate for unevenness of up to 3 mm per linear meter. Exceeding these values leads to excessive stress in the laminate joints.
- Flexible laminate, unlike the previous ones, i.e. hard laminates, has vinyl base, which allows it to be laid on a poorly prepared base that allows height differences of up to 5 mm. In appearance, a floor covering made from this material differs little from traditional solutions, but at the same time it is much stronger than them and absolutely moisture resistant.

Technology for laying laminate flooring on wooden floors
Design decisions related to laying laminate flooring on wooden floors will depend primarily on the condition of the floors themselves.
In any case, floor preparation work is preceded by diagnostics, during which the actual state of the wooden flooring is analyzed and a decision is made on methods for preparing and compensating for unevenness. In accordance with SNiP, the following gradation is recommended:
- New wood floors. It is assumed that they are laid out as required, i.e. appropriate treatment against fungi, etc. has been carried out. Height differences are checked, fastening nails or screws are recessed, and the cracks are filled with a special solution. If the unevenness of the flooring exceeds 2 mm per linear meter, additional measures are taken.
- Old wooden floors require disassembly to assess the condition of the joists and other structural elements. During repairs, it is recommended to turn the logs upside down, check their condition, and also minimize level differences. Remove worn elements and replace them with new ones. After that flooring gathers again. Removed if necessary old paint, the floor is sanded mechanically.
- Sometimes a method is used in which a new floor is laid on top of the existing wooden floor at an angle of 90° (in a cross) - if there is confidence in the quality of the base (of course, if the height of the room allows).

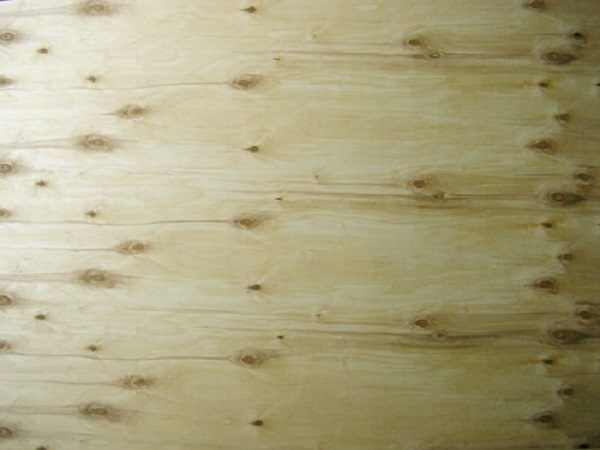
Types of plywood
Laying plywood on a wooden floor is very affordable way renovation of the premises, since the industry produces a fairly large number of types of this lumber. There are plywood made from coniferous species wood, and birch plywood.
Based on the degree of moisture resistance, plywood is divided into three categories:
- FOF - has the most low level moisture resistance, but low-toxic adhesives are used in its manufacture;
- FC - plywood with an average level of moisture resistance, most suitable as a base for laying laminate;
- FSF - increased level moisture resistance, but in the production of such plywood toxic adhesives are used, i.e. It is not recommended to use it in residential premises.

In addition, according to quality (presence of inclusions, heterogeneity of composition, rottenness) plywood is divided into 4 grades. The most expensive is 1 (first). When creating a substrate on a wooden floor, it is quite acceptable to lay 3rd grade plywood. Plywood is produced in a standard size, in sheets 1.5 m wide. It is advisable to cut such a sheet right on the spot, based on cutting the sheet into 4 parts - for ease of transportation.
Plywood laying technology
The installation technology is described in detail in the relevant literature, but several fundamental points should be noted:
- On slats or directly on the floor - if the warping of the floor boards is insignificant, and the total height of the room allows it - plywood panels can be attached directly to the floor (plywood thickness - 10-18 mm). Otherwise, fastening is carried out through special slats, which are evenly placed on the base and thus level the surface.
- Thermal clearances are critical to avoid warping due to thermal expansion of the plywood backing. It is recommended to leave at least 8-10 mm between sheets, and distances from the walls - up to 15 mm.
- Layout plywood sheets is carried out on a wooden floor under a laminate with bandaging - a technique adopted when laying bricks, which eliminates the formation of long seams, as well as corners where all four sheets meet. This solution minimizes the load on the locks of laminate structures.
- Fastening is carried out with self-tapping screws through pre-countersunk holes, allowing the heads of the screws to be recessed into the sheet.
- Final processing allows grinding the resulting surface mechanically to remove protrusions and focal irregularities.

When laying laminate flooring, one of the main requirements is that the subfloor surface should be as smooth as possible, and the easiest way to achieve this is with plywood. Dense, smooth sheets can be easily mounted on any base, covering various defects, and also serve as additional thermal insulation. And the absence of “wet” processes significantly reduces the time for repairs, which is also important. Let's consider which plywood is best to lay on the floor under laminate, what to look for when choosing, and how to lay the material yourself.
The strength and durability of the plywood substrate directly depends on the thickness of the sheets, strength indicators, number of layers and type of processing. Therefore, when choosing plywood, you should pay attention Special attention not in appearance, but technical specifications material.
Plywood thickness
The choice of plywood thickness depends on the type of rough base and the method of laying the sheets. If you plan to lay plywood on concrete screed, a thickness of 15 mm is quite sufficient; for a plank floor it is better to take a little more - 18 mm. In both cases, the sheets are laid in one layer. When installing on joists, it is recommended to attach plywood in two layers to avoid sagging of the material and to give the base maximum rigidity. Here you can take sheets 15 mm thick or make the bottom layer thicker, for example, 21 mm, and the top layer thinner (12-15 mm). The wider the distance between the joists, the thicker the flooring should be.

The thickness of plywood is determined by the number of layers of veneer it consists of. The thickness of each layer varies between 1-1.5 mm, so different manufacturers plywood of the same thickness can differ in the number of layers and vice versa. It should be noted that sheets with maximum number layers rather than thicker ones.
Sheet sizes
Based on size, plywood is divided into format and large format. The first type includes sheets with maximum dimensions 1525x1525 mm, for the second - from 1830x1525 to 3000x1500 mm. It is more convenient to work with smaller plywood, but at the same time, a large number of joints reduces the rigidity of the coating. When choosing the size of sheets, you must take into account the size and configuration of the room so that you have to trim the material as little as possible.

Material of manufacture
Based on the material used, plywood can be birch or coniferous. This means that in the first type the upper layers are made of birch veneer, in the second - from pine, spruce or larch veneer, as well as other conifers. The inner layers are usually made from cheap wood, both hardwood and softwood. Visually distinguishing the material is quite simple: birch plywood is lighter and has a weaker pronounced texture, while coniferous has a more saturated color and beautiful drawing on a surface.

The bending strength of birch plywood is 10-12% higher, so it is used where the floor is subject to increased loads. It is denser and heavier than coniferous, which is not always convenient during installation, and is also more expensive. Coniferous plywood is more practical: it is cheaper, lighter in weight and resistant to rot, fungi, and mold. This type is more suitable for installing a subfloor in a residential building, because there are no intense loads on the base, and moisture is often high.

Combined plywood is also produced, the structure of which includes both birch and coniferous veneer. This material combines good quality, strength, attractive texture and affordable cost, and it is most often used in furniture production and interior decoration.

Prices for plywood for flooring
plywood for floor
Grade and marking
Depending on the quality of the material, there are four main grades and grade E - elite, the properties of which are regulated by GOST 3916.1-96. The types of veneer on the front and back sides may differ, which helps reduce the cost of products.
| Material grades | Characteristics |
|---|---|
| The highest quality. The presence of visible processing defects or wood defects is not allowed. The surface of the sheet should have an even color and pattern |
| High quality veneer, no more than three defects per sheet are allowed: small knots up to 1.5 cm in diameter, closed cracks, brown veins, edge processing defects up to 2 mm wide. Inserts that differ in color or texture are also allowed, provided that their area does not exceed 2% of the sheet area |
| No more than 6 defects per sheet are allowed: fused or unfused knots, small cracks, wormholes up to 6 mm in diameter, dark veins. Also on the surface there may be minor dents, leaked glue, inserts of a different shade with an area of up to 5% of total area plywood |
| The number of defects is no more than 9 per sheet. These can be knots, wormholes up to 6 mm in diameter, inserts that differ in texture and color, cracks up to 2 mm wide, stains of leaked glue. Defects in edge processing and disruption of the fiber structure in certain areas are also acceptable. |
| Lowest quality material. Veneer may have a wavy surface, torn fibers, dents and cracks of varying lengths. The sheet may contain large quantities wormholes and small knots, leaking glue |


The lower the grade of the material, the cheaper it is and the lower its operational properties, since the presence of cracks or wormholes reduces the bending strength of the sheet and its resistance to mechanical stress. Grade is indicated by two numbers that indicate the grade outer layers veneer For example, the numbers 1/2 in the marking of plywood mean that on one side of the sheet there is veneer of the first grade, on the other - of the second. The numbers 1/1 indicate that both sides of the sheet have first grade veneer.


Grade 3 plywood is quite suitable for laminate flooring: it is inexpensive, but at the same time quite strong and durable. If the screed serves as a rough base, and the traffic of the room is low, in order to save money, you can use fourth grade plywood. It is not practical to use grade 1 and 2 plywood as a subfloor due to its high cost.
In addition to the type of plywood, you need to know other markings. According to GOST, sheets are marked with special paint on the reverse side. The marking must include the following designations:
- Name;
- brand;
- grade;
- emission class;
- type of material processing;
- sheet dimensions.
Of primary importance is the grade of material, which is based on the type of binder for the veneer sheets and determines the degree of water resistance of the plywood.
| Brand | Characteristics |
|---|---|
| Urea glue, which is relatively resistant to moisture, is used as a binder. The material has good strength, low toxic resin content, does not high cost. This type plywood is widely used in construction for interior work |
| The binder is phenol-formaldehyde resins, thanks to which the material has excellent resistance to moisture and mechanical stress. Due to the presence of toxic components, plywood of this brand is not suitable for residential premises |
| Bakelite varnish is used for gluing veneer. The finished sheets have maximum resistance to water and other negative impacts. It is characterized by high cost, which limits the use of plywood in construction |
| Albumocasein natural glues act as binders. Of all types of plywood, this is considered the most environmentally friendly, but it is not resistant to moisture. |
| Melamine resin is used for gluing veneer. This binder provides high resistance to moisture and does not emit toxic compounds, so plywood of this grade can be used in residential premises |


Equally important is the emission class, which is designated by the letter “E” and the numbers 1, 2, 3 and indicates the content of formaldehyde resins in 100 g of material:
- E1 – less than 10 mg;
- E2 – from 10 to 30 mg;
- E3 – from 30 to 60 mg.
To avoid negative health consequences, E3 plywood should not be used in residential premises.

According to the type of surface treatment, the material is divided into polished and unpolished, and this is designated as follows:
- NSh – unsanded sheets;
- Ш1 – plywood sanded on one side;
- Ш2 – grinding on both sides.
The roughness that is present on the surface of unsanded sheets does not in any way affect the quality of laying the laminate, so there is no point in overpaying and buying sanded plywood. Moreover, it is inappropriate to use painted or laminated sheets, the cost of which is much higher than usual, but the performance properties are the same.


As for plywood manufacturers, the most preferred products are domestic companies, which combines good quality with a very reasonable price. For European manufacturers, the cost is higher, but for Chinese companies, the quality of plywood often causes a lot of complaints, and the characteristics of the material in most cases do not correspond to the declared ones.
Which plywood to choose?
So, after comparing the characteristics of plywood, you can confidently choose best option. The main criteria here are the reliability and safety of the material, while external characteristics do not play any role. For bedroom, nursery, living room the best option There will be 3 or 4 grade plywood of the FK brand with a thickness of 12-15 mm. Emission class is only E1, others are not suitable. As for the material of manufacture, there are no special recommendations; you can use both birch and coniferous plywood.
In the kitchen or hallway you need to select stronger plywood with a thickness of 15-18 mm, still of the same 3 or 4 grades. Recommended brand - FK or FKM, emission class E1. For convenience, you can use Sh1 plywood, mounting the sheets with the sanded side up. It is easier to lay a thermal insulating substrate on a smooth surface; the material does not cling to rough surfaces, and there is less need to correct it.

How to lay plywood under laminate
Installation of plywood is quite simple and does not require special skills. Let's look at how to properly lay plywood under laminate on a subfloor made of boards. Before starting work, you should prepare necessary tools and materials:
- screwdriver;
- jigsaw;
- self-tapping screws;
- foamed polyethylene backing;
- plywood sheets;
- roulette;
- scotch;
- level.


Please note that the subfloor must be in good condition, and this applies not only to the boardwalk, but also to the logs. If the floor is severely worn out or certain areas are rotten, you cannot lay plywood. Firstly, it is impossible to securely fasten the flooring to rotten boards, and secondly, the wood under the plywood will continue to deteriorate until one day the floor sag under your feet.
Step 1. Prepare the base. Remove the baseboards, check the integrity of the boards, strengthen loose areas with screws, and seal large cracks. If there are noticeable unevenness in some places, you need to remove them using grinder. Finally, the floor is vacuumed or swept to remove all excess.

Step 2. Measurements are taken carefully and the sheets are cut to minimize the number of joints. In this case, you need to take into account the mandatory gap around the perimeter of the room with a width of 8-10 mm and gaps of 2-3 mm between the flooring sheets.


Advice. After cutting the plywood, it is recommended to sand the ends of the sheets to remove burrs and loose fibers.
Step 3. The underlay is laid on the floor in strips end to end. The edges of the material should extend onto the walls by approximately 5-10 cm. At the joints, the substrate should be taped to seal the heat-insulating layer. In addition, this will prevent the strips from moving when laying the plywood.

Step 4. The prepared sheets are laid one by one on the floor, leaving a gap from the wall. The joints between the sheets are shifted in each subsequent row by about a third of the sheet width. Be sure to check the horizontality of the flooring with a level to avoid differences in height (when installing laminate, maximum differences of up to 3 mm per meter are allowed).

Step 5. Fix the plywood to the floor with self-tapping screws, screwing them in increments of 15-20 cm and always at the corners of each sheet. The fastener caps should be recessed by 1-2 mm.


After this, the floor is ready for laminate installation, and laying the flooring on such a base will not be difficult. The edges of the thermal insulation substrate protruding from the walls are cut off upon completion of all work, before attaching the baseboards.
Prices for Tarkett laminate
Tarquette laminate
Video - Which plywood is better to lay on the floor under laminate
Video - Laying plywood on a wooden floor
Laminate has now become a very popular flooring option. One of the advantages of the material is the ability to lay it on almost any base after carrying out the necessary preparatory work. For owners wooden houses or in cases where it is extremely difficult to dismantle the old plank flooring, it is possible to lay the laminate on a wooden base.
Lay laminate flooring on a wooden floor quite simple, Just remember that you need a level base for installation. The height difference should not exceed 2 mm. In this regard, often, gender needs to be leveled.
One of the simple and low-cost ways to adjust a wooden floor to the desired level is to level it with sheets of plywood. This option is great will hide all the imperfections and foundation defects.
Choosing plywood for laying under laminate
 It is recommended to buy plywood for laminate flooring no thinner than 10 mm. The thickness of the plywood sheet should ideally be greater than the thickness of the finished floor covering. You should also decide on the brand wooden material- it depends on the degree of moisture resistance.
FK and FSF grades of plywood are intended for work in residential premises. FSF sheets are produced using phenol-formaldehyde glue. They have good moisture resistance, but their use indoors is not advisable, as it is harmful to health. It is better to give preference to less moisture resistant, but at the same time environmentally friendly and cheaper FC brand.
To level the base of the floor, ¾ and 2/3 grade plywood is suitable. The sheet must be sanded on at least one side. Plywood is laid sanded side up and laminate is laid on it.
Pros and cons of leveling the floor with plywood
Smoothing out differences in height of a wooden floor by laying plywood is quite universal method repairing the base before laying the floor covering. After all, this method has a number of advantages:
- the strength and moisture resistance of plywood increase the service life of the laminate;
- sound and thermal insulation properties material;
- resulting in a high-quality, even and stable foundation;
- low price of material and minimum costs for its installation;
- ease of installation allows you to quickly carry out work on leveling the floor.
There is, of course, one significant drawback use of this material. When leveling with plywood the height of the flooring increases, which may be unacceptable for certain premises.
Methods for laying plywood on a wooden floor
There are two main ways to install plywood coverings on a wooden floor:
- mounting on logs;
laying on a wooden base.
 Installation of plywood sheets using logs is the most labor-intensive way. For lag it is recommended to take boards with a thickness of 40 mm and a width 80−100 mm. When installing, maintain a distance between the axes of no more than 50 cm. The logs are placed in such a way that they top points were in the same horizontal plane.
Sheets of plywood covering are laid like brickwork, i.e. there should not be intersection of 4 seams In one place. This is done to prevent deformation.
When laying plywood, the edges of the sheets are located on the joists and fixed with self-tapping screws with intervals of no more than 30 cm. In this case, there should be a distance between the sheets - seams of about 2 mm.
A properly installed plywood covering on a joist base will be resistant to moisture and heat. This method is great hides large differences floor height. However, it should be noted that it is not suitable for rooms with low ceilings, since the floor rises by 8-10 cm.
If the wooden base does not have large differences in plane height, then we can use the method of laying plywood with glue. To level the floor without using joists, the thickness of the plywood sheets should be from 12 mm. You should start by cleaning the base from debris and dust. We cut the plywood. Without fastening, we lay it over the entire floor and adjust the pieces to size. Pre-drill holes for screws.
Then the sheets can be removed and the base prepared - saturate the surface primer. When laying, each sheet is coated special glue for plywood with a layer of up to 3 mm and is attached with screws. The seams between the sheets should be 2−3 mm.
In this manner smooth and durable base under finishing The floor is quickly installed and does not require large expenditures.
Cutting and fitting plywood
 Plywood is cut according to the floor area. It is necessary to take into account that when laying away from the wall it is done indentation 10 mm and the gap between the seams is 2-3 mm. Cutting sheets into squares the right size, you need to check their edges for delamination at the ends and the presence other defects. If the edge is damaged, the workpiece should be replaced.
Plywood is laid in a checkerboard pattern. The sheets are drilled to the base with self-tapping screws along the perimeter and additionally along the surface in increments of about 20 cm. For quick and convenient installation It is recommended to number the sheets and also mark the fastening points with self-tapping screws.
After fitting, the blanks are removed, the base is cleaned from dirt and dust. Before laying, the prepared sheets should be impregnated with an antiseptic in order to increase their service life. Then you can begin installation.
Plywood laying technology
- The plywood is fastened to the wooden floor according to a pre-planned layout of the sheets. Self-tapping screws or screws with plastic dowels are used for fastening. Holes for self-tapping screws are pre-drilled and countersunk with a large-diameter drill in order to “hide” the screw head.
- The mounted plywood base for laying the laminate is sanded and then covered protective compounds, increasing moisture resistance and wear resistance.
- A special laminate underlay is laid on top, which has noise-absorbing and heat-insulating properties.
The technology of leveling the floor with plywood allows prepare for installationfinishing coating wooden base of any quality. If the installation of rough plywood flooring is carried out in compliance with the necessary requirements, then the laminate will last for a long time. Environmental Safety, The unpretentiousness and strength of the material make it possible to use it in residential premises to create a smooth and stable floor.
There are a lot of options for leveling the floor, for example, to lay laminate flooring. All of them are available for self-execution and allow work to be done quickly. Sheets of plywood, as level base, both professionals and amateurs purchase quite often. There should be no difficulties in the work, but it would be useful to find out the properties of the materials that you plan to use, as well as the nuances of their installation. This article will discuss how to lay laminate flooring on plywood.
Everything you need to know about plywood
Since the main task is to obtain a smooth and durable surface so that the laminate lasts longer, the lamellas do not diverge, and there is no creaking when walking, then the choice of plywood must be approached with skill.
How is the material produced?
- Plywood is a product of the wood processing industry. The basis is veneer sheets various breeds trees (deciduous or coniferous). The manufacturing process is reminiscent of assembling a layer cake. There may be several “floors”, but minimal amount- three.
- Wood fibers have a longitudinal or transverse direction; when gluing sheets into a single product, veneers alternate with different directions. The outer layers always have the same fiber orientation. Therefore, the division of plywood into longitudinal and transverse depends on the direction of the “pattern” of the outer layers of the building material.

Tip: during installation, you need to lay the sheets taking into account the main trajectory of movement around the room. The plywood fibers should be perpendicular to it. If the sheets are laid on logs, then their direction is chosen taking into account this requirement.
Classification of plywood by purpose
- A material with the same name is not always suitable for leveling the floor.
- Construction plywood- this is what you need to ask sellers in stores.
- Industrial variety b is not as good quality as previous version, but it can be used.
- Furniture, structural and packaging types of plywood are worth ignore. They are not useful for the floor.
Dividing the material according to moisture resistance

In some houses, such a characteristic of plywood as resistance to moisture absorption is especially useful. Labeling will help determine this indicator.
- FBA- an environmentally friendly version of the material, but it cannot be used without creating a waterproofing layer: the moisture resistance of such plywood as an indicator is practically absent.
- FSF- has increased protection against moisture. The glue used for its production includes phenol-formaldehyde resin. This building material can be used not only for internal, but also for external finishing work.
- FC- This is plywood, in the production of which an adhesive composition with a base of urea-formaldehyde resin was used. It resists moisture well and meets all the requirements of materials intended for indoor use.
- They also produce plywood with markings FB, which is perfect even for a humid tropical climate, but in the conditions of our apartments and houses it is not necessary to use it, especially if you plan to install a heated floor. Bakelite glue, which is used for its manufacture, is also used in the material with the letter designation BS And BV. If you need to level the floors on a personal yacht, you can purchase them, but for apartments it is better to limit yourself to one of the above options.
Division according to the principle of surface treatment
- After the floor is covered with plywood sheets, the coating will need to be sanded over the entire area.

- You can avoid additional labor costs if you immediately purchase plywood marked Sh2. This means that it has undergone a polishing process on both sides. Ш1 - designation for sheets of material with smooth surface On the one side. NS - letter designation unsanded plywood.
Material quality
Like any other product, plywood can be first-class or far from acceptable quality. This is what it can be depending on the presence of knots or other defects.
- "E" category. This material is elite. There are no knots on the veneer, no other defects (cracks, poorly processed edges). It can be used as a leveling layer, but it will be unreasonably expensive. Usually it is not used for such operations.
- Category I. Minor defects in the form of uneven swelling or shrinkage of veneer and knots are allowed. But their length should not exceed 20 mm. There may be wormholes, but their diameter should not exceed 6 mm, and there should be no more than three such defects per 1 m².

- II category. The presence of falling out, fused or unfused knots is assumed. Number of wormholes per 1 square. meter should not exceed six pieces. If the choice is made in favor of this material for other work, then, if necessary, defects can be hidden with veneer inserts. In the case of leveling floors, such additional actions are not necessary.
- III category allows fused or unfused knots, holes and wormholes (no more than 10 per square meter). For installation of structures hidden from prying eyes, it can be used quite well. Our case is just one of those.
- IV category assumes any manufacturing defects.
Advice: to level the floor under the laminate, it is better to choose any category of plywood from the first to the third. In principle, all sheets will be covered with laminate panels, and no one will appreciate their “beauty”. Therefore on appearance You can save some money here.
Size range
One of the principles of a thrifty owner is reasonable savings. Correct calculation of materials greatly contributes to this. Therefore, it makes sense to familiarize yourself with standard sizes plywood.
- The material is produced in the form of square (1525 × 1525 mm, 1220 × 1220 mm, 1475 × 1475 mm, 1270 × 1270 mm) or rectangular (1525 × 1350 mm, 1525 × 1220 mm, 1525 × 1475 mm, 1525 × 1270 mm) sheets .

Advice: taking the largest sheets possible is not always profitable. Approach the measurement of room area and calculation Supplies care must be taken to reduce the amount of trimming.
- The thickness of the plywood is selected depending on the method of its installation. To create a base on the joists you will need material with a thickness of 16 to 21 mm. This is provided that one layer is laid out. And if you plan to lay the base under the laminate in two rows, then the thickness of the sheets can be reduced to 8 or 10 mm. To lay plywood directly on the subfloor, a material of at least 6 mm is suitable. The thickness of finished plywood for an adjustable floor starts from 10 mm. Accordingly, if House master decides to independently produce an analogue of such material, then when purchasing the base he needs to focus on this indicator.
When everything is clear with the quality and quantity of plywood, it’s time to start leveling the floor. You can do this in one of four ways.
How to level plywood under laminate
- It all depends on how smooth the subfloors in the house are. For quality workmanship cement screed and a wooden floor with a deviation in height of different sections of no more than 2 mm, plywood can be attached without the use of joists and without additional leveling.

- The wooden base will need to be treated with acrylic sealant or prepare a putty mixture (sawdust and PVA glue lightly moistened with water) and use it. If differences between floor areas of 1 m² are more significant, then it would be correct to make a sheathing from timber. It is better to disassemble wooden floors that have significant deviations in height and install them from new lumber.
Fastening plywood with glue and screws
The method is quick, simple and applicable to any flat floor, both wooden and concrete.
- Sheets of plywood are marked, cut into pieces of the required size, and the necessary recesses are cut out for door jambs or to bypass heating risers. Most often, plywood with standard dimensions is sawn into four parts.
- Each fragment of the future foundation is laid on the floor, taking into account technological gaps. Along the walls they have a size of 10 or 20 mm, and between the sheets they are left with a tire of 0.5 to 1 cm. This is not just the prevention of a squeaky floor, but the provision natural circulation air. Such foresight will have a good effect on both the plywood itself and the service life of the finishing floor covering.
Advice: when laying sheets, keep in mind that each subsequent row will begin not with a whole sheet, but with a sheet of plywood shifted in half. That is, installation is carried out in an order reminiscent of brickwork. And when sawing and pre-laying fragments, they should be marked, since afterwards they will have to be removed for preparatory work.

- So, it was decided not to level the base of the subfloor, but it still needs to be prepared. This stage is slightly different for wooden and concrete surfaces.
- Now the plywood sheets are in the prescribed manner put on glue, not forgetting to leave gaps. Additionally, each fragment is secured with self-tapping screws or any other hardware at intervals of no more than 20 cm from each other. The screw heads must be properly embedded in the plywood. Unsanded material will need to be processed mechanically or manually using sandpaper. After cleaning, the plywood base can be covered with a backing and laminate can be laid.
Adjustable plywood floor
- A specially produced type of material is used for it, in which holes are drilled using a drill according to the applied pattern. The height is adjustable using anchors equipped with washers and nuts to secure the desired position.

- First, the anchor pins are driven into concrete base. A nut and washer are screwed onto them. The height of the nut is set according to laser level. Now sheets of plywood are laid on the anchors. The excess length of the rods is cut off. Now you can lay the second layer of plywood so that the upper slabs overlap the joints of the lower slabs.
Such a floor cannot be called cheap, but if there are significant differences, this system allows you to do without leveling and installing timber sheathing.
Leveling the floor with sheets of plywood along the joists
- The subfloor is cleared of debris and covered with film for vapor barrier. Using a level, the zero mark is determined and beacons are set (at intervals of approximately 20 cm). Logs made of timber with a cross-section of 80 × 40 mm are laid on top. When laying them, you need to focus on the beacons: if there are large depressions, using available materials, they construct linings to align the lags at the level. The interval between the guides should be from 40 to 60 cm.

- After the rough installation of the longitudinal joists, their even position is checked again using a level and final fastening is carried out with hardware. In order for the sheathing to acquire a finished look, it is necessary to secure the transverse elements of the structure. The distance between the crossbars should not exceed 50 cm, and the minimum step of their location is 30 cm. The thicker the sheet of plywood that is laid, the more often it should be attached to the beams, which means that the distance between the transverse sections of the sheathing must be reduced.
- The empty space between the joists is filled with any insulation; if the base allows, it can be filled with expanded clay. After the thermal insulation layer has been created, the logs are covered with a layer of vapor barrier material and they begin to mark and cut plywood sheets of the required size. At the same time, we should not forget that the laying will be done in the same order of brickwork, and the joint of adjacent sheets of plywood should be in the middle of the log.
- The need to make a base in two rows of plywood sheets is assessed ambiguously by experts. Some believe that this will produce a more durable surface. Others remind us of how the material is produced (when layers of veneer with different grain orientations are alternated). And this feature in itself provides plywood with the correct thickness with sufficient strength. In any case, the master himself will have to decide.

Installation of plywood base on boards
- The described method is suitable for a bulk subfloor. This method of insulation and simultaneous raising of the base is used both in apartments and in private houses. The dry screed is poured and compacted in accordance with the technology, and laid on top wide boards. Most often, material with a width of 200 or 150 mm is used.
- The interval between the guides should be approximately equal to their width. On top of them, starting from the far end of the room, a layer of vapor barrier is laid.
Light: you can only move on the boards without stepping on the screed.
- A sheet of plywood is immediately attached to the self-tapping screws on top of the vapor barrier. Next after the starting sheet, a solid layer of material is fixed, placing it on the opposite wall with the necessary shift.
Advice: installation should be carried out in exactly this sequence, immediately fixing large pieces of plywood in order to cover as much as possible with them. large area. This is due to the mobility of the dry screed. And by using this method of fastening, it will be possible to move around the floor more freely, and without fear, fix smaller elements of the plywood base in their places.

Now you can begin installing the finishing coating.
How to lay laminate flooring on plywood
The first step will be laying the substrate. Which of its types are on the market today? building materials The home master himself decides to purchase it, depending on personal preferences and budget size. But the need for such a layer between the rough plywood base and the laminate board is justified.
The underlay is not attached to the floor; it will be pressed tightly against the laminate. You just need to tape the canvases together with tape, because the width of the material in the roll is not enough to cover the entire floor area in the room.

Some general rules will allow you to avoid the main mistakes made when laying laminate flooring on plywood.
- The general appearance of the laid laminate slats, when viewed from above, should resemble brickwork. That is, the rows will alternate, starting either with a whole plank or with a trimmed one. This staggered laying method helps to properly distribute the load on the lamellas.
- Laminate flooring is not mounted flush against the wall. A gap of approximately 1 cm is left so that during further use of the floor, the lamellas have room to expand. A loose connection of the material to the walls along the entire perimeter of the room is a guarantee that after a while the laminate will not stand on end. You can purchase spacers at a hardware store or use identical pieces of scraps from laminate boards.
- You need to carefully study the manufacturer's recommendations indicated on the packaging. It contains information about the required thickness of the substrate, describes the basic principles of installation and the locking system. Most often, lamellas are attached in two ways:
- Click connection assumes that the elements are first joined at the desired angle, then carefully moved along the groove until a characteristic click occurs. It means that the alignment is correct and the panels are firmly attached to each other.
- The lock connection requires connecting the top of the die to the groove of the preceding lamella. You can also find out if an action was performed correctly by clicking on it.

- Laminate requires special care when tapping the plank (to ensure a tighter fit). It is convenient to use a mallet or a regular hammer, but do not allow the tool to come into direct contact with the board (you can damage the locks). When tapping, you need to attach a piece of laminate to the board and apply pressure to the lamella through it.
- In order to snap the lock into the panel that completes the row, use a clamp. This tool has bends at the ends that are located at right angles, but each oriented in its own direction.
- Before you begin laying the first row, the interlocking joints facing the walls must be cut off.
- For sawing material, it is better to stock up electric jigsaw. It is more convenient for them not only to cut boards to length, but also to cut out recesses in order to go around the radiator or door frame.
- The first row is mounted from solid lamellas. The choice of direction is dictated by the location of the window in the room. It is recommended to make row joints in parallel luminous flux. This will make them less noticeable. You should start work from the corner farthest from the entrance, located on the left side. When calculating, it is important to take into account the fact that the length of the cut element must be at least 30 cm. This should be taken into account so that the coating remains durable throughout the service life of the laminate.
- You can lay the boards one by one, joining each one to the previous one. Carrying out the entire sequence of actions until the lock snaps into place. Or assemble the planks in rows and combine them with the slats already laid along the wall. The first method is preferable for those who are going to work alone or have little experience in laying laminate flooring. The second option allows you to speed up the installation process, but you will need a couple of assistants so that the long row is docked and connected to the previous one properly.
- The second row begins with a board shortened from the first lamella of the initial row by 1/3, and the third - offset by 2/3 of the length. After the panels of the second row are joined to the first, you need to lay spacers along the wall to provide a gap.
- So, a laminate coating on plywood is gradually formed. The last row adjacent to the wall can be easily connected to the previous one using a clamp. Now all that remains is to remove the wedges that prevent the slats from touching the walls, mount the baseboards and install general cleaning. You can arrange furniture and invite guests so that they can appreciate the skills of a home craftsman.
Many people, when renovating an apartment or house, choose laminate as a material for a new floor covering. Due to its characteristics and beautiful appearance, it has become very popular in last years. The material has many advantages that play an important role in the appearance, practicality and service life of the floor. The main difficulties arise at the installation stage. The fact is that it must be laid on flat surface. If the floor in the home is concrete, then you will have to make a screed, and then lay the laminate. Things are more difficult for homeowners with wooden floors. They will need to tear down the old boards and put in new ones. This will require a lot of effort, time and financial investment. Therefore, it is better to think about laying plywood on a wooden floor under laminate.
Advantages and disadvantages
Using plywood is a simpler and less expensive option when laying laminate flooring. You can lay chipboard sheets on an uneven floor and thereby level its surface. Plywood has several significant advantages and virtually no disadvantages, which makes it ideal option to solve this problem.
Advantages of plywood:
- The material is quite dense and durable. Thanks to this quality, the floor will be able to withstand heavy loads and not deform, which is a very important point. This factor has a positive effect on the service life of the laminate. There is no need to be afraid to place heavy furniture in the room. But it is important that the thickness of the plywood sheets is chosen correctly.
- Thanks to light weight material, its transportation and installation does not require much effort.
- The installation process is very simple. It does not require special skills or knowledge. And due to the fact that plywood is produced in sheets there is enough large sizes, the laying speed increases significantly.
- Due to its performance characteristics, the material is capable of bending, but it is very difficult to break.
- High moisture resistance, which has a positive effect on the service life of the plywood itself, as well as the laminate laid on top of it.
- High thermal insulation properties prevent the penetration of cold.
- The cost of the material is low. And if you also do the installation of plywood on the floor under the laminate yourself, then a considerable amount of money will be saved in your wallet.
But there is also a drawback that can force a person to abandon the use of plywood, and this method of floor leveling in general. When using this material, the floor level will rise significantly, which does not suit everyone.
How to choose the right plywood
The choice of material should be based on compliance with several criteria, which will clearly affect the convenience, safety of use and service life.

When purchasing you need to take into account:
- Plywood thickness. Under the laminate on a wooden floor you need to install a material whose value is no less than 1 cm, but this is not enough. This will depend on the condition and characteristics of the rough flooring on which the sheets are planned to be laid; it must be smooth and rigid.
- Purpose of the room. If it is planned to put heavy objects furniture, then under the laminate you need to put plywood, the thickness of which can eliminate the risk of deformation of both the first and second layers of coatings.
- Moisture resistance of the material. Based on this criterion, plywood is divided into 3 classes:
- FOF – the lowest, produced using harmful human health phenol-formaldehyde glue. Despite its high moisture resistance, it should not be used indoors;
- FC – average and most suitable option. The sheets are made using harmless glue and can be laid in any room;
- FSF is high, but does not withstand moisture well, so this option should also be discarded.

- Quality. Based on this criterion, plywood is divided into 4 grades:
- 1 – has no flaws, but is the most expensive;
- 2 – in some places there are knots and veneer inserts;
- 3 – there are many cracks and knots in the structure;
- 4 – most low quality gluing, many cracks, knots, veneer inserts, the surface of the sheets may be uneven.

Pine or birch are used to make plywood. But the resin found in pine, when reacting with glue, can release harmful substances. Therefore, it is recommended to give preference to birch products. If the type of material and thickness are chosen correctly, the floor will last for decades.
Preparation for installation
Any job requires careful preparation. Installing plywood on a wooden floor is no exception. It is imperative to check whether there is floor covering places that bend under the weight of a person. If there is, you will have to remove all the boards and repair or replace the joists. If the floor is in good condition, you can proceed to the next step.

To work you need to purchase necessary materials and tools:
- drill;
- jigsaw;
- screwdriver;
- grinding machine;
- building level;
- roulette;
- self-tapping screws;
- sandpaper;
- wood glue;
- sheets of plywood.
You should stock up on everything you need in advance so that later the installation process is not interrupted due to the lack of some tool or material.
Cutting sheets
At this stage you need to cut the material. To do this correctly, you should pay attention to the following points:
- room dimensions;
- the distance from the walls when laying near the walls should be 1-1.5 cm;
- the gap between adjacent sheets should be 0.8-1 cm;
- the principle of laying plywood: it is placed directly on boards or on logs mounted on top of them.


You also need to take into account that plywood must be installed according to the principle of brickwork, and not in one row. This is done to ensure that the edges of the four sheets do not meet in one place, and also to prevent the formation of long seams. This installation method will make the base more stable.

The standard sheet dimensions are 125x125 cm. Therefore, to prepare the main part of the pieces, it is recommended to cut the purchased plywood into four parts. All the rest will have to be adjusted to the size of the walls.
Before cutting, it is recommended to draw up a diagram, focusing on the above points, number each piece and mark its place on paper, so as not to get confused during installation. After cutting, you need to check if there are any delaminations on the edges of the sheets. If any are found, the damaged piece must be replaced with a whole one.
One of the most important moments is to check the evenness of the wooden subfloor. If there are differences of no more than a few millimeters on it, then it will be possible to use substrates for sheets. If the differences exceed the specified value, you will have to install logs. This method is considered one of the most labor-intensive and expensive, but if there is no other option, you will have to resort to it.

During installation, gaps may form between the joists and the floor. In these places you need to put pieces of plywood that fit in size. It is imperative to use a building level to control the horizontalness of the joists. Their top edges must be in the same plane. It must be remembered that when laying plywood sheets, their edges should be located on the joists.

After installation, you can fill the space that has formed between the bars. For this purpose, materials are used for noise and heat insulation. This space can be used for installation engineering communications. With this installation method, it is necessary to use plywood with a thickness of at least 1.5 cm.
Installation procedure
When all preparatory work completed, installation can begin. To increase the life of plywood, it is recommended to coat the material before installation. antiseptics and let dry.

The sheets are placed in place according to the prepared diagram. To attach them to wooden base use self-tapping screws or special glue. In the case of glue, everything is simple, but if self-tapping screws were chosen as fastening elements, you will have to follow several rules:
- you need to make an indentation from the edges of at least 2 cm;
- the length of the screw must exceed the thickness of the plywood by 3 times.

Fasteners should be screwed along the edges and diagonally of the sheets. The distance between them should be within 15-20 cm. To reduce the risk of damage to the material, holes for screws and their heads should be drilled at the fastening points.

At the last stage of the work, the coating is sanded, after which the substrate can be laid and the laminate can be laid.

There is nothing complicated about laying plywood. You just need to have desire, patience and enough free time. The advantages of this method of floor leveling clearly outweigh the disadvantages. If you take into account all the nuances and follow the recommendations during preparation and installation, the result will definitely please all members of your family.

