How to build a frame house with your own hands. Do-it-yourself frame-panel house. Installation of ceiling beams

Frame buildings have a lot of advantages: such a cottage can be built in a short time, at any time of the year, and they often cost less than their concrete and brick counterparts. These significant advantages help those who are thinking about building their own home to choose not to build from timber, but to frame-frame technology. But we should not forget that, like any building structure, it has not only advantages and requires a responsible and thoughtful attitude: the design, the quality of materials, and adherence to technology are also important. How frame walls should be built correctly, what materials to choose, how to insulate and what to finish with, what buildings can be erected on a suburban site using this technology, we understand this week’s topic with our users and specialists.
Articles:
In recent years, there has been a real frame boom in the field of private suburban construction. And these designs in various designs are common among FORUMHOUSE participants. Follow the link: types of wood frames and more, personal experience of our users to help novice house builders. Find out what such a building is made of, what percentage of wood is in the walls of a frame house and how to make an outdoor frame wall.
Frame wall, structure.
Mineral insulation, insulation, universal tools, protection for steel structures, waterproofing and decking - everything that a house is made of, everything that is used for its construction and finishing. The correct design of a frame wall with insulation, brought to life by our users.
A change house, a barn, a utility block - this is the first thing that any person needs when developing a site. We offer self-construction of cabins. . Is it necessary to install a vapor barrier in the outer wall of a frame frame, where and how to install it, what is the dew point - our users tell us how to avoid mistakes and build the right walls.
FORUMHOUSE experts talk about the nuances of calculation and independent installation of wooden floors.
If it was not possible to complete the planned construction work during the warm season, the facility must be mothballed. There is a specific technology for each type of structure. Our users and experts talk about how to preserve an unfinished building, protecting it from frost, moisture, bad weather and other external threats.
FORUMHOUSE experts tell you how to plan and build a budget, but reliable and warm barn for one or two people.
Video:
Selecting materials for building a frame house. Each developer goes through certain stages in the construction of a house: the choice of foundation, wall material, roofing, windows, facade, additional elements... Portal participant Maxim Brovin, an expert in the field of house construction from Moscow, will talk about what frame houses are made of, which ones should be used for quality results in our conditions.
Frame house: what are the walls made of?
How to insert a window and hidden roller shutters into a frame. The standard technology for installing windows applies more to stone buildings. In this case, it is necessary to achieve complete tightness, high-quality vapor barrier and reliability. We have to come up with our own special solutions, and our user shared one of them.
Frame house construction technology - let's look at how to build a frame wall in a house using the popular construction technology - as it is also called - Canadian, using the example of one country cottage.
House made of LSTK. Personal experience . FORUMHOUSE member Evgeniy Cheremukhn, like all developers, took a responsible approach to the choice of wall material, and LSTK seemed to him the ideal option. Evgeniy is sure: if you strictly follow the technology, there can be no shortcomings. He will talk about how to avoid mistakes in the construction of a metal frame.
How to convert a frame dacha into permanent residence. Personal experience . Thinking about permanent residence in a picturesque place outside the city, our user Mikhail Yakushkin decided that it was not worth demolishing a small country house. Instead, he renovated it, made an extension and provided all the necessary communications.
Insulating the house with ecowool. Master Class . Insulation with ecowool (cellulose wool) is an old and well-proven technique. Not everyone knows about her. Let's take a closer look at the features of insulation and at the same time see how to properly insulate a home with ecowool.
Insulation of a frame house. Using a specific example, we consider one of the key stages of construction - insulation. consists of an insulation pie; how the floor and outer wall of a frame house are insulated, how best to insulate the under-roof space, what the thickness of the insulation layer should be, how to choose the optimal heat insulator and other advice from a specialist.
Forum topics:
A one-story building can be built in a few holidays and summer vacation. As proof - this topic with a large number of photographs.
 Frame houses. What are the walls made of?
In this multi-volume book, you can learn how and what the walls of a frame house are built from, and also ask your question on this topic.
In this large topic, a specialist in traditional frame construction shares his knowledge and experience.
One day Natachka, a divorced woman of “Balzac’s age,” had a vision: a happy home life with her family in a beautiful cottage. And then the decision came by itself: to start building it using LSTK technology.
This topic is for reference and was created with the aim of accumulating experience and knowledge, both positive and negative, in the form of images: photos, ready-made diagrams, drawings showing the correct installation of walls are presented here, the structure of the outer wall of a frame house, etc. is clearly shown. .
On our portal there are many examples of projects implemented using this technology. Here you can see brief information about construction sites with links to user topics and you can learn more about the technologies of such house construction.
That topic contains videos found on the Internet and dedicated to classical technologies and “schools” and everything connected with it (how to build roofs, how to assemble the frame, facade and interior decoration, cladding, insulation and insulation materials, working methods and etc.).
The housing problem has always been acute in Russia. Multi-storey cities were erected, buildings stretched higher and higher towards the sky. However, people increasingly began to dream of being closer to nature, clean air. True, they either had a high cost, and their construction took a lot of time. We couldn’t stay away from this topic, which means today we’ll talk about how to build a frame house with your own hands. The step-by-step instructions that we will provide in the article will explain in detail to the novice master the technology and algorithm for constructing an inexpensive, .
Do-it-yourself frame house: step-by-step instructions, advantages and disadvantages of self-building
What is a frame house? This is truly a godsend. After all, even without experience in construction work (with a responsible approach), you can build such a building with your own hands in 3-4 months. As the article progresses, we will look at the technology of work in detail, but first, let’s figure out what advantages and disadvantages such structures have. For the convenience of our Dear Reader, we will present the pros and cons of a frame house in tabular form.
| Advantages | Flaws |
| Fast construction. If you hire professional builders, the “lift” from the roof to the ridge will take 2-3 months, which is 3-4 times faster than when performing the same amount of work on a brick house. It will take 3-4 months to raise this house on your own. | The main problem of such houses is the fire hazard, but this problem can be solved by using various ones, of which there are quite a lot on the shelves today. |
| Saving time and money on the foundation. The frame structure does not require capital support due to its low weight. A pile-screw foundation is quite sufficient. | Wood rotting. This happens when building materials or materials are stored improperly. Good wood can be treated with special treatment. composition, which are also available on store shelves. |
| No shrinkage time required. After construction, the house must stand for about a year before finishing can begin. Here this time is not required. | |
| There is no need to hire equipment. The materials used in construction are quite light, all work is done by hand. | |
| Stability - frame buildings are not afraid of ground precipitation or even tremors. | Need to be replaced at least once every 30 years. But this also cannot be called a disaster. With the proper approach, the work will take no more than a week. |
| Such a house retains heat better than a brick one; communications are easily hidden under the cladding, which makes their replacement or repair quite simple. | Rodents. This is really a problem that you will have to overcome, especially if polystyrene foam is chosen as insulation, in which they like to make burrows. The problem is solved by using such insulation as ecowool. Moreover, if the house is two-story, it is enough to insulate only the first floor with ecowool. |
| Ease of redevelopment - the internal walls can be freely moved as the owner requires. The appearance and shape of the house can be absolutely anything - it all depends on the imagination of the future owner. | |
| If the materials are of high quality and the house is properly maintained during its lifespan, it can last up to 100 years. | Mold and mildew. Such a nuisance can occur if it is installed incorrectly or insufficiently. |
Looking at the pros and cons, we can say with confidence that all the shortcomings with the right approach can be easily eliminated, which means that by assembling a frame house and properly caring for it, you can be confident in its reliability.

Preparation and marking of the site for the construction of a frame house with your own hands
Preparing and marking the site is one of the most important actions during construction, so this should be approached with all responsibility. The first step is to clear the area of various debris, remove snags, stumps, demolish old structures that are not necessary or if they will interfere with construction. Next, we provide free delivery of building materials. It is also worth considering where to turn the vehicle if it is not possible for it to reverse. It is better to equip places for future storage of building materials with a canopy.
If necessary, the area must be leveled. It wouldn’t hurt to have a good one that will ensure the safety of materials and prevent their theft. Often, before starting construction work, owners install a trailer in which they themselves live during construction.

The marking begins with the fact that, according to the diagram, the outline of the future house and the internal walls are transferred to the area, marked with pegs with ropes. Angles must be measured carefully. If the angle deviates even a few degrees from the required 90°, the loads will be distributed incorrectly. This will lead to curvature of the walls and fragility of the structure.
Important information! According to the standards, the construction of a house should be carried out no closer than 3 m from the edge of the site. Also in some areas there are standards for the distance from the road - at least 5 m. Before starting construction, you should clarify all the necessary points with the district administration.
Remember that the more carefully the preparation and marking are done, the easier it will be to carry out the work. By the way, the quality of the final version directly depends on this. As for the project, for frame houses it is allowed to carry it out by hand, in the form of a sketch. It can be provided to the administration after the frame house is completed on a turnkey basis, before it is put into operation. However, for yourself it is necessary to have an approximate one with communications marked on it.

Foundation for building a frame house: foundation requirements
As a foundation when installing a frame house, you can choose any type of the simplest types of foundation - this is what makes a frame house good. There are three main types that are most often used in such construction:
- Pile-screw foundation.
- Tape base.
- Slab or monolithic-slab.
Each type has both pros and cons. Let's look at them in more detail.
We build a frame house on a pile-screw foundation
This is the simplest base option. It can be done in two ways. The first - piles made of asbestos pipes - is more labor-intensive. To accomplish this, wells are drilled into which asbestos pipes are lowered. Next, the pipe is filled with concrete.

The second option is to use ready-made metal screw piles, which do not require wells. They are screwed into the ground, for which they have a kind of drill at the end. This work is done using technology or manually. Here is a small step-by-step instruction for making a similar foundation with your own hands for a 6x6 frame house.
| Illustration | Description of action |
 | This is what screw piles look like. It is necessary to calculate the required quantity and order a kit, having previously marked the drilling locations. Their length will depend on the soil, but for frame houses it is not long. Sometimes for such calculations you have to turn to specialists. |
 | We begin to bury the screw piles strictly vertically. To do this, one person monitors the position using the mounting level, while the other two rotate the pile clockwise. The same actions can be performed using a special machine. It is important that the top cuts of the piles are at the same level. This can be checked with a laser level. |
 | When all the piles are buried, a tie is made using steel pipes under the upper platforms. This is done to give strength and stability to the future structure. If you have never done welding work, it is better to seek help from professionals. |
 | The last step is to weld a frame of steel channels onto the upper platforms of the piles. It will become a support for the future subfloor. Welding strength and seam quality are very important here. After the work is completed, the entire frame, especially the welding areas, is covered with anti-corrosion paint. |
We decided to describe this type of foundation in more detail than the others, since it is less labor-intensive, installs faster than others and is the most popular.
Arrangement of a strip foundation for a frame structure
Now let's look at the technology for constructing the lower floor. Due to the fact that frame houses on a pile-screw foundation are the most common, it is with their example that we will analyze the stages of construction.

Related article:
Tape, columnar, slab; how to choose the type of foundation, how to strengthen and insulate it, what you need to pay attention to when laying - read the publication.
Step-by-step technology for building a frame house: bottom floor
The lower floor consists of a frame and a subfloor, which can be concrete or wood. If the second option is chosen, then there is air space between the ground and the floor. Experts advise choosing this one.
Foundation tying: how it is done, manufacturing materials
The tying of the foundation frame when building a frame frame with your own hands is made from 150x150 mm timber, which can be connected at the corners in two ways - “in half a tree” or “in a paw”. The difference between the joints is that when joining “half a tree” the longitudinal cut is made smooth, while the “paw” option involves a cut with a bevel. This can be seen in the picture below.

The connection is secured to each other using a bracket or plate. For fastening to the channel frame, metal ones are used, which are slightly recessed into. Having secured the strapping to the foundation, the timber is impregnated with an antiseptic solution. After drying, it is advisable to treat it with a fire-fighting compound.
Arrangement of the subfloor: nuances of the work
A beam is laid on the frame, and boards are nailed underneath, as shown in the photo below. It was for fastening that we left the space below empty.

Vapor barriers and vapor barriers are placed in the resulting niches. It can be mineral or ecowool, polystyrene foam, polypropylene foam. Due to the fact that rodents pose a great danger to wooden houses, ecowool would be the best option here. It contains borax, which not only has antiseptic properties, but also repels rodents - such a house is clearly not for them. After laying the insulation, boards are nailed to the laid timber (joists). You can already move on this floor.
How to build the walls of a frame house with your own hands: step-by-step instructions
It is quite difficult to explain the technology of constructing the walls of a frame house in words, and therefore we offer you step-by-step instructions with photo illustrations.
| Illustration | Description of action |
 | To begin with, we prepare racks for future walls from boards measuring 50×150 mm or 50×200 mm. Their number is determined individually, but you should not install racks too rarely. The optimal distance between them is 60-80 cm. |
 | We lay the upper and lower frames of the walls directly on the floor, having previously marked on them the junction points with the racks, which are located between them. It is important to immediately mark where the windows will be located. Thus, a wall that is not yet fastened is formed on the floor. |
 | Next, we fasten the racks to each other, as well as to the upper and lower trim using nails. Be sure to check the diagonals - they must converge. Otherwise the wall will be crooked. |
 | We cut the grooves in the boards to a depth of 50 mm and insert the jibs into them. They will give strength to the walls. Typically, the jibs are installed at an angle of 45° relative to the harnesses. |
 | This is what the walls should look like when they are ready for installation. Pay attention to the arrows - they show how the windows are made on the future walls of the frame house. Such wall frames, 6 m long, can easily be lifted by 3 people. |
 | Lifting the finished structures one by one, we fasten them using temporary jibs, which will prevent the frame from falling apart before the main fasteners. It should be understood that the boards must be dry, otherwise it will be difficult to lift them, and subsequently the frame will begin to rot. |
 | The last stage is to attach the lower wall frame to the foundation frame using nails, having previously leveled them. We also fasten the wall frames together. After this, you can be sure that the entire frame will not fall apart. |
The interior walls are assembled using the same principle. Markings are made on the floor and the same actions are repeated that were performed when assembling the frame of the outer walls. The assembled frames are lifted and attached to the foundation frame and side walls.
Helpful information! The assembly of wall frames on the floor of the future house is not done only because it is convenient. This method allows you not to make a mistake with the length of the future wall.
Wall insulation: how it is produced, materials, technology
After assembling the frame, it is sheathed on the outside with film and decorative material. It can be imitation timber, lining, siding - it all depends on the wishes of the owner. Further work is carried out from the inside. In the cavities remaining between the racks we fill them with mineral wool, which is inexpensive, and is ideal for this purpose. This must be done so that there are no voids left. For additional insulation, you can add more rows of transverse slats, between which insulation is also packed. The next layer of the wall is covered with a vapor barrier film, on top of which OSB is packed. Now you can close the wall. You can see what the wall should look like in section in the figure below.

Stages of constructing the roof of a frame house with photo examples
The roofing of a frame house is carried out in two stages - the installation of the rafter system and the installation of the roof covering.
Step-by-step instructions for constructing a roof truss system for a frame house
To begin with, we offer step-by-step instructions with photo illustrations, after reading which you will certainly understand how to properly build the roof of a frame house.
| Illustration | Description of action |
 | First of all, we install and fasten 50x200 boards around the perimeter and center, dividing the ceiling into 2 equal parts. This will give additional strength. In addition, the lintels will be shorter, which will simplify construction. |
 | After installing the jumpers, the ceiling should look something like this. The main thing is that all jumpers are firmly secured. nails. By the way, with such work there can be no question of any self-tapping screws - all fasteners are made only with nails. |
 | We install the central supports under the ridge (red arrows) and the outer rafters with cuts (yellow arrows). The boards will fit into the grooves. The upper opening between the rafters is intended for the ridge (the upper edge of the roof). |
 | Now we attach two intermediate ridge supports above the double inner wall. They won't necessarily be exactly in the center. It all depends on where the inner wall in the house is located. It is on this that the racks rest. Afterwards the ridge itself is mounted. There is no point in showing it. It’s not difficult to guess how the skate is attached. |
 | Using a pre-made and adjusted template, the remaining rafters are marked and prepared at the bottom, the corners for the stops are cut out (shown by the arrow), after which the rafters are moved upward. |
 | Here they are attached without any template. Pre-prepared “shorts” (boards exactly 60 cm long) help to avoid confusion. They are marked with red arrows. The grooves cut at the bottom in the form of a corner fall exactly on the boards and rest, creating additional strength (yellow arrows). |
 | But why we needed cuts in the outer rafters. Subsequently, it will be small, which will prevent rainwater from flowing down the walls. |
At this point, the construction of the rafter system is completed, you can proceed to the installation of the roofing covering.
Roofing: installation procedure
First, a mounting strip is attached to the bottom of the slopes, after which the roof is covered with a dense membrane for. This material is much more convenient than bikrost or roofing felt, which bursts over time. The width of this material is 1 m, which is quite convenient. We begin to cover the roof from the bottom, moving upward step by step. We fill the counter-lattice on top of the membrane, on which it will be attached directly.
Important information! Experts advise making the sheathing yourself - only then can you be sure that it will be the same size (as opposed to purchased). This is very important for the final result, because it will become the basis for the final roof covering.
The membrane is secured using bars so that the bar does not reach the edge of the strip. This is done so that the next strip overlaps the previous one.
Having secured one strip in this way, we fill the entire length of the sheathing onto the bars along the slope with a step of 28 cm between the first and second. Between the next boards, the step should be equal to the wavelength of the metal tile (if it will be used for the finishing coating). Most often this is 35 cm. Now you can climb higher along the sheathing and move on to the next strip of membrane. This way the entire roof is covered. It should look something like the photo below.

Having installed the sheathing completely, you can proceed to attaching the finishing coating. This work is not complicated, and therefore we will not dwell on it in detail. Let's just say that installation should be done from the bottom sheets to the top sheets with an overlap - this will prevent rain and melt water from getting under the coating. You can see how to install a similar roof on a frame house with your own hands in the video.
Windows and doors for frame houses: types, pros and cons
For frame houses, 2 types of windows and doors are used - wooden or. Of course, there is another material from which such products are made - aluminum. However, it has too high thermal conductivity, so it is used extremely rarely.
Important! Windows and doors in frame houses are installed immediately after the roof is erected, when interior finishing has not yet begun.
There is a lot of debate around the question of which windows are best to install. Some say that wood is more environmentally friendly, others say that PVC is more durable. And there are quite a lot of such “stumbling blocks”. Of course, everyone must decide for themselves, however, in the opinion of the site’s editors, it is better to go with the PVC option, and now we will explain why. In our case, we are considering the independent construction of a frame house, and wooden windows and doors are quite difficult to install, compared to plastic ones. In addition, PVC is not susceptible to pests, which is very useful in the case of a wooden house.

The final stage of construction – interior finishing
As for, there are no special features here. All work is carried out in the same order as in any or. Materials, interior design - all this is limited only by the imagination and financial capabilities of the owner. There are sections on the pages of the site where Dear Reader can find all the necessary information on this issue.
Features of wiring of utilities during the construction of frame wooden houses
Wooden frame houses are convenient because all communications, be it electrical wiring or sewerage, are easily hidden under the cladding of walls and partitions. In conclusion
Comfortable, warm housing that can be built independently even without experience in construction is frame houses. Reviews from the owners of such buildings confirm this. The main thing is to approach such work with full responsibility. With proper attitude to work and subsequent care of your home, such a house will warm you and your loved ones with warmth and comfort for a very long time and, perhaps, even your grandchildren will have time to live in it.
In order to master the step-by-step construction of a frame house, at least in its simplest version, it is enough to master the basics of the crafts of a carpenter, mechanic, finisher, etc. We are talking about ordinary housekeeping skills from the professional arsenal of the majority of the male population. Of course, the actual labor costs and immersion in theoretical issues already depend on the chosen approach to construction (type of project, method of erecting the frame, participation of assistants in the production process, etc.).
If everything is done correctly, then within one season, with relatively small financial investments, you will be able to become the owner of your own home. Therefore, and also taking into account the optimal ratio, private developers often choose it.
What and how to build from
Before you build a frame house with your own hands, you should carry out a number of preparatory activities, select a design and materials, understand the nuances of technological stages, etc.
Choosing a construction method
If you have already decided to do without the involvement of installation crews, you still have several possible ways to erect the building.
1. Frame-panel technology
It has several implementation options. You can order a “house kit” made from multilayers or with design parameters at a specialized enterprise. A construction kit made from fitted elements, supplied with instructions for assembling a frame house, will be delivered to your site. This is not cheap, but the least labor-intensive way. It allows you to become the owner of your own home in a short time. For example, a box of ready-made elements is mounted on a prepared base within a day. Of course, for this you will have to invite a couple of assistants and rent a truck crane.
Panels can also be made by hand directly at the construction site. Their assembly is carried out in a horizontal position on a flat platform of suitable size. Next, the finished wall parts are installed and secured vertically. This method allows you to achieve good accuracy in the independent production of building elements, and the help of assistants will only be required to lift and fix the panels in the design position.
2. Frame technology
With its classical method of implementation, a frame house is built step-by-step from the assembly of its entire skeleton, which is then filled with insulation and lined. On the one hand, the advantages of this method are that it is less demanding on the accuracy of the geometric parameters of lumber. Each rack or jumper is installed individually and immediately in its design position. This allows you to level out some defects in the geometry of the frame elements on site. On the other hand, such a frame-frame assembly is quite difficult to implement independently at any of its stages. It is almost impossible for one person to simultaneously hold a stand or jumper, align and secure it at level.
A certain optimization of the process can be achieved by a method of constructing a frame house, partially combining panel and frame assembly. For example, you can order wall and ceiling frames from the company. You will receive high-quality products at an affordable price, the installation of which does not require the use of lifting equipment. You can also make the frames yourself, and start filling and covering them after assembling the skeleton of the box and covering it with a roof.

The main materials used for enclosing structures
The prototypes of domestic frame frames are objects built using the technologies of Canadian-American and European craftsmen. This continuity is even confirmed by the fact that one of the main industry standards SP 31-105-2002 “Design and construction of energy-efficient single-family residential buildings with a wooden frame” was developed on the basis of Canadian housing construction rules.
Frame
Indeed, the skeletons of the predominant number of frames are constructed from boards or timber. For example, in many standard projects of residential buildings designed for a temperate climate zone, softwood lumber is used:
- for load-bearing walls and external thermal circuit walls – board 150*40 mm (H*W) or 150*50 mm;
- for floors - a board of 200 * 40 mm or 200 * 50 mm, as well as a beam of identical height with a thickness of 100 mm or 150 mm.
When choosing lumber, preference should be given to planed products dried to a standard moisture content of 12-18%. They are more expensive than edged boards for general construction purposes, but saving on them will subsequently cause many problems, in particular:
- wet wood warps greatly when dried, which leads to deformation of the panels, as well as opening of the joints between them;
- Initially, crooked boards significantly complicate and slow down the installation process, and its aesthetic results leave much to be desired.
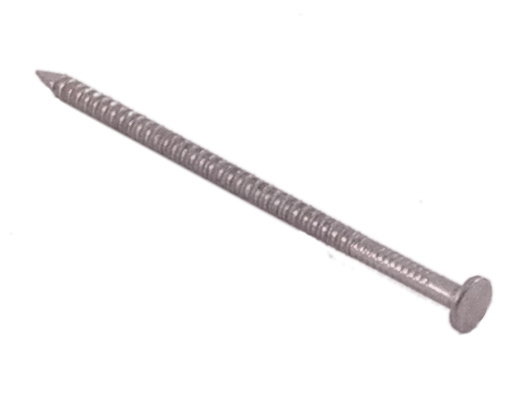
Important! The elements of a frame house can be connected using steel angles, nails or self-tapping screws. In this case, preference should be given to nails with a textured surface, for example, anchor nails (brushed, corrugated).
Filling the frame
It is recommended to fill the frames of internal floors and partitions with fibrous soundproofing materials. Often, mineral wool with special acoustic properties is used for this. To confirm its specialization, the packaging of the material must be marked accordingly.
The external thermal circuit is assembled on the basis of any effective insulation with a thermal conductivity parameter not exceeding 0.1 W/(m* 0 C). In this case, filling the frame with bulk material is allowed only in floors or attic roofs with a slope of no more than 1:5. For thermal barriers of walls, slab (roll) fiber, foam or spray insulation is used. A frame house assembled with your own hands is most often insulated:
- stone wool with a density of 30-50 kg/m³;
- glassy density 15-20 kg/m³;
- expanded polystyrene with a density of 15-25 kg/m³.

Frame covering
The technology for constructing a frame house involves gradually covering the structural skeleton with layers of vapor and waterproofing, as well as protective or protective-decorative cladding.
Of particular importance is the creation of a reliable vapor barrier from inside the room. The thermal contour of the building is built using a thermos system with a relatively thin shell. In the cold season, its internal and external surfaces are affected by a significant temperature gradient and partial pressure of water vapor. Humid air tends to escape outside, including through walls and ceilings, where condensation falls out of it. And this is no longer acceptable, as it threatens to damage the thermal insulation, frame elements and cladding.
Therefore, for vapor barrier on the inside of the frame, roll materials with almost zero vapor permeability are used. These are:
- special vapor barrier films (anti-condensation, laminated, foil-coated, etc.);
- polyethylene fabric made from primary raw materials (thickness 150-200 microns);
- kraft paper.
In contrast to assembly from ready-made factory panels, step-by-step construction of a frame house with your own hands also involves installing waterproofing on the outside of the thermal contour panels. Preference should be given to membranes that do not prevent the free escape of steam from the thermal insulation. If external cladding with a ventilation gap is installed, the waterproofing must also have windproof properties.
Further covering of the steam and hydrobarriers is carried out with any sheet or piece material that satisfies the operating conditions and the wishes of the owner: clapboard, OSB, plasterboard (inside only), corrugated board, DSP, etc.
How to save material
To simplify all stages of building a frame house, you can take a standard project as a basis and customize it to suit you, spending very little time. Of course, we are talking about minor changes. It is better to adjust the dimensions of wall and ceiling panels, door and window openings, as well as the spacing of posts, joists, and beams of the structural skeleton, where possible, taking into account their multiple of the overall parameters of the insulating filler and sheathing sheets. Thus, it will be possible to minimize the amount of trim and save time on cutting mineral wool, OSB, plasterboard, etc.
For example, the practiced strut spacing of 400 mm allows for vertical installation of 1200*2500 mm gypsum boards without side trimming. But mineral wool with a roll (slab) width of 600 mm fits comfortably only into the gap of “European” racks.
It is more difficult to select the multiplicity of the outer skin. Thus, when some popular sheet products are oriented horizontally, they will be installed without trimming at the next step of the racks:
| Material | Sheet length, mm | Number of racks per sheet (excluding the last one, common with the adjacent sheet) | Pitch, mm |
| DSP | 2700 | 4/5/6 | 675/540/450
640/533,3/457,1/400 |
| OSB | 2440 | 4/5/6 | 610/488/406,6 |
| Cement Aquapanel | 1200 | 2/3/4 | 600/400/300 |
The table shows that external gypsum boards with a length of 3200 mm, with a rack pitch of 400 mm, or Aquapanel (steps of 400 mm and 600 mm) will correlate well with internal gypsum boards. You can use 2500 mm OSB sheets by installing gypsum boards horizontally (500 mm pitch). But in this case, you will have to deal with trimming the mineral wool.
Consider the offers of the retail network
When adapting a frame house project to waste-free technology, you first need to decide on the materials that are desired and available in your region. Check their exact dimensions. The same mineral wool is not always 600 mm wide. It has a significant variation in size, depending on the manufacturer. For example, the width of popular mineral wool slabs or rolls, mm:
- Isover – 565, 600, 610, 1180, 1190,1200, 1210,1220;
- Knauf – 570, 600, 610, 100, 1100, 1200;
- Ursa – 600, 610, 1200.
Important! When measuring the width of the thermal insulation and the pitch of the racks (lag), do not forget to take into account their thickness. In this case, slabs or strips of mineral wool rolls must be laid tightly and without gaps. Therefore, their width is taken to be at least 20-30 mm greater than the width of the frame opening.
Do not violate the design parameters!
Being carried away by achieving waste-free construction, you can unacceptably deviate from the design characteristics laid down by the developer of the frame house project. Changes to it should be made extremely carefully. For example, an excessive increase in the pitch of the racks can lead to a significant loss of strength of the building. On the contrary, frequent installation of racks will lead to a decrease in the thermal resistance of external panels, since the thermal conductivity of wood is several times higher than that of mineral wool. Therefore, if a total reconstruction is planned, then you will have to resort to the help of a specialized engineer or thoroughly study the calculation systems yourself.
Stages of building a frame house
Foundation
Frames are one of the lightest capital construction structures. Therefore, for their installation, the least material-intensive prefabricated foundations are often used. For example, from screw piles. Their supporting structures are assembled based on groups of steel pipes linked into single spatial systems.
The form factor and immersion depth of the supports depend on the load applied to them, bearing capacity and freezing of the soil. Thus, the main characteristics of the pile are:
- the diameter of the screw blades, which decreases with increasing rock density. Weldable screw surfaces can be completely replaced with threaded threads for particularly dense soils or permafrost;
- diameter of steel pipes - the larger it is, the greater the load the support bears. At the same time, without the use of equipment, you can screw in piles up to Ø 108 mm. Frame houses are usually built on them with their own hands;
- immersion depth, averaging 2-2.5 m. The blades of the supports should be placed below the freezing depth of the soil in its dense layers;
- treatment with anti-corrosion compounds.
Installation of wine foundation
You will need the help of 2-3 people to screw in the screw piles. Before their installation, trees, bushes, and large objects are removed from the site, as well as near it. The installation sites for supports are marked on the site. It is convenient to do this in accordance with the construction scheme of a frame house and its foundation part. The supports are installed at all nodal points (wall crossroads) and on straight sections in increments of 1-3 m (no more than 3.5 m).
In order not to look for or make special clamps or grips for screwing in piles, you can drill a couple of holes in their upper parts. The ends of the gate levers will be inserted into them. During the process of immersing the supports, their verticality should be adjusted.
After installing the last pile, they are cut in one horizontal plane, and the pipes are filled with concrete mortar.

The framing beam (grillage) is made of rolled metal or wood. In the first case, a frame of I-beams or channels is welded onto the pipe sections, repeating the projection of the walls. In the second, platforms are made of sheet steel 8-10 mm thick. A frame made of timber with a cross section of 150 (200) * 150 mm is attached to the platforms with bolts.
All metal elements are treated with anti-corrosion compounds, and gaskets made of 2-3 layers of roofing material of any type are installed under wood parts.
Floor (floors)
Step-by-step instructions for building a frame house with your own hands may include the next step either installing walls or ceilings. In the case of a screw foundation, it is more convenient to make a floor slab, and then start working on the walls.
If the grillage is a wooden beam, which is better if it is completely manually assembled on a construction site, then beams (joists) or a finished skeleton of the floor frame are immediately installed on it. For free spans up to 3 m, a single board on an edge (200*50 mm) is used, for wider spans - a double board or timber 200*100 mm. At the stage of installation of screw supports for the foundation of a frame house, the installation of additional piles may be provided, and at the stage of laying the framing - additional transverse beams of 200 * 150 mm to strengthen long spans of floors.
The choice of lag step is also important. The recommended thickness of the flooring for rolling the upper subfloor or sheathing elements will depend on it. In addition, we do not forget about the principle of multiplicity of materials, which helps to save them. For example, if the lag pitch is 600 mm, then to arrange the upper subfloor you should take a board at least 35 mm thick.
Example of a floor assembly
The structure of the floor slab of a frame house is shown below. For the lower rough rolling, take an unedged board with a thickness of no more than 25 mm. Set up staggered. Wind protection can be laid freely, but vapor barrier requires gluing the joints with mounting tape. The overlap of both types of canvases is at least 15 cm. The lathing on top is made of boards 35*100 mm or timber with a side of 40-50 mm. The thickness of OSB should be commensurate with the frequency of the sheathing, but be at least 12 mm.

Important! The step-by-step assembly of the floor of a frame house is distinguished by its variability, which depends on the materials chosen, the preferences of the owners, as well as accessibility to the lower part of the slab.
The optimal option is when the floor frame is made separately in the form of a panel skeleton with a padded lower part (from rough knurling and wind protection) and end boards. Then it is turned over, installed in the design position and its further configuration is carried out (insulation, vapor barrier, etc.). With this method it is convenient to install the lower subfloor and wind barrier.
At the same time, according to established tradition, logs are often initially installed on the harness. Then they are lined with unedged boards and a wind barrier is laid, as shown in the figure below. This leads to some difficulties at the stage of attaching the padding, as well as not entirely correct operation of the wind barrier.

It remains to add that the interfloor ceilings are assembled according to a similar pattern. The main difference is that instead of the lower rough beating, decorative finishing (plasterboard, tongue-and-groove boards, etc.) is installed over a slatted or timber sheathing, and instead of a wind barrier, a sealed vapor barrier is installed.
Wall assembly
Despite the fact that with any assembly technology the structure of the finished walls will be basically the same, the following points should be taken into account:
- When making panels in a horizontal position, do not forget that in finished form they have a specific gravity of 30-50 kg/m2. Therefore, in order to later be able to freely put sections of walls in place manually, they must have a small quadrature. Otherwise, it is better to assemble on the site only the frames of the house panels from 150 by 50 (40) boards;
- to give rigidity and stability to the vertical frame, use temporary diagonal elements from boards of the same section;
- Permanent braces should be installed inside wall panels in cases where subsequent cladding on either side cannot provide longitudinal rigidity. For example, if there is plasterboard on the inside and lining on the outside. If you install an OSB or DSP board outside, then there is no need to leave braces inside the frame.
It is better to start laying out a vertical frame with your own hands from the outer cladding. Those. A waterproofing membrane (wind barrier) is attached to the posts and covered (with or without a ventilation gap) with façade cladding. Next, thermal insulation is laid between the racks, a vapor barrier and internal lining are installed. An example of such a layout is shown in the figure below.

Roof
The roof structures of a frame house are no different from those built over any other type of building. You also have two main options - to assemble a cold roof with a ventilated attic or an insulated one, under which you can arrange another attic floor or mezzanine.
The least labor-intensive option is to assemble a pitched flooring over an unused attic space. After all, its structure lacks layers of insulation and vapor barrier, and often, the design of internal decorative lining. However, in this case, you will have to take care in advance of careful heat, steam and waterproofing of the upper floor above constantly used utility and residential premises. If the project for the construction of a frame house involves the construction of a warm attic floor, then it is better to lay acoustic insulation in the interfloor ceilings. At the same time, the presence of a vapor barrier film is only required over wet rooms (kitchens, bathrooms, baths, etc.), but, for example, it does not need to be installed above the living room.

The structures of warm roofs with different types of coatings differ fundamentally only in the way the sheathing is installed:
- under soft coverings, such as bitumen shingles, it is assembled with a continuous roll of boards, moisture-resistant plywood or OSB;
- under coverings made of hard materials (slate, corrugated sheets, metal tiles) - often made of slats (bars) with a certain pitch, but sometimes a continuous roll of wood materials.
You can read more about the arrangement of roofs
Have you ever encountered the topic of “correct” or “wrong” frame house popping up in discussions on forums? Often people are pointed out that the frame is wrong, but they find it difficult to really explain why it is wrong and how it should be. In this article I will try to explain what is usually hidden behind the concept of a “correct” frame, which is the basis of a frame house, just like a human skeleton. In the future, I hope we will consider other aspects.
Surely you know that the foundation is the foundation of the house. This is true, but a frame house has another foundation - no less important than the foundation. This is the frame itself.
Which frame house is “right”?
I'll start with the basics. Why is it so difficult to talk about the right frame house? Because there is no single correct frame house. What a surprise, isn't it? 🙂
You will ask why? Yes, very simple. A frame house is a large constructor with many solutions. And there are many decisions that can be called correct. There are even more decisions – “half-correct” ones, but the “wrong” ones are legion.
Nevertheless, among the variety of solutions, one can single out those that are usually meant when speaking about “correctness.” This is an American and, less commonly, Scandinavian type frame.
Why are they considered examples of “correctness”? Everything is very simple. The vast majority of private homes for permanent residence in America, and a very significant percentage in Scandinavia, are built using frame technology. This technology has been used there for decades and perhaps even a hundred years. During this time, all possible bumps were filled, all possible options were sorted out and some universal scheme was found that says: do this and with a 99.9% probability everything will be fine. Moreover, this scheme is the optimal solution for several characteristics:
- Constructive reliability of solutions.
- Optimal labor costs during construction.
- Optimal cost of materials.
- Good thermal characteristics.
Why step on your own rake if you can take advantage of the experience of people who have already stepped on this rake? Why reinvent the wheel if it has already been invented?
Remember. Whenever we talk about the “correct” frame or the “correct” components of a frame house, then, as a rule, this means standard solutions and components used in America and Scandinavia. And the frame itself satisfies all the above criteria.
What frames can be called “semi-regular”? Basically, these are those that differ from typical Scandinavian-American solutions, but, nevertheless, also satisfy at least two criteria - reliable design and good solutions in terms of heating engineering.
Well, I would classify all the rest as “wrong”. Moreover, their “wrongness” is often conditional. It is not at all a fact that the “wrong” frame will necessarily fall apart. This scenario is actually extremely rare, although it does occur. Basically, the “wrongness” lies in some controversial and not the best decisions. As a result, things get complicated where things can be done easier. More material is used where less is possible. The design is made colder or more inconvenient for subsequent work than it could be.
The main disadvantage of “wrong” frames is that they provide absolutely no benefits compared to “correct” or “semi-correct” ones - neither in reliability, nor in cost, nor in labor costs... nothing at all.
Or these advantages are far-fetched and generally doubtful. In extreme cases (and there are some), improper framing can be dangerous and will result in a major home renovation being required within just a few years.
Now let's look at the question in more detail.
Key features of the American frame
The American frame is practically a standard. It is simple, strong, functional and reliable as an iron saw. It is easy to assemble and has a large margin of safety.
Americans are tight-fisted guys, and if they manage to save a couple of thousand dollars on construction, they will definitely do it. At the same time, they will not be able to stoop to outright hackwork, since there is strict control in the construction field, insurance companies in case of problems will refuse to pay, and customers of unfortunate builders will quickly sue and rip off negligent contractors like a stick.
Therefore, the American frame can be called the standard in terms of the ratio: price, reliability, result.
The American frame is simple and reliable
Let's take a closer look at the main points that distinguish the American frame scheme:
Typical components of a frame house
Timber in racks and frames is almost never used, unless this is due to some specific conditions. Therefore, the first thing that distinguishes a “correct” frame house is the use of dry lumber and the absence of timber in the walls.
Points that distinguish the American frame:
- Corners - there are several different schemes for implementing corners, but nowhere will you see timber as corner posts.
- Double or triple racks in the area of window and door openings.
- The reinforcement above the openings is a board installed on the edge. The so-called “header” (from English header).
- Double top frame made of boards, no timber.
- The overlap of the lower and upper rows of trim at key points - corners, various fragments of walls, places where internal partitions join external walls.
I didn’t specifically mention Ukosina as a distinctive point. Since in the American style, if there is cladding with OSB3 boards (OSB) on the frame, there is no need for miters. The slab can be considered as an infinite number of jibs.
Let's talk in more detail about the key features of the correct frame in the American version.
Correct corners of a frame house
In fact, on the Internet, even in the American segment, you can find a dozen schemes. But most of them are outdated and rarely used, especially in cold regions. I will highlight three main angle patterns. Although realistically, only the first two are the main ones.
Nodes of corners of a frame house
- Option 1 – the so-called “California” angle. The most common option. Why exactly “California” – I have no idea :). From the inside, another board or strip of OSB is nailed to the outer post of one of the walls. As a result, a shelf is formed on the inside of the corner, which subsequently serves as a support for the interior decoration or any internal layers of the wall.
- Option 2 – closed corner. Also one of the most popular. The essence is an additional stand in order to make a shelf on the inner corner. Among the advantages: the quality of insulation of the corner is better than in option 1. Among the disadvantages: such a corner can only be insulated from the outside, that is, this must be done before sheathing the frame with anything from the outside (slabs, membrane, etc.)
- Option 3 – “Scandinavian” warm corner. A very rare option, not used in America. I have seen it in Scandinavian frames, but not often. Why did I bring him then? Because, in my opinion, this is the warmest corner option. And I'm thinking about starting to use it at our facilities. But you need to think before using it, since it is structurally inferior to the first two and will not fit everywhere.
What is unique about all three of these options and why is timber a bad option for a corner?
Angle made of timber, the worst option
If you noticed, in all three versions of boards the corner can be insulated. Somewhere more, somewhere less. In the case of timber in a corner, we have two drawbacks: firstly, from the point of view of heating engineering, such a corner will be the coldest. Secondly, if there is a beam in the corner, then there are no “shelves” on the inside to attach the interior trim to it.
Of course, the last issue can be resolved. But remember what I said about the “wrong” frames? Why make it complicated when you can make it simpler? Why make a beam, creating a cold bridge and thinking about how to attach finishing to it later, if you can make a warm corner from boards? Despite the fact that this will not affect the quantity of material or the complexity of the work.
Openings and top trim are the most significant difference between the American frame design and the Scandinavian one, but more on that later. So, when they talk about the correct openings in a frame, they usually talk about the following scheme (window and door openings are made according to the same principle).
Correct openings in a frame house
The first thing (1) that people usually pay attention to when talking about “wrong” openings is the double and even triple racks on the sides of the opening. It is often believed that this is necessary to somehow strengthen the opening for installing a window or door. Actually this is not true. A window or door will be fine on single posts. Why then do we need cohesive boards?
Everything is elementary. Remember when I said that the American frame is as simple and reliable as an iron saw? Pay attention to Figure 2. And you will understand that solid racks are needed solely to support the elements lying on them. So that the edges of these elements do not hang on nails. Simple, reliable and versatile.
In Figure 3 there is one of the simplified versions, when the lower frame of the window cuts into a torn rack. But at the same time, both window frames still have supports at the edges.
Therefore, we cannot formally say that if the racks are not doubled, then this is “wrong.” They can also be single, as in the Scandinavian frame. Rather, the mistake is when the racks along the edges of the openings are solid, but do not bear the load from the elements resting on them. In this case they are simply meaningless.
In this case, the horizontal elements hang on fasteners, so there is no point in doubling or tripling the racks on the sides
Now let's talk about an element that is already more critical and the absence of which can be considered as an “irregularity” of the opening. This is the “header” above the opening (header).
Window header
This is a really important element. As a rule, some kind of load will come from above onto the window or doorway - the floor joists of the second floor, the rafter system. And the wall itself is weakened by deflection in the area of the opening. Therefore, local reinforcements are made in the openings. In American it is headers. In fact, this is a board installed on edge above the opening. Here it is important that the edges of the header either rest on the posts (if the classic American scheme with solid opening posts is used), or are cut into the outer posts if they are single. Moreover, the cross-section of the header directly depends on the loads and dimensions of the opening. The larger the opening and the stronger the load on it, the more powerful the header. It can also be double, triple, extended in height, etc. – I repeat, it depends on the load. But, as a rule, for openings up to 1.5 m in width, a header made from a 45x195 board is quite sufficient.
Is the absence of a header a sign that the framework is “wrong”? Yes and no. If we act according to the American principle of “simple and reliable,” then the header should be present at every opening. Do this and be sure of the result.
But in fact, you need to dance from the load falling on the opening from above. For example, a narrow window in a one-story house and the rafters in this section of the wall are located along the edges of the opening - the load from above on the opening is minimal and you can do without a header.
Therefore, the header issue should be treated as follows. If there is one, great. If it is not there, then the builders (contractor) must clearly explain why, in their opinion, it is not needed here, and this will depend, first of all, on the load falling on the opening area from above.
Double top harness
Double top frame made of boards, also a distinctive feature of the American frame
Double top harness
The double strapping again provides reinforcement along the top of the wall for deflection from the load from above - the load from the ceiling, rafters, etc. In addition, pay attention to the overlaps of the second row of strapping.
- Overlap in the corner - we tie two perpendicular walls together.
- Overlap in the center - we tie together 2 sections of one wall.
- Overlap along the partition - we tie the partition together with the outer wall.
Thus, the double piping also fulfills the second task - ensuring the integrity of the entire wall structure.
In the domestic version you can often find the top frame made of timber. And this, again, is not the best solution. Firstly, the beam is thicker than a double frame. Yes, it may be better for deflection, but it is not a fact that it is necessary, but the cold bridge at the top of the wall will be more significant. Well, it’s more difficult to implement this overlap to ensure the integrity of the entire structure. Therefore, we return again to the question: why make it difficult if you can make it simpler and more reliable?
Correct jib in a frame house
Another cornerstone. Surely you have come across the phrase “jibs made incorrectly.” Let's talk about this. Firstly, what is a jib? This is a diagonal element in the wall, which provides spatial rigidity for shear in the lateral plane. Because thanks to the jib, a system of triangular structures appears, and the triangle is the most stable geometric figure.
So, when they talk about the correct jib, they usually talk about this option:
Correct jib
Why is this particular jib called “correct” and what should you pay attention to?
- This jib is installed with an angle of 45 to 60 degrees - this is the most stable triangle. Of course, the angle may be different, but this range is best.
- The jib cuts into the upper and lower trim, and does not just rest against the rack - this is quite an important point, in this way we tie the structure together.
- The jib cuts into every post in its path.
- For each node - adjacent to the harness or rack, there must be at least two fastening points. Since one point will give a “hinge” with a certain degree of freedom.
- The jib cuts into the edge - this way it works better in the structure and interferes less with the insulation.
And here is an example of the most “wrong” jib. But nevertheless, it occurs all the time.
This is just a board stuck into the first opening of the frame. What is so “wrong” about it, since formally it is also a triangle?
- Firstly, the angle of inclination is very small.
- Secondly, the jib board works worst in this plane.
- Thirdly, it is difficult to fix such a jib to the wall.
- Fourthly, pay attention to the fact that cavities that are extremely inconvenient for insulation are formed at the junctions with the frame. Even if the jib is carefully trimmed and there is no gap at the end, there is no escape from the sharp corner, and properly insulating such a corner is not an easy task, so most likely it will be done somehow.
Another example, also common. This is a jib cut into the posts, but not cut into the harness.
The jib is not embedded in the harness
This option is already much better than the previous one, but, nevertheless, such a jib will work worse than one embedded in the harness, and the work will take 5 minutes more. And if, moreover, it is fixed to each rack with only one nail, then its effect will also be minimized.
We won’t even consider the options for all sorts of small defective “corners and braces” that do not reach from the top harness to the bottom.
Formally, even the most crooked jib makes at least some contribution. But once again: why do it your own way if a good solution already exists?
This is where we finish with the American frame and move on to the Scandinavian one.
Correct Scandinavian frame
Unlike America, where frames are practically standardized and there are very few differences, there are more variations in Scandinavia. Here you can find both the classic American frame and hybrid versions. The Scandinavian frame, in essence, is the development and modernization of the American one. However, basically, when they talk about a Scandinavian frame, we are talking about such a design.
Typical Scandinavian house kit
Scandinavian frame
Corners, jibs - everything here is like the Americans. What should you pay attention to?
- Single strapping along the top of the wall.
- Power crossbar embedded in the racks along the entire wall.
- Single posts on window and door openings.
In fact, the main difference is this very “Scandinavian” crossbar - it replaces both the American headers and the double harness, being a powerful power element.
What, in my opinion, is the advantage of the Scandinavian frame over the American one? The fact is that it places a much greater emphasis on minimizing all kinds of cold bridges, which are almost all solid boards (double strapping, racks of openings). After all, between each solid board, a gap could potentially form over time, which you may never know about. Well, it’s one thing when the cold bridge is the width of one board, and another question is when there are already two or three of them.
Of course, you shouldn’t focus on cold bridges. There’s still no escape from them, and in fact, their importance is often exaggerated. But, nevertheless, they exist and, if it is possible to minimize them relatively painlessly, why not do it?
Scandinavians in general, unlike Americans, are very concerned about energy saving. The colder, northern climate and expensive energy resources also have an impact. But in terms of climate, Scandinavia is much closer to us (I’m talking primarily about the North-West region) than most American states.
The disadvantage of the Scandinavian frame is that it is slightly more complex, at least in the fact that in all racks you need to make cuts for the crossbar. And the fact is that, unlike the American one, it does require some kind of mental effort. For example: large openings may require double racks to support horizontal elements, and additional crossbars and headers. And somewhere, for example, on the gable walls of one-story buildings, where there is no load from the joists or roof, perhaps a transom is not even needed.
In general, the Scandinavian frame has certain advantages, but requires a little more effort and intelligence than the American one. If the American frame can be assembled with the brains completely turned off, then in the Scandinavian one it is better to turn them on, at least in the minimum mode.
“Semi-regular” frames
Let me remind you that by “semi-correct” I mean precisely those that have every right to exist, but differ from the typical Scandinavian-American solutions. Therefore, calling them “semi-correct” must be done with caution.
Let me give you a few examples.
An example of how you can “overdo it”
The first example is from our own practice. This house was built by us, but according to a design provided by the customer. We even wanted to redo the project completely, but we were limited by deadlines, since we had to go to the site; In addition, the customer paid a significant amount for the project and formally there are no violations in the design, but he has come to terms with the stated shortcomings of the current solution.
Why then did I classify this frame as “semi-regular”? Please note that there are Scandinavian crossbars, American headers, and double trims not only at the top, but also at the bottom of the walls. In short, there is an American scheme, and a Scandinavian one, and another 30% of the Russian reserve is thrown on top, just in case. Well, the prefabricated stand of 6 (!!!) boards under the glued ridge beam speaks for itself. After all, in this place the only insulation is isoplate on the outside and cross-insulation on the inside. And if there was a purely American scheme, then there would simply be no insulation in this section of the wall, bare wood from the outside in.
I call this frame “semi-correct” because from the point of view of structural reliability there are no complaints about it. There is a multiple margin of safety “in case of nuclear war.” But there are an abundance of cold bridges, a huge waste of material for the frame, and high labor costs, which also affects the price.
This house could have been made with a smaller but sufficient margin of safety, but at the same time reducing the amount of lumber by 30 percent and significantly reducing the number of cold bridges, making the house warmer.
Another example is a frame using the “double volume” frame system, promoted by a Moscow company.
The main difference is that it is actually a double outer wall, with racks spaced apart relative to each other. So the frame fully satisfies the strength criteria and is very good from the point of view of thermal engineering, due to the minimization of cold bridges, but loses in manufacturability. The problem of eliminating cold bridges, which is primarily solved by such a frame, can be solved by simpler, more reliable and correct methods such as “cross-insulation”.
And, curiously, usually “semi-correct” frames somehow contain Scandinavian-American solutions. And the differences are rather in an attempt to improve the good. But it often happens that “the best is the enemy of the good.”
Such frameworks can be safely called “semi-correct” precisely because there are no gross violations here. There are differences from typical American-Scandinavian solutions in attempts to improve something or come up with some kind of “trick”. Whether to pay for them or not is the customer’s choice.
“Wrong” frame houses
Now let's talk about the “wrong” frames. The most typical, I would even say collective, case is presented in the photo below.
The quintessence of “directional” frame house construction
What can you immediately notice in this photo?
- Total use of natural moisture material. Moreover, it is a massive material, which dries out the most and changes its geometry during the drying process.
- The beams in the corners and on the straps and even on the racks are cold bridges and an inconvenience in further work.
- Lack of headers and opening reinforcements.
- Don't understand how the jib is made, poorly performing its role and interfering with insulation.
- Assembly on corners with black self-tapping screws, the purpose of which is to fasten gypsum boards during finishing (and not for use in load-bearing structures).
The photo above shows almost the quintessence of what is commonly called an “irregular” frame or “RSK”. The abbreviation RSK appeared in 2008 at FH, at the suggestion of one builder who presented a similar product to the world, called Russian Power Frame. Over time, as people began to figure out what was what, this abbreviation began to be deciphered as Russian Strashen Karkashen. Like the apotheosis of meaninglessness with a claim to a unique solution.
What is most curious is that, if desired, it can also be classified as “semi-correct”: after all, if the screws do not rot (black phosphated screws are by no means an example of corrosion resistance) and do not burst during the inevitable shrinkage of the timber, this frame is unlikely to fall apart. That is, such a design has the right to life.
What is the main disadvantage of “wrong” frames? If people know what they are doing, they will quite quickly come to the Canadian-Scandinavian pattern. Fortunately, there is a wealth of information now. And if they don’t come, then this says one thing: they, by and large, don’t care about the result. The classic answer when trying to ask them why this is so is “we have always built it this way, no one has complained.” That is, the entire construction is based solely on intuition and ingenuity. Without trying to ask how it’s generally customary to do this.
What prevented you from making a board instead of timber? Reinforce the openings? Make normal jibs? Collect on nails? That is, do it right? After all, such a frame does not provide any advantages! One large set of not the best solutions with claims to super strength, etc. Moreover, the labor input is the same as the “correct” one, the cost is the same, and the material consumption is perhaps even greater.
Summarize
As a result: the American-Scandinavian frame scheme is usually called “correct”, due to the fact that it has already been tested many times on thousands of houses, proving its viability and the optimal ratio of “labor-input-reliability-quality”.
“Semi-regular” and “irregular” include all other types of frames. In this case, the frame may be quite reliable, but “suboptimal” in terms of the above.
As a rule, if potential contractors cannot justify the use of certain design solutions other than the “correct” American-Scandinavian ones, this indicates that they have no idea about these very “correct” solutions and are building a house solely on a whim, replacing knowledge with intuition and ingenuity. And this is a very risky path that may come back to haunt the home owner in the future.
That's why. Do you want guaranteed correct, optimal solutions? Pay attention to the classic American or Scandinavian frame house construction scheme.
about the author
Hello. My name is Alexey, you may have met me as Porcupine or Gribnick on the Internet. I am the founder of the Finnish House, a project that has grown from a personal blog into a construction company whose goal is to build a high-quality and comfortable home for you and your children.In our country, until recently, houses were mainly built from logs, brick or concrete, but now the time has come for new technologies, and frame houses have appeared in this segment. They are very popular due to their unique combination of high quality and low financial costs. But the main thing is the opportunity to make a durable frame house with your own hands without the use of special equipment. Therefore, we have made detailed step-by-step instructions for you.
The guide itself consists of 7 steps:
- choosing a location for a home;
- design;
- foundation installation;
- frame assembly;
- walling;
- thermal insulation;
- roofing.
The construction of a frame house has the main advantage over other technologies - the rapid pace of construction without the involvement of special lifting mechanisms. Inexpensive frames are put into operation in one season, but such speed in no way worsens the comfort and quality of living - these parameters are no worse than those of wooden and stone houses.
Choosing a location on the site
In accordance with the urban planning standards of the Russian Federation, your residential building must be located at a distance of at least 3 m from the official border of the site. Also, in most cases, local regulations regulate a 5-meter setback from the red line of the street to the house.
It should be taken into account that all frames belong to the IV and V degrees of fire resistance, therefore, in accordance with fire safety standards, the distance from your building to the house on the neighboring site must be at least 10 meters.
The remaining requirements for placing the house are presented in this image:
We are drawing up a project
According to the Federal Law, the developer is obliged to be guided by the project created by professional design organizations. The documentation drawn up must also be agreed upon by authorized officials of various services, where changes and/or additions may be made.
In fact, local authorities only require a preliminary design, including a general plan diagram, plans, section, facades and basic technical and economic indicators. Such a project costs no more than 10,000 rubles, and it can be ordered after construction and before commissioning.
However, for your convenience and saving on rework, we recommend choosing a suitable standard project or creating an individual one, taking into account personal preferences and wishes. In both cases, it is necessary to mark out all communications and include engineering systems in the plan.
 Example of a typical preliminary design
 Please note that standard projects are traditionally cheaper, while individual ones allow you to realize your own ideas. Individual drawings from the design documentation are drawn up taking into account the reference to the topography and other features of the site - only such scrupulousness can guarantee the long-term operation of the home without problems and major repairs.
Engineering systems
To build a frame house, it is necessary to include all utility networks in the project. They are laid in strict sequence, and you need to start from the foundation. If a concrete base is used, all technological holes for communication systems must be made at the time of pouring, so that after hardening you do not have to deal with complex drilling of holes.
The electrical system consists of a distribution board, electrical wiring, outlets and grounding. The distance between points for sockets should be no more than 4 m. Sockets with covers are installed near water sources. The ventilation system includes air ducts with holes. Is it worth reminding that the ease of access and use of taps, switches, as well as the functioning of drains and sewerage drainage depends on the correct layout of pipes and wires?
Foundation installation
Construction technology involves the use of, or. The strength of the base is increased with the help of reinforcement and monolithic piping. It is possible to make a high-quality foundation only after conducting a geological analysis of the soil.
In most cases, a simpler foundation is sufficient for a frame house, which can easily withstand light loads. The most appropriate one is . Such a foundation does not require a large amount of materials, which reduces the cost of construction estimates by an average of 15-20%.

In the case of a monolithic foundation, it is necessary to dig a trench, compact the soil and pour a sand cushion. Before you start pouring concrete, you need to make formwork and install reinforcement bars. The solution must be compacted during the pouring process. Half a meter long vertical studs are placed in the liquid concrete of the base every 2 m - the lower frame frame will be attached to them. The surface of the resulting grillage must be leveled with cement mortar.
Bottom harness
Seven days after the work of pouring concrete, a lower frame made of wooden beams with a cross-section of 15x15 cm is laid over the entire surface of the foundation. The wood is pre-treated with antiseptic agents, and two layers of roofing felt are laid along the bottom, which plays the role of .
The timber can be fixed with anchor bolts or foundation studs. If bolts are used, then technological holes up to 10 cm deep must be drilled for them.

Floors
When all the wooden beams are laid and connected to each other and to the foundation, grooves are formed in them and floor joists are placed (board 50x150 mm). The upper part of the logs is aligned horizontally, and boards are nailed along the bottom - they will serve as the basis for constructing the subfloor. Membrane insulation is laid on the resulting board base (prevents the insulation from weathering and getting wet, and does not prevent water vapor from escaping outside). In the gaps between the joists, you need to press in insulation (mineral wool or polystyrene foam) and cover it with a vapor barrier. An edged board (40x15 mm) is laid on top.

Creating a frame
From the very name of the technology it is clear that the main element of such a structure is the frame, and it is on it that the entire structure is supported. The frame consists of vertical posts fixed with crossbars and horizontal strapping. As before, here the entire construction process is carried out in stages.

Wood is used as a material. It is recommended to choose coniferous timber with a low degree of humidity, ideally kiln drying. The height of the racks must correspond to a similar parameter of the room. The racks are connected with nails 10 cm long. After adjusting the elements, there should be no gaps.

Depending on the load that will affect the load-bearing supports, as well as based on the size of the insulation and cladding material, the distance between the posts is planned. The universal section of the racks is 150x50 mm; double beams 150x50 mm are placed in the openings. The most popular pitch is 600 mm (allows you to install the insulation “in tension” to densely fill the wall). To connect the racks with the lower frame, temporary braces are used, which is why the structure acquires the necessary rigidity.
 Layout of wall corners
 The installation of the upper trim is carried out after installing all the racks. Fixation occurs using the same grooves that fastened the lower beam. The upper fastening to the racks is carried out with two nails, which must penetrate the material at least 10 cm. The final fastening of the frame is carried out by permanent bevels installed to replace the dismantled temporary ones. Read more about this in the article ““. We also recommend that you familiarize yourself with the device of the most important.
We insulate the walls
The outer walls of the house are sheathed with imitation timber, wooden lining, plastic, as the owner of the house wishes. It is better to do insulation using mineral wool. It is environmentally friendly, durable and does not burn, which makes frames even more profitable and in demand.
 Scheme of proper insulation of frame walls
 The material is pressed into all the cracks between the beams to remove voids. A hydro- and windproof membrane, which is attached over the insulation to the studs, will help protect the tree from moisture, and only then the slatted sheathing for the ventilated façade, which will be hidden under the outer cladding, is installed. On the inside, OSB or gypsum fiber boards mounted on top of a vapor barrier are suitable for wall cladding.
Constructing a ceiling
The ceiling is attached to the floor beams, which in turn are fixed with nails or steel brackets on the top frame beam. Where interior partitions are installed, you need to install support beams, in the place of which a wooden ceiling panel is nailed.

Roof
Before you start work, determine the degree of slope, the number of slopes, the type of roofing cladding, and the design of the rafter system.

A roof with a complex shape looks attractive, but it is difficult to implement and therefore not cheap. The most common are those that allow or attic space. Here it is necessary to install only one ridge; there are no valleys at all, which eliminates the accumulation of sediments and leaks. To prevent snow from lingering on the roof, plan a slope of more than 28º, but not more than 50º, otherwise the wind load will increase.
The cross-section of the rafters is determined according to the thickness of the insulating material placed between them. It is best to take a board with a caliber of 150x50mm and a length of 6 m. Two boards need to be knocked down in the shape of the letter L, and then they are lifted up and the angle is determined, making sure that the overhangs extend beyond the level of the wall by 30-50 cm. Now the boards can be assembled using a crossbar, and we get something like rafters.


The upper trim acts as a Mauerlat here. Based on the manufactured sample, rafters are created for the entire roof, not forgetting about a pitch of 600 mm. The rafters on the ridge are installed on the pediment and the installation of the remaining elements continues along them. The type of roofing material determines what type of sheathing will be used.
Roofing material
The step-by-step instructions end at the stage of installing the roof cladding. You can choose , or . All of these materials are easy to work with, affordable, and look decent. After the facing work, all that remains is to install drainpipes and a drainage system, which will be responsible for draining precipitation outside the site.
Now you can imagine the whole process of building a frame house with your own hands , so that the structure is durable and warm. If you do not ignore the rules of construction and assembly technology, you will become the happy owner of your own home, which you can only dream of.