How to assemble a ball screw with two nuts. Ball screw SFU1605 from China: assembling a large CNC router. Purpose of ball screws
Read also
Complexity
Working hours
A short digression about the materials that we will need:
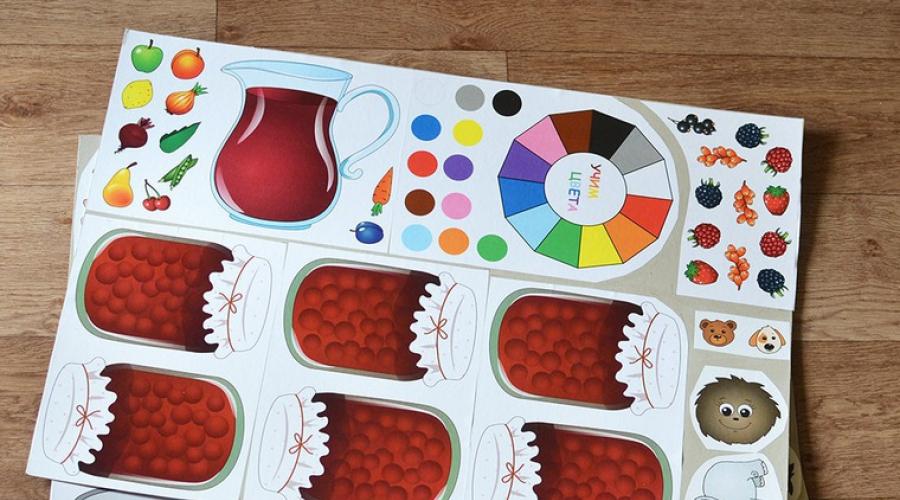
1. I buy cardboard at an art store. Typically, for the base of the “playing field” (jars of jam, like here, for example), the cardboard thickness is 1.5 mm. For small parts(like berries here) - 1 mm. If you are not confident in your abilities (or you do not need two huge sheets of thick cardboard), then you can take 1 mm cardboard for all the details (it is, of course, a little less dense, but for such games it is quite enough). This cardboard is sold in a format of 70 cm * 100 cm (that is, almost Whatman paper). Therefore, if you are going to buy such cardboard, make sure you have transport, or take tailor’s scissors with you, or accept that you will have to carry a stiff piece of paper home :)
I wore it :) Yes, it’s not very comfortable, but it’s quite possible :)
2. I use PVA glue. For working with paper - this is the most convenient option. It's better, of course, to buy it from hardware store(since the one sold in stationery departments is usually runny and warps the paper).
3. We will also need lamination film. Can buy transparent film on an adhesive base, or hot-melt adhesive - it is glued with an iron (this is how our mothers pasted over the covers of our textbooks).
Well, we’ll figure out the rest of the materials along the way :)
So, let's begin! First of all, we glue paper with a printed game onto our thick cardboard. I apply the glue construction brush, 5 cm wide - this allows you to do everything quickly, and speed plays an important role here. Spread glue on required area, carefully apply the sheet and immediately smooth it with a soft cloth (I use an old terry cloth kitchen towel) so that we don't have any wrinkles left. After this, we let our beauty dry for about an hour. This is what we get after the first manipulations:

The second step is lamination. I laminate with hot melt film.

We cut our whatman paper into landscape-size sheets, cut the film into the same pieces, lay it with the matte side DOWN, straighten it, cover it with a regular sheet and go over it with an iron several times. Important: before laminating a future toy, try laminating some unnecessary piece to understand what temperature it is better to set on the iron. I laminate at medium power - then the film lies almost without wrinkles. If folds appear, then go over this place with an iron again (also through paper) and then they will almost completely come apart.

This is what we get - almost a mirror shine :) And, at the same time, protection from moisture and scratches :) Put the iron aside and ironing board for a while and take up the scissors again.

First, we chop our sheet into small pieces, then cut it into shape. I don’t try to cut close to the outline - this has a bad effect on the strength and on the nerves of the cutter (we remember that our cardboard is very thick?). We give only a general form.

When everything is cut out, we return to the iron and go through almost finished products again. This is necessary so that the film does not come off at the edges and grips even better.
So, the finish line! After everything is glued, laminated and cut out, all we have to do is assemble the toy. If you have a toy with clothespins, then take glue gun and glue clothespins.

If there is lacing, then we make holes with a hole punch (yes, it takes cardboard of this thickness) and select the lace.

If there is something with magnets, then we glue the magnets. This can be magnetic tape with an adhesive backing, or soft refrigerator magnets and double-sided tape.

Well, if this is a game with Velcro, then we will need Velcro with an adhesive backing.

You can, of course, get by with the usual ones, but in this case, you will need much more patience, effort and time, because this process looks like this:

In this case we use a glue gun. In order for the Velcro to attach well to the base, we make notches in the places where they are attached and only then apply glue.
That's all - our toy is ready - it's time to give it to a happy baby and start developing while playing :)
