How to mount a disk image in daemon tools. How to mount an image in Daemon Tools: step-by-step instructions. Using the program itself
Read also
Notepad++ - popular text editor with the ability to write program codes and edit programs. Free download Russian Notepad Plus Plus for your computer. Permanent link: website/ru/text/notepad
Brief description of NotPad two pluses
Notepad++ is a well-known text editor, loved by many users for its high-quality functionality, quick opening, viewing and editing of files, as well as support for most known formats. This is a great replacement for the meager feature set of the standard Windows Notepad.
To get started you need a text editor Microsoft Windows Notepad++ free download for Windows 10, 8.. User interface The program is convenient and intuitive, you can set up a hotkey combination in the text editor, set up a spell check, auto-save settings when exiting the editor, insert a date, auto-indent, use the print preview option.
Functionality, benefits, plugins and Russian language
Notepad Plus Plus is wonderful with rich functionality, running on the Microsoft Windows operating system. The advantages of the free text editor Notepad++ include the following:
It can work with several tabs at the same time, for example, if during work you need to work with several documents at the same time;
- you can arrange windows of different documents and work with them together;
- several viewing windows can be configured for one document, this is important for ease of work and editing large texts;
- windows can be configured and positioned in relation to each other, you can use the window scale change;
- text search is carried out in one file or in all specified files;
- it is possible to customize the search window with replacement with several options: checking the found section of text, or simply replacing all found fragments automatically;
- the free program can be used in writing codes and editing programs;
- the editor itself finds and highlights keywords or regular expressions;
- the program can divide the generated code into blocks, determining its structure according to the analysis of operator actions;
- auto-completion mode for words from the program’s personal dictionaries directly while typing with automatic detection of the programming language;
- search for blocks in a logical way;
- the free editor supports programming languages: HTML, XML, Java and JavaScript, C, C++, php and others; it can determine the language automatically or manually;
- powerful macro support.

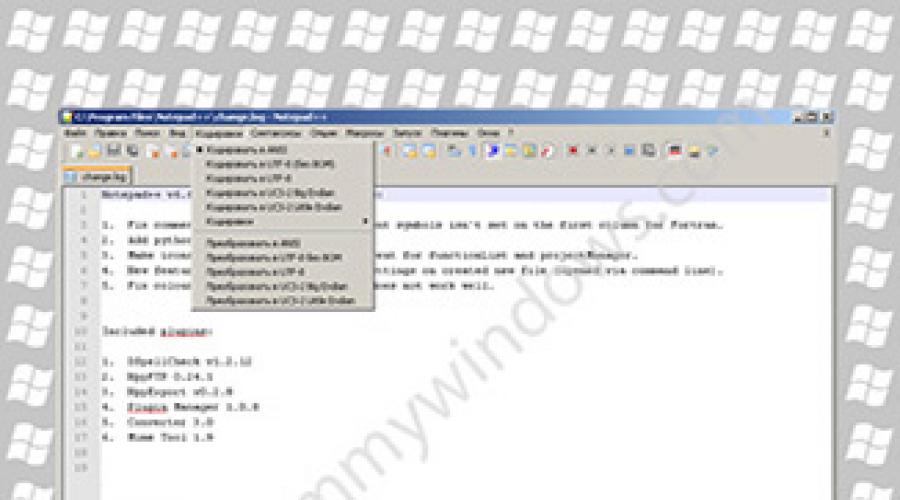
If the standard functions of the program are not enough, then the functionality can be expanded with additional plugins. You can connect the required plugin by downloading it in advance from the Internet, importing it into the program, or connecting directly from the program interface menu using the connection manager in the “plugins” menu. If you need a Russified version, then you need to download Notepad++ for free latest version in Russian for Windows 8, 7, Vista, XP.
On the company's official website you can download Notepad Plus Plus Rus (Russian) for free for your computer or mobile phone without registration and SMS. Also on the company’s website, the user is free to leave reviews, comments, and receive help with the program from technical support companies. Timely updating of the Notepad Plus Plus notepad will save stable work program, for this you can download the latest version of the Notepad Plus Plus text editor for free in Russian from the website programmywindows.com. Unfortunately, such a program has not yet been developed for Android users, but there are similar applications for mobile phones And Android tablets. If you want to get such a text editor for Android devices, you can try to comment on this wish on the home page of the official website or leave a comment right here.
For Windows, serving as an advanced replacement for Windows Notepad and WordPad. Main advantages of Notepad: high speed work and small size. Notepad++ can open and store multiple files, allowing you to view and edit multiple documents.
What else can Notepad++ do?
A powerful feature - dynamic adjustment of viewing windows - consists, for example, in the fact that you can edit the same document in different places, holding it in two program windows. All changes are made synchronously to the document. This is sometimes necessary when editing large files. For example, when compiling a list of references, you can simultaneously add footnotes to the required pages in the same document. Notepad itself determines the status of the file and reports if there is something wrong with the file, for example, the document was deleted by another program or the remote connection was interrupted.
- wide range of possibilities,
- undemanding to computer resources,
- highlighting brackets and other paired elements,
- dragging text with the mouse,
- macros.
Another reason to download Notepad Plus Plus for free is its support for the syntax of major programming languages. Notepad++ displays text as required by the syntax of the programming language (the language is user-selectable):
- text highlighting,
- collapsing blocks
- operator selection,
- selection of paired elements.
Notepad is distributed in the hope that it will be useful, but nothing is guaranteed. You can download Notepad for free using a direct link from the website.
Free download Notepad++
Free programs download for free
Now you are on the page "Advanced Notepad ++ Editor", popular in narrow circles, in a section of the site where everyone has the opportunity to legally download free programs for a computer with Microsoft Windows without captcha, without viruses and without SMS. Page about the Notepad ++ editor substantially updated on June 20, 2019. Starting your acquaintance with legally free programs for operating room Windows systems from the current page, “look through” other materials on the site https://site at home or at work. Thank you for visiting the section.
And install it on your computer. Next, the program itself will install and configure a new virtual BD-ROM into the system (a full-fledged software “turntable” that works with all types and types of discs, be it CD/DVD/Blu-ray Disc). Now, all that's left for you is to learn how to mount and run/play disk images! And this can be done in several ways that are easily accessible even to an inexperienced user.
1. Through the desktop gadget Daemon Tools on the desktop
Click on this widget button "Mount"(option with an arrow icon), as shown in the screenshot below.
Next, in the opened "Explorer", select the folder in which you have the disk images and select the desired image file a lion. keyboard mice. Then click on the button "Open".

Image automatically will be added to the application And mounted on disk. You will find a ready-to-use image in virtual drive created by Daemon Tools by going to "My computer". To launch the disc, click twice lion keyboard mice to the virtual icon "BD-ROM" drive or press the right key on it. mouse, and then select any of the launch options you like (see screenshot).

2. Through the disk image file itself
Open the folder where you have files with electronic disk images and select the one you need. Click on it with the right key. mouse and click on the following options: "To open with" --> "Daemon Tools". The file itself (automatically!) will be added to the application and to the virtual “spinner” (drive).

To start using the disk, also go to "My computer" and click on the icon "BD-ROM"!
3. Through the program Daemon Tools
Run the program with shortcut on desktop/worker table. In the lower window of the utility you will see virtual drive icon. Click on it with the right key. mouse and select the option "Mount".

Further, (exactly the same as in the first method) in the opened Windows Explorer you go to the right one the folder where the image disks are stored and, highlighting left mouse button, select the one you need. Don't forget about the button too "Open".

"Last Images"
It is noteworthy that this program automatically saves the entire history of your actions. Therefore, everything previously opened you in Daemon Tools, you will find the images in the list "Last Images", located in central program window, and at any time you can easily launch them again! Just press right key. mouse on any image from the list and click on the function "Mount".

Now you definitely no longer need to constantly get the necessary disks through "Conductor".
"Catalogue of images"
Also, for greater convenience, you can create your own in Damon Tools "Catalogue of images", for example, the most frequently used drives so that you no longer have to climb into them every time "Conductor" and it would be possible launch instantly them straight from top center window programs. To do this, click on the icon "Add image" in the lower application window, then in "Explorer" select one or several images at once, click on the button "Open" and they will independently (automatically!) appear in top center window program, which is called "Catalogue of images".

When you need it, it’s just as easy click on any of which pr. clave. mouse and activate the function "Mount".

As you can see, mounting disks in the “DT” is really very simple, and most importantly, it’s also convenient!
For those who cannot imagine their life without computer games, the daemon tools program is known firsthand. Gamers know about the ability of daemon tools to quickly cope with almost all game copy protection. Why with almost everyone? But everything is clear to game producers, who are trying to fight this and protect their creations from mass distribution. For those who have not yet understood, you need the daemon tools program when you downloaded a game or software, and without the original disk they do not run on the computer.
How to mount an image in daemon tools - instructions
Sometimes users encounter some problems while working with daemon tools, for example, how to mount an image in daemon tools. If you figure it out and follow the instructions, in reality everything will not be so difficult. To explain to you how to solve this problem, we will tell you how to work with daemon tools, and accordingly, how to mount an image in daemon tools:
- First of all, you will need the program itself. If it is missing, you will need to download it. You can do this here DAEMON Tools Lite.exe (11.2 MB). This version of the program (Lite) is free.
- We think there will be no problems during the installation of daemon tools. You just need to click “yes” or “next” everywhere.
- After installation, look down at the taskbar at the bottom of the monitor. An icon for the daemon tools program should have appeared somewhere next to the clock.
- Now you will need to right-click on this icon and select “Virtual CD/DVD-ROM” from the menu that appears.
- In the new window, click on “drive”, and then on “mount image”.
- And now the most interesting thing: in front of you is a window in which you should indicate the path to the image. Remember where you downloaded the image from the Internet, you just need to find this folder and click on this image in it. After this, the program automatically emulates it on virtual disk.
Thus, you have learned how to mount an image in daemon tools. And a virtual disk with the game appears on your computer. You will always find this virtual disk in “My Computer”. In addition to games, similar problems can occur with some software. The method of action is similar to this one.
Some people advise to always mount the image using daemon tools, because the standard disk burning wizard in Windows often writes data incorrectly or even damages the disks. And as you already understand, everyone can work with daemon tools.
Hi all! As promised in the last article, today I will write as in daemon tools lite mount image. I will also show you how to create a disk image using daemon tools lite. Now you can easily install downloaded games, programs and make disk images.
If daemon tools lite is not yet installed on your computer, you can read how to do this, I wrote about this .
How to mount an image in daemon tools lite
Often downloaded games or programs are a disk image in various formats such as iso, mdf and others. Having mounted the image in the daemon tools lite program, you can easily begin installing the downloaded software. I’ll explain how to do this now.
1. After you first open daemon program tools lite, a virtual drive is automatically created.
2. If the virtual drive has not been created or you want to add a few more. You must click on the "Add virtual DT drive" button.(B free version lite, you can add up to four of them) 
3. When the virtual drive is created, you need to add the image. To do this, click the "Add Image" button. 
4. A window has opened in front of us in which we need to find the disk image on the computer and click open.
You can also open the image by double-clicking on it. 
5. Now in the “Image Catalog” field we see the image we just added. Double-click on it, after which the disk image will be mounted. 
6. In the "Autorun" window that opens, click "Run AUTORUN.EXE". The program or downloaded game is ready for installation! 
7. In order to unmount the image, you need to right-click on the virtual drive and select “unmount”. 
How to create a disk image in daemon tools lite
1. The first thing you need to do is insert a disc into the drive on your computer.