How to make a coffee table from chipboard with your own hands? DIY table made from chipboard: a variety of models How to assemble a table from chipboard
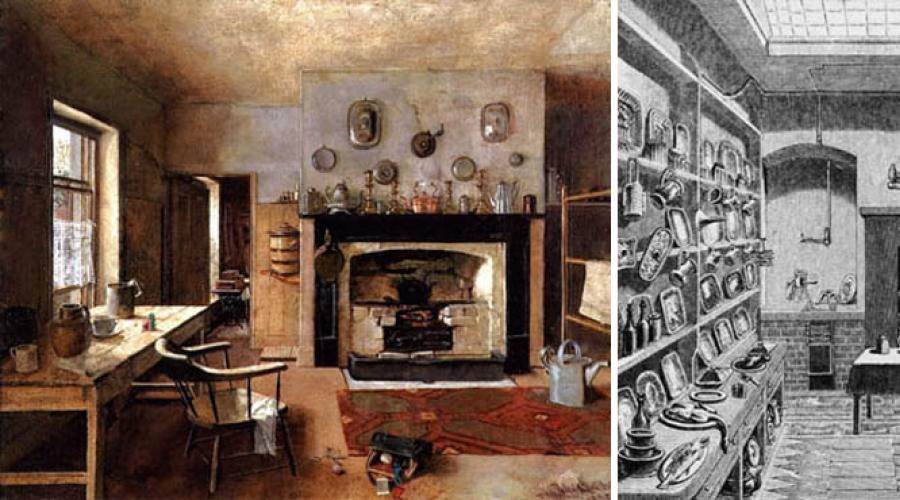
The kitchen table is the same age as the kitchen itself. Probably even older than this: in the sites and settlements of primitive people, large flat stones were found near the hearths, which served as cutting, distribution and dining tables; they contained remains of food and food. In this article we will look at how to make a kitchen table with your own hands completely at home. This will not only allow you to save a certain amount (in general, not ruinous), but will also provide an opportunity to acquire initial carpentry skills, which may turn out to be much more significant in the future. The most common types of furniture joints are used in kitchen tables, but its design forgives rather serious flaws in work. There are also great-looking types of kitchen tables, for the manufacture of which it is enough to be able to saw off a piece of board and tighten a screw.

A table in the kitchen also provides considerable opportunities for creative self-expression: much less skill is needed here than imagination, and failure will not ruin the entire interior. The samples of original kitchen tables in the photo below are quite accessible for making with your own hands, but first you need to get a feel for the design and material at a basic level, which is what we will try to help the reader with.

There are at least 15 different ways to make a kitchen table, including artistic forging and casting from homemade artificial marble. However, firstly, we will limit ourselves to kitchen tables made of wood, as a material that allows us to obtain the desired result with the least amount of labor, money and time.
Secondly, we will deal with tables with rectangular or rounded corners. A round table requires 1.6-2.2 times more usable space than a rectangular table for the same number of eaters. Moreover, the first meaning refers to the case when the hostess is deprived of a free approach to him and must be served over the shoulder of the person sitting. This already falls into the category of parodies of the rules of good manners. Like, how should you tilt the plate when finishing the soup: towards you or away from you? Answer: depending on what you want to pour on yourself or the tablecloth. In addition, a round table in a small kitchen is stronger than a rectangular table of the same capacity and is wedged into the so-called. functionality triangle, see below.
Dimensions and ergonomics
The height of the kitchen table is normal, 700-780 mm, counting from the floor to the top surface of the tabletop. For people of average height, the optimal table height is 750-760 mm. But with the dimensions of the kitchen table in plan, the situation is more complicated.
The essence is in the same triangle of functionality: refrigerator-sink-stove. Ideally, it should be rectangular isosceles with legs of 1.2-1.6 m. However, the ergonomics of the kitchen is spoiled much more than a slight deviation from these proportions by wedging the dining area into the hypotenuse. Simply: the hostess bent over the sink or stove and pressed her seductive forms against her husband’s cheek just when he brought the spoon to his mouth. Therefore, it is advisable to make the table in the kitchen, especially of economical layouts, smaller, as long as it is comfortable for the eaters.
The minimum acceptable dimensions of a family kitchen table in plan are considered to be 600x900 mm. For single people, let's say a table is 450x750 mm, like in railway cars. In this case, in a “micro-kitchen” or kitchen area of a small-sized one-room apartment, it is also permissible to make it a wall-mounted folding one, see below. But the optimal dimensions of a kitchen table top are considered to be (650-800) x (1100-1400) mm, depending on the available usable area and the size of the users.
Which one to do
Traditional kitchen table - on the base, pos. 1 in Fig. The underframe is the supporting frame of their boards placed on edge - the tsar. The drawers can be tightly fastened to the table legs, and the tabletop can be placed loosely on them; those. its fastenings only prevent horizontal displacement. This kitchen-sized table is simpler in design and stronger, but it is more difficult to bring in/take out, especially if the passage to the kitchen is narrow. The second option is that the drawers are tightly fastened to the tabletop, and the legs are detachable. In this case, the tabletop needs to be durable and not made of anything suitable for use. case, the material, and the design is more complicated. But there are no problems with bringing in/out. Both of these options for a classic kitchen table will be discussed in more detail below.

The table on the base can also be artistically designed, pos. 2. Making an artistic kitchen table is not as difficult as it might seem. The basis of its design - turned shaped legs - can be easily obtained from commercially available railing balusters (see below). For a novice craftsman who knows how to use a jigsaw, a figured sawed-off drawer does not pose a problem. What remains is a molding - a shaped chamfer on the lower edges of the drawers. For this, you can rent a manual milling machine with a cutter of the profile you like; with it, the work itself on setting up the molding takes less than an hour, plus 10-15 minutes of training on some kind of trim.
No less common in kitchens are tables of beam construction, pos. 3. Even in their simplest design (see 2 options below) they are more attractive than tables with a base. However, to complete them in a high-end design (item 4) requires well-equipped carpentry and solid manufacturing skills. Beam tables require more material, but their undeniable advantage is that they can be made completely collapsible without tools (also see below).
Tables with a load-bearing tabletop without an underframe (item 5) are also very often found in kitchens. In a factory-made version, this is perhaps the cheapest type of good quality kitchen tables. A set of legs for such a table + a postforming tabletop (see below) will cost about 2,500 rubles, and assembly will take at most half an evening. But when making such a table completely independently, a beginner will encounter some significant nuances, see below.
Tables-books, they are also tables-pedestals, pos. 6, initially created a sensation due to its compactness when folded and the ability to be used in a half-fold version, but then there was a period of some disappointment. Firstly, no matter how you sit at such a table, your legs feel uncomfortable. Secondly, in the first samples, the rotary support lock was the simplest, consisting of a pair of 50x20 bars, attached with a gap equal to the thickness of the support to the underside of the tabletop. The outer faces of the bars were often removed with a wedge so that the support would not cling to them when unfolding the table. However, if you accidentally pry the tabletop with your knee, the lock is immediately released. Therefore, such tables could not do without a hodgepodge of cutlets and mashed potatoes on the trousers and the floor, and a reliable and easy-to-use mechanical lock turned out to be very complex and expensive. Nevertheless, both amateur craftsmen and serious manufacturers are improving this, in principle, very promising design, which will be the subject of a special section in this publication.
Wall-mounted folding tables (item 7) are rarely found in very tiny kitchenettes. Most often - among busy bachelors who are accustomed to doing everything while standing, even sleeping on the carpet in front of their bosses, because... have all the disadvantages of book-tables with virtually no room for improvement. Serving tables (item 8) are used much more often on the farm, but this is a separate class of furniture with its own specific qualities and manufacturing technology, so here we will limit ourselves to just mentioning them.
Technological subtleties and innovations
The kitchen table, firstly, is made from wood species or materials that are little or not subject to shrinkage when dried: oak, hornbeam, wenge, laminated chipboard, MDF. Ordinary industrial wood in a kitchen atmosphere with its fluctuations in temperature, humidity and organic vapors in the air begins to warp and crack after 5-7 years, even if impregnated and varnished. On the other hand, the dimensions of the kitchen table are small. This leads to some features of its manufacture, which ultimately make it possible to simplify the work.
Tabletop
This is the main detail of any table. For a homemade kitchen table, the best option is to buy a ready-made postforming tabletop; they are available in a wide range of colors, textures and sizes. Postforming is a profiled laminated chipboard with rounded edges, finished to look like wood or other material. The advantages of postforming in relation to a kitchen table are as follows:

Postforming is good technologically for simplicity and speed of work. But countertops made from boards, the so-called, look much more solid. solid wood or furniture panels. Joining boards into an array is quite delicate and painstaking work; for this purpose, special devices are used - clamps. If you want to try your hand at making furniture from solid wood, we offer a selection of videos:
How to assemble a furniture panel with your own hands:
How to make a panel top for a kitchen table:
How to make a tabletop from wood end cuts:
In the last video, the material is junk, but you can achieve the look - cool oligarchs will salivate.
Dowels, confirmations and dowels
Traditionally, wooden furniture is assembled on dowels. The dowel connection is invisible and cheap; Just in case, let us remind you what it is and how it is done, see fig. To connect wooden parts, wooden dowels are used, which dry out along with the connected parts; The laminated chipboard, which practically does not dry out, is connected with plastic dowels. Corner plastic dowels are rarely used, because... often break. Connections with wooden dowels are usually glued.

It is often difficult for novice craftsmen to achieve accurate markings for the dowel connection. Tricks, such as marking with bitten nails (item 4 in the figure), do not always help, and it is impossible to remake an incorrectly marked dowel connection; both parts go to waste. Therefore, it is better for beginners to assemble their first products using Euro-furniture screws - confirmed ones. This is more expensive, but does not require special skills, because... the confirmation hole in both parts, compressed with a clamp, is drilled in one go, see fig.

Parts made of laminated chipboard or dense thin-layer wood, connected with confirmats, last for many years. All the designs described below can be assembled both on dowels and on confirmations. However, in the latter case, the following rules must be observed:
- Use furniture grades for wood, not plumbing grades for plastic. They differ at first glance: furniture slots have a hexagon slot, and plumbing slots have a Phillips screwdriver.
- The diameter of the body of the confirmat without thread when attached to the end should be no more than 1/5-1/3 (as an extreme case) of the thickness of the attached part.
- The height of the confirmation neck must correspond to the thickness of the main part.
- The penetration of the threaded part of the confirmat into the attached part must be at least 5-6 full diameters of the confirmat.
- The hole (blind hole) for the confirmat is drilled to its full length with the head.
- Use only a twist drill for wood.
- The main drill must be inserted into a mandrel that exactly matches its diameter and screw size.
- Drill holes for confirmations with a main drill of a diameter equal to the diameter of the confirmation by thread.
In practice, it is not difficult for even a perfect “teapot” to fulfill these conditions:
- Based on the thickness of the part, we determine the diameter of the body of the confirmat without thread;
- There is a lot of information on confirmatories on the Internet, from which you can, knowing the diameter of the screw body, the thickness of the main part and the drilling depth, determine the required standard size. It is better to immediately open pictures for the request “furniture screw (or confirmation) drawings dimensions”;
- We are looking for a retail outlet where the seller, when asked to show furniture confirmations, shows them exactly;
- We say: “I need so many of such and such a standard size and a drill with a mandrel for them.” They may offer a solid drill just for this confirmation, it will be cheaper.

And a little more about dowels. It is best to place a detachable (freely applied) tabletop of a classic kitchen table on them. Incl. and for such purposes, plastic dowels with a round head or dowels with a head and different types of corrugation on the long recessed and short protruding parts are produced, see fig. on right. Thick tabletops are attached first, approx. from 20 mm; the second ones are thinner.
Various tables
Classic
Classic tables on the underframe along with the legs (item 1 in the figure) are traditionally connected (assembled) using tongue-and-groove joints, which is quite complex and labor-intensive. A modern tool - a drill with a twist drill for wood and a screwdriver - in combination with legs, the section of the heads of which is not less than 60x60 mm (for balusters the heads are usually from 100x100 mm), allows for a kitchen table with plan dimensions of up to approx. 750x1500 mm can be made by connecting with wood screws at an angle, pos. 3. In any case, the outer sides of the drawers should be 1.5 cm away from the outer surfaces of the heads of the legs, this is necessary for overall strength. The minimum permissible height of the kitchen table drawers is 120 mm; thickness – 30 mm.

It is highly advisable to reinforce the connection with self-tapping screws diagonally with diagonal ties in the corners (item 4, above) from the same board as the drawers. If the tabletop is not intended to be removed unless absolutely necessary, then the labor-intensive installation of it on dowels can be abandoned. Then, at the corners of the finished supporting frame, scraps of the same board - crackers - are cut into the drawers and the tabletop is attached to them from the bottom with self-tapping screws, pos. 4 below.
The tabletop of a classic table with detachable legs should be at least 24 mm thick (chipboard, plywood) or 30 mm thick (solid wood). Countertops made from other materials, e.g. artificial stone, suitable for tables on the base along with the legs, are not applicable here. Due to the large difference in thermal expansion modules between them and wood, the table will soon become loose.
Next, the drawers are attached to the tabletop with long confirmations right through the end, on the left in the figure, with sizing with wood glue or PVA. It is difficult to achieve accurate assembly using ordinary wood screws, because... they are without a neck to keep the joint from moving.

The next point is that jibs in the corners (also in the figure) are required, wooden mortise ones or ready-made steel overhead ones. The legs at the corners are attached in the usual ways, on the right in Fig.
Desk drawer
A drawer is a classic structural module of a classic kitchen table. The guides for the table drawer are the same as for the drawers of the bedside table, chest of drawers, and closet. Since a large weight load is not expected in this case, and the smooth movement of the drawer and the ability to fully extend it are not of great importance, you can use inexpensive roller guides on which the keyboard boards of computer desks run.

The structure of a furniture box is shown on the left in Fig. It is not necessary to assemble its tray the old fashioned way on a box tenon (on the right in the figure); you can use self-tapping screws into the ends of the boards. The thickness of the boards for the drawer sides is 12-20 mm. The plywood bottom is often fastened with a furniture stapler, but this is not entirely reliable. It is better to attach it with self-tapping screws through the cranial bars along the contour of the bottom. The front of the drawer can overlap the front side of the table or fit flush into it, it doesn’t matter.
To install the drawer in the table, an opening is cut out in the longitudinal front drawer according to the cross-sectional dimensions of the drawer tray, plus allowances on the sides for the guides (indicated in the specifications for them), plus another 3 mm along the contour. Then the side support boards are installed to secure the guides. They are attached to the longitudinal frames from the inside using backing bars. There is no need to fasten it to the tabletop; it will become loose. Next, the box is assembled, attached to it and to the supporting boards, respectively. the guide parts push the drawer into place, that's all.

Quite simple
A completely simple, but good-looking kitchen table with a classic look can be made on a supporting frame made of boards, see fig. on right. Its length, if the drawer section is at least 120x20 mm, can be increased to 1100 mm. Tabletop – any weight up to 15 kg. The angle of inclination of the legs from the vertical is 15-20 degrees, this is one fundamental point in this design. The second is transverse ties made of 50x15 timber, they give the entire structure the necessary rigidity. So, although this table looks classic, in fact it is already a beam table.
Beam
Drawings of a pair of kitchen tables with a beam structure are given in Fig. Above - completely collapsible without tools. The tabletop is structurally any, placed on dowels, although the style of this table (rustic) is fully consistent only with a tabletop made of solid wood. A variant of its fastening from the underside without dowels on cranial bars is shown in the inset in the center on the right.

In this product, a beginner may find the bottom bandage (longitudinal tie) with a beveled through groove for the wedge to be a stumbling block. In fact, everything is very simple: the bottom bandage is assembled with glue from 3 layers of 10 mm plywood or boards. How to make beamed kitchen tables of this type, you can watch the following video:
Video: DIY table by components
The table, drawings of which are shown below, has 2 features. First, all material is boards with a width of 120 mm, timber is not used. The second is that only a tray is provided for the tabletop, and it can be made of glass, plywood with a mosaic of tiles or its fragments, etc. The gap between the board of the tabletop and the frame of the tray is prone to clogging, but removing the tabletop for cleaning is also easy. So whether it’s rustic or modern, whether it’s a kitchen table, boudoir or coffee table, you decide for yourself.
Without table support
Factory-made kitchen tables without bases are usually produced with postforming tabletops, pos. 1 in Fig. Those who want to make something similar on their own for a wooden tabletop will encounter the following tricks.

First, you still need a table stand, made of wooden beams from 50x50, pos. 2. The fact is that mechanical stress in boards always flows to the corners, where they are distributed very unevenly. But the wood under all 3 fastening points of the leg frame must be tensioned approximately equally, otherwise the fastening will loosen on its own. Timber piping expands the fan of stress in a given place to an acceptable value, but it is impossible to replace continuous piping with corner pads; they will be of no use.
The second is the material of the countertop. The standard threaded sockets for mounting the leg clips (item 3) are designed for laminated chipboard or dense, fine-grained wood. If the tabletop is made of pine, etc. layered rather soft wood, then the nests can, having torn the layers, crawl back out already during the installation of the clips. And the probability that this will happen when someone accidentally pushes the table is close to 100%
And the third is the leg clips themselves. In cheap sets of parts for tables without tabletops from “alternative” manufacturers, they are most often made of silumin, pos. 4. And silumin, as you know, is very, very fragile. In general, if you like such tables, it will be easier to buy a ready-made one with a guarantee. Most likely, and cheaper than assembling a kit for self-assembly at retail.
Books and Cheburashkas

The disadvantages of the table-book of the original design (see figure on the right) have already been mentioned above. In Fig. Below is a drawing of the design of a table-book (conventionally, only one rotary support is shown without the wings of the tabletop), which eliminates them in an amateurish, but effective manner. Simply, the width of the rotary support is reduced by more than half compared to the wing span of the tabletop (350 and 720 mm, respectively). Now the support rotates 90 degrees, so you can sit comfortably as you wish. The support, located in the working position along the longitudinal axis of the tabletop, holds it even better than an oblique one, and in order to lift the tabletop until the upper support bar comes out of the simplest clamp (see above), you need to raise your knees so that it will be very uncomfortable for yourself. Overall stability is ensured by the legs of the cabinet section, which must be made as long as possible, but not less than 600 mm. Otherwise, the swivel supports must be brought down in height to the floor level.

A fundamentally similar solution was used in the wall-mounted folding table (items 1 and 2 in the next figure), but here the bevel of the hanging corner of the support contributes to operational reliability. Which is quite applicable in the previous one. case: there are no contraindications for performing that support in the form of a trapezoid converging downward.

A proprietary solution to the problems of a book-table is removable legs stored in the cabinet. Installing them is not much more troublesome than catching the latch on the tabletop with a rotating support. Such a table-book is, of course, more expensive, but its operational reliability is complete: there is no latch, because it's simply not needed.
The next step in the evolution of the book-table is a design with a larger cabinet and one leg on each wing of the table top. There are half as many legs, which means the whole table is cheaper. Its stability has only increased due to the expansion of the cabinet, it is generally comfortable to sit, and there is more space in the cabinet (which is always in short supply in the kitchen).
Consumers liked such kitchen tables so much that they were already given the nickname - Cheburashka table. Probably, remembering from the cartoon: “Here, we built, built, and finally built it.” A folding kitchen table as it should be.
Alternative
If your kitchen is combined with a living room or you plan to combine them, then you don’t need to think about a kitchen table; it’s better to replace it with a column. You can not only drink at the bar counter, you can also eat there. The point of such a replacement is that at least half of the dining area goes beyond the kitchen, and the rest is used sporadically and does not wedge itself into the functional triangle. Result? See fig. It is more convenient to work and dine in a 5-meter kitchenette with a bar counter, which separates the apartment zones, than in an 8-9-meter Brezhnevka kitchen. Don't believe it? Let's do the math.

The kitchen table does not stand on its own. To plant the eaters, you need to add 400 mm along the contour, and another 300-350 for the approach. As a result, a 900x600 mm table requires approx. 2.5 sq. m of “living space”, and the table is 1200x700 mm and all 3.5 sq. m. It is very, very difficult to push such a thick piece into a kitchen of normal size without crushing the soft-boiled functional triangle. Here, even if two people sit at the counter from the kitchen side, the functional triangle is not disturbed, and the hostess is within easy reach of everything.
One of the famous culinary experts once said: “The kitchen is conservative, like the digestive tract.” Here, of course, he bent and overdid it. Something like a stove, refrigerator, food processor and microwave is not found in our stomachs, although the kitchen is really conservative. But even in the most conservative sphere, at some point there comes a time that requires fundamental changes.
Photo
You can make a table from chipboard yourself. To do this you will need a hammer, tape measure, screws, a screwdriver, a pipe with a diameter of 30 mm, flanges, jokers, a jigsaw, wheels and chipboards 16 mm thick, glue.
Drawing of a coffee table.
Preparatory work
To make a table from chipboard with your own hands, you will need to create drawings of each piece of furniture. Part parameters are indicated on the corresponding product diagram. Cut out patterns are applied to the material. Their outline is outlined with a pencil and scratched out with a nail (to prevent the material from chipping when sawing).
At the bottom of the table and tabletop patterns, the outline of the legs is printed. The data is transferred to the details. A center line is drawn. Mark 3 holes 12 mm deep. To do this, use an 8 mm drill. You can control this parameter with regular electrical tape. On the inside of the legs, markings are made for the holes that are necessary to support the shelves.

Cutting diagram for the coffee table top.
The ends are finished with a flexible U-shaped profile, the texture of which should match the appearance of the slabs. Experts recommend making a table from chipboard with your own hands using an overlay profile that will wrap around each part on both sides.
This does not require a groove for fastening.
Each end is treated with sandpaper. Then the profile is glued to the legs. The last elements are connected to the shelf using a dowel. The profile is placed on the shelf and cut off on the other side. If the glue has dried, its excess is removed.
Step-by-step instruction
- A tabletop and bottom shelf (size 100x50 cm) are cut out of chipboard. The flanges are screwed to the 1st part. An indent of 6-7 cm is made from the smaller side. A parallel line is drawn along the surface. Similar actions are repeated on both sides of the tabletop and shelf. This technique allows you to obtain 4 intersection points into which the flanges are screwed. Then rubber wheels are installed. The next step involves inserting the pipe into the flanges. They are secured with bolts.
- Classic rectangular. It is a tabletop with legs or supports. It is often equipped with drawers for storing office supplies.
- Combined with a window sill. The advantage of this model is maximum lighting above the tabletop. The window opening is equipped with additional drawers or shelves. Also, such a table saves space in the room.
- Angular. Such a desk for a schoolchild or an adult allows rational use of space and is characterized by a large working area.
- Desk-bureau. This product combines a chest of drawers and a tabletop. There are a large number of drawers and shelves under the work surface. The tabletop can be hidden in one of the bedside tables, freeing up space.
When making any modification of a table for a schoolchild with your own hands, you can get several significant advantages: cost savings, the ability to use materials to your own taste, and develop a unique and functional design taking into account the parameters of the room and its interior.
Rectangular
 Combined with window sill
 Folding
 Folding
 Angular
Materials and tools
In order to make a desk with your own hands, you first need to decide on the material, having first studied its properties.
| The most common raw material options are presented in the table. | Type |
| Characteristic | Chipboard |
These are wood shavings held together with an adhesive. The material is easy to process and lightweight. However, with frequent exposure to water, it swells and becomes deformed. Poor quality material releases formaldehyde. To process the product, use a fine-toothed saw or jigsaw. Sandpaper is used to remove chips. The product should not be loaded; it is not recommended to make folding transforming tables from such raw materials. Self-tapping screws and glue are used for fastening |
|
A more expensive material, characterized by environmental friendliness, a high degree of homogeneity, and resistance to moisture. The product is wood chips pressed under high pressure. Thanks to its high density, it holds furniture fasteners and fittings well. The slabs can be processed by grinding, sawing, and milling machines. Any design can be made from this material. |
|
This is a durable raw material, lightweight, and affordable. Plywood desks can be restored. But really high-quality material is difficult to find. You should not use it if the load on the table is significant. Not recommended for use by beginners. Processing plywood requires heavy-duty tools | This material is strong, natural, durable, can withstand any fasteners, and can be easily restored. But wood has a lot of weight and high cost. The product is difficult to process; it must be carefully polished, coated with antiseptics and varnish. Nevertheless, any modification of the table can be made from wood |
Pallets | They are used to produce classic rectangular models. Pallets can withstand heavy loads, they are inexpensive, environmentally friendly, and practical. Grinding machines, grinders, drills, and jigsaws are used for processing. |
It is better for a novice craftsman to choose chipboard or MDF, since these materials are the easiest to process. To fix parts, nails, screws, glue, and staples are used.
 Chipboard
 MDF
MDF
 Plywood
 Natural wood
 Pallets
 Materials for fixing parts
Choosing a tabletop
Before making a desk with your own hands, you also need to decide on the configuration of the tabletop. Products are:
- Rectangular. This option has good capacity and fits into any interior. But it is not suitable for small rooms, as it takes up a lot of space.
- Radial. Such countertops are often installed in apartments where several children live. Their use is possible only if there is a large area.
- Corner. They allow you to use the entire space of the room. The outlines can be symmetrical or L-shaped.
 Rectangular
 Radial
 Corner
As for the material of manufacture, there is also a choice.
Product type | Characteristic |
Laminated chipboard | It is resistant to moisture, has a high degree of wear resistance, and cuts well. It can be cleaned with various household products. But despite its resistance to moisture, chipboard should not be exposed to it frequently, as the material may swell. |
It can be used in children's rooms, as it is environmentally friendly, has a wide range of colors, is easy to process and durable. But if the surface is glossy, scratches will be clearly visible on it. |
|
The most durable and durable material that matches any design style and is environmentally friendly. But a wooden tabletop is expensive, has quite a lot of weight and requires restoration after some time of use. |
You can also make a design with a glass tabletop. This material is wear-resistant and makes the furniture original and light. However, the glass always leaves marks, so it has to be washed and polished frequently.
 Laminated chipboard
 MDF
MDF
 Tree
Tree
How to determine the optimal dimensions
The desk must be assembled after its optimal dimensions have been determined. For an adult whose height is above 175 cm, they are: height - 75 cm, width - 50 cm, length - 70 cm. As for children, the parameters are different.
If the table is needed as a workstation for a computer, about 40 cm is added to the standard tabletop width. For schoolchildren, the parameters are slightly different. Here the minimum width is 1 m, the depth is from 60 cm. For a child to be able to place his hands normally, a space of 500 × 500 mm is required. The preferred option is a product with adjustable tabletop height and angle.
For adults, a design with a length of 110–140 cm and a width of 50 to 80 cm is suitable for working with documents.
 Minimum table parameters for a schoolchild
 Optimal table parameters for an adult
Preparation of the drawing
Making a wooden table with your own hands begins with drawing a sketch, from which drawings are created. In addition, instructions and work sequence diagrams will be required. It is important to consider the following parameters:
- layout and size of the room, the presence of other pieces of furniture;
- purpose and dimensions of the table;
- type of material used for work;
- product functionality;
- presence of additional structures.
If a beginner is doing the work, it is better for him to start with a simple desk, and it is worth making sure that the step-by-step instructions are quite detailed. This will minimize wasted time and prevent the risk of making mistakes.
If there are 2 children in a family, and there is not enough space at home, you can organize a workspace using a double structure, which is equipped with additional drawers and cabinets. Sometimes the tabletop is installed in a niche between the walls, which saves usable space. You can also give preference to multifunctional products in which the upper part is installed on a rack. Rectangular tables can be placed in any area of the room.
To make a drawing, you need a sketch, a sheet of paper, a pencil and a ruler. All parts of desks are shown with dimensions. The diagram indicates the general edges of the furniture and draws all its details. If you can’t come up with a design yourself, you can find ready-made drawings of a desk, and then adapt them according to your dimensions.
Based on the resulting diagram, a cutting map of parts is made, and the drawing is detailed. It has the form of a table, which indicates all structural elements (even small ones), their quantity, as well as the exact dimensions in millimeters. In this case, it is necessary to take into account the characteristics of the room and the thickness of the material.
 Computer corner
Step-by-step manufacturing algorithm
It is better for a beginner to start working with a simpler material - chipboard. It can be cut immediately at the place of purchase according to the specified dimensions to prevent damage to the slab. Now you need to collect the necessary tools:
- hammer;
- a screwdriver, as well as a drill with drills;
- fastening elements (self-tapping screws or special bolts for furniture);
- wood glue;
- measuring tools, pencil, building level.
If the desk requires the use of solid wood, you will additionally need a sanding machine and a milling machine. Clamps are needed to secure the parts before fixing.
To create the design you need the following parts:
The product is assembled in stages. You can use ready-made instructions:
- Holes are made in the central and side elements for the lower shelf. It is better to draw marks at a height of 5–7 cm from the floor. You can secure the shelf using self-tapping screws.
- In the same way, the upper shelf is installed at the selected height.
- Next, the rear wall is fixed. It is located at the same height as the end of the side and central parts.
- Now the second side post is screwed to the rear wall.
- Lastly, the countertop is installed. To do this, holes are made in the side elements and dowels are installed. You need to do the same with the very top part. Here the holes should be deep, but not through. Now the dowels need to be lubricated with glue, inserted into the ends of the frame, and then put the tabletop on them.
Further finishing depends on the material used. Laminated chipboard or MDF does not need to be additionally painted, but the wood will have to be sanded, treated with a primer and antiseptic, and then painted or varnished.
Making a desk with your own hands is not difficult if you draw the drawing correctly and think through every step of the work.
 It is also important to choose high-quality material, in which case the self-designed product will last a long time.
The advantage of such a table is that you can choose its color, shape and size according to your taste, and you can also make it as suitable as possible for the interior of your room. It is easy to find particle boards for tables in almost any hardware store. To make a table from chipboard, you need to divide it into its component parts and make a pattern for each of them. Having received the patterns, they are applied to the material for the future product. The model is outlined with a pencil, and a nail is re-drawn along its mark (to prevent damage to the chipboard when sawing). We cut out the table top and the bottom shelf (size – 100 × 50 cm).
Assembly steps
 Screw the flanges to the 1st part. From the smallest side, make a gap of 6-7 cm. Draw a parallel line along the plane. Similar actions are repeated on both sides of the table top with a shelf. This method allows you to get 4 intersection points into which the flanges are screwed. Then install the wheels.
The next step involves inserting the pipe into the flanges. They are fastened with bolts. To give the furniture durability, the surrounding supports are connected with a pipe and a joker. To make the table more attractive, you can add a shelf to it.
In this case, ordinary pipes are replaced with special analogues with fasteners. Then cut the glass to the appropriate dimensions and insert it into the fastener.
To protect the product from moisture, use a varnish coating. To treat furniture with it, use sandpaper and a special remover. If the plates from which the table was made were previously painted, they must be cleaned of varnish/paint. For this, experts recommend using a mechanical, thermal or chemical method. In the latter case, the reagent is applied to the coating with a rag. After 10 minutes, it is removed from the surface along with the loose coating. The thermal method of removing old paint or varnish involves using a hair dryer. The coating heats up and the paint is removed with a rag. The mechanical method is performed using a grinder (at low speed) and sandpaper.
Product finishing
 To apply paints and varnishes we use a roller or brush. In the case of using colorless varnish, the product must be treated with a primer or stain in several layers.
To reduce material consumption and hide surface roughness, experts advise priming the table. For this, a water-based composition is used. After 12 hours the surface will dry. Next, the table is varnished and left for a day to dry completely. After a day, reapply the varnish.
A coffee table can be decorated in various ways. A mosaic would be an excellent design solution. To install it, you need sandpaper, a brush, a spatula, and paint. First, the object to be decorated is coated with paint. Cover the areas you plan to decorate with glue. Next, the mosaic slabs are laid and pressed. After drying, treat the seams between the tiles. This is done with a special grout. Places where finishing has not been done must be covered. After completely decorating the tabletop, the product is ready for use.
Other examples of decoration

Even a novice craftsman can make a table with his own hands from chipboard, and this is not surprising, because chipboard is easy to process, reliable and affordable. In order to make a simple design, it is enough to purchase the necessary materials, select tools and suitable drawings.
Properties of laminated chipboard
Laminated chipboard is widely used in furniture production because it has a number of advantages over wood, plastic and other materials. Thus, it is characterized by its low cost, ease of processing, resistance to moisture and mechanical damage, durability, and heat resistance (you can place coffee pots and hot frying pans on it).
This material does not delaminate or disintegrate during processing, so dowels and screws can be screwed into it. Laminated chipboard has a pleasant appearance - it looks like natural wood. Now on the market the material is presented in a wide range of colors and patterns, which allows you to choose an option that suits any interior.
But laminated chipboard also has disadvantages. Thus, it contains formaldehyde resins, which have a negative effect on the human body. In addition, it cannot be subjected to deep milling (it will begin to crack), so it will not be possible to cut a beautiful design on it.
When choosing laminated chipboard for tables (especially for a child’s room), you need to pay attention to the following parameters:
- Degree of toxicity. Chipboard comes in 3 classes: E1, E2 and E3. Each class allows the content of a certain amount of formaldehyde; only class E1 can be used for furniture assembly. In order not to make a mistake with your choice, it is better to purchase material from trusted manufacturers. If the buyer buys laminated chipboard from little-known suppliers, then he needs to analyze the material himself. To do this, just get close to the product in the store. If the formaldehyde content is increased, an unpleasant odor will be felt at a distance of one meter from the bag. You should also be suspicious if the product emits a pleasant aroma. This may be evidence that manufacturers are trying to hide the smell of formaldehyde.
- Strength indicators. The main indicator is the density of the material - the denser it is, the stronger it is. In the picture you can see a product with a high density (left) and a lower density (right). Optimal density is 650-660 kg/m3. Before purchasing the tile, you need to inspect it on both sides; you can try to press a screwdriver or other object into its end. It will not be possible to press an object into dense material.
It should also be remembered that some manufacturers cover chipboard not with laminate, but with paper. Such a fake can be identified by stroking the surface of the slab with your hand (the buyer will be able to feel with his fingers that it is paper and not laminate).
Simple desk
The easiest way for a novice craftsman to assemble a simple table from chipboard for a study or children's room.

To work, you will need a drawing of the future product with all dimensions, as well as materials and tools:
- Four sheets of laminated chipboard: 1300x60 mm for the lid, 1170x400 for the inner wall, 2 sheets 450x740 for the end walls.
- Confirmations for connecting parts, caps for nail heads, end edges. To twist confirmations, you will need a drill of suitable length and diameter.
- Hand tools: ruler, square, tape measure, hammer, knife, screwdriver, furniture stapler, pliers, clamps, hex key for confirmations.
- Circular electric saw.
- Electric drill with reverse or screwdriver.
- An electric jigsaw that allows you to adjust parts to size.
- Sanding machine or sandpaper.
- Workbench for installing removable vices.
First you need to purchase a laminated board from a hardware store. It is advisable to go to the hypermarket with a drawing of the future product; the dimensions of all parts should be indicated on the diagram. You can cut out the necessary elements from a sheet of laminated chipboard yourself using a jigsaw, but this requires appropriate skills and time. You can order a cut to size directly from the material supplier; to do this, you just need to provide him with a drawing of the future design.
You need to glue a decorative edge to the ends of the prepared table parts; to do this, you need to attach the edge to the end of the sheet and run a heated iron along it. The heat-sensitive adhesive on the back of the decorative strip will melt and ensure its secure attachment to the end. Edgebanding of parts can also be ordered from material suppliers.
At the next stage, using a drill, you need to drill holes in the future table legs. The top hole should be 50mm from the top edge of the leg and the second hole should be drilled 300mm below. The distance from the long edge of the slab to the hole should be equal to half the thickness of the inner wall. So, if its thickness is 26, then the hole must be drilled at a distance of approximately 13 mm from the edge.
Then you need to take a slightly larger drill and use it to make a shallow groove over the hole for the confirmations. The head of the fastener will be recessed into this groove.
The transverse partition is attached to the legs with holes and attached to them with furniture screws. The tabletop is placed on top of the base and screwed with confirmations, for which holes are pre-drilled. The screw heads recessed into the chipboard are closed with special plugs. A simple desk is completely ready.
This model is distinguished by its functionality and large size, while the corner table occupies unused space in the room, freeing up space for other furniture. Making this item is not difficult at all. You need to buy sheets of laminated chipboard or MDF and ask the store employees to cut them according to the pattern.
The work begins with all visible sections of the future product being sanded with sandpaper and then covered with a decorative edge. If desired, pasting can also be ordered at a hardware store. The side walls are connected to the back wall with nails or self-tapping screws. You need to pre-drill holes for the fasteners; their diameter should be slightly less than the thickness of the fasteners themselves.
Then you need to turn the tabletop upside down and mark the places where the dowels are attached. After this, deep, but not through holes are drilled in appropriate places. The dowels should be lubricated with glue and used to attach the top cover to the base. After complete drying, the product can be used for its intended purpose.

Furniture for kitchen
A do-it-yourself chipboard tabletop can be used not only in the office, but also in the kitchen. The technical characteristics of particle board allow it to be used in conditions of high humidity and temperature changes.
To work you will need:
- table top sheet with plastic coating, length 3000, width 600 and thickness 36 or 26 mm;
- end and connecting strips;
- end edges and ties;
- supports.
The legs can be made from timber yourself or purchased ready-made. The most popular option is round chrome-plated legs with a diameter of 60 and a height of 71 mm. They can be shiny, matte or painted, and even height-adjustable legs are sold.
First of all, markings must be applied to the future tabletop; roundings with a radius of at least 60 mm should be made at the corners. Then the tabletop is given the required shape using an electric jigsaw.
It is advisable to use a saw with reverse teeth, otherwise chips may appear on the plastic coating. First, the corners must be cut with a jigsaw with a margin of 2 mm, and then rounded with a grinder.
After this, you need to process the ends of the table cover. This operation not only improves the appearance of the product, but also protects the base from moisture. To work, you will need edge tape or furniture edging made of polyvinyl chloride. The best option is a plastic mortise T-shaped edging with girths.

At the next stage, the groove for the furniture edging is milled. Depending on the thickness of the edge, milling is performed either in the center of the end or with a slight offset. The exact milling parameters are calculated after determining the edge geometry using a caliper. Then the ends of the table top and the inside of the edge are coated with silicone sealant. After this, the edging is stuffed using a rubber mallet. Excess sealant is removed.
Now all that remains is to attach the legs. To do this, markings are made on the back side of the tabletop; it is recommended to place the legs at a distance of 100 mm from the edges. Self-tapping screws with countersunk heads about 20 mm long are used as fastening elements. The legs are put on the holders and secured with a hex key. The furniture is ready.
Coffee table
To create this simple design, you only need a drill, a screwdriver, self-tapping screws, confirmats and laminated chipboard cut into suitable pieces.
The table will consist of:
- countertops 736x700 mm;
- 4 planks 464x100;
- 2 shelves 700x500;
- 4 legs or wheels;
- 4 plastic corners;
- 8 confirmations;
- 16 self-tapping screws 3.5x16;
- melamine edge or ABS.
You can cut the shelves and tabletop yourself using wood saws with fine pitches. An easier option is to purchase materials cut into suitable pieces at a hardware store.
All end elements must be glued with a decorative edge. Then the tabletop should be connected to the side strips using plastic corners and self-tapping screws. After this, a shelf is attached to the center of the racks. In order for it to hold tightly, it must be secured with confirmations, for which holes are first made with a 4.5 drill.
At the next stage, the bottom is attached to the vertical slats in the same way. After this, the table is equipped with wheels or legs made of laminated chipboard. It is recommended to attach the supports at a distance of 15 mm from the edges of the product. At this point the work is completed, the table is ready for use.