How to make a pumpkin lantern for Halloween. Jack-O-Lantern: How to Make a Scary Halloween Lantern How to Make a Halloween Pumpkin Without a Pumpkin
Making a Jack O'Lantern, how to carve a Halloween pumpkin and turn it into a lantern. We present to you step by step wizard class with photos and descriptions of each stage. Find out how to make your own Halloween pumpkin without missing a finger.

Do you want to decorate your home with an unusual and slightly creepy lamp? In Ireland and the UK, Halloween pumpkins are present in almost every home! It is believed that it helps to scare away evil spirits that become active on the eve of All Saints' Day.
Everything you need
Romantic types may try to make a “Jack-O-Lantern” in a deep forest or in a cemetery. We will tell the reader how to make a pumpkin for Halloween with your own hands in a more comfortable, home environment. You can use yours for work kitchen table, do not forget to take care of good lighting! Prepare these things in advance:
- Two sharp knives - small and large
- Black marker, felt-tip pen or gel pen
- Drawing of a pumpkin with an ominous grin
- One tablespoon
- Candle small size
- Insect dummies and other “decorations” - to taste
- Actually, the pumpkin itself, from which you can cut a lamp

The candle should not be larger than the pumpkin; we will place it inside the lamp when the work is completed. Also prepare a small bowl or plate in which you can place the pumpkin pulp and seeds.
Carving a pumpkin with your own hands - 5 steps
Stage 1. Now you will learn how to carve a Halloween pumpkin. In order not to spoil the fruit, you must first apply “markings”. Using a marker, we draw eyes, a nose, and a grinning mouth on the pumpkin.

We used a ready-made photo that we took from Google Images for the request “pumpkin for Halloween photo”; you can download another picture or use your own imagination.

Stage 2. Cut off the top of the pumpkin. For this job you will need big knife. Try to cut out the top carefully, in one motion. About the same as the maniac in your favorite horror movie does.

But if you don’t succeed with “one blow,” then don’t be discouraged - continue to chop up the unfortunate fruit.

Stage 3. Scoop out the pulp and seeds. Here we cannot do without a tablespoon, which we prudently stocked up before the start of “”. Don't throw away the pumpkin seeds - they can be dried and fried. They are healthy and very tasty.

Stage 4. Cut holes for the nose, eyes and mouth. It’s better to do this with a small knife - it will be more accurate and there will be less chance of cutting your fingers.

Stage 5. Spray the inside of the pumpkin with varnish. The fact is that a prepared Halloween pumpkin with your own hands dries out quite quickly, becomes deformed and even begins to mold. Therefore, if you want the “Jack Lantern” to serve you longer, its “insides” should be varnished. You can use any hairspray for these purposes.

Not enough creepiness?
Now that you have figured out how to make your own Halloween pumpkin, you need to decorate the craft. It's time to get into the gloomy spirit of the ominous holiday and show your imagination. For our part, we are ready to give you a couple of ideas.

If there is a joke shop in your city, then visit it - this is a real Klondike! Here you can buy “wormy” fingers, dummies of hairy spiders and dried insects and other “cute” things. If you paste them over a pumpkin, it will look much more piquant! You can also paint a couple of “bloody” spots on the surface of the lamp.

Don't want to spend money or don't have a specialized store within walking distance? In this case, you will have to “sacrifice” the old broken doll. Disassemble the toy into separate arms, legs and head, then attach them in a chaotic manner to the finished pumpkin lantern.

We guarantee that this Halloween decoration will look truly sinister, especially in the dark.

And, of course, don’t forget to place a candle inside the lamp. A flickering light that casts mysterious silhouettes on the walls will help create a gloomy atmosphere in the room.
Why did the pumpkin become a symbol of the holiday?
According to an ancient Irish legend, it all started when a certain blacksmith Jack met Satan. Like many Irish people, the hero of our story loved to drink. So he invited the Devil to have a couple of drinks at the local pub. As one would expect, the Prince of Lies and all sorts of vices found no objections to such a proposal.

Jack was a little stingy, so he suggested that Satan turn into a coin so that he could pay for the drink with counterfeit money. The devil agreed and turned into a coin, which the blacksmith immediately put into his pocket. And in this pocket there was already , so the Prince of Darkness was trapped.

However, Satan managed to persuade Jack to let him go, in exchange for a promise not to harm the blacksmith and not lay claim to his soul.

When sinner Jack died, his soul was not allowed into heaven or hell. The devil only gave the blacksmith an eternally burning coal from the underworld as a farewell. Jack put the coal in the lantern he made from a pumpkin. Since then, the spirit of the former blacksmith has been wandering around the world, illuminating its path homemade lamp, and cannot find peace in any way.
Pumpkin lantern (Jack-lantern) is the main attribute of the Halloween holiday. Traditionally, a jack-o'-lantern is placed in a house window or doorstep to ward off evil spirits. The lantern is a hollow pumpkin with holes in the shape of eyes, nose and mouth. A burning candle is placed inside the pumpkin. Carving a jack-o'-lantern is a fun and festive way to celebrate Halloween.
How to Carve a Jack-O-Lantern for Halloween
Choose fresh pumpkin in the shape you like best. Some people prefer their lantern to be low and round, while others prefer it to be tall and oval.
Cover work surface before you begin, as carving a pumpkin can be quite a messy job.
Draw a circle or hexagon on the top of the pumpkin in preparation for making the hole. The hole should be large enough to fit your hand and a spoon to remove the seeds and pulp from the pumpkin. The pumpkin stem should be the center of the circle.

Use kitchen knife, a tool for carving a pumpkin or reciprocating saw to cut out the top of the pumpkin according to your sketch. At the same time, you need to cut off the top of the pumpkin at an angle so that the edges of the cut remain wide enough, this is necessary so that the lid stays on the pumpkin and does not fall inside.
Remove the top of the pumpkin you just carved and, using a large spoon, scrape the pulp and seeds out of it and the inside of the pumpkin. Later you can fry it in the oven. Peel the side of the pumpkin where the face will be located. inside until it is about 2 centimeters thick.
Determine what the pumpkin's face will look like and apply the design to the pumpkin. If you will be using a traditional pumpkin face, use a marker to draw triangles for the eyes and nose and a crescent shape with a few teeth on the top and bottom of the mouth using a marker pen on a clean pumpkin. If you choose to use , attach the edges to the pumpkin using duct tape. Transfer the design to the surface of the pumpkin by using an awl or other sharp object to make intermittent holes along the lines of the design. Remove the template.
Make sure to draw the eyes, nose and mouth large enough, you will have a hard time cutting out the tiny features when you use a large knife blade to cut through the tough skin.
Take a knife or special tool For carving a pumpkin, you can also use a jigsaw. Carving tools are usually included in pumpkin carving kits. If you decide to take the traditional approach, use a medium-sized knife. Its blade should be at least 1cm larger than the pumpkin skin and thin, especially if you want to carve detailed parts.
Carve the face slowly and avoid hasty steps. Following the lines of your drawing, cut out the entire face. You need to start with small details such as eyes and nose. Then the mouth is cut out. After you have cut out one of the pieces, gently press it with your fingers so that it falls inside the pumpkin. The pulp sticking out of the slits can be cut off at an angle. To preserve the pumpkin longer, grease
If you are new to the difficult task of carving, we recommend starting with the classics and making a regular Jack-o'-lantern. The “face” of such a pumpkin is familiar to everyone: its nose and eyes are in the form of triangles, and its mouth is ominously bared. For the lamp to be a success, the main thing is to choose a round and as symmetrical vegetable as possible. You need to wash the pumpkin, degrease the surface with alcohol, cut off the “cap” and scoop out the pulp and seeds with a spoon. Then apply the desired design and cut it out with a knife. To prevent the vegetable from drying out, it is good to coat the inside with Vaseline or fatty cream. Finally, place a candle or electric garland inside.

Who said Halloween pumpkins have to be scary? Her “face” can be given any expression, or you can not limit yourself to just this, creating entire compositions! Funny pumpkins, angry and predatory pumpkins, pumpkins with teeth, winking, scared, laughing - all these variations can produce vivid impression for your guests on Halloween.

In the West, pumpkins are mostly carved by children, so it is not surprising that Spidermen, Pokemon, members of the Addams family and other fictional characters look at passers-by from the threshold of every house. At the same time, it is not necessary to completely copy the image of the hero; some characteristic detail is enough. For example, for Bart and Ernie from Sesame Street, these are round noses, furry eyebrows and forelocks. If this method of preparing a pumpkin seems too complicated for you, you can simply paint a face on it with acrylic paints.

The mummy is a popular image for Halloween, so why not give it a pumpkin twist? To do this, you don’t even have to do carving; you can simply wrap the vegetable in bandages and draw a mouth on top and glue on the eyes. If you want to end up with a lantern, you will still have to make several holes. Preparatory stage the same as for any Jack-o'-lantern: wash, degrease, clean out the cavity, cut out the face.

Zombies are another popular Halloween image, and a pumpkin looks great with it. The main thing for such a character is to make a leaking brain, which will require a fair amount of tinkering. As in standard version, the fruit needs to be washed through side hole clean the cavity, cut out the nose, mouth and eyes. Then cut off the skin at the top of the pumpkin, leaving enough thin layer pulp. Then it’s a matter of small things - using a pen, manicure stick or other thin object, depict the brain’s convolutions and folds.

A pumpkin in the shape of a witch’s house looks interesting, and if you have the strength and desire, you can create an entire witchcraft quarter. Making a hut is even easier than a regular Jack-o'-lantern. To do this, you need to apply a design to the surface of the vegetable, and then cut out windows, doors, the moon, stars and other details of your composition. Finally, don’t forget to place a candle inside the pumpkin. The mysterious light pouring from the windows of the house will remind you and your guests that you are not the only one who does not sleep on Halloween night.

If all the options above do not impress you, then we suggest making a smoking pumpkin. To do this you will need glycerin, which is easy to buy at a pharmacy or craft supply store, and can. The pumpkin needs to be cleaned from the inside and the face cut out, then a lighted candle should be placed in the vegetable. Cut the tin in half, leaving the “legs”: you should get something like an aroma lamp. Cover the candle with this structure and pour glycerin into the recess on top. When exposed to heat, it will smoke, creating a truly demonic effect.

This lantern is suitable for those who have already gained enough experience over the previous holidays. Cut out a pattern or some kind of picture (especially with an abundance of small parts) is much more difficult than the usual Jack face. The best option for beginners, use a paper stencil that needs to be attached with tape to the pumpkin. Walk along the contours of the design with an awl and only then take up the knife. Important nuance: how more complex drawing, the thinner the walls of the pumpkin should be.

Such a pumpkin cannot become a full-fledged Jack-o'-lantern, but it's a cute detail festive interior- quite. In this case, there is no need to cut off the stalk, extract the pulp with seeds and think about how best to put a candle. But you will have to take care of something else - a decent set of tools for carving. Wood cutters are ideal, but you can try using a peeling knife. To make it easier, you should cut out the design using a stencil.
Although Celtic monks have long made lanterns from vegetables, usually rutabaga, beets and turnips, to drive away evil spirits, the tradition of lighting a jack-o-lantern is owed to the inhabitants North America. They were the first to use pumpkin and made it one of the main attributes of the most “terrible” holiday.
Classic Halloween Pumpkin
Traditionally, the jack-o'-lantern is carved into the shape of a scary head. Americans call it the Jack-O-Lantern. It appeared thanks to an old legend about an old farmer named Jack. This man was lazy, dishonest and very fond of drinking. At the same time, he managed to deceive the devil twice. After death, there was no place for Jack in heaven or hell. Looking for a way in the darkness, the farmer asked the devil for a lamp, but he only threw him a few smoldering coals. Jack had to make a jack-o'-lantern and put coals in it. With him he began to wander in search of peace between earth and sky.
Making your own pumpkin for Halloween is not that difficult.
- To keep your pumpkin decor fresh for a long time, soak the vegetable in water for several hours.
- To make the pattern last longer, it should be coated vegetable oil or Vaseline.
- To prevent the jack-o-lantern from frying from the inside, make several small holes in the lid of the vegetable - streams of hot air will flow out.
- If you rub the inside of a lantern with nutmeg, it will emit a pleasant aroma when lit.
- Try to choose a fresh pumpkin for your lantern. The fruit has a not too hard skin, so it will be easier for you to cut out patterns on it.
Making a lamp
Take a pumpkin, its size may vary, but its color is only orange. Draw a circle, square or zigzag around its stem. The size of the figure must be large to free the vegetable from the pulp. Using a thin knife, cut through the fruit along the marked lines. Do it under small angle so that the cut off top does not fall inside the lantern.
Using a spoon, remove the pulp and seeds from the vegetable. Using a felt-tip pen, draw the contours of the fetus’s eyes, mouth and nose – the mouth is often shaped like a crescent with a pair of fangs, the eyes and nose are shaped like triangles. If you have a stencil, attach it to the vegetable with tape, and then transfer the outline of the design by piercing the lines with a thin awl or needle. Cut through the peel of the fruit along the marked lines.

You can remove the cut pieces by prying them with a knife, or push them inside. To make the outline beautiful, scrape off the protruding pulp with a knife. Remove the cut pieces from the fruit, place a candle inside and cover it with a “lid”. The Halloween pumpkin is ready.

Original pumpkin ideas
Halloween doesn't have to be limited to just Jack-O-Lantern. The house can be decorated with other pumpkin crafts. This fruit is an excellent material for creativity. You can create many unusual decorative items from it.
Modern pumpkin
If you don't really like the sinister face, you can decorate the vegetable more in a modern way. For example, using rivets.

This pumpkin is easy to make. Purchase several packs of rivets from a craft or sewing store. They need to be stuck in a row so that they run parallel to the stripes of the fruit. This is how you need to decorate the entire pumpkin.


Other unusual pumpkin for Halloween, the photo of which is presented above, is also simple to create. You will need acrylic paints in contrasting colors. They need to paint the peel through the sections.


Elegant lamp
Option 1
In addition to its intended purpose, such a lamp can serve as a vase.

You will need:
- drill and drill bits of different sizes;
- glowing sticks- plastic straws, which after breaking can glow for a while or wireless LED lights;
- pumpkin;
- tape or tape;
- glass beaker or jar;
- large knife;
- flowers;
- scissors.
Using a marker or felt-tip pen, outline the design with which you plan to decorate the fruit. It should consist of holes different diameters. They are best done using various verifiers. To make the design symmetrical, use electrical tape. When all the holes have been drilled, use a knife to cut off the top of the vegetable at an angle and scoop out its contents with a spoon.
Read also:
What can you take on a plane? useful tips

If you want to decorate the pumpkin with flowers, place a jar or glass filled with water inside it. Place sticks or lanterns around the container for illumination.

Option 2

Making such a lamp will require skill.
You will need:
- pumpkin;
- screwdriver;
- chisel for cutting linoleum;
- nail or awl;
- pattern template;
- masking tape;
- spoon;
- candles.
Cut a hole in the bottom of the fruit, and then use a spoon to remove the pulp along with the seeds. After this, attach the template to the vegetable with masking tape and pierce it with a nail or awl in accordance with the lines of the drawing. The holes should be next to each other.

When the design is transferred to the fruit, take a chisel and carefully, trying not to cut through the flesh too much, cut out the peel along the puncture lines. After this, completely remove the peel, but keep in mind that the holes should not be through. In this case, the light from the candle will not be bright, but dull.

To provide ventilation, and at the same time beautiful view, using a screwdriver or drill, drill several through holes in the vegetable. Original pumpkin ready!

Glowing pumpkin
These pumpkins will look beautiful with the lights off.

You will need:
- fluorescent neon colors different colors;
- several pumpkins;
Clean the surface of the vegetable. Starting from the stem, draw thin vertical stripes, then next to them draw stripes of a different color.

The lines do not have to be neat; they can go down to the bottom of the fruit or up to the middle. You don’t have to paint over the entire surface of the vegetable. You can apply other designs this way. Before painting the pumpkin, you can cover it acrylic paint any desired shade.
Pumpkin candle holder

Such candlesticks, depending on how they are decorated, can become beautiful autumn decor or worthy decoration on Halloween.
You will need:
- small pumpkin;
- brush;
- drill;
- candle;
- glitter;
- universal glue.
Measure the diameter of the candle and select a hole saw of the appropriate diameter. Cut off the stem of the fruit, determine its middle and carefully drill out the core. From time to time, clearing the drill from the pulp, drill the vegetable to the required depth. If you don't have such a tool, you can make do sharp knife with a thin blade.

When the hole is ready, cover the fruit with glue and sprinkle it generously with glitter. Once dry, spray with hairspray to prevent glitter from falling off. Now place the candle in the hole.
Spooky pumpkin ideas
For those who are sure that they need to scare someone on Halloween, we suggest making scary crafts out of pumpkins.
creepy pumpkin
This is a variation on the Jack-O-Lantern theme. This Halloween pumpkin will impress your friends and family. To make it you will need 2 pumpkins - large and small.
Let's deal with the big fruit first. Cut off its top; do this at an angle so that later the “lid” does not fall through. Use a spoon to remove all the pulp and seeds. After that, apply the design as in the photo. The opening of the “mouth” should be large enough to fit a smaller pumpkin.

Cut out the mouth along the contour and highlight the teeth. The latter need a little polishing.

You can start making the eyes. Make pupils - they will give the craft a more frightening look.

Now take a small pumpkin. She needs to be made scared. It is better to remove the pulp from the fruit through the mouth, so it must be large. When the small pumpkin is ready, insert it into the large mouth.

Pumpkin - bat
Halloween symbols are evil spirits, including the bats. So why not make these ominous creatures from another traditional attribute - pumpkins.
You will need:
- black acrylic paint;
- white cardboard;
- small pumpkin;
- black paper.
Cover the surface of the pumpkin with paint. While it dries, start making the eyes, ears and wings. Cut out eyes from white cardboard. Make pupils from black paper and glue them to the center of the cardboard eye blanks.
Draw a pattern of wings and ears. Place them on black paper and cut out four identical shapes. Place 2 shapes together and glue them together, after placing part of a toothpick inside. For the wings, you can use skewers or stiff wire.
Read also:
How to grow fruiting lemon at home
Glue the eyes to the surface of the pumpkin, then stick the ears into the upper part of it, and the wings not far from them.
Paper pumpkin
Not everyone has the opportunity or desire to tinker with a real pumpkin. The house can be decorated with a paper pumpkin.
Option 1
Cut out blanks from green and orange color, as shown in the photo. Sizes may vary depending on how big you want your pumpkin to be. Take a rectangular piece - the middle of the fruit, bend it so that a cylinder comes out, and glue it together. Bend all the cloves outward.

Apply glue to the bottom and top teeth of the cylinder. Glue one of the long strips to the teeth. Glue the remaining strips in the same way.

Take 2 green pieces and score them, cutting one piece from bottom to middle and the other from top to middle. Connect the parts. Glue the tail to one side of the pumpkin.

Option 2

You will need:
- orange paper;
- thin green ribbon;
- thin wire;
- needle;
- scissors;
- pencil;
- glue;
- pliers.
Make a template that matches the picture below and use it to cut out blanks from orange paper.


Bend each segment slightly inward, and then do the same with their round parts.
Gather the round ends together lower parts and insert the wire with the sharp end into the hole.

Glue the first and last segment together, then slide the top round pieces onto the wire and round the end of the wire.

Tie a ribbon to the curve.
Pumpkin from a book
If you have unnecessary books lying around, you can find a worthy use for them, for example, make something unusual out of them. There are many crafts that can be made from unwanted publications - postcards, frames, boxes, lamps and even flower pots. We'll show you how to make a Halloween pumpkin from an old book.
You will need:
- Old book;
- paper;
- paper cutting knife;
- glue – glue in a gun is suitable, it can be replaced with PVA;
- a can of orange paint;
- green decorative ribbon;
- twig;
- pencil.
Draw the outline of the future pumpkin on paper. To make it symmetrical, fold the sheet in half, draw only half of the fruit, and then cut it out. Separate the cover from the book and fold the prepared template onto the binding.

Trace the template with a pencil, separating several pages - 5-6, and start cutting out the shape.

Continue cutting out book pages until you run out. When you cut out the pumpkin half, try to cut a couple of millimeters closer to the center each time, otherwise your fruit will begin to expand. It is better to cut off unnecessary pages from the spine with a paper knife.

When the workpiece is ready, glue the first one and last page. Apply glue to one sheet at a distance of 5 mm from the binding, attach another to it and press. To make the pumpkin stable, glue a few more pages together. different places. Place the book vertically and, slightly pulling away from the binding, straighten each leaf, making the pumpkin more symmetrical. If necessary, you can glue the pages.

Once the pumpkin has the desired shape, start painting. Place the product on the paper and spray paint on it from a can. You can paint the edges or the entire surface of the petals.

Cut a small piece from the prepared stick, apply glue to one of its ends and insert it into the core of the product. Hold the stick until the glue dries, and then tie a ribbon.
During Halloween celebrations, people traditionally decorate their homes with a wide variety of pumpkins. These can be cute little crafts or huge grinning monsters. Making your own traditional Halloween decorations is easy. In addition, the vegetable can be used for decoration and decoration of the home.
Below you will find useful and practical answers to the following questions: why a pumpkin is a symbol of Halloween, how to carve it for the holiday with your own hands, how to make it beautiful and interesting.
Probably each of us has ever wondered what a pumpkin means for Halloween. An old Irish legend explains the origin of the modern Halloween symbol.
It tells the story of the cunning blacksmith-drinker Jack, who twice trapped Satan himself. Wanting to free himself, the deceived devil was forced to promise Jack not to interfere in his life and not to take his soul after death.

When Jack died, he could not go to heaven or hell. Both God and Satan, true to his word, closed their domains to him. In parting, the devil threw Jack a small coal so that the restless soul could use it to light his way. Jack put the coal in the pumpkin, protecting it from the rain, and went to wander the earth in anticipation of Judgment Day.
Interesting! The Halloween pumpkin is called a Jack-O-Lantern.

This is how a vegetable with a light inside became a symbol of a soul that cannot find peace after death. Thus, such a mysterious story arose.
In addition, many people traditionally associate the vegetable with the autumn harvest, and some believe that the light and an evil face scare away evil spirits, which, according to legend, cross the border between the world of the living and the dead on the night of October 31 to November 1.
Agree that this story makes you want to carve a pumpkin for Halloween even more!

What you need to make a Jack Lantern
To transform an ordinary vegetable into a magic lantern, you need to arm yourself with some tools. To create your own Halloween pumpkin with your own hands, you will need:
- orange or yellow vegetable;
- knives (preferably different sizes and length);
- awl;
- marker;
- a printed template (different templates are waiting for you at the very end of the article!);
- spoon with sharp edges, scraper;
- scotch;
- scissors;
- candle, flashlight or garland.
These items will help you cut them out correctly and make the main attribute for the holiday.

To make the lantern beautiful, you need to choose the right vegetable. Pay attention to it appearance. It should be even and smooth, without dents, scratches or other defects.
When choosing live vegetables, pay attention to their shape and color. It is better that the color of the plant is uniform and the shape is correct and proportional. The pumpkin should not be rotten, its surface should be hard, without dents. You can buy a live pumpkin for Halloween in stores and markets.
By the way! The room will be even more interesting if you make both large and small lanterns for the holiday.

Note! How more pumpkin, the more beautiful the Halloween lamp will be, but it will take much longer to work.
On the other hand, the small surface of a pumpkin is difficult to carve out Halloween faces, so the average size will become optimal.

How to Carve a Halloween Pumpkin
After choosing and purchasing the most beautiful pumpkin, start creating your Halloween decorations. How to carve a pumpkin for Halloween? The process will become simple and clear if you follow the step-by-step instructions.

- Step 1. First you need to decide how you want to illuminate the lantern from the inside.. If you want to decorate a Halloween pumpkin with a candle, you need to make a hole on top. To do this, you need to cut a cone-shaped piece from the top so that the lid does not fall inside. If there is a garland or lantern inside, it is better to cut out the bottom.

- Step 2. Then you need to clean the Halloween pumpkin.. All contents are removed from it: seeds, pulp, inner part peels. To peel a Halloween pumpkin, use a knife, spoon or scraper. It is most convenient to clean with your hands; this option is suitable for those who are not afraid of getting dirty. Carefully scrape out the area where the “face” of the pumpkin will be located. This will make it easier to cut.

- Step 3: Once you've peeled your pumpkin, you'll need to take your already printed Halloween pumpkin template and tape it to the skin . Using an awl, the outline of the lantern's face is transferred with dots to the surface of the vegetable (as in the picture below). Before cutting, you can connect the dots with a marker.

- Step 4. Cut out the necessary parts using a knife. If the picture contains small elements, you can use stationery knife. You need to carefully cut out the pumpkin so that unnecessary cuts or defects do not appear on the decoration.

Important! If you are making a lantern with children, be especially careful to ensure that none of the children injure themselves or others.
- Step 5. You can treat the inside of the Halloween pumpkin with fragrant spices(cinnamon, coriander, nutmeg, rosemary, mint, star anise, lavender, sage, oregano, thyme, vanilla) or pour coffee beans, orange and tangerine peels, and cinnamon sticks inside. The warmth of the candle will make Jack's pumpkin smell all over the house.

- Step 6. To make a full-fledged Jack's head out of a pumpkin, you need to add lighting at the end. The candle is placed in a pumpkin with the top cut off. The height of the candle should not be large so that the pumpkin does not bake over an open fire. For small items, tablet candles are perfect. Several holes can be made in the lid to hot air could go outside.
- An alternative to a regular wax candle can be an electronic candle or flashlight.It is more convenient to place them on flat surface, and “put on” a pumpkin without a bottom on top. Another option -garland: regular, flashing or multi-colored. When connecting the garland to the power supply, you also need to use a vegetable without a bottom, then the wire will not be noticeable.

- Step 7: Place your Halloween lantern in a prominent place in your home., where guests and friends can admire it.
Photo of a step-by-step execution of a Halloween pumpkin:

Video: how to carve a pumpkin for Halloween.
What else can be made from vegetables?
As already noted, a pumpkin for Halloween can be a wonderful decorative item, you just need to get creative with the design. If the process involves small children who should not be given a knife, try doing a variety of interesting things. For example, a Halloween pumpkin can be funny, kind, or interesting, bright and colorful.
By the way! To make an interesting pumpkin with your own hands, you don’t have to carve it. There are many other original ideas!

How to decorate a pumpkin for Halloween? Firstly, you can simply paint the pumpkin. To do this, you need to choose a white or light yellow vegetable - this way the paint will lie more beautifully. How else can you decorate a vegetable for Halloween?
- Paint in pastel colors.
- Take 7 small fruits and paint them in the colors of the rainbow.
- Make a gradient coloring.
- Place black, white and bright orange lanterns around the house.
- Decorate the vegetable with black and white stripes, checkered patterns or polka dots.
- Decorate your Halloween pumpkin with colorful handprints.
- Draw a face with paints instead of cutting it out.
- Decorate it like a large donut with colored icing and sprinkles.
- Cover the vegetable with fluorescent paint to make it glow at night.
- Decorate with an ornament of cobwebs and spiders.
- Depict an autumn landscape or still life.
These are not all the options for Halloween pumpkin crafts; you can come up with even more yourself.


Secondly, you can color your Halloween pumpkin using wax crayons. It will turn out very interesting and beautiful effect when using this technique: a lot of wax crayons are laid out near the cutting itself. You can arrange them in a chaotic manner or create a gradient so that the colors flow smoothly into each other.
After this, you need to take a regular hair dryer and direct the stream warm air for crayons. The wax will melt and flow down the surface of the vegetable, forming fancy rainbow smudges.

By the way! The child will love transforming a vegetable into a famous cartoon character: Nemo the fish, Jack Skellington, Mickey Mouse, Olaf the snowman, Minion and other favorite cartoon characters. A vegetable can be transformed into any bird or animal. In general, there are a lot of options for pumpkin designs for Halloween.
You can also decorate your pumpkin for Halloween in a variety of ways. decorative elements to give it a festive look or turn it into a real work of art. The following elements are used:
- buttons of all colors and sizes;
- beads;
- ribbons;
- bows;
- lace;
- sparkles and rhinestones;
- textile;
- paper applications;
- Garlands;
- twine;
- sackcloth;
- autumn flowers.


On a Halloween pumpkin you can: use markers to draw funny and kind faces, write funny inscriptions on the peel, and use the vegetable itself as a beautiful vase or basket for flowers and sweets. To make a basket, you need to carefully cut out the handle, and if you cut out doors and windows instead, you will get a cute little house.

How to Preserve a Pumpkin for Halloween
Many people wonder how long Halloween pumpkins last. Typically within 3-5 days. However, the holiday atmosphere usually reigns in the house not one, but several days - before and after the holiday. Therefore, it’s nice if you manage to keep your Halloween lantern for as long as possible, because it’s very beautiful and interesting decoration, which is a pleasure to admire.

- Initially, choose a beautiful and undamaged vegetable.
- Remove as much pulp as possible from the vegetable: the more pulp, the faster it will spoil.
- If the fruit begins to deteriorate, it should be placed in cold water for several hours.
- To preserve such a decorative item, it needs to be treated Place incisions with Vaseline.
- You need to start making a Jack-o'-lantern for Halloween 1 (maximum 2) days before the holiday, so the vegetable will definitely not have time to spoil.

Now you know how to cut out a Halloween vegetable with your own hands and create original decoration for All Saints' Day. Halloween beauty is not only beautiful and unusual item interior design, this is also a wonderful opportunity to show your creative nature, bring to life the most unusual ideas and spend some time with loved ones.
Video: DIY Halloween pumpkin.
DIY Halloween pumpkin photos for inspiration and new ideas
Halloween is a very interesting holiday that gives both adults and children the opportunity to immerse themselves in the world of fantasy and creativity. Therefore, you have to choose whether to make a scary and terrible pumpkin for Halloween or a beautiful, cute and funny one. Below you can see pictures various options for Halloween and get inspired or get ideas for yourself.
Pictures of beautiful Halloween pumpkins


The photo below is a great example of how a Halloween lantern can be very fun and interesting.

Cute Halloween smiles will put you in a great mood and decorate absolutely any room.


Pictures of the scariest pumpkins for Halloween


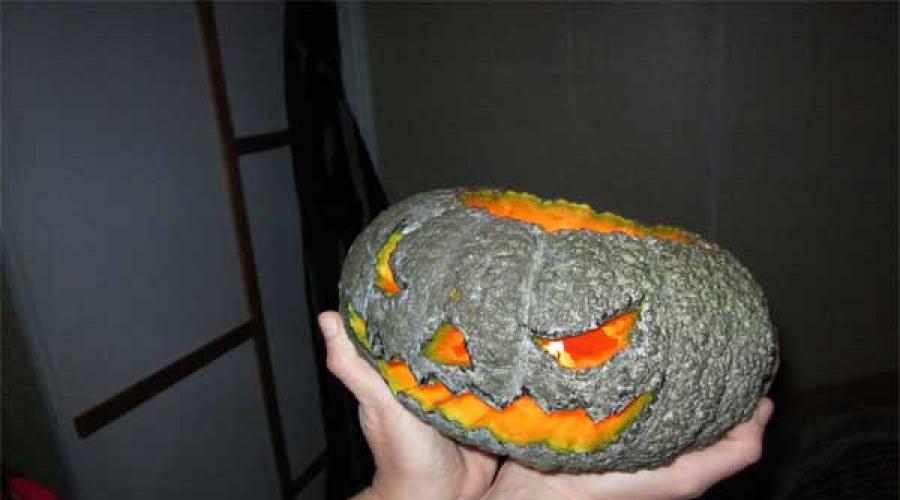
A terrible and gloomy Halloween lantern that eats its smaller brother.


And here's what an evil and non-standard Halloween lantern can be like:

Stencils and face templates
It is much more convenient to cut out a Halloween vegetable using a stencil. The finished drawing will help you do this most accurately and beautifully. You can cut out festive attributes for Halloween using ready-made stencils or ones that you have drawn yourself.
Below you can choose your favorite Halloween pumpkin stencil and print it on your printer:


In contact with