How to make carvings on a metal pipe. How to cut threads on a pipe. Relevance of threaded connections
Independent thread cutting on pipes of various classes requires the performer to have certain skills and knowledge of all the intricacies of this procedure. In this article we want to introduce you to how to cut threads on a pipe with your own hands (on a water pipe, on a stainless pipe).
Mastering the technique of thread cutting will allow you to independently repair water supply and heating networks, as well as any household appliances that include pipe products.
Threading techniques
The technique of cutting threads on pipe blanks involves the use of the following techniques:
- use of special threaded combs and cutters;
- rolling threads using round (flat) dies;
- preparing a threaded connection using “classic” taps and dies;
- thread cutting using special cutters.
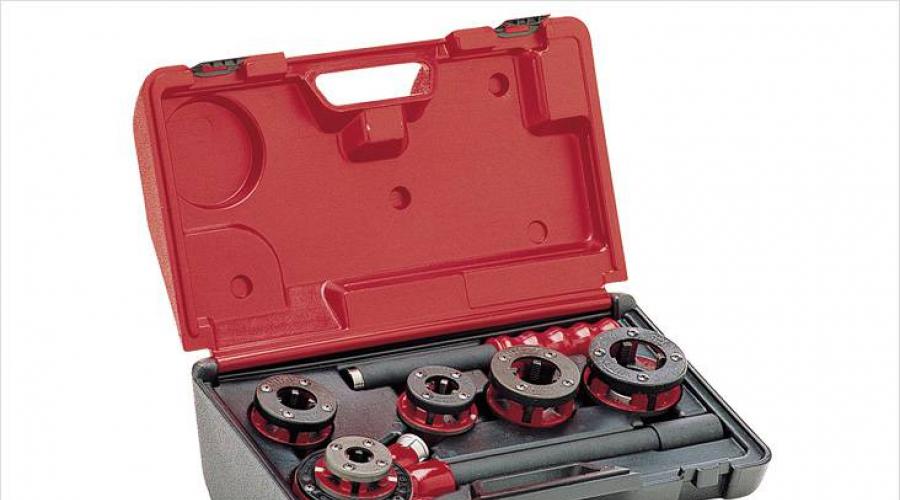
Thus, preparing threaded connections at home is possible only if you have certain devices and tools. In the article we bring to your attention, we will consider in detail the method of cutting threads using a special thread-cutting kit (the so-called “klupp”).
Tool composition

An electromechanical thread-cutting kit called a “clupp” is used in conjunction with a set of radial dies of various diameters, designed for cutting threads on pipe blanks of any size. In addition to the device itself, you will need the following tools and materials for threading:
- Taps for quick cutting of internal threads.
- A mechanical vice used to hold pipe workpieces.
- A grinding machine designed for preparing thread cutting areas.
- Lubricating oils.
We immediately draw your attention to the fact that working with an electric grinder is only allowed with gloves and safety glasses.
The procedure for cutting external threads on a water pipe

First of all, using a grinding machine, a part of the water pipe with an old thread or a section damaged by corrosion is cut off.
To form a high-quality cut, guaranteeing the convenience of all subsequent operations, immediately after marking, the pipe section is firmly fixed using a gas wrench or clamped in a vice. Next, a thin chamfer is cut off on the prepared section of the pipe, which significantly facilitates the rotation of the die. To facilitate its sliding along the thread, the cutting area is lubricated with machine oil.
During the threading process, the die holder rotates clockwise; but after the formation of several threads, the direction of its rotation is reversed. Using this technique allows you to free the working area from waste metal shavings.

The length of the threaded connection should not exceed 1 cm, which corresponds to the standard for most household pipeline networks. At the end of the thread cutting procedure, the treated area is cleared of metal shavings and then thoroughly wiped with a rag or rag.
Threading of internal threaded connection

Before cutting threads on the pipe in its internal cavity, you will need to measure the diameter of the pipe hole. Based on the data obtained, you can select a working tool (tap) of the required size. Make sure that the length of the pipe section protruding from the wall is several millimeters longer than the threaded part being cut.
Once you have finally decided on the required diameter of the internal hole, you should drill it to a size convenient for cutting threads.
During the drilling process, you need to carefully monitor the position of the inserted part of the drill, which should not deviate from the vertical.
Upon completion of the preparatory operations, a tap of the required diameter is inserted into the pipe hole while simultaneously rotating its base clockwise. Rotation is carried out using the so-called “wrench” included in the tool kit.
The procedure for preparing internal pipe threads involves the use of the following working tool:
- tap under the designation No. 1, intended for preliminary (rough) “running” of threads. The design of this tap is such that when using it, up to 70% of the material is removed;
- tap No. 2, used for final (finishing) thread cutting. With its help, the remaining 30% of the pipe material is cut off.
Thus, to obtain a high-quality and complete thread, you will first have to “walk” through the internal cavity of the pipe with tap No. 1, and then repeat the same operation using tap No. 2. All of the above work must be accompanied by the introduction of small portions of machine oil into the work area.

The principle of thread cutting is no different from the usual situations described above. The only difference is that it is extremely inconvenient and problematic to perform this work near the wall. For example, sometimes it is necessary to slightly hollow out a section of the wall near a pipe. It is very important to make the cut carefully. If it is uneven, it will be difficult to cut, and considering that you have already made a recess in the wall, cutting the thread will be extremely difficult. You can use a die to complete this task. First lubricate the pipe and die, and then start cutting the branches.
If the pipe near the wall has a large diameter, then the task of cutting threads becomes more complicated. In such circumstances, it is necessary to use not a die, but a die. For convenience, it is better to use an electric socket.

As for cutting threads on a stainless pipe, the task is complicated by the fact that the metal used is quite hard. Therefore, for cutting, you should select the appropriate grade of steel dies. In this case, marking P18, or better yet P18F2, would be a suitable option. The letter “F” means that the material contains a regulating additive of vanadium up to 2%. In addition, dies marked P9 can be used to cut threads on a stainless pipe.
If you choose a die of the wrong brand, you may end up without a die and without a thread. In some cases, it is possible to make a thread only on the shaft with a cutter.
Video
Instructions for cutting threads with a die:
Threaded connections are used in the manufacture of a wide variety of products. This is due to the fact that you can cut it yourself using inexpensive equipment. Before applying coils to the surface of the product, you should consider the main points regarding certain parameters. High-quality thread is characterized by a tight connection and high reliability. Let's take a closer look at the process of cutting turns on pipes.
Preparing to Carve by Hand
Threading pipes at home can be done using available tools. The basic rules of preparation are as follows:
- At the place where the coils are cut, dirt, rust and other contaminants are removed. This recommendation is due to the fact that foreign elements can degrade the quality of the turns.
- If there is a chamfer on the pipe, it is carefully removed using a file. In some cases, this process is carried out with a grinder, but the quality of the resulting chamfer may be low. Therefore, if there is no need to rush, then it is best to carry out the work with a file.
- At the time of work, the surface should be well lubricated with oil. Only in this case can the smooth running of the mechanism used be ensured.
Step-by-step instructions for cutting threads using a die
The most common is a die of various types. It is one of the necessary tools for thread cutting. Among its features, we note the following points:
- The die looks like a nut made of hardened steel. On the end sides there are holes made in the shape of a flower. To ensure mechanical processing, the faces are represented by sharp cutting edges. The petal shape ensures removal of chips from the cutting zone.
- The body has holes for installing the handle. They are located on the sides, thereby ensuring uniform impact.
The die has become widespread due to the fact that it is quite easy to use. Recommendations for its use are as follows:
- At the time of processing, the pipe must be vertical. At the same time, it is fixed using a vice.
- It is recommended to clean the surface and create a chamfer.
- Oil should be applied to the pipe, which will simplify the movement of the die along the pipe.
- It is worth considering that the die must be positioned strictly vertically. Even a deviation of only 10 degrees will lead to a decrease in the quality of the resulting turns.
- The handle should be rotated clockwise.
- In order to improve the quality of the resulting surface, after two turns, one should be made in reverse, thereby ensuring the removal of metal residues from the cutting part.
During work, you should periodically lubricate the working part and the pipe with oil. Lubricants make the cutting process easier and smoother.
Threading set for pipes and rules for its use
You can significantly simplify the task of cutting threads by purchasing a special set for pipes. It is ideal for use at home. An example is a clamp - a slightly modified die, which is used together with a ratchet and a guide. The set may include various accessories:
- Monolithic ones are represented by a cylindrical body with an internal hole. For work, the kit also includes a special die holder.
- Sliding ones consist of incisors, the distance between which can be adjusted if necessary. It is used for cutting a threaded surface in several passes, thereby increasing quality.
The hole is selected depending on the diameter of the pipe and the direction of the thread. The cutting process is characterized by the following features:
- A special tool called a clamp is installed in the ratchet.
- Oil is also applied to the cutting part, which simplifies the movement of the working part.
- A guide is installed on the edge of the pipe being processed.
- The ratchet rotates around an axis, due to which threads are formed.
- During machining, oil is added from time to time.
It is worth considering the fact that the device may become dull after prolonged use. That is why you need to monitor the condition of the cutting edge.
Threading a pipe near a wall
The most problems arise with cutting threads on a pipe that is located near the wall. This is due to the location of the workpiece and insufficient free space. That is why a common question is how to cut threads on a pipe.
In such a case, processing is carried out using similar tools. However, threading a pipe near a wall is often only possible by partially removing the wall. Among other features of the procedure, we note the following points:
- If you need to cut a thread on one of the sections of the pipeline, it is recommended to first dismantle it. In some cases this is possible.
- Cutting pipe threads also requires a fairly large amount of oil, which facilitates the movement of the device. However, when the pipe is positioned horizontally, it begins to drain quickly, which creates significant problems with carrying out the process in question.
- The carving is made in several passes, which ensures a high quality surface.
It is quite difficult to cut a thread on a water pipe when it is in a horizontal position. This is due to the fact that it is quite difficult to control the strict position of the mechanism used parallel to the axis, as well as to apply the required load.
How to cut internal threads?
In some cases, an internal thread is required, which can also be cut using hand tools. Often, for such work, a tap is selected, which consists of three main parts:
- Fence.
- Calibrating.
- Tail.
The intake is applied directly at the time of cutting, the calibrating guide guides the tool and ensures its vertical position. The tail part is required in order to secure the die in a special holder.
An internal thread can be formed as follows:
- The pipe is fixed in a vertical position.
- The tap and the workpiece being processed are lubricated.
- The device is placed strictly vertically, after which several rotations are made clockwise and one counterclockwise.
During operation, oil should be added from time to time. This ensures smooth running of the tool.
Gutter cutting machine
Special machines are often used in production. In terms of design features, they are in many ways reminiscent of vertically oriented machines. Among the features we note:
- The diameter and thread pitch are adjustable.
- If necessary, you can carefully adjust the number and speed of rotation of the cutting element.
- Almost all models are characterized by the ability to process external and internal surfaces.
Modern machines can be used even when cutting thin-walled products. Difficulties can only arise if the workpiece cannot be removed and installed vertically.
Basic cutting methods
There are two main ways to cut coils on the surface being treated: manually or using automatic equipment. In home workshops, hand tools are often used, as they are cheap and easy to use. The most commonly used die is the following ones on sale:
- Kluppovye.
- Whole.
- Split.
The main part of the device can be made in the form of a square and hexagons. The most widespread are disk versions, which are used for thread cutting.
Split or spring-loaded versions are characterized by high wear resistance. However, the peculiarities of their design determine that it is practically impossible to achieve high accuracy and cleanliness of the cut turns.
You can also use sliding dies, which often consist of two working parts. This ensures versatility in application.
Thread cutting technique
As previously noted, the die is represented by a modernized die, which has adjustable cutters. In addition, the cutting part can be replaced if necessary and extend the service life of the tool.
On sale you can find a manual version, as well as an electric one. Hand tools are more common; they are easy to use and inexpensive.
Electric ones are characterized by high performance. The clamp is installed in different positions, but most often in a vertical position.
Cutting with a hand clamp
- The working part is installed in a special holder made in the form of a ratchet. It greatly simplifies the process of cutting coils on the pipe surface.
- You can start by cleaning the pipe. It is worth considering that when cutting turns, it is possible only in the absence of strong defects.
- The surface is cleaned down to the metal until it begins to shine.
- The outer edge is processed to obtain a chamfer. This ensures that the tool enters.
- The surface is treated with technical Vaseline. It reduces the degree of friction and makes the tool move smoother.
- The pipe is secured in a vice; you can also hold it with a gas wrench. It is important to eliminate the possibility of the pipe tilting or moving when a high load is placed on it.
The work involves making several turns clockwise, and then in the opposite direction. This is done in order to remove chips from the cutting zone.
Cutting with an electric clamp
In addition to hand tools, electric tools have also become widespread. The advantage of this design option is high performance. The work when using it has the following features:
- The part to be processed is carefully prepared.
- Ensures reliable fastening of the workpiece.
- The mechanism is attached at the starting point.
- The free movement of the guides and the direction of rotation of the cutting part are checked.
- The first turns are cut in the jog mode.
On the tool you can set basic parameters, for example, the length of the cut. Application features depend on its functionality and other performance characteristics.
The procedure for cutting external threads on a water pipe
There are water pipes in almost every residential and commercial premises. The sequence of actions when cutting threads is as follows:
- Preparation. At the preparatory stage, the main thing is to remove all dirt and possible rust, as well as remove all defects. Otherwise, difficulties may arise in carrying out the work.
- Installation of the workpiece. The pipe must be positioned strictly vertically, otherwise the die may move to the side.
- Cutting. At this stage, you need to ensure that the mechanism used is strictly vertical, since even a slight displacement can lead to significant problems.
- Quality checking. This stage involves screwing on the nut, due to which the cleanliness of the turns and the accuracy of their location are checked.
When using a lathe, it is possible to create turns in one longitudinal pass. However, screw-cutting lathes are not the best suited for the task at hand.
On a stainless pipe
Stainless steel is often used in the manufacture of pipes. It is characterized by high strength and resistance to corrosion. However, the presence of a large number of alloying elements leads to a decrease in the degree of machinability. That is why quite a lot of difficulties can arise with thread cutting.
The cutting process can be simplified by liberally using a lubricant. In addition, you need to choose a die or tap made of wear-resistant material that will not become dull during processing.
In conclusion, we note that it is not necessary to have any skills or special tools to obtain threads on the surface of pipes. It is important to use the selected thread cutting mechanism correctly, as well as monitor the presence of lubricant. It is worth considering that an insufficient amount of lubricant can lead to jamming of the die or tap.
Threading is the process of machining a hole or rod in a part, during which a specialized thread cutting tool is used to obtain an external or internal screw thread consisting of helical protrusions and alternating spiral grooves.
Threading is done on bolts, nuts and pipes used in split piping systems and other structural parts. If the pipeline is installed manually from pipes that do not have threads, then it will be important for you to understand how you can cut threads on the product yourself.
The main characteristics of any thread are its depth, pitch, profile angle, profile, average, outer and inner diameters.
Required Thread Information
The thread profile is the cross-sectional figure near the thread. Depending on this indicator, triangular and rectangular, trapezoidal and so on are distinguished. Triangular is used exclusively for the installation of sanitary systems and its elements.
In addition, the thread is divided according to the type of direction of the turns into right and left.
Depending on the purpose of the thread, fastening and special threads are distinguished. Special ones are called rectangular ones, and triangular ones are called fastening ones. The triangular one is called fastening because it is cut only on the fastening elements of the structure: nuts, screws, bolts. The thread pitch is the distance between the tops and bottoms of adjacent turns.
The profile angle is the angle formed by the intersecting sides (edges) of the turns.
The distance from the beginning to the end of the thread is called its depth.
The outer diameter is the distance between points on two sides of the thread that lie opposite to each other. The inner diameter is the distance between the bases of opposite sides. The distance between the top and the bottom of the opposite side is called the average diameter.
According to the system of measures, the triangular type of thread is metric and inch. Metric threads have the shape of equilateral triangles at the apex with an angle of 60 degrees. This type is used in instrument making and mechanical engineering. The internal diameter of the section and the external size of the screw with metric types are calculated in millimeters, while the pitch can be calculated in millimeters and its fractions.
In profile, the inch version looks exactly the same as the metric one, but the apex angle is 55 degrees. It is calculated in inches and differs from the metric type in a different step.
The inch variety is used when assembling sanitary-type parts. It is divided into pipe and fastening. These two types differ from each other in that the fastener has a larger pitch, which guarantees a reliable connection of the structure, and is used for cutting nuts, bolts, rods and holes. Pipe is used for pipe connections. It is smaller than the fastening one because its depth is limited by the thickness of the pipe wall. The density of pipe threads is noticeably greater than fastening threads due to the numerous turns per inch of product length.
External thread cutting
External threads on rods, bolts and screws are cut by hand using dies.
Depending on the device, they are divided into round, prismatic, solid, and sliding.
Prismatic thread has a pair of identical halves, mounted in a frame-shaped clamp with handles. On a pair of outer sides of these dies there are prismatic grooves, which are intended for the prismatic protrusions of the die.
Sliding dies are located in the die so that the numbers on its sections are opposite the same numbers on the frame. Otherwise, the product will be damaged. They are attached with persistent screws. A steel plate-cracker is installed between the stop screw and the die so that the device does not burst when pressed by the screw.
The round die is secured in the easy-holding collar with two and four stop screws.
Using the sliding type, you can cut threads if there are imperceptible deviations in the diameter of the rod, which is unacceptable when cutting with solid round dies. With a smaller rod diameter, an incomplete thread is cut, and with a larger diameter, an even thread is cut.
Threading from the inside
The internal thread is cut independently using taps inserted into the driver.
The tap has a fence part (its end), which is necessary for cutting, a calibrating part (middle), used for guidance when cutting a hole and calibration, and a tail part, which has a square head in cross-section, to hold the tap in the collar when cutting.
When moving from insufficient to full metric or inch fasteners, use a set of taps that includes three taps of varying depths.
Basic thread locations
The connection of pipes for supplying gas or liquids is made in such a way that cylindrical pipe threads are cut or rolled at their ends. The pipe ends are attached to each other using connecting elements.
When connecting pipes for water or gas, short and long cylindrical threads are used. The last two turns are called runaway. It is formed due to the design of the die, in which the first turns are countersunk. Thanks to the run-out, it is possible to jam the coupling on the pipe, which guarantees a reliable tightness of the connection with the sealing material.
The length of the short type should be slightly less than half the length of the coupling. Then there should be a gap of 2-3 millimeters between the ends of the connected structures, which allows the coupling to jam at the run-out. For connections that cannot be disconnected using fittings, the short version is used. Such a connection can be disconnected on an installed pipeline only by cutting the pipe products.
In order to separate the assembled pipes without cutting them, a puller is used. It includes a coupling, locknuts and a long thread, which must be of such a size that when connecting the drive, the locknuts and coupling can be easily screwed onto its surface.
The sizes of short and long threads vary depending on the size of the pipes.
In order not to use excess metal, pipes with thin walls are often used in heating systems and gas supply systems, since their external cross-section diameter is almost the same as the internal one, unlike water pipes, a pipe is usually rolled onto the pipe, with the maximum permissible wall thickness There should be no fewer similar pipes than when cutting pipe threads on gas and water pipes.
DIY thread cutting equipment
On pipes for small volumes of work, external threads can be cut with your own hands using pipe clamps, using fixed or sliding dies.

Initially, the pipe is clamped into a clamp, the end of the pipe is cleaned of scale using a file, after which the cut part is lubricated with sulforesol or drying oil.
A special tool is installed on the pipe - a clamp, which has sliding dies, and by gently hitting the handle of the faceplate with a hammer or mallet, the guide dies are brought close to the pipe, then everything is secured with bolts. In addition, based on the risk of the faceplate, cutting dies are installed. Then they begin to rotate the tool clockwise, while simultaneously pressing on it.
In the pipe clamp body, on one side there are four holes for the dilution die, and on the other side there are three holes for the guide die. The cutting guide dies are moved apart, and the faceplates are brought together, which are attached to the body with clamping rings. In the planes adjacent to the body, the faceplates have spiral grooves into which the die pins fit. If you turn the faceplate, the pins begin to slide along the spiral grooves, and the dies come closer together (if you turn the faceplate to the left) or gradually diverge (if you turn the faceplate to the right). At a time when the dies are already mounted in the required position, the faceplate is secured using clamping bolts.
Pipe dies are manufactured with a pair of sets of cutting dies: for cutting threads on pipes measuring 20 or 15 millimeters and for cutting pipes with a diameter of 25, 38, 32 and 50 millimeters.
For pipe clamps, radial double-sided or radial single-sided dies are used. Dies are produced in 4 copies per package. Each has a designation with a size and a serial number from one to four. The corresponding numbers are located at each slot on the body of the clamp. The pipe has replaceable bushings for different pipe diameters, located in the guide flange and secured with screws. The latter is secured with screws to the body, where the corresponding die numbers are installed.
Pipe clamps have the advantage of the highest quality of threads obtained on products and structural strength. The disadvantage of this equipment is its large mass and the need for serious maintenance.
When cutting a 50 mm thread, it is necessary to rearrange the guide strips, turning them 180 degrees, then with the short side inside the die.
Mayevsky technology dies for threading pipes
Equipment such as the Mayevsky clamp is often used. This device has split dies consisting of two parts. A separate part of the rams corresponds to a certain pipe size. The dies, depending on the number indicated in the socket and on the die, are mounted in the housing socket using screws according to the marks marked on the dies of the required size and on the body. A thrust cover fastened with screws is placed on the dies.

Klupp Mayevsky - appearance
This equipment is produced in two sizes: for cutting threads with a diameter of 15 and 20 millimeters and for threads with a width of 25 and 32 millimeters.
Such a device has the following advantages: low weight, ease of design and maintenance, and the ability to quickly replace dies.
Clutches with ratchet for thread cutting
This equipment is used for cutting threads of 20, 25 and 15 millimeters. A head with various dies is fixed in its body. At the bottom of the head there is a ratchet wheel that rotates the die head and die.
A pair of ratchets are installed in the clamp body, closing the cheeks. Using the handle, the clamp head can be rotated. Cutting is done by rocking the handle with the ratchet turned on. Once the cutting is complete, the ratchet is turned on, which engages the teeth of the ratchet wheel as the handle swings and drives the round die. Using a ratchet die, you can cut threads in areas of the structure where it is impossible to use traditional tools. This happens especially often when carrying out repair work.
In order to cut a pipe thread, the product is clamped in a clamp so that the protruding end to be cut is short. This is due to the fact that the long end of the pipe may become deformed when cutting. The end of the threaded end should be located at an angle equal to 90 degrees to the axis of the threaded pipe. The device is installed on the pipe with guide dies and guide rings according to such a system that the cutting dies extend onto the pipe by 1-2 turns. On pipes, the threads are lubricated with oil to keep the dies clean and cool. Before starting cutting with a die, you need to check the installation rules of the cutting die, that is, the number of the socket in the body must match the number of the die.
To cut threads, the equipment rotates and moves forward. In one circle, cutting is carried out on pipes up to 25 millimeters, in two – on pipes with a width of more than 25 mm. The dies in the die are approached using a faceplate or screws.
Upon completion of work, the clamps should be disassembled and cleaned.
If you are repairing plumbing, changing the water supply system, then you need to know how to correctly cut a thread on a pipe with a die in order to screw on a faucet, coupling, and the safety of repairing your apartment, as well as the neighbors below, depends on the correct thread cutting.
I have already described the thread cutting process itself in the article "", but based on the questions received by email from readers of my blog, I decided to describe in more detail how it should be done.
In order to cut a thread, you will need the following tool:
- die holder, lerka
- rough thread cutting die
- finishing die
- grease, machine oil or a piece of lard
- grinder or file
They are also called first pass and finish dies.
Why I recommend using two dies:
Firstly, it’s easier to cut, and secondly, tool wear is reduced, and with the current quality, this is very important, since now you’ll cut 3-4 threads, and you can throw away the die.
If you are cutting a thread on a water or heating riser, or a tie-in to an apartment, be sure to make sure it is in good condition, otherwise you risk breaking the pipe!!!
1. When you cut the pipe to size, on the side where you will cut the thread, be sure to remove the chamfer, you can also slightly clean the place where the thread will be, if there is paint on the pipe, then it is better to clean it, it will be easier to cut the thread.
2. Lubricate the thread and the teeth of the die with grease or lard.

3. Take a die holder with a 1st pass die, or a thread-cutting tool for rough threads (pictured) and pressing it with your hand with force (so that the die catches on the pipe and starts cutting), begin cutting clockwise, approximately 5 turns. After about the 2nd turn, when it gets tight, turn it back half a turn, this will break off the chips, and it will be easier to cut, and turn clockwise again.
4. When you have cut the rough, take the 2nd die, again lubricate the threads, the die for finishing threads, and repeat the same steps.

And now some tips and nuances.
Do not buy taps with 3.5 turns of internal thread, even if they are thick-walled, such valves can be screwed onto fittings with brass threads; they are not suitable for water supply or iron pipes.
Be sure to cut the first thread through the guide so that the thread does not become skewed.
If you are cutting a finishing thread without a guide, be careful to ensure that the die is screwed on 1-1.5 turns evenly, without distortion.
Advice: cut at least 5 turns, and be sure to screw the tap onto the bare thread, and count the number of turns, it should be 5, while on an iron pipe with flax you need to screw at least 4.5 turns!!! So don’t be lazy, if the tap is screwed on with fewer revolutions, be sure to trim the thread!!!
If you screw it on by 2-3, then after a short time 1-2 turns will rot, and the tap will fall off, and there will be a flood. How to properly wind flax on a thread, read.
Here is the process and tips on how to properly cut a thread on a pipe with a die with your own hands, you can watch the video.
Home craftsmen today don’t often think about how to cut threads on a pipe. Most projects are implemented using alternative materials. But such a need sometimes arises. Thanks to basic skills, you will be able to independently carry out simple repairs at home or in other conditions.
Basic Concepts
A threaded connection is essential if it is necessary to install a shut-off valve, adapter tee or coupling on a metal pipe. Very often joints become unusable and have to be redone. The thread is characterized by:
- depth;
- walking;
- profile;
- profile angle;
- location.
Depending on the profile and pitch, threads are distinguished:
- Inch. Has the shape of a triangle. It got its name from the units in which the outer diameter is measured. Used in the assembly of plumbing and heating parts. Conventionally, they are divided into pipe and fastening. The second has a larger pitch to ensure better fixation.
- Conical. The main use of this type is to ensure that the connection is sealed without the use of various sealing materials.
- Cylindrical. This is a type of inch thread with a finer pitch. The upper edge of the profile is smoothed and resembles part of a cylinder. Usually the thread pitch coincides with the inch pitch for parts of suitable diameter.
- Trapezoidal. Has an apex angle of 30°. Most often used in bolted connections to provide greater reliability during fixation. A thread whose sides resemble an isosceles trapezoid is called persistent.
- Rectangular. Used for the same purposes as the previous type.
Note! The last two varieties belong to the metric class. They can be cut into small diameter pipes that are used in specific tools.
Based on the location of the cutting, the following are distinguished:
- external;
- internal.
Each of these types requires an individual approach and is intended for specific purposes.
Preparatory stage
The quality of the final product depends on how responsibly this stage is completed.
- The tool that will be used to perform the work must be in good condition. There should be no rust on it. For this purpose, during long-term storage it is coated with a preservative lubricant. Clupp cutters must be well sharpened.
- If the pipe has already been in use and there is paint on it, then it must be thoroughly cleaned. This is done with a file, grinder and grinding wheel, sandpaper or hair dryer.
- Using a grinder or hacksaw, the plane of the end is drawn out. To do this, a small piece is cut off to make a right angle relative to the axis.
- The burrs are removed with a file.
- The chamfer is removed in such a way as to create a small cone.

All work is done with a die or a ladle. These are identical concepts and are synonyms. Depending on the design they can be:
- Adjustable or sliding. Usually they contain several incisors, the distance between which can be changed. They are especially useful in cases where the pipe profile is uneven due to deformation or manufacturing defects, but threading is still required. Most often they are installed in clamps that provide them with good fixation. With the help of such products, threads can be cut in several passes, which increases its accuracy and quality.
- Monolithic. They are a small cylinder with a hole in the middle. Such a tool is clamped into a special die holder. Usually secured with one or more bolts. With this tool, cutting is made in one pass.
- Conical. Designed for cutting the corresponding threads mentioned above.

The lathe is selected depending on the diameter of the pipe being processed, as well as on the direction of the thread - right or left. All designations are applied to the packaging or directly to the instrument itself. The whole process will boil down to the following steps:
- The workpiece is fixed. If it is not secured in any system, then it is clamped in a vice. In the case when cutting will be done on a water pipe or heating pipe, it is necessary to make linings to immobilize it.
- The end of the prepared pipe section is lubricated with machine oil or grease. If these components are not available, then you can use what you have on hand - even lard.
- The surface of the tool cutters is also lubricated.
- The die holder with the leech is brought to the end of the pipe. This must be done exactly at a right angle. This is much easier to do with a die holder with a guide.
- At the same time, it is necessary to rotate the thread cutting tool and press it against the pipe. Coupling has to happen. Thus, it is important to cut the first 2 turns.
- If you do not use a die holder with a guide, you will need to constantly ensure that the angle remains 90°. If you do not comply with this requirement, then a imbalance may occur. This threatens that the thread will be torn off, the tool will be damaged, or the required step will not be observed.
- Do not cut in a continuous pass. The process will produce metal shavings. In order to remove it, you need to make one turn in the direction of movement and half a turn back. It is thanks to this that accumulated waste will be removed.
- As you progress, you also need to add lubricant.
- After completion, you need to unscrew the eyeliner and go through it again to make the final liner.

Note! In order for the final result to be much better, two dies are used. One of them is called draft. Its purpose is to quickly lay out the path and marks for the next element - the finishing one. Thanks to the second die, the perfect cut is obtained.

Thread cutting using a die uses the same mechanism. In addition to this, some products have the ability not only to move the cutters, but also to rotate them. In this situation, you can use the same tool to perform both finishing and roughing passes. When using such a unit, you must be very careful during the initial stage. This is due to the fact that thanks to the ratchet handle, you can apply more force than with a conventional leash holder. If you don’t set the angle correctly at the very beginning, then you can ruin the entire workpiece and not even notice it. The clamp is inconvenient to use in cases where the pipe is already installed and is close to the wall. You will need to either bend it using a wedge or hollow out part of the plaster so that the nozzle fits well and does not move.
Using a power tool

An electric thread cutter can carry out the planned work several times faster, and the quality of the final product will be much higher. The sequence of work will be as follows:
- The pipe is cut to the required size. The most acceptable result is obtained when using a reciprocating saw with a guide.
- There is no need to remove the chamfer, as for the chamfer. By the way, this rule is also relevant when using a manual clamp.
- A special holder is placed on the pipe. He acts as a guide. It is important to clamp it well.
- The power tool is brought in and inserted into the receiver of the holder. The clamp is put on the pipe.
- Lubrication is carried out using a special composition.
- Then the unit does everything automatically.

There are times when to assemble a structure it is necessary to cut an internal thread in a pipe. For such purposes, a completely different tool is used - a tap. It is a small metal pin, at one end of which there are external incisors. To ensure everything goes right, you need to follow these steps:
- Using a caliper, the internal diameter of the pipe is measured.
- The corresponding tap is selected exactly based on this value.
- All burrs are removed using a file.
- The surface is treated using a metal brush.
- Tap number 1 is clamped in the holder and inserted into the pipe. It will remove 70% of the material during the pass. The remaining 30% is removed with a number 2 finishing tap.
- In order to remove chips along the way, the same rule applies as in the case of a lecher.
- If a thread needs to be cut in one of the pipe walls, then a hole is drilled with a drill. The drill must be clearly perpendicular. This is important, because otherwise you won’t get high-quality cutting.
Note! If the pipe is in the wall, then the thread can be cut so that a few millimeters of the protruding pipe are without it. It is necessary to leave such a gap so as not to tear the product when screwing in the connector.
Nuances

There are some secrets that have been developed over the years and are rarely talked about. Here are a few of them:
- You can make your task easier when using an ordinary leveler with a special guide. It is a small clamping mechanism with a thread at the end. It must be inserted into the middle of the pipe until it stops against the side and the jaws must be opened. The die is screwed onto the thread of the clamp and then goes smoothly and accurately along the pipe.
- Some craftsmen recommend using dishwashing detergent as a lubricant. No matter how absurd it may sound, it provides excellent passage, and the chips are not torn, but solid, which indicates the best quality of the work done.
- If you plan to install a brass tap on a steel pipe, you need to cut the thread so that when screwing on the locking mechanism, you get 4-5 turns. This will guarantee good fixation and long service.
- The design of the die is such that the thread is slightly conical, i.e. the last turns are less deep than the first. In this case, the bends are not wound completely. To compensate for such a deviation, it is necessary to walk after the clamp with another ordinary leer.
- There are situations when a thread needs to be cut on a pipe that extends a short distance from the wall. In this case, you can use a ruler or trim the die guide. This will not affect performance, but will provide greater convenience.
- When replacing cutters in a die, be sure to follow the sequence in which they should be installed. Most often they have numbers on them that correspond to the receiver.
- If the thread needs to be cut on a pipe that is recessed into the wall, then you need to do this. A small area is knocked out around the pipe to accommodate the plug. You can rotate the slicing mechanism using the T-shaped handle. A hexagonal head with slots is placed on its end. It is selected in such a way as to enter through the external hole of the die and cling to the space between the incisors.
Using the methods and methods listed above, you will definitely get an excellent result, which you will achieve with your own hands. If you know some secrets about where to cut threads and how best to do it, share them in the comments to this article.
Video
The technology for cutting threads on a metal pipe is demonstrated below: