How to make an electric smokehouse at home. Home electric smokehouse for an apartment. Features of cooking meat, fish and sausage

Read also
The idea is simple but effective: the operating principle of this homemade electric smokehouse is that when wood is charred by an electric heating element (also made by hand), smoke is generated.
My old friend Alexander was born and raised in the village. From his ancestors he inherited an irrepressible craving for keeping various domestic animals on the farmstead. Despite being busy with his main job, on his farm he kept a horse with a foal, two cows with calves, pigs with piglets, a dozen laying hens, several geese and turkeys, rabbits with rabbits, up to 50 broilers and someone else. On a small personal plot all living creatures were housed literally on two floors.
But his worries did not end there. It was necessary not only to raise these animals, but also to process the products obtained on their mini-farm and sell the surplus. The sale of smoked meats was a particularly profitable business during the perestroika years and remains to this day. Smoked products at the market are simply torn off with your hands. Even through friends they sign up for a month in advance with a paycheck.
At first Alexander used traditional method cold smoked. Installed a smokehouse wooden cabinet, laid a long line in the ground chimney and built a pit with a fire. He hangs well-salted preparations in the closet, lights the fire early in the morning, covers the burnt coals with damp chooks and goes to work. During the lunch break he will throw in some lumps, in the evening he will add more, and at night he will monitor the progress of the process. But one day, in dry, windy weather, a fire broke out from the smokehouse, and part of the yard with the bathhouse burned down! This loss and the danger of open fire pushed the owner to the idea of getting rid of the fire when smoking.
And an idea was born to him, to test which he connected two air electric heater- Heater, put them on a trough made of galvanized sheet and installed this device on bricks under the smoking cabinet.
Then he placed raw apple tree chicks on top of the heaters and plugged the cable into the mains.
The experiment was a success. The heating elements heated up, the wood began to smoke, and the smokehouse started working.
I also found out about this one convenient way smoked and after a while decided to make myself a similar yard homemade smokehouse.
Taking Sasha’s idea as a basis, I implemented it with my own hands in my own way.
For my smoking cabinet, a box from an old electrical panel with dimensions of 1200x600x250 mm was ideal.
It has a door and ventilation holes below and under the top cover (photo 1).
The modification was expressed only in the installation of a latch under the padlock, installing the support legs and making two pairs of holes for the reinforcing rod for hanging hooks with semi-finished meat products (photo 2).
The finished cabinet was installed on permanent place in the corner of the yard away from buildings. The heating elements were enclosed in a special portable housing in the form of a trough on legs. I connected the heating elements to the power supply with a long cable.
Such a heater (Fig. 1) is convenient to maintain and store between smoking sessions in a dry place on a shelf in the garage.
Making a smoke generator with an electric heater with your own hands is quite simple.
We bend a trough from a rectangular piece of sheet metal 1 mm thick. Its length must correspond to the dimensions of the heating elements. We cut out two cheek-legs from the same metal and electric weld them to the trough. We drill two holes in the cheeks according to the diameter of the heating elements, and then cut vertical grooves into which we place these heaters.
Using copper jumpers, we assemble a serial circuit for connecting the heaters to the cable. The positive result of this connection is that the heating temperature is optimal for the slow smoldering of wood in the trough.
In addition, the fins of the heating elements do not allow the logs to be laid tightly (photo 3), which ensures excellent convection of the hot air necessary for their smoldering. The power of the heaters must be consistent with the dimensions of the smokehouse and correspond permissible load home electrical network. In my case, the optimal power of two heaters was 1.5 kW.

To protect against accidental contact with electrical contacts We cover all connections with protective boxes, which we attach with screws and nuts to the cheeks of the heater body.
The third, very important part of the design is the drip pan, which prevents melted fat from getting onto the chocks and the hot heater. Wood soaked in grease can catch fire.
Let's make a drip from three rectangular sheet metal blanks of the same size. Trays should be slightly longer than the width of the cabinet. We connect the drip pan into a single unit by electric spot welding of trays with corner triangular ribs so that the upper tray overlaps the edges of the lower ones, and the ribs are inclined towards draining the fat. Inclined fins easily pass smoke and even mix its flow.

The attached drawings will help you understand the simple design of the smokehouse (see Fig. 1-3).
Homemade electric smokehouse - drawings

Drawing 1: Construction of a homemade smokehouse and a diagram of smoking products.
1. Cabinet 2. Door. 3. Cover 4. Lock assembly. 5. Hinges. 6. Legs 7. Support plates 8. Rod for hanging and then smoking meat and fish 9. Door handle 10. Hook for smoking meat and fish

Drawing 2: Electric smokehouse heater.
| 1. Housing-trough | 1 PC |
| 2. Legs - cheeks | 2 pcs |
| 3 Protective covers | 2 pcs |
| 4. Air heating elements | 2×1.5 kW |
| 5. M5 bolt, nuts, washers | 4 sets |
| 6. Spacers TZN in place | 4 things |
| 7. TZN copper jumper | 1 PC |
| 8. M4 nuts. fastening washers | 4 sets |
| 9. Copper radiator | 2 pcs |
| 10. M4 screw, nuts, cable fastening washers | 2 sets |
| 11. Diselectric rubber in the lid | 1 PC |
| 12. Cable with plug | set |

Drawing 3. Smokehouse drip.
An electric smokehouse is a device with which you can cook meat and fish in the shortest possible time.
The device has quite simple design, his really do it yourself, using available materials.
What does a smokehouse for cold and hot smoking consist of? Use in home, apartment
The smokehouse is metal container, securely closing the lid:
- Chips are poured onto the bottom, which when heated begin to smolder and produce smoke.
- Inside there are grates for semi-finished products and a tray for collecting fat.
- In order for the device to work, you need to connect the transformer wire to the grid at the bottom.
- You need to hang food at the top that need to be smoked. In this case, each of them must be connected to the opposite pole of the transformer.
- The smokehouse must be closed with a lid and ignite the fuel in the smoke generator.
Attention! The transformer must be turned on after smoke appears from the fitting on the cover.
There are smokehouses two types, namely: working on the principle cold or hot smoking They differ in that the latter disinfect food using heat treatment, and the former due to the long exposure of food to smoke.

Photo 1. Electric cold smoker made from an old refrigerator.
Another difference is the cooking time. The cold smoking device must be operated for 1-2 days, the smoke in this device is supplied through a special pipeline. The hot smoking device will cook food in 2-4 hours. Here, the smoldering sawdust is at the bottom, and the smoky masses simply rise.
The operating principle of an electric smokehouse is charge action. With its help, the smoke rises and envelops the food, after which it exits through the outlet pipeline.
For home use The smokehouse is not suitable for cold smoking. Within the walls of an apartment or house it is better to use electric mini smokehouse for hot smoking.
On sale you can find models in which both smoking modes are present, they are complemented by the function oven. Making a smokehouse yourself is not difficult if you follow the recommendations.
Stages of making an electric smokehouse with your own hands
Anyone can create such a device if they have a barrel on hand required diameter and other components.

Using such materials, you can make a device for hot smoking, subject to the following algorithm:
- The hull is being prepared. It needs to be checked for leaks. IN top element a hole is drilled into the housing. In the future, a chimney pipe will be installed in it.
- You need to place an electric hotplate underneath, on which the tray for smoldering sawdust will stand.
- A tray designed to collect fat is installed. It can be made from sheet metal. To be able to place food, you need to install grates or hooks.
Important! Knowledgeable people It is recommended to check the smokehouse before use. It is worth assessing the level of smoke concentration, the absence of open fire in the sawdust tray, the location of the food grates, and how efficiently the heating element works.
A high-quality check is the key to long and trouble-free operation of the smokehouse. If you ignore this step, you can ruin all the products along with the smokehouse. With good assembly and high-quality testing, the service life of the device is significantly extended and the quality of its work is improved.
How to properly prepare for assembly?
To correctly assemble such a device you do not need to have big amount construction skills, but worth preparing certain components, such as:
- Metal container with a lid. The best option in a similar situation is a metal barrel with volume 200 l. It is better to take a container in which various oils or chemical substances. You can get rid of any remaining contents by thoroughly washing the barrel before use. If oil was previously stored in it, you need to put dry firewood in it and set it on fire. After everything has burned out, you should treat the inside of the container with floor or dishwashing detergent.

- Electric thermostat regulating the temperature from 20 to 90 degrees Celsius.
- Special tiles.
- Pallet, made of metal. Fat will drain into it.
- Thermometer.
- Metal grid.
- Cable, along which it will be summed up electricity.
- Wire rack or old sawdust pan.
- Can be screwed furniture wheels to the bottom of the smokehouse. Moving heavy equipment It becomes easier and the mobility of the entire installation increases.
Reference. It is worth remembering that no matter how high-quality the assembly is, homemade smokehouse inferior to professional cooking power and speed. Devices from the store have a more beautiful appearance, but you will have to pay for them from 10,000 to 20,000 rub.
Do not forget that the manufacture of the smokehouse must be carried out under certain conditions:
- Room temperature should not exceed 25 degrees Celsius.
- Humidity above 80% is not allowed.
- If the products are located in a running installation, you can't touch it.
- All components that perform their functions under voltage are needs to be insulated.
Additionally, it is worth preparing:
- Drill for drilling holes in the housing.
- Furniture wheels.
- Screwdriver or screwdriver.
- Tin snips or wire cutters.
These tools will come in handy during assembly.
You might also be interested in:
How to make, photo of the process
When creating a cooking device, you must adhere to the following algorithm:
- You need to decide which project an electric smokehouse will be made. When creating an installation, you can use 4 different schemes . The choice remains with the person doing the assembly. A smokehouse can be made from a bucket, metal sheets, barrels, bricks and stainless steel.

Photo 2. Drawing of an electric smokehouse. The order of the elements from top to bottom: mesh, thermometer, bowl of water, grease tray, sawdust container, electric stove.
- Let's get started case manufacturing. Are looking for metal barrel and prepare as described above. Furniture wheels are mounted on the bottom. To do this you will need to drill several holes. Holes should be made at the bottom to allow smoke to escape. Their optimal diameter is 10 mm.
- The installation base must be made of dielectric material, such as wood or plastic.

Photo 3. Cutting metal mesh with metal scissors. You can use it to make grates for a smokehouse.
- Need to make gratings. They must correspond to the width of the body and be securely fixed in it. Worth choosing metal mesh and, if necessary, trim it using wire cutters or metal scissors.
- As a pallet you can use an ordinary pan, but you need to make sure that the diameter allows it to be in the housing.

Photo 4. Grid and tray, which is made of a pan, in an electric smokehouse.
After everything preparatory procedures completed , let's start assembling:
- Need to fix product rods using fasteners. They must be made of dielectric material.
- Need to put on a smoke exhaust hose to the nozzle and remove it to the ventilation.
- Connecting the cooler. To do this, take a plastic or metal hose of small diameter and wind it around the chimney in a spiral. Then one end of it is connected to the tap, and the other to the sewer.
- Hanging products, set fire to the fuel and when smoke appears, connect the transformer to the network.
If everything is done efficiently, then you don’t have to worry about the service life of the smokehouse.
The process of smoking at home has always been a rather labor-intensive undertaking, especially when it comes to the most delicious form - cold smoke treatment. It was necessary to monitor the temperature and quality of the process for long hours, maintain the proper operation of the smoke generator and, most importantly, control how accurately the flow of smoke was directed towards the meat or fish filling. The process can be seriously simplified if you make your own electrostatic smokehouse. The quality of processing will remain virtually unchanged, and worries and problems will noticeably decrease.
The secret of live smoking
It’s worth making a reservation right away - making an electric smokehouse with your own hands only makes sense for cold smoking. Despite the fact that enthusiasts are actively experimenting with hot smoking and even trying to cook kebabs using electrostatic devices, the best quality indicators are still obtained with smoke with a smokehouse temperature of no more than 45-50 o C.
IN in this case The electrostatic booster provides two additional factors that are practically useless when processing food in a hot smoker:
- The electrostatic field accelerates both predominantly charged water molecules and existing polar organic compounds into smoke, including acids and lower alcohols. Thanks to this, the process of saturation of products occurs many times faster than in the absence of an electrostatic field;
- When a cold electrostatic smokehouse operates, there is no degradation or destruction of animal protein and fats, those basic building blocks that make up meat, lard or fish. In this sense, the process of smoking in an electrostatic field is very similar to drying, but with more high speed processing.
- In hot smoking, moisture is intensively removed from the surface of the product, and even if the electrostatic field “throws” water vapor and acids from the smoke, all this is swept away by streams of hot air. Essentially, it is the process of frying meat or lard in hot air with the addition of smoke.

There are more than enough fans of both smoking methods, cold and hot, so every year more and more new methods and designs of electrostatic smokehouses appear. There are even schemes for smokehouses with a built-in meat surface temperature control unit using a remote infrared thermometer and with adjustable electrostatic field voltage. It is clear that such smokehouses are made mainly for processing large volumes of products; for yourself, you can make a small electric smokehouse with your own hands (photo).

Unlike large chambers with powerful electrostatic units, which require a barn, garage or at least a summer house, small-sized electric smokehouses can be used even in a city apartment. Naturally, the productivity of an electrostatic smokehouse is less, but the taste and quality of the product is noticeably higher.
Electric smokehouse device
The circuit diagram of the apparatus for electrostatic smoking is very simple and quite easy to assemble with your own hands. The design of the smokehouse consists of the following parts:
- Housings made of dielectric material, possibly wood, plastic or even paper;
- Electrostatic “radiating” mesh suspension made of steel, copper or brass wire;
- Smoke generating unit of a smokehouse or smoke generator;
- Flue flow cooling systems.
The main module on which the quality and performance of the smokehouse depends is the electrostatic field generator. designs and various schemes There are a huge number of electrostatic units, but not all of them work equally successfully and produce a high-quality product.
A removable wire hanger is mounted in the center of the body, onto which the products are directly attached. The radiating mesh is installed on the walls of the electrostatic smokehouse, and a smoke generator is installed in the lower part of the body. In powerful smokehouses, the smoke generating unit is removed together with the cooler as a separate structure outside the housing.

Electronic generator using spare parts from a TV
Most cold smoking enthusiasts believe that the easiest way to make an electrostatic smoker with your own hands is from a TV scanner. Indeed, old transistor televisions used a frame scanning board. IN modern TVs its functions are performed by several chips and keys, so it will not be easy to get hold of such a board, and the device will cost a lot.
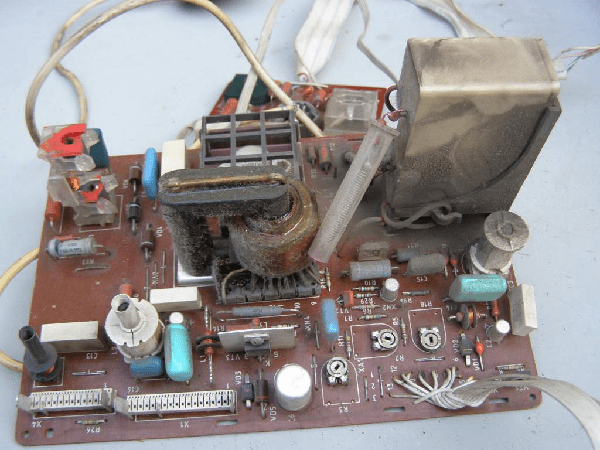
In fact, the use of a board is not very suitable for such utilitarian purposes; it is important not only to obtain an electrostatic field for the smokehouse, but also to control its power. Otherwise, the smokehouse will work like a Russian stove, so most often a separate circuit is made, which uses only a high-voltage transformer.
You can assemble an electrostatic smokehouse with your own hands from an ignition coil from an engine internal combustion cars. There is no big difference, but if in the previous case the maximum potential of the electrostatic field in the smokehouse is only 20 kV, then in a system with an ignition coil the total is 40 kV.

The currents are very small, if the insulation is broken, the trans from the TV can noticeably hit your hands, while the impact of a high-voltage generator on a coil from a Lada car will be equal in strength to the discharge of a powerful stun gun, as in the video
Therefore, if you plan to build a small smokehouse, then it is best to make its electronic part using a TDS17 transformer.
Electrostatic smokehouse for yourself, the simplest option
You can smoke lard and meat quite simply even in a city apartment, where there is no way to install and run a smoke generator, and even more so there is no way to get rid of the combustion products of wood chips. Therefore, home models of electrostatic smokehouses are made compact and low-power.

The main advantages of the electric smoking chamber option below are as follows:
- Very simple design;
- The minimum amount of materials and parts required for the manufacture of a smokehouse;
- Easy maintenance.
For your information! For getting High Quality processing products with smoke in a smokehouse, it is necessary to use an adjustable electrostatic field
The basic principles and operating principle of a smokehouse with a controlled electrostatic field are presented in the video
Camera design
The smokehouse is a body with a diameter of 300-350 mm and a height of 600-700 mm; you can use a plastic or cardboard pipe of the appropriate diameter. At the bottom of the body, a metal base is made - a sleeve, preferably from an aluminum or steel container.

This design does not have a separate remote smoke generator; instead, a built-in model is used. Essentially, this is a tray with a built-in electric heater. Since the volume of the electrostatic chamber is small, no more than 70 ml of fine sawdust from beech or alder is used for one session. As a heater, you can use a Chinese soldering iron with removed handle, instead of a sting, a copper wire bent in a spiral is laid.

The main amount of smoke in the smokehouse is formed due to the sublimation of dry shavings upon contact with a heater coil heated to 350-400 o C. As a result, the smoke produced for electrostatic smoking is colder, more humid and richer than that produced by thermal decomposition of wood. Most of the smoke is cooled on a cone plate at the bottom of the smoker.
In order to avoid smoke leakage, a tee pipe is installed in the upper part of the lid, onto which a container for collecting condensate and a miniature fan are placed. Some of the air and smoke from the electrostatic chamber is pumped out through a PVC tube in order to create a vacuum and prevent the leakage of odors and smoke.
Electrostatic unit design
The electrical part of the smokehouse consists of three parts:
- Electrostatic high voltage generator;
- Pendants for meat and fish;
- Grid guide.


In the upper part of the smokehouse, a grate is installed on ceramic insulators, on which a pendant with products is placed. The negative electrode of the electrostatic generator is connected to the grid. Whatman paper with glued wire is placed along the walls of the smokehouse; this is a positive electrode. Sharpened pieces of the same wire are soldered onto the wire; they direct the flow of charged molecules towards the products.
Generator circuit
Most the hard part electrostatic smokehouse is electronic circuit high voltage constant voltage generator. The electrostatic generator circuit is shown below.
The circuit is based on a TDS17 high-voltage transformer. To generate rectangular pulses, a circuit assembled on the NE555 from a powerful field effect transistor IRF3205, the operating frequency of the master circuits is about 10 kHz, but it can be adjusted using a variable resistor R5. As a result, the potential of the electrostatic field on the smokehouse grid can vary within 10%. To power the circuit, an EN 8 142 series assembly is used.
Multicore is used as the primary winding copper wire 1 mm in diameter, ten turns are wound directly onto the magnetic core. When setting up a high-voltage field generator, you may have to swap the connections so that the output produces the polarity required for the smokehouse.
Operation of an electrostatic mini smokehouse
Before starting, the products are hung on the smokehouse suspension for a relatively short time, 5-7 minutes. turn on the blower fan. So that there is no breakdown electric field, meat and lard must be dried, and even blot off excess moisture with a napkin.

Sawdust is loaded into the smoke generator box, a “soldering iron” is inserted and the electrostatic system terminals are secured. Next, the smokehouse is closed with a lid and the heating is turned on; after the lower part of the body is filled with smoke, the power generating system is turned on. In order for the smoke to concentrate on meat products, it is necessary to adjust the level of the electric field potential, otherwise most of the decomposition products will settle on the walls of the smokehouse.

Conclusion
The above diagram of an electrostatic smokehouse is remarkable in that it does not oversaturate the products with resins and volatile substances. To obtain an average level of saturation, it is enough to operate the smoking chamber for 45-60 minutes, whereas in classic version the smoking process would take several hours.
An electric smokehouse is attractive because you don’t need to look for wood to start a fire. Most of its modifications create smoke by heating smoking chips with a heating element. There is also an option that allows you to obtain smoke for cold smoking thanks to the force of friction. You can make any of these electric smokehouses with your own hands.
Materials
They are:
- 1 board with dimensions 960x220 mm;
- 2 boards with dimensions 260x235 mm;
- 2 boards with dimensions 340x425 mm;
- 1 board with dimensions 425x220 mm. All boards must have a thickness of 15 mm;
- 1 plywood. Dimensions 425x220 mm. Thickness 5 mm;
- 1 plywood with dimensions 260x220 mm;
- 1 piece of plywood with dimensions 235x220 mm;
- 1 piece of plywood. Dimensions 340x220 mm;
- electric single-phase motor (power 0.53 kW);
- magneto;
- 2 capacitors with a capacity of 2,200 pF;
- neon light bulb MH-6;
- constant resistance 180 kOhm;
- metal box with a lid. Length 220 mm;
- screw;
- spring;
- wooden block;
- metal mesh 23x21 cm;
- asbestos;
- a pulley, for the manufacture of which the manufacturer used a textolite core (it should have inclined holes);
- steel cage (must be such that it fits tightly around the pulley);
- bolts with nuts;
- nails or screws.
Tools
You will need:
- drill;
- hammer;
- screwdriver;
- open-end wrenches;
- welding;
- saw.
Creating a wireframe
It will represent two cameras mounted on a long board. The first chamber will have dimensions of 26x24x22 cm. It will contain a motor pulley and a wooden block. Smoke will be created here. The dimensions of the second chamber will be 34x43x22 cm. Cold smoking of homemade meat preparations will take place in it.
Making a smokehouse frame for a home includes the following stages:
- Cutting into a board with dimensions 425x220 mm. holes, which in height and width should be 22 and 20 cm, respectively. It should be at one end of the board. It is cut out at a distance of 1 cm from the edge.
- Making a chamber for cold smoking. To do this, take with your own hands a board with a cut hole, plywood with these dimensions and 2 boards with a length and height of 34 and 42.5 cm, respectively. These elements are fastened with nails. It's better to use screws. Metal rods are fixed at the top of the chamber. Meat will be hung on them.
- Fixation on the hole with fine metal mesh.
- Fixing the manufactured chamber for cold smoking on a long board. This camera should be on the edge of the board. The cut hole in one side of the chamber should “look” into the middle of the base.
- Making a smoke chamber. To do this, cut a hole for the engine rotor in the middle of the lower edge of the plywood with dimensions of 23.5x22 cm. A rectangular hole is cut out in the front wall (a board with a width and height of 26x23.5 cm) for metal box. The dimensions of the hole are made the same as the dimensions of the box. This element should be placed opposite the pulley. Next, the smoke chamber is knocked down. However, they do not fix it on the base, but put it aside with their own hands.
Read also: Homemade smokehouse
Engine installation
 To secure it, several holes are drilled on the base. Next, use bolts to screw the electric motor to the base.
After that perform the following actions:
- A magneto is connected to the engine.
- Perform a series connection of capacitors, a constant resistance and a neon light bulb.
- Include the above elements between the magneto terminals.
- Connect the negative terminal of the magneto to the metal mesh with your own hands.
- Connect the positive terminal of the magneto to the metal rods of the cold smoking chamber.
- Place a pulley with a steel cage on the axis of the electric motor.
Then all that remains is to cut off one end of the metal box and drill a hole in the other end. A nut is welded onto the formed hole. There should be a long screw turning in it. There will be a spring at the end of the screw in the box.
The prepared box is fixed with your own hands on the base of the home smokehouse. Next, a chamber is nailed to this base in which smoke will be created.
The final process of making an electric smokehouse for a cottage or home is to line the walls of all chambers with asbestos. Instead, you can use any other fireproof material.
It is worth adding that in the absence electrical network The electric motor can be replaced with a gasoline one.
How does a design with an electric motor work?
The engine starts and starts turning the pulley. A wooden block is pressed against it (fed through a metal box).
It is advisable that the block be made of sheet wood. As a result of friction, smoke appears. In this case, you can control the intensity of smoke emission. To do this, increase or decrease the pressure on the wooden block by tightening or unscrewing the screw. Tightening the screw causes the spring to compress. She “wants” to return to initial position and therefore creates additional pressure on the block.
During cold smoking, it is worth remembering that the electric motor pulley gradually wears out the block. Therefore, from time to time you need to unscrew the screw, throw away the rest of the block and install new material.
The generated smoke gradually exits into the cold smoking chamber. However, its movement is too slow. To speed up the movement of smoke through the smoking chamber, the charge of its particles is changed. Passing through the metal mesh, the particles receive a negative charge. Since metal rods and meat hooks have a positive charge, smoke particles with a negative charge immediately move towards them. Moreover, this movement is faster than without the use of electricity.
Read also: Brick smokehouse
As a result, the duration of cold smoking is reduced. The product is of higher quality, and the number of bars used is less than the amount of wood burned in a regular home smokehouse. Therefore, such a smokehouse for home can be safely called professional.
Accessories for electric stove designs
To make such an electric smokehouse for the garden and home you need to find:
- barrel with lid 200 l.;
- furniture wheels;
- electric stove;
- electric thermostat (it should regulate the temperature in the range +20...+90°C);
- electrical cable;
- mechanical thermometer;
- metal mesh or rod;
- container for wood chips (suitable tin with a wide bottom, however, it needs to be cut so that the height is 5-6 cm);
- a tray into which the fat will drain.
You can make the pallet yourself. For this they take sheet metal thickness 0.5-1 mm. and bend the edges. The height of the side should be 1-2 cm. All side joints must be welded.
 You will also have to prepare the barrel that was lying near the house with your own hands. The easiest way is to take the barrel that contained some oils or chemicals. Of course, particles of these substances always remain on the walls. Therefore, you need to get rid of them by thorough washing.
If there was in the barrel machine oil, then you can put dry wood on its bottom and set it on fire. The remaining oil will burn along with them. Afterwards, you need to wash the container. To do this, you can use products used to wash dishes or the floor at home.
Assembly of the structure
This process begins immediately after completely dry barrels. His performed in the following sequence: 
- Furniture wheels are secured to the bottom of the barrel. To do this, you will have to place the wheels on the bottom, mark the places where you need to make holes, drill holes and fix the base of the wheels with bolts. In general, you need to attach four small wheels with your own hands. The wheels may not be attached, but moving the electric smoker around the house will be inconvenient.
- Drilling 5-8 holes at the bottom of the barrel. It will be good if the diameter of the holes is 10 mm. They should be at a height of 5-10 cm from the bottom of the barrel.
- Preparation electric stove. It consists of removing the cover and removing all internal elements. The exception is heating element and two wires connected to it. The result of such manipulations will be a housing with a heating element. This body is placed in the center of the bottom of the barrel and screwed to the bottom with two bolts. Of course, before fixing, holes are drilled in the body and bottom of the barrel.
- Installation of the thermostat. This element is placed near what is left of the electric stove. To install it, a hole is made at the bottom of the barrel. The oven is connected to the fixed thermostat. For connection, it is better to use a wire with a cross-section larger than 2.5 mm². Of course, all connections are reliably insulated. The thermostat sensor must be placed in the area where the meat will be.
- Connecting a small light bulb. This is done parallel to the stove. It will turn on simultaneously with the heating element turning on. Thanks to this, it will be possible to visually monitor the operation of the heating element.
- Installation of a mechanical thermometer. To do this, make a hole at the top of the barrel, not far from where the mesh with meat is placed. Next, fix the thermometer.
- Making a mount for a baking sheet. It involves the use of long bolts. First drill 4 holes. Then the bolts are inserted and the nuts are tightened.
- Creating a similar mount for a meat rack. It is better to find the grate in the store. You can do it yourself. To do this, use stainless steel wire. Diameter 5 mm. It is bent into the shape of a circle and the ends are welded. A wire with a diameter of 3 mm is welded on top. Its segments should be placed parallel. Step – 3-4 cm.
- Making a chimney. If there is a lid on the barrel, then make a hole in it with a diameter of 5 cm. If there is no lid, you will have to put wooden rods and burlap on the top of the barrel. The latter must be constantly moistened during smoking.
We all know that smoked products are not dietary products, especially those sold in stores, because they contain many harmful preservatives and additives. This is where a completely reasonable question arises: how to reduce the potential harm of your favorite products, while maintaining their taste and aroma? There is a solution - home smoking. Tasty and, most importantly, absolutely safe for health products can be obtained even at home. And an electric smokehouse, assembled with your own hands, will help with this.
Today there are a lot of drugs that can replace natural wood smoke with synthetic liquids. At the same time, a self-made electric smokehouse allows you to get a tasty, aromatic smoked product prepared on the basis of natural smoke. Which type of wood to choose for smoking is a personal matter.
Experienced experts assure that the most successful meat is obtained if you use oak and aspen for smoking it, while it is better to smoke fish on branches fruit trees: cherry, apple, pear, peach, etc. In turn, conifers are not suitable for smoking, since they contain resins that spoil the taste of the finished product.
When making an electric smokehouse with your own hands, it is better to give preference to the cold smoking method, and here’s why. Hot way characterized heat treatment within 60-120°C, while the process itself does not take much time (2-3 hours). Of course, it is very convenient, and the taste of the product is excellent. In an electric cold smoked smokehouse, you can get a product with a longer shelf life, because thanks to the maintained temperature of 20-25°C, the product is better preserved.
Let's take a closer look at how to make a cold smoked smokehouse with your own hands.
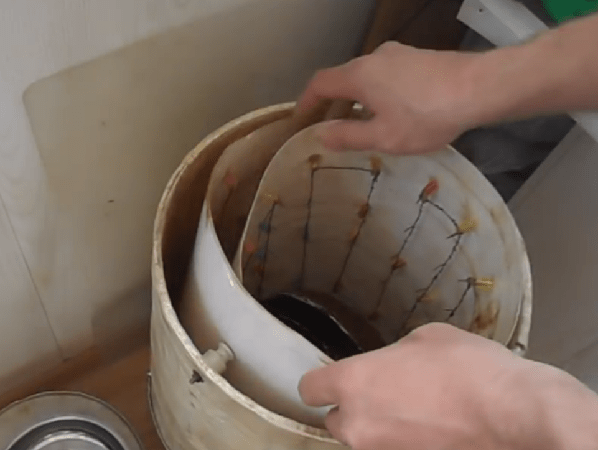
Smokehouse from a 200-liter barrel
To do home smokehouse cold smoked with your own hands, we will need metal barrel, it’s good if it is made of heat-resistant steel. As a rule, chemically harmful substances and liquids are stored in such barrels. If in your household If there is no such item, then you can easily purchase it from your hands by flipping through advertisements either in the local newspaper or on online platforms. The main condition is that the barrel must come with a lid, the functionality of which you will learn a little later.

In addition to the barrel itself, you will need the following items:
- an electric stove, through which the air inside the smokehouse will be heated - even the most primitive “potbelly stove” or heating element will do

- 4 small wheels with which you can move the electric cold smoker from place to place - they can be purchased both at a flea market and in any hardware store;
- a thermostat with which you can regulate the temperature inside the device - it is better to give preference to devices with an adjustment range of 20-90°C;

- thermometer;
- a container for collecting fat that will be released from products during smoking - this can be any round or rectangular shape;
- metal drill - Ø10 mm;
- pallet for flammable materials;
- mesh, grid or hook system on which the product will be placed.
Unit assembly process
It is not difficult to assemble a cold-smoked smokehouse for fish or meat with your own hands, it is only important to follow the detailed instructions:
- If the barrel was previously used to store fuels, lubricants and other chemicals, it must be thoroughly rinsed. In most cases, for these purposes, use soda with a stiff brush, then wash it with detergent and rinse thoroughly. Thanks to such manipulations, you can avoid possible contact with harmful substances for smoked products.
- We place an electric stove at the bottom of the barrel so that it does not fall on either side. To do this, you can fix it with metal plates.

- Next you need to make ventilation, for which you need to drill 5-8 holes Ø10 mm in the bottom of the device. Now you need to secure the area on which the products will be placed - this can be either a grid or a system of hooks.
- After all the above processes have been completed, take an armful of brushwood or firewood, put it inside the barrel and set it on fire. This will eliminate any remaining oil and will promote additional hardening of the walls of the apparatus.
- As soon as a trial smoking attempt has been carried out, we remove carbon deposits from the walls of the barrel. You can use a wire brush for this. And then we carefully rinse the cold-smoked smokehouse, made by ourselves, using detergent. And don’t forget to get rid of the detergent itself.
- We install the device on the wheels, screwing them to the bottom of the almost finished smokehouse.
VIDEO: How to make a smokehouse from half a barrel
- Let's move on to electric stove, from which, according to by and large, we only need a heating element. And even if you have never encountered such devices, you can easily cope with this task. So, when removing the heating element from the electric furnace, you just need to remove the heating disk and disconnect the wires of the heating element. Or you can do it even simpler, do not “gut” the electric furnace, but buy a heating element on the market or in a specialized store.
- Using screws, we fasten the heating element in the center of the smoking unit and next to it we place a thermostat with a serial connection. It is advisable to use copper wire with a cross-section of at least 2.5. Now we place its sensor in a place where it will be convenient for you to look at it.
- The next stage of assembling the electric smokehouse will be the arrangement of the upper part. At the top, a small hole is drilled in the wall through which it is necessary to secure the thermometer so that it is located inside the device. And in the lid you should make a hole Ø5 cm, which will act as a chimney.
- We install a tray in the middle of the smokehouse to collect fat. This can be an old baking sheet or any other container that is most suitable in size for this design. And a little higher we place a grate on which the products will be placed.
If you plan to use a hook system instead of a lattice, you can also make it yourself. Taking rods Ø3-5 mm, twist them with a hook and attach them to metal strip, in which holes of the corresponding diameter were previously made. This design is screwed to the walls of the barrel using screws.
.jpg)
The hole in the lid of the device is closed with a flap and must be closed at the beginning of the smoking process. Otherwise, the efficiency of the unit will be extremely low.
You can use a mesh or a regular pan as a tray for flammable materials. As a rule, a five-liter pan of fuel is enough for the installation to operate for 8-10 hours at a temperature of 20°C or three hours in accelerated mode.
It is advisable to carry out test heating for a third of an hour in order to “warm up” the installation, after which you can safely put smoking products into the device.
Here, in fact, are all the subtleties of the assembly smoking device. Of course, you can buy a cold smoked smokehouse in a store, but you will have to pay a lot of money for it. And the very fact that you make such a device yourself will make the finished product even tastier.
VIDEO: DIY smokehouse for cold and hot smoking