How to make a safe torch. Master class “Olympic torch. DIY Olympic crafts
Read also
Situations in which you may need good torch, a bunch of. The most common thing is a complete lack of electricity, and the area needs to be illuminated with something. Or you need to explore some cave, but you don’t have a flashlight. Or just make something that burns and can be used.
Hence the basic properties indeed good torch: it burns for a long time, nothing flies off during the process, it is simply manufactured, it burns regardless of external conditions. It is clear that without the necessary skills all this is extremely difficult. But, as practice shows, there is nothing particularly difficult in making torches. You just need to remember some nuances. So.
General
Nice torch consists of several parts - flammable material, flammable impregnation, non-flammable fixative and non-flammable stick. Ideally, the clamp and stick do not react to fire at all, which makes them reusable and makes reassembling the torches much easier. But this is ideal. In principle, you can do without impregnation - the material will burn on its own, but this will happen more slowly, there will not be a strong fire, and there is a high chance that the burnt out pieces will fall off. You can also do without a retainer, but then there is a risk that the burnt fabric can slide down and burn your hand.
Material
Absolutely any fabric is suitable as a material. But there are tricks here. If you take asbestos fabric, which is positioned as absolutely non-flammable, and at the same time impregnate it with something that burns well, the process of burning the torch will be VERY long. Which is exactly what we need. Tow, felt and burlap work a little worse in this regard. As for ordinary textiles, they burn too quickly. It is better not to use synthetics and polyethylene at all, since they burn and melt at the same time, which means they can drip molten. They will also smoke a lot.
Impregnation
Honestly, absolutely any flammable material will do. The question is purely a matter of nuances. Gasoline and kerosene, for example, emit a lot of smoke when burned, and the smell is not very pleasant. Rosin, wax and paraffin do not have such shortcomings, but you can easily find them. We will have to gut apiaries, candle stores and radio equipment stores. Machine oil smells bad, is thick and drips, vegetable oil is too thin, but it is easier to find. Pine resin... You can find horseradish on a large scale. And preparing complex multi-component mixtures is long and tedious, although they give a good effect.
In short, there is no ideal option. It all depends on external factors, conditions and time availability. If you have access to paraffin, that’s great. It can even be used to create “cartridges” for reusable good torches manufacture. Well, if not, then gasoline and kerosene have long become classics. Again, if there is no access to a flammable liquid, the torch can still be assembled. Yes, it will burn much worse, but it’s better than nothing.
Retainer
The ideal option is wire. Does not burn, can be found anywhere, easy to wind and remove. You can come up with more complex options - all sorts of metal attachments, plugs and clamps. But do it with wire good torch much easier. The thicker the wire, the easier it is for it to perform the second function of the retainer - to prevent the molten components of the torch from flowing down the shaft.
Stick
The main thing is that it is as non-flammable as possible. The plastic one won't work - it might melt. Aluminum and steel do not burn, but they heat up quickly, so you will have to additionally make a handle by which you can hold this good torch. Wood - depends on the type, thickness of the stick and its “hardness”. “Hardening” - preliminary firing of the working end of the stick until blackened. When a tree is covered with a layer of burnt coal, there is less chance that the core will catch fire. It is also better to use a thicker stick as it will burn longer and worse.
As for the type of wood, you definitely shouldn’t use coniferous trees - they burn very well. We are interested in aspen and larch. Both of these varieties contain quite a lot of liquid so as not to catch fire for as long as possible. You can also use one of the many fireproof impregnations. To summarize, for a reusable torch with replaceable “cartridges” it is better to take metal, but if you don’t bother with this, then a wet aspen branch will last for a long time.
Assembly
There are two fundamentally different manufacturing options good torch. The first is to first wrap the fabric around a stick, and then immerse this end in impregnation. Pros: simple and fast. Disadvantages - the inner layer may not be sufficiently saturated, so the torch will burn unevenly. The second method involves immersing the fabric in impregnation before winding. Then you can even give away the excess liquid. Pros: uniformity and stability of the flame. Disadvantages: it takes a long time, requires more impregnation, and the treated fabric may not wrap well. In general, the second option is more effective, especially if you are making “cartridges” for reusable torches.
If you proceed according to the first option, then first wrap the fabric on a stick, fix the lower part with a dense and thick winding of wire, immerse the working end in the impregnation and turn it over so that the fabric is evenly saturated. Well, in the second option, you first immerse the strips of fabric in the impregnation, then take them out, lightly squeeze out the excess liquid, wrap them around a stick and fix them.
If you want to good torch with replaceable “cartridges”, then you need to proceed as follows. First, a thick layer of newspaper is wrapped around a metal pipe, and layers of fabric are placed on top of it. You need to wrap it as tightly as possible. Next, the “working part” is carefully removed from the shaft (which is why it must be smooth metal) and immersed in impregnation for some time. Turn over occasionally for uniformity. At this stage, there is a risk that the impregnation will flow into the middle and clog the central hole, so it is better to plug both ends with a cloth in advance, which can then be removed. Actually, that's all. We prepare several of these “cartridges”, attach a wire clamp to the pipe and wrap the other end with hard cloth or leather - this will be the handle.
sych.v 12/11/2013 - 15:19
Gentlemen, very often in feature films they show torches that burn with an even, smokeless fire, like a large candle, how do they do it? Or how to make a torch from scrap materials that will burn brightly, with virtually no smoke and, most importantly, for a long time? There are many recipes on the Internet, I would like to listen to practitioners.
Taraz999 12/11/2013 - 15:26
the lantern burns brightly and without smoke
advice from a practitioner 😊
Taraz999 12/11/2013 - 15:32
I'm wondering too
Sabalaq 12/11/2013 - 15:36
Evgeniy Sartinov_Gold on Blood
".... Before this, you will pass through the gorge, it goes like a snake, but then
and you will see a cave. Don't forget to stock up on torches. “I brought you some resin,” she touched the birch bark container with a lid. - My grandfather said that he switched fifteen torches while passing through the cave.....
In the morning we finished the meat we had cooked in the evening, and then for another hour we stocked up on torches. Andrei cut down suitable branches, and I, putting the sap with resin closer to the fire, coated them with viscous resin.
Pelageya spoke about fifteen torches, we stocked up on twenty, just in case....
Yurka, we’re out! Come out, damn it! - The Lieutenant yelled enthusiastically, hugging me by the shoulders and shaking me like a sack of potatoes. Then he laughed at the top of his lungs, pointing his finger at me. I also did not remain in debt. From the smoke of the torches we became as smoked as two Ethiopians.
- Hello, Uncle Tom! - I proclaimed, shaking the Lieutenant’s hand. - How is your hut?
“It burned to the ground,” the newly minted black man answered politely. - How are you doing in your historical homeland, my dear Muganba?
- It sucks. Yesterday we ate the last banana without salt.
Having washed our faces with snow, we moved on to the flat taiga that so beckoned us. We were fed up with the mountains.....
Taraz999 12/11/2013 - 15:40
yeahsome kind of movie burners
gas or alcohol
I don't know though, just a guess
atadracula 12/11/2013 - 15:54
Impregnation... fat, oil or any flammable crap, "broom" in the forest...
m_mbembe 12/11/2013 - 16:07
I always did it simply: I cut a stick from any bush, wrap it in a rag, maybe a dirty sock, for example, and secure it with two wire clamps. then I go where I need to go. on the spot before lighting it directly, I pour some flammable liquid on it little by little so that it doesn’t drip, and burn it, and go further into the darkness where I need to go. Only sometimes it becomes stuffy from the torch, and then I get soaked in soot all over myself.
making a torch that burns the way the vehicle wants is either impossible (mutually exclusive paragraphs), or it will be very expensive and uninteresting.
markoff74 12/11/2013 - 16:16
sych.vYou don't see anything like that in the movies.
very often in feature films they show torches that burn with an even, smokeless fire, like a large candle
They don't run out of cartridges there either.
And the main character comes out of the fire unburnt.
The script, however
sych.v 12/11/2013 - 16:16
No, you can saturate a rag with any flammable liquid and go ahead. But it will burn quickly... How can you make sure that the “bump” on the stick burns steadily and smokes moderately for 20-30 minutes? Or is it not real?
sych.v 12/11/2013 - 16:21
You don't see anything like that in the movies.
I agree here, I think they use alcohol, but in the Middle Ages people probably achieved perfection in this matter using, by the way, the simplest materials, maybe who knows what they used then? Oil? Fat? Are there any ancient recipes?))
Odvokat P11001 12/11/2013 - 16:42
You can make a good torch from a long piece of plexiglass, it burns evenly and for a long time, although it smokes a little
almost anonymous 12/11/2013 - 16:48
How can you make sure that the “bump” on the stick burns steadily and smokes moderately for 20-30 minutes? Or is it not real?for sale - costs 20 rubles. A rope wound on a cardboard tube and soaked in paraffin. Burns for more than 20 minutes.
sych.v 12/11/2013 - 17:03
This is what they write on the internet
One part vegetable oil (let's say flaxseed oil 😊
Five parts beeswax
The tow torch is impregnated with this property.
Lots of light, pleasant smell, view from afar - a fire.
You can replace the wax with paraffin so you don’t have to run around the markets, but I think everyone still has rosin, replace the tow with a bandage, you can stir it up on the weekend.)
Stag-beetle 12/11/2013 - 17:04
I remember when we were kids we made torches to climb into caves. Birch bark is 15-20 cm wide and as thick as possible, wound onto a raw, freshly cut thick stick. To hold it tighter, it is heated over a fire. It is important to warm up the first layers well - then the birch bark “clings” to the stick better and there is no need to secure it with anything. The more layers of birch bark, the longer it burns. You can do it easier: insert birch bark into a split stick and update it as needed. However, this is a much less convenient option.
Stag-beetle 12/11/2013 - 17:10
One part of vegetable oil (let's say flaxseedIt will probably be much easier and cheaper to stock up on a flashlight than to cook such a mixture...
Five parts beeswax
Four parts rosin (the most affordable version of tree resin)
Heat in a water bath and mix.
The tow torch is impregnated with this property.
sych.v 12/11/2013 - 17:14
We walked through the dungeons of Königsberg with oil or fuel filters from trucks, which were leaving their end, on a stick; they were made of paper back then. An ideal thing, both in form and content, it burns for a long time and smokes moderately, the most important thing is that there was a sea of them under the fence of any convoy.
sych.v 12/11/2013 - 17:21
It will probably be much easier and cheaper to stock up on a flashlight than to cook such a mixture...
This is one of the options, and any kid will choose a torch at night in nature...))) Why not give your son such a gift, take everything and cook it right while hunting or fishing in the evening?)
DON MIGUEL 12/11/2013 - 17:26
sych.v
We walked through the dungeons of Königsberg with oil or fuel filters from trucks, which were leaving their end, on a stick; they were made of paper back then. An ideal thing, both in form and content, it burns for a long time and smokes moderately, the most important thing is that there was a sea of them under the fence of any convoy.
Almost analogous... When we arrived as pioneers, we made torches like this:
a tin can was nailed to the handle, an old filter was inserted into it and clogged with paraffin honestly spioned from the medical office... It burned for a very long time - it was enough for the ceremonial line, for the transition to the bonfire clearing, for the ceremonial lighting of the bonfire and for burning around the clearing...
Spongebob 12/11/2013 - 17:49
General requirements:
the stick is fresh and green so that it doesn’t burn itself (Rowan is good)
protection-screen or additional winding so that it does not drip or flow down the handle.
dmr110 12/11/2013 - 20:17
We made it from sticks, rags and gasoline drained from my father’s motorcycle. We explored the basement of a five-story building. It was smoky in the entrances 😀
quaserfirst 12/11/2013 - 21:46
A jar on a stick filled with rags and soaked in a wonderful liquid called “font cleaner.” A two-hundred gram bottle, the price of a penny in office supplies. It produces virtually no smoke and does not burn the fire.
Being poured onto dried katy behind the garbage chute in the entrance and set on fire, it almost brought us to lynching for a chemical attack.
quaserfirst 12/11/2013 - 21:50
I heard the word “korza” or “corsa” from professional fire show people, Google doesn’t know. It smells like a "font cleaner"
NR-43 12/11/2013 - 22:28
A little bit of reconstruction from the forum:
Impregnation composition: wax + rosin (resin) in equal proportions. The wind can indeed knock down the flame, but if the torch has ignited well beforehand, it then flares up again. Putting out such torches is not easy.
Why was tow chosen? Perhaps it’s worth experimenting with materials here? For example, cotton, as far as I know, has very good smoldering properties. By the way, I got the most difficult to extinguish torches (extinguished by the wind and then flaring up again) when using ribbons of coarse cotton fabric. What actually happened there: a strong wind knocked down the open flame, but “inside” the torch the threads continued to smolder and as soon as the wind died down the burning of the open flame resumedOr better yet, in the topic itself:
http://www.tforum.info/forum/i...0%BB#entry32449
NR-43 12/11/2013 - 22:30
1) Materials.
It is better to make a torch on a stick 2-5 cm in diameter.
For winding, you can use tow or cotton fabric (cut into strips). I use cotton fabric. Tow is sold in construction stores and markets, cotton fabric is sold in fabric and workwear stores (special fabrics).
Wax is usually sold in the same place as honey. In Moscow, we bought wax in several pavilions selling honey at the All-Russian Exhibition Center (formerly VDNKh).
It is more convenient to buy rosin in stores selling goods for radio amateurs and the electronics industry, rather than in ordinary hardware stores. Best of all - in large packaging, approximately 100 grams (significant savings compared to purchasing small jars).
Some hemp rope or twine.
2) Tools.
The resulting mixture will be quite sticky and difficult to wash off. It is liquid only when heated. Ideally, it is better to take dishes that you don’t mind and constantly use them only for preparing the torch mixture.
You also need something like tweezers or forceps.
3) Safety precautions when making torches.
- Be careful and careful when grinding wax and cutting tapes when working with cutting tools and when grinding rosin - do not get hurt or injure yourself.
- The work is carried out with a heated mixture; if it comes into contact with unprotected areas of the body, burns are possible. To avoid hot mixture getting into your eyes, it is better to wear safety glasses. When melting the mixture and maintaining it in liquid form, follow the standard safety precautions for your heating element. Don't forget to turn it off when finished.
- For the first time, it is better to cover the floor in front of the stove and everything nearby with newspapers or film. Do not place flammable films or newspapers near the heating element.
- Wear protective clothing, as you may get splashed.
4) Process.
It is easy to guess that wax and rosin melt faster if they are pre-crushed: wax is easily cut with a heated knife, rosin can be put in a thick plastic bag and crushed with a hammer or other hard object - it is quite fragile.
I usually do the initial heating and melting directly on the heat source (aka a pan on the stove). When the mixture melts until smooth (the process will go faster if the mixture is stirred). It can be placed in a water bath or simply on the edge of a heating element for the sole purpose of preventing it from thickening - otherwise it will have to be melted again. So, we immerse the fabric tape in the molten liquid mixture. We achieve complete wetting. It is more convenient to lay the tape not in a lump, but according to the principle of an accordion made of paper. When the fabric is soaked, we take out the tip of the tape with tongs, wrap it around a stick and, turning the stick evenly, wind the fabric onto the future torch. When winding, you need to try not to leave any excess mixture on the torch. Otherwise, the burning torch will drip heavily. Having wound a sufficient number of ribbons (with a fabric width of 1.5 meters, a strip width of 4-5 cm and a winding zone width of 10 - 15 cm on one torch, I wind 3 - 4 strips - the torch burns for about 30 - 40 minutes). Then, you need to tightly wrap dry tape over it (next in line for impregnation) and squeeze the torch tightly with your hands. The wound tape will absorb all the excess mixture.
About 10cm below the edge of the fabric I wrap a few turns of hemp rope or twine around the torch. This is done so that if a few drops of excess mixture flow down the handle of the torch during combustion, it will save your hands from getting burned.
Lighting torches can be made easier by first burning the surface of the torch in a flame to a uniform deep black color. This can save a few minutes when lighting the torch.
We usually prepare torches in this way two to three hours before their intended use.
5. Safety precautions during use. When using torches, safety requirements must be observed. Do not keep a lit torch in close proximity to trees, grass, flammable objects or people. Beware of burns: you can not only burn yourself, but also cause burns to others. Always (!) fill an extinguished torch with water - even in the absence of an open flame, it can smolder for a very long time.
sych.v 12/11/2013 - 22:36
It's time to post photo and video reports.))) On Sunday I'll have time, everything seems to be there, I'll try vegetable oil...
narkad 12/11/2013 - 23:11
sych.v
I'll try vegetable oil...
Take unrefined, it will taste better! 😊
------------------
I'm always ready to learn, but I don't always like being taught
13mm 12/11/2013 - 23:24
In addition to the torches, you also need a pitchfork and armfuls of dry hay or straw! 😊
In general, I don’t understand how you can illuminate something with a torch. If they hold it in front of them or in their field of view so as not to set anything on fire, then nothing but fire can be seen. In my opinion, it is much more convenient to set fires with torches.
And I take into account how many ingredients you need to BUY to make torches; it’s easier to buy a lantern. At least kerosene...
By the way, I remember in one book that one guy, before going to the cave, stupidly stocked up on trunks of “resinous Christmas trees.” Has anyone tried this?
atadracula 12.12.2013 - 14:31
A tablet of dry alcohol, no longer a torch...? A torch, this is from the lack of fish and is made from what is underfoot)))
almost anonymous 12.12.2013 - 14:42
A tablet of dry alcohol, no longer a torch...?it doesn't shine.
if only it is left as an ignition to ignite the tar/paraffin
13mm 12/12/2013 - 17:37
Well, you can keep the shit for yourself, but a dry wooden stick with one end burning, and you can hold it at the other and there is a simple torch.
ShamanVudu 12.12.2013 - 20:18
Giovanni
Firemen saturate asbestos fabric or cord with heating oil or kerosene
They also use (um 😊) special ways of winding clubs and knots for poi. But pure kerosene burns out quickly, so it is mixed with liquid paraffins (you can use lighter fluid). Or take solarium. It doesn’t smoke as brightly, but it burns several times longer. For a torch, the option with paraffin and rosin is more accurate. If you stick a piece of hemp rope into the windings so that the ends stick out, it will be much easier and faster to light, even without burning it black.
almost anonymous 12.12.2013 - 20:51
in short: an Ikea lamp with Ikea candles in it. Each up to 7 hours.
© 2020 This resource is a cloud storage of useful data and is organized with donations from users of the site forum.guns.ru who are interested in the safety of their information
As 2014 approaches, various Olympic-themed crafts, especially among children. We will tell you below what exactly you can make for the Olympic theme with your own hands in our small selection of interesting master classes.
So, crafts for the olympic games with your own hands.
1.Crafts on the theme of the Olympic Games for the playground.
In the articles posted on our website, we have already told you, and continuing this topic, we want to tell you how to make Olympic symbols practically from improvised means.
To work you will need:
Five identical old car tires;
Facade paint in red, black, blue, green and yellow;
Plywood sheet;
Large screws;
Simple pencil;
Thick metal or wooden rods for spacers of the composition.
Description of work in stages.
Stage one. According to the author's idea, a composition on the theme of Olympic symbols made from car tires will represent one of the main symbols of the Olympics - five multi-colored rings intertwined in a special order. Instead of rings, we will use the same car tires, for this we will cover each of them with two layers of oil-based facade paint. As a result, we should have five tires of different colors - black, red, green, blue and yellow.
Stage two. We wait until the paint on the tires is completely dry, and then we begin to assemble our Olympic structure in a place previously selected for this. First, we attach the first two green and yellow tires to the ground, after which we dig them in lightly. Also, using one or two self-tapping screws, we connect them together from the inside so that they are not accessible to children and do not lead to unexpected injuries.
Stage three. Then we proceed to stop the second row of tire rings. To begin, install the first black top one in the center of the two bottom ones and attach it to the bottom tires using self-tapping screws.
Stage five. On the left side, we attach the last blue tire of the second row in exactly the same way.
Stage six. To ensure that the entire composition of tires holds securely, we dig into the ground from the back side three thick metal or wooden rods, which we also pre-painted with black paint and waited until they were completely dry. The rods should be dug in such a way that they provide a rigid support for a structure made from old car tires in the form of Olympic symbols. Additionally, you can attach the tires to the rods using wire or the same self-tapping screws of a suitable diameter and size.
Stage seven. Plywood will help complement the symbolic icon of the Olympics craft olympic torch To make it, take a sheet of plywood and freehand draw a torch with flames on it. Then use a jigsaw to cut out the design along the outline.
Stage eight. Next, the torch needs to be decorated with paints. To do this, you can use the paints that you have left after painting the tires. If you don’t have the color you need, prepare it yourself by mixing several colors into one. For example, to get brown, you need to mix yellow and blue paint.
Stage nine. After waiting for the paint on the torch to dry completely, it can be installed next to the composition of car tires. The lower part of the plywood torch should be dug a little into the ground, and a spacer made of the same rods with which we strengthened the Olympics badge should be attached to the back side.
Work on our large Olympic-themed craft has been completed. Such a composition can be installed in the yard, on the playground in kindergarten and school, and thereby encourage children to play sports and win.
What else you can do you will find on our website.
DIY Olympic crafts.
Olympic torch
One of the unchanging symbols of the Olympic Games, no matter which country in the world they are held, is the Olympic flame and torch. That is why we invite you and your children to try to create a craft in the form of that very Olympic torch that symbolizes the will to win.
To create it you will need:
Empty cardboard roll of kitchen disposable paper towels;
Golden paint;
Paper glue;
Sheet of cardboard;
Simple pencil;
Scissors;
Kitchen knife;
Paper napkins, yellow, red or orange.
Description of work in stages.
Stage one. Let's start making the torch itself; to do this, take an empty cardboard roll from kitchen disposable paper towels and cut a piece of it ten to twelve centimeters long using a regular kitchen knife. If you don’t have such a roll on hand, you can make it yourself from thick packaging cardboard (box) or thin cardboard folded several times and glued together. A homemade roll should be about three to four centimeters in diameter.
Stage three. In the meantime, take a sheet of cardboard and draw a circle on it, about ten to twelve centimeters in diameter. To make the circle even, you can use a compass or circle some suitable round object, for example, a saucer.
Stage four. Now use scissors to cut out the drawn circle along the contour.
Stage five. Then in the center of the made circle we draw a second one, the diameter of which should coincide with the diameter of the blank for the torch from a cardboard roll, which is still drying, covered with bronze paint.
Stage six. Carefully cut out the central circle, being careful not to crush the entire piece. This part of the future torch can also be painted with bronze paint or left in the same color as the colored cardboard, in our case it is orange and harmonizes well with bronze. Of course, for example, green or blue cardboard will look quite out of place, so it is better to paint it.
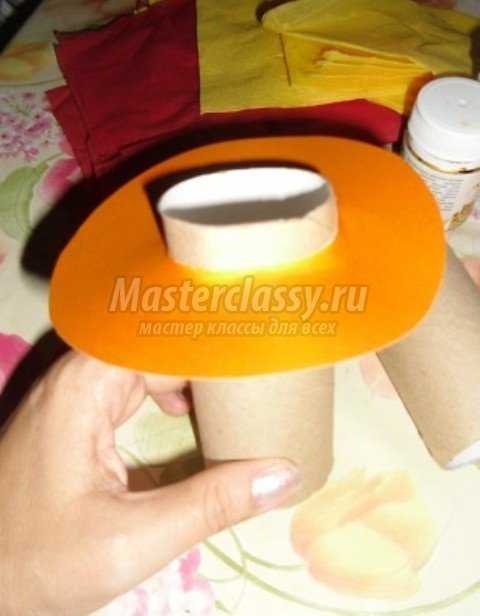
Stage seven. Next, we put the cardboard blank on a base made from a roll, so that it rests in the upper part of the cylinder. If you cut out too much of the inner circumference of the part and because of this it does not stay in the right place, but slides down, you can secure it with glue or compact the roll with a strip of paper.
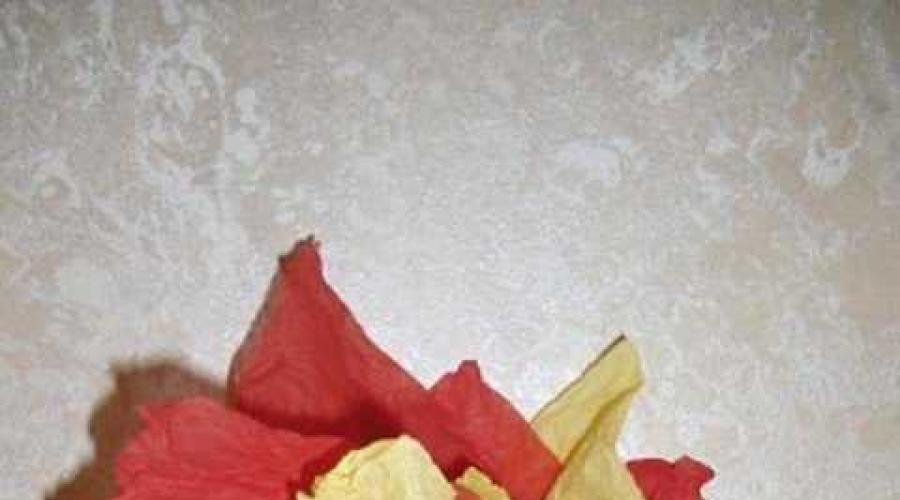
Stage eight. The torch is ready. All that remains is to add flames to it. To do this, take standard paper napkins in yellow, red or orange. You can use all colors at once. We spread the first red napkin on the table. We lay a second yellow napkin on top of it, so that its corners lie on the sides of the bottom one and do not coincide. Next we lay a third one in red or orange, placing it like the first.

Stage nine. We collect all the napkins together, slightly crumpling them in the center and thereby forming tongues of flame.

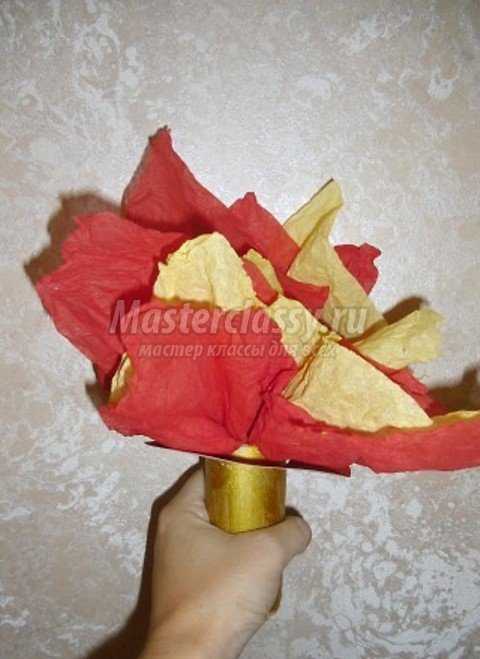
Stage ten. Lubricate the lower part of the manufactured flames, where we initially crumpled the napkins with glue, after which we insert the workpiece into the hole of the torch and glue it on the inside.
Our original Olympic craft - a torch with the Olympic flame, is ready!
Olympic bear craft applique for little ones
Even the little ones want to take part in creating Olympic-themed crafts; you can offer them to make, under your strict guidance and with your help, a charming Olympic polar bear, so beloved by all modern kids.

To make it you will need:
A sheet of yellow colored cardboard or thick colored A4 paper;
A sheet of white A4 paper;
Black felt-tip pen;
Simple pencil;
Compass;
Scissors;
Blue colored paper;
Glue stick for paper.
Description of work in stages.
Stage one. In order for the child to be able to independently make an applique of the white Olympic bear cub - the symbol of the Olympics in Sochi, which will take place in 2014, we need to make blanks for him of individual parts. To do this, on a regular sheet of white paper, using a compass, draw a circle with a diameter of seven to eight centimeters. If you don’t have a compass on hand, use any round object for these purposes, for example, a cup or glass, which you can simply trace with a simple pencil. This circle will be the head of the bear cub.
Stage two. Next, using the same compass, we will draw a second circle, this time with a diameter of three to four centimeters; in this case, to depict an even circle, you can also use any suitable round object, for example a glass. The smaller circle will be the face of the bear.
Stage three. Then, on the smaller circle, using a black felt-tip pen, draw the little bear’s face - a nose and mouth.
Stage four. Then we draw two small semicircles, irregular in shape, which will serve as ears for our Olympic hero.
Stage five. Carefully cut out all the details along the contour, as a result of which we get one large circle, one smaller circle with the image of a muzzle and two small semicircles of irregular shape.
Stage six. Next, we take blue colored paper and on the back side, using a simple pencil, draw a wavy strip on it, approximately three centimeters wide and eight to ten centimeters long - this will be a scarf for our teddy bear.
Stage seven. We cut out the drawn scarf along the contour, like all the other parts, and assemble them together.

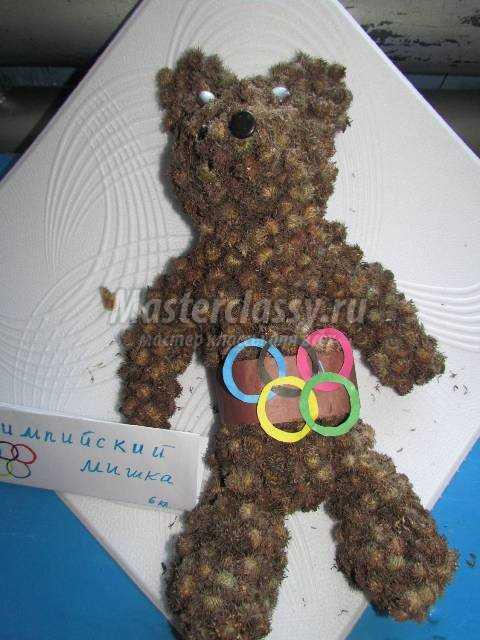
Stage eight. Now your child can start creating his own Olympic appliqué. To do this, on a sheet of yellow cardboard in the center we glue the first large circle using a glue stick.
Stage nine. On top of it, closer to the bottom edge, glue a second circle with the image of a muzzle, so that the nose is located at the top and the mouth, respectively, at the bottom.
Stage ten. Then we take two semicircles of irregular shape and glue them in the upper part of the large circle along its contour at approximately the same distance from each other, two teddy bear ears.
Stage eleven. Glue a scarf cut out of blue colored paper under the bottom of the bear's head.
Stage twelve, at the end we draw two black round eyes and finish work on our Olympic teddy bear applique.
4. Three-dimensional paper figures of the Olympic symbols of Sochi 2014 - a hare, a polar bear and a leopard.
Not only is the polar bear a symbol of the Olympic Games in Sochi 2014, it also has company. Bunny and leopard. We suggest you make all of them from paper in a very simple way that is accessible even to children.

To work you will need:
White office paper;
Transparent wide tape;
Scissors;
Simple pencil;
Colored paper in black and blue.
Description of work in stages.
Stage one. All three figures are made using the same technique of crumpling paper into balls. To do this, it is better to choose sheets of office paper; they are more pliable to work with, wrinkle easily and easily take the desired shape, unlike, for example, landscape sheets. So, take sheets of paper and crumple them into small lumps.
Stage three. In order to make the eyes, nose and mouth of the animals, we draw on the back side of black colored paper the details of the shape and size we need and cut them out along the contour.
Stage four. Before fixing the head of the animals with tape, we place the embedded eyes, nose and mouth in the right place, and only then fix them, like the figure itself, with tape.
Stage five. Finally, we complement the figures with wavy scarves cut out of blue colored paper, as well as other details characteristic of each talisman.
Below we bring to your attention a few more photos of ideas for creating interesting DIY crafts on the theme of the Olympics.
Today, purchasing various accessories for masquerade, competitions and other creative events is not at all a problem, but all these cute trinkets don’t cost a penny, so the idea of making such paraphernalia with your own hands did not arise by chance. In addition, it is not at all difficult to cope with the task, especially since to make a paper torch with your own hands, you will need the most inexpensive materials, which in most cases can be found on your farm. As for the process of making this wonderful craft, there are several simple ways to make a torch out of paper, and the easiest of them is to make a cardboard frame and then place a mini-flashlight with replaceable batteries inside it.
To do this, you will need a rectangular sheet of cardboard, from which it will be easy to roll up a “ball”, as for seeds, which will be fixed using a stapler with a long gripping part or thick glue designed for working with cardboard or thick paper. After the workpiece is fully formed, it is necessary to trim its free edges, doing this in such a way that the resulting cone, turned upside down, is absolutely hollow inside. After this, you can safely begin decorating it, which involves covering it with colored paper or painting it with water-based acrylic paint. Typically, for these purposes, many craftsmen use dark brown, black or gray colored paper/paint, silver or gold-colored food foil, as well as a spray with decorative sparkles (shimmer).
While the base of the future torch dries, you can begin making its “flame”. The easiest way to accomplish this task is to cut out 6-12 teardrop-shaped petals from different shades of yellow, red and orange. The main condition is that you can only use double-sided colored paper. The next stage looks like this: a small amount of liquid PVA-type glue is applied to the base of each petal with a brush, after which all the elements are folded together at the base and rolled like a cigarette. As a result, all the petals should twist with each other in a random order, visually resembling tongues of flame. In order to maximize this effect, you can carefully place a thin pale yellow plastic bag on top, giving it the necessary shape with a characteristic tilt in a certain direction.
To keep the bag in its desired shape, you can add a small amount of transparent silicone sealant, most often used for plumbing work, inside it. The next stage involves placing and ensuring reliable temporary fixation of the flashlight inside the torch body, for which it is best to use ordinary cotton wool. This simple method allows you to easily remove the device if necessary, without damaging the overall structure of the craft. For additional convenience, you can make a small hole in the cardboard body of the torch to turn on/off the device hidden inside. The final stage of making a homemade torch involves carefully attaching an artificial flame from paper petals with a bag to the body, for which you can use double-sided tape, plasticine and any other available means.
Galina Karpova
Dear colleagues, I want to tell you how I did sports festival torch.
Maybe it will be useful to someone. As sometimes happens with us, torch needed it quickly and urgently. I didn’t have much time to think, I made it straight from what was at hand.

After New Year's holidays there is still a spool of decorative tape left, I needed: a reel of wide tape; a sheet of thick Whatman paper, size 30.0 cm x 40.0 cm (A3), red and yellow tracing paper, yellow film, regular tape, shiny tape, glue stick. The first thing I did was a flame.

This is crumpled colored tracing paper and film, secured at the fractures with ordinary transparent tape. I think that this film is a very successful idea of mine, the film is transparent and glares at the breaks. It looks a lot like a flame.

Tip "flame" I twisted it tightly and pushed the New Year's ribbon spool into the hole.

On the other side I cut it and secured it with tape.

Very successfully, this structure fit into a reel of wide adhesive tape, just as ordered.


First I secured it with regular tape, then with glitter tape.


Then, I made cuts in a circle, bent them outward, applied glue, and inserted them into the upper part.


She wrapped the entire structure with shiny tape.

Ready. It took me about twenty minutes to do everything. She spent more time describing the process than doing it. And now it's mine torch at the opening of our sports festival.
