How to install a split system yourself.
Commercial proposal for site protection
The main tasks of climate control equipment are to supply cooled/heated, purified air inside an apartment, house, office and other premises. This is especially true with the onset of the warm season (cooling), off-season (heating). The main thing is that the device does its job well. High-quality, efficient functioning of the climate system largely (up to 80%) depends on professionally organized installation. By following certain rules for installing an air conditioner, it is possible to extend the life of the equipment, enjoying its flawless operation every day.
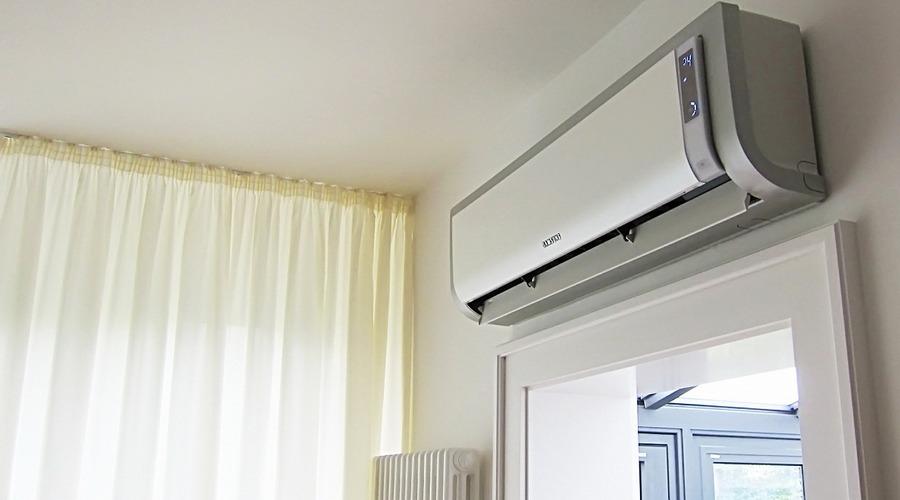
Split system indoor unit above the bed
Air conditioner. What is this? Increasingly, you can see the outline of an external air conditioner unit on the facade of a house. The use of climate control equipment has long become the norm, its sales are gaining momentum, model series
are replenished with enviable consistency. But what is this unit, usually called the word “air conditioner”? As a rule, by this concept most people mean split systems consisting of two parts: indoor unit
, intended for installation indoors, and externally - on the facade of the house. These are the most popular options for climate control equipment, which have become so due to an acceptable balance of price-quality-functions. The blocks are connected to each other by pipes with freon and electrical wires, forming a coherent working system for cooling, heating, air purification inside the living space, apartment building country cottage . A split system is just a type among other air conditioning devices (monoblocks, chillers and fan coils, cassette, duct, column devices
, central systems, etc.). When purchasing equipment, you need to decide, of course, on the model, functional equipment, and design. But in addition, it is important to take care professional installation system, because its further quality work
, service life, level of comfort created.
 Rules for installing the indoor unit
 The indoor unit is that part of the split system, the design and functional improvement of which is given great attention. And not in vain, because it is located indoors, one might say, it is the “face” of the climate control equipment.
The installation of the indoor air conditioner unit has many requirements, which are designed to organize it in the most efficient manner. We list the basic rules for installing the indoor unit of a split system, used by specialists:
- Installation of the device is best done before or after renovations in the room. This way you can lay out communication routes in the most convenient, less expensive way.
- It is necessary to observe strictly designated distances to the nearest walls and ceilings: at least 10 cm to the ceiling, at least 10 cm to the walls, taking into account the fact that from the device to the communications exit point is at least 50 cm.
- Windows cannot be installed behind curtains or in niches. This will limit the cooled air flow; it will circulate only through the space of the window opening.
- Should not be installed above tall chests of drawers, cabinets (minimum – 1m). The air flow will also be restricted by the obstruction, causing dust accumulated on the furniture to enter the room.
- Cannot be placed above elements heating system. Temperature sensor inside the device will permanently record high temperature, causing it to continuously operate in cooling mode. This will lead to rapid wear of parts and failure of the climate system.
- Arrange in such a way that places of rest, work, and frequent stay of people are out of direct refrigerated air air flow.
- The climate control device must be positioned strictly horizontally to avoid the accumulation and then overflow of condensate from drainage tank.
Rules for installing the external element of the climate device
 External unit of climate split system
 Strict regulations also govern the installation of air conditioners on the façade of a building. Factors taken into account include:
- Mounting fasteners are installed with a safety margin of 2-3 times the weight of the device. Mounted with anchor bolts.
- The outer surface of the building must be smooth and durable. Fastening to a dilapidated wall is excluded. Under the influence of vibration force, the fastenings will become loose and the device may fall.
- When installing air conditioners on the facade, it is necessary to take into account its finishing. If it is insulated with foam plastic, or a ventilated facade is designed, you need to make sure that the fasteners are mounted to the wall itself, and not to the façade finishing.
- There should be a distance of at least 10 cm between the wall and the climate control device, and at least 10 cm from any object above it. This ensures natural circulation air flow around, allowing it to cool down in time.
- Fastening is carried out taking into account further unobstructed access for maintenance.
- It is placed strictly horizontally in all planes in order to organize the correct free movement of freon along the cooling circuit.
 Installation diagram of an external split system unit on the facade of a building
 - The location should be no lower than 1.8-2 m from the ground, preferably in a protective sheathing.
- When installed on upper floors It makes sense to think about placing the system on the roof of the house. This will avoid calling industrial climbers. It is important to remember that the maximum distance between the elements of the split system is 15 m.
- It is recommended to install on unglazed balconies, loggias, which will significantly protect the climate device from mechanical damage, unfavorable atmospheric conditions.
- Installation inside a covered balcony is extremely undesirable due to insufficient air flow convection, which is so necessary for the external element of the split system.
The rules for installing air conditioners on building facades are general and apply equally to all split systems.
Rules for installation of communications
When installing the air conditioner on correct installation The route for the cooling circuit takes a significant amount of time, which is due to the following factors:
- The maximum distance between blocks is 30 m. At a distance of up to 5 m, all properties of the coolant are preserved. The greater the distance, the greater the losses.
- Compound copper pipes must be sealed, the freon supply system is insulated as much as possible to avoid gas leakage, which will reduce the performance of the climate system, even to the point of failure.
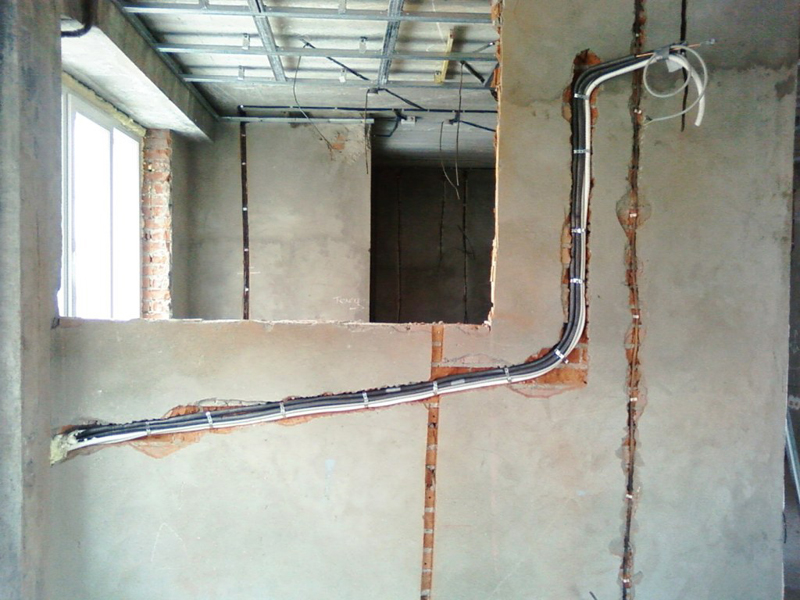
- It is best to cut a route in the wall for the cooling circuit. Communications will be hidden, which will preserve the aesthetics of the room. If the repair has already been made, the pipes are covered with a plastic box. In this case, it is necessary to ensure access to connections for service.
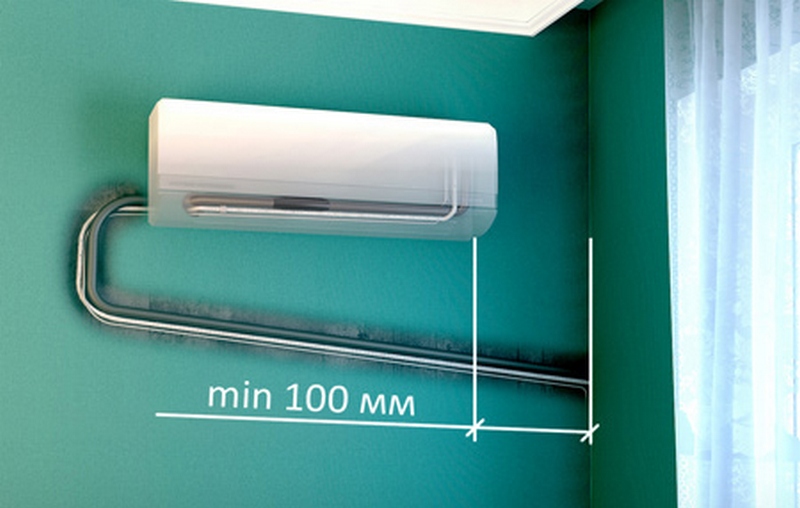 Minimum distance
 - The freon pipeline must not be kinked so that the coolant circulates freely.
- For the climate system, it is recommended to carry out a separate electrical cable with a separate switch in the panel to remove the load from the general power supply network, especially if it is already old.
- All connections of electrical wires must be securely insulated.
- It is best to place the drainage pipe in a separate groove.
- It would be correct to run a pipe to the sewer pipe to drain condensate.
- If this is not possible, the pipe can be installed near the external element of the climate system, making sure that condensation does not subsequently damage the facade of the building or get on passers-by.
- A cup holder is installed inside the hole in the outer wall, through which connecting communications are passed.
- Refrigerant pipes, electrical cables, and drainage pipes must be packed with a foam pipe and wrapped with vinyl tape.
- After fixing the outer part of the air conditioner to the facade and connecting the climate system, it is necessary to carry out a vacuum (at least 50 minutes) using special equipment. This ensures complete removal air, liquid from the cooling circuit, excluding the occurrence of corrosion on inner surface pipes
- Be sure to conduct a test run of the air conditioner at the end of installation work.
- It is necessary to check the device for no refrigerant leaks, the presence of constant pressure inside the circuit, and timely removal of condensate. The main functions of the climate system are tested.
Features of installing air conditioners in residential buildings
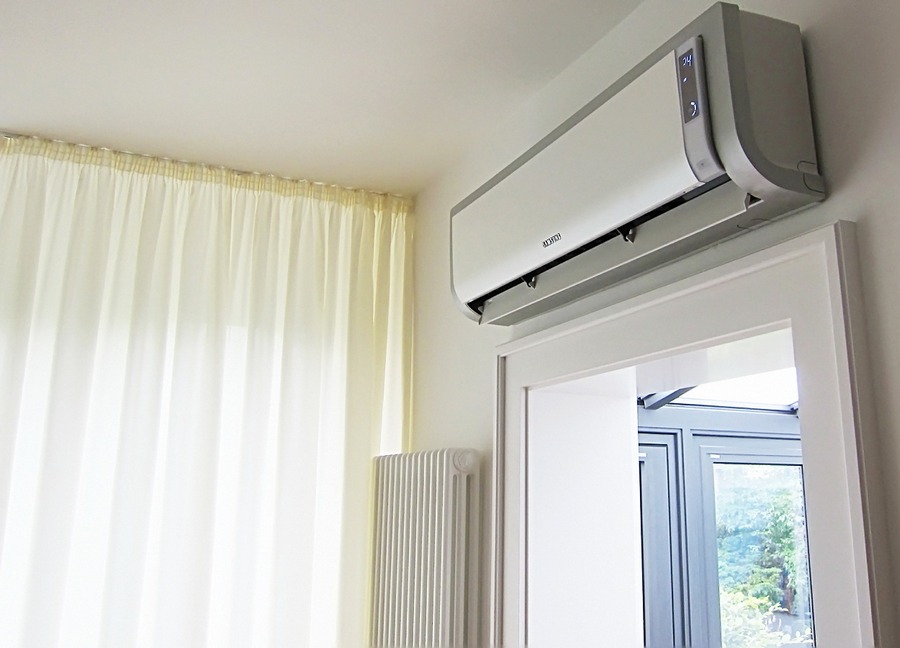
 Installing the indoor air conditioner unit on the wall
 Regulations for installing air conditioners in residential buildings same as in apartment building. Distinctive feature– when planning the purchase of a climate device, it is necessary to take into account the availability, capabilities ventilation system Houses.
Country housing is characterized by the use of multi-split systems (one outdoor unit+ several internal). Often a system is used for ventilation and air purification central air conditioning. Also, private houses can be equipped duct air conditioners, which is very convenient to organize in the space of a large building.
The main condition is that the climate control equipment should not create obstacles to the operation of the main ventilation system. Their work is coordinated, complementary functioning.
Improper installation of the air conditioner will definitely affect the quality of its operation in the future. The consequences can be serious; it is often necessary to replace a faulty climate control device with a new one. One of common problems– leakage of coolant through leaky pipe joints. If not detected in time, it threatens the failure of the compressor, condenser, and other important components.
Also, a consequence of improper installation of the air conditioner on the wall of the apartment is the overflow of condensate from the drainage tank outside, into the room (the placement is not strictly horizontal).
Ignoring the basic rule for installing the outdoor unit of an air conditioner can cause it to fall down. At best, he will create loud noise at work.
Professional installation of climate control equipment is a prerequisite for its reliable, efficient operation for a long time.
Friends! More interesting materials:
 Air conditioning
Compared to other air conditioning devices, the split system has a more complex two-block design. This system consists of an external compressor-condenser module and an internal evaporator module with a corresponding number of communications through which freon and electricity are supplied and condensate is discharged. This scheme complicates installation, but does not exclude self-installation. To install such an air conditioner yourself, just read the instructions, make up for the lack of knowledge and experience through Internet resources, and consult with specialists.
Installation features depend on the design of the indoor module, which can be wall-mounted or floor-mounted. To save space, small apartments usually use a wall-mounted air conditioner. This split is somewhat more difficult to install due to the need for durable wall mounting. But regardless of the details, the work is carried out in the following sequence:
- installation of separate wiring;
- installation of an external condenser unit;
- fastening the evaporator (indoor unit);
- connection of communications with vacuum;
- test activation.
Tools
To install the split yourself you will need a tool. It is recommended to include in the set:
- a drill with a hammer drill and a corresponding set of drills that is capable of breaking through a solid concrete wall;
- pipe cutter for neatly cutting pipes without the threat of clogging with copper shavings;
- a kit for flaring the edges of tubes, which will ensure the tightness of the connections;
- an example that can be used to strip the ends of connections;
- a pump, possibly a bicycle pump, to assess the tightness;
- vacuum cleaner, to remove moisture from the system by vacuuming;
- indicator screwdriver and tester for wiring;
- pressure gauge for pressure control.
How to choose a place
Before installing split system modules, it is necessary to correctly determine their location. For the external unit, the space should be:
- protect the device from direct sun rays and exposure to dust;
- guarantee the stability of the structure;
- provide free space, sufficient for normal operation of the device.
Here such a situation is excluded, and the necessary protection of the unit is provided by the visor. An additional advantage is ease of maintenance. When choosing a location for the compressor you need to:
- provide protection from sun or heating;
- eliminate the threat of ignition of various vapors and gas leaks;
- provide the required free space and distance from the floor around the perimeter of the block as required by the instructions;
- prevent interference from constantly operating electrical appliances (distance of at least a meter);
- guarantee the strength of the wall, preventing the structure from collapsing.
Installation of separate wiring
A split system, even in its most low-power version, requires at least 1.5 kW. Such power requires a separate line, unloaded by other consumers, especially in houses earlier than 1990.
It requires:
- two-core wire with a cross-section of 1.5 to 2 mm, always copper;
- 16A circuit breaker.
If you plan to hide the wiring in a groove, then you should take care of this during the renovation so as not to spoil the expensive interior of the renovated apartment. When the idea to install a split came after a renovation, the solution may be to install additional wiring in the box. In any case, this will allow:
- avoid overloads;
- prevent device failure;
- eliminate the possibility of fire as a result of a short circuit.

Installing an external condenser unit
The complexity of this stage depends on the location where you decide to place the air conditioner. Three options can be used:
- on the open balcony;
- on the loggia;
- on the wall.
On the balcony it is enough to install short brackets and place the module on them. The protection function will be performed by a standard balcony canopy.
When choosing a loggia, you can limit yourself to the same brackets, but you should remember closed space does not provide the necessary air circulation, which will damage the air conditioner.
Open doors will help avoid this, which reduces the value of the loggia especially in winter time. It is impossible to mount the module on the wall without reinforced brackets, which must confidently support a weight several times greater than the mass of the unit itself. To attach them, it is better to use long anchors with a diameter of 20 mm.
Mounting the evaporator and installing communications
Before installing it, you need to mark the mounting locations. Check them horizontally and vertically using a level. After this, the work is performed in the following order:
- Holes are drilled according to the markings and anchors are inserted.
- Fastened with screws mounting plate;
- In accordance with the position of the block, a hole is punched for communications (50 - 80 mm) with a slight slope outward for drainage.
- A waterproofing cup with a tube is mounted in the holes.
- a check is made to ensure that the wire is connected correctly to the terminals in accordance with the diagram.
- Tubes with thermal insulation made of flex and drainage are connected to the corresponding pipes.
- If it is necessary to lengthen the edges of the tubes with the nuts on, they are first flared.
- A compact bundle (route) is formed from tubes, drainage and wires using electrical tape, which is passed through the hole to the outside.
- The indoor unit is hung on a mounting plate.
After completing the above work, you can install external unit onto the previously fixed brackets and bring the route to it. Excessive force should be avoided when bending the tubes to avoid deformation and wrinkles (the permissible bending radius is at least 100 mm).

If the air conditioner hangs over the sidewalk, then it is necessary to take care of alternative options for discharging condensate indoors.
Sealing and vacuuming
It is impossible to install a split correctly without sealing and vacuuming the communications. Sealing of connections is carried out using a soap solution and a conventional bicycle pump. The solution is applied to the connections and the tubes are pumped using a pump. When bubbles appear, carefully tighten the nuts by 1/8. The procedure is performed until the bubbling stops.
- Then vacuuming is performed, which removes air, dust and remaining moisture. For this:
- open several running ports;
- connect the vacuum pump through the service port;
- turn it on and wait for a pressure of 10 mmHg;
- close the low pressure lever;
turn off the pump, return plugs to all open ports.
Testing Before checking, fill the split with freon or refrigerant, depending on the requirements of the instructions, to the specified pressure. Testing is activated using a circuit breaker. At correct execution
- After installing the air conditioner, it will automatically enter test mode. Its result should be:
- normal flow of cold air;
- correct position of the blinds;
condensate drainage through drainage.
If all the signs are present, the split can be used every day. Otherwise, you will need to contact specialists. In this case, the warranty for the air conditioner will be lost.
Installing an air conditioner in a residential area has its own characteristics. In order for this climate control equipment to work most efficiently, it is important to carry out the installation correctly. Not less important suitable power. The main parameter for calculations is room volume. But the side of the world that the windows face also matters. So, if it is south, the room will be a priori warmer than a room of similar size, but with windows facing north. Therefore, you should choose a device that is 30% more powerful. Low-power air conditioner even when correct installation will not be able to fully cope with the function assigned to him.
Where to start?
So, there is a suitable air conditioner. What's next?
- selection of installation time;
- choice of installation location;
- choosing an installation method.

Most often, split systems are installed in apartments, consisting of an internal (evaporator) and external (condenser) units. They are connected to each other by a tube containing wires and freon. Recently, devices with two indoor units operating independently of each other have become popular - this makes it easier to install an air conditioning system in adjacent rooms.
The optimal time to install an air conditioner is not spring or summer, but during repairs.

It is necessary to draw a separate line from the electrical wiring panel for the air conditioner, and if this is done during the repair process, the wires can be successfully disguised. And preparing the hole for the freon tube is literally dusty work. Therefore, if there are repairs in the near future, it is better to wait to install the air conditioner.

How to properly install an external unit
Installation of an air conditioner always begins with the installation of a condenser. Based on the weight of the external unit, brackets that can withstand such a load are selected. The brackets must be attached not to the insulation or sheathing of the house, but directly to the wall - a solid foundation.
To protect the device from precipitation, it is recommended to cover it with a visor. This is not necessary, but such a measure will extend the functionality of the device. If the air conditioner is located on one of the first two floors, it would be a good idea to make a metal cage for it - this will protect the device from theft.
According to the installation rules of this type climate control technology, the drainage pipe coming from the outdoor unit must be discharged into the sewer.

Placing an external unit under a window
In practice, in our houses, especially multi-story ones, this is impossible, so the pipes are left hanging freely. But the sound of dripping condensation may not please neighbors living below. And this is natural - the knocking of drops on the windowsill only becomes more distracting and annoying over time. If you want to stay with your neighbors a good relationship(as well as your nerves, which may go into figuring out who is right), it is worth foreseeing this moment.

Installing an external air conditioner unit on the balcony
The optimal solution is to lengthen drainage tube so that drops fall along the wall along a line where there is no window openings or balcony structures. Don't forget about Alternative option- application.
Where is the best place to place the indoor unit?
The distance between the blocks is directly proportional to the power loss of the device. Therefore, the shorter the distance, the more efficient the air conditioner is.
It is for this reason that it is preferable to install the indoor unit on the same wall as the external one, or as close as possible to it.
It is important to remember that air conditioners:

Sometimes the most convenient option It seems like placing the air conditioner above the closet - no one will see it there. But firstly, it will prevent normal operation device, and secondly, every time you start the air conditioner, all the dust from the surface will be swept down, and people will breathe it. Therefore, this option is not as good as it seems at first glance.

Important so that free access to the indoor unit of the air conditioner is provided. This will not only ensure higher performance, but will also allow you to clean the device in a timely manner.
Sometimes they try to mark the indoor unit behind curtains or lambrequins so as not to attract excessive attention. Of course, he may not fit exquisite design interior, but such camouflage prevents productive air cooling.

It is better to spend a little more time choosing an air conditioner and find a model whose evaporator will be in harmony with the interior.

Protective screen-reflector for air conditioner - prevents direct hit cold air per person
Modern manufacturers offer various options- from laconic classics to very bold solutions, right up to, so the search will certainly be crowned with success.
How to install the indoor unit
Actually, the principle of its installation is similar to the principle of installing an external unit. Selected first appropriate place, then brackets are attached to the wall, and the evaporator itself is installed on them. The only difference is that before installing the indoor unit, a hole is prepared for the freon tube.
After this, the indoor and outdoor units are connected and the air conditioner is connected to the network. The fewer bends the tube has, the more efficiently air is removed, which means the more productive the device is.

Advice. Upon completion of installation, be sure to check the air conditioner for functionality.
For this, there are special test programs that allow you to determine whether the system is installed correctly.
Is it worth doing the installation yourself?
The principle of installing an air conditioner is generally simple, but the details are very important. So, it is necessary that both blocks are installed evenly - without distortions. Otherwise, condensation may accumulate and, as a result, rapid breakdown of the device.

In addition, some companies provide a broader warranty if the installation is performed by a qualified specialist, which is understandable: this eliminates all doubts about improper installation as the likely cause of unit failure. However, the instructions for any air conditioner include: detailed description how this device should be installed. Therefore, if there is an irresistible desire to do the work yourself, this is quite possible.

True, it may be difficult to find a tool to install the brackets and drill a hole for the freon tube. And on floors above the first it is not so easy to install an external unit: insurance is required. Specialists will not have any problems with this - all the equipment is included, they know how to use it, and do it quickly and efficiently.
- this is real, but entrusting the installation to specialists is more effective.
A properly installed air conditioner does not make any extraneous sounds. It only requires preventive cleaning once or twice a year - in spring or spring and autumn, depending on the intensity of use, as well as refilling with freon once every two years.
For many, air conditioning at home has become simply indispensable. It creates a comfortable indoor microclimate when it is hot outside. But this is only possible if it is installed correctly.
So as not to languish from the heat in the summer, but in cold period to heat the rooms, you are planning to purchase a split system. Moreover, you want to install and connect it yourself in order to save on professional installation (which is not always the case).
Our publication has 2 tasks: to tell you how to properly install an air conditioner with your own hands and to analyze how economically feasible it is. Let's go in reverse order and first compare the costs of manual and custom installation, and for this we list...
Installation tools and materials
We will not reveal here the principle of operation of the split system; it is described in detail on our resource. For a general understanding: between two heat exchangers - external and internal, refrigerant (freon) moves through pipelines in liquid and gaseous states, carrying thermal energy outside or into the house, depending on the selected mode (air conditioning or heating).
The installer’s task is to place and secure the units according to all the rules, connect them with pipes and connect them to the electrical network, and at the end start and check the units.
There is also no point in putting every screwdriver or wrench on the list; a skilled owner should have such tools at hand. Let's take into account only the equipment and accessories, without which it is impossible to install and run the air conditioner yourself:
- a hammer drill with a diamond drill or a core drill (depending on the wall material) with a diameter of at least 45 mm;
- Vacuum pump;
- manifold.

Note. If work is being carried out during the renovation of an apartment, then add to this list a grinder with a circle on concrete. It is useful for hidden laying of highways in the grooves of walls (in common parlance - grooves).
Specialists in refrigeration machines Those involved in the installation of climate control equipment will immediately ask: where is the kit for cutting and flaring copper pipes with a scraper for stripping (reamer)? The answer is simple: a beginner does not need these devices for a one-time installation of a split system with a power of up to 3 kW. It’s easier to buy a ready-made installation kit, which includes all the necessary elements:
- 2 copper tubes of custom length with a diameter of 6.35 mm (¼”) and 9.52 mm (3/8”) with properly flared ends and nuts;
- rubber insulation of the K-Flex type (already stretched on the main);
- corrugated hose for drainage;
- electrical cable with 4 or 5 cores with a cross-section of 1.5 mm²;
- bracket for mounting the outdoor unit.

Why is it better to use a kit to install an air conditioner in an apartment? Firstly, its price is comparable to the cost of rolling devices and materials purchased separately. Secondly, the ends of the lines are cut on a machine rather than by hand, which contributes to a reliable connection. Poor-quality manual flaring is a mistake made by most inexperienced craftsmen, leading to freon leaks and compressor breakdown.
 Factory (left) and manual rolling (right)
 Note. Depending on the conditions for laying communications, you will have to purchase additional plastic cable channel, winding PVC tape, polyurethane foam and a visor.
On economic feasibility
For a correct comparison, we will take as a basis the cost of installation work household split system power up to 3.5 kW (7000-9000 BTU). This includes installation and connection of the outdoor and indoor modules with laying a harness (2 lines, cable and drainage) up to 5 m long through the wall. The price includes all related materials listed above.
In Moscow, installation of low-power home air conditioners costs from 5,500 to 8,000 rubles, which in dollar equivalent is 98-143 USD. e. In other cities of the Federation, the cost may differ less, but the proportions are still the same. Now we list the average Moscow prices for the purchase of materials and rental of equipment for manual installation:
- Makita rotary hammer - about 500 rubles. per day;
- two-stage pump for evacuation together with a manometric manifold - 700 rubles per day;
- installation kit with communications 5 m long - 2500 rubles.

For reference. When renting equipment, you are often required to make a deposit in the amount of 4-8 thousand rubles in relation to the specified units. Those wishing to roll copper pipelines They can independently rent tool sets for 300-500 rubles. per day.
Adding up the indicated amounts, we get 3,700 rubles. or 66 USD e. If you add 10% for the purchase Supplies and unforeseen expenses, it will come out to approximately 4,000 rubles (71 USD). This means that installing an air conditioner yourself will save you from 1,500 to 4,000 rubles. As a rule, the lowest price threshold stated on the Internet does not correspond to reality, since it does not include some of the work and you will have to pay extra for it.
Hence the conclusion: Personal installation of split systems is cost-effective and allows you to save 2500-3500 rubles on low-power units. or 45-62 USD e. One condition: the work must be done efficiently, otherwise the costs of alterations or repairs will make you remember the proverb about how many times a miser pays.

Note. Prices in rubles are taken for the period March - April 2017 and may vary depending on exchange rates and seasonality.
How to install a cooler - instructions
The split system is installed in several stages:
- Determine where to hang the outdoor and indoor units. Mark the route for laying the wiring harness.
- Drill through the wall and lay the lines. Secure the indoor module and connect freon pipes, wiring and drainage to it.
- Install the outdoor unit and connect all communications to it.
- Perform commissioning work.
It is important to follow this sequence of operations. You cannot first mount the support plate of the internal module and then drill a hole for the harness, because when drilling you may bump into the reinforcement, causing the tool to move to the side or upward. In the first case, the route will look clumsy, and in the second, you will not be able to meet the requirements for the slope of the pipelines and the plate will have to be moved higher.

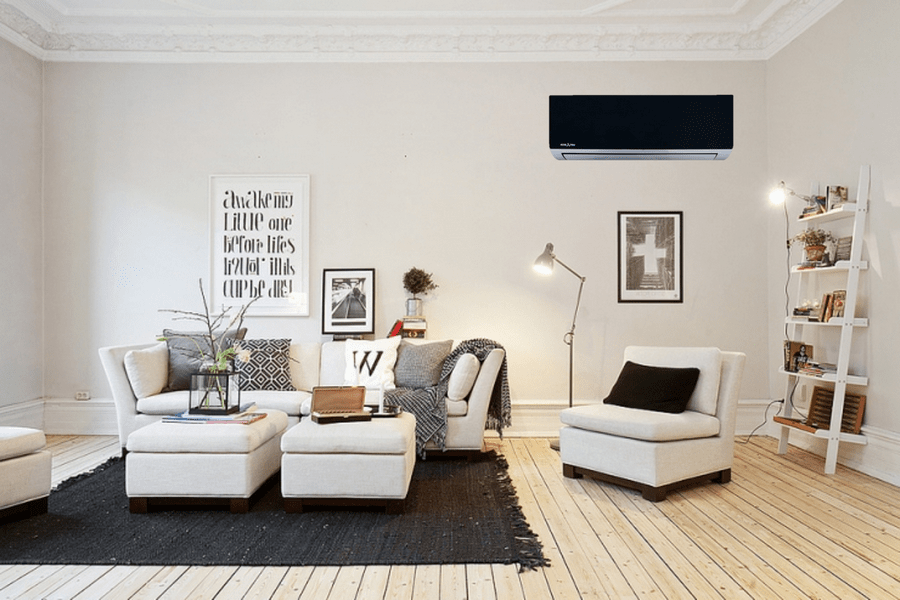
- The indoor unit of the air conditioner must be hung in such a way that the air flow does not blow directly on you, otherwise you will get a cold. Optimal location- right on external wall or on the side partition near the window.
- The minimum distance from the ceiling to the air conditioning unit is 100 mm, but it is better to retreat 30 cm. A minimum clearance of 125 mm is needed between the body and the side wall in order to have enough space for curtains.
- The outdoor unit must be installed so that it can be safely serviced at height. The most comfortable spot– on the wall within an unglazed loggia or balcony. If they are absent, the unit must be placed under the window so that the technician can reach the service ports and all parts of the device - compressor, heat exchanger, and so on.
- The distance from the building structures to the rear wall of the outdoor module is 20 cm, to the sidewall – 300 mm, as shown in the diagram.
- According to the rules, highways are laid with a slope towards the street. Along the way there should be no stagnant areas in the form of loops facing up or down.

Advice. It is wrong to place an outdoor module on the wall next to the window. Although you can reach the service ports, you will not be able to disassemble the unit without complete dismantling will not work. A technician who comes to repair a compressor has every right to refuse to carry out the work. increased danger(on high).
Installing the indoor unit
First of all, we advise you to unpack the product, take out the instruction manual and study it carefully. The fact is that given in technical passport The diagram shows exactly how to correctly install and connect a split system of this particular model. Immediately remove the wall plate from the chassis. The next procedure is as follows:
- Drill through the outer wall so that the channel slopes towards the street. The optimal hole diameter is 50 mm. It is highly advisable to put a special plastic sleeve in it.
- Unpack the installation kit and immediately wrap the ends of the freon tubes to prevent dust and moisture from getting into them. Connect the other ends to the communications inserted into the niche on the back wall of the indoor module.
- Strip the ends of the electrical cable, lead it through the rear opening of the case and connect it to the terminals, sketching a small diagram on paper in order to remember the colors.
- Form a harness from the lines and cable, as shown in the diagram below, and then carefully wrap it with PVC tape. Do not twist the pipelines together!
- Now accurately position the block’s mounting plate and attach it to the partition with dowels, strictly observing the horizontal position.
- Together with an assistant, insert the harness into the hole, while simultaneously installing the internal module onto the plate (it is secured with latches).
 Interblock communications in the harness
 Advice. If you decide to install a split system while renovating your home, then it is better to lay inter-unit communications hidden, cutting grooves in the walls along the route. Do the same with the power supply cable. How to do it yourself is explained in the following video:
What you need to know for successful installation and connection of communications indoors. First, when twisting the refrigerant lines, rotate the union nut while holding the mating part with a wrench, and not vice versa, as is done in the photo. Otherwise, you will “break the head” of the factory tube and you will have to solder it. Also, do not tighten the nut with great strength so as not to squeeze out the rolling, which will subsequently cause a freon leak.

Second nuance: fasten the plate clearly in level; the built-in condensate tray is already made with the required slope. And lastly: do not plug the power cable into the outlet, it looks ugly. Hiddenly install a separate line with your machine from the distribution panel.
Since the article a priori cannot contain all the details, otherwise it risks turning into a story, we recommend watching a video of the installation, filmed by an experienced master:
Installing the outdoor module
When installing an outdoor air conditioner unit in an apartment, it is important to be careful and protect yourself with insurance. Have a helper hold your belt while you attach the fasteners, or use safety equipment. The installation technology is simple and looks like this step by step:
- Using a building level, mark drilling points on the wall and make holes for anchors.
- Insert the mounting bolts of the outdoor unit into the brackets with their heads facing down, calculating its position on the site. Secure them with special plastic washers to prevent them from falling out.
- Install the brackets, securing them with anchors. Place the external module on them, aligning the holes with the bolts. Using a spanner with an extension, install the mounting nuts and tighten them.
- Connect the communications to the unit - screw the tubes to the ports and connect the cable to the terminals.
Advice. Do not rush to install the visor right away; it will prevent you from working with the service ports during the startup process. How to install the external part of the split system is shown in the video:
The final stage is launching the system
All new air conditioners are charged from the factory with freon contained in the outdoor unit. Your task is to fill the entire circuit without loss and start the split system. The work order is as follows:
- Connect the end hose of the gauge manifold to the service port spool on the gas side (it will accept a larger diameter tube). Connect the middle hose to the vacuum pump. In this case, all taps must be closed.
- Turn on pump unit and open the manifold valves. During the first 10-20 seconds of operation, bleed the air through the fitting provided on the pump.
- Evacuate the system for at least 20 minutes if the length of the route does not exceed 5 m. The goal is to completely remove moisture from the circuit and pump out the air, which the pressure gauge on the manifold will inform you about (it will show a pressure of minus 1 bar).
- After half an hour, close the valve and stop the vacuum, then wait at least 20 minutes, watching the pressure gauge needle. If it starts to rise to zero, then your system is leaking and needs to be redone.
- Using a hex wrench, unscrew the service port valve on the liquid side, and then on the gas side, thereby filling the circuit with refrigerant.
- Turn on the air conditioner and check its operation. When the pressure in the system rises, quickly unscrew the hose from the manifold and install all the plugs.

Attention! If you use an adapter for R410 freon to connect pressure gauges to the port, then to disconnect, unscrew the nut of the adapter itself, not the hose! Otherwise, all the freon will escape into the atmosphere.
When finished, let the air conditioner operate in all modes and make sure that condensate flows from the drain and not in another place (for example, along the wall under the indoor module). More information You can learn about installing a street block and starting a split by watching the latest video:
Let's say you accidentally released factory refrigerant into the atmosphere or the gas escaped through a poor-quality connection. Eliminate the cause of the leak, buy freon in a cylinder and refill the air conditioner using.
It is unnecessary to write hackneyed phrases about the difficulty of installing an air conditioner yourself, this is clear from all of the above. For a better understanding, we advise you to carefully watch the videos from different masters, and also read the comments left under these videos on YouTube. Smart installers often post there and you can get a lot of useful information from them.
The last point - do not try to save money on the tool. If you can borrow a hammer drill from a neighbor, then you are unlikely to find a vacuum pump for free, and you cannot work without it. Although some unfortunate installers do without vacuuming, squeezing air out of the circuit with freon. But the moisture remains, and it then damages the compressor.
In the hot summer, people begin to realize what they are missing in their home improvement.
Air conditioning allows:
- get rid of problems such as heat and stuffiness;
- maintain the desired temperature level in the room, as comfortable as possible for humans and household appliances.
Unlike fans, causing drafts and leading to colds, modern air conditioners maintain the set temperature regime in automatic mode without problematic air flow movements.
Household Appliances according to design they are divided into two main classes:
- monoblock;
- multiblock devices.
Monoblock installations consist of one working unit and are divided into the following main types:
- Window. Such devices must be installed in window opening. Modern systems are produced with a power of 1.5-6 kW, can have additional system air heating, automatic temperature control and remote control. The price of such an air conditioner is from 12,000 rubles and higher depending on the configuration.

- Monoblock air conditioner mobile type designed for floor installation and can move around the apartment. He does not require special installation; The only condition is that the air exhaust hose must be brought outside. The hose has a diameter of up to 15 cm and a length of up to 2 m, which limits movement by distance to the window.

- Rooftop devices, which are rarely used as domestic installations.
Multi-block designs are represented by split systems various installations with two or more blocks. They have an external unit containing a compressor and are installed outside the room, and one or more internal ones for distributing air flows.
- The most common type of split system is wall option indoor unit. It is connected electrically and hydraulically to the outdoor unit and is mounted on the wall anywhere in the room. Such devices are produced with a power of 2-7 kW and are capable of cooling a room with an area of 12 to 75 square meters. m. The distance between elements (pipeline length) is selected up to 7 m.

- Unlike a simple split, which provides 1 indoor unit, a multi-split system is based on the installation of 2 to 5 indoor units, which can have different designs and power (within 2-5 kW). Such a system allows you to distribute air conditioning throughout the apartment, without cluttering the outer surface of the wall with additional blocks.

Air conditioner power calculation
Selecting an air conditioner by power. This important parameter device depends on the volume of the room.
- S– area of the room;
- H- ceiling height;
- q– heat transfer coefficient of the walls (for the sunny side q=40, for the shady side - q=30) with the addition of 10% for the heat generated by people and household appliances(except the kitchen).
For example, for a room of 30 square meters with a height of 2.5 m, going to sunny side at home, the power should be 30 x 2.5 x 40 x 1.1 = 3300 W. Standard range of split system capacities: 2; 2.6; 3.5; 5.3 and 7 kW. Hence, you will have to choose an air conditioner with a power of 3.5 kW.
How to choose the right air conditioner
With the coming summer season Many people wonder: which air conditioner to choose? When selecting, in addition to power, We recommend paying attention to the following characteristics:
- electricity consumption, freon line length;
- weight;
- drainage features, design;
- important - availability automatic control temperatures, remote control, availability of fittings for fastening;
- and, of course, the price of the device.
Watch our video on how to choose the right air conditioner:
Operating principle of the air conditioner
All household split systems have a similar operating principle:
- Air cooling occurs due to the fact that refrigerant(freon) at the moment of transformation into gas in the evaporator chamber picks up a large number of heat.
- By using vacuum pump gaseous freon is pumped out of the chamber and enters the condensation chamber, where again turns into liquid.
- Then a new cycle begins, and this repeats constantly. It should also be taken into account that in the evaporation chamber When freon evaporates, water condensate is formed, accumulating at the bottom of the chamber and requiring drainage.
A special feature of the split system is remote separation of the location of the condensing chamber, compressor and vacuum pump, and evaporation chamber.
Due to the fact that all elements that produce noise (compressor, pump) are placed in the outdoor unit and removed from the room, it is ensured silent operation.
Freon is distilled through annealed copper tubes through the indoor unit, where the evaporation chamber is located and the air is cooled.
System energy consumption can be reduced by the following measures:
- minimum length of the freon line;
- good drainage of the evaporation chamber;
- avoiding heating of the outdoor unit under the influence of direct sunlight.
Energy consumption is reduced when the outdoor unit is located below the indoor element, since, when heated, any liquid itself rushes upward, which means that it does not have to be advanced artificially.
The tightness of the entire system is important - any microscopic defects can lead to volatilization of freon.
Do-it-yourself air conditioner and split system installation
Installation of a split air conditioner includes the following main steps:
- Preparatory work.
- Installation of outdoor and indoor units.
- Freon pipeline layout.
- Installation drainage system.
- Electrical circuit installation.
- Filling the refrigerant and sealing the system.
- Testing and launch.
For installation  air conditioner with your own hands, you need to prepare the following tools in advance:
- hammer drill, electric drill and screwdriver;
- rolling kit;
- vacuum pump and manifold;
- tools for pipe processing - pipe cutter, scraper, reamer, pipe bender;
- Screwdriver Set;
- a set of socket and wrenches;
- Adjustable wrench;
- tester;
- level and plumb;
- Bulgarian.
How to choose a humidifier? What is the benefit of this device, and is there any harm? Details.
How to choose and install it yourself? Let's figure it out.
How much does it cost family budget using an electric boiler to heat a private home? .
When installing the device yourself, you will need next material for installation and equipment:
- for freon route: copper tube (two sizes); return nuts for tubes (two sizes); material for thermal insulation of the route;
- For electrical installation: cable, circuit breaker of at least 25A, connection (terminal) block, RCD, PVC electrical tape, corrugated pipe for cable;
- for drainage system: hose for outdoor and indoor units, fittings for connecting to sewer system and connections;
- for fastening: brackets for the outdoor unit, mounting plate for the indoor unit, anchor bolts, dowels and screws, rope (cable) to hold the outdoor unit during installation;
- for filling and sealing: freon bottle, silicone sealant;
- auxiliary elements: plastic boxes for pipes and drainage (60-100 mm) and cable (20-30 mm), clamps, pipeline fasteners, screws, dowels.
Preparatory work
The preparatory stage includes a number of Activities without which you cannot start work:
- preparation of the installation kit;
- studying the instructions;
- checking the availability of all parts;
- determining the location of the blocks;
- route markings; clarification of the possibility of the electrical network.
Installation work must begin by reading the instructions by use. Without instructions, where the specified device parameters are given, high-quality installation is impossible. If the instructions are lost, then you should find a similar air conditioner model (company office, service centers, Internet).
The instructions specify the following parameters:
- operating current;
- permissible length and diameter of the pipeline;
- drainage requirements specific installation requirements;
- type of refrigerant and its operating pressure;
- mass of blocks.
Placing Blocks

When determining the place where you need to install an air conditioner in an apartment, you must follow certain rules.
- The internal one is installed close to the ceiling, but not closer than 15 cm.
- There should be a free gap of at least 10 cm around the block.
- When installing, the unit should be hung at an angle of up to 5 degrees.
- The location of the element should allow free supply of pipes and cables, and should also be located away from heat sources.
- The distance to the block from the window should not exceed maximum sizes, established for the length of the freon route.
- The outdoor unit is installed on outside the walls are lower than the inner one, but not more than 3 m.
- Its location must be chosen so that installation can be easily carried out from the window opening.
- The length of the pipes from the unit to the entry into the room should not exceed 1 m.
- During installation, the outer element is moved 10 cm away from the wall. It is prohibited to install the unit near a gas pipeline.
Planned Places for installing blocks are marked with chalk or marker with markings for mounting brackets. Then, between them the pipe laying route is marked for freon and power cable. Noted electrical distribution box mounting location. Drainage systems are being marked s and taking it to the sewer.
Routing and laying of freon route
 Installation of the system consists of fastening the blocks, laying and fixing the pipeline, electrical wiring and drainage system.
Pipelines and cables along the wall can be laid in three ways:
- fine;
- plastic box;
- corrugated hose.
Fines allow you to make a hidden route, but require high costs time and effort. To lay all highways, a standard standard is punched into the concrete. channel size 40 x 60 mm.
Chasing is carried out using a grinder, hammer drill or wall chaser. The simplest and highest quality way is to use a wall chaser, which allows you to make a channel in one pass, but the cost of such a power tool is high. More A common method is to cut 2 longitudinal slots with a grinder followed by sampling of concrete between the slots with a hammer drill.
A simpler installation method is a plastic hose or box. They are attached to the wall using dowels, for which holes with a diameter of about 8 mm are pre-drilled in marked places. To carry out the route through the wall, it breaks through hole with a diameter of 5-8 cm using a hammer drill.
Installation of drainage system

Correct installation - drainage of the air conditioner into the sewer, but this is only realized when close sewer pipes. Most often, the drainage hoses are simply vented outside (the volume of condensate is small and is released in the form of drops). A feature of drainage installation is the need to ensure gravity flow of water, i.e. the hose should drop 3 cm for every 1 m of gasket length.
Electrical connection
The cable for powering the units is placed in a corrugated hose or pipe pierced in the wall. It extends through the wall into the same hole as the tubes. By external wall and in the hole in the wall The wiring is placed in a corrugation. The channel for installation inside the wall has dimensions of at least 10 x 10 mm.
Retraction electrical circuit connection of the air conditioner from the main electrical network is carried out in the nearest junction box, if the cross-section of the supply wires allows. More often, necessary to an existing channel extend additional cable(the wire) the required section. A terminal block is installed in the junction box, in which the connection is made.
In the introductory electrical panel RCD is installed with a circuit breaker for a current of at least 25 A.
The figure shows electrical diagram air conditioner connections:

Installation of split system

The outdoor unit is mounted on brackets, the dimensions of which must take into account the weight of the device, as well as weather factors (snow, icing, wind). The brackets are fastened with anchor bolts, and holes in the wall for them are punched with a hammer drill. Usually, brackets are included in the kit. It is recommended to install a canopy over the outdoor unit.
To install the indoor unit previously on fixed to the wall using dowels mounting plate included with the air conditioner. Holes for dowels are drilled with an electric drill or punched with a hammer drill. According to the installation technology, the block itself is installed with an angle of 3 to 5 degrees. to direct the flow of cooled air downwards.
When laying copper tubes follows with special attention approach their bend. To avoid deformations, bending should be done using special device- pipe bender. The permissible bending diameter is 20 cm. The tube must be cut with a pipe cutter, and the cut end must be processed with a scraper.
A heat-insulating polyurene foam hose is placed on the tubes(flex). Threaded flanges (return nuts) are installed at the ends of the tubes, and the end is rolled using a reamer. The flanges are installed on the fittings of the blocks and tightened, but so as not to deform the soft copper base tubes.
Special attention - the thread of the flanges must be directed towards the end, and when fastening the cold outlet of one unit must not be allowed to be connected to the hot outlet of another.
Refrigerant charging and installation completion
The final stage of air conditioner installation includes filling the system with refrigerant, sealing and testing.
After installation is completed, the electrical network is connected and the system is charged with freon. 
- air is pumped out using a vacuum pump;
- then the system is filled with freon from a cylinder, where it is under pressure.
The tightness of the structure is controlled by a pressure gauge manifold.
If the collector does not show an increase in pressure within 60 minutes, then the tightness is considered normal; Otherwise, you should check the sealing of the joints. The easiest way to check is lather. Sealing of broken joints is done by applying silicone sealant.
Testing is carried out when turned on in different modes. Switching on is done using circuit breaker, and the test mode is set on the air conditioner.
To learn how to install an air conditioner yourself, watch the video:
Rules for using air conditioners
When using air conditioner V Everyday life You should adhere to some rules:
- Do not direct a strong stream directly at a person so as not to cause a cold;
- It is not recommended to allow a temperature difference between adjacent rooms of more than 10 degrees;
- recommended optimal temperature– 20-22 degrees;
- You should periodically turn off the device and ventilate the room to restore the ozone content;
- recommended to use;
- it is necessary to carry out preventive measures– replacing filters, adding freon, cleaning the system.
It is prohibited to turn on a faulty air conditioner: sparking in places electrical contact, clicking inside, cable heating, refrigerant leakage.
Air conditioner installation cost
Installing an air conditioner yourself requires certain costs - purchasing fasteners, refrigerant, auxiliary materials. In general, everything costs should not exceed 1000 rubles.
Air conditioner installation by a specialist can be produced without spending your own time and effort, but will require the lowest prices from 6000 rubles. By time installation of a split system will take no more than 8 hours in the presence of the right tools and materials.