How to make your own kitchen set. DIY kitchen: drawing up a project for the kitchen, step-by-step assembly process. Cabinet for telescopic hood
Read also
Design and build kitchen set doing it yourself is not as difficult and problematic as it might seem from the first minute. Of course, it will not be possible to assemble a facade of furniture quality; this requires considerable experience and special equipment, but making a kitchen set for a summer house with your own hands is quite possible. The question depends only on the availability of sufficient resources and free time.
Work order, how to build a set correctly and reliably
Before you make your first kitchen set with your own hands, it will be useful, first of all, to evaluate your strengths. The fact is that kitchen furniture can be made in two ways:
- As a built-in kitchen unit placed on a pre-assembled wooden frame. A built-in headset is easier to manufacture, requires fewer resources, and the process itself takes a maximum of a few days of work;
- The prefabricated set is, in essence, an exact copy factory-made kitchen furniture, with the only difference being that we make the kitchen set with our own hands from glued spruce boards using hand carpentry tools, without furniture lamination.
Frame options for headsets differ in huge bearing capacity. Due to the frame and the absence of adjustable support legs, the kitchen furniture is very durable and stable. Can be doubled or tripled on shelves and drawers large quantity kitchen utensils than in classic typesetting or modular set. And even after 20 years of operation, the cabinets will not sag, and the lower tier in the kitchen unit will not bend in an arc due to the prohibitive or uneven load on the countertop.

But modular scheme has its advantages. For example, if a frame frame, in the event of a breakdown, takes a very long time and is difficult to repair, then for a typesetting scheme the problem of how to repair a kitchen set with your own hands can be solved in a couple of hours. It is enough to unfasten the ties and pull out the cabinet or cabinet in need of repair.
Selection of drawing and materials
Regardless of which method is chosen for making furniture, before making a kitchen set with your own hands, you need to select drawings for the product or make them yourself, preferably with the maximum degree of detail.
One of the options for how to make a sketch and calculate the dimensions for a kitchen set with your own hands is shown in the video
A set of drawings should contain three main documents:
- An assembly sketch that reflects all the nuances and dimensions necessary to understand how the kitchen set is assembled;
- Detailing or schematic drawing for each detail;
- General list and image of blanks for each module or built-in cabinet.
The best material to use is a simple and abundant spruce laminated panel, dimensions 600x1200 mm, thickness 30 mm. For wireframe diagram you can use any timber and the same spruce panel, but more modest in size, 400x600 mm. Of course, before starting work, the material must be impregnated with woodworm protection and coated with a protective varnish.

We build a frame set with our own hands
Traditionally, built-in models of kitchen units were made in a corner design. This made it possible to strengthen the structure and at the same time increase the supporting area of the kitchen façade.
The kitchen set is assembled in the following order:
- Frame assembly;
- Installation of countertops;
- Making drawers and hanging doors on bedside tables and cabinets;
- Wood tinting, finishing operations.
With dimensions of 200x250 cm, the average cost of production is about 50 thousand rubles. Skeptics may claim that for this amount you can buy something similar from any of the companies that make furniture from chipboard. But in practice, making a kitchen set yourself with your own hands, photo, means a guarantee of quality and minimal risk of alterations.
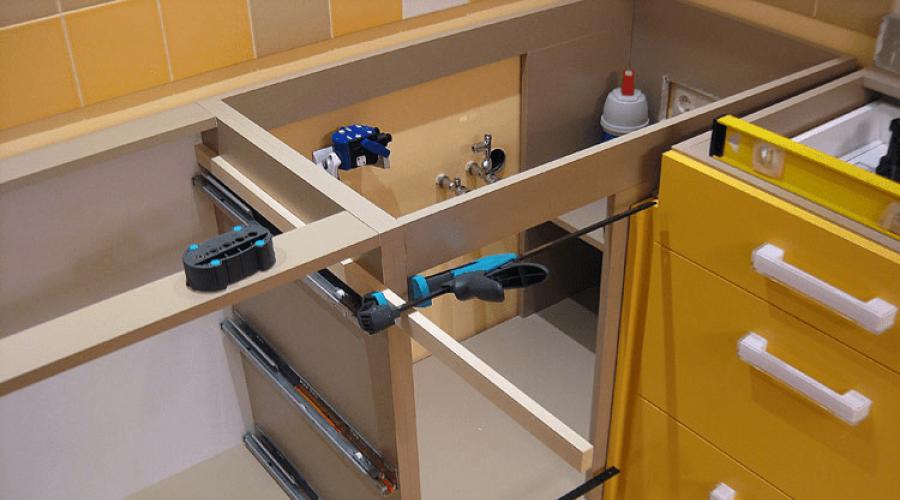
For the frame we use pine timber, thoroughly dried and treated with varnish impregnation. First of all, you need to collect upper tier, cut a 90 cm piece from a 50x50 mm beam and sew it vertically with dowels, along corner line walls.
The second step is to sew on the left and right horizontal strips of the frame. In order to hold the tabletop set, it is necessary to use a starting strip at least 20 mm thick and 10 cm wide. Next, the bottom box is assembled from a 20x100 mm board; it can be laid directly on the floor, provided, of course, that the tiles or any other floor covering on which the kitchen set will rest have a waterproofing sublayer.

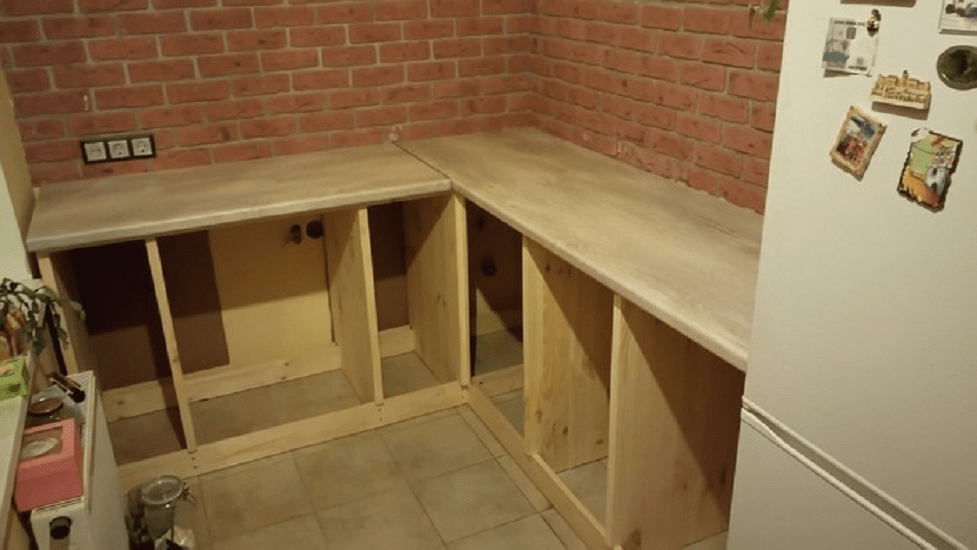
The next step is to vertically install partitions made of spruce panels onto the assembled L-shaped box, which will later form power frame the lower tier of the kitchen unit. To sew partitions to previously installed starting bars, at the corners of the panels, a corner cutout or cut is made in the form of a 60x20 mm rectangle.
After the panels are aligned, a second pair of horizontal strips is installed. The frame of the kitchen unit is ready, you can proceed to laying the countertop.
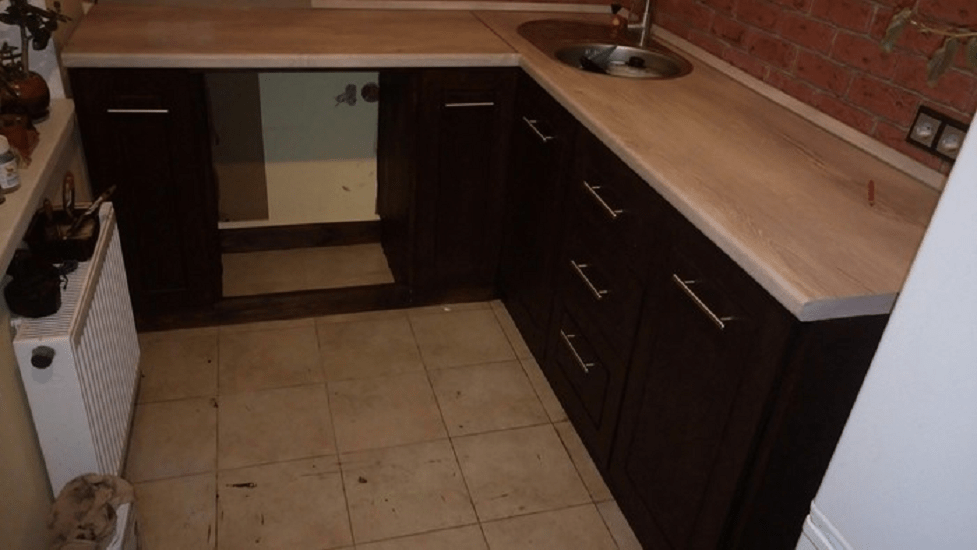
Kitchen countertop
The most expensive part of a homemade kitchen set. The cost of one set will cost approximately 15-20 thousand rubles. For frame structure best to use laminated chipboard with sealed ends.
A pre-purchased slab 60 cm wide and 4.5-5 m long is marked for cutting into two equal parts. The left part, 2.5 m long, is laid first on the frame. The slab can be secured with self-tapping screws from the inside, or placed on the set on silicone sealant, without mechanical fasteners.
The second part of the kitchen countertop is laid at the end in the shape of an L, and the cutting line does not even need to be cleaned. The joint line, like all similar parts in the set, will be sealed and covered with an overlay molding.
We equip the unit with a sink, drawers and doors
While the main elements - drawers and shelves - have not been installed on the frame set, it is necessary to installation work with sink, water supply connection and sewer drain. Of course, until the frame set is completely assembled, all communications remain muted.
The sink is installed on kitchen countertop last but not least. In order not to tear off the thin laminated film, stick transparent tape along the marked cutout line.

- Using a jigsaw, cut out an oval window;
- Coat the cut walls with silicone;
- We install and settle the sink bowl.
To install the working drawers of the set, you must first fill the wooden slats-runners along which the boxes with kitchen utensils will be pulled out from the body of the set.

Each box is assembled on a pre-prepared rectangular template, the sides and back wall are made of wooden plank, the bottom is made of plywood. The only difficulty that you may encounter when making a frame kitchen set is the need to manufacture door fronts and drawer fronts.

It’s obviously not possible to cut them beautifully by hand, so that a homemade kitchen set looks at the factory level, so this part of the detailing will need to be ordered or purchased ready-made.
11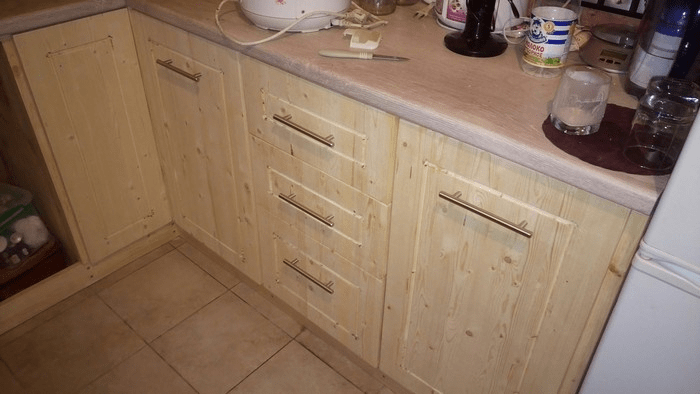
Making a modular kitchen set
A prefabricated kitchen set takes much longer and is more difficult to build. If the kitchen furniture includes a lower support tier and a set of hanging drawers, then the entire work will take at least 5-10 days, depending on the size and complexity of finishing the set.
Preparation of material
Before cutting and cutting the purchased panel material into a set, it is necessary to reject the slabs and throw away all knotty and crooked panels. Material with small cracks is sent for auxiliary purposes, for example, for cutting out the internal shelves of a kitchen set.
The rest of the panels are cut according to existing sketches and drawings. Upon completion of cutting the blanks, the ends of the front parts of the future kitchen set are sealed with polyurethane tape, and the surface is polished to a matte shine.
One of the best auxiliary materials How to make a kitchen set with your own hands is shown in the video
Step one, we build drawers and cabinets for the set
If the cutting of the blanks is carried out correctly, without deviations from the calculated dimensions, then the assembly operations in the manufacture of cabinets and cabinets are no more difficult than if you assemble a purchased factory kitchen set.

For example, mounted kitchen drawer is made in the following order:

After assembly, the corner edges must be carefully cleaned with fine sandpaper, in order to avoid the appearance of burrs and remove the protruding edge of the sidewall.

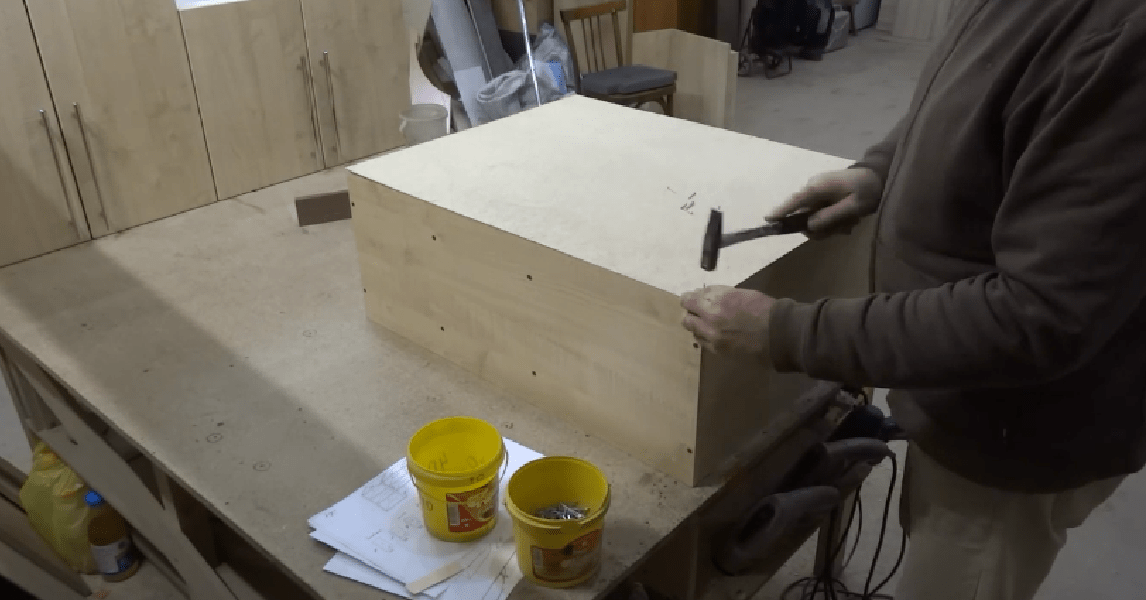
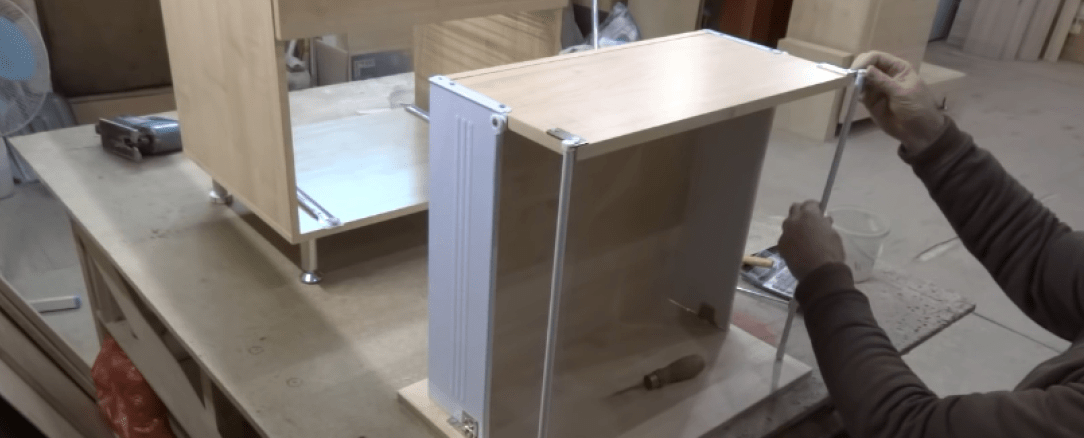
Assembling the drying cabinet
The parts of the lower tier are assembled in the same way as a wall cabinet, but assembly work have their own nuances. Most kitchen units are equipped with drying racks or drying cabinets for dishes. Making a drying rack for kitchen utensils requires correct installation additional equipment - grates and tray.
The body of the drying cabinet is assembled using self-tapping screws. Since the kitchen set must be installed with a ten-centimeter gap from the floor, support legs are attached to the bottom of the box, the front ones are made of chrome-plated steel, the rear ones are made of impact-resistant plastic.
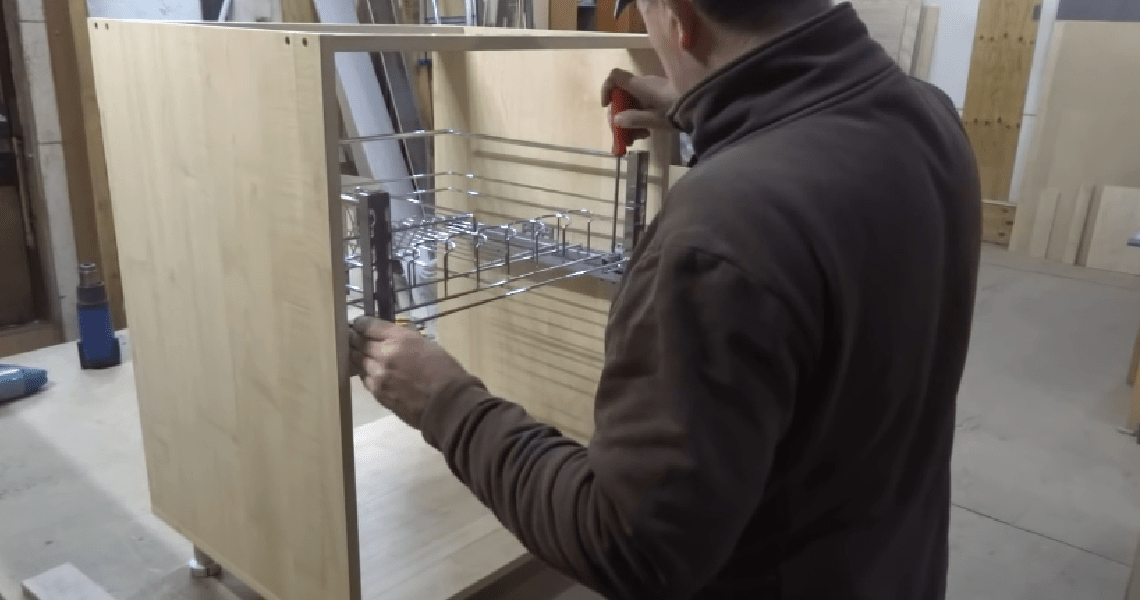
The dryer itself can be made on your own from steel mesh, but this option is not always suitable. If you are making a kitchen set at a professional level, it is best to use ready set parts for dryer with closer.
The operating principle of such a device is not much different from a drawer. The only difference is that instead of wooden box A metal mesh with cells for dishes slides out and slides in, and a built-in mechanical closer helps push a heavy loaded dryer all the way into the cabinet.
The first step is to mark two lines for fastening the runners with the closer on the inside of the vertical walls and attach the supporting parts to the walls.
For your information! The closer is used for inertial finishing of the drawer and shock-free closing of any pull-out object built into the kitchen set.

And at the end of the assembly, we attach it to the front part of the pull-out dryer façade panel.
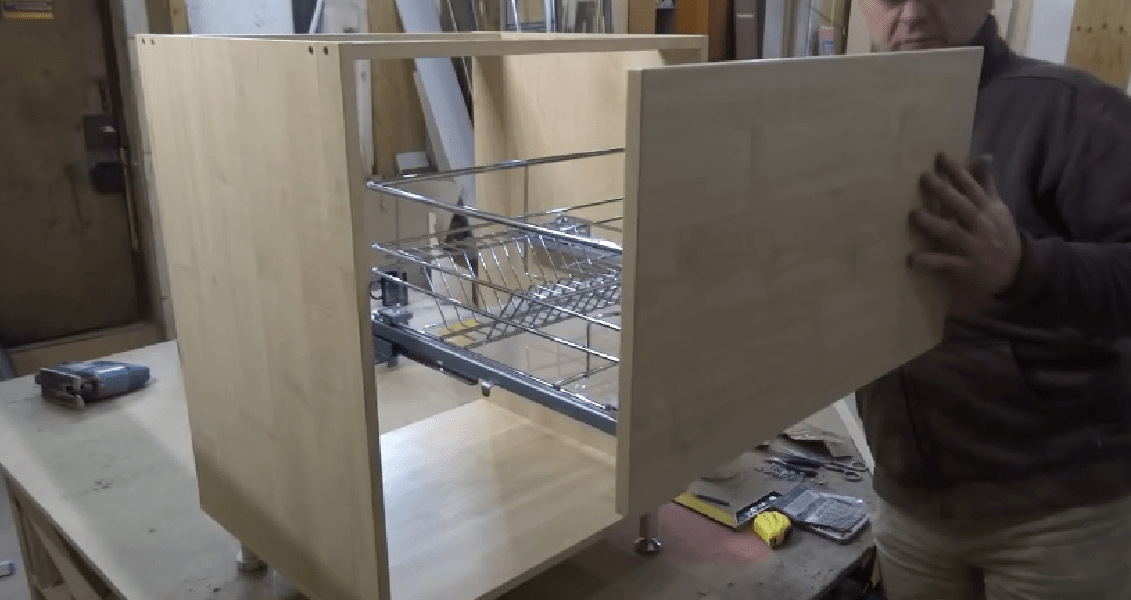
As a result, the kitchen unit has a drying compartment that is no different from a factory dryer.
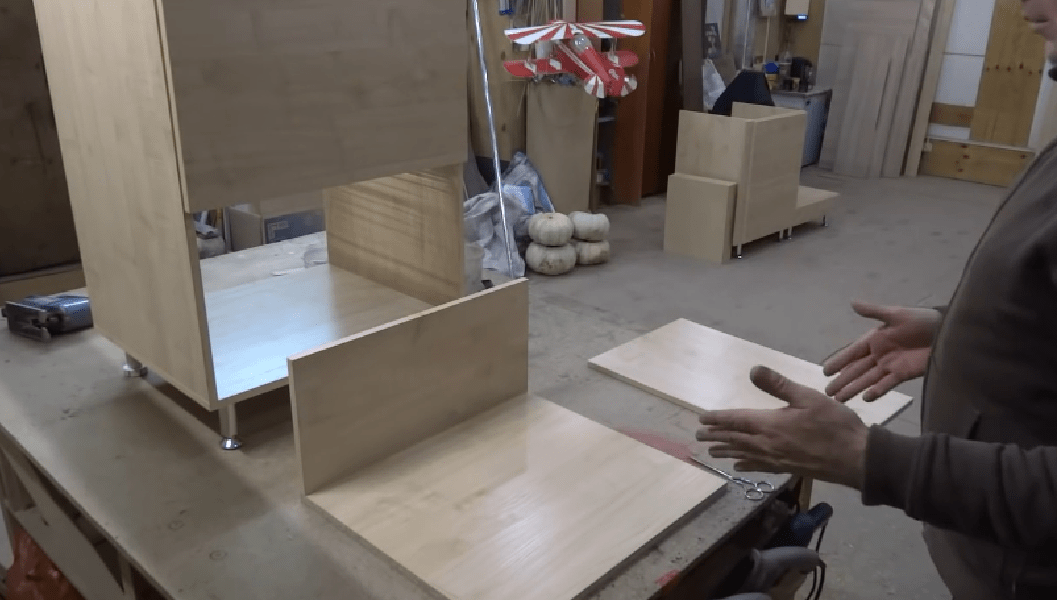
Making a metabox
Most of the kitchen utensils are stored in the set in the drawers. Therefore, it is difficult to imagine how, when making a kitchen set, you can do without a dryer with a pull-out drawer compartment.
For a dryer, an improved version of a drawer, also called a metabox or metal box, is best suited. In fact, this is an ordinary box with metal sides and roller supports.
The basis for the metabox is a plywood bottom cut to size. Attached to the back edge of the workpiece back wall boxing, also made of plywood.
The fastening is very simple, but it should be done extremely carefully and carefully so as not to go beyond the boundaries of the box, otherwise a crooked metabox will spoil the entire impression of the beautiful facade of the kitchen unit.
The next step is to attach the metal sidewalls with roller supports using self-tapping screws. We install guide rails at the bottom of the cabinet into which the metabox will be inserted. It remains to perform one of the most delicate operations, making a kitchen set. You will need to secure the front panel of the metabox so that it covers the lower edge of the bottom of the cabinet. In this case, the gap between the upper edge of the metabox panel and the facade of the dryer was no more than 2 mm.
Screeding operation of cabinets
The combination of several hanging drawers into one monoblock is used to give the kitchen set higher rigidity. Preparation and marking are carried out “on the ground”, the screed itself is carried out at the moment of hanging the boxes on the wall.
Previously, the upper tier of the kitchen set is laid out horizontally on flat surface table.

Kitchen set, lower tier
The assembly and screeding of the lower tier of the kitchen unit remains much more labor-intensive. The assembly process begins with the installation of all cabinets and cabinets on a flat horizontal surface.
First, by rotating the support legs of the headsets, the height is leveled. The absence of distortions is controlled using building level. Once all the cabinets have been accepted desired position, the entire structure is fixed with several construction clamps.
After final alignment and fixation, M5-M8 holes are drilled in the adjacent walls, tie pairs are installed and tightened to working condition. The design of the entire kitchen unit turns into a monoblock.
The issue of installing the countertop must be resolved only after the slab has been adjusted and installed without gluing in the rough version. For homemade kitchen sets, the only option is to make a countertop based on laminated chipboard or waterproof plywood. It is possible to cut a window for installation in the sink and hob set only after completing the installation of water and gas communications.
Conclusion
Planning and making a kitchen set with your own hands is quite within the capabilities of an ordinary amateur carpenter intermediate qualification. Despite the fact that some components for a kitchen set have to be purchased ready-made, economically, building cabinets and tables turns out to be more profitable than buying ready-made factory furniture for the kitchen.
If you have completed a kitchen renovation or summer kitchen and now you want to install a new set, you will probably be interested in how to assemble kitchen furniture correctly with your own hands.
Of course you can buy ready-made set made of wood for a kitchen or summer kitchen or order it at any furniture store, but you can save on assembly, especially since this process is not at all complicated.
Creating drawings and counting materials
Before you start assembling kitchen furniture with your own hands, you should draw up detailed drawings of the kitchen, which will indicate the width and height of the walls, the dimensions of the partitions and window sill areas.
Also include in the drawings a diagram of communications - gas and water pipes, wiring, batteries.
The drawings should show the shape of your future wooden furniture - it can be straight, L-shaped or U-shaped. For a small girl, an L-shaped or U-shaped shape will be relevant.


It should be taken into account that the stove should be no further than two meters from the gas pipe, washing and dishwasher It is better to place it closer to the water and drain pipes, and place the refrigerator further from the gas stove and closer to the power supply.
In the drawings, also include in which cabinets you will store dishes and all kitchen utensils, where food will be hidden. Don't forget about the work surface too.
When creating drawings of wooden furniture for large and small kitchens with your own hands, consider what material you need to make cabinet frames, facades, and countertops from.
Which cabinets will have solid doors, and which ones will have glass or mirrored ones. All of these materials have their own thickness, so your drawings must take this into account.
Special attention should be paid to counting fittings.

You should know that standard height bottom drawers - 85 cm. This includes the thickness of the table top, the height of the legs, which are adjustable, as well as the wooden cabinets themselves.
The width of the drawers depends on the contents and purpose, for example, dishwashers, ovens and hobs are mounted in a cabinet with an internal width of 60 cm. The remaining cabinets can be made of absolutely any size, but in standard sets these are usually round numbers - 30, 40, 50 cm.
If you only want to update your kitchen by replacing the facades, then simply measure their dimensions.
If you are the owner of a small apartment, then your future kitchen should also be small, Special attention You need to pay attention to saving space.
You can save space in a small kitchen by using the space under the window, where you can place a work or dining surface.
You can also save space in a small kitchen by narrowing the cabinets by 10 - 20 cm, built-in appliances, sliding doors. Take all this into account in your sketches.
If you are designing furniture for an outdoor kitchen, then you should also consider some points. It is better to use materials for a summer kitchen that are heat and moisture resistant.
If you will be preparing and canning in your summer kitchen, then consider the space for storing vegetables and fruits and kitchen utensils.
If it is difficult for you to make a drawing of furniture for your kitchen or summer kitchen yourself, then you can use ready-made drawings for small and large kitchens, which are presented in various magazines and photos on the Internet.
To make your work easier, you can also use special furniture programs that are very easy to use.
When your drawings are ready, you need to make the final calculations and purchase all the necessary materials.
To update just a few details kitchen space, detailed drawings will not be needed.
Materials for kitchen furniture
Nowadays it is rare to find kitchen furniture made of natural wood; most often, chipboard is used to make furniture with your own hands.
Basically, those companies that sell chipboard can cut the sheets into parts of the size you need, as well as edge the chipboard. The thickness of chipboard for cabinets and bedside tables is 16 or 18 mm.
For kitchen doors, you can buy regular hinges or hinges with closers. Special systems for any pocket are also sold for chipboard drawers.

If funds allow, you can choose different fillings for your cabinets - dryers, grids, shelves, retractable systems and much more, which will be especially relevant for a small kitchen.
You choose all this based on your taste and wallet size.
For the manufacture of facades, the same chipboard is used, but you can purchase ready-made facades of standard sizes from MDF or natural wood.
It is best to choose a tabletop that is moisture and heat resistant, but if you need a budget option(for example, for a summer kitchen), then you can use regular chipboard as a countertop.
Assembling upper and lower cabinets
Assembling furniture yourself begins with assembling straight cabinets. Attach rails for drawers to the side walls of the cabinets, as this will be inconvenient later.
The assembly continues like this: the initial fastening of the cabinets is carried out using dowels set with glue. After this, the parts are connected with a hex screw.
A decorative plug is then placed on the screw head to match the color of the cabinets.
Now you need to attach adjustable legs to the cabinet, or, if you have a budget option, ordinary plastic legs-nozzles.
A sheet of laminated fiberboard is nailed onto the back wall of the cabinet.
Assembly upper cabinets with your own hands, the same thing happens.
At this stage of work they also fasten adjustable fastenings for doors, lamps and other elements provided for by the design.
Now you need to assemble the drawers yourself.
They are assembled in the same way as other cabinets - three walls are fastened together, fiberboard is inserted into the bottom and the front of the drawer is secured with a special tie.
Now attach the roller guides to the bottom corners of the drawers and push the drawers into place.
Installing the headset
When the assembly of the cabinets is completed, we begin to install the furniture in its place. It’s most convenient to start with a side cabinet or, if the furniture is corner, then from a corner cabinet.
In the cabinet in which the sink will be located, cut a hole for the drain and water pipes. Install all base cabinets and adjust their height.
Wall cabinets must be hung on a steel rail. Connect the cabinets together with furniture ties to create a solid structure.
Upper cabinets should hang at a distance of at least 60 cm from the lower ones.
In the same way it is attached hob. It is very inconvenient to cut such holes yourself, so it is better to call someone for help.
Now you need to attach the tabletop. If you have a corner kitchen, then the ends of the countertops are connected using metal strips, in a small kitchen the countertop comes in one solid piece.
The ends of the covering near the stove are covered with finishing strips, also made of metal, and where the heat will not act, a furniture edge is attached.
The tabletop should be installed on cabinets with an overlap of about 3 cm, and it should be secured from below with self-tapping screws. Once everything is assembled, you can hang the doors on the cabinets.
If this was done at the very beginning, they would interfere with further installation of the kitchen, so the doors are hung at the end of the work.
Special plastic skirting board, in the color of your countertop, seal the gaps between the surface and the wall. Install a sink, stove and hood.
Updating an old kitchen set
In the event that you only need to update the headset, for example, when its content is still in good condition, but the design is outdated or tired, or you want to make an updated set for a summer kitchen or cottage, then you can use several methods.
The simplest and cheap way update the set for the summer kitchen with your own hands - cover it with self-adhesive film or decorate the facades with vinyl stickers.
This option works as country furniture or furniture for a summer kitchen.
A more radical way to update your kitchen with your own hands is to replace the facades. Instead of old facades, you can purchase facades made of wood or chipboard in standard sizes or in individual sizes.
If you want to update your kitchen inexpensively, you can do this using facades made of chipboard, plastic or cheap wood.
If your budget is not limited, then you can update the set using valuable wood or MDF. You can update your kitchen yourself with moldings and painting.
Such an update would be appropriate for small and large kitchen, and will also perfectly complement furniture for a summer kitchen.
Mark the fronts, attach the molding with wood glue, attach the hardware, prime and paint the surface.
Country and kitchen furniture updated in this way will look fresh and new.
After visiting the store and seeing the “exorbitant” prices for kitchen furniture, have you thought about creating a set with your own hands? Do not rush to claim that the task is impossible. In this article I will try to prove not only the benefits of hand-made kitchens, but also tell you in detail how to make them.
Kitchen from scratch
So, why did I decide to assemble a set based on my own sketch?
There are several reasons:

- You will have the opportunity to create a set that is ideal for the size and configuration of the kitchen, taking into account all its features.
- You will receive truly exclusive furniture with a unique design.


- This set will allow you to use every centimeter with maximum benefit.
- And last but not least, the reason is that with such construction you can save up to 50% of the cost of furniture.
As you can see, there are plenty of reasons to create a kitchen. Do you think that the installation process will require expensive tools or special skills? I hasten to assure you that it is possible to assemble the set if you have direct hands and the availability of tools. Read below to learn how to design a kitchen yourself without any special skills.

Stage 1. Design
When doing some large-scale work, it is sometimes difficult to understand what to grab and where to start. And you need to start by expressing your imagination to the maximum, which must be used in the design process.
Working on the concept
First, decide on the appearance of the future kitchen. Clearly imagine how you want it to look, where you will place a cabinet of one type or another, a stove, what materials to use.

Next you will need to sketch a sketch of the headset. You don’t need any special artistic skills for this; you can (in fact, I highly recommend) use special programs for 3D modeling. “PRO 100” is quite simple and convenient.

Before creating a sketch, carefully measure every centimeter of the room and carry out modeling according to the data obtained.
Things to consider
Colored 3D diagram corner kitchen must contain all the necessary elements.
So you need to remember about:
- corner sink and cabinet under it;
- at least two cabinets to the right and left of the sink. They can serve as cabinets for storing kitchen utensils, or become a niche for storage. washing machine, oven or dishwasher;
- upper sections (minimum 2 units);
- place for stationary equipment (refrigerator, for example).
Takes ~5 minutes to read

Save
These funds can be spent on more expensive and beautiful facades. By refusing the help of specialists, you can assemble a set that best suits the owner’s wishes.

Save
Making the kitchen of your dreams: varieties

Save
Before you start designing a headset, you should decide how it will fit into the overall interior layout of the room. The use of simple modular elements will solve both issues of functionality and ease of assembly and operation. The choice of layout also depends on the personal preferences of the assembler. There are the following main types of kitchen sets according to the design scheme:
- Linear. The simplest one. Used in long rooms. The entire set runs along one wall. Typically used in narrow kitchens.
- Corner. A very compact and sophisticated option. With such a layout, it is very important to correctly calculate the corner modules in which the sink is most often placed. You have to take into account all the irregularities in the interior of the room.
- In the shape of the letter "P". This design can be used in spacious rooms. Excess space is taken up by functional modules. You can even place a dining table in the center.
- Peninsular. Part of the set in this layout can act as a bar counter or work surface. It looks very stylish and impressive.
Features of mutual arrangement
When choosing a kitchen layout option, there are some features to consider. They are associated with the relative position of its various modules. Below is a list of key rules.
- Gas pipes must not be placed flexible hoses above or below the water supply system.
- The gas stove or hob should be located at a distance of 1.5-2 m from the main gas pipe.
- Washing and gas pipe move away from each other at a distance of 50-80 cm.

Save
The latter is especially important in corner layouts. They should not contain a sink or gas stove immediately on both sides of the corner cabinet. There is always a chance that the housewife will pour water on the burning gas burner or put a towel on it.
General sequence of design actions

Save
Development of circuits is a very important and difficult part when assembling a kitchen set. It can be divided into several key stages:
- the material from which the frame part of the product will be made is selected;
- materials are selected for the manufacture of the most expensive elements of the furniture - facades and countertops;
- specific models of hardware products, such as handles, hinges and door closing mechanisms, are determined.
- the dimensions of the room in which the furniture will be placed are measured, taking into account the requirements of safety and convenience;
- a design diagram is created, which accurately indicates the location of all modules (cabinets, drawers, cabinets, sink, stove);
- the desired dimensions of the headset modules are reduced to physical dimensions (dimensions of the room, thickness of the material, location of air ducts, pipes and connections).
After completing these steps, you can begin assembly.
Selection of materials
Support module materials
Most of load-bearing elements will be hidden behind the facades and under the countertop. The cheapest and most common today is laminated chipboard (laminated chipboard). It goes very well with any facade materials. There is a huge selection decorative coatings. Maximum length cannot exceed 3.5 m. This length is quite sufficient for the manufacture of any modules.
The thickness of the laminated chipboard is selected as follows:
- 16 mm - for side walls and shelves;
- 18 mm - for the base of the bottom row of cabinets;
- 10 mm - for decorative inserts.
Tabletops can be made from laminated chipboard with a thickness of 24–32 mm. If there is sufficient funds, more can be used expensive materials: fake diamond, acrylic, glass, natural stone. There are even styling options decorative tiles to the surface of its functional zones.

Save
Facades and fittings
The face of the kitchen set is the facades. Their main function is aesthetics. The most common facade material today is MDF. Made from environmentally friendly pure material, they are covered with various decorative films that create color and texture. There is no need to skimp on this material. There is nothing wrong if its share of the entire budget is more than half of the total amount.
If the facades perform a decorative function, then the fittings mainly perform a functional one. The exception is handles - they should look beautiful. Without functional elements, all furniture will be just a set of empty drawers in which it will be difficult to find the right thing.
Features of the design of individual elements
In the kitchen wall everything is located in two rows:
- lower - cabinets with doors or drawers;
- upper - cabinets with doors or open.
Moreover, the construction has a number of features depending on where they are located.
Standard

Save
Along the straight sections of the kitchen are the simplest design modules: cabinets and cabinets. The drawing for a standard cabinet starts with two side boards. They are made from 16 mm laminated chipboard. They are located vertically. Then the horizontal boards are placed end-to-end between the vertical ones. The result is a cabinet-box. The thickness of the material is taken the same. In hinged ones, the load-bearing parts are the side walls. The elements of the fastening system are attached to them.
The cabinet is made differently. First, the bottom board is taken - 18 mm chipboard. Two side ones, 16 mm thick, are placed on it. On top, between the side elements, guide strips are placed. They don't even need to be laminated on all sides. A tabletop will subsequently be attached to them, which will hide the slats. At the bottom cabinet, the entire load falls on the bottom. Since the finishing cover (tabletop) is not immediately attached, only stiffeners are installed.
The back wall, made of fiberboard 4 mm thick, is placed in the same way for the cabinet and cabinet. This thickness should not be neglected at the design stage. All adjacent modules are connected to each other with special ties. They cannot be covered with shelves. Installation of fastening clamps will require drilling holes with a diameter of 6-8 mm.
All pull-out components, such as drawers, are designed with extra thickness of the fittings. For example, if the roller guides have a thickness of 22 mm, and the side walls are 16 mm, then for the width of the box the planned dimensions are taken minus the sum: 16+22+22+16 mm. They go in sequence: wall, guide, drawer, guide and wall.
Non-standard

Save
In any kitchen you will definitely find such interior elements as pipes, protrusions for the air duct, sloping walls, etc. Cabinets and cabinets in this case will play not so much the function of storing things as masking the shortcomings of the interior.
Hiding a niche is quite simple. To do this, you simply need to make the depth of the cabinet larger by the amount of the protrusion. And the protrusions will already be cut out from the furniture elements, and “eat up” some of them usable space. The shelves can also be cut to size.
Pipes inside cabinets will require appropriate recessing. If part of the pipe runs over the apron, you can make an additional box to match the color of the apron or countertop. There are times when sewer pipes protrude more than 30 cm from the wall. You can hide them with a beveled product. One side of which has a wall with a standard depth of 30 cm, the second - an amount sufficient to mask the pipes, for example, 50.
Features of corner kitchen components
Corner cabinets and cabinets in the inner curve of the kitchen are the most difficult to design. It is not very noticeable in the drawing that opening doors will block access to neighboring ones. This creates a huge space, the far corners of which are difficult to get to. Most often, a sink is located in a corner cabinet, instantaneous water heater and a trash can. The tabletop is made with a small margin in depth so that it protrudes 2-3 cm and hides the door.

Save
A corner cabinet can mask the water supply communications system, which is most often located in the corner. This piece of furniture must be made with a 45° cut. It should be done in such a way that the horizontal partitions are located inside the vertical ones. If the confusion of this sequence is excusable, then the facade door simply will not fall into place.
Facade design
Despite its simplicity, façade elements require drawings that indicate dimensions. Door leaves can be either overhead or internal. The way they are placed depends entirely on the choice of hinges. Their width should be made with a margin of 4-5 mm on each side. For example, with a cabinet width of 0.6 m, the horizontal dimensions of the doors are 29.2 centimeters each.
Another difficult moment that everyone has facade structures: special drink for loop dies. It is usually done with special cutters. The drilling depth of the recesses for some hinges may differ from the standard ones. The hinges can be adjusted in depth. The placement of the dies may vary by 2-6 mm from the edge of the door.
Design diagram of the entire headset
Taking room measurements
![]()
Save
When taking measurements, it is necessary to take into account a number of features. Despite the fact that you want to fill the entire space of the room along the wall as much as possible, some areas will remain blind. First of all, this concerns the base. A gap of 10-15 cm under the ceiling does nothing. If there is a hood right under the ceiling, then the boundary should be drawn along its lower level. At a lower location vent Air ducts run in the upper cabinets, resulting in a loss of interior space.
The bottom step from the floor is 7-10 cm. Most kitchen cabinets are placed on special legs that allow you to change their height. They can withstand loads of up to 200-300 kg per element. The number of legs must be taken based on the design weight of the cabinet with the things stored in it. When passing through the heating system pipes, a margin of 5-10 cm should be provided. It would be better to hang a curtain in this place. This will allow you to hide the pipes while maintaining easy access to them.

Save
The tabletop can fit closely to the rest of the walls. The lower cabinets themselves will stand 100 mm from the wall, allowing communication elements to be installed behind them: gas hoses, water supply, sewer pipes. Before installation, it is better to lay out the apron on the wall. Made from tiles, it will take an additional 10-15 mm. If it is absent, this margin should be taken into account when designing.
Layout of modular elements

Save
A schematic drawing of kitchen furniture is drawn up at this stage. All cabinets in the upper row and cabinets in the lower row should be arranged in such a way that it is convenient to work with them later. You should be very careful about the location of such important elements kitchens such as sink, hob and refrigerator. It is between them that the owner will have to run the most. When arranging them, the rule of the functional triangle is used.
There is a stove in the center. It is advisable to place it immediately under the air duct. This will allow you to fix the hood in the same place and avoid placing long and bulky boxes. People often work at the stove with two hands.
They also work at the sink with both hands. It should be located on one side of the stove, for example, on the right. The refrigerator should be located on the other side. In our case - on the left. It is better to make the distance between the sink and the stove no more than 1.5 m. It is better to place the refrigerator at a shorter distance, for example, 1.2 m. It will be convenient to organize a cutting table in the area between the refrigerator and the stove. This will save effort when removing food before slicing.
In addition to the horizontal layout, ergonomic rules should be taken into account when removing upper cabinets. They should be positioned in such a way that the lower edge is at the level of the hostess’s chest. The top shelf should be accessible from the floor at arm's length. When choosing the height of the cabinets for the ceiling, the top shelf can only be reached from a stool.

Save
Drawing of a homemade kitchen set with dimensions
When designing the sizes of cabinets and cabinets, you should take into account several rules for choosing sizes, which have already become a standard:
- 30 cm - depth of the upper ones;
- 60 cm - depth of the bottom row cabinets;
- 85 cm - the height at which the tabletop is located;
- 72 cm or up to the ceiling minus the basement area - the height of the cabinets;
- 35-80 cm is the width of cabinets closed with one or two doors.
Regarding the last size, it should be taken into account that with a standard swing door opening, with a leaf width of 40 cm, the structure will sag significantly. If you make a cabinet with two doors more than 80 cm wide, then there will be overpressure on the hinges. Additional reinforcement with 3 or 4 loops will look unsightly and take up a lot of space inside.
It will look beautiful homemade kitchen with a mezzanine board located under the plinth. In this case, you can leave a distance between it and the row of cabinets. Equipped with lighting fixtures, it will not only perform a decorative function, but will also become a lighting fixture.
Since the cabinets are not mounted close to the wall, their depth is chosen to be only 45-50 cm. But in this case, the facades will be located at a distance of 60 cm (plus the thickness of the facade) from the wall. This is exactly the width of standard countertops.
The family spends a lot of time in this room: family conversations over a cup of coffee or tea, dinners and lunches, discussions important events per day. That is why the kitchen should be cozy. But when creating an interior, it is necessary to take into account that kitchen area must be functional and convenient. When arranging a room, you need to approach the choice of furniture responsibly.
Today the most popular kitchen furniture designs are:
- a timeless classic. This style is preferred by those people who have high demands on design. Classic style will never lose its popularity. The furniture in the kitchen will remain relevant and modern even after many years. Kitchen sets in classic style distinguished by sophistication and elegance. They fit perfectly into any interior of an apartment or house;
- modern modernism, in which there is a harmonious combination of colors. Such furniture is distinguished by functionality and practicality. The presence of decor is especially important when creating furniture in the Art Nouveau style. For such purposes it is worth using modern fittings.
Secrets of creating a successful design
In the manufacture of kitchen furniture, fittings play an important role. She won't be able to increase usable area, but allows you to make the furniture especially comfortable. It is worth creating furniture not only based solely on its size. Must be taken into account internal organization kitchen products, simply put, you need to correctly plan the “stuffing” for the kitchen. 
Remains the most popular for many years corner cupboard. However, this item is practically never used and takes up a lot of space. It contains items that are needed in very rare cases. But it can be turned into a functional product by equipping it with a special mount for shelves that will move out.
Kitchen drawers should be made with separated zones. So everyone kitchen tools will get his place. You can always quickly and easily find a knife or fork. Modern mechanisms It should be done on the basis of spring brackets, so the cabinet doors will open upward. 
It is more convenient to install the kitchen set on legs. It is impossible to avoid litter in the kitchen, but it is much easier to clean under such furniture. Another advantage of the legs is the fact that if moisture gets on the floor, it will not damage the furniture. The water can be wiped off quickly and easily.
When creating kitchen furniture, you can use special roof rails - beautiful strips made of chrome material. Such kitchen accessory can be used to create any interior. You can place any kitchen utensils on it using hooks.
When installing a kitchen set in the Art Nouveau style, an excellent option is to create a metal rack for dishes or a bar counter.
When creating kitchen furniture, you need to consider color palette. The shade of the kitchen should be in harmony with the room itself, because only a complete room is comfortable and cozy.
You should decide on the types of cabinets and their placement. With this task, the easiest way is to contact a qualified designer who will help you choose the color and type of furniture more rationally and design the set correctly. But if you have excellent taste, knowledge and a sense of harmony, then creating a kitchen furniture design will not be difficult for you.
Choosing material for making kitchen furniture
Currently, a variety of materials are used to make kitchen furniture:
- Laminated chipboard or natural wood to create a facade headset. Chipboard is a more popular material, because it is much easier to work with. For the manufacture of facades, types of fiberboard are perfect: laminated chipboard, which is the most inexpensive material, MDF, which has a medium price range, and MDF with a painted surface. Many experts recommend using MDF to create a kitchen facade. This material is more practical and durable. In addition, it can have the most incredible colors.
- Countertops. There is a huge selection here. It all depends on the amount you are willing to pay for a piece of furniture. On construction market Tabletops made of stone and chipboard are available for purchase. Chipboard is the most popular material, because it can be used to make a tabletop of any shape and size. In addition, the material is easier to process and has a long period operation and reasonable cost.
The chipboard tabletop can be made matte or glossy. But if you create a real work of art, then without stone countertop you just can't get by. To create it, both natural and artificial materials can be used.
- Apron . This working surface of the wall, finished with special panels, can become a real decoration and addition to the set. If you choose an apron in the same tone as the tabletop, you will be able to create complete picture. This accessory is very easy to install. It does not require special care and can last for a long time. But its cost is slightly higher than that of good ceramic tiles.
- Accessories for kitchen furniture can be very different. It all depends on your means and desires, as well as the style you choose. You can use fittings made of plastic, wood or chrome. Products of this kind should be chosen especially carefully, because the entire appearance of the kitchen unit, and, accordingly, the room, will depend on their appearance.
Eg, plastic handles tend to lose their appearance after a short period of time. The most popular fittings option today are chrome products. They have a long service life and are very easy to care for.
Manufacturing of parts for kitchen units

The manufacture of kitchen furniture should begin with the preparation of materials and tools. You won't need a hammer and a screwdriver for this process. The work will require a significant number of tools:
- a plane used to process cuts in material. An excellent option is a tool that runs on electricity;
- a hacksaw used to cut the base material;
- a router used to cut holes and recesses for fittings. You should take a woodworking tool;
- a drill used to form sockets for door hinges;
- screwdriver for quick and trouble-free installation;
- iron used to glue the edge;
- tape measure for measurements;
- screwdriver for twisting parts;
- a simple pencil for creating drawings on the material;
- sandpaper for sanding cutting areas;
- primer of the same color as the base material.
Also for self-made kitchen materials you will need:
- Chipboard from which the shelves will be made. For such purposes the most the best option is chipboard with a thickness of 16 mm;
- Chipboard 32 mm thick to create a tabletop;
- Fibreboard for making the back walls of the set;
- modern fittings;
- fastening materials.
You can make kitchen furniture of any configuration yourself. But even the simplest products look elegant and individual if you approach the creation of a project with skill. When designing a kitchen set, you should be guided by the functionality of every detail, and then you will certainly be able to create comfortable furniture.
The main task in drawing a sketch is accuracy and clarity. It is necessary to take measurements and put them on paper. It is recommended to use a unit of measurement of 1 mm, this way it is possible to create a particularly accurate design. It is recommended to leave allowances of 2 mm and 5 mm on the material. Make the drawing with a simple pencil, which ensures precision of application. Also, many experts recommend numbering each part for the convenience of further assembly of the structure. 
Before starting to create a project, it is recommended to determine the places where it will be located kitchen appliances. They should be marked on the plan indicating exact dimensions. It is also necessary to create on paper the appearance of the kitchen unit, namely the placement of cabinets, cabinets and shelves.
Only after determining all the dimensions and drawing them on the drawing can you begin to manufacture the parts. For this:
- apply all planned fasteners and handles to the material. You can make a layout using plain paper or cardboard;
- drill holes for mounting handles and hinges;
- cut the parts, strictly following the drawing lines. It is better to make the cut from the back side of the material, thus allowing the outside to remain beautiful;
- glue the ends of all parts. This will provide your furniture with a longer service life, since it is the edge that protects the material from swelling.
The main stage of creating parts for the kitchen set has been completed. As a result of your work you received individual elements, which needs to be collected.
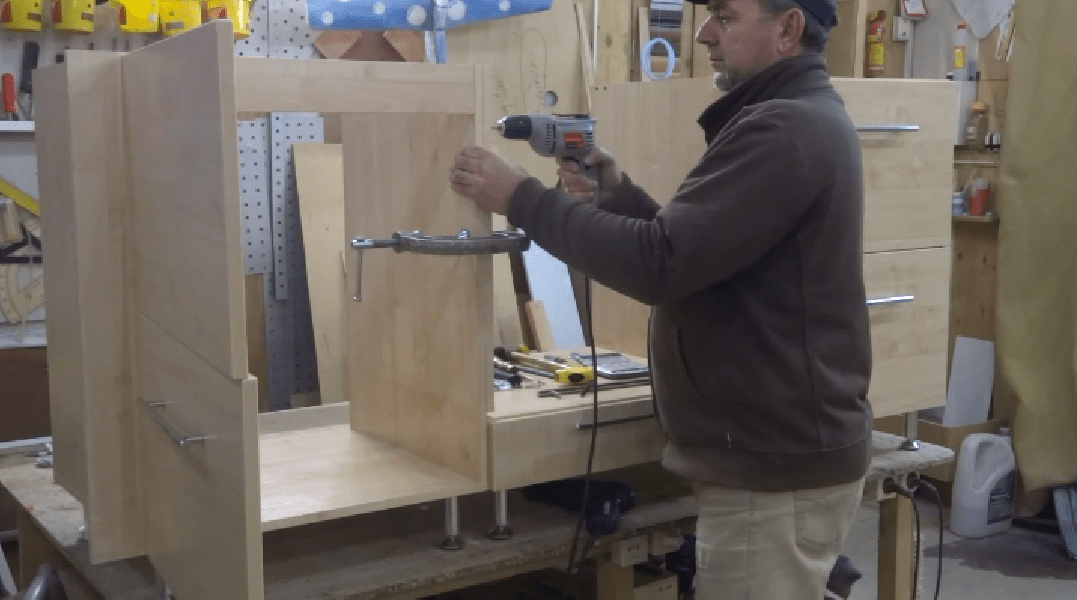
Assembly and installation of kitchen units
You can see the process of assembling kitchen furniture in the video:
To assemble kitchen furniture you will need a drill. Take a drill with a diameter of 5 mm and a longer length than furniture screed. Kitchen furniture should be assembled with a tie, which is why you will need an Allen key. First, it is recommended to make a preliminary screed using “rough” screws. This is necessary to determine all errors and inaccuracies in the design. Furniture assembly begins with the installation of the lower bedside tables. The vertical parts should be attached to the horizontal ones. Don't forget about attaching the shelf supports. To complete the structure, you need to nail the back wall. 
Next, taking into account the height of the retractable structures, guides should be attached. Remember that they exist right-handed and left-handed. The next step will be assembly drawers. Many people recommend using glue to connect the elements of drawers. This will make the structure especially durable. This is important for products that will constantly move. Ready drawers insert into special profiles. They should move smoothly and not cling to other parts of the structure.
If the drawers sag, the back wall should be nailed more firmly. This will make the entire structure more durable and integral. The last stage the legs will be attached to the bedside table. All bedside tables, including wall-mounted ones, are assembled in the same way.
After the rough assembly is completed and all inaccuracies have been eliminated, you can assemble the set. For these purposes, screws 50-60 mm long are used.
The working surface of the kitchen set can be purchased ready-made at a hardware store. But if you plan to make it yourself, to make the tabletop you will need chipboard of the same size as the cabinet that will be placed under it. Also an excellent option is to lay fiberboard underneath. This will allow you to even out any uneven edges of the cabinet and make the tabletop stronger and more durable. The tabletop is attached to the cabinet using self-tapping screws. The holes for this are prepared in advance. From the inside, the entire structure is strengthened with steel corners.
Placement of the sink will require precise measurements. Use a pencil to make marks, cut a hole with a jigsaw according to a previously created sketch. It is recommended to lubricate the edges with a special silicone-based glue to increase fixation.
In the places marked for hinges, cut out sockets for fastening. This should be done especially carefully so as not to spoil outside cabinets or cabinets. Attach the hinges using self-tapping screws.
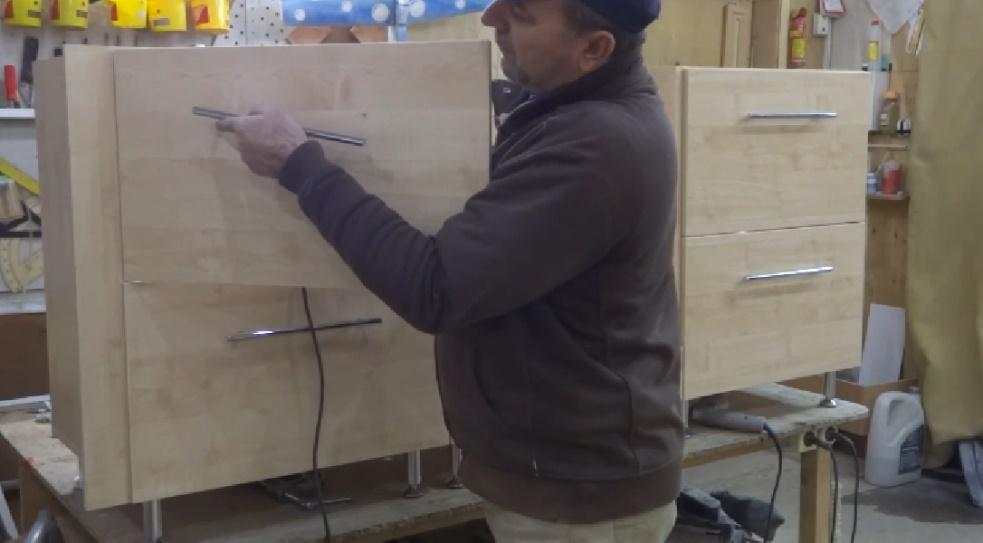
The last stage of installation will be attaching the fittings. Handles and hinges, holders for kitchen utensils and towels should be placed in the most convenient places. These products also imbue the entire set with a unique meaning. It is thanks to them that the furniture comes to life. When choosing accessories, stick to a single style, giving preference to quality materials. These are elements that you should not skimp on.
For a do-it-yourself kitchen, you can make your own kitchen table.
Making a kitchen set with your own hands is not difficult. Stock up on patience, materials, tools and feel free to get down to business. It should be carried out with enthusiasm and inspiration, because self-creation furniture should bring pleasure. This is the only way to get good results from my work. Simple tips will help you create kitchen furniture that will bring joy from its use and fill the room with comfort.