How to make self-leveling epoxy floors. Epoxy self-leveling floors, cost and work plan. Properties of epoxy coating
Self-leveling floors are floors in which special mixtures are used when screeding. If the technology for constructing such coatings is strictly followed, they should level themselves and the surface will be ideal.
The main components of this type of coating, used mainly for coatings on concrete, are epoxy resin and hardener, modified with solvents and plasticizers
Main characteristics
Depending on the purpose, mixtures may contain various coloring pigments and additives.
Epoxy self-leveling coatings have significant advantages:
- Mechanical strength
- Wear resistance
- Chemical resistance to most substances and UV radiation
- Fire safety.
Such surfaces are seamless, safe, have antistatic properties, are aesthetic, and have sufficient long term service, which proper care can reach 20 years.
Due to these properties, epoxy floors are used in medical institutions- hospitals, laboratories and industrial premises that are subject to mechanical stress. They are also in cafes, restaurants, offices.
Fill tool
Optimal thickness of filler epoxy coating– from 2 to 2.5 mm. The main steps in the installation of self-leveling coatings are the preparation of tools and surfaces, and then the alternate application of primer, base and finishing layers.
Tools used when installing self-leveling epoxy coatings:
- Synthetic padding rollers with a pile of 12-14 cm, steel spatulas (no more than 600 mm wide) - for applying primer layers, putty and underlying layer
- Squeegee - for distributing the entire composition in the front layer
- Aeration needle roller - to remove air and redistribute material over the surface
- Mixer and mixer - for mixing components
- Paint shoes - for moving along the surface
Special conditions of work
The work is carried out at an air temperature in the range of 5-25 degrees, while the temperature of the material itself should be in the range of 15-20 degrees. Relative air humidity (at the time of pouring the surface) and within 24 hours after is 80%, and the humidity of the base is not more than 4%.
A quality concrete base must have a strength of at least grade 200 and not deviate from the horizontal surface by more than 2 mm over a segment of 2 meters, and not have greasy stains and traces of rust. If these shortcomings available means cannot be eliminated, then it is necessary to make a new concrete screed on top of the base.
Main technical characteristics
 For epoxy self-leveling coatings, mainly two-component materials are used as a primer, putty and finishing layer, and dry quartz sand is used as a filler and to create a sublayer.
- Self-leveling epoxy floor does not contain organic solvents
- After mixing the components, the solution retains its “working” properties for 40 minutes
- Thanks to epoxy primer - high adhesion to concrete
- Drying – 3 hours, start of active use – after 3 days
Finishing layer on concrete pavements, applied using the “pour” method, provides (compared to painted epoxy paints and “sprayed” floors) a very even and smooth surface.
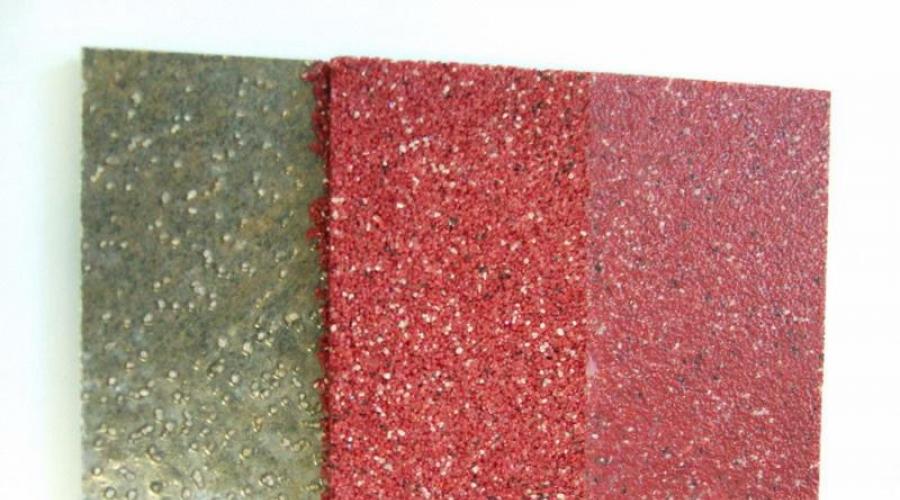
 In addition to standard ones, the market offers a fairly large range of epoxy self-leveling coatings that can also be used in residential construction - this decorative surfaces with chips, various sparkles and
The design of most of them is available only to professional specialists. But having basic skills and having studied some features, you can quite successfully get a job small areas self-leveling epoxy floors, so to speak.
Cost of epoxy self-leveling floors
 Depending on the surface area, type of concrete and layer thickness, the price of a set of materials for an epoxy self-leveling floor on the market ranges from 550 to 1050 rubles. for 1 sq.m.
At the same time, the higher the quality concrete preparation(max. - M350) with an optimal layer thickness, the cheaper the cost of the main set of materials. Decorative and protective properties with increasing floor thickness change slightly, but the cost increases quite noticeably.
Therefore, if it is still necessary to increase the thickness of the surface, then you can reduce the cost of work by arranging an underlying layer of sand or epoxy putty mixed with sand.
- Chips, flocks and sparkles increase the cost of 1 sq.m. from 10 to 100 rubles depending on their quantity.
- When using wear-resistant and light-resistant polyurethane varnishes to protect against scratches and secure decorative elements, the price of the floor installation also increases. But you save money on subsequent repairs.
It is also necessary to take into account the cost of tools and auxiliary materials.
The cost of installing epoxy coatings is approximately 30% of the cost of materials (excluding transport costs and travel allowances), which, with the proper skill and experience, can be saved by installing epoxy floors with your own hands.
When choosing self-leveling coatings, it would be a mistake to focus exclusively on foreign brands. Similar products from many domestic producers is not inferior in quality to imported mixtures - at a much lower cost
Thus, when installing, for example, 1000 sq. m. surfaces optimal thickness the price of a turnkey epoxy self-leveling floor will range from 750 to 1,400 rubles. for 1 sq.m.
Epoxy self-leveling floor - it's relative new way arrangement floor space in apartments and country houses.
Previously, this method was used only to create special durable coatings in places with increased requirements to wear resistance and service life. Now liquid formulations have greatly reduced their cost, expanded their range and become more accessible to the common man.
Brief description, features and benefits
Epoxy floors are a variety of special hardeners and stabilizers. They are used to create bases with high strength, wear-resistant and decorative characteristics.
The epoxy floor is applied “in bulk” - this allows the mixture to flow freely over the plane, creating an absolutely flat and seamless surface. For improvement decorative properties the floor arrangement involves mixing and joining different color schemes, applying color washes and strokes, adding various glosses, etc.
In addition to mixing shades, various colors can be used decorative elements– chips, flocks and glitters. These elements are matte, semi-matte or shiny particles that are applied to the finishing layer and sealed with a transparent composition.
A distinctive feature of this coating, in addition to durability, is its high decorative effect and a wide selection of colors.
The scope of application of such floors is extensive and not limited. specific tasks. These include the energy and food industries, chemical industries, parking complexes and car services, medical and household institutions, shopping and exhibition complexes.
For installation in apartments and country houses, the technology of self-leveling epoxy floors suggests the use of mixtures of a similar composition, as for installation in places with a more aggressive attitude towards the floor surface.
The standard liquid solution for such a floor is a two-component composition containing an epoxy-colored base and a hardener. The solution is supplied and distributed in different containers. The mixture is prepared only before pouring onto a leveled and prepared base.
Distinctive advantages and disadvantages
There is an opinion that epoxy floors emit harmful substances and hazardous to health. This is fundamentally wrong, since among the variety of resins, epoxy substances are the most harmless and safe.
The liquid epoxy composition does contain substances that irritate the mucous membrane, causing slight suffocation and burns, but their percentage is so small that during polymerization of the base they completely evaporate. Some types of compositions for self-leveling floors do not contain volatile substances at all.
That is why any qualified specialist will strongly recommend purchasing funds personal protection– gloves, glasses and special clothes. Manufacturers do not hide this themselves - safety precautions can be found on the product packaging.
In view of this, after completely dry The liquid mixture produces an environmentally friendly and absolutely safe coating, completely suitable for installation in children's rooms, kitchens and bathrooms.

The transparent look is more traditional and involves the use of various decorative additives
In addition to safety, self-leveling epoxy floors have the following advantages:
- resistance to stress – the finished coating has high strength, resistance to mechanical and physical stress, and is inert to chemical reagents and compositions;
- sealing the base - the liquid composition allows you to completely fill all pores and irregularities, providing a monolithic, seamless and airtight base;
- ease of maintenance - the absence of seams and joints greatly simplifies the process of cleaning, applying and removing detergents;
- fire safety - the coating does not contribute to the spread of open fire, does not emit particularly harmful and lethal substances when burning;
- hygiene – polymer flooring does not cause the formation and does not contribute to the spread of bacteria, fungus and harmful microorganisms.
Among other things, such floors have a service life of more than 15 years, do not require annual renewal and overhaul. Depending on the type of base and expected loads, it is possible to use thin-layer compounds, which are characterized by simpler application technology and lower price.
Among negative aspects from the use of epoxy coatings, one can highlight their weak point strength. That is, when strong impact or fall very heavy object Possible crack or chip formation. To avoid such damage, it is recommended to use the compositions according to their intended purpose and area of application.

Adding various glitters and chips makes the surface more varied
That is, for example, two-component epoxy self-leveling floors and quartz fillers are used for arranging floors with special requirements for strength, a classic mixture without sand additives for residential premises and rooms with low traffic intensity.
With prolonged use, even despite wear resistance, it is inevitable that minor defects and scratches, which will require applying a new layer of polymer varnish and complete update coverings. Partial removal, replacing or covering the old base is technically impossible and no technology is envisaged.
Choice specific brand and composition for installing epoxy self-leveling floors depends on the type of base, its technical condition, requirements and expectations from the final floor covering.
There are many manufacturers of self-leveling floors, but we can highlight separately domestic companies, offering good compositions and related components at fairly affordable prices. This is the TeoKhim company - trademark“ElakorED”, the company “KrasKo” - the trademark “Epolast” and “TNP Group” with compositions under the brand name “Tapping”.
The products of these companies meet all international safety and quality standards and have a wide range of products for any load and strength. In addition, manufacturers periodically hold seminars and master classes, where they talk in detail about the technology of work.

Two-component polymer floor Epolast Aqua on water based
The technology of epoxy floors involves the use of several compounds intended for preparing the concrete base, filling the surface, creating an underlying layer, and arranging the front and finishing coatings.
For example, the products of the KrasKo company include primers, adhesive compounds for old concrete foundations, traditional and two-component water-based bulk mixtures, etc.
The nominal consumption of bulk mixtures depends on the manufacturer and is indicated on the packaging specific product. Thus, the consumption rate of epoxy self-leveling floor per 1 m2 with a thickness of 1 mm of the ElakorED brand for the underlying layer is 300-400 g, for the finishing layer - 1.7-1.8 kg. Consumption of “Epolast Aqua” for the finishing layer is 1.75 kg, “Taping Floor 205 C” - 750-900 g with a similar thickness.

Spiked soles for moving on liquid floors and a needle roller for distributing the mixture
In addition, we have provided the average cost of the above products and additional components, which can be found in the table below.
Sequence of pouring epoxy floor

When filling cracks and damage, a special resin-based putty is used
The installation of an epoxy self-leveling floor can be done with your own hands, provided that the person carrying out the work is trained or at least familiar with the technology of preparing the base, preparing and pouring the solution.
The load-bearing base must meet a number of requirements, without which the installation of a self-leveling floor cannot be carried out. From a technical point of view, old concrete surface should not have strong differences in height, deep damage, cracks or cavities.
Maximum tolerance indicated on the packaging of the composition, but on average it is no more than 2-3 mm per 2 m of base. Damage is repaired by caulking and filling with a special putty provided by the floor manufacturer. Organic solvents are used to remove grease stains and oils. If it is impossible to carry out these works, prepare the base for pouring a thin-layer screed.
For a new concrete layer, you should wait for it to completely polymerize and mature until brand strength. The residual moisture content of the concrete layer should not be more than 4%. For concrete floors on the first floors, roll or coating waterproofing is required.

A squeegee for distributing the mixture and a spatula for arranging the underlying layer
When applying and distributing the composition, it is recommended to use only prepared tools soaked in xylene. This will help remove any remaining factory grease and disinfect the old instrument from the remains of the former decoration. For application, construction rollers with medium pile (12-14 mm), metal spatulas with a smooth edge (500-600 mm) and squeegee are used.
Removing air from the mixture is done with a needle roller. All movements on liquid composition performed in needle soles. are used construction mixer power of at least 1.2-1.5 kW. The rotation speed is selected based on the temperature of the mixture, capacity and power of the tool, but usually it is no more than 500-600 rpm.
For safety reasons, workers must have respirators, goggles and gloves. It is advisable to use replaceable clean shoes and overalls. The preparation of the solution is carried out in a strictly designated place and is carried out immediately before pouring onto the surface.

The main stages of preparing and pouring the epoxy mixture
Do-it-yourself epoxy self-leveling floors are made using the following technology:
- The surface of the base is thoroughly cleaned and dusted using a construction vacuum cleaner.
- The expansion joint is glued around the perimeter of the room. A damper tape is used for this. required thickness. The tape is fixed using a stapler or an adhesive mixture.
- A one- or two-component primer composition is being prepared. In the first case, the solution is mixed with a mixer, in the second, the components are mixed in a larger container. The primer is mixed according to the instructions and applied to the concrete surface.
- After polymerization of the first layer, the floor surface is re-treated with a primer. If there are shiny or glossy areas left on the base, remove them, clean the surface and re-prime. Immediately after applying the second layer, the surface is sprinkled quartz sand based on 100-120 g/m2.
- If there are sinkholes, potholes and cracks, they are repaired using epoxy putty. The putty is prepared in a similar way by mixing the two components. If necessary, a small amount of quartz sand is added in the ratio specified by the manufacturer.
- If areas of the floor have been sealed with putty, sand them using hand sanding. grinding machine. Next, the surface is cleaned and the preparation of the epoxy coating begins. In other cases, sand is removed from the base of the floor using a construction vacuum cleaner.
- Prepare the solution for the underlying layer. To do this, the main component is mixed using a mixer at the required speed. Mixing is performed with smooth movements throughout the entire volume. Next, add the second component, the hardener, and mix again. The mixture is prepared strictly according to the instructions.
- The underlying layer is poured with a thickness of 1.2-1.5 mm. Using a metal spatula, spread the mixture at an almost right angle, pressing firmly into the base. After 10-15 minutes, cover the floor surface with quartz sand at the rate of 1.2-, 1.5 kg/m2.
- After the underlying layer has dried, excess sand crumbs are removed using brushes and a vacuum cleaner. The surface is inspected for unoccupied areas and other possible problems. If quality is maintained, a sealing layer is applied. This is done by applying a mixture of self-leveling epoxy floor at a rate of 350-400 g/m2. The mixture is distributed using spatulas.
- The finishing face layer is being prepared and poured. During the work process, you should calculate the time for kneading and the number of required portions, since when room temperature The mixture sets in approximately 30-40 minutes. Self-leveling coating applied to the surface and distributed with a squeegee and spatulas. 10-12 m after application, the finishing layer is rolled with a roller to remove excess air and left to dry.

The use of purified quartz sand makes it possible to strengthen the first self-leveling layer

The final coating is mixed immediately before it is poured.
This work technology is valid for Elakor-ED self-leveling flooring with quartz filler. The time for drying the primer, preparing the mixture, releasing air from the solution and polymerization is indicated in the attached instructions.
When installing other self-leveling epoxy floors with your own hands, the technology may be slightly different. Some types do not require the use of putties and quartz fillers at all.
Quite often, the construction of private houses includes a complete remodeling flooring. Epoxy resins are being improved, transformed and construction technologies are improved. It is quite possible to make an epoxy or polymer self-leveling floor with your own hands, but you must follow the instructions and all stages of work so that the canvas does not deteriorate or crack immediately after drying.
The most beautiful are self-leveling floors made on the basis of an epoxy composition. The combination of epoxy resins and hardeners, after drying, forms a completely monolithic base, which has a huge number of advantages over other coatings - excellent wear resistance, high strength, the ability to withstand sudden temperature changes, good adhesive properties to any substrate, complete absence of seams.
Self-leveling flooring is a coating whose manufacturing technology is simple, but requires care and a thorough approach.
Sex doesn't require serious or complex look care, resistance to aggressive chemical components, long service life, the ability to create a wide variety of design solutions.

Due to the many advantages of this material, it is possible to carry out the pouring process in the most various rooms, for example, such as:
- Production workshops;
- Laboratories;
- Clinics;
- Kindergartens;
- Schools;
- Garages;
- Trading platforms and more.
Lately such polymer coatings began to be installed in private houses and even apartments. Despite the presence of many advantages, this wonderful product also has its disadvantages. finishing material. Before pouring the composition, you need to carefully prepare the base, which may require high costs effort, time and money. The cost of materials is far from small, and therefore they cannot be called accessible to everyone. If installation is carried out incorrectly, delamination of the coating may occur when drying. If it is necessary to repair the floor covering, it is almost impossible to carry out it without leaving marks, and finding a canvas that matches the color is not easy, and sometimes even impossible. Removing damaged or outdated epoxy flooring can be time consuming and costly.
Durable epoxy coating
To make a floor based epoxy resin, it is enough to study the technology, and this can be done with your own hands. To do this, you need to carefully carry out each stage. Prepare the base and pour the main coating layer. A decorative layer is required and a final finish is applied.
The quality of self-leveling floors directly depends on how competently each stage is carried out.

Once the composition has hardened, it is impossible to correct defects. For proper construction, you will need to prepare the necessary set of tools, evaluate the foundation for strength and moisture level, and also select as accurately as possible the composition that will be poured.
To install an epoxy self-leveling floor, you need to prepare certain tools:
- The roller should be needle-shaped, aerated, and also coated with padding polyester.
- Spatulas with different widths and lengths.
- Mixer for mixing bulk composition.
- Mixer for organically soluble material, which has a reverse function and the ability to change the speed.
- Paintshoes.
- Raklya.
- Personal protective equipment.
- Vacuum cleaner.
Before work, you need to soak all the elements for a couple of hours in a solvent so that after installation they can be easily cleaned of material. Next, the base is prepared. The ideal option for the base of a self-leveling floor is a concrete screed, but it is also possible to pour other compounds, for example, ceramic tiles, but this will require more strength and time.
How to use epoxy resin for flooring
What varnish should I use on the floor? How to extend its service life? Epoxy resin is considered the most ideal option for finishing the floor, only it is not applied to it, but is its component.

It has a lot of advantages and these are:
- Excellent resistance to abrasive substances;
- Excellent wear resistance;
- High strength;
- Excellent performance characteristics;
- Long service life;
- Minimal shrinkage after hardening.
Polymer (polyurethane) epoxy is a transparent composition that is added to self-leveling floors, making them stronger and more durable. Why are these so in demand? modern coatings? They allow you to create the most extraordinary canvases, not only monochromatic ones, but also embody the most different ideas. The easiest way to decorate them is to decorate them with decorative chips.
Due to the design of the self-leveling epoxy floor, you can create the most incredible effects.
After the coating has dried, the surface is often painted by hand, making the rooms more stylish, beautiful and modern. The most common ones are suitable for this. acrylic paints. Printing houses often order banner networks, which can be coated with images of any complexity. More cheap option decoration is the application graphic image through vinyl stickers or self-adhesive stencils.
DIY installation of self-leveling epoxy floor
In theory, pouring an epoxy floor can even be done on a wooden base, but the service life of the coating will be significantly reduced, since over time the wood will gradually begin to deteriorate.

There are a number of requirements for a base under an epoxy floor, and these are:
- Smooth, non-wobbly surface;
- Complete dryness;
- No horizontal deviation.
A horizontal deviation is acceptable, but only 2 mm for every 2 m2. Often, to level the floor, the use of a special mixture is required. Floor humidity can be no more than 4%. This requirement should not be overlooked, since otherwise, after installation, delamination of the canvas will begin. Its deformation will lead to cracks. It will not take long for the coating to deteriorate and will lead to complex re-work.
As a rule, filling with fresh concrete screed completely hardens to monolithic state And highest degree strength only after 4 weeks.
Until this point, it is strictly forbidden to use the floor. It is very difficult to work with old screeds, since you first need to remove the old coating, remove dyes, grease and dirt, and only then can any renovation work begin. Before laying a new coating, it is necessary to eliminate chips, nicks and other defects. If finishing is carried out in a residential area, then a layer of waterproofing is laid along the edges of the wall; this must be done a couple of hours before installing the floor. The surface of the base must be cleaned with a regular vacuum cleaner before pouring.
How to make epoxy floors (video)
Proper preparation will allow for proper installation, through which a decorative and stylish floor will be created with excellent performance characteristics.
Self-leveling floors have firmly established themselves on construction market, which is not surprising - strength is precisely one of the advantages of bulk compositions. Epoxy self-leveling flooring is also very attractive and practical, and the technology for creating such a coating can be mastered by anyone interested.
Self-leveling epoxy floors are based on two components: epoxy resin and hardener. That’s why epoxy self-leveling flooring is called two-component. However, you can also find a lot of additives in the composition. Thus, latex and casein, which are stabilizing substances, improve resistance to mechanical damage, which, by the way, is very useful for epoxy compounds - excessive fragility is considered their Achilles heel.
Sodium nitrite helps the composition to withstand large temperature changes, which is important for production premises or laboratories. However, it is better not to use an epoxy coating to create it - although manufacturers claim that the coating is safe, an unpleasant and very suspicious odor is released when the floor is heated. Under normal conditions, you really don’t have to worry about safety.
There is no need to add water-repellent components to the composition– self-leveling floor epoxy based On its own it does a great job. To add color, you can use various colors, mainly of inorganic origin. The main condition for such pigmentation is that it does not wash out over time and does not lose its brightness. The painted composition can be used as a finishing floor covering.
It is much less common to add diamond or other mineral chips to the composition to make it decorative, but such a step gives rise to a lot of problems - the floor will have to be sanded for a long time, and this cannot be done without serious equipment. It’s better to cover the frozen floor with decorative film.
You will also find epoxy-polyurethane mixture on the market. This middle option between epoxy and polyurethane floors combines them best qualities– strength, elasticity, durability. This mixture withstands mechanical shocks better and is less brittle, so it can be used as a bulk or storage material.
The advantages of epoxy compounds for creating floor coverings mostly apply to bulk mixtures at all. However, the disadvantages that will be listed apply only to epoxy self-leveling floors.
So, the advantages:
- Seamless coating technology - polymer epoxy self-leveling flooring has a perfectly smooth and glossy surface. By the way, the degree of gloss can be reduced using special additives. The absence of seams greatly protects not only from moisture penetration, but also prevents the accumulation of dirt and the development of colonies of microorganisms and bacteria. This is why epoxy flooring is so valuable in healthcare facilities.
- High dirt-repellent properties - epoxy flooring is really easy to wash from everyday dirt, and there will be no problems with complex stains.
- Chemical resistance - alkalis and acids are not capable of harming such a coating even at high concentrations. Industrial polymer epoxy self-leveling floors can often be found on pharmaceutical companies , warehouses for storing chemical reagents.
- Safety - when pouring floors based on epoxy resins, you can adjust the degree of roughness, ensuring no slipping even in the presence of oil stains. Epoxy resin is flame retardant.
- Long service life - epoxy floors have a service life of more than 20 years (by the way, this is not the limit for floor coverings, but also a lot), they are not at risk of exposure to ultraviolet radiation, and they are abrasion resistant.
- Optimal cost – for family budget and inexpensive but durable repairs, this flooring option is perfect.
Among the disadvantages it is important to mention the following:
- Brittle – Epoxy floors are very hard and quite brittle. Impacts may cause the surface to become cracked and chipped.
- Loss of decorativeness - after all, scratches will eventually ruin the decorative glossy look floor. That is why it is more practical to make matte surfaces.
- Self-leveling floors are generally difficult to remove from the surface - this rule also applies to epoxy floors. There is no question of re-laying the covering; it can only be thrown into a landfill.
Epoxy self-leveling floors allow you to create a high-quality and perfectly smooth floor covering with your own hands. This does not require any special skills or special equipment. And the process itself will not seem extremely tedious to you.
How to make an epoxy self-leveling floor with your own hands - step-by-step diagram
Step 1: Preparing the base
The first step is to prepare the base - the smoother it is, the less material consumption and better result. To get started, spend comprehensive cleaning from debris, oil stains, traces of paint. Various solvents, which are available in abundance in every building materials store, will help you speed up the process.
Chips, cracks and unevenness must be leveled using putty, or if there are too many unevennesses, first fill in a rough leveling self-leveling floor, which in one fell swoop will eliminate the unevenness and create an ideal base for the final filling.
On average, compositions based on epoxy resin dry in 7 hours, but complete polymerization requires several days. Therefore, do not rush to arrange furniture or household appliances. If you want to extend the appearance and gloss of your flooring, use a special epoxy paint. It protects the floor from mechanical damage, besides, it is easy to update during the next renovation.
One new option for flooring is pourable epoxy resin. It is used both for residential premises and for industrial buildings, as well as places Catering and airports.
What are these floors? Where are they used and how can you fill them yourself?
Epoxy resin - what is it?
When choosing self-leveling epoxy floors, you should pay attention to two factors.
First, the emulsion composition must be suitable for future use. Depending on the expected loads of a mechanical or chemical nature, it is necessary to select the appropriate epoxy composition.
The second factor is design solution. If we're talking about about covering industrial structures, then there is no need for excessive sophistication here. However, for private homes and especially for restaurants and cafes, it is very important to choose the right color palette and floor pattern.
For bathrooms, they have recently become popular. You can use photographs, but you should be careful with them, because the design cannot be changed over time.
If not special requirements to the originality of the floors, then you can opt for a quartz coating. It is cheaper and also stronger.
Pouring technology

You can make an epoxy self-leveling floor with your own hands in the same way as others. The following article details the process step by step.
Preparing the base
The most reliable base for self-leveling floors is cement-sand screed. Exist on tiles or wooden surface, however, the quality and reliability of such floors is decreasing, and preparing the base will take more time and money.
The surface must be smooth and dry. If the humidity of the floors is more than 4%, then moisture entering the main layer of the coating will destroy it. If it was done immediately before pouring the mixture, you must wait 4 weeks until the concrete gives up all excess moisture and gain the required strength. If you work with old screed, it must first be cleaned of dirt and grease. It is also necessary to repair cracks and chips.
It is especially necessary to carefully level the surface so that there are no holes or bumps on it. Immediately before priming, it is important to remove dust and other debris, for example, using a vacuum cleaner.

Padding
The technology of self-leveling epoxy floors involves priming in two layers. After applying and completely drying the first one, it is important to make sure that there are no glossy areas on the surface. If there are any, they need to be cleaned and primed again.
When the first layer is completely dry, you need to apply the second and sprinkle it with quartz compound. Then the surface should be left until completely dry, and this will happen no earlier than in a day.
Base layer
It is applied in strips and evenly distributed using a squeegee and spatula. To ensure there are no air bubbles in it, you can roll it with a needle roller.
To avoid leaving marks on the floor surface, you need to wear paint shoes over regular shoes.
Finishing layer
After applying the base layer, about 2 days should pass. Before applying the finishing layer, you can create another one - a decorative one, which will be in harmony with the design of the room. With its help you can divide the room into zones. Then you can apply a finishing clear coat.
As you can see, the two-component self-leveling floor has simple technology fills. However, when working with it, it is very important to pay attention to details and carefully approach the issue of surface preparation.
Having completed all the work on pouring epoxy resin with high quality, you can get durable and reliable floors that will please the eye and fit harmoniously into the interior of the room.