How to install window structures in a wooden house and installation options. Technology for installing windows in a log house Shrinkage gap for windows in a log house
Read also
Recently, building your own wooden house has become increasingly popular. Modern technologies allow you to make your home comfortable, practical and cozy.
Whatever the design you choose, no matter what extravagant ideas are implemented in the decoration, modern windows in a wooden house are an indispensable attribute on which the appearance and comfort of living largely depend.

Understanding all the variety of options on the market is sometimes not so easy. When assessing the advantages and disadvantages of a particular option, it is necessary to take into account many nuances.

How to choose windows for a wooden house? Let's try to look at this issue in more detail and identify the main aspects that influence the selection process itself.
Please note - the best wood-aluminum windows from the manufacturer OKNAZENIT at the best prices in Moscow.

Types of windows for a wooden house. Peculiarities
Currently, there are the following types of windows suitable for installation in a wooden house:
- plastic;
- metal-plastic;
- wooden;
- aluminum;
- combined.


It is impossible in principle to answer the question of which of these types is definitely better. It is important to consider your own preferences and design considerations.


Plastic and metal-plastic double-glazed windows have a number of undoubted advantages, which include their low price, practicality, absolute tightness and a wide range of color shades. Among other things, they are durable and require little maintenance.

The main drawback is the materials used in the window construction itself; how they will fully affect human health is still unknown.

Aluminum and combined windows also have their own advantages, due to the materials used in the construction, such advantages include durability, structural strength, tightness and convenience.

When choosing one type or another, look at photos of windows for a wooden house in advertising brochures, try to imagine how the window will look, how the structure will fit into the overall design and, based on your financial capabilities and subjective perception, make the final decision.


Window installation
During construction, it is important to take into account that the installation of windows has some features, neglect of which can lead to undesirable consequences.

We are talking about the peculiarity of the construction of wooden buildings: as you know, wood shrinks to some extent, and therefore, over time, the geometric dimensions change downwards, which can lead to the appearance of gaps, curvature of the window structure, deformation of the double-glazed window, etc.

To avoid these troubles, take into account the following recommendations:
- in log houses, window openings must be installed after the main shrinkage of the log house, which requires waiting about a year and a half. The installation should not be carried out immediately - it is impossible to unambiguously calculate the degree of shrinkage, it depends on the moisture content of the wood, environmental conditions, etc.;
- if you choose a project using laminated veneer lumber, you can install window structures right away - the shrinkage of such a structure will not exceed 2%;
- When installing window structures, use only sliding joints;
- directly above the window frame, provide a shrinkage gap of 6-7 cm.

Another important point in the design of a wooden house, and in the context under consideration - in the calculations when installing window frames, is that a wooden building is constantly in some movement. This movement is explained by the properties of the tree, the characteristics and quality of the foundation, as well as other external factors.

This feature must be taken into account at the design stage and directly during the construction process. To solve these problems, the window frame is installed in a special design - a frame. In view of the importance of this element, we will consider its features in more detail.


Features of the pigtail
The frame, as a special structural element, is necessary for any type of window being installed, be it a wooden structure or PVC window. It provides:
- the impossibility of vertical displacement of log logs in the opening without interfering with the shrinkage of the walls themselves;
- increases the structural strength of the window opening;
- the lower part of the pigtail serves as a window sill;
- ensures subsequent convenience when installing cash;
- an additional element is created in the insulation system of the entire window opening.


The pigtail can be implemented using two different schemes:
- On the end part of the logs, after cutting out the window opening, a special groove is selected. A specially prepared timber is mounted into it. This option is suitable for installing wooden windows;
- The second method involves creating a special tenon at the ends of the window opening, on which the so-called window “carriage” is installed - a special block with a groove.

When creating a frame, you must remember: the vertical height of the installed bars must be less than the height of the window opening by the calculated amount of shrinkage, otherwise you risk lifting the upper crowns of the frame with the appearance of a gap.

Features of installation of plastic double-glazed windows
Plastic windows are very popular and widely used, and therefore we will present some features of their installation in a wooden house.

Installation must be carried out at an ambient temperature of at least minus 10 degrees Celsius. Under no circumstances should you install a plastic double-glazed window without a frame.


The gap for foaming of the structure must be within the following limits:
- 4-5 cm at the top;
- 3-4 cm at the bottom;
- on the sides - about 2-3 cm.

Use special fasteners during installation. Fixing it through the frame using self-tapping screws results in the window losing its airtightness.

The effect of "crying" windows
In order to avoid suddenly finding excessive sweat or heavily frozen glass on your windows on winter days, which subsequently begin to thaw and “cry,” certain conditions must be met, namely:
- Install windows carefully. Think through all the points, carefully consider the installation process;
- use energy-saving glass;
- do not forget about ventilating the room;


These are, of course, only the most general tips, but even they will help you avoid unpleasant surprises in the future.

Self-production of windows
Making wooden windows yourself is a separate and complex topic. Let's look at some key points related to this issue.

When making boxes, the most common type of material is pine. The bars themselves must be thoroughly and properly dried. Try to choose a material without cracks or knots.


When connecting elements, use wood glue, and additionally install wooden dowels at nodal points, this will ensure the rigidity of the structure. When installing glazing beads, use sealants.

Instead of an epilogue
Windows are a necessary and important element in the design of a house. It is necessary to treat this issue carefully and with full responsibility and your home will be bright, warm and cozy for many years.

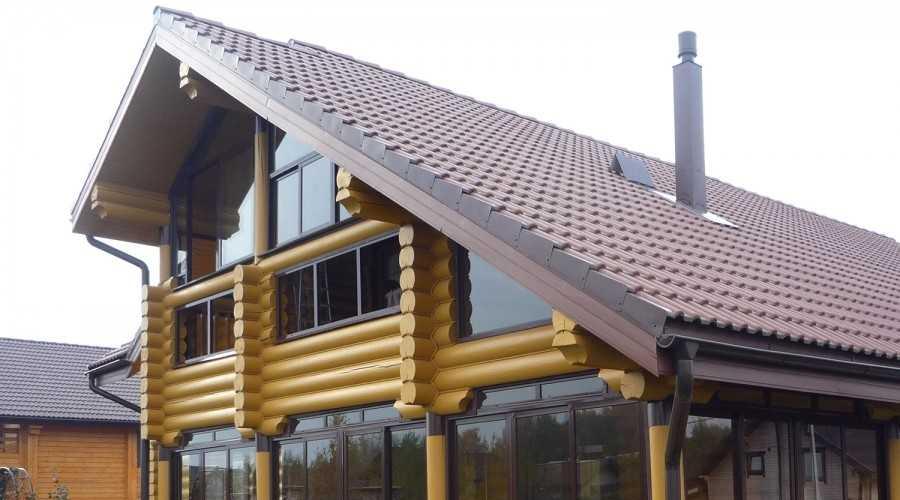
Photo of windows in a wooden house


Installing windows in a wooden house is significantly different from installing windows in brick and stone houses. For example, the openings of buildings made of logs and beams, as a rule, have a quarter, but not from the inside, but from the outside.
Shrinkage
But the most important difference between houses made of wood (does not apply to frame-panel houses) is the ability to shrink as a result of drying of the wall material (logs, timber). And this point is decisive in installing plastic windows in a wooden house, because if you install a window, as usual, in a bare opening, it will inevitably be crushed and deformed by the shrinkage process.

There is an opinion that the first two are the most active period of wood drying. But that's not true. After the construction of the house, the shrinkage of the walls continues for decades. But that is not all. Wood not only gives off moisture, but also absorbs it. Therefore, rigid fastening when installing windows in a wooden house is impossible in principle!
- Shrinkage in a log house is about 10 - 15 mm per log D = 250-300 mm
- Shrinkage in a house made of timber is about 7 - 10 mm per beam with a section of 150x150 mm
- Glued laminated timber - unknown.

There are other ways to calculate the shrinkage height of log houses as a percentage: approximately 10-15% of the original height. But in fact, the shrinkage of houses made of timber and logs depends on many factors:
- on the material (log, rounded log, timber, laminated timber);
- on the time of material procurement (winter procurement or summer);
- depending on the time of day(morning, evening) Yes-Yes!!! Don't be surprised - we explored this too!
- from where the forest grew (swamp, field);on the degree of resinity and density of the tree;
- on the size of the material - both its length and thickness;
- from the moisture content of the material;
- on the size of the building;on construction technology (dowel, type of felling, etc.);
- from the material of inter-crown insulation;from the type of wood;
- depending on the time of year when construction is carried out.
The most severe shrinkage occurs in log houses made of ordinary logs, followed by rounded logs, profiled beams, timber, and laminated veneer lumber.
Even if the house is more than a dozen years old, it is still necessary when installing windows in a wooden house to take into account the vertical movements of the walls as a result of an increase and or decrease in humidity and air temperature at different times of the year.

Wooden house - Living
A wooden house is a constantly moving structure, compared to buildings made of stone and concrete. Therefore, the installation of windows in a wooden house is carried out not in the opening itself, but in a special wooden box, which acts as a connecting link between the window and the wall. This box is called differently: casing, frame, deck, pigtail, linden.
As can be seen from the photo, the casing is an ordinary window box made of four, sometimes three (sides and top) thick boards, installed inside the opening.

The meaning of this design is that it is independent of the vertical movements of the wall and moves freely in the opening, since it is not attached to the logs (timber) with nails, screws, or other fasteners, but is held in place by grooves in the side posts mounted on the spikes at the ends of the logs. Even foam is not used to seal the gaps around the window frame - only tow, jute (flax batting) and other soft insulation.
Shrinkage gap
Please note: a large gap is specially left above the jamb, the size of which is designed for the maximum possible amount of shrinkage of the logs (beams). During the first years after the construction of the house, this compensation gap will gradually decrease to a minimum, but the upper log (timber) of the opening, if calculated correctly, will not press down or deform the frame. Thus, the shrinkage of the house will not in any way affect the size and shape of the window frame, and, accordingly, will not damage the plastic window located inside it.
Shrinkage gap size

If you decide to install windows in an old wooden house that has long gone through the process of shrinkage, then, when disassembling the window blocks, you will probably notice: they are made according to the same principle as the casing design described here, i.e. are not nailed to the logs of the opening, but are fixed in it using a simple “mortise and tenon” system on the sides.

This suggests that the technology of installing windows and doors in a wooden house in frames was invented a very long time ago, and is used successfully to this day. We will not invent anything new and will follow the same path.
There are several ways to install the pigtail (more details at the link):
- T-shaped frame - a groove is made at the ends of the opening logs, and a T-shaped profile is placed into it;
- U-shaped - the tenon is cut out at the ends of the opening logs, and the groove is made in the side casing posts).
We do both options, since they provide maximum strength and stability of the opening, because the frame not only protects the window from shrinkage of the walls, but also ensures the stability of the wall at the place where the opening is cut.
Briefly, the sequence of our actions will be as follows:We cut out an opening in the wall, the dimensions of which are slightly larger than the dimensions of the inserted plastic window;

We form a groove for the T-shaped pigtail;

We form a spike for a U-shaped pigtail;

We make the parts of the pigtail;

We install the window frame in the finished opening;

We install a window in a wooden house into a frame, aligning it flush along the front edge (we fasten it with self-tapping screws of such length that they do not pierce through the frame and do not go into the logs);

We blow foam into the gap between the frame of the plastic window and the frame, not forgetting about the installation of waterproofing (outside) and vapor barrier (inside - suitable for rough frame under cladding, for finishing it is not required since the window rests on the quarter) of the foam seam;

we install external platbands (we attach them to the casing);

we carry out the interior finishing of the window (window sill, slopes - not required for finishing the frame, since it is the slopes and window sill).

We use foam only inside the pigtail. We insulate the gaps around it with traditional flax fiber or jute fabric.

Over the next 5 years (if the house is newly built), we will have to periodically remove the trim and gradually reduce the amount of insulation put in there. If this is not done, the upper parts may bend.

Even after the house has completely settled, the gaps around the casing should under no circumstances be sealed with foam.
Preparing the opening for installing a window in a wooden house
Before cutting, we mark the window opening using a level, because the plastic window will be installed strictly level in all planes, therefore the frame must also be installed in the opening as accurately as possible according to the level initially.

The lower crown in the opening needs to be sawed through so that a flat horizontal platform is obtained.

We determine the dimensions of the opening based on the size of the plastic window, the thickness of the casing bars and the size of the required gaps.
We perform all calculations visually. Here is an example of a diagram for calculating the size of the opening for a rough T-shaped frame:

Accordingly, we take a beam with a cross-section of 100x150 mm and cut out a T-shaped profile.

Here is a diagram for calculating the details of a p-type finishing socket:

For a U-shaped window frame, we cut out a U-shaped profile from solid timber.
The size of the shrinkage gap (H shrinkage) is not easy to determine, since the amount of shrinkage of the house, as mentioned above, depends on many factors. If we, for example, roughly calculate, taking everything to the maximum, then for a window with a standard height of 1400 mm (plus the thickness of the casing crossbars, plus installation gaps of ~ 245 mm) with 15 percent shrinkage, the top gap will be 24.5 cm - a huge hole , the height of which will most likely end up being too large.
To simplify the task and avoid mistakes, you should not rack your brains over GOST standards regulating the shrinkage values of building materials of various wood species, comparing this with local climatic conditions, etc.
You can do it simpler, namely:
If you are building a new house, then start installing windows no earlier than a year after the construction of the log house in order to wait out the period of the most active shrinkage. Then, when manufacturing and installing the frame, the size of the shrinkage gap (H shrinkage) can be safely made 60-50 mm for a log house, 50-40 mm for a timber house and 40 mm for a house made of laminated veneer lumber;
If your house has stood for more than five years, then the shrinkage gap (H shrinkage) can be made minimal - 40 millimeters, just to compensate for possible seasonal changes in the geometric dimensions of the opening;
So, we calculated the size of the opening, marked it and cut it out. Now you need to cut out a tenon at the ends of the logs (beams) on the sides of the opening. The tenon is also marked using a level in the center of the log (beam).

We make the tenon size 60 mm - width and 40 mm height.

We cover the sides and bottom of the opening with linen or jute using a stapler.

Making a pigtail
First, you need to decide on the width of the frame bars: it should either be equal to the thickness of the wall, or be a little larger, so that later, when installing external trims, they (the trims) fit tightly and unhindered on the frame, and not on the wall. There is another option in a log house - a groove around the opening along the width of the groove.
Secondly, to make a pigtail you need to take well-dried material, otherwise the assembled structure itself will soon deform as it dries.
First we cut out the bottom part (window sill), making it 10 cm longer than the width of the opening. At the ends of the window sill we cut a groove for a tenon 65 mm wide and 40 mm deep.

We also make small 20 mm recesses at the ends of both window sills for joining the crossbars with the side posts - the so-called locks.
We make the side posts 70 mm higher than the height of the plastic window frame. On the reverse sides of the racks, using a circular saw, we cut out a groove for a tenon 60 mm wide and 40 mm deep. We immediately make a lock in the side posts for the upper part.

Lastly, we make the top part of the pigtail. Based on the dimensions obtained between the two installed side parts.
Installation of the pigtail
We begin installing the frame into the opening from the bottom crossbar (window sill). Then the top is inserted into the opening, under which we place the side posts one by one, placing them with grooves on the tenons.

We fasten the elements of the frame together with self-tapping screws and, if desired (not obligatory), coat the joints with sealant. We caulk the gaps around the casing with ordinary tow, but without much fanaticism, so that the parts do not bend.
We close the upper shrinkage gap with soft insulation such as Rocwool or holofiber. This operation is best done after installing windows and external trim. More details in the article ""
>
Now you can begin installing the window.
Installing a window in a wooden house
We install a wooden or plastic window, aligning it with the front edge of the frame. There is no need to place a window inside a third of the wall thickness, as is done in a panel or brick house, due to the lower thermal conductivity coefficient of wood (smaller freezing depth).
Moreover, given the small thickness of the walls of a wooden house, by deepening the window into the opening, we will be forced to trim the already narrow window sill. And the ledge that is formed as a result on the outside of the opening will have to be additionally closed and sealed. And as measurements taken with a thermal imager show, the main conductor of cold is the profile itself. For more details, see the photo report made from photographs from a thermal imager here.

Rough frame for cladding
If you have calculated the dimensions of the opening and the frame as described above, then the installation gaps around the window frame when installing in a wooden house should be 15 mm on the sides, 15 mm on the top and 15 mm on the bottom (we do not make the bottom gap larger, because the stand profile makes it possible later place a plastic window sill under the frame, the thickness of which is 30 mm).
It is more convenient to attach the frame to the frame with the help of self-tapping screws of such a size that they fit into the body of the frame, but do not penetrate the wall. We drill holes in the frame with a drill with a diameter of 5-6 mm. Using self-tapping screws longer than the thickness of the frame is dangerous because they will pass through the frame and screw into the logs (timber), which is unacceptable.

Provided that all preparatory work has been done using a level, the window frame should fit exactly along the frame, i.e. the front edge of the frame should be parallel to the plane of the window, without noticeable distortions.
Waterproofing a window from the outside
Before foaming the gap between the window and the frame, we need to decide what material we will use to waterproof the installation seam on the street side. As you know, the two main enemies of foam are sunlight and water. If from the sun's rays we can simply cover the installation seam with platbands or flashings, then with waterproofing the situation is more complicated, because it must meet two basic conditions: not let water in and at the same time not prevent moisture vapor from escaping from the inside to the outside. Well, and, of course, waterproofing must be resistant to prolonged weathering.
All these conditions are met by materials such as PSUL, waterproofing vapor-permeable tape and special sealant “STIZ-A”.
Sealant "STIZ-A" - a one-component, vapor-permeable acrylic sealant of white color for sealing the outer layer - is characterized by good adhesion to the main building materials: plastic, concrete, polymer concrete, foam concrete, plaster, brick and wood, among others.
It is also resistant to UV radiation, precipitation, temperature deformation and can be applied even at temperatures as low as -20 degrees. The only disadvantage of this material is that it is difficult to find in small containers, and buying a whole bucket makes sense when you are installing a lot of windows. If you choose “STIZ-A” as external waterproofing, then the procedure will be as follows: first we foam the window, then, after complete drying, we cut off the foam sticking out from the outside and after that, using a spatula, apply sealant to the cut.
Waterproofing vapor-permeable tape (self-adhesive butyl rubber tape consisting of a vapor diffusion membrane with an adhesive layer of sealant on one or both sides) is sold in rolls of different widths. In our case, a tape with a width of 70 mm is suitable. When using this tape as waterproofing, ensure it is oriented correctly when gluing.

You can determine this by blowing into it from one side and the other (don’t forget to remove the paper first). Since there is a membrane inside the tape, air passage is only possible in one direction. The side from which it is impossible to “blow through” the tape is the outer (street) side.
The sequence of actions (first the tape, then the foam or first the foam, then the tape) does not matter much, but you need to take into account that the foam, expanding when drying, not only stretches the tape with a bubble (it will interfere later when installing platbands), but in general it can tear it away from the window or frame.

Therefore, if you first stick the tape, then screw the platbands or hard strips on top of it immediately, and only then foam it. Or foam it first, wait for the foam to dry, cut off the excess and stick the tape on the same day so as not to expose the foam cut to prolonged weathering.
PSUL is a pre-compressed self-expanding sealing tape (similar to foam rubber), impregnated with a special composition, thanks to which it is waterproofing and vapor-permeable. Supplied compressed, rolled into rollers.
If you choose PSUL tape, then buy one that expands more than 30 mm. The PSUL will have to be glued not to the outer side of the frame profile, but to the end next to the front edge. This should be done after fixing the frame in the opening, but before foaming. Of course, it is more convenient to cover the frame with PSUL before installation, when it lies on the floor, but then the installation will have to be done at an accelerated pace, because after a few minutes the tape will expand and interfere with work.
The installation seam should be foamed only after the PSUL has completely expanded and closed the installation gap. But here the same problem is quite possible as with the waterproofing tape: the foam expanding as it dries can squeeze the PSUL out. This can be avoided by pressing the PSUL on the street side with platbands or flashings.
Internal vapor barrier of windows
On the inside, the foam should also not remain open to prevent moisture from entering it from the air in the room. To install an internal vapor barrier, you can use vapor barrier tape, which has already been discussed in the main section of this site, or use acrylic sealant SAZILAST-11 (“STIZ-B”).
The vapor barrier tape is glued to the end of the frame with a thin adhesive strip before foaming. Immediately after foaming, the protective paper is removed from the wide adhesive strip, and the tape is glued to the pigtail. Before the foam under the tape hardens, it is advisable to immediately install the window sill and screw the starting profile to the edges of the frame, otherwise later the tape “bloated” with foam will interfere with this.
Sazilast is applied to the hardened foam, or more precisely, to its cut. In this case, it is no longer necessary to rush to install the window sills and the starting profile, as when using tape. Nothing will prevent you from doing this later, when it is convenient.
Interior decoration
The interior decoration of a window in a wooden house (window sills, slopes) is not much different from the decoration in a panel or brick house. It’s even a little simpler here: you don’t need to drill holes to install the slopes - we fasten everything with self-tapping screws into the wood (into the frame).
There is also no need to additionally insulate the slopes from the inside with foam plastic or other material. To be on the safe side, before installing the slopes, it is enough to foam the inner surface of the casing with a narrow strip next to the installation seam. This will be enough, because wood does not freeze as deeply as concrete or brick.
Like a window sill and slopes
This method of installing a window in a wooden house allows you to save on slopes and window sills, gain time and achieve, in my opinion, a greater aesthetic effect, but for this you will need a good woodworking machine to evenly cut out the so-called reverse quarter on the casing elements, which will be install a plastic window.

What a reverse quarter is can be easily understood from the figure. This is the recess into which the window frame will be installed on the street side. Quarter depth - 20 mm. The width is made exactly corresponding to the thickness of the frame, for example: a 5-chamber VEKA has a profile thickness of 70 mm, therefore the width of the reverse quarter should be 70 mm.

It is important to accurately calculate the dimensions of the frame and the window, carefully assemble the frame and install the frame in the opening exactly at the level - the internal clearance should have the shape of a regular rectangle, and all edges of the outer edge should be located in the same plane without distortion. In order not to make a mistake in the dimensions, it is better to first make and install the window frame, and only then accurately measure and order the plastic window locally.
Let's assume that the window frame is already installed in the opening. The size of the plastic window is made such that it is slightly larger than the “clearance” of the casing, or more precisely: 10 mm more in width and the same amount in height. Such a window will not fit into the frame from the inside, but it will easily fit into the reverse quarter from the street side. In this case, the edges of the frame will “hide” behind a quarter of 5 mm on each side (this is no longer possible - the sash hinges will interfere), and an installation gap will remain around the frame, which will later be filled with foam.
The frame is attached to the frame with self-tapping screws, as already described above. To ensure a beautiful tight connection between the frame and the casing on the room side, you can use a D-shaped door seal. It is glued before installing the frame with the adhesive side on the edge of the quarter. Accordingly, the dimensions of the quarter must be adjusted for the seal.
But as practice shows, with high-quality production of the pigtail, there is no need for such an addition. The window is placed directly into the quarter and the meringue of gaps is pressed tightly against the frame.

When attaching the frame, we press it tightly against the quarter, squeezing the seal, and screw in the screws, fixing the window in this position. The installed window is foamed from the street. Then, after the foam has dried, its excess is cut off, the seam is sealed with waterproofing tape or sealed with “STIZ-A” sealant, and the trim is installed.
Of course, since we refuse to decorate the casing with any additional elements, we must refine it, i.e. give it a look that matches the interior design of the room.
First of all, you need to give the bottom crossbar the shape of a window sill so that its inner edge protrudes slightly from the wall and is slightly wider than the opening.

Secondly, we “dawn” the internal surfaces of the racks and the top, i.e. we abandon the primitive rectangular (in cross-section) shape of these elements and create a large chamfer, simulating a reversal of the slopes.
Next, we process the inner surface of the casing elements. There are many options here: texture, color - the choice is yours. You can simply sand the surface and coat it with varnish. You can cover the wood with stain of the desired color so that the surface of the casing is in harmony with the color of the window and/or the color of the walls.
There is also, in my opinion, an interesting, but more expensive option - brushing the surface, i.e. antiqued treatment.
Artificial aging of antique wood is now very popular in various design styles. The essence of brushing technology is to remove soft fibers from the surface of wood using a metal brush (along the fibers), while the surface turns from smooth to embossed. After giving the relief texture, the wood is cleaned of lint and fibers, then the final gloss is given.

You can immediately coat the wood with varnish, but “aged” wood will look much more impressive after treating it with stain of the color you want. However, there is an even more effective way of painting - patting - creating a contrast between dark wood pores and a lighter surface.
This is achieved using paint of the desired color: the entire front surface of the casing is covered with it, and then the top layer is removed with a cloth before the paint has had time to dry. The final stage of artificial aging is varnishing. It is applied in two or three layers. You can then rub the surface with a soft cloth to add shine.
The installation of windows during the construction of a wooden house has always been and remains one of the most important and difficult tasks. The specifics of installing windows in a log house are such that attaching them to the walls of the log house is not recommended.
In the log house, over the course of 5-8 years, settlement occurs, caused by the process of natural drying of the wood, and compaction of the inter-crown filling under the load of the house’s own weight. Only during the first year the shrinkage of the house can be 3-5 cm. Therefore, in the old days, our ancestors allowed a wooden house to stand without doors or windows for at least a year until its walls settled. And only then did they begin to fill the window and door openings.
Today, few people agree to wait for a finished log house to settle down. Therefore, the installation of windows in a log house must be done so that the subsidence of the house does not in any way affect the structures filling these openings: it does not deform the double-glazed windows or jam them. This can be avoided by installing special joints for connecting door and window frames to the frame, which do not prevent their free movement relative to each other.
The walls of a log house and window and door frames are two independent structures, each of which works in its own way. Installing windows in a log house requires proper preparation of the opening. To compensate for the shrinkage phenomena of wooden wall structures, window and door openings must be made with larger dimensions than the dimensions of the window and door frames.

- First you need to decide on the height of the window sill. As a rule, it is 80-90 cm. This height is optimal for comfortably leaning on the windowsill. The window opening is cut approximately 5 cm below the expected height of the future window sill, since the thickness of the polyurethane foam layer is 1-2 cm, and the thickness of the window sill itself is 3-4 cm.
- Next, you need to place the horizontal and vertical lines of the window opening. A building level and plumb line will help with this.
- The bottom line of the window opening is placed according to the level, and then the top line. In this case, the height of the window opening should be at least 14 cm greater than the window itself, since the distance from the bottom edge of the window opening to the window should be left 4 cm for the window sill and foaming, on top - 2 cm for foaming, and for shrinkage of the house - 4-5 cm .
- When marking the vertical lines of a window opening, it is also necessary to take into account that it must be at least 14 cm wider than the window itself, of which 2 cm goes for foaming, and 10 cm for the casing (jam).
- The window opening is cut according to the markings.
Return to contents
Casing: purpose and types

The casing is a wooden frame, for the manufacture of which 4 boards 60-80 mm thick are used. The bottom board is a window sill, the other three are slopes. A longitudinal slot 20 mm deep and 60 mm wide is made in the side elements. This slot is necessary in order to create a pliable joint between the casing and the wall. It includes a ridge made at the end of the opening, or a specially made skull block that forms a keyed connection between the casing and the wall. This joint, when the frame settles, allows the timber or logs to deform, thus reducing the size of the gap above the windows and moving along the groove in the casing, without transferring the load to the double-glazed windows. A block is attached to the lower plane of the window opening, but its functions are different - it is necessary to prevent blowing through the junction of the wall and the window sill.
All plane joints must be sealed with insulation - tow or some other natural material. For these purposes, it is not recommended to use polyurethane foam, since during the process of settling the log house, the foam may come off the surface and cracks will appear.
Installation of the casing begins with the installation of the window sill at a level. After this, the side parts of the box are mounted and covered with the top block.
Return to contents
Casing installation methods

Image 1. Installation of windows in a frame using an embedded block.
Installing windows in a jamb using an embedded block (image 1):
- A groove for bars with a section of 50x50 is cut out on both sides of the logs, and the bars themselves are installed. The joints between the bars and the surface of the logs are insulated with tow or other heat-insulating material.
- A U-shaped window frame, the so-called frame, is mounted from boards with a section of 50x150 or 50x20 mm and secured in the window opening to the block. From below, the ends of the boards are attached to the crown.
- At the top, between the horizontal board and the upper part of the wall of the opening, a gap of 5-8 cm is made and filled with insulation (under no circumstances fill it with foam).
Installation of a socket in a groove in a wall made of logs (image 2):
- Glued laminated timber with a cross section of 100x150 or 100x200 mm is used. A spike element is made in it. A groove is cut out on the side.
- The side parts of the pigtail are mounted and the joints are insulated with tow. Then they are attached to the lower crown of the frame.
- A horizontal board is fastened between the side elements of the pigtail.

Image 2. Installation of a socket in a groove in a wall made of logs.
Installation of the socket on the spike (image 3):
- A 50x50 mm tenon is made in the window opening in the wall and lined with insulation. After this, the side elements with a pre-cut groove are inserted.
- Next, installation is carried out in the same way as installing the socket in the groove. The side parts are attached to the lower crown, and in the upper part they are bursting with a board. In this case, it is also necessary to make a thermal gap.
Installation of a window in a casing with a quarter (image 4).
This installation option is similar to installation in an embedded block. The difference is that it is necessary to produce specially shaped frame parts, which represent a typical window quarter and are more aesthetically pleasing for houses made of timber or timber.
Return to contents
Stages of installing wooden windows in a log house

Image 3. Installation of the socket on the spike.
- Window opening measurements. The dimensions of a window opening with a frame should be larger than the size of windows in walls made of brick or concrete, since there is no need to install a frame there. As a rule, the casing is made of timber with a cross-section of 100x150 mm and these dimensions should be taken into account when calculating window openings. Gaps are left between the opening and the casing: 20 mm on the sides, 70 mm or more on top.
- Installation of casing.
- Window installation. The wooden window is attached to the frame using self-tapping screws or using anchor plates.
Return to contents
Tools and materials for installing wooden windows in a log house
Tools:
- router and set of cutters;
- circular saw or circular saw;
- plane;
- screwdriver;
- wood hacksaw;
- set of chisels;
- hammer;
- rasp;
- mallet;
- abrasive sandpaper;
- level;
- roulette;
- square
Materials:
- shaped board with a cross section of 50x125 or more - for making a frame;
- timber with a section of 50x60 or more - for sashes;
- triangular and rectangular glazing beads, the height of which should be 10 - 12 mm;
- two window hinges and one locking handle per window sash;
- glass 4 mm thick;
- wood screws 4x60 mm: for window frame – 8 pcs. for the sash – 4 pcs.;
- wood glue.
Installing windows in a log house has a number of features. First of all, before installation, you need to wait for the wooden house to shrink, which lasts 6-18 months depending on the design of the building, the area and weight of the structure, and the type of soil on the land plot. Due to the shrinkage of the log frame, window structures become deformed and crack. In addition, a log house that continues to shrink will simply crush the installed structures. Read more about the process of shrinking a wooden house.
Specifics of installing windows in a wooden house
To prevent the frames from warping, you need to make a casing box or frame. Installation of such a box requires precise measurements, care in manufacturing and installation. An incorrectly assembled and installed structure will lead to distortion of the frame and log walls. This will worsen the appearance of the building, and heat will escape through the cracks and cold air, moisture and wind will penetrate.
Correctly selected window opening dimensions are the key to successful window installation in the house. The optimal distance from the floor to the window sill is 80-90 cm. As a rule, the window sill is made slightly higher than the tabletop. When installing, carefully monitor the size of the openings. Let's look at how to properly make a casing and install windows in a wooden house.
window frame
Windows in a log house cannot be attached directly to the ends of the opening. Otherwise, the blocks are deformed due to shrinkage. To avoid this, make a piping or casing of the opening. It strengthens the ends and does not interfere with the functionality of the structures and prevents the crowns from moving.
Window trimming is done in two ways depending on the type of windows (plastic or regular). For wooden structures, the block is made of bars and inter-crown insulation made of flax or jute is used. Wooden windows are more environmentally friendly. In addition, they will fit better into a log house. For plastic structures (PVC), a comb is cut out and a carriage with grooves is put on. Polyurethane foam is used as insulation. Such windows are more airtight.

Window frames for log houses are made from wood with 10-12% humidity. With less humidity, internal cracks appear. A simple design is used for windows made of natural materials. And making an opening for plastic products requires special care and a more complex casing option.
When fitting, a shrinkage gap of up to 7% of the opening height is made between the top element of the box and the log part of the house. It will protect window and door blocks from log pressure and deformation.
Which windows to choose: plastic or wooden
Today, many owners of country houses choose installations made of wood. Constructions made from natural materials preserve environmental cleanliness, safety and the atmosphere of a log house. Wooden windows are characterized by a pleasant forest aroma and attractive appearance, resistance to frost and temperature changes.
This material “breathes” and maintains a comfortable humidity level in the room. Among the disadvantages, one can note the high cost of products. In addition, wood must be periodically treated with antiseptics to protect living material from the negative effects of moisture.

Some people prefer to install plastic windows in a log house. Plastic is a more accessible, cheap material that is characterized by a long service life, good thermal insulation, and a wide selection of colors. Plastic products do not require special care and treatment, but they heat up when exposed to strong sunlight.
Plastic windows emit harmful substances and have an unpleasant odor. They attract dust and do not allow moisture to pass through, so a greenhouse effect may occur in the room.
If for a cottage you can still choose between plastic and wooden windows, then for a bath it is necessary to use windows exclusively made of wood. The wood does not heat up and does not burn the skin, and does not interfere with the healing effect of the bath. You will find interesting projects of bathhouses, country cottages and country houses at the link http://marisrub.ru/proekts/all-proekts.
Installation of wooden windows
The frame for ordinary windows is made using a groove in the logs adjacent to the opening, into which a block is inserted. The block becomes one of the sides of the window block. First, insert the bottom one, then the two side ones, and finally the top one. Inter-crown sealant is placed in the grooves and shrinkage gap.

The seal provides heat and sound insulation, protects the wood from dampness and insects. Sometimes polyurethane foam is used as insulation, but it is completely unsuitable for a wooden house. The foam holds the logs tightly together and prevents natural shrinkage. It is better to choose natural flax and jute.
Finally, the shrinkage gap is closed and decorated using fillets and casing. They will give the window a finished look and make the decor aesthetically pleasing. Products can be of any shapes and sizes, colors and shades, with carvings and patterns.
Installation of plastic windows
Installing a casing for plastic windows is a labor-intensive process, as it requires cutting out the ridge and installing a carriage. It is along the carriage that the logs will settle. It must be taken into account that the opening should be 13-15 cm larger than the window frame.
The holes and grooves are filled with mounting foam, then covered with mounting tape. The hermetically sealed connection will not let the cold into the room and will ensure the necessary moisture exchange. Finishing is done using plastic slopes and window sills.

Installing windows in a wooden house is a labor-intensive process that requires a sequence of actions, accuracy and care. Improper installation of the window frame will lead to serious problems. These include frequent drafts and creaks, jammed doors and locks, skewed openings and walls.
To avoid such troubles, entrust the work to the masters of the MariSrub company. They will manufacture and install blocks, insulate openings around the perimeter using thermal insulation materials and vapor barrier film. This will protect against the penetration of wind, cold and excess moisture in the room.
They are regaining their once lost popularity in the individual housing class. Tired of reinforced concrete and brick sarcophagi, people are returning to the material traditional for our latitudes - wood. But a return to traditional materials does not mean blindly copying the construction techniques of the past - a modern house made of timber (rounded wood) is a fusion of innovative technologies with centuries of experience in wooden architecture, among the main features of which is the installation of metal-plastic windows in wooden houses.
Installation of windows in wooden houses: wooden or metal-plastic
The advantages of wooden windows are undeniable:
- they harmoniously and naturally fit into the interior of any wooden house, be it profiled timber or rounded logs, preserving its originality and style
- ecological cleanliness

![]()

- support natural ventilation - air circulation between indoors and outdoors
- treatment with antiseptics significantly increases the service life of wooden windows
But at the same time, over time, solid wood, under the influence of external factors (especially when the manufacturer used low-quality wood), can crack and change its geometry (they say - the tree has led). In addition, wood requires periodic painting; they have poor repairability.
Metal-plastic windows are reliable, durable, and significantly superior to wooden ones in terms of airtightness and sound insulation. They are durable, do not require special care (no need to additionally insulate for the winter and paint), their hygienic treatment is not difficult.


And if in “stone” construction the metal-plastic version of windows today has practically no alternative, then plastic windows in a wooden house raise doubts among some developers. There are two main reasons:
- aesthetics – namely, how the plastic window and wooden wall will be combined, and whether it will look foreign. In fact, many manufacturers have long had a model line of windows specifically for wooden houses. They contain plastic, both in color (you can choose a variety of shades, from light honey to moraine wood) and in texture, which is practically indistinguishable from natural wood
- do not allow air to pass through – which results in a musty, suffocating atmosphere in the house and disrupts natural ventilation. This situation is indicative of a brick (reinforced concrete) house, but for a wooden one, this statement is only partly true.
In fact, wooden walls are responsible for the main air exchange and humidity regulation; the volume of air circulating through the frames of wooden windows is relatively small. Therefore, metal-plastic windows installed in a wooden house will not have a dramatic impact on habitability in terms of air quality, but they will help reduce heat loss.


How to install plastic windows in a wooden house: sequence of operations
The peculiarities of installing windows in a wooden house with your own hands are due to the fact that wooden houses, especially in the first years, have high structural mobility. This is due to the fact that the wood begins to lose stored moisture, while decreasing in volume. The worse the wood was dried beforehand, the more noticeable this process will be.
The house shrinks, which occurs especially actively in the first year and continues for 3-5 years. At the same time, per meter of masonry, the height of the wall, due to the drying of the log or timber, can be reduced to 1.5 cm. If you simply install a metal-plastic window, then due to the compression of the foam layer in the first year, the subsidence will not be noticeable. But already in the second year, problems may arise with opening the window, and in the future, at best, it will be blocked, but most quickly, the glass, unable to withstand the pressure, will simply burst.
Even after the end of the active phase of shrinkage, the walls of the house, depending on the season, may fluctuate slightly - with high humidity (in autumn), the tree takes on water and increases in volume, the walls “grow”. In summer, the tree dries out and the wall sags. That is why, to install windows (both wooden and metal-plastic) in a wooden house, you will need a special design - a casing (frame).


Installing the casing makes the windows independent of the load-bearing walls, eliminating the possibility of loading the frame when the wall bends and shrinks:
- the jamb blocks the movement of logs (beams) in the vertical plane in the window opening
- does not prevent vertical shrinkage
- the casing bears the entire load
- additional reinforcement of the wall in the area of the cut opening
To install the window, first mark and cut out an opening that is 5-8 cm larger on each side so that it is possible to install a window frame.
The simplest option for casing is to cut a vertical groove measuring 5x5 cm at the ends of the logs, into which a beam of the same size is inserted. (Fig. 2). But this option is effective when installing a wooden window.
A more reliable option (just for PVC logs) is to cut out a ridge at the ends of the logs, and then put (install) a window carriage on it with a groove of the appropriate width. Alternatively, the tenon can be cut on the carriage, and the groove in the logs, this is not important (Fig. 3). It is important that when shrinking due to the ridge, the logs will slide (move) inside the groove, without vertical displacement and without creating pressure on the frame (window).
Window carriages are vertical beams measuring 15x10 cm, at the ends of which cutouts of 5x5 cm are made - horizontal lintels and boards measuring 15x15 cm with spikes at both ends are inserted into them.
Installation procedure:
- the lower lintel is laid
- gun carriages are stuffed onto a comb of tow
- The upper jumper is inserted into the upper gap and lowered into the grooves
- the resulting structure is fastened with self-tapping screws, without capturing the ridge (!), otherwise there is no point in installing the casing. The gaps between the logs and the trim are foamed (filled with tow).


Window installation begins with the installation of a window sill:
- To ensure that the window sill is securely fixed, shallow (5-10 mm) grooves are cut out for it in the wooden opening
- Using plates (plastic or wooden) and a level, level the window sill
- fix the window sill with self-tapping screws. To prevent the plastic window sill from cracking when tightening the screw head, use a rubber (washer) gasket. Holes for self-tapping screws are drilled in those places that will later be covered with a plastic window.


Advice! In a wooden house, it is optimal to install a window either in the middle of the wall, or slightly moving it towards the outside, but not right next to each other!
After this, proceed to the installation of PVC windows:
- prepare the window (remove double-glazed windows and sashes)
- use bars to level the frame horizontally
- The window is secured with anchors on the top and sides
- foaming


After installing the frame and subsequent checking horizontally and vertically, double-glazed windows are inserted into it and closed with glazing beads, after which the sashes are inserted and the fittings are adjusted. All gaps between the opening and the frame are foamed; it is better to fill the gap between the window sill and the frame with silicone sealant.
The procedure for installing a metal-plastic window in a wooden house is presented in detail in the video
Metal-plastic windows: we care for them correctly
The fact that PVC windows do not require significant maintenance does not mean that they do not need attention. And if caring for a double-glazed window is no different from caring for ordinary glass (with the exception of not allowing alcohol-containing cleaning solutions to get on the rubber seal), then caring for the other parts has its own subtleties:
- plastic care – immediately exclude aggressive chemical and abrasive detergents. To care for plastic, use degreasing detergent compositions, or simply a warm soapy solution, which is applied with a soft sponge (but not with its hard surface)


- seal care – at least 2 times a year (preferably in autumn and spring), it is necessary to clean the seal using an ordinary soap solution. Wash the seal with a cloth or soft sponge, wipe it dry and lubricate it with silicone grease.
- maintenance of fittings – at least once a year it is necessary to lubricate all moving elements. Hardware manufacturers usually designate lubrication points with special symbols - “drop” or “oil can”. Machine oil (for sewing machines) without acids and resins is suitable for lubrication.


- drainage holes – drainage channels are located at the bottom of the frame; they remove water (moisture) outside the frame. It is necessary to systematically check that it is not clogged.