How to warm the soil for seedlings. Disinfection of soil in pots. What fertilizers are needed for soil for seedlings?
Read also
How to heat the earth in the oven? What time is it, what is the temperature? and got the best answer
Answer from Dan Bessonova[guru]
In general, during heat treatment, most of the vitamins are lost, nutrients change structure and lose value
A microwave completely changes the structure of the earth, but here’s a recommendation.
# Steaming in the oven. The damp soil is poured in a thin layer onto a baking sheet, covered on top to avoid active evaporation of moisture, stirring occasionally and kept in the oven for 1 hour at a temperature of 100-120° C.
# Steaming in a microwave oven is a short-term treatment of wet soil at high temperature. The wet soil is placed in a special container or in a bag made of thick polyethylene (you must first make holes in the sealed bag of purchased soil). The optimal time for steaming 0.5 liters of soil is 5 minutes at maximum mode. Or two passes for 2-3 minutes each with mixing the soil between treatments.
# Steaming in water. The soil is poured into a metal container, filled with water until evenly moistened, covered with a lid and kept on low heat for 1 hour.
# Steaming in a water bath. The earth is poured into a metal container, closed with a lid, placed in a larger container with water, covering three-quarters of the container with earth, and kept on fire with water at a low boil for 1-1.5 hours.
# Steaming in a colander. The colander is lined with several layers of gauze or canvas and covered with soil. A colander is secured over a container of boiling water and covered from above. Keep on fire with low boiling water for 1 hour. During the cultivation process, the soil is periodically stirred to ensure uniform heating.
# The earth, poured in a thin layer on a metal tray, is poured with boiling water and then dried.
# Freezing. The soil is kept in severe frost with complete freezing. The easiest way is to leave small packages of soil on the open balcony all winter. Freezing does not rid the soil of many microorganisms and weeds.
Heat treatment also has a downside - immediately after it, the risk of introducing unwanted microorganisms into the soil and their active development in a sterile environment increases; the natural microflora of the soil takes a long time to recover. Calcination of the soil without moisture instead of steaming leads to a change in the structure of the soil, turning it into dust. Exceeding the recommended temperature for soil treatment (especially commercial soil with numerous additives) can lead to the formation of undesirable compounds.
To “revitalize” sterile soil, it is recommended to use biological products - Trichodermin, Planriz, Baikal, Vozrozhdenie and others. A dry biological preparation is added to the soil that has cooled after heat treatment, or the soil is spilled with its aqueous solution.
You can sterilize only the most dangerous components (turf, leaf, humus, coniferous, heather soil), and then add relatively clean peat.
Sand, expanded clay, pebbles, gravel are washed to clean water, poured into a metal container, filled with water and kept on fire at low boil for 30-60 minutes.
The bark, roots of fern, sphagnum moss, and cones are briefly treated with boiling water before use.
The risk of pests and diseases is significantly reduced with the transition to substrates that do not contain humus and consist of peat, perlite, vermiculite, coconut fiber, and bark.
Chemical treatment allows you to get rid of pests and pathogens. The soil mixture, spread in a thin layer on a tray, is spilled with a solution of potassium permanganate (hot solution of potassium permanganate, 0.5-1 g per liter of water) or a pesticide (fungicide, insecticide, acaricide). Tilling the soil with biological products containing microorganisms that are antagonists of soil pathogens is more natural, but less reliable.
Thermal and chemical treatment of the soil is carried out 1-3 weeks before use to restore soil microflora.
Dana Bessonova
Thinker
(9520)
I wrote that this is harmful, read more carefully. By the way, my earthen mites did not die after calcining the earth in the oven. and so you know, I restored the soil with EMKO
It would seem that potting soil is much easier to improve and disinfect than in a garden bed - the volume is small, you can control literally every centimeter of the soil. You just have to get a little wrong with the proportions and that’s it, goodbye to the harvest. In open ground, you can sow green manure, add stinking manure, pour boiling water on it, and potassium permanganate - even if you screw it up a little, the soil will be restored. There is no room for error with potting soil...
Soil disinfection- this is not for the lazy. But if you don’t take at least basic measures, you can ruin all your work. Where does the soil in bags come from? Often, this is waste soil from greenhouses, sifted and enriched with peat, mineral fertilizer and ballast fillers. Often unidentifiable herbs sprout from it, but this can be survived... And this soil is also “enriched” with pathogenic bacteria, mold spores, aphid larvae and other bugs.
Potting soil can be disinfected in a number of ways, which will be discussed in this article.
Calcination of the soil. Soil sterilization
My grandfather, a winegrower and gardener with 50 years of experience, treats the soil for seedlings in 3 stages: calcination and adding ash and yeast to the soil. He simply fries the garden soil in a huge frying pan, stirring occasionally and moistening it with a spray bottle. Mix a three-liter jar of soil with a heaped teaspoon, then add yeast. described in detail what is what about using ordinary yeast for the needs of a garden on the windowsill. Of course, this takes up precious time, but it guarantees the absence of fungi in the soil and the death of any living creatures. Ash is a fertilizer and an additional sterilizer, and yeast populates the soil with its colonies and helps the plant feed, enriching it with nitrogen. This method is not the only one, nor is it the most convenient.
Another option roasting in the oven(suitable for a small volume of soil): pour the wet soil into the baking sleeve. Bake for 40 minutes at 180 degrees. I think it's a great idea.
Steaming the soil in a water bath
Place a sieve on a pan of boiling water, place a layer of gauze, add soil and cover with a lid. You can stir the soil occasionally. The procedure lasts from 20 minutes to 1.5 hours, depending on the amount of soil. After steaming, the soil should breathe for some time. Add yeast or any available bacterial fertilizer to the warm soil. It is effective to steam the soil in several passes in small portions.
Biological disinfection of soil with fungicides
The most popular biological fungicides: Fitosporin, Barrier, Barrier, Fitop, Integral, Baktofit, Agat, Planzir, Alirin B, Trichodermin. All of them have a non-chemical effect on fungi and pathogenic bacteria - the “right” bacteria. For the first time, I used the Ukrainian analogue of Fitosporin - Phytocid M. I planted mini-tomato seeds in the soil treated with it. In general, biological fungicides are praised by flower growers. The main thing is to strictly follow the instructions. It is written on the packaging that the diluted Phytocid should be stored for no more than a day, but I got a three-liter jar and I have been watering all my plants with this solution for the second week now. The watercress is delighted with this watering; I have never had such lush harvests!

Chemical soil disinfection
You should write about chemical fungicides, but you shouldn’t use them. At least for our windowsill gardens. I will write only about those drugs that have hazard class 4 (low-hazard substance).
Albite. The composition contains terpene acids, extracts from soil bacteria and microelements. Available in paste form. Prevents root rot from developing powdery mildew, brown rot, and other nasty things. Counts biological fungicide with chemical action.
Potassium permangantsovka(potassium permanganate). A long-familiar but ineffective method of soil disinfection. It also becomes a potassium fertilizer.
There are a great many drugs of this kind, but they are hardly suitable for us.
copper sulfate, inkstone . They disinfect and at the same time inhibit plant growth. They don't suit us.
And about the last resort for today - mustard powder! Effective against fungi, bacteria, viruses, thrips, nematodes. Loosens the soil and stimulates plant growth. Apply to the soil as follows: per 5 liters of soil, a tablespoon of mustard powder. Combine with nitrogen fertilizer.
Update 11/29/2016
Since writing this article, I have become much more attentive to the sources of information on which I base my material. Despite the fact that disinfecting potting soil is traditional for post-Soviet countries, it is not practiced anywhere else. The application of biofertilizers with effective microorganisms (Baikal, Fitosporin, etc.) has no proven effectiveness in field conditions, although according to my own (biased) experience there is a result. According to some data described in the article about EO drugs, homemade infusions with effective microorganisms are better than industrial mixtures (infusions with banana peels, sauerkraut juice, yeast).
Before you start sowing seeds for seedlings, you need to prepare the ground. Experienced gardeners They know that the health and development of seedlings largely depends on the quality of the soil.
Someone buys soil for seedlings in a store. When purchasing land, you need to pay attention to its composition, since often the main component of purchased soil, up to 90%, is peat with mineral additives. It is best to use a multicomponent mixture for growing seedlings, in which the main part is turf land, humus, and also added peat and sand.
Many gardeners prefer to prepare the soil for seedlings themselves, in order to save money, and so they are sure that the basis for growing seedlings is prepared as it should. You can take meadow soil for seedlings yourself, removing 10 cm from under the roots of plants; excellent loose soil is obtained in the forest under the tree crowns. However, many gardeners do not have the opportunity to take land except from own garden. In this case, there is a risk of soil contamination with spores of fungi and bacteria that cause diseases vegetable crops. Also, self-collected soil may contain larvae and overwintering pests and weed seeds.
There are many ways to disinfect soil for seedlings, but we try to choose not only effective methods, but not labor-intensive to cleanse the land of diseases and pests.
1. The first method is freezing the ground . Soil for growing seedlings is collected in autumn in buckets, breathable bags, and boxes. If you store soil for seedlings in the basement or in a shed, then in winter, in the most severe frost of more than -20 degrees, the soil should be taken outside and kept for a week. After the first freezing, return the soil to a warm place where the temperature is above zero degrees; from such a drop, weed seeds and harmful microorganisms will begin to wake up, just like in the spring. After 7-10 days in the warmth, move the soil for seedlings back to the frost for a week and all awakened seeds, pathogens, and pest larvae will die. It is recommended to freeze the soil 2-3 times, alternating heat and cold with a temperature of less than -15 degrees. You can freeze the soil in the freezer, but in this case you will be limited in volume.
2. Calcining or steaming the soil well cleanses the soil from diseases and pests. There are ways to disinfect soil in the oven, in the microwave and in a water bath by steaming.
When calcining the earth in the oven, pour boiling water over the earth, pour it into a suitable container in a layer of about 5 cm and place it in an oven preheated to 90-100 degrees for half an hour.
More quick way calcination of the earth in the microwave, but in this case the cultivation of the earth should be done in small portions of about 1 liter per glass jar or in plastic bag. Place the damp soil in the bag in the oven and turn it on for 4-5 minutes at maximum power. The container where the earth is warmed up should not be tightly closed; if you do this in a bag, then pierce it in several places.
The method of steaming soil in a water bath is quite labor-intensive, but perhaps someone uses it. The earth is poured into a fabric bag and placed on a wire rack or in a colander over boiling water in a pan; steaming the earth should last 30-40 minutes.
The most important thing in the method of warming the earth is not to raise the temperature to more than 100 degrees, since in this case you risk getting sterile and dead soil without harmful and without beneficial microorganisms.
3. The method of disinfecting land using disinfectants, for example, using potassium permanganate, is very popular, since it is the easiest . You just need to dilute potassium permanganate in warm water until Pink colour, not dark and not too light, and shed plenty of soil. After some time, watering is done with clean water.

All of the above methods of soil disinfection have one significant drawback - along with the harmful microflora in the soil, beneficial microorganisms also die , the earth becomes poor, not alive. Therefore, after any procedure for disinfecting the earth, we must add beneficial microorganisms and nutrients to it in order to revive the earth. You can use available biofertilizers - these are phosphobacterin, azotobacterin, Baikal M, Siyanie.
4. The most gentle and simplest method of land disinfection can be called biological , since in this case preparations with beneficial bacteria are used, which will suppress the growth of harmful microorganisms in the soil, the soil becomes safe and at the same time does not lose its properties. Available and popular preparations for soil disinfection are trichodermin and phytosporin. This method can also be used as an additional method, after the procedure of freezing, calcination or watering with potassium permanganate, in order to populate the soil with beneficial microorganisms.

5. In addition to disinfecting the land, when preparing for sowing, it is necessary to take care of disinfecting the containers , in which you grow seedlings from year to year. Plastic cups and containers must be thoroughly washed with the addition of White. Wooden boxes can be treated with a solution of potassium permanganate.
The next stages of preparing the land for growing seedlings consist of determining the acidity of the soil and adding various components that will give it the desired structure and enrich it with nutrients.
Next, read in the new issue how to prepare your own soil for growing seedlings of tomatoes, peppers, eggplants, cucumbers and other crops. To do this, subscribe to the channel so as not to miss the release of new articles.
Seedlings require a soil composition that is significantly different from soil for adult plants. Specially prepared soil for seedlings is sold in flower shops and other specialized stores.. Many amateur gardeners prepare mixtures on their own, but make a number of mistakes that are revealed already when the seedlings are received. Lost time cannot be returned. Therefore for proper preparation soil mixture, it is necessary to perform a technological chain of work.
Soil options for seedlings
What should be the mixture for seedlings?
Soil mixtures for seedlings are baby food for a newborn. The soil should be light, air- and water-permeable, and at the same time moisture-absorbing. Organic matter gives this property to soils. Therefore, the composition of the soil for seedlings must include loosening materials - mature humus or vermicompost. In regions rich in peat, it can be used to increase the porosity of the mixture, but only high-moor. Lowland peat has increased acidity, and for seedlings the indicator is optimal within the pH range of 6.5-7.0. The artificially created substrate must contain a sufficient amount of nutrient salts and microelements.
The components are prepared in the fall in sunny weather, placing them in separate containers - boxes, bags, small plastic containers. Usually prepared:
- turf soil from the top 5-15 cm layer (light soil, heavy soil below). Grind into small pieces and clear of undecayed debris. It is better to use soil from a clover field.

- In the absence of turf, you can prepare leaf soil from the forest top 5-8 cm layer under fallen leaves. Do not use soil from under oaks and willows.
- Garden soil is collected from your own plot, clean from chemicals and herbicides,
- Sifted wood ash.
- Humus soil from completely decomposed horse or cow manure. Ripe manure or vermicompost is sifted through large sieves and placed in prepared boxes.
- Peat soil is harvested from elevated areas of peat islands or dried out swamps from the top 12-15 cm layer. This peat has neutral acidity, which is very important for planting land.
- Among the baking powders you always need are perlite, expanded clay, hydrogel, and straw cutting. The mixture contains up to 30% loosening agents to ensure optimal conditions for the root system of the growing embryo and seedling.
- At home, you must have mineral fertilizers in an easily accessible (water-soluble) form, microelements, as well as preparations to protect seedlings from diseases and pests.

Preparation of soil mixtures
The prepared ingredients serve as the basis for preparing soil mixtures. The number of included ingredients and their ratio can be very different for each type of seedling. But most often, gardeners prepare a universal mixture of 2-4 components, which consists of:
- 2 parts of mature humus or vermicompost. Semi-rotted manure is not recommended. A high concentration of active organic substances can negatively affect the young roots of the embryo. The process of overheating of unripe manure raises the soil temperature, sometimes up to +30°C, which will also lead to the death of the embryonic roots.
- parts of turf soil, which can be replaced with leaf soil, prepared independently from fallen healthy leaves garden crops.
- one part of baking powder, for example, fine river sand. High-moor peat can be used as a soil loosener.
The ingredients of the soil mixture are thoroughly mixed and cleaned by sifting through large sieves to remove large inclusions.

Soil mixtures in their original form
Disinfection
The main purpose of disinfection is to clean the soil mixture from weed seeds, pests, and fungal diseases. You can disinfect using cold or hot methods. Cold disinfection includes freezing and etching of the soil mixture. Hot methods include steaming and calcination.
Cold way It is more advisable to carry out disinfection where there are severe winters. In the southern regions, it is more reasonable to use steaming or calcination of the soil mixture. Soil disinfection with preparations (soil dressing) does not depend on climate and can be carried out in any climatic zone. When pickling the mixture, it is better to use biological products. They are safe for humans and animals.
Steaming
How to steam soil for seedlings? When hot disinfection is carried out using the steaming method, a water bath is usually used. If you only need a little soil mixture, you can use a colander. To prevent the soil from spilling, cover the colander with gauze, add a layer of soil, cover with a lid and place over boiling water. The duration of steaming ranges from 15-20 to 40-45 minutes.

Easy steaming and disinfection
If a large amount of soil is required, then use large containers. Water is poured into the bottom of the tank, a high stand is placed in the middle, and a finely perforated bag with soil mixture is placed. Steam from boiling water steams the mixture well in 1.0-1.5 hours. Moistened with steam, it is distributed over the litter and dried until flowable.
Freezing
In cold regions, with the onset of cold weather, the prepared soil is taken out into the street in boxes, where it can remain from 3-5 days to several weeks. At frosts of -15...-25-35°C, most seeds, eggs and larvae of pests, and microflora die. A month before filling containers for sowing seedlings, the soil mixture is brought into a heated room with a temperature of +18..+25°C. Soil pests and preserved weed seeds begin an active life. The procedure is repeated several times. Before filling containers for sowing seeds, you can spill the mixture with a 2% solution of potassium permanganate, followed by drying it to a free-flowing mass.
Calcination
Steaming can be replaced by calcination. How to calcinate the soil for seedlings? Primingscatter on trays in a layer of 5-6 cm, lightly moisten with a spray bottle or sprinkle, heat at +40...+60*C for about 40-45 minutes. The heated soil is cooled to room temperature.
Etching
The most accessible etching is carried out with potassium permanganate. Prepare a solution at the rate of 3-4 g/bucket of water, spill the soil, mix thoroughly. The wet substrate is scattered and dried.
How to restore soil after disinfection
When soil is disinfected, part of the beneficial microflora dies. Therefore, after the disinfection procedure, so-called effective microflora preparations or EM preparations are added to the moistened soil:
- antifungal biofungicides (trichodermin, phytosporin, gamair, etc.),

Biofungicide “Fitosporin-M”
- bioinsecticides that destroy soil pests (fitoverm, actofite, bowerine, etc.). Reproducing quickly, they activate soil processes and simultaneously destroy the remnants of surviving pests. Together with biofungicides, you can add the biological product “Emmochka-Bokashi”. Some gardeners moisten the biosoil with a working solution of the Baikal EM-1 concentrate. In a warm, humid environment, effective microflora will quickly restore biochemical processes.
What fertilizers are needed for soil for seedlings?
Vegetable seedlings need a good supply of nutrients, so mineral fertilizers are added to the prepared soil mixture. To reduce the time spent preparing different mixtures for each type of vegetable crop, experienced gardeners prepare soil mixtures, adding the amount of fertilizer taking into account the requirements of the crop, and sometimes adding an average rate of mineral fertilizers.

Complex organomineral fertilizer
To a bucket of the disinfected mixture add 200 g of wood ash, no more than 50 g of slaked lime, a level teaspoon of ammonium nitrate and potassium sulfate, a dessert spoon of superphosphate (preferably water-soluble). The resulting seedling soil is thoroughly mixed. Individual soil mixtures can be offered as a guide for beginning gardeners.
- For cucumbers: 1 part each of turf, vermicompost or humus. Add about 200 ml of ash, 15 g of basic mineral fertilizers.
- For eggplants, sweet peppers: 2 parts each of humus and garden soil, peat. Add 1.0-1.5 cups of ash, 20-25 g of urea, 60 g of superphosphate, 20 g of potassium sulfate to the mixture. Mix everything thoroughly.
- For tomatoes: the same mixture as in the previous paragraph or 8-10 g of ammonia, 80 g of superphosphate, 20-30 g of potassium sulfate.
- For cabbage: add 5 parts of ash to 20 parts of turf or leaf soil, and 5 parts of sand and lime. You can not add fertilizer to this mixture or add 20-25 g of urea and superphosphate, 10 g of potassium fertilizer and 25-30 g of dolomite flour (lime).
The mixtures given are approximate. Experienced gardeners usually have their own seedling soils.

Preparing soil mixture for seedlings
How to improve purchased soil mixture
Some gardeners, not wanting to spend time on self-production, purchase ready-made soil mixture. The purchase must be carried out in advance (2-3 weeks), and be sure to check the quality of the products. Sometimes, instead of high-quality soil, you can buy a mixture that is over-acidified due to low-lying peat, not disinfected, and with the presence of pathogenic microflora.

Ready seedling soil is needed:
- check for acidity (you can use a litmus tape),
- if there is a large amount of peat, add 250 ml of ash, 30-40 grams of slaked lime to the mixture bucket,
- disinfect the soil using one of the methods described above,
- add 20-30 g of nitrophoska, azofoska or nitroammophoska to a bucket of purchased soil (after disinfection),
- If almost only peat was purchased instead of soil, you need to mix the purchased low-quality soil with garden soil from the site in a ratio of 3:1, add slaked lime, be sure to disinfect,
- To increase the moisture capacity of poor-quality soil, you can add hydrogel or humus. Please note that the hydrogel in a humid environment increases in volume by 250 times.
The procedure for improving the acquired soil will always pay off with high-quality seedlings.
Video: preparing soil for seedlings
For many centuries, jadeite was not separated from its similar jade, and they were called.
We rarely think about how our family influences future children and their children, and we also don’t know.
By the beginning of the nineteenth century, the Jews of Russia did not have surnames, and they only used first names.
In ancient times, the hyacinth stone was known and loved in many parts of the world. But they especially revered him.
- Nature (222)
- ☺ Space (13)
- ☺ Parks and Nature Reserves (57)
- ☺ Undersea world (27)
- ☺ Nature of Russia (40)
- Videos (77)
- Dacha (56)
- ☺ For the vegetable garden (3)
- ☺ For the garden (37)
- Children (27)
- Animals (155)
- ☺ Wild animals (10)
- ☺ Turtles (7)
- ☺ Rodents (1)
- ☺ Cats (29)
- ☺ Horses (8)
- ☺ Birds (30)
- ☺ Dogs (15)
- Health (152)
- ☺ Witchcraft (31)
- ☺ Karma (12)
- ☺ Meditation (7)
- Interior (42)
- Art (797)
- ☺ Wood (9)
- ☺ Glass (10)
- ☺ Jewelry (16)
- ☺ Simulation (3)
- ☺ Russian folk painting (8)
- ☺ Architecture (133)
- ☺ Graphics, Art (87)
- ☺ Painting (170)
- ☺ Dolls (18)
- ☺ Museums and exhibitions (62)
- ☺ Fairy tales and myths (23)
- ☺ Sculpture and Monuments (174)
- ☺ Dancing (10)
- ☺ Porcelain (13)
- History (332)
- ☺ Ancient world (26)
- ☺ Ancient Egypt (12)
- ☺ History of Moscow (15)
- ☺ Peoples of the world (99)
- ☺ Memory of the Second World War (20)
- ☺ Romanovs and Russian named after. (44)
- Woman's beauty (156)
- ☺ Fashion (76)
- ☺ Perfumes (10)
- ☺ Hairstyles (16)
- Personalities and Biographies (66)
- Holidays (62)
- ☺ Wedding (6)
- ☺ Day today (15)
- Greeting (5)
- Psychology (61)
- Religion (170)
- ☺ Temples (25)
- ☺ Icons (13)
- ☺ Prayers (17)
- Retro (36)
- Photo collections (362)
- ☺ Travel (239)
- Hobbies (58)
- ☺ Drinks (11)
- ☺ Scrapbooking (15)
- ☺ Floristry (14)
- ☺ Photoshop (14)
- Losing weight (43)
- ☺ Diets (20)
- ☺ Physical exercise (11)
- Florist (187)
- ☺ Houseplants (49)
- ☺ Plants in the interior (17)
- ☺ Plant care (41)
- Esoterics (100)
- ☺ Signs (29)
- ☺ Dreams (12)
- ☺ Feng Shui (26)
- Etiquette (16)
So, at what temperature and for how long should the earth be heated in the oven: optimal temperature – this is 70-90ºС, the time is about half an hour. After this, the soil must be given time to restore the normal balance of beneficial microflora and only then used for planting.
It is also important to know how to heat the soil in the oven for seedlings: to do this, you first need to sift it, moisten it a little, then pour it onto a metal sheet in a layer of about 5 cm and immerse it in a preheated oven.
Additionally:
# Steaming in a microwave oven is a short-term treatment of wet soil at high temperature. The wet soil is placed in a special container or in a bag made of thick polyethylene (you must first make holes in the sealed bag of purchased soil). The optimal time for steaming 0.5 liters of soil is 5 minutes at maximum mode. Or two passes for 2-3 minutes each with mixing the soil between treatments.
# Steaming in water. The soil is poured into a metal container, filled with water until evenly moistened, covered with a lid and kept on low heat for 1 hour.
# Steaming in a water bath. The earth is poured into a metal container, closed with a lid, placed in a larger container with water, covering three-quarters of the container with earth, and kept on fire with water at a low boil for 1-1.5 hours.
# Steaming in a colander. The colander is lined with several layers of gauze or canvas and covered with soil. A colander is secured over a container of boiling water and covered from above. Keep on fire with low boiling water for 1 hour. During the cultivation process, the soil is periodically stirred to ensure uniform heating.
# The earth, poured in a thin layer on a metal tray, is poured with boiling water and then dried.
# Freezing. The soil is kept in severe frost with complete freezing. The easiest way is to leave small packages of soil on the open balcony all winter. Freezing does not rid the soil of many microorganisms and weeds.
Heat treatment also has a downside - immediately after it, the risk of introducing unwanted microorganisms into the soil and their active development in a sterile environment increases; the natural microflora of the soil takes a long time to recover. Calcination of the soil without moisture instead of steaming leads to a change in the structure of the soil, turning it into dust. Exceeding the recommended temperature for soil treatment (especially commercial soil with numerous additives) can lead to the formation of undesirable compounds.
You can sterilize only the most dangerous components (turf, leaf, humus, coniferous, heather soil), and then add relatively clean peat.
Sand, expanded clay, pebbles, gravel are washed to clean water, poured into a metal container, filled with water and kept on fire at low boil for 30-60 minutes.
The bark, roots of fern, sphagnum moss, and cones are briefly treated with boiling water before use.
The risk of pests and diseases is significantly reduced with the transition to substrates that do not contain humus and consist of peat, perlite, vermiculite, coconut fiber, and bark.
Chemical treatment allows you to get rid of pests and pathogens. The earth mixture, spread in a thin layer on a tray, is spilled with a solution of potassium permanganate (hot solution of potassium permanganate, 0.5-1 g per liter of water) or pesticide (fungicide, insecticide, acaricide). Tilling the soil with biological products containing microorganisms that are antagonists of soil pathogens is more natural, but less reliable.
Cited 3 times
Liked: 3 users
source
It would seem that potting soil is much easier to improve and disinfect than in a garden bed - the volume is small, you can control literally every centimeter of the soil. You just have to get a little wrong with the proportions and that’s it, goodbye to the harvest. You can sow green manure in open ground, add stinking manure, pour boiling water on it, and potassium permanganate - even if you screw it up a little, the soil will be restored. There is no room for error with potting soil...
Soil disinfection- this is not for the lazy. But if you don’t take at least basic measures, you can ruin all your work. Where does the soil in bags come from? Often, this is waste soil from greenhouses, sifted and enriched with peat, mineral fertilizer and ballast fillers. Often unidentifiable herbs sprout from it, but this can be survived... And this soil is also “enriched” with pathogenic bacteria, mold spores, aphid larvae and other bugs.
Potting soil can be disinfected in a number of ways, which will be discussed in this article.
My grandfather, a winegrower and gardener with 50 years of experience, treats the soil for seedlings in 3 stages: calcination and adding ash and yeast to the soil. He simply fries the garden soil in a huge frying pan, stirring occasionally and moistening it with a spray bottle. Mix a three-liter jar of soil with a heaping teaspoon of ash, then add yeast. Here I described in detail what is what about using ordinary yeast for the needs of a garden on the windowsill. Of course, this takes up precious time, but it guarantees the absence of fungi in the soil and the death of any living creatures. Ash is a fertilizer and an additional sterilizer, and yeast populates the soil with its colonies and helps the plant feed, enriching it with nitrogen. This method is not the only one, nor is it the most convenient.
Another option roasting in the oven(suitable for a small volume of soil): pour the wet soil into the baking sleeve. Bake for 40 minutes at 180 degrees. I think it's a great idea.
Place a sieve on a pan of boiling water, place a layer of gauze, add soil and cover with a lid. You can stir the soil occasionally. The procedure lasts from 20 minutes to 1.5 hours, depending on the amount of soil. After steaming, the soil should breathe for some time. Add yeast or any available bacterial fertilizer to the warm soil. It is effective to steam the soil in several passes in small portions.
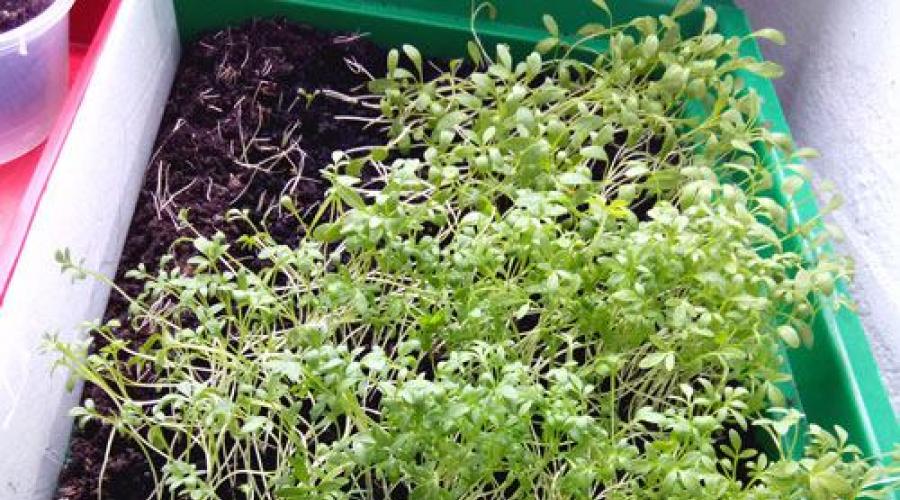
The most popular biological fungicides: Fitosporin, Barrier, Barrier, Fitop, Integral, Baktofit, Agat, Planzir, Alirin B, Trichodermin. All of them have a non-chemical effect on fungi and pathogenic bacteria - the “right” bacteria. For the first time, I used the Ukrainian analogue of Fitosporin - Phytocid M. I planted mini-tomato seeds in the soil treated with it. In general, biological fungicides are praised by flower growers. The main thing is to strictly follow the instructions. It is written on the packaging that the diluted Phytocid should be stored for no more than a day, but I got a three-liter jar and I have been watering all my plants with this solution for the second week now. The watercress is delighted with this watering; I have never had such lush harvests!
watercress after treatment with Phytocid
It is necessary to write about chemical fungicides, but not to use them. At least for our windowsill gardens. I will write only about those drugs that have hazard class 4 (low-hazard substance).
Albite. The composition contains terpene acids, extracts from soil bacteria and microelements. Available in paste form. Prevents root rot, powdery mildew, brown rot, and other nasty things from developing. It is considered a biological fungicide with a chemical effect.
Potassium permangantsovka(potassium permanganate). A long-familiar but ineffective method of soil disinfection. It also becomes a potassium fertilizer.
There are a great many drugs of this kind, but they are hardly suitable for us.
Copper sulfate, iron sulfate. They disinfect and at the same time inhibit plant growth. They don't suit us.
And about the last resort for today - mustard powder! Effective against fungi, bacteria, viruses, thrips, nematodes. Loosens the soil and stimulates plant growth. Apply to the soil as follows: per 5 liters of soil, a tablespoon of mustard powder. Combine with nitrogen fertilizer.
Update 11/29/2016
Since writing this article, I have become much more attentive to the sources of information on which I base my material. Despite the fact that disinfecting potting soil is traditional for post-Soviet countries, it is not practiced anywhere else. The application of biofertilizers with effective microorganisms (Baikal, Fitosporin, etc.) has no proven effectiveness in field conditions, although according to my own (biased) experience there is a result. According to some data described in the article about EO drugs, homemade infusions with effective microorganisms are better than industrial mixtures (infusions with banana peels, sauerkraut juice, yeast).
Good day!
Question: if you disinfect the soil using an oven or microwave, do you then need to add ash and other fertilizers to it?
Hello! Everything you need! After the microwave, it is advisable to populate some good flora, such as phytoverma. Just remember that the soil must cool completely.
Hello! Thank you very much for the article!
I am a beginner, in the truest sense of the word. I would be very grateful if you could give me some advice.
I live in China, so all the products of manufacturers of fertilizers and plant preparations that are sold in the CIS countries are not available here. There are a lot of products here, but I don’t understand them at all.
Yesterday I bought several plants (decorative roses, a Japanese maple tree, strawberries), planted dill seeds, and also recently planted a one and a half meter seedling of a cherry tree. My climate is subtropical, so everything can grow on the balcony. All plants appear to be healthy: the leaves do not fall off and are in the flowering period. I did not disinfect the soil before planting/transplanting and now I am very afraid that there were pests (nematodes, or something else) there. I didn’t even imagine that store-bought soil could pose any threat.
Tell me, what can be done for prevention when the plants are already planted/transplanted to make sure that the plants grow healthy and strong? And also how to improve plant immunity using improvised means.
I have a 4-story greenhouse cabinet, phytolamps, and all kinds of fertilizers. I can easily buy mustard powder and potassium permanganate.
Thank you in advance for your attention!
Hello! I would like my answer to be as detailed as your comment))). I admit, I had to google what methods of prevention there are after planting. In addition to the biological products that I mentioned in the article, there are recommendations with vitriol and manganese, but for your soil volumes you should not use copper, and you can try manganese, but only after all the plants have flowered. Try the ash! https://g.janecraft.net/udobryaem-zoloj-domashnij-ogorod/ it also contains manganese, and if you don’t overdo it with the concentration, it won’t do any harm, and it works great as a pickling agent.
Strawberries get sick if there is a specific mite in the soil, and I think this is not a threat to you. The maple should not get sick, as long as it has enough space for the root system and is good drainage. Fruit trees- this is a separate conversation, but I am not competent in these matters, unfortunately. You will look at the situation. If anything suspicious appears, write to us and we’ll try to figure it out together!
Thank you very much for your answer! I'll try to find some ash, although I don't know if I'll succeed. By the way, today after a very detailed examination of the strawberries, I noticed a population of small black (dark green) insects, mainly on the inflorescences and where there is a crowd of leaves on the stem. What do you think this is and how to deal with it? I really don't want to use chemicals.
Please tell us about mustard powder.
Here's what I know about mustard: 10 grams (half a tablespoon) of mustard powder are infused for two days in a liter of water, in a tightly sealed container. Then filter. To spray, take a glass of this infusion and dilute it with 800 ml of water, so that you end up with a liter. Spray with this solution. I haven’t used it myself, but people more experienced in gardening say that it helps well against pests visible to the naked eye, but I have doubts that at least something helps against plant viruses - here the “experts” are lying))). I should also edit the information in this regard in the article...
It's most likely aphids on the strawberries. I periodically get scale insects on my flowers, I prefer to manually “pluck” them for a long time and tediously; I also don’t really want to water them with chemicals (although in my case it’s rather laziness, since I won’t eat my flowers later). And yet, I recommend that you inspect the strawberries more often and collect insects, not only process them (well, that’s me just in case, you will probably do the same).
And one more thing about ash. You rarely find it on sale in Poltava, so in the spring at the next “kebabs” I burn pre-purchased coconut coir (this hair is from a nut, we sell it as an additive to the soil, as a leavening agent), or you can use dry straw grass, sunflowers, in general, everything that is smaller than trees))). Now everything has burned out, and you can take these ashes and insist))). Nitrogen disappears very quickly from ash, so it is better to store it in a jar with a lid. The ash didn’t let me down, it’s an especially cool way to protect seedlings. It’s just better not to report it than to shift it, otherwise you can harm the roots.
Write!
So you are also from Ukraine! ^_^
Thank you very much for your advice! Today I will go to burn the pressed straw that I have left from the rabbit (his death will not be forgotten).
Hello. For the first time I decided to start growing flower seedlings. She disinfected the earth in this way: first she shed hot water, not boiling water, approximately 70-80 degrees, then with a solution of potassium permanganate. But in some pots the soil still began to mold. Is it possible to do something about this mold, water it with something?
Hello. I have never encountered mold myself. Remove the top contaminated layer of soil and let it dry thoroughly. Apparently, the disputes settled from high humidity. If you have not sowed yet, then wait until the earth is thoroughly shaken, and if the seeds are already in pots, try not to flood them. I wouldn't do anything now.
Good afternoon It so happened that I didn’t disinfect the soil for the growths... what can I do now? They are still very small. Phytosporin? Ash? Mustard? All at once?)))
It’s difficult to heat it at home in a frying pan or in the oven - the smell and interaction with the dishes 🙁 Is it effective to pour boiling water over it?
If possible, stop at phytosporin, but even if you don’t do anything now and just give moderate watering and protect the plants from temperature changes, everything will be fine. I myself only recently learned that plants have real cellular immunity, which works great if we care for the plant correctly.
Just in case, keep this article in mind
Spilling boiling water is considered effective even in field conditions, but after drying it will be necessary to repopulate the soil with the same phytosporin, since sterile soil will very quickly be colonized by fungi in the absence of natural enemies (bacteria in phytosporin). Unfortunately, I am not entirely competent with these bacteriological things, so I simply believe the manufacturer and the labels on the packaging of drugs of this kind.
Thank you. I’ll take care of the rastuski) I also heard about the need for phytosporin in sterile soil (essentially everything is the same as in humans - children even have the so-called “cleanliness disease” due to the constant disinfection of the apartment, because there is not enough necessary bacteria, everything here exactly the same thing). It’s just that sometimes you process it and nothing grows, and sometimes you threw a seed in by accident and forgot it’s a plant)
I wonder if the immunity is higher in spices grown from seeds or in rooted cuttings? The plucked mint from the dacha went not into tea, but into water, now it has taken root, out of curiosity I want to try to do the same with thyme and rosemary, albeit from the store, although soon, I hope, the seeds should sprout). It will be interesting to watch both of them under the same conditions.
I am sure that cuttings are much healthier than crops))). The only problem is getting a fresh cutting of rosemary or lavender, for example))). We have to sow!
Hello! I don’t quite understand: is biological disinfection instead of calcination?
Good afternoon I brought soil from the garden and planted indoor flowers. Soon I noticed a nematode running on the surface of the ground around the flowers. What can be done? SOS!
This article https://g.janecraft.net/perekis-vodoroda-dlya-rastenijj/ contains recommendations for preventing pests and diseases with peroxide solution.
Hello. Please tell me what to do if transparent worms appear in the soil with the cuttings and eat the roots?
Good afternoon How much dry yeast should be added to the warm soil after steaming? Thank you!
source
We have all heard and read many times that before sowing seeds for seedlings, the soil needs to be disinfected, and this can be done in several ways. One of them is calcination in the oven.
In this matter, you need to choose the right temperature and processing time, since you can overdo it and, in addition to fungi and pests, destroy all beneficial microorganisms, making the soil dead and infertile.
So, at what temperature and for how long should the earth be heated in the oven: the optimal temperature is 70-90ºC, time is about half an hour. After this, the soil must be given time to restore the normal balance of beneficial microflora and only then used for planting.
It is also important to know how to heat the soil in the oven for seedlings: to do this, you first need to sift it, moisten it a little, then pour it onto a metal sheet in a layer of about 5 cm and immerse it in a preheated oven.
Baking the soil is a slightly modified version of calcination. In this case, the soil is placed in a baking sleeve and then sent to the oven. At the same time, moisture is retained in the soil and the effect of steaming with boiling water additionally appears, since the moisture in the soil is heated to 90-100ºC and, acting on it, additionally cleans and disinfects.
Soil disinfection is perhaps the key point in growing seedlings. The health of future seedlings and adult plants directly depends on proper soil disinfection. Properly carried out calcination kills pathogenic bacteria, dangerous nematodes, eggs and pupae of insects, and fungal spores. In addition, this is how we fight in advance against the “black leg” - a dangerous enemy of seedlings.
As you can see, you should not neglect this stage, so as not to regretfully treat or throw away lovingly grown seedlings in the future.
The world around us 3rd grade
What is soil
The top fertile layer of the earth is the soil.
The main property of soil is fertility.
Practical work “Soil composition”
Do the experiments. Record the results in the table.
Experiment 1. Throw a lump of dry soil into the water. We will see air bubbles coming out of the soil. This means there is air in the soil.
Experiment 2. Heat some fresh soil over a fire. Hold the cold glass over the soil. Soon the glass will become damp. This experiment shows that there is water in the soil.
Experiment 3. We will continue to heat the soil. Soon we'll see the smoke, we'll feel it bad smell. This burns humus soil, which was formed from the remains of plants and animals. Humus adds to the soil dark color.
Experiment 4. Calcined soil in which all the humus has already burned (it gray), pour into a glass of water and stir. After some time, sand will settle to the bottom of the glass, and clay will settle on top of the sand.
Experiment 5. Let's filter the water in which the soil has been sitting for a long time. Place a few drops on the glass. Let's keep him on fire. The water will quickly evaporate and remain on the glass. white coating. These are mineral salts. This means that the soil contains mineral salts that dissolve in water.
So, the composition of the soil includes air, water, humus, sand, clay, and mineral salts.
Plant roots breathe air contained in the soil. They absorb water from the soil. Plants absorb dissolved mineral salts along with water. Salts are nutrients without which plants cannot live..
List what plants get from the soil.
Plants receive from the soil: air, water, mineral salts.
Solve the crossword puzzle “Soil:
1. The top layer of soil on which plants grow. Answer: soil
2.
A substance that is part of the soil, thanks to which plants grow better. Answer: humus
3. The main property of the soil. Answer: fertility
4.
One of the constituents of soil. Answer: sand

open the empty crossword puzzle “Soil”>>
There is little salt in the soil. Plants could quickly use them up, but this does not happen. The supply of salts in the soil is constantly replenished thanks to humus.
Humus, under the influence of bacteria that live in the soil, slowly, gradually turns into salts. The more humus in the soil, the more fertile it is.
Animals living in the soil make passages in it, where water and air easily penetrate, mix the soil, and crush plant remains. This is how animals increase soil fertility.
What animals live in the soil?
Answer: Mole cricket, beetle larva, cricket, mole, centipede, toad, wood mouse, earthworm.
source
 Before planting seedlings, you need to carefully prepare the soil, disinfect and feed the soil. What's the best way to do this? Treat with a solution of potassium permanganate, phytosporin? Heat in the oven or microwave? Let's discuss all the known methods and find out why this or that method is good.
The healthier the soil, the stronger the seedlings that grow on it, this is an axiom. But not everyone has the opportunity to purchase ready-made soil for seedlings every year. So practitioners are thinking about how to disinfect last year’s or garden soil.
Proper disinfection affects various bacteria, nematodes, eggs and pupae of insects, and fungal spores. And protects against blackleg, a common disease of young seedlings.
It’s even better to carry out the treatment in such a way as to protect the soil from pathogenic bacteria and not harm beneficial microorganisms.
All methods can be divided into two groups. In the first traditional methods, in the second - disinfection using various purchasing funds. Let's start with traditional methods.
The simplest processing method is freezing.
Attention! After any type of disinfection, you need to pour the soil into sterile containers wiped with bleach.
This method also has a drawback. Negative temperatures negatively affect not only pathogenic, but also beneficial microflora. Therefore, freezing is not recommended for soils that contain vermicompost.
Another minus - low temperatures will not cope with carriers of diseases such as late blight. Only heat treatment will affect them.
It turns out that you can fry, steam and stew... earth. Various pests do not survive in heat-treated soil.
- to calcinate the soil in the oven, you need to pour the soil into a large basin and pour a small amount of boiling water over it;
- when the mixture has cooled a little, mix it thoroughly;
- pour the wet mass onto a baking sheet in a layer of no more than 5 cm and place in the oven;
- Heat for half an hour at a temperature of 70-90 degrees.
It is believed that steam treatment is a more gentle method than calcination over fire. But at the same time, quite reliable.
Tip: after any heat treatment, the cooled soil should be scattered on paper or polyethylene in a layer of up to 10 cm and leveled. This will fill it with air and become looser.
- it is necessary to prepare a large container, for example a tank;
- lay bricks or an iron grate on the bottom;
- pour water below the level of the bricks;
- place soil in a canvas bag or fabric bag on the lattice or bricks;
- cover the tank with a lid, put on fire and steam the soil in a water bath for about two hours.
- line a colander with a cloth;
- fill a large saucepan with water and wait until it boils;
- Reduce heat and hang a colander with soil over the pan. Or install it on top so that the water does not touch the ground;
- warm up for half an hour. Steam penetrating the soil sterilizes it.
Using the same principle, gardeners advise frying the soil in a frying pan, calcining it in the microwave, or stewing it in foil or in a sleeve. When processed with two in the latest ways the water contained in the ground heats up and further cleans the soil. You can also pour boiling water over the soil in a shallow container and cover with film.
There is one caveat: heat treatment kills both pests and beneficial microflora. This means that the above procedures must be done in advance in order to have time to restore the soil before planting.
Some practitioners advise treating not only garden soil, but also purchased soil. To do this, place a closed bag with the prepared soil mixture in a bucket. Pour boiling water down the side of the bucket and close the lid tightly. Remove the bag only after it has cooled completely.
You can also disinfect the soil chemically:
Simultaneously with disinfection, it is necessary to equalize the acid-base balance of the soil. After all, even in disinfected soil that has an acidic reaction, sulfur stalk and clubroot develop well.
Peat soil has an acidic reaction and garden soil. To alkalize, slaked lime or dolomite flour is added to the soil. Moreover different cultures- your proportions.
Folk means of disinfection, such as calcination, steaming and freezing, are more environmentally friendly. But they do not destroy 100% of pathogens. In addition, to use them you need 2-3 free months. It is necessary to begin disinfection using such methods in winter.
The use of various purchased drugs is highly effective and does not require long period time. So, each method has its pros and cons, taking these into account, you can prepare the soil for planting seedlings as much as possible.
source
What, when and how to do at the dacha

Disinfection of soil for seedlings is one of key points in seedling production. Often, not only the future harvest, but also the life of the plants itself depends on how competently the disinfection of seedling soil is carried out. You can disinfect the soil in any way convenient for you. Amateur gardeners have invented a great variety of them.
You should not ignore safety measures - proper disinfection kills pathogenic bacteria, fungal spores, dangerous nematodes, insect eggs and pupae. In addition, this good prevention against damage to seedlings by the black leg (every gardener and florist has ever encountered a terrible picture of this disease).

So, advice from amateur gardeners
Seedling soil for disinfection can be:
- freeze,
- steam,
- bake in the oven,
- pour boiling water (in small portions),
- spill with a 1% solution of potassium permanganate (etching in potassium permanganate),
- warm up in the microwave,
- fry in a frying pan,
- bake in foil,
- bake in a baking bag,
- spill the soil with Aktara solution,
- shed with a fungicide, for example, foundationazol,
- add phytosporin to the soil,
- disinfect with boiling water and frost
- repeatedly freeze and thaw the soil.
As you can see, there are no limits to imagination.
Repeated freezing of the soil
The bag of soil is kept on outdoors, then brought into a warm room for 7-10 days. During this time, weed seeds will begin to germinate and pests will awaken. The revived soil is sharply frozen again (it would be good if the temperature outside was 15-20 degrees below zero), after some time the soil is brought back into the room and frozen again.
This is a good simple method, but you should be aware that, unfortunately, it is not able to protect plants from such serious diseases as, for example, late blight or clubroot. To cope with the spores of these diseases, thermal treatment of the soil is necessary.
Steaming the soil
It is convenient to steam the soil in a colander covered with a cloth. It is hung over a pan of boiling water, covered with a lid and after the water boils, heated over low heat for 20-30 minutes. Steam passing through the soil sterilizes it. Soil pests and their eggs, spores of pathogenic fungi and bacteria die. True, and useful too.
Calcination of soil in the oven

Moist soil is poured onto a metal sheet in a layer of no more than 5 cm and kept for half an hour in an oven preheated to 70-90 degrees.
Important! Higher temperatures are dangerous for the soil: nitrogen is mineralized, beneficial microorganisms die, and the soil becomes infertile.
Baking the soil
Baking the primer in foil or in a baking sleeve ( folk way) has its own rational grain: moisture is retained in the soil. In addition, with this treatment there is additionally the effect of steaming and the effect of treatment with boiling water, since soil water, heating up to a temperature of 90-100 degrees, affects the soil, cleansing it.
When the earth has cooled slightly after heat treatment, it is poured onto paper or film and leveled with a layer of about 10 cm to saturate it with air. You can thoroughly mix the soil directly in the bags. The soil enriched with air will acquire a good structure and become looser.
Disinfecting soil for seedlings loses all meaning if it is then poured into used and unsterile containers for seedlings. They can be sterilized by treating them in a diluted bleach solution. Otherwise, the soil may become secondarily infected with pathogens.
source
To make high-quality soil for seedlings, both organic and inorganic components are used in various proportions.
- turf soil (harvested in the fall, so now, if it is not available, you can take soil from the garden);
- leaf soil (rotted leaf litter of any tree species, except oak and willow - their foliage contains a lot of tannins);
- humus;
- peat;
- sphagnum moss;
- husks of grains and sunflower husks;
- wood ash (birch ash is especially valued);
- raw eggshell(dried and crushed).
- washed river sand (you need to wash it until complete removal impurities until clear water). The lighter the sand, the better. It is believed that the more intense its color, the more impurities of iron and manganese it contains, and their excess is harmful to plants. Sand is an excellent leavening agent. In addition, it promotes the formation and growth of skeletal parts of plants;
- perlite is an environmentally friendly material, pH neutral, not containing heavy metals. Perlite does not decompose or rot, and has a high (up to 400% of its weight!) absorbing ability. It is used to increase the looseness and breathability of the soil, prevent its compaction and the formation of a crust on the surface. It maintains optimal soil moisture - absorbing moisture, gradually releases it to the plant, thereby preventing root rotting;
- vermiculite is a highly porous environmentally friendly material. It has the same properties as perlite, but additionally contains potassium, calcium and magnesium (in small quantities). Perlite and vermiculite in pure form used for growing seedlings using the hydroponic method using nutrient solutions;
- hydrogel is an inert sterile polymer with high moisture capacity. Allows you to reduce the number of waterings (it is even called alternative drip irrigation), maintains a constant level of soil moisture;
- expanded clay;
- polystyrene foam (crushed);
- fluff lime (reduces soil acidity).
Oh, there are so many of them that it’s simply impossible to list them all. The main thing here is to focus on the requirements of the crops that will grow in this soil. 
For peppers, tomatoes, eggplants, cabbage, the following compositions are optimal:
- earth (turf or leaf), peat (humus) and sand (perlite, vermiculite) in a ratio of 1:1:1;
- turf soil, leaf soil, humus and sand (perlite, vermiculite) - 3:3:3:1.
For peppers, tomatoes, cabbage, celery, onions and eggplants, you can use the following composition:
- humus, turf soil and sand – 1:2:1. Add 2 cups of wood ash to a bucket of the mixture, and another 1 cup of fluff lime under the cabbage.
To grow pumpkin and cucumber seedlings, mix:
- humus and turf soil (1:1) and add a glass of wood ash to a bucket of the mixture.
I, like any gardener, have my own preferences, my favorite compositions. To grow seedlings of peppers, tomatoes, and eggplants, I use the same composition: soil from the garden, purchased soil for seedlings (universal) and sand - 1:1:1. To all this I add a handful of perlite. The seedlings turn out to be good quality and strong, so I’m not going to change the composition yet.
The soil and sand should be sieved before mixing to remove debris, worms and large insect larvae. Experts strongly recommend disinfecting the soil from pathogens, small larvae and eggs of pests. The most commonly used methods are:
- Steaming: a month before use, the soil is steamed in a water bath for 2-3 hours. The container lid must be closed.
- Calcination: 30 minutes in the oven preheated to +40 °C.
- Freezing: in the fall, leave the harvested soil outside, covering it from precipitation. About a month before use, it is brought into the house, warmed up, mixed with the other ingredients and taken out again into the cold.
Each of these methods has followers and opponents, which one you will (or will not) use depends only on your choice.
All the subtleties and nuances of proper soil preparation for seedlings are described in detail in this video:
What seedling mixture do you use? Is there a “signature” composition for any culture?
A good harvest always has several components. All of them are important: the quality of the seeds, their proper preparation for sowing, the choice of variety, conditions and care. But there is one parameter whose influence is most important. This is the quality composition of the soil in which seedlings are grown. The harvest of all seedling crops (and in our climate most vegetables are grown through seedlings) depends to a large extent on properly composed seedling soil.

Preparing the land for seedlings
There is no one universal soil that meets the needs of all plants. Each garden culture requires an individual approach. Each plant has its own requirements for the soil mixture. But there are general rules that allow you to create a base soil and then optimize it for one or another crop with minimal effort.

Each plant has its own requirements for soil mixture
Depending on the type of plants that are grown as seedlings, the soil mixture can be composed of different components, mixed in certain proportions. But in all cases it is necessary to comply with the initial requirements for seedling substrates.

The soil for seedlings must be nutritious

The components used must be free of foreign impurities
The soil intended for sowing seeds must contain components of organic and inorganic origin.

Soil for growing seedlings
- soil – turf, leaf, garden;
- vegetable compost;
- rotted cattle manure;
- peat – lowland and highland;
- sphagnum, coconut fiber, seed husks, bark, sawdust;
- wood ash.

Peat is one of the popular components of seedling soil mixtures.
It is not necessary that absolutely all the components from the list are present in the soil, but most of them are. It is better to mix the soil from three different soils: garden, which can be taken directly from the ridge (unless, of course, sick or insect-infested plants grew there); leafy (from leaves rotted with the ground); turf (which is obtained by cutting turf). Soil is the basic element of the seedling substrate.
Compost - rotted plants - must be mixed with rotted manure, which is called humus. This is a supplier of necessary substances.
Advice! Do not sow vegetable and herb seeds in humus, compost or low-lying peat. Too much organic matter will cause the seedlings to produce excessive leaf mass at the expense of root formation. As a result, the seedlings will take root poorly when planted in a garden bed or greenhouse soil.

DIY soil for seedlings
You will definitely need peat, it is what makes the soil fertile. The lowland contains about 70% organic matter, the upland, consisting of sphagnum, makes the soil structure loose.
Peat is found in most soil mixtures for seedlings. It is obtained from swamps. This is not to say that it is a non-renewable resource. From decomposing organic components under the influence natural processes it forms in swamps, but very slowly - over thousands of years. In addition, peat is part of the natural ecosystem - if it is completely removed from the swamps or at least a serious deficiency is created, the ecological balance will be disrupted.
This is why scientists have been last decades tried to find a replacement for peat. And finally they found it. More and more manufacturers of soil mixtures for seedlings are now switching to using coconut fiber.
Benefits of coconut fiber.
- It is 100% organic without chemical impurities.
- They are able to absorb and retain water, working like a sponge, retaining moisture for plants and not removing useful substances from the soil.
- The layer of soil in a pot or container with a substrate that includes coconut fiber remains dry, which prevents the appearance of soil fungi.
- Coconut fiber has a pH level of about 6, so it normalizes the overall acidity of the entire substrate.
- The fiber contains phosphorus, potassium, and other needed by plants substances in significant quantities.
Sunflower seed husks, tree bark, rotted sawdust, dry moss and other loosening agents are also used to loosen the soil. Wood ash added to normalize soil acidity.

The soil for seedlings should be loose
Advice! Do not add more nutrients to the soil than normal - an abundance of fertilizing is appropriate during the growing season; the seeds, which contain the plant embryo, have a sufficient supply of substances to form and release a full-fledged sprout. Enhanced nutrition of the seed is not required.
- river (or, in extreme cases, quarry) sand;
- perlite;
- vermiculite;
- expanded clay;
- hydrogel;
- mineral supplements.
Advice! Do not grind the components of the soil mixture too much and do not sift the mixture through a sieve with small cells - the fine-grained substrate will sour and “swim” after each watering.
Perlite is an excellent component of seedling soil mixture. This substance has a number of significant advantages.
- Sterility - spores of fungal diseases and pathogens of infectious diseases do not settle in perlite.
- The absence of insects - they simply do not grow in the substance.
- Lack of weed seeds - they do not take root in the soil mixture with perlite and do not sprout.
- Preservation in its original condition for a long time - perlite does not rot.
- Light weight - perlite is very light.
Vermiculite is a porous, environmentally friendly material that contains a record amount of necessary sprouts already at initial stages life of magnesium, potassium and calcium.
Expanded clay drains the soil, acting as an organic loosening agent and helping to improve the structure and moisture capacity of the soil.
Hydrogel is a polymer compound, which, due to its properties, also serves to maintain high moisture capacity in the soil.
Advice! To simplify the watering procedure and maintain the required humidity, add hydrogel to the prepared soil before sowing.
In addition to the required components, the soil mixture also includes the following elements:
- ash;
- urea;
- potassium sulfate;
- potassium chloride and sulfate;
- ammonium nitrate;
- superphosphate.
This small but important point is often ignored. Amateur gardeners neglect it, as a result, all efforts to prepare the right soil are wasted.
The following components should not get into the soil mixture:
- clay;
- fresh manure;
- not rotted plant residues;
- tea leaves, coffee grounds and other similar waste;
- salty sea sand.
Clay cannot be used
Clay will make the soil heavy, impervious to moisture and air, and dense. Unrotted organic matter and coffee/tea will cause rotting processes - they can begin to decompose, increasing the temperature of the substrate, which will be detrimental to many seeds and seedlings. Also, the decomposition of organic matter will entail the release of nitrogen, which will evaporate, depleting the substrate.

Fresh manure should also be discarded
The table below shows the composition of the soil for each of the most commonly grown vegetable crops.
Table. Composition of soil mixture for common vegetable crops.
| Culture | Components of soil mixture and their proportions |
|---|---|
 | About 2 kg of garden soil, 1 - humus, ½ kg of sawdust (rotted), fine wood bark or coconut fiber. For 6 kg of finished substrate – 40 g of ash, 20 g of superphosphate, 10 g of urea. |
 White and red cabbage | 5 kg of turf soil, 5 kg of high peat, 2.5 kg of sand, 2 kg of humus, 1/4 kg of lime, 1/2 kg of ash or dolomite flour. |
 Broccoli, cauliflower, Brussels sprouts | 6 kg of peat or 3 kg of leaf soil and coconut fiber, 2 kg of turf soil, 1 kg of humus, 1 kg of sand, ¼ kg of lime. |
 | 4 kg of peat, 2 kg of turf soil, 1 kg of rotted sawdust or coconut fiber, 1 kg of humus. |
 | 2 kg of peat, 2 kg of turf soil, 2 kg of humus, 1 kg of coconut fiber or rotted sawdust, 1 kg of sand. For 6 liters of mixture - 40 g of ash and 15 g of potassium sulfate and superphosphate. |
 | 8 kg of peat, 2 kg of turf soil, 1 kg of river sand, mullein or humus, or 2 kg of vegetable compost, 1 kg of sawdust or coconut substrate. For 6 kg of mixture - 10 g of ammonium nitrate and potassium chloride, 20 g of superphosphate and 45 g of ash. |
 | 2 kg of leaf soil, 2 kg of humus, 2 kg of peat or coconut substrate, 1 kg of sand. For 6 kg of mixture – 50 g of ash, 15 g of potassium sulfate, 20 g of superphosphate. |

Do-it-yourself soil preparation for seedlings
When preparing the soil for sowing seedlings, it is recommended to follow the instructions and follow step-by-step recommendations. It is necessary to start preparing components in the fall. They are also mixed in the fall. Then the finished soil is sent for freezing, which will serve as additional sterilization.

It is advisable to prepare the soil in the fall
Important! At the stage of mixing soil components, do not add nutritional mineral additives. Nutrient additives are applied to the soil in the spring, after basic sterilization, before planting seeds, in the form of solutions.
Step 1. Prepare all the necessary components that you plan to add to the substrate. They must be dry and in different containers.

Soil components for seedlings
Step 2. Spread oilcloth or other suitable bedding on the floor in the utility room, or take a large container (basin, trough, tray, pan) in which you will mix the soil components.
Step 3. Take a measuring container (glass, mug, etc.) or prepare a scale. Prepare your tools - a spatula, small rakes - and put on gloves.
Step 4. Measure out the required amount of necessary ingredients, place in a container or pour onto oilcloth, mix thoroughly.

All components must be mixed
Step 5. Pour the finished substrate into small bags (ideally no more than 20 liters). If the bags are plastic, make several small holes at the top to allow the soil to “breathe.”
Step 6. Place bags of soil in the barn, utility room, where the temperature will remain below freezing in winter.
 When to plant watermelon seedlings
If speak about middle lane, then it is preferable to grow watermelons here (as well as some other crops - for example, melon) through seedlings. In reality, there is nothing complicated in this process; the main thing is to know when to plant watermelon seedlings and how to do it.
Harmful microorganisms contained in garden soil, leaf soil, turf soil, peat, sand, humus and other essential components of the seedling substrate can harm the seeds, introducing infection and reducing their germination. To prevent this from happening, the substrate must be disinfected. This is a very important procedure that should not be neglected if you want to get strong, healthy seedlings and productive plants.

The soil for seedlings must be disinfected
There are four ways to disinfect the substrate:
- freezing;
- steaming;
- calcination;
- etching.
You can limit yourself to one method, but it is better to combine any of the first three with subsequent etching.
Important! Freezing is carried out during the winter. All other methods begin to be used in January - February, when it is time to prepare the soil for sowing.
The method of disinfection by freezing consists of leaving a bag of soil in a room where the temperature is maintained at sub-zero temperatures in winter. If there is no such room, closer to spring the soil is taken out into the cold and left for a week at a temperature of about -10°C...15°C. Then the frozen soil is returned to the heat and allowed to defrost for a week. During this time, all the germs of weeds and pests that were not destroyed by the first freezing will “wake up” in it. After this, the soil is again sent to the frost. And so two or three times.
The most effective method Freezing is considered disinfection. The most beneficial for the soil is steaming. During this procedure, not only disinfection is carried out, but the soil mixture is also saturated with moisture. For steaming, pour the soil into a sieve with fine mesh(so as not to spill out) and, stirring, hold over a container of boiling water for 8 minutes.
When calcined, the soil is subjected to heat treatment at a temperature of +70°C...90°C. It makes no sense to set the temperature lower - not all microbes will die. It is impossible to go higher in any case, the structure of the soil will be disturbed and the fertile layer will be destroyed.
It is best to use an oven for calcination or microwave(if the volume of soil is small). The soil should be scattered on a tray (baking sheet) in a layer of 5 centimeters. Then be sure to moisturize. Despite the fact that the method is called calcination, the soil is not heated dry, but slightly moistened. The oven must be preheated to the desired temperature. The soil warms up for about 30 minutes.
This method can be used for insurance after any of the above. He is the simplest. If calcination or steaming was carried out before this, you can make the solution with cold water. If freezing - with hot (about +40°C). The solution is prepared bright pink. The soil is placed in a sieve or fine-mesh colander and poured through.
Advice! Seeds sown in a properly prepared substrate should be watered only with settled or filtered water. Tap water contains chlorine, which neutralizes the effects of compounds that activate beneficial bacteria.
The disinfected soil is placed in a suitable container and watered with a solution of minerals that are necessary for a particular crop. Then the moistened substrate is laid out in containers, cups or individual pots. Now he is ready to sow the seeds.
There are a lot of recipes for preparing nutritional compositions for growing seedlings, but the basic requirements for all soil mixtures are the same:
- fertility and balance of all nutrients;
- lightness, porosity and breathability;
- moisture capacity;
- acceptable acidity level (6.5–7 pH);
- sterility;
- cleanliness and environmental friendliness.
Any soil for seedlings should be light, nutritious and moisture-absorbing.
Standard, or universal, soil, acceptable for all crops, is prepared from:
- peat, turf soil, coarse washed sand (1:1:1);
- forest soil, river sand, mature humus (1:1:2);
- high-quality rotted manure, turf, peat (1:1:1).
- potassium sulfate - 5–10 g;
- superphosphate - 10–15 g;
- urea - 15–20 g;
- ash - 100 g.
Universal and any other seedling soil is prepared from several components
Before use, all soil mixtures must be disinfected by calcination, freezing, steaming or pickling.
Seedling mixture for nightshades is prepared from:
- Sod (garden) soil, well-rotted sawdust, peat and humus (1:1:1:1), add to a bucket of soil:
- ash - 110–125 g;
- superphosphate (can be double) - 55–60g;
- urea - 20–25 g;
- potassium - 15–20 g.
- Fertilize lowland peat, humus (vegetable compost), sand, coconut substrate or sawdust and turf soil (8:1:1:1:2), 10 liters of soil:
- ammonium nitrate - 10 g;
- potassium chloride - 10 g;
- superphosphate - 20–25 g;
- ash - 45–50 g.
Tomatoes love nitrogen-rich soil
For bell pepper A composition of turf garden soil, coarse sand, and lowland peat (1:1:2) is suitable; use on a bucket of soil:
- ammonium nitrate - 25–30g;
- double superphosphate - 20–25 g;
- potassium sulfate - 35–40 g.
Bell pepper is demanding on soil fertility
Cabbage seedlings prefer a soil mixture of:
- Garden (turf) soil, sand, ash and lime, without mineral additives (20:5:1:1).
- Soil from the garden, last year's rotted compost, sand, peat (2:1:1:1) with mineralization per 10 liters of soil substrate:
- potassium sulfate - 10 g;
- superphosphate - 20–25 g;
- chalk - 25 g;
- urea - 15–20 g.
The soil for cabbage seedlings does not need to be additionally fertilized with mineral components.
It is better to use a mixture of: garden or forest soil, finished compost, rotted sawdust and black peat (4:4:1:2), poured onto a bucket:
- urea - 8–10 g;
- superphosphate - 50–55 g;
- potassium - 20 g.
For eggplants, you can use the same soil compositions as for tomatoes.
Before sowing cucumbers, prepare a soil mixture from:
- Humus, black peat and sawdust (2:2:1), enriching it with mineral additives (per 10 l):
- potassium sulfate - 15–20 g;
- superphosphate - 20–25 g;
- ash - 100 g;
- urea - 20–25 g.
- Humus and garden soil in equal proportions with the addition of:
- ammonium nitrate - 8–10 g;
- dolomite flour - 10–12 g;
- potassium sulfate - 10 g;
- superphosphate - 10–15 g.
The composition of the soil for cucumber seedlings must include plant and mineral components.
I only plant tomatoes for seedlings; I prepare a seedling mixture for them from ordinary garden soil and ready-made compost. I take them in approximately equal quantities, be sure to add a little peat and clean sand. Otherwise, the soil will be heavy and a hard crust will form on its surface.
Ready-made soil mixtures are sold in stores, but there is no guarantee that they are of appropriate quality. With a little effort and some time, you can prepare exactly the composition that a specific crop needs.
I write with pleasure and about many things.
For successful growth and development of seedlings, and therefore a good harvest in the future, certain conditions are needed, first of all, high-quality soil. Some prepare the soil mixture themselves, others use ready-made substrates. Whose method “works” better?
The first option requires much more time and effort: first you need to select the components (peat, turf soil, sand or sawdust, mineral fertilizers, etc.) in appropriate proportions. Then the soil must be disinfected by steaming or freezing. The next point is mandatory monitoring of the acidity level and its regulation using deoxidizers.
All these labor-intensive steps can be avoided by purchasing ready-to-use soil in which everything is balanced.
Fertilizer with microelements Substratdünger or PGmix is a complex, fully water-soluble, long-acting fertilizer with microelements in chelated form. Provides uniform soil fertility.
When purchasing soil for seedlings, you need to take into account the main factors, without which the soil mixture cannot be considered ideal in all respects.
First of all, pay attention to the composition and acidity level of the soil. The optimal indicator is pH 6-7. In soil with such a reaction root system most plants develop most successfully. Adding limestone or dolomite flour to the soil helps achieve this pH level.
Peat is the main component of soil suitable for growing seedlings. It increases soil fertility, making it more porous and nutritious.
Ideally, the soil mixture contains high-moor or a mixture of high-moor and low-lying peat. High-moor peat gives the soil looseness, improves its structure, air and water permeability. Lowland peat saturates the soil with organic components.
The proportion of the main macroelements (nitrogen, phosphorus, potassium) included in the soil is usually indicated on the packaging. It should meet the needs of the seedlings within 1-2 weeks from the moment the seeds are sowed. Higher doses affect rapid growth seedlings, but does not at all guarantee them strong immunity and further productivity. Small doses do not provide seedlings with adequate nutrition, so they will require earlier and richer additional feedings.
Fertilizers included in soils must be in chelated form. Otherwise, young plants simply will not be able to absorb them.
The soils of the Fasco trademark are developed in compliance with all required parameters. Depending on the name of the soil mixture, the nutrients in its composition are selected in the required proportions, taking into account the needs of specific crops.
The range of soils offered by the company is intended for growing the most popular vegetable crops: nightshade, pumpkin, as well as flowers and indoor plants.
Fasco soils are offered in loose and pressed forms, so that every gardener can choose the most convenient option for himself. For example, pressed soil “Krepysh” in fluffed form will be similar in volume to 25 liters of bagged soil, but its weight will be almost 2 times less, which significantly facilitates delivery from the store to home.
The “Krepysh” series includes universal soils for seedlings of vegetable crops (tomatoes, peppers, cucumbers, zucchini, cabbage, eggplant, physalis, etc.) and flowers. These peat-based substrates are completely ready for use and contain a full range of nutrients (macro- and microelements) necessary for the full growth and development of plants. There is also a pressed version of the soil with increased porosity and high moisture capacity.
- for growing seedlings of all vegetable crops;
- for picking seedlings into separate pots and open ground;
- for growing a “winter garden” on the windowsill (green onions, lettuce and other herbs);
- for growing indoor flowers.
For seedlings hybrid seeds F1 is a special biosoil with a unique composition. Its components are selected and balanced in such a way that the plants will not need additional feeding for 6 weeks from the moment of planting.
The soil of the “Malyshok” series is intended for growing high-quality and healthy seedlings of nightshade crops: tomatoes, peppers, eggplants. The substrate contains a full range of nutrients, increases seed germination, and increases subsequent yield.
Rodnichok soil is intended for seedlings of pumpkin crops: cucumbers, squash, zucchini, pumpkins. Soil components stimulate the growth of the root system and promote the formation of ovaries, and, consequently, increase productivity.
Do not forget also that during the entire growth period (from emergence to planting permanent place) seedlings need additional feeding. For young and immature plants, use only liquid fertilizers that do not burn the roots.
- Liquid organomineral fertilizers "Fasco" stimulate growth due to the content of humates, which are natural stimulants.
- Water-soluble mineral fertilizers "Fasco" strengthen the immune system and increase the stress resistance of plants. Fertilizers are in chelated form, do not contain chlorine and are packaged in convenient packaging (1 sachet (50 g) = 50 liters of ready-made solution).
The Fasko assortment also includes the necessary equipment for seedlings: peat pots, peat tablets Jiffy Strong, peat briquettes, greenhouses with peat tablets.
Modern technologies have come so far that successful cultivation To grow seedlings at home, there is no need to dig the ground in the garden. Special soils of a balanced composition will provide your plants with adequate nutrition for growth and development. And all you have to do is surround them with care and concern.
source

We still have time before planting seedlings, so let's look at how to disinfect the soil. Not all summer residents buy seedlings every year new soil. It is clear that the healthier the soil, the stronger and stronger the seedlings themselves will be. This means that the soil from the garden does not become a source of infections for plants, it must be disinfected before use.
At home, disinfection is carried out in the following ways:
- freezing,
- calcination,
- steaming,
- etching.
Let's analyze each method and note the advantages and disadvantages.
Prepare the soil in the fall by filling a bag with it. During severe frosts (15-20ºС), take the bag of earth outside or onto the balcony for several days. After the ground freezes, place it in a warm room for about a week. This is done in order to awaken wintering pests and weed seeds in a warm environment. The temperature contrast of the soil is arranged 2 - 3 times.
But this method has disadvantages.
- Frost has a negative effect not only on pathogenic microorganisms, but also on beneficial microflora. This means that this method is not suitable for soil that contains vermicompost.
- No amount of low temperatures will destroy late blight pathogens. They should only be destroyed by heat treatment.
The soil is scattered on a metal tray in a layer of no more than 5 cm, and then the soil is poured with boiling water and placed in an oven heated to 70-90ºC. The temperature should not be higher than indicated, otherwise a higher temperature will lead to nitrogen mineralization and deterioration of soil quality.
The advantage of this method is the death of all microorganisms; they simply do not survive.

Despite the fact that the method is more gentle than calcination, it is also quite reliable. Its advantage is that in addition to disinfection, it also saturates the soil with moisture.
The soil is poured into a colander and, gradually stirring, kept over a pan of boiling water for 10 minutes. In this case, the colander is placed over the pan so that the bottom of the colander does not touch the water. Some gardeners combine both temperature methods, that is, they first steam the soil and then take it out into the cold.
With such heat treatment, not only pathogenic, but also beneficial microflora dies. Therefore, the steaming procedure is carried out in advance to restore the soil before planting.

The easiest way to disinfect soil. The idea of etching is to water the soil with a pink solution of potassium permanganate, diluted at the rate of 3 g per 10 liters of water. But remember that the solution only treats surface layer soil and does not affect the majority of pathogens.
Therefore, for more thorough treatment, antifungal drugs (fungicides) are used:
The meaning of the treatment is to suppress the pathogenic flora by the beneficial bacteria that are contained in these preparations and are actively developing. The process takes 2-3 weeks, therefore, processing is carried out in advance.
The essence of the method is that the prepared soil for seedlings is generously spilled with a pink solution of potassium permanganate, and then placed in the microwave for 3 minutes at high power. Watch the video to see how they do it.
In conclusion I will add. Remember that immediately after disinfection the soil is sterile. But after a couple of weeks, the microflora in it is restored, and it’s not a fact that it’s only useful. Therefore, after disinfection, if you do not use the soil immediately, transfer it to a clean (sterile bag). And just before planting, add vermicompost (1 liter per bucket of soil) or supercompost (1-2 cups per bucket of soil).
The soil in the greenhouse must be processed twice: in the fall, after harvesting, preparing it for winter, and in the spring before planting seedlings. Treat the soil with the following preparations.
I described in detail how to prepare a solution for use in the article about phytosporin. It is better to buy it in paste form. After dissolving a 100 gram package in 0.5 liters of water, you will obtain a dark brown liquid. The concentrated solution is diluted to prepare a working solution no earlier than one day later. This is necessary so that the living bacteria that are in the product are activated.
Immediately before tilling the soil, 1 tbsp. l. concentrated solution is diluted in 10 liters of water and this solution is poured generously from a watering can onto the soil in the greenhouse. The greenhouse is closed for 14-20 days to allow the bacteria to do their work. After this, the greenhouse is opened and you can start planting seedlings.
The unused concentrated solution is placed in a dark place and stored there until next use.
Disinfection with a solution of potassium permanganate is the easiest way to treat soil in a greenhouse. The essence of the method is to apply a pink solution of potassium permanganate and abundant watering of the soil. To create such a solution, just dip a damp toothpick in crystals of potassium permanganate, and then dissolve what remains on the toothpick in 1 liter of water. Sprinkle the prepared pink solution generously onto the soil and leave for several hours.
Another very simple one affordable way To disinfect the soil in a greenhouse, pour boiling water over it. It is enough to pour boiling water over the soil and then cover it with plastic wrap. Under influence high temperature all harmful microbes will also die.
And there is one more point that needs to be taken into account. Even after disinfecting the soil for seedlings, pathogens can be introduced with the seeds. This means that before planting, the seeds should also be treated and then your seedlings will be strong and healthy.
Dear readers! Thank you for stopping by to visit me! I would be glad if you share in the comments your experience of growing vegetables, methods of combating plant diseases and pests. If you liked the article, share this information with your friends. Please click on the social buttons. networks that are located to the left of the article. I will be very grateful to you.
I really hope that we will communicate with you for a long time, there will be many more interesting articles on the blog. To avoid missing them, subscribe to blog news. Have a good harvest!
source
In early spring, gardeners and summer residents begin their vigorous activity associated with sowing and germinating seedlings. It is not so easy to get healthy and strong shoots that easily adapt to open ground and will delight you with a good harvest in the future. The main condition for their growth, and therefore the basis for the future harvest, is properly selected or independently prepared soil.
Before you take active steps, you need to responsibly approach the question of how to prepare the soil for seedlings with your own hands.
You need to start preparing the soil not in the spring, but in August-September. Garden soil in its pure form is not suitable, but it can become the basis for a nutritious soil mixture into which the seeds will be sown. You should not ignore such a preparation stage as disinfecting the soil for seedlings if you take it from the garden or garden.
The second disadvantage is garden or garden soil- is the presence of a large number small pests, capable of destroying seeds and weak roots of young shoots.
When selecting and combining soil mixture components, you need to adhere to certain rules. Primary requirements:
- Porous (air) structure. You need to minimize clay, which clogs pores and leads to the formation of lumps.
- The presence of a sufficient amount of useful components (organic and mineral fertilizers). But in this matter one should not cross the line. Excessive mineral fertilizer content slows down the seed germination process and can lead to seedling diseases.
- No pests, larvae, insect eggs. The soil must be disinfected, but not completely sterile. Any soil mixture must contain beneficial microflora.
To destroy and prevent pests, it is necessary to study the question of how to disinfect the soil for seedlings and carry out necessary measures soil disinfection. But its structure and composition directly depend on the correct selection of components and their proportions.
The most popular universal composition soil for seedlings is prepared on the basis of garden soil (2 parts), peat (1 part), humus (1 part). The baking powder can be clean coarse river sand or sawdust. Mineral fertilizer will be ash or charcoal. All these components are carefully sifted and combined. Even a beginner who previously did not know how to properly prepare the soil can cope with this task. Seedling soil made in this way can also be suitable for indoor plants.
What's our next step? What do we do after we have prepared the ground? We disinfect the soil for seedlings, this will avoid all the troubles associated with diseases and pests of young growth.
Even the most correct composition of soil for seedlings can be useless if it has not undergone a disinfection procedure. In this case, the soil may contain pathogenic flora, eggs and larvae of pests, weed spores and mold. All of the above begins to quickly develop and manifest itself as soon as a favorable environment for germination of seedlings is created. This can cause irreversible damage to the seedlings. To avoid such problems, you need to know how to disinfect soil for seedlings.
There is a misconception that soil from bags does not need to be disinfected and is completely ready for use. In fact, it can contain exactly the same number of dangers as in a garden garden, since, in essence, it is waste soil from greenhouses and conservatories, mechanically cleaned and enriched.
How to disinfect soil for seedlings? This is a simple question, because there are a great many ways to sterilize soil. Experienced gardeners sometimes they themselves invent new methods or improve existing ones.
Soil calcination is one of the most popular methods of soil disinfection. It is based on heat treatment. It can be produced in different ways.
Firstly, the soil can be roasted in the oven by spreading it on a roasting pan. The temperature should be 180 °C, and the time should be about 40 minutes. The method is very affordable and simple, but is not suitable for a large volume of land.
Secondly, you can calcinate the soil in the microwave. In this case, the wet substrate is placed in a glass container and left in the microwave for 10 minutes at maximum power.
Thirdly, a water bath is suitable for thermal treatment of soil. The method is effective, but, as in previous cases, it is designed for small volumes.
If you have prepared the soil for seedlings since the fall, you can disinfect a large volume of soil without much effort, simply by leaving it in an unheated room or on a balcony during frosts. Winter cold will help you destroy almost all harmful microorganisms in the soil.
The whole point of biological disinfection is to populate the soil for seedlings with beneficial microorganisms that will displace harmful ones.
The most popular biological agents today are “Fitosporin”, “Fitop”, “Barrier”, “Barrier”, “Trichodermin”. When using biological preparations for disinfection, it is important to carefully follow the instructions, strictly observe the dosage and shelf life.
When biological preparations are used correctly, they not only destroy pathogenic flora, but also accelerate the growth of seedlings.
Chemical disinfection of soil for seedlings is best used only in exceptional cases. As in the situation with biological drugs, it is important not to violate the instructions. Some of these drugs not only destroy pathogenic flora, pathogenic bacteria and fungi, but also inhibit plant growth.
Potassium permanganate is considered the most harmless, but also ineffective method of chemical disinfection. It eventually turns into potash fertilizer.
By disinfecting the soil for seedlings using mechanical or chemical methods, we deprive it not only of pathogenic flora, but also of beneficial bacteria. They can be restored by adding bacterial fertilizer to the soil (Rizotorfin, Azotobacterin, Phosphorobacterin). Some gardeners use regular yeast for this purpose.
It is worth noting that all of the above procedures for preparing and disinfecting soil for seedlings are not suitable for “lazy” gardeners. Self-cooking substrate requires time and effort. It is much easier and faster to buy a ready-made composition for sowing seedlings. Those who choose this option should be aware of the pitfalls that exist.
Unfortunately, manufacturers do not always conscientiously write truthful information on the packaging. It happens that, having chosen a package with the best composition, you end up with poor peat-based soil. When planting seeds in such a composition, there is a high risk of being disappointed with the result. The seedlings will either not sprout at all, or even if shoots do appear, they are unlikely to meet expectations. Therefore, you should not be too economical in this matter, but choose products from well-known companies.
Even if you have such a low-quality peat-based mixture, try to correct the situation yourself. To do this, you need to mix it with garden soil, previously disinfected. We discussed earlier in our article how to disinfect soil for seedlings. Next, be sure to check the resulting substrate for acidity, and if it is higher than normal, we correct this problem. The acidity of the soil is reduced by adding chalk or dolomite flour. Since such a soil mixture does not have enough of its own nutrients, additional mineral fertilizers must be added.
It is necessary to approach the issue of preparing land for seedlings very seriously and scrupulously. Experienced gardeners know that the correct soil composition is 80% of success when growing seedlings.