How to build a brick shed. Outbuildings for a dacha - types of outbuildings and ready-made outbuilding projects (95 photos). About temporary sheds
Do-it-yourself brick shed, foundation for a brick shed.
Brick is, one might say, one of the very first building materials. During the period of clay development, people learned to make not only dishes, toys and other household utensils, but also mastered the production of clay bricks.
Which, by the way, has survived to this day, almost unchanged. So, from ancient times to the present day, brick construction is considered one of the most reliable, durable, and profitable.
Not only living quarters are built from brick, but also ancillary buildings, popularly called sheds.
Sheds are called premises for livestock, for birds, utility rooms for storing equipment and tools, and so on.
A barn can be built from various materials, these are:
- Brick;
- Adobe;
- Shell rock;
- A mixture of cement and sawdust;
- Aerated concrete blocks;
- Tree;
- Frames and so on.
Each region has its own, most familiar and accessible materials. However, brick is ubiquitous and is considered one of the most reliable building materials.
Brick is used in the construction of housing and utility rooms. Bricks are used to lay gazebos,...
And if you have a lot of used bricks, broken bricks, and you want to put them to good use, then you can build a brick shed.
Brick barn
Anyone can build a brick shed with their own hands, the main thing is to understand the basic rules and remember the procedure.
And by building a brick shed with your own hands, you will gain experience, new skills and knowledge. Who knows, maybe you will like this business, and you will master a new specialty, which is always in demand on the labor market.
Preparing to build a brick shed
No matter how significant the construction project is, certain rules must be followed.
Namely, to carry out in a certain sequence all the steps associated with the construction of new structures.
Design
Before constructing any object, even the smallest one, it is required, first of all, to design it.
- Width and length of the building;
- Foundation depth;
- Wall thickness;
- Building height:
- The shape of the roof (single slope, double slope, etc.);
- Foundation material;
- Material for roofing and ceilings and so on.
Once your project is on paper, you can proceed to the next, no less important step - choosing a site for construction.
Choosing a suitable location on the site
So, in addition to your desire to build a brick shed in one place or another, some conditions must be met:
- Carry out zoning of the site;
- Determine the suitability of the soil for the construction of buildings.
Since the construction of a brick shed assumes that it will last for more than one year, you should think in advance in which zone to place it.
The structure must fit into the overall landscape and not interfere. But, at the same time, “to be at hand.”
If possible, cover the area from prying eyes. That is, partially taking over the function of the fence. However, in this case, you must not cause inconvenience to your neighbors; follow the rules of good neighborliness.
It is advisable to choose a place for the shed that is flat and not sunny. Most unsuitable for garden crops.
Brick foundation for a barn
When you have decided on the location, you can proceed directly to the construction of a brick shed.
As you know, any object begins with a foundation. If you want the structure to be strong and last a long time, then a foundation is necessary.
The foundation can be built from various materials. Since this is not a capital construction of residential premises, we will consider budget options.
Since brick is supposed to be used to build a shed, the options for sheds on stilts are immediately eliminated.
For a brick shed, either a monolithic ground belt or a monolithic slab is suitable. By the way, the monolithic slab serves as a foundation and floor.

Soil preparation includes the following steps:
- Alignment;
- Removing fertile soil to the required depth.
When you want to pour a monolithic slab, you should remove the soil from the entire marked area.
If you decided on a strip foundation, then you need to dig trenches of the required depth, along the perimeter or established markings.

If there is a broken brick, it can be used in the construction of the foundation.
Rules for pouring the foundation
In order for a brick foundation to last longer, it is necessary to carry out high-quality waterproofing of the area at the first stage.
Since the brick is capillary active, it quickly absorbs moisture from the soil. And over-moistened brick at sub-zero temperatures quickly collapses.
As a result, the foundation made of broken bricks and cement begins to crumble and disintegrate into small pieces.
Concrete based on capillary active filler will not last long without appropriate waterproofing.

Such a foundation must be protected from moisture both above and below. The base must be protected from groundwater, moisture, etc., and the top must be protected from precipitation in the form of snow and rain.
Such a foundation, protected from moisture on all sides, will last a very long time.
Of course, it is best to create a sand cushion of about twenty centimeters under the foundation. But, in principle, you can do without it.
Pieces of brick and stone are placed in a trench pre-insulated from moisture and lined with formwork. Next, the brick battle is filled with liquid concrete. Try not to allow air bubbles to form.
In the case when you have whole bricks, the foundation is built like a regular wall. In this case, the foundation should be approximately half a brick wider than the main wall.
You will learn how to lay a foundation under a brick shed from the video:
Not a single summer cottage or private house can do without utility rooms. Usually they are erected at the first stages of land development as temporary shelters, which can serve as a shelter from the rain, a bathroom, and a warehouse for tools and building materials.
With thoughtful placement, such a structure, after the construction of a residential building, can be converted into a barn, bathhouse, or used for other household needs.

Types of outbuildings
Before you organize a utility block at your dacha, you need to decide on its purpose, take into account the main functions of this building and the period of time during which it will be used.


Budget temporary shelters can be built from wood or a metal frame upholstered in different materials. Foam block buildings will require more investment, but they will last much longer and have better hydro- and thermal insulation. It would be advisable to include such a building in the overall land development project.

Depending on the purpose, the design, dimensions, layout and placement of the utility unit are determined.

Garage-type buildings are an enclosed space with an adjacent canopy. At the stage of building a house, the covered part can serve as both a temporary home and a warehouse, and a car can be parked under the canopy. Such a temporary shed can later be converted into a covered garage, workshop or summer kitchen.

Security booths provide round-the-clock human presence at the dacha to prevent theft, or just overnight stays. In the future, they can be disassembled, moved or converted into storage space.

A shed is a storage unit. When determining dimensions, architecture and building materials, it is tedious to focus on individual needs and capabilities.

But you need to take into account that a concrete foundation, pitched roof, drainage, waterproofing and ventilation vents will increase the functionality of such a structure.

A temporary shelter with amenities is intended for living on a plot of land. It is equipped with a shower and toilet, electricity is provided, heating and a stove are connected for cooking.

If you build such a temporary shed in the rear part of the planned house, it can be converted into a good utility unit for storage, a workshop, laundry, etc.

Ready-made utility units
All types of utility units can be purchased ready-made. Structures made of plastic and metal with verified dimensions and the necessary options can quickly solve the problem of temporary living and working on the site, or supplement the residential complex with the necessary utility rooms.


As a rule, such structures are easy to assemble and can be used seasonally or moved to different areas. There is also the option of buildings on wheels.

The quality indicators of finished plastic trailers and temporary buildings in some cases are not inferior to structures made of metal profiles. Thoughtful design and quality of external and internal finishing materials, as well as the presence of a floor, are the advantages of this choice.

The service life of plastic houses is up to 10 years. The advantage of buildings made of metal profiles is their strength and durability. By cleaning surfaces and painting, you can update the appearance and functionality of the building.

Although it will take more time to assemble the metal frame and cover the profiles, it will also be necessary to prepare the foundation and flooring for the finished metal models. But buildings of this type are easier to remodel; they can be expanded or partially dismantled.

Household units in the modern sense
Nowadays, utility blocks are a full-fledged part of architectural design, and unsightly sheds hidden in the depths of the garden are becoming a thing of the past.

Naturally, well-equipped, durable and aesthetically pleasing buildings require material costs, but a neat spacious garage, a dry and ventilated warehouse or a sauna is not just a tribute to fashion, but a reasonable contribution to ensuring comfort.

Outbuildings located at some distance from the house with a rational layout relieve the load on the main residential building, increasing comfort and facilitating economic activities.

The design solutions for utility blocks for a summer residence proposed in the photo indicate that even inexpensive and modest buildings can become a decoration for a personal plot.

The first building on a plot of land does not have to be temporary, inconvenient and ugly. It is enough just to free yourself from stereotypes and start building utility blocks with your own hands or with the help of specialists with care and attention to detail.

It is worth spending time on both design and calculations in order to ultimately get a full-fledged and multifunctional office space.

Photo of the utility room for the dacha


In suburban areas, most new owners first install a small “temporary structure”. And the capital construction of a barn at the dacha with your own hands can be carried out even after the construction of the dacha itself. That's the right decision. A “temporary building” can serve as shelter from bad weather and a place to relax after work. But first of all, this simple building serves as a storage place for country equipment and tools.
Shed made from scrap materials
 A temporary structure for storing the same garden tools and other materials is simply necessary. In any case, this will be a frame option for building a barn in the country. The frame itself is made from a wooden block, or less often from a profile. A “temporary shed” is built from inexpensive material, most often it is a do-it-yourself slab barn, which does not require large investments and time for construction.
 A lightweight foundation can also be made for temporary construction. Usually it is enough to install it on posts. If the construction of a shed at the dacha will take place on reliable soil from which water drains well, then the foundation can be made as follows.
How to make a foundation for a small shed in the country:
- Mark an area that will be 1 m larger than the building.
- Dig a pit to 30 cm depth.
- Fill the pit with a cushion of sand and gravel.
- Pour water over the “backfill” and compact it.
- Make a sheathing from timber and lay it on a pillow.
Sheathing is a frame made from a wooden beam impregnated with an antiseptic, which will serve both as a foundation and as joists for the floor of a future garden shed.
What type of foundation to install
 No matter how easy the construction is planned, it is still better to make a reliable foundation. If you install a good-quality shed directly on the soil, the wooden foundation will rot very quickly.
If you are concerned about the task of how to build a wooden shed, and are deciding which foundation to choose for it, then we hasten to inform you that traditional types of foundations are used here: block, pile and monolithic type.
Block base
This option has its pros and cons. The positive aspects of building a block-type foundation include: the speed of installation and the affordable cost of the blocks. The disadvantages include the fact that the blocks are not recommended to be installed on soils prone to heaving. Heavy blocks settle on difficult soil, and over time the structure warps.
Pile or column foundations
 The best choice if you decide to build a utility block for your dacha with your own hands. Steel pipes can be used as piles. The pipe is driven into the ground up to 1.5 meters. The distance between the piles is also 1.5 m; if the planned width is larger, it is recommended to install intermediate supports (columns). A building 1.5x4 m will require only 8 pillars.
Monolithic foundation
 The most reliable type of base. For example, if you are building a large brick shed with your own hands, then you can build a monolith yourself. The depth of the pit is up to 30 cm, while the sand and gravel cushion will be 15-20 cm, and the slab itself will be 10-15 cm.
The advantages of a monolithic base also include speed of installation. One or two days are enough to fill. Another advantage of the monolith: it can also serve as a floor, which can also be additionally covered.
Installing a monolithic slab for the foundation or a strip base is not entirely rational. Exception: if you plan to build a heavy building, with thick, insulated walls, or if you are planning to build a metal shed for your summer cottage with your own hands.
 An affordable and acceptable option for a column-pile foundation. A timber base is also suitable for a lightweight structure. It all depends on the material and size of the shed at the dacha. For a lightweight construction, a base made of timber that is laid almost on the ground is also suitable.
Why build a utility block at the dacha?
The choice of material for building a shed depends on financial capabilities, personal preferences and the overall design of the site.
Brick
 Not everyone can build brick walls on their own. For an experienced craftsman, it is not a problem to build four walls one or even two bricks thick. If you choose a brick for construction, then experience is required. And if you take into account that the average cost of one brick is 15 rubles and multiply it by the number of pieces to get the required cubic capacity, then you get an impressive amount. Add to this the cost of crushed stone, sand and cement, and we will see that brick is not the most profitable material for building a utility block on a summer cottage.
The construction of brick walls requires the laying of a solid foundation, which will additionally result in monetary costs and an increase in the construction period.
Wood
A wooden structure is one of the most profitable options, especially for practical site owners who are asking the question: “What to build a shed from cheaply?”
 A frame made of timber is quickly constructed, which will only need to be covered with suitable material: boards, chipboards, MDF, siding. The advantages of frame construction also include the speed of work, which can be carried out by one person, without the involvement of specialists.
Wood requires care, even if it has been treated with antiseptics. Every year you need to inspect the building for rotting, treat open areas with special means, and repaint it.
Polymer materials
 With the development of industry, polymers are used in various industries, including construction. The material is widely used in the construction of industrial greenhouses, as it is resistant to humidity and ultraviolet rays. This option can be classified as an inexpensive project for building a shed, and a lightweight one at that.
The frame can also be made of plastic pipes, which are covered with polystyrene or polyvinyl chloride tiles. In this case, the result will be a completely environmentally friendly project. There is another budget-friendly way to build a shed from in your country house.
Profiled sheet
 Sheets of corrugated sheets can be used to cover any household buildings. The frame is built from a profile, a metal corner, a pipe, and wooden blocks are also used. A barn made from corrugated sheets is considered inexpensive to build, but there is a significant drawback. Without additional covering materials, the room will have high humidity. Condensation on iron collects during temperature changes and in cold (winter) times.
Blocks
Made from lightweight concrete, cement blocks have high technical characteristics that simultaneously combine wood and brick.
Building blocks include the following materials:

There are building cement blocks based on expanded clay, and blocks containing sawdust are also produced.
Compared to its large size, the material is very light, which does not require equipment for lifting and moving on the site. The blocks can be laid independently. The premises are used as a utility block for tools, equipment and other inventory, and for other needs. The room is warm, and some summer residents get chickens or even small livestock for the summer season. The barn is quite suitable for raising such a farm, or combining it with other country buildings: a garage, a summer kitchen and a shower.
Walls made of foam blocks are erected quickly; you don’t have to be an experienced craftsman to make such a shed.
How to build walls from foam blocks
 Even such a simple construction requires adherence to technological nuances. When building walls, masons use a plumb line and a level. Strictly horizontal and vertical position of masonry is the main criterion for the quality of work of all masons.
Before starting masonry, the foundation is coated with a layer of mastic, on which roofing felt is applied on top. As experts advise, each row should be connected with metal mortgages, which are necessary for the strength and stability of the wall.
Step-by-step laying of blocks:
- The sand-cement mortar is mixed.
- Corners are being built.
- The masonry works like brickwork - the connection of two blocks is closed at the top with one piece.
- A cord is pulled between the corners around the perimeter.
- When laying, use a trowel and a rubber mallet.
 A separate issue is being considered - how to cover the roof. The choice of roofing material is huge. However, it is worth thinking about this in advance in order to focus on the fasteners in the walls, which should be installed on the basis of the selected roofing material.
When the building is provided with a pitched roof, then one of the walls of the barn should be slightly higher to make it more convenient to make a roof slope. Experts advise building a gable roof. A gable roof looks more attractive, but the main thing is that such a roof will not retain snow, which is especially important in cold regions. In addition, there will be a spacious space where you can store all the tools and material until the next season.
The article discusses current construction methods, as well as the most popular materials that are used for the construction of country sheds. The choice of construction method depends on the preferences of the reader.
Construction of a frame workshop shed - video
No matter the size of the house, you can’t do without a shed on the site. Not everything can and should be brought into the house, even if there is space, and even if there is not, then even more so - outbuildings are necessary. By the way, this may be your first experience in independent construction: you can build a shed with your own hands without any skills. The main thing is that the hands grow from the right place.

What materials are they built from?
If the shed is located close to the house and you care about its appearance, it makes sense to use the same material as when building the house. If you don’t want to spend a large amount on outbuildings, you can choose the finish so that you can’t tell it from a distance. In most cases, this is not very difficult: there are many technologies and many materials very accurately reproduce the appearance of expensive finishing materials. A striking example of this is. It is available for logs, beams, bricks, stones with different textures. So you don’t have to use expensive materials to build a shed. It is more practical to use inexpensive construction technology, and then cover it with material with a texture similar to the finishing of the main building.
How to quickly and cheaply build a shed
The fastest and at the same time inexpensive option for building a shed is by. The frame can be wooden or, it is sheathed on the outside with finishing, a roof is installed and that’s it, the barn is ready. If the barn is planned to be made of wood, it is assembled from timber and boards. A metal shed can be more conveniently made from a profiled pipe: it has a square section and is much easier to weld and join. There is also a special metal frame. It is assembled using self-tapping screws, and the entire structure is ordered and manufactured at the factory. Such houses are considered the cheapest; barns are unlikely to be expensive. Assembling both a metal and wooden shed takes several days: it has been tested more than once.

The frame building is lightweight, so the foundation for the barn needs a lightweight one. In most cases, columns and concrete blocks are sufficient; sometimes screw piles are installed or bored piles are made. On more difficult soils and for those who love reliability, you can build a monolithic or prefabricated () shallow strip foundation.
Another option. It is suitable for soils from which water drains well, and the groundwater is located deep. Then they mark out an area that is 50 cm larger than the planned barn in each direction, remove the turf and make a sand and gravel backfill. Framing beams are laid on compacted crushed stone and floor joists are attached to them (treated with anti-septic tiles for direct contact of wood with the ground). That's all. No difficulties.

This is far from the best option: even with a low groundwater level and careful processing of the wood, the shed will not last long. If you are comfortable with this, you can do it this way.
Foundation for a frame shed
All types of pile or columnar foundations require the placement of single supports around the perimeter: always at the corners of the building and at the junction of lintels (partitions), if any are provided. The installation step of the supports depends on the size of the barn and what kind of logs you plan to use. The larger the span, the larger the section required for the logs.
For example, for a barn width of 2 meters, you can install only two rows of posts and the logs will be 150 * 50 mm (in extreme cases, 150 * 40 mm). If the width of the barn is 3 meters, then either install intermediate supports (posts, piles), or take a 150 * 70 mm board. Calculate what will be cheaper in your region and choose.

With a board width of 100 mm, the floor bends noticeably under your feet. So you have to make the installation step of the log about 30 cm. Then there is no deflection at all, or it is insignificant (depending on the weight).
The fastest way to make a foundation is on ready-made blocks: you can buy them or make them yourself. Under them, pits are dug a little larger in size than blocks. Sand is poured onto the bottom, compacted, then gravel, this is also compacted. The thickness of the compacted bedding is 20-30 cm. Blocks are installed on it, and the lower trim is mounted on the blocks.

If we are talking about a shallow strip foundation, then a trench is dug 40-60 cm deep relative to the ground level, the width of the strip is about 25 cm, and the trench itself must be wider by at least half a meter or more: the bottom is leveled and compacted. Crushed stone is poured onto the bottom and compacted again.

A frame is knitted from a 12-14 mm rod. Four ribbed longitudinal rods are connected using frames made of smooth rod 6-8 mm. The dimensions of the frames must be such that all reinforcement is located at a distance of at least 5 cm from the edges of the tape. For example, if the foundation is 40*25 cm, then the rods are tied into a structure with a rectangular section of 30*15 cm.

A connected frame is installed in the formwork, which is then poured at least M-200
Do-it-yourself wooden frame shed: step by step with photos
A frame barn measuring 6*3 meters was built. The roof is pitched, covered with ondulin. The height of the front wall is 3 meters, the back one is 2.4 m. Operation has shown that with such a difference in height, snow does not accumulate much (Len. region).
Standard FBS 600*300*200 blocks were used as the foundation for the barn. They are laid on a sand and gravel bedding 25 cm thick. A cut-off waterproofing is laid on top of the blocks - a layer of roofing felt, on bitumen mastic. A layer of “hydrotex” is also glued on top of the same mastic. This cake was made because the groundwater level was high, and it was necessary to ensure that the building was protected from dampness.

Start of construction of the barn. Waterproofing is laid on the foundation, a frame is placed on it, and a beam is attached to the frame
A beam with a cross section of 150*150 mm was laid on the waterproofing (all lumber was processed). Connected into half a tree, nailed - 100 * 4 mm. For those who are unfamiliar with carpentry, you can join the beams end-to-end, nail reinforced corners to the joints from the inside, and a mounting plate from the outside.
In this version, the frame was not attached to the blocks in any way. In regions with high wind loads this is unjustified. You can fasten it using studs: a hole of the same diameter (12-14 mm) is drilled under them, through the timber, into the block. A pin is driven into it, the bolt is then tightened with a wrench. To hide the cap, you can drill a hole for it.
The next step is to attach the floor joists. Installed on the edge of a 150*60 mm board. They are attached to the harness with special brackets of the appropriate size. Attached to 100*4 mm nails.

The logs were aligned along the upper edge of the strapping beam. Everything must be level, otherwise the floor will be difficult to lay. You may have to level it with a plane or redo it.
The frame was assembled using the “platform” technology: first the floor was laid, and the walls were mounted on it. The wall frame or part of it is assembled on the floor. In some cases, they are immediately sheathed from the outside if slab material is chosen for the sheathing. And already in this form (with or without casing) they are lifted, placed vertically and secured.
There is a second technology called “balloon”. The frame is mounted along it gradually: the corner posts of the frame are mounted on the frame or even directly on the blocks. They are leveled in all planes. A rope is pulled between them, along which the remaining racks are then placed. They are also nailed one at a time, fastening them together with slopes and temporary cross members.
In this case, the “platform” technology was chosen and 18 mm thick OSB was laid on the logs. In general, the floor can be made of boards, plywood (moisture resistant), OSB, etc. You will need 20 boards, 13-15 mm plywood, but you need moisture resistant (OSB is moisture resistant by default).

Next, the assembly of the walls began. The frame is completely knocked down: the lower frame, the racks, the top frame. In this form, it is installed exactly along the edge of the strapping beam, aligned, reinforced with safety struts, stops, and slopes. It is nailed through the flooring to the trim beam. The nails were 200*4 mm.

To assemble the frame, 100*50 mm boards were used, the distance between the posts was 600 mm, the rafters were installed with the same spacing. The rafter system was assembled from 150*40 mm.
Window and door openings are reinforced - two boards are nailed, which are nailed together in a checkerboard pattern every 20 cm. The load here is greater, so reinforcement is required. There is a gate at one end for loading/unloading large items. Therefore, in this wall (you can see in the photo) there are only corner posts and reinforced ones - for fastening the sashes.

Since the roof is single-pitched, the rafter system is simple: boards that are selected for the rafters are laid on the edge. Their length is longer, since the roof overhang is necessary. It is usually 30-50 cm on each side. In this option, with a barn width of 3 meters, the length of the rafter legs (taking into account the slope) was 3840 mm.
They were nailed obliquely with nails - two on each side. It can be strengthened by installing corners: this will withstand even significant wind and snow loads.

The external walls were covered with OSB 9.5 mm thick.

The doors were installed and small steps were made.

The finishing touches were to install the wind board. The barn was then clapboarded and painted to match the rest of the buildings on the site. The barn was built with your own hands on a ready-made foundation in two weekends. Cladding and painting were done much later - almost a month later.

The final barn...beautiful
The unattractive foundation is covered with asbestos sheets cut to size. It turned out to be a beautiful barn.
Shed with a gable roof made of metal tiles
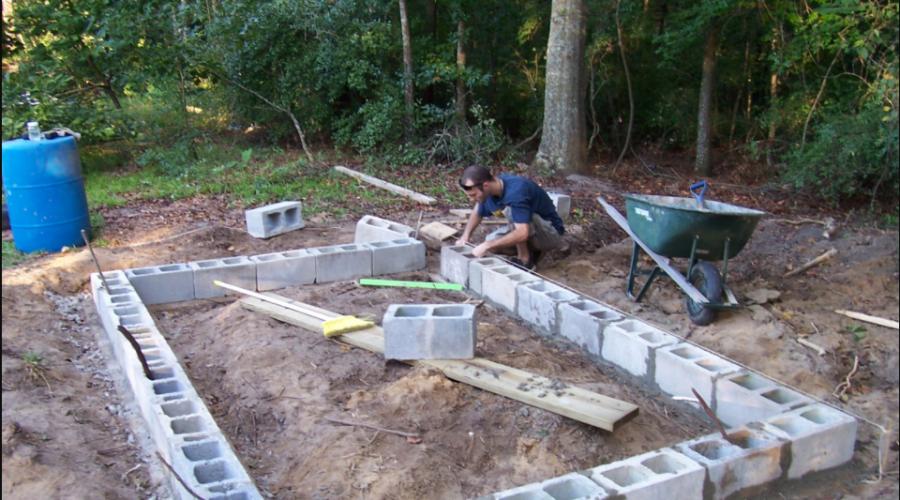
This barn was built alone. The construction is also frame: the cheapest way. In this case, the assembly method is “balloon” - gradual alignment of the racks. It all starts the same way: first we made columns for the foundation. Only this time they are brick.

As you can see, there are studs built into the corner posts. Holes are drilled in the strapping beam and it is put on studs. They can be done not only in corners, but also on intermediate posts: it will hold on more firmly.
This barn has a small porch, so a cross beam is installed at the required distance. And the wall will support it. Columns were also pre-made for it.

The logs can also be attached with a notch. Then a notch in the shape of the log is cut out in the strapping beam. In depth it should not exceed 30% of the thickness of the beam, so the joist is cut so that it is flush with the frame. This method is more labor-intensive.
Next, the frame was assembled: corner posts 100*100 mm, intermediate posts - 50*100 mm, the top frame and rafter system were assembled from the same board. The triangles at the top are reinforced with applied metal plates. Smaller plates were also attached at the junction of the upper frame beam and the racks. They were connected end-to-end without cutting, nailed on top and diagonally with nails. The plates reduced the likelihood of folding under lateral loads.


The frame was covered with OSB sheets - the most convenient size for construction. Subsequently, the walls will be finished with wood siding.

The sheathing, by the way, does not have to be made of plywood or OSB. You can attach the lining or board directly to the racks. But then, when assembling the frame, you need to install slopes: without the rigidity of the slab material, the building will be flimsy. If you don’t set the slopes, you can swing them by hand.

After installing the braces, you can fill the board, lining, block house, imitation timber - the choice is yours.

For those who are concerned about the appearance of the building, here are some ideas on how to make a barn beautiful in video format.
Video about building wooden sheds
The barn turned out to be beautiful, but not cheap. But it is decent in size, strong and in appearance no different from a house - it fits into the composition. Everything is shown/described in detail, there is one violation: the waterproofing under the metal tiles is laid vertically. Even with good gluing of the strips, sooner or later the water will make a path for itself. Otherwise, everything is correct.
In this case, the barn is built with your own hands on what is probably the cheapest foundation: concrete is poured into old tires. The frame stands on these “pillars”. Naturally, they need to be placed on a flat, reliable surface and they themselves must be at the same level. In terms of strength, the base will not be inferior to the best concrete blocks, and may even surpass them. Tires protruding from under the structure can be closed by making a step and subsequently placing flowers on it or using it for other needs. It will be even more practical.
Another video with a step-by-step illustration of the construction of a frame barn made of timber.
Drawings with dimensions
Several drawings to help you navigate the dimensions of the building. If necessary, adjust to your site or needs.

Shed with a pitched roof - drawing with a diagram of the arrangement of racks


Square barn - dimensions

This building does not amaze the imagination with its architectural forms. However, the need for a good barn arises for every homestead owner. Someone wants to acquire a warehouse for household belongings or a workshop, someone is going to raise chickens or rabbits.
It’s good when the thought of an outbuilding comes to mind when building a residential building. There are no problems with the material at this time. Excess blocks, timber, sheet metal - everything can be put to use.
But when the idea of a utility room appears later, you have to rack your brains over what to build it from.
In this article we provide an overview of options tested in practice. We hope that getting to know them will help you decide what kind of shed to build in your country house.
Frame construction technology is applicable to any structure. Barns are no exception to the rule. The main idea is to create a rigid spatial “skeleton” that absorbs loads. It can be assembled from a wooden beam or from a profile pipe. Any sheet and molded materials are suitable for cladding.
Wood (slab, board)
An inexpensive option for any task: keeping animals, garages, warehouses, workshops. A good owner always has some timber, a couple of cubes of boards or slabs in stock. They can be used to construct such a building.

Wooden frame posts should not be dug into the ground. Even impregnation with an antiseptic will not be able to protect them from rotting for a long time. Therefore, before starting to assemble the frame, you need to think about the foundation. It is best to use columnar or pile. Having made it, they begin to install the support frame made of timber. Stands are attached to it. The rafters of the pitched roof are placed along their upper ends. Having assembled the wooden “skeleton”, it is sheathed with a board or slab.

Over time, cracks appear in the cladding made from ordinary edged boards. Therefore, it is better to use tongue and groove material for work. If it is not there, then you need to fill the joints with wooden planks.
Another simple way to protect walls from blowing is to install herringbone paneling, when each top row of boards overlaps the bottom with its edge.

To build a warm barn for wintering livestock, you need to attach a wind-moisture-proofing film to the posts and place vertical bars on it to secure the sheathing. After this, insulation begins, laying insulation (mineral wool, polystyrene foam) into the inside of the frame.

Insulation of wooden frame outbuildings
OSB board
When thinking about what to build a shed from, many people opt for OSB boards. At a cost of 1 m2, this material is slightly more expensive than boards, but cutting and installation are less hassle.

The main condition for quality is to position the frame posts so that the joints of the sheathing slabs are in their center. If everything is done accurately and evenly, then cladding takes a minimum of time.

OSB board practically does not rot and does not warp from moisture. However, you will have to paint the walls. Not only for aesthetic reasons, but also as additional protection.
Metal (corrugated sheeting)

The remaining metal remaining after installing the fence can be used in the barn. The frame for it is best made from a profile pipe, but a wooden beam is also suitable for this purpose.

There are uses for old water pipes. By concreting them in the ground, you will get reliable racks. Purlins for fastening the cladding are fixed to them (by welding or bolting).

Using steel pipes as posts
Sheet metal without insulation is an option for a cold warehouse. If the building is allocated for a workshop or for keeping animals, then its walls from the inside will have to be lined with insulation.
Polycarbonate
It makes sense to use this material for cladding the frame when building a utility block with an enclosed run for poultry. Transparent walls are not needed for warehouses, garages and workshops, although if there is no alternative, it can also be used.

According to the technology of installation on the frame, honeycomb plastic is similar to the OSB board. In both cases, self-tapping screws are used for fastening. Only for polycarbonate you need to buy special ones with a wide cap and a sealing washer.
Slate
A popular improvised material for outbuildings. The old wave slate left over after replacing the roof can be used. The best basis for its fastening is wooden posts and purlins.

A more aesthetic solution is a flat asbestos cement sheet. Large surface area reduces installation time. Resistance to frost, moisture and sun increases the service life of such a structure several times compared to planks.
Straw
When considering materials for building a barn, few people realize that ordinary straw can be used in this capacity. More precisely, pressed blocks from it. In rural areas you can always buy this cheap and environmentally friendly material inexpensively.

Straw “bricks” do not burn. They are quite durable and hold heat well. True, it is quite difficult to assemble walls from them without using intermediate posts. Therefore, compressed straw blocks are most often used to fill gaps in a wooden frame.
The best way to finish such walls is to spray clay plaster over a steel mesh.

The cost of a thatched building is minimal. In terms of its thermal characteristics, it is significantly superior to sheds made of brick and cellular blocks.
Sawdust concrete
For ancillary buildings, you can use the technology of a formwork monolith with a frame. The most affordable material for this work is sawdust concrete. Bringing a couple of truckloads of wood waste from the nearest sawmill and buying cement is not a problem.

The main condition for quality in this matter is strong and even formwork. So don't skimp on it. Make shields from OSB and securely fasten them to the frame. After this, you can begin pouring the mixture of sawdust and cement mortar layer by layer.
Pallets
You can buy them inexpensively by visiting any wholesale center. Pallets are not used as cladding. The gaps between the boards are too large. Walls are built from wooden pallets. To do this, they are placed on a foundation and tightened together with bolts or threaded rods.

Having assembled the walls and installed the rafters, they began cladding. For this work we recommend using OSB boards.
Firewood and clay
Anyone who wants to make a cheap barn for pigs and other domestic animals can adopt an eco-technology called. The combination of wood, clay or cement-sand mortar gives excellent results.

There are two varieties of this technology: laying walls from logs in clay mortar with ligating the seams like bricks and filling the gaps between the frame posts with them.

The high strength of clay-wood structures is optimally combined with good energy saving indicators.
Sheds made of blocks, bricks and stones
Blocks made of cellular foam and aerated concrete are most often used for the construction of solid outbuildings. Their main advantages are low price, large size, precise edge geometry and low thermal conductivity.

For year-round operation, the ceiling under a pitched roof must be thermally insulated with mineral wool. When using a gable roof, you can do without additional insulation.
Arbolite blocks are another popular material for utility rooms. They are not as fragile as aerated concrete and at the same time durable and warm. The plaster adheres perfectly to the rough surface of the wood concrete. Therefore, it is most often chosen for finishing.

Winter sheds made entirely of brick are rare today. The main reason is the high labor intensity of the work. Therefore, in practice, this material is combined with blocks (arbolite, gas silicate), using it for external cladding.

The stone from the quarry remaining after pouring the foundation will find its place in the walls of the utility block. Such a building cannot be called warm. For winter use, it must be insulated from the inside with a mineral wool slab and sheathed with flat slate or wooden lining.

Flagstone, a flat-shaped calcareous stone, is best suited for laying walls.
Timber, logs and sleepers
When building a house from logs or beams, they need to be purchased in such a way that there is enough for a barn. Buildings made from the same material look much better than buildings of different types.

It is better to entrust the assembly to specialists. Many of those who did this work with their own hands later honestly admit their mistakes and mistakes.
A log house made of timber or logs as a barn is the optimal solution for year-round keeping of animals and arranging a workshop. For a cold warehouse, it will be cheaper and easier to assemble a regular frame, covering it with slate, boards or metal profiles.

Occasionally on estates there are outbuildings made from old sleepers. Today, wood is rarely used for their manufacture, since it has been replaced by reinforced concrete. However, in remote corners of Russia you can still find deposits of sleepers that have served their purpose.
If by chance you manage to buy them, then there will be no special problems with the construction of outbuildings. Such a structure cannot be called beautiful, but it cannot be denied good quality and durability.

Assembling the walls is simple: sleepers are laid one on top of the other, tying them at the corners. The height of the walls is secured with steel brackets driven into the side edges of the beams. In corner joints, for greater rigidity, staples are driven in from above, connecting the joined rims with them.
There is another installation method. In this case, part of the sleepers along the perimeter of the building are dug vertically into the ground. The rest are cut with a chainsaw so that a protrusion is formed at the ends - a spike. A groove is formed on the pillars by driving two bars onto the sleepers.

After this, sleepers are inserted into the prepared grooves in layers, fixing them together with staples.
Prefabricated sheds
The progressive methodology of prefabricated construction is also applicable to outbuildings. A “constructor” for a shed can be ordered along with the purchase of a house kit, or this can be done when the need for a utility room arises.
There are three design options for prefabricated buildings:
- SIP panels;
- sandwich (metal-insulation-metal);
- plastic panels.
From this list you can only make SIP panels with your own hands. To do this you will need OSB board, glue, polystyrene foam and wooden beams. Assembly is carried out according to the “sandwich” principle. Having laid a sheet of particle board flat, an adhesive composition is applied to it and foam is laid so that there is space along the contour for installing the joining beam. After this, a second sheet is glued onto the insulation, and the load is evenly laid out on top.

The panels are installed by inserting joining bars between them. They are screwed to the edges of the slabs with self-tapping screws. To prevent blowing, foam is used in the joining areas.

Sandwich panels are familiar to everyone who has seen modern construction change houses. Their design is similar to OSB boards. In addition to polystyrene foam, rigid mineral wool can be used in them. The outer cladding is made of steel corrugated sheets. For installation, such panels require a metal frame.

It should be noted that the price of sheds made of SIP panels and sandwich is higher than the cost of frame and block structures. The main advantages of the fully assembled version are high installation speed and mobility.
The ubiquitous composite plastic has also reached outbuildings. Today, houses are made from it, in which you can store garden tools or set up a small workshop. They are not suitable for keeping domestic animals. The reasons are the small area and lack of insulation.

Plastic “containers” cannot be called cheap. Despite this, ease of assembly, durability, aesthetic appearance and lack of corrosion attract the attention of owners of private estates and summer cottages.