How to put slopes on a door. Door slopes - a variety of options. Video: finishing door slopes using plaster mixtures
After installing a new iron entrance door in an apartment, all the pleasant impressions about it can immediately dissipate if slopes are not made from inside the apartment. Only they can say that the stage of repair work is completely completed.
To make them perfect, specialists are most often invited. On the other hand, you can do them yourself if you first study all the tips and recommendations.
What are door slopes?
Slopes are a small section of the wall located around the door frame (outside and inside it).
In recent years, their arrangement is mandatory, because they not only decorate the overall appearance of the door space, but also serve as the beginning of the overall design of the corridor or rooms.
Types of finishing materials
Having chosen the right material, we can safely say that success awaits you in the process of finishing slopes. If you are a beginner builder or do not have a lot of time and money, do not take on methods that require really significant skills and experience.
To avoid mistakes, you need to know what materials suitable for creating a beautiful space around the front door.
MDF panels
MDF panels are a popular material that is perfect for these purposes. As a result variety of colors, panels can be used to decorate slopes in almost any interior.
Installation occurs using regular or liquid nails, as well as self-tapping screws, corners or casing are applied around the perimeter.
Among the positive properties, the following should be noted:
- able to withstand small impacts and damage;
- have an attractive appearance;
- easy to install by one person, do not require professional help;
- they resemble various types of wood, which makes the appearance of the slopes visually expensive and sophisticated;
- have good noise insulation properties.
The disadvantages of the panels are that they cannot withstand scratches and strong impacts, as well as can change their appearance and structure, if they are installed in rooms with high humidity (for example, baths and saunas).
In addition, being exposed to various pollution, require careful care, otherwise it will be almost impossible to wash them.
Decorative stone tiles attached to a special solution. In the interior, decorative tiles look interesting and expensive.
The advantages include:
- has a lower cost than natural stone;
- is light in weight;
- does not require special care;
- thanks to a wide range of colors, it can imitate the appearance of any stone;
- able to withstand significant temperature fluctuations;
- resistant to moisture.
Main The disadvantage is the fragility of the material. In rare cases, the size of the opening will coincide with the size of the tile, so its installation almost always requires the ability to correctly and accurately cut the tile to avoid cracking.
If you choose a heavy tile, there is a possibility that it will lag on the upper part of the slope, creating danger for human life and health.
Laminate
Another option for finishing door slopes is laminate, a material has the following advantages:

- good indicator of strength;
- shelf life can be up to 15 years;
- a wide selection of colors allows you to choose the one that suits each specific room;
- have excellent thermal insulation characteristics;
- easy to wash and clean from various contaminants;
- You can easily attach decorative elements to them (using regular glue).
Among the disadvantages, it can be noted that this type of finishing material poorly resistant to moisture and temperature changes. As a result, over time it may change its appearance and initial technical characteristics.
If you plan to install laminate flooring on a frame, then you need to be prepared for the fact that the doorway will become smaller.
You may be interested in learning about plastic wall panels, their types and sizes. Read this one.
Plastic
Plastic trim is well suited for a doorway only because you don’t need to spend a lot of money to purchase it, it is lightweight, can imitate various textures and materials, and is also easy to care for.

One of the disadvantages that can be noted is its fragility, because even with the slightest impact and effort, it simply deforms and breaks.
Decorative rock
Decorative stone is a material with a huge number of positive properties. Decorative stone finishing quite expensive compared to other materials, but also looks more luxurious in the interior, as shown in the photo.

Advantages:
- completely environmentally friendly material;
- installation does not require a perfectly flat surface;
- perfectly withstand high temperatures and large amounts of moisture;
- unlike natural stone, it has significantly less weight;
- wonderful appearance, variety of textures allows you to satisfy the tastes and requirements of any buyer;
- can be mounted in a doorway of any shape and size;
- does not burn, retains heat well in the room;
- It washes well and does not absorb foreign odors.
Of the disadvantages of decorative stone, the only thing known is that It is not recommended to use it for exterior door decoration, which immediately go out onto the street.
When exposed to very low temperatures and severe frosts, the material may deteriorate slightly.
Plaster
Plaster is often used to create doorways. This is one of the economical finishing options; with the help of plaster, if necessary, you can not only seal the slopes but also level them.
It has the following advantages:
- perfectly insulates living space;
- cleans well from dirt;
- has high strength;
- thanks to various methods of application to the surface, you can give the slopes a unique appearance;
- long shelf life.
Main stages of drywall installation:
- Having measured the size of the side slope, cut a blank from a sheet of plasterboard, which must necessarily be 1 cm larger in width. If this is not done, then the sheet will not be able to be inserted into the gap between the opening and the box.
- Having made a recess with a knife in the mounting foam passing between the door frame and the opening, insert the side cut sheet into it. Slightly bending it on the other side, use a gun to apply polyurethane foam along the entire length.
- Press the material well against the wall. Make sure there are no distortions. The sheet must be positioned strictly vertically. Fill all cracks with foam.
- Carrying out all the above steps, secure the second vertical slope in the same way.
- Measure the top of the opening and from a sheet of drywall cut a sheet of identical length, which will be 1 cm larger in width (for the same purposes as the side sections).
- Make a recess in the polyurethane foam into which to place the resulting piece of material. Use a level to check the correct angles between the side and upper sections of the slope.
- Glue the sheet with polyurethane foam, pressing it well to the base of the wall.
- Wait until the polyurethane foam has completely dried(this will take 1 day) you can start applying finishing materials to the drywall.
This video shows step by step how to finish the slopes with your own hands.
How to apply?
Design of slopes – an important stage in the entire work of creating a doorway. You need to start by creating corners on the drywall using putty.
This should be done this way:
- Using a spatula, apply a small layer of putty to the corner.
- After waiting for it to dry completely, we apply serpyanka, which is covered with another layer of putty.
- When the second layer is completely dry, finishing putty is thinly applied to the corners. In this case, any unevenness must be avoided.
If you plan to paint such slopes, then the entire surface of the drywall must also be plastered twice. In the event that the repair work will be completed with wallpaper, the sheets do not need to be further processed.
Creating beautiful door slopes is not a very difficult job that any man can do, without resorting to outside help. The main thing is to first study all the necessary recommendations, consult with a specialist and purchase those materials that will be simple and easy to work with.
After installing a brand new door, the opening has an unsightly appearance, spoiling the entire impression of the renovation. And it’s not just about beauty - drafts appear in the cracks, unprotected polyurethane foam quickly gains moisture, which causes heat loss in the entire room to sharply increase. In addition, correctly installed slopes for entrance doors play the role of additional sound insulation. What types of slopes exist, what should you consider when choosing how to do the finishing yourself?
From the outside, a small gap between the opening and the frame can be closed using platbands - special shaped strips, usually included in the door installation kit. However, from the inside of the room there remains a fairly wide area of exposed brickwork with layers of concrete mortar, and to ensure the proper level of tightness it must be finished not with one, but with several types of materials - insulating, load-bearing and decorative.
Finishing slopes improves the microclimate and is part of the design
Modern methods and available finishing options
According to the installation method, there are 3 options for finishing slopes for entrance doors:
- Applying cement mortar directly to the wall and further plastering it. It is considered the most reliable and cost-effective method, but at the same time the most labor-intensive. To lay out perfectly smooth surfaces, you must have some experience both in preparing the plaster solution and in its application.
- Gluing finishing panels using a suitable adhesive mixture. Finishing door slopes using this principle is more expensive, while the “wet” installation process is quite long (each layer must be allowed to dry), but it is quite accessible even to a beginner in the repair business.
- Fastening finishing elements to a pre-assembled frame. The fastest solution that allows you to achieve a perfectly flat surface, hide telephone or electrical communications, and install lighting equipment in the door block. The downside is the low mechanical strength required to protect the door fasteners from breaking.

It is advisable to isolate the slopes from the concrete walls with a layer of polyurethane foam or mineral wool
In order for the slopes to withstand temperature changes, especially noticeable if the door leads directly to the street, and not to the corridor or landing, it is advisable to install a layer of thermal insulation on the wall: it can be mineral wool, polystyrene foam or its modification - penoizol. If installing insulation does not allow the width of the opening (according to SNiP, the dimensions of the doorway must be at least 0.8 x 1.9 m), cover the slopes with sandwich panels.
Frame slopes are indispensable when the opening is too wide and a large volume of cement mixture is required to seal it. They are also chosen when there are damp walls, or there is no time to do finishing work - plastic or wooden panels themselves look presentable. In order to fix thin sheets, the space between them and the walls is filled with polyurethane foam sealant, which also serves as a heat barrier.

You can choose the shade of the sandwich panel to match the color of the front door
Selection of facing materials for home renovation
In addition to the protective function, the slopes perform the task of decorative design of the opening. To cover the rough surface, one of the following materials is layered onto concrete or drywall:
- paint – thanks to the varied palette, you can choose any shade, and, if desired, a textured pattern, thereby decorating the hallway space in an original way;
- wallpaper is a good choice for those who, at the same time as replacing a door, are making renovations in the hallway, since using the same wallpaper on the wall and slopes creates the impression of a monolithic surface (a step-by-step algorithm showing how to decorate slopes at the front door with wallpaper is described in the section on finishing operations);
- one-sided sandwich panels - due to the peculiarities of their structure (a layer of extruded polystyrene foam is attached to a sheet of polymer plastic), there is no need for additional measures for insulation and sound insulation of surfaces, and their minimal weight allows them to be attached directly to the wall using an adhesive method;
- plastic panels are considered a compromise option, since, despite the external similarity with sandwich panels, plastic is very fragile, and when finishing deep slopes it is very problematic to achieve uniform rigidity over the entire area;
- MDF is quite durable (withstands medium impact loads without causing scratches or dents) and easy to install material, allowing it to be installed even under conditions of increased operating load;
- laminate or parquet board - a wide variety of colors and textures allows you to choose a tone-on-tone panel with the canvas and door frame, and the high strength, designed for use as a floor covering, determines the long service life of the slopes.

Laminate cladding
Recently, designers, trying to include the doorway into the overall interior picture, use atypical building materials to decorate it - ceramic tiles, mosaics, natural or artificial stone.

Artificial stone in the hallway looks modern

Tiling
Installation technology using frameless and frame methods
Before finishing the slopes of the front door, make sure that it is installed vertically and check the tightness of the installation seams. To do this, hold a lit candle around the entire perimeter of the opening and add sealant in places where the flame has deviated to the side. Don’t forget to cover the door leaf and frame with masking tape and cut off the remaining dried foam with a stationery knife. After this, remove old plaster and loose areas of brickwork.

Wallpaper decor
Plastering - complete process algorithm
It is important to thoroughly clean the leveled sections of the wall from construction dust and coat them with a deep penetration primer (it will strengthen the base surface and ensure high adhesion of the layers). Pay special attention to the concrete lintel above the door - it should be treated with “Betonokontakt”, a special primer for poorly absorbent surfaces.
After the primer has dried (after approximately 5–8 hours), the most accurate installation of the beacon profiles required for leveling the plaster slopes of the entrance door is required:
- Using a laser or regular level on the side wall 3 cm from the door, mark the position of a strictly vertical line.
- Drill holes with a diameter of 6 mm along it in increments of 30 cm.
- Insert 6x30 mm dowels into the holes and use twine to level the caps.
- Install the beacon on the clips and check the verticality of the installation again with a level.

The corner protection profile simultaneously serves as a plaster beacon
In a similar manner, position the corner profiles at the top and sides of the doorway so that they are flush with the end walls and the area above the door.
After installing the beacons, you can begin preparing the cement-sand mixture. The simplest and cheapest option is to use quarry or river sand and M-150 or M-200 cement as the base ingredients. To get the right consistency, follow a certain sequence:
- Sift the building materials through a sieve with 3x3 mm or 5x5 mm cells.
- In a prepared container, mix 3 parts sand with 1 part cement.
- Gradually start adding clean, settled water to the dry mixture and at the same time mix the solution with a trowel or a special electric drill attachment.

If the technique is followed, plastered slopes last for decades
As soon as the mixture begins to envelop the instrument, like dough, the solution is ready for use. Use a trowel or spatula to force it onto the wall, trying to completely cover the profiles. After going through a small area, apply the rule to the beacons and smooth the plaster with it. This way you will achieve a perfectly flat surface.
Instructions for installing drywall or finishing panel
Adhesive finishing of entrance door slopes with laminate, plasterboard, sandwich panels or thin MDF sheet does not require smoothing the surface. It is important that the base is aligned vertically and does not have obvious defects. In this case, a slight collapse of the side wall can be corrected with a layer of plaster 8–10 mm thick. If you are lucky and the original surface is level, the task is extremely simplified and is reduced to a minimum of actions:
- Carefully prime the base on which the panels will be attached.
- Measure the dimensions of the slopes, mark them on the building material, double-check the marks with a tape measure and a square.
- Using a jigsaw, cut the sheet into the required number of fragments (you can install laminate and MDF vertically, with one lamella per slope, or horizontally - by installing small pieces of lamellas from bottom to top).
- Apply glue to the prepared part using the square-cluster method in increments of 15–20 cm in spots approximately the size of a Soviet nickel.
- Let the glue stain dry - a film should appear on its surface.
- Place the element in the desired location, align it with a small amplitude and, starting from the top edge, firmly press the panel against the wall with your palms.

Installation of the top strip made of gypsum plasterboard with polyurethane sealant
As a construction and installation mixture, you can choose liquid nails, for example, Titebond or “Instant Grip” (“Moment”). Polyurethane adhesive PUR 501 (Kleiberit) and even polyurethane foam are also suitable. However, you need to be careful when using the latter: if you apply it in large quantities to the material, further polymerization may cause the finishing details to shift.
In the event that the inner surface of the slope is severely damaged, there is no other choice but to level the doorway with plaster (for a step-by-step description of this process, see the previous section), and only then proceed to the above algorithm. After complete drying, it’s time to install the painting profile on the outer corners and final processing.
How to install door slopes on a frame with your own hands
The heavier the front door, the more likely it is that the slopes will experience excessive load. For example, after installing an iron door, finishing the doorway with plaster may cause it to crack already in the first year of operation. Therefore, the frame method is optimal when the need arises:
- preventing surface deformation;
- installation of heavy MDF sheet (more than 4 mm thick);
- eliminating excess space around openings.

Assembly of aluminum profiles into a frame
This option is also suitable for installing slopes in the bathroom or in other rooms where moisture regularly penetrates the walls, and it is not recommended to directly glue finishing sheets, especially if it is laminate or drywall. The simplest solution is to use an aluminum profile for the load-bearing base for the construction of plasterboard walls and ceilings or wooden slats of suitable thickness, pre-impregnated with an antiseptic.
The scheme for preparing the walls of the opening and constructing the frame base looks like this:
- Clear the walls of debris and check them for cracks and cracks.
- If necessary, repair the surface with a cement compound.
- After the plaster mixture has dried, treat it with an antiseptic primer.
- Level the outer beam or profile and secure it with dowel nails with plastic sleeves.
- Install a second rack parallel to the first element and firmly attach it to the solid base.
- Install parallel posts around the entire perimeter of the front door opening.
- Reinforce the structure with longitudinal jumpers connecting both parts of the sheathing.

MDF slopes
Next, run communication cables through the upper part of the structure and place insulation in the cells. After this, make slope strips exactly to size and install them on “liquid nails,” ensuring that the gaps between them are minimal. Reinforce the fastening with self-tapping screws, hiding their heads under the decorative caps, and carefully fill the gaps between the parts with transparent sealant or tinted putty.
Video: How to make a slope on an MDF front door with your own hands
Finishing touches - finishing the slopes
As you can see from the results of the work in the video, there is no need to additionally finish the MDF door slopes with your own hands - the material on them looks advantageous as is. This applies to laminated and plastic surfaces: the finishing operation for them is to install platbands and mask the joints with furniture stickers or matching mastic.

Metal door decoration
A roughly plastered doorway needs to be refined with paint, decorative plaster or wallpaper. Before painting, the slope must be covered with two layers of putty - a starting one, designed to eliminate the main irregularities, and a finishing one, necessary to obtain a smooth surface. The next step after puttingty is applying a primer and two layers of paint - water-based or acrylic.

Wood finishing
Due to the routine nature of the process, wallpapering is often abandoned, even when the required amount of finishing material is available. However, you can handle the process quite easily if you take into account some secrets:
- glue the surfaces not immediately after installing the slopes on the front door, but simultaneously with the entire hallway;
- for finishing the area around the door, choose wallpaper without a pattern;
- calculate the position of the canvas so that it covers the entire width of the slope;
- cut off the excess fabric taking into account its overlap beyond the corner line onto the adjacent plane.
Before sealing the opening above the door, cut a piece from the roll that is long enough to wrap onto the slope. Glue the wallpaper to the wall, eliminate all the unevenness and you can enjoy the result of the work you did yourself.
Video: how to stick wallpaper on a door slope
The above technologies do not show all the nuances - in each specific case, a sober assessment of many factors that influence the choice of materials and structures is required. To be sure to protect yourself from mistakes and, along with replacing the front door, to bring the slopes into proper form, involve professionals in the reconstruction - they will relieve you of the burden of these far from easy troubles.
Installing a door is a fairly complex type of work that must be done scrupulously and carefully. Installing door slopes will add completeness. In addition, they can serve as a decoration for the doorway, while also serving as additional insulation for the room. Therefore, the question of how to make door slopes should be approached responsibly.
General diagram of the door and slope.
Materials for door slopes
The material for finishing door slopes should be selected based on the reliability and beauty of the entire doorway structure after completion of the work. In addition, when choosing materials, you should pay attention to the fact that the slopes and the door must be structuredly coordinated.
Among the materials for door slopes are the following:

Scheme of the device of the girth box.
- Extras. These are special boards that are installed as a door frame, and the width of the door opening should be less than the thickness of the wall. Extensions are most often installed if the door leaf itself is made of wood, and they are matched to it or made from the same wood as the door. The telescopic design of the extensions is preferable, which will greatly facilitate the process of installing the platband.
- Plasterboards, laminate panels, MDF sheets. These are universal building materials that require the installation of a frame during installation. However, after the work is completed, the door slopes will be perfectly smooth. In addition, the use of these materials for finishing slopes will allow you to complete this amount of work yourself, without resorting to the help of a construction team.
- Plaster. In addition to its availability, this material has sufficient reliability and strength. However, a very thick layer of plaster between the door frame and the wall is not desirable; over time, it may be destroyed, which will lead to a violation of the integrity of the entire door structure. Plaster can also be applied independently, however, certain skills are required to finally level the surface. If you use a ready-made plaster mixture, you must take into account what type of work it is intended for, external or internal. If you need to make a door slope for the front door, then a mixture for interior work will not be suitable for this work, since the characteristics of moisture resistance and strength vary significantly.
- Decorative stone, ceramic tiles, mosaic. The use of these materials increases the strength of the slopes. However, their use must be consistent with the interior of the adjacent rooms. This type of decoration is most appropriate when decorating an interior in an ethnic or rustic style.
Related article: Build a gazebo with your own hands: a guide to action
In addition, the technology for making slopes is divided into frame and frameless. Using frame technology, installation is carried out using plasterboard sheets, laminate and MDF panels. All other materials can be used without first constructing a frame.
Required Tools
Depending on the arrangement, the following may be useful:

Dimensions of wooden boards.
- spatulas;
- roulette;
- screwdriver;
- Bulgarian;
- hacksaw;
- perforator;
- empty containers;
- hammer;
- construction knife;
- marker or pencil;
- level and others.
Plastered door slopes

It is not difficult and quick to make a slope from plaster, in addition, it is a very inexpensive finishing method.
The most acceptable option for increasing the sound insulation of a room is to use plaster as a material for finishing slopes. As a result of plastering work, the door slopes will be free of voids and will also become resistant to mechanical stress. At the same time, a perfectly leveled surface of the slope will allow it to be decorated in the future.
To perform the work, you can use ready-made mixtures for plastering work. They are sold dry in bags and diluted with water in the proportions described on the packaging. However, you can prepare the solution yourself using cement and sand. For such a solution, take 1 part cement and 3 parts sand. It is necessary to add enough water so that the finished solution does not drain from the surface during operation.
It is necessary to prepare the surface of the door slope before applying the solution. The gaps between the wall and the door frame are sealed using felt (tow), hammering it with a wooden stick, or foam using a construction gun. Sealing with foam is an effective and modern method. However, when using it, it is necessary to take into account that it will increase in volume as a result of hardening, and therefore you should not fill the voids to their boundaries, and it is also better to use gloves when working with foam, otherwise it will be difficult to remove stuck particles.
Related article: Bathrooms in blue tones
Platband diagram with dimensions.
The entire surface of the wall that needs to be plastered must be thoroughly cleaned of debris: dust, dirt of any origin, stains of any nature. If the surface is smooth, then to improve the adhesion of the plaster to the wall, it is necessary to make shallow notches with an ax (the sharp part of a construction pick) or a hammer drill, using the necessary attachment.
If you plan to lay a thick layer of plaster in order to achieve a perfectly smooth door slope, then the surface must be reinforced. For reinforcement, in this case, a plaster mesh is used, which is fixed to the wall using plastic dowels. Before plastering the door slopes, the wall or rough slopes must be moistened. This is done with a brush and water.

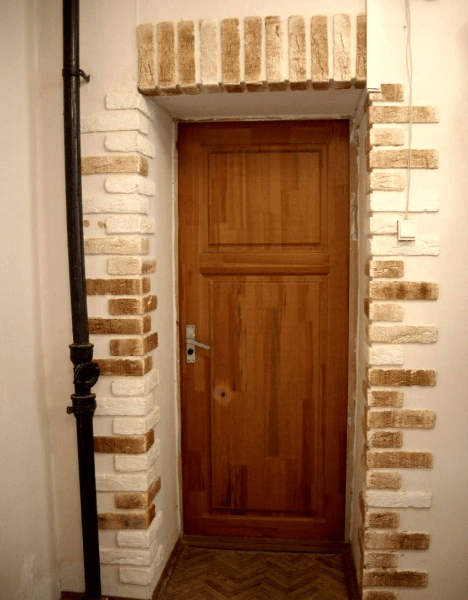
Decorative stone finishing is used in eco-style interiors.
To ensure that the surface of the door slope after finishing with plaster is perfectly smooth, it is necessary to use beacons. They can be either metal or wood or from improvised materials, for example, the same solution with the addition of gypsum. However, the most reliable beacons will be metal ones. Beacons are set strictly according to level using a corner.
After installing the beacons, apply plaster in 3-4 approaches, depending on the required thickness. In this case, it is necessary to pre-treat with water before each layer of plaster.
Cracks that may form where the door frame comes into contact with the plastered surface can be sealed with acrylic or sealant. Leveling the applied sealant using a mounting gun is carried out using a soft rubber spatula. After drying, the plastered surface is ready for further decoration.
Finishing with plasterboard sheets
Since this technology is frame-based, it is necessary first of all to build a frame from a metal profile. For this type of work, the same profiles are used as for the construction of any other plasterboard structures.
The walls adjacent to the doorway must be leveled in advance.

Slope finishing options.