How to hang paper wallpaper on the ceiling. How to wallpaper a ceiling: surface preparation and pasting process How to easily wallpaper a ceiling
Various materials are used to decorate premises. They all have their pros and cons. Wallpaper is a fairly popular material that can be used to glue not only walls, but also ceilings. It is clear that with walls the situation is much simpler, but still even a beginner who has some skills in this area can glue them to the ceiling. The process itself is simple, but requires compliance with some nuances. We will talk about all this in the article. What tools will you need? How to choose the right wallpaper? What is included in the preparation of the ceiling and how to glue wallpaper.
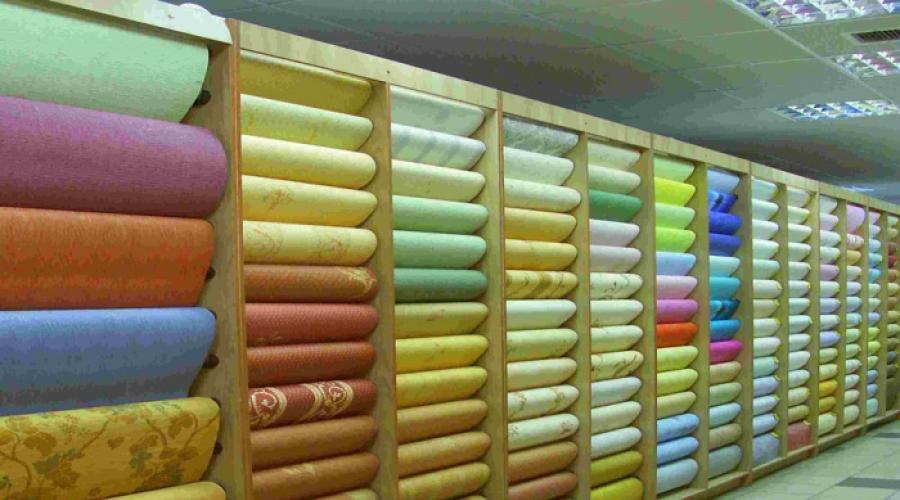
Wallpaper that can be glued to the ceiling
Choosing wallpaper is an important stage that needs to be given special attention. You must decide on the material, color, structure, pattern, etc. Wallpaper comes in:
- paper (smooth, structured, photo wallpaper, embossed);
- non-woven;
- vinyl;
- textile;
- liquid.

- Over time, non-woven wallpaper can be painted any color you wish to freshen up the room.
- You can glue them to any surface, be it wood or concrete.
- The gluing process is simple, since the glue is applied only to the wall. They do not need to cover the wallpaper themselves.
If you do not have the necessary funds, the ideal solution would be to choose simple paper wallpaper. They are cheap, so if necessary, you can replace the old coating with a new one. What can we say about their color?
If your ceiling in the apartment is low, it should be visually expanded. Canvases in light colors or with a small and pale pattern are suitable for this. This way you can visually lift it. In addition, light wallpaper is universal and suitable for decorating an apartment with any interior design. But if the ceiling is high, and you want to visually lower it, then dark-colored wallpaper will be suitable. Still, as they say, “it depends on the taste and color...”, so you can choose the color that you like. Nobody will stop you from doing this. Just take into account the overall interior so that the ceiling fits into the overall picture and does not look out of place.

All that remains is to purchase paper ceiling wallpaper and start gluing it. But first, pay attention to the ceiling itself and prepare the necessary tools.
Preparing the ceiling for gluing
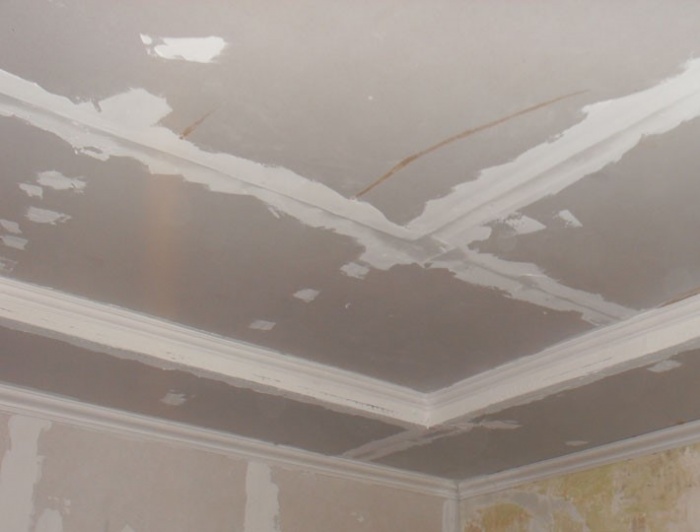
The advantage of wallpapering the ceiling is that you don't have to strip off the old paint. Still, if there is whitewash on it, it is better to tear it off and putty in 2 layers. Otherwise, the wallpaper may peel off and fall off. Surface preparation also includes stripping off the old coating. Wallpaper on the ceiling can be easily peeled off with a spatula. An alternative is to use a special wallpaper stripper.

Please also keep in mind that the ceilings must be level. If you live in an older home where they are uneven, this should be corrected. In case of strong differences, it is better to cover them with plasterboard and putty. If the differences are small, seal them with putty and level them. Here the choice is yours. Ideally, of course, it is better to cover the ceiling with plasterboard, but if you have a limited budget, putty will do.
In order for the wallpaper to stick securely to the ceiling, it is important to ensure good adhesion to the surface. A deep penetration primer will help you with this. It must be applied to the ceiling in an even layer and allowed to dry. Make sure that there are no untreated areas.
Advice! The primer can be applied with a wide brush or roller.
It is more convenient and faster to do this with a roller, and a tray attached to it will help control the amount of mixture applied. This way you will avoid leaks.

The drying time for the primer is indicated on the packaging. After this, you should start wallpapering.
Stages of wallpapering the ceiling
To describe to you the scope of subsequent work, we will look at the step-by-step process of how you can get a finished and beautiful surface with your own hands. In practice, everything looks like this:
- Preparation of all necessary tools and materials.
- Ceiling measurements to calculate the length of wallpaper strips.
- Cutting strips of wallpaper.
- Mixing and applying glue.
- Gluing strips of paper wallpaper to the ceiling.
- Smoothing the canvases, expelling air and forming seams.
- Gluing baguettes.
As you can see, the process is simple. It is enough to follow the sequence and carefully glue the paper strips to the ceiling. So let's look at all the steps in detail.
Stage 1 – tools and materials
The set of tools is simple, they are easy to operate, and the price is low. For full work, you will need:
- Ladder.
- Container for mixing glue (bucket, basin).
- A construction mixer for mixing glue or a regular wooden stick.
- Pencil, ruler and tape measure.
- Stationery (wallpaper) knife.
- Construction roller with medium pile and long handle.
- Roller tray to control the applied glue.
- Rags, brushes, plastic spatula.

As for materials, the first thing you need to do is correctly calculate the number of rolls of wallpaper. How to do it? Measure the length and width of the ceiling. For example, your ceiling measures 5x4 m. Wallpaper can be of different sizes: 50 cm wide and 8–10 m long, 60 cm wide and 8–10 m long. Knowing the width and length of both the wallpaper and the room, you can subtract the required number of rolls. To begin with, divide the width of the ceiling by the width of the strip of wallpaper: 4/0.5 = 8. Now divide the length of the roll by the length of the ceiling: 10/5 = 2. Now all that remains is to divide the first number by the second: 8/2 = 4 rolls. It turns out that to cover the ceiling you need exactly 4 rolls of wallpaper. All you have to do is go to the store and buy them.

Thus, you have completed the second stage - measuring the ceiling. So it turns out that you must cut the wallpaper into even strips of 5 m each.
Stage 2 – cutting strips of wallpaper
Please note that the strips do not need to be made exactly 5 m. You need to make a short leave of 3–5 cm. As a result, they will be cut off and the coating will look even. Cutting wallpaper correctly is a simple matter, but there are some subtleties.

The process is as follows:
- Take a roll of wallpaper and place it face down on the floor. The floor must be clean!
- Then unwind it over the surface.
- Take a tape measure, measure the desired length and mark the location with a pencil.
- Using a ruler, draw an even strip.
- Fold the strip in the marked place with the right side up and iron the fold.
- All that remains is to take a stationery knife and cut a strip along the inside of the bend.

That's all, the strip is ready to go. But don’t stop at just one; cut several or all at once to speed up the process.
Advice! Before gluing the canvases, you need to make a starting line on the wall for the first strip. It must be perfectly flat so that there are no distortions left when gluing.
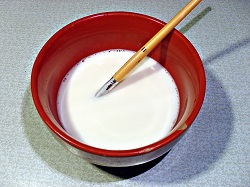
Stage 3 – mixing and applying glue
It's quite simple to do. Manufacturers often provide instructions on their products for their preparation. You must mix the ingredients and stir the mixture so that there are no lumps left. When the glue is ready, you can apply it to the strips.

To do this you need:
- place the first strip on a flat surface with the pattern down;
- take a brush or roller and dip it in glue;
- All that remains is to apply the mixture to the surface in an even layer.
Note! If you are gluing the material to wallpaper, then the glue must also be applied to the ceiling, 1 strip wide
After the strip is smeared, it should be allowed to soak for several minutes. To do this, bend it as shown in the figure and begin applying glue to the next sheet.

Well, now we’ll look at exactly how to glue paper ones.
Stage 4 – gluing
We can say that all the preparatory work has been completed and now everything is ready for work. Immediately place a stepladder in the place where you will glue the first strip.
Advice! Doing the job yourself will be quite difficult, especially if the ceiling is long, so it is advisable to enlist the help of a friend, family member or other helper. This way you can increase the quality of gluing and speed up the process itself.

Now follow the instructions:
- Take the strip and, focusing on the intended line, begin to apply the strip to the ceiling. Do this from a corner, and let your partner hold the other end of the strip.
- Gradually press the canvas, gluing it to the surface. Then take a plastic spatula (or rubber roller) and begin to smooth the canvas, expelling the air from it. Work from the center outwards to remove excess glue. It can be removed with a cloth.
- That's all, all that remains is to cut off the excess on the other side.

Prepare another strip and stick it in the same way. The process is repeated until the entire ceiling has been processed. It is important to expel all the air from under the canvas so that the material does not fall off during operation.
Note! To give the ceiling a finished look, cover it with baguettes.
Additionally, we invite you to watch a video on how to hang wallpaper.
Some features
If your wallpaper has a pattern, it needs to be aligned correctly. How to do it? Based on the size, cut the first strip. Now unwind the roll on the floor and apply the first strip so that the patterns meet. Mark a cutting line and cut the strip. Do the same with the rest. There will be a lot of leftovers.

When it comes to finishing the ceiling surface, people in most cases consider only three options: installing a stretch ceiling, installing a suspended structure and painting. It would seem that there is not much to choose from, but there is a fourth option, which has been used for decades, but today for some reason it is becoming a thing of the past. We are now talking about wallpapering. Ceiling wallpaper was not always glued, mainly because gluing it is quite difficult and inconvenient. This article was written so that even a beginner can understand how to hang wallpaper on the ceiling.
To begin with, this finishing option has always been original, as it provided wide design possibilities. Wallpaper allows you to create unique interiors that you cannot find in other houses or apartments.
As for other advantages of this method, these include:
- no need to frequently paint the ceiling if it fades over time;
- no need for significant financial costs associated with the arrangement of tension/suspended structures.
In other words, wallpaper is the best option according to several criteria at once. However, it should be remembered that the choice of material must be approached with all responsibility (this is especially true for rooms with high humidity).
Now let's look at the gluing process itself. This procedure, as noted above, is extremely inconvenient: it is not easy to glue wallpaper onto walls, but here all the work is done overhead.

For which rooms is wallpapering suitable?
It is not suitable for every room. Embossed colored ceilings are known to visually make a room smaller, so this method is suitable for large rooms - say, a living room, where you can not only experiment using different textures, but also hide imperfections in the finishing. The fact is that the latter are less noticeable in large rooms than in small ones.
The ceiling, covered with wallpaper, also has a large set of visual effects. With its help, for example, you can both make a room more comfortable and divide it into several zones. It is quite obvious that the ability to delimit rooms is especially important in one-room apartments, where one room serves as an office, a living room, and a bedroom. Finally, the porosity of the wallpaper also provides additional sound insulation.
Prices for photo wallpapers
photo wallpaper

Stage one. Deciding on the type of wallpaper
First, you need to familiarize yourself with the features of some types of wallpaper, and also find out which option is more suitable for finishing the ceiling.
- Paper. The most common type of material, characterized by low cost. A good choice for cosmetic renovations.
- Liquid. Who doesn’t know, such wallpaper is a special liquid mixture that, after application, gives a seamless and perfectly smooth surface.
- Vinyl. Very popular today, they are distinguished by durability, strength and moisture resistance.
- Non-woven. Such wallpapers are especially durable, elastic, and abrasion-resistant.
- Textile. They consist of two layers - a paper (or non-woven) base and a textile fabric.

We have not considered all types of wallpaper present on the current market, and this is of no use. Instead, let's return to the main topic, namely wallpapering the ceiling with your own hands.
GOST 30834-2002. Wallpaper. Definitions and graphic symbols. File for download.
Stage two. We prepare everything you need
As for the wallpaper itself, there are no restrictions in terms of their choice - you can use any of the options listed above. For example, the starry sky is a very original method of decorating the ceiling surface.
On a note! Wallpapering for painting deserves special attention. Modern models of the material can be painted up to 15 times, which means that if you are tired of the color, then it is not at all necessary to remove the previous finish - instead, you can simply repaint it.
If the ceiling in the room is low, then it is preferable to use wallpaper in light colors, and always with small and dim patterns. This will visually raise the ceiling, and the light wallpaper itself will be suitable for almost any interior. In order to reduce the height of the ceiling, you need, on the contrary, to use dark colors. However, this is a matter of taste, so no one can stop you from using the option that you personally like for gluing.
Prices for non-woven wallpaper
non-woven wallpaper

You will also need the following tools:
- stepladder (or durable table, sawhorses);
- brushes;
- bucket;
- rags;
- a construction mixer (in extreme cases, you can use a regular wooden stick) to stir the glue;
- pencil;
- roulette;
- roller (the handle should be long and the length of the pile should be medium);
- a special tray for the roller (thanks to it the glue will be distributed evenly).

On a note! The strips must be laid parallel to the window. With natural light coming from the window, the joints will be less noticeable. For this reason, trimming wallpaper should be done taking into account the longitudinal size of the room.
And one more thing: it’s better to do the gluing together. One will glue the wallpaper, and the other will hold the edges of the strips and make sure that the installation is done correctly. Although this can be done independently (by folding the canvas into an “accordion”), but only if you have a lot of experience.
Stage three. Preparing the ceiling
One of the main advantages of wallpapering is that it is not necessary to remove the old covering from the ceiling. But if there is whitewash, then it is advisable to remove it and then putty the surface twice. If there was already wallpaper on the ceiling before, they also need to be torn off.
If the working surface is uneven or has significant slopes, then it needs to be leveled (in especially serious cases, plasterboard is used for leveling). However, this again depends on your budget, as well as what kind of renovations you will be doing.
Prices for putty
putty

If wallpapering will be done on a puttied surface, then before starting work it must be properly treated. You can use an acrylic primer for these purposes, applying it to the ceiling with a regular brush.
When the primer layer dries (and this will happen quite quickly), you can begin directly gluing the wallpaper. Let us also note that priming the ceiling is an optional procedure, but wallpaper on a primed surface, which has been repeatedly proven, sticks, sticks and dries much better.
Be sure to sand down the dried primer. Also, the treated surface must be marked in such a way that the strips of material are glued at an angle of 90 degrees relative to one of the walls of the room. Seal the area where the chandelier will be hung using masking tape. Don't forget to turn off the electricity before gluing.

Stage four. Cutting the wallpaper correctly
It's no secret that to hang wallpaper, you first need to cut it according to the required sizes. For this reason, you should definitely know how to cut without ruining the material. Below is an algorithm of necessary actions.
First, take the roll and place it so that the front side “looks” down.
Using a tape measure, measure the appropriate length, then mark the location with a pencil.
Wallpaper glue prices
wallpaper glue

Where we put the mark, we bend the material (the front part should be on top) and smooth out the resulting bend.
At the end, we take a stationery knife and cut the strip along the bend (more precisely, along the inside of the latter).
Stage five. Draw a line for the first strip
When the ceiling is properly prepared and the wallpaper is cut into strips of the required length, we need to mark a line along which we will glue the first sheet of wallpaper.

To make the line as even as possible, we hammer in a couple of nails along the width next to the ceiling on opposite walls. We tie and pull the rope tightly between these nails, having previously rubbed it with chalk. Next, we pull back and sharply lower the rope - as a result, a white line will remain on the ceiling, along which we will glue the first strip.
Note! The line must be marked before the actual wallpapering begins.
Stage six. Let's start wallpapering
Here, a lot depends on the type of wallpaper chosen for the room. If we are talking about, say, vinyl or paper, then the glue should be applied directly to the wallpaper sheets themselves. If non-woven wallpaper is used, the adhesive mixture should be applied to the ceiling surface. The adhesive that was applied to non-woven wallpaper must be kept for several minutes, while for paper wallpaper this is unacceptable - the material should be laid on the ceiling immediately after applying the adhesive.

Let us add that the strips of material must be laid parallel to the window opening, as was already mentioned at the beginning of the article. Thanks to this, the joints will be practically invisible. When everything is ready, we get to work. For the convenience of visitors, the instructions are presented in table form.
Table. Pasting ceiling wallpaper.
| Steps, no. | Short description |
|---|---|
| Stir the glue. It must be very thick to securely fix the wallpaper. |
| Take the first strip and apply the adhesive mixture to it, spreading it from the center to the edges. It is important that the glue never gets on the front of the wallpaper. |
| It all depends on how many people are doing the pasting. If you do this alone, then fold the glue-coated strip into an accordion shape, then glue along the previously marked line, gradually straightening the material. As you glue, smooth the material with a roller or a special smoothing brush. If two people are working, then one must climb onto the trestle, holding the edge of the strip. The second one at this time should hold the second edge and monitor the process. |
| Now we squeeze out the remaining adhesive solution and air from under the wallpaper strip. For this purpose, we take a clean roller and roll it, moving from the center to the edges. To remove excess glue, use a sponge or rag. |
| We perform similar actions with the remaining wallpaper strips. Difficulties here can arise only with the adjustment of the adjacent strip to the already glued one. We do this end-to-end, without overlap. If there is some kind of pattern on the wallpaper, then we need to combine adjacent stripes (we need to take care of this at the stage of cutting the material). |


Note! There should be no drafts in the room during gluing. It is recommended not to open windows and doors for several days after completion of work.
If you work alone, you can make yourself a convenient device designed to support the strips from a plasterboard profile, connecting it with the letter “T”. The video below clearly shows how to wallpaper a ceiling yourself.
Video - Wallpapering the ceiling with your own hands
You can use ceiling plinth to seal joints.
Common mistakes when gluing
The most common defect is material lag. This can happen after gluing it to old and peeling plaster. To avoid this defect, you must first remove the layer of plaster or paint. This is especially true in the case of lime or chalk whitewash. After removing the old coating, the surface must be treated with fixing paint.
When gluing, it is advisable to apply glue both to the ceiling and to the wallpaper. As a rule, special adhesive solutions for heavy types of this material are used for this. Moreover, it is recommended to dilute the glue somewhat thicker than indicated in the manufacturer's instructions. The ceiling surface itself should be treated, and the smaller the thickness of the wallpaper sheets, the more careful the alignment should be. If thick textured wallpaper is used, then leveling can be done less carefully, since small defects will not be noticeable. Sanding and priming, as noted earlier, will help improve grip.
Prices for suspended ceilings
suspended ceiling

Pay special attention to air bubbles under the material, as they will be especially noticeable when the lights are on.
Finally, to avoid getting wet through, you should not soak the wallpaper for too long, and the glue layer should not be too thick.
Rules of care
To extend the life of the wallpaper, you can coat it with varnish. Most paintable wallpaper can easily withstand at least several stains, so this finishing option is extremely economical. And if the wallpaper comes off, coat the fallen edges with glue and press them to the surface with a clean roller.
As for embossed wallpaper, they are distinguished by the fact that they absorb dust and unpleasant odors well. For this reason, such material needs periodic cleaning, for which you can use a vacuum cleaner, dry cloth or brush. Moisture-resistant wallpaper can be wiped with damp cloths.
Video - Gluing non-woven wallpaper to the ceiling
Summing up
Actually, we can end here. We found out that gluing ceiling wallpaper is quite a difficult task, but if you wish, you can handle everything on your own. The main difficulty of the process is that you need to complete all the steps listed and described above. If you strictly follow the instructions, there should be no problems.
Of course, everyone has experience of gluing wallpaper on a wall: after all, this is one of the most popular options for decorative finishing in a modern interior. However, far fewer people know how to properly glue wallpaper to the ceiling. Despite the general similarity of the technological process, the latter option still has some features. We invite you to consider the entire process of gluing wallpaper to the ceiling in one instruction, starting from choosing the appropriate type and ending with creating special conditions for complete drying. And by clicking on the link below, you can read another instruction on how to install a plasterboard ceiling with your own hands.
Wallpaper selection


Any renovation begins with the purchase of materials, so before you start gluing wallpaper, it would be a good idea to purchase them. Fortunately, there are no problems with this: the assortment is dizzying, but we are interested in the most suitable options for the ceiling surface. Here are some useful tips that you should definitely use so that you don’t torment yourself later with moaning about a wrong choice:
- If the concrete base of the ceiling is perfectly flat, and the room in which the gluing is planned is not associated with constant temperature changes, then it is quite possible to save money and buy ordinary paper wallpaper. Their disadvantages are considered to be the impossibility of masking even the smallest irregularities, but you are sure that your ceiling is perfect, right?
- uneven ceiling - non-woven wallpaper, remember this logical connection. This type of wallpaper allows you to hide any errors in the base, but avoid buying a canvas with a uniform color - it is better to prefer a pattern. In this case, to your guests - and to you too - your far from even ceiling will seem ideal;
- If there is a real problem with the concrete base and it is not possible to hide these defects, then it is optimal to stick wallpaper with a relief surface on the ceiling. This texture creates a beautiful uneven volume and at the same time reliably hides flaws in the base from prying eyes. And yours too;
- pay attention to the weight - it should not exceed 110g/m2, otherwise the risk of the glued canvas falling off will be quite high, and you will simply waste both precious time and equally precious money.


Preparation of tools and materials
At this point you will not discover America. In order to hang wallpaper, you definitely won’t need anything more than the original one. Here is a rough list of everything you should definitely have on hand:
- pencil;
- roulette;
- square;
- glue;
- glue bucket;
- paint brushes (wide and narrow);
- putty knife;
- roller;
- ladder.

Preparing the base

What to dissemble is the most tedious and unbearable process, on which, nevertheless, too much depends to be neglected. It’s sad, but it’s the old wallpaper that holds up best, which you need to get rid of as quickly as possible, and the worst thing is the wallpaper that has just been pasted. All this, of course, is a joke, but it does not at all negate the truth: in order to remove old wallpaper, you will have to soak it in warm water, and then carefully remove it, actively helping yourself with a spatula.


In the case where you are dealing with a bare concrete base, it is necessary to remove the applied plaster and prime the ceiling.


First, tape the place where the chandelier invoice will come out from. You can even turn off the electricity completely to ensure the complete safety of those involved in the repair.


Ceiling markings
The main question that we solve at this stage: how to glue the wallpaper - along or across the ceiling? The longest wall is taken as the starting point, but it would be more correct to rely on the window openings. If the room is not corner and you want to avoid the visibility of joints, then the best option is gluing perpendicular window.


The guide for the first fragment can be made with a laser level, but in its absence, a cord will work just fine. Remember that the mark should not be placed across the entire width of the canvas, but slightly less. Approximately 2 cm.

Preparing wallpaper

Cut the pieces to the required length. If you are dealing with a drawing, then when preparing you need to take into account its format in order to make a close to ideal fit.
Don’t be afraid to err on the side of enlarging the fragment - extra centimeters can always be trimmed with a knife without any hindrance.
The glue is applied to the canvas or directly to the ceiling in the case of non-woven wallpaper. However, experts advise fulfilling both conditions to be on the safe side.


Use a brush to spread the adhesive from the center to the edges.

Carefully fold the finished pieces with the coated side inward and leave to soak. Usually this takes 5-10 minutes.
Pasting

As you can see, the process itself is not particularly complicated, but in order to directly paste individual parts of the wallpaper onto the ceiling, it would be useful to have help in the form of another pair of human hands. This is due to the fact that you have to deal with large fragments that need to be securely fixed on a horizontal surface.

One pair of hands is good, but two pairs of hands are even better. One person stands on a stepladder and accepts a folded strip of wallpaper from the second. To properly glue the first strip, you need to align it with the line drawn with the cord and press it very tightly.


It’s not scary if part of the strip goes onto the wall - later you can simply remove it with a knife.


But not treating the pasted fragment with a roller is just scary. Therefore, we do not waste time and carefully smooth the applied strip with a roller, getting rid of bubbles in this simple way.

The second strip is glued end-to-end and processed with a roller in exactly the same way, as are all subsequent strips.


Particularly difficult for gluing are the corners and the place for the central lamp or chandelier.

- In the first case, you should accurately determine the position of the corner by making the desired mark with a pencil, and then separate a section of wallpaper and remove the excess fragment. This needs to be done quickly - otherwise there is a risk that the strip will stick and you will have to spend significantly more time on all this.
- In the second option, you should stick a strip of wallpaper around the hole for the chandelier and make a cut for the box, and then cut the wallpaper so that the mounted lamp or chandelier completely covers the cut out areas.

Attention! You should only connect the electricity not after you have finished gluing, but after the wallpaper has completely dried.

Drying
In order to speed up this process, care must be taken to create special climatic conditions: there should be no drafts in the room, and direct exposure to the sun's rays on the glued strips must be excluded.
If you used non-woven wallpaper, be patient - it takes much longer to dry than paper wallpaper. However, you now know how to glue wallpaper on the ceiling, and the long wait is a mere trifle for you!


Conclusion
Knowing how to glue wallpaper on the ceiling does not make you a professional in the field of repair - after all, this is a fairly simple and understandable process for everyone, the only difficulty of which is the need for assistance in feeding the sheets during direct gluing. However, the ability to quickly and efficiently update the ceiling surface in your apartment or house is a big plus for you as an owner who is able to decorate the interior in the most suitable way.


The modern world of design does not stand in one place: more and more new styles, finishing materials, and approaches to room design appear. Such changes lead to the fact that the room takes on an original and non-standard look. When decorating a house, various alterations are made that affect not only the walls, but also the ceiling. On the modern building materials market there is a wide range of finishing coatings for ceilings, but wallpaper remains the most popular.
Where to start
Wallpapering is a rather complicated process from a technical standpoint. The main difficulties arise when decorating ceilings, which is mainly due to the inconvenience of holding the wallpaper, and subsequently hand fatigue.
To hang wallpaper on the ceiling you will need:

The sequence of preparation and the process of gluing wallpaper on the ceiling will help you evaluate the provided video:
Features of ceiling preparation

The quality of gluing depends primarily on the preparation of the ceiling. It should be even and smooth. To achieve this result, you need to:
- priming the concrete surface;
- to level the ceiling, starting putty is used;
- priming again;
- finishing type puttying;
- sanding until maximum smoothness is obtained;
- and again priming.
Advice! After applying each layer, it is necessary to allow time to dry.

After preparation, all that remains is to draw a line, which will serve as a guide for correctly gluing the wallpaper. It will prevent deviations to the sides, and then the wallpaper will be laid evenly. An ideal option for drawing a line would be painting thread. It needs to be pulled and released. After this, a line will appear on the ceiling and then you can proceed to the next stage of work. You can see the best way to stick it on the ceiling in the photo:

Now comes the time to prepare the wallpaper. First of all, their required length is calculated. When cutting off the required pieces, it is necessary to take into account not only the distance between the walls, but also make allowance for bends in the corners. We do not recommend saving on this indicator; it is better to cut off a little more. The excess can be cut off later.
Another important point in correctly gluing wallpaper to the ceiling is adjusting the pattern. It's most comfortable to do this downstairs. After selecting the pattern, you can cut the required length and stick the stripes to the ceiling without any difficulty.

The next step is choosing the glue. Based on the wide variety of this product on the construction market, you will need to choose the type that matches the selected type of wallpaper. But the most basic requirements that are put forward for this material are a thick consistency and quick drying.
Wallpapering

Upon completion of the preparatory stage, you can begin the process itself. First, the glue is diluted, and then applied to the wallpaper using a special tool - a roller. It is recommended to smear it from the center to the edges. This process must be carried out very carefully, since glue can get on the front side, and it will not look very nice. For better impregnation, the canvas must be folded like an accordion or in half. The duration depends on the type of material chosen.

Correctly gluing wallpaper to the ceiling should be done slowly, carefully, focusing on the drawn line. Glue is applied to the area, and then the prepared piece is applied and gradually pressed to the surface. Using special tools, namely a roller or spatula, the material is smoothed and air is removed, as well as excess glue - with a sponge. Each subsequent strip is glued end-to-end to the first. The strips must fit tightly to each other, otherwise the joints will be visible. It is better to carefully coat the edges of the joints to prevent unwanted peeling of the wallpaper from the ceiling.
A special approach is required to properly apply wallpaper in the corners. A brush or pencil will help you achieve the desired result in this matter. These items allow you to gently press the wallpaper into a corner. After this, a small area is separated from the surface and an “extra” piece is cut out.

To make the wallpaper on the ceiling look perfect, special attention should be paid to gluing around the lamp. If there is a chandelier or other lighting object, it should be temporarily removed. A small cut is made in the canvas for wiring, and the wallpaper is glued directly to the surface. Excess areas are cut off carefully. After drying, the lighting fixture is installed in place.
Advice! The gluing should be done with the windows and doors closed. The absence of drafts is the key to successful work. Temperature is also of great importance. It should not be below +10C.
The following video will help you to glue wallpaper on the ceiling yourself:
Features of choosing wallpaper

There is a huge selection of wallpaper that can be glued to the ceiling. The best option is non-woven wallpaper for painting. After their installation, you have the opportunity to change their color several times. Such products can be remade up to 15 times.
Since non-woven wallpaper belongs to the heavy class, the glue must be selected appropriately for it. It should be made on the basis of methylcellulose, which guarantees reliable adhesion to the surface

You can glue fabric, liquid, and glass wallpaper to the ceiling.
The paper type is characterized by a high level of environmental friendliness and relatively low quality. The process of gluing them is the simplest.

Very often a controversial question arises: is it better to paint the ceiling or stick wallpaper? The answer depends first of all on people's preferences, and then on the right choice. Wallpaper should be selected to match the interior of the room, since each of them has its own characteristics.
Thus, in order to paste wallpaper on the ceiling correctly and beautifully, you need to prepare: stock up on the necessary tools, purchase glue, wallpaper, cut them into pieces, and also watch a video tutorial that will help you learn all the nuances of such a difficult task. With some effort, the result will always be positive.
How to properly glue glass wallpaper to the ceiling is shown in the video:
Perhaps few things evoke such awe as wallpapering a ceiling. After all, the position is uncomfortable, your hands get tired, and if you do something else incorrectly, then this process simply turns into a nightmare.
Listen to the tips below, and then you will be able to understand how to wallpaper the ceiling with minimal losses.
Preparatory work

All furniture must be removed from the room during renovation. If this is not possible, then move it to one corner and cover it with polyethylene.
You also need to think about a reliable stand with which you can reach the ceiling.
First of all, we prepare the wallpaper, glue and tools - a wide brush for applying glue, a roller for processing seams, a wallpaper brush and scissors.
We clean the ceiling surface from old decorative materials:
- dye,
- wallpaper,
- whitewashing, etc.

Cut the wallpaper to the desired length and stack it with the wrong side up.
Apply the glue with a wide brush first to the middle of the canvas and then carefully spread it over the entire surface. Make sure that the layer of glue is uniform.
Carefully fold the coated fabric like an accordion, making folds about 30 cm deep. The coated side should not touch the front.
Leave the folded canvas for a few minutes so that the glue is absorbed into the paper, so it will be more pliable. There is no point in delaying the process, otherwise you risk getting a fabric that is too soft and may tear.
When climbing on a stepladder or other stand, take with you scissors, an upholstery brush and a seam roller. You should have them with you to glue the wallpaper to the ceiling and smooth it thoroughly.
Choose work clothes that have many pockets, then you will always have a roller and scissors at hand.
Also, take something with you to support the “accordion” to avoid tearing the canvas. This could be a broom wrapped in plastic, a leftover roll of wallpaper, or a cardboard roll from under packaging foil.
Hold the support roller and accordion with one hand, while with the other hand carefully apply the upper section of the canvas to the ceiling surface, focusing on the drawn reference line.
Then press this section tightly and smooth it with a brush from the middle to the edges. Please make sure there are no wrinkles or bubbles.

Near the wall, press the edge of the wallpaper into the corner with the blunt side of the scissors, so you will mark the cutting line. Then slightly move the canvas away from the surface of the ceiling and cut along the break you marked. This way you will achieve a smooth, neat cutting line.
When you wallpaper a ceiling and come across a chandelier on your way, make a cross-shaped cut in this place to avoid unevenness. Later, the chandelier cap will cover this cut.