How to whitewash the ceiling with a water-based emulsion without streaks. How to paint a ceiling without streaks: the choice of paint, techniques, execution. Different shade of stripes
Read also
Whitewashing is the most elementary of all finishing works and an ideal option for refreshing a room. However, this type of processing is rarely used today. When you have decided to freshen up your home by whitewashing the ceiling, it is important to figure out how to do it right. Today we will tell you what methods of whitewashing exist and how to carry out repairs on your own quickly and efficiently.
Preparing the ceiling for whitewashing
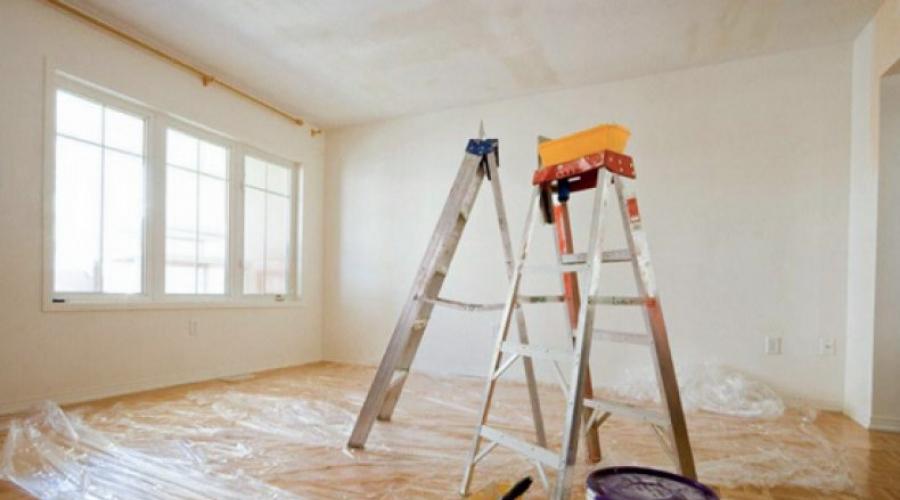
Before work, it is necessary to prepare the room: remove excess furniture or cover it with polyethylene, remove lamps, chandeliers, cornices, prepare tools and accessories.

Removing old whitewash
To apply fresh whitewash, you must first remove the old coating. The easiest way is to wash it off with water. To do this, wet a small area of the ceiling using a brush, roller or spray gun. When the previous layer swells, it is scraped off with a spatula, spatula or scraper. This manipulation is carried out on the entire area of \u200b\u200bthe ceiling.
Important! To enhance the removal effect, you can add a little citric or acetic acid to the water.
The previous layer of white can be quickly removed using a grinder.. However, in this case, you should protect your eyes and respiratory organs from dust.

Removing traces of dirt
After the old paint layer is removed, the ceiling is carefully inspected for rust spots, mold, grease and other contaminants.
Rusty marks and drips can be washed off with a suspension of copper sulfate. Ordinary stains are simply washed off with water, and the soot is cleaned with a solution of hydrochloric acid (3%).

Fat is removed with soda ash dissolved in warm water.
Leveling process
Cleaning of stains and old whitewash is important before the process of refreshing the room itself., but in order for the white to lie evenly, the entire ceiling should be repaired, repairing cracks and other flaws with cement-based putty.

Ceiling joints are glued with a special tape and then puttied. When the ceiling dries, putty places are treated with sandpaper and a primer is applied. Only after it dries out (not earlier than in a day) do they start work.
Did you know? At with The word “repair” has French roots, originally it had to do with the cavalry units of the army. "Repair" meant replacing old horses with young ones.
Choice of whitewash
You can cover the ceiling in several ways: with chalk and lime. Both materials are environmentally friendly, but each of them has its positive aspects and disadvantages.
Chalk
This material is suitable for those who aim to achieve the maximum depth of ceiling whiteness. Ground building chalk meets all sanitary and hygienic standards, does not cause allergies and is ideal for processing both residential and auxiliary premises, and for the hallway.

Among the disadvantages of the chalk solution, it is worth noting that over time it gradually crumbles, leaving excess dust in the room. In addition, this whitewash is not waterproof and is completely unsuitable for finishing work in the bathroom and in rooms with high humidity.
Important! If the ceiling was originally covered with lime, then it is not recommended to process it with chalk, since later stains may appear on the surface, which will seriously spoil the appearance.
Lime
This material has a high bactericidal quality, good resistance to moisture and well masks minor surface defects.

However, when decorating bedrooms and especially a children's room, one should take into account the individual reaction of residents to slaked lime. It can cause allergies.
Tool preparation
Qualitatively and evenly, the ceiling can be covered with a sprinkler, roller or brush. Beginning craftsmen should not use an airbrush, as there is a danger of splattering the walls. It is better to give preference to a maklovitsa brush.

It should be made of organic materials with a pile no shorter than 15 cm. Before finishing, for several hours, the brush is soaked in water to make it softer and stronger. The advantage of such a tool is that the whitewash is easily washed off from it.
The roller is also good for beginners. It allows you to quickly and efficiently carry out finishing work. When purchasing a roller, you should take care of the pallet into which the whitewash will be poured.
Did you know? For gluing stones during the construction of the Great Wall of China, a mortar mixed with rice porridge was used.
If you already have skills in applying the mortar or the surface area is quite large, it is better to use a spray gun, vacuum cleaner or garden sprinkler.

whitewashing process
So, the material is selected, the ceiling is prepared, you can proceed to the coating process itself.
Solution preparation
Based on the selected material, the specifics of the preparation of the solution are also different.
Chalk based
To prepare the chalk solution, you will need (per 10 sq. M surface):

- 5 liters of warm water;
- 30 g of glue (carpentry or PVA);
- 2.5-3 kg of chalk;
- 15-20 g of blue (used to prevent the appearance of yellow spots).
The consistency of the chalk mixture should be such that it does not drain without a trace from the object.
Important! In order not to overdo it with the amount of chalk, it is added in small portions, reaching the required consistency.
based on lime
For lime preparation you will need:

- lime - 2.5-3 kg;
- food salt - 70-100 g;
- aluminum alum - 150-200 g;
- water.
Video: Cooking whitewash for walls
Methods for applying the solution to the ceiling
There are three main ways to whitewash the ceiling. All of them are easy according to the method of execution, but some nuances should be taken into account.
brush
The easiest and most popular way to apply whitewash on a small area ceiling is a maklovitsa. By dipping the brush into a container of white, they make W-shaped gestures over the surface, thus applying layer after layer.

When applying the mortar with a brush, it should be remembered that the first level is applied from the window, and the second - vice versa, so that there are no brush marks left.
Roller
If you paint with this tool, then the whitewash will lie flat, no streaks or plaques will form. To achieve the desired effect, the solution will have to be applied in two layers. The second layer is applied after the first one dries.

Only one roller will not be enough. Additionally, you will need a container for the solution, some kind of object for stirring and a special paint tray. In addition, you will have to stock up on a small brush to cover the ceiling at the joints - it will not work neatly with a roller.
The main advantages of the roller:
- whitewash material is saved;
- the coating goes evenly, without streaks and streaks;
- no bristles remain;
- if the roller is equipped with a long handle, a stepladder is not needed;
- high performance over large areas.
sprinkler
You can apply whitewash with a spray gun (sprayer) or a vacuum cleaner (if there is a special nozzle). If you carry out the procedure correctly, you will get a good result.

The device works like this: under pressure, air enters the spray gun, takes the required amount of white and sprays them along with the air.
To regulate the supply of paint, there is a special hole on the sprayer, when closing and opening it, the intensity of the jet is regulated.
Before painting, the solution is thoroughly mixed, poured into a container and closed.
Important! The container must first be moistened. This ensures better adhesion of the mixture to the surface.
When applying whitewash to the ceiling, be sure to monitor the surface, trying to prevent the appearance of drops, which then lead to stains.

To evenly apply the paint, it is sprayed in a circular motion. In this case, the spray gun must be kept at a distance of 70-100 cm from the surface.
For a better result, you will need to apply 2-4 layers, which will hide minor defects.
Solution application technology
Whatever method of whitewashing you choose, there are general rules for the work:

- During drying, drafts and open sunlight should be avoided. Otherwise, there is a high risk that the paint will peel off.
- Lime mortar is best applied to a wetted ceiling. Then the whitewash will lie better and will not leave streaks.
- You shouldn't rush. Layers should be applied in even circles.
- Despite the chosen method of finishing, you should first brush over the joints and in all corners, and only then proceed to the main work.
- Do not make the composition too thick - the consistency should resemble fresh sour cream. Otherwise, the paint will not lay down evenly.
- For a homogeneous layer, all components are filtered, freeing the solution from excess debris and lumps.
- At least two layers should be applied, observing a technological break between each. So you can achieve uniform whitewashing.
- It is desirable to remove the previous whitewash completely. Then the chances of the absence of stains and stains will increase.
- The overlaps between the layers should be 4-5 cm. This will save you from unpainted areas.
Did you know? Chalk is one of the components of the earth's crust. The percentage of its content in it is 4%. And more than 20% of sedimentary rocks are completely composed of chalk and limestone.
Precautionary measures
Compliance with safety regulations is required for all types of repair work. And whitewashing is no exception. First of all, you should protect the body, eyes and respiratory organs. Therefore, finishing must be done in goggles, a respirator (can be replaced with a gauze bandage soaked in water), gloves, a scarf and overalls (ideal - overalls).

As you can see, do-it-yourself whitewashing is feasible for anyone who decides to refresh their home. By following the above rules, even a beginner will be able to finish the ceiling almost perfectly.
To paint the ceiling with water-based paint without streaks, you need to know some of the nuances and rules. The choice of materials and tools is also important.
Today, paints are widely used to finish the ceiling in apartments. The popularity of this material lies in the fact that it is highly resistant to external factors. The painted ceiling is easy to wet clean. Painting a ceiling is just as easy as whitewashing. Today we will look at how to properly paint or how to paint the ceiling with water-based paint without streaks.
Before proceeding with the direct finishing, it is necessary to select the material. When choosing it, you should pay attention to the microclimate of the room in which it will be used. This will create a strong and durable coating.
The most common option is water-based paints. They are best suited for decorating living rooms. The reason for this popularity is that water is used as a solvent. And this means that when painting and drying the coating, harmful fumes will not be released into the air. Also, water-based paints dry very quickly. So, the surface will be ready within a day after staining.
As for the choice, today on the market you can find several types of water-based paint:
- silicate. The basis is silicate glue. They have a low cost and are ideal for painting damp rooms. The only drawback is the instability to abrasion. The finish is not suitable for cleaning with water.
- . Compared with the previous material, they have a higher resistance to abrasion. But, they are not adapted to cleaning with water. Finishing coating poorly resists high humidity. So, even splashes of water can leave traces that violate the aesthetics of the coating.
- Mineral. The composition of the substance contains cement or lime. Often used for finishing brick and concrete structures. The only drawback is the fragility. The cover will need to be updated periodically.
- Acrylic. The substance based on acrylic resins is very resistant to abrasion, as well as temperature extremes and high humidity. Therefore, experts recommend using this option for finishing the ceiling in rooms such as bathrooms and kitchens.
- Silicone. Paint based on silicone resin. It can be used to hide small cracks. Ideal for wet areas. Easy to apply and highly resistant to negative environmental factors. The only drawback is the high cost.
As you can see, there is a wide range of such finishing material on the market today. Therefore, the choice must be approached very carefully.
Choosing a tool
High-quality painting means uniform application of paint to the structure. And to do this, you need to choose the right tool. So, what tools will you need for coloring:
- Wide cushion. It is best to opt for cloth products that have a long handle and medium pile length. Used to finish the main area.
- A small, long-haired roller or brush. Used for painting hard to reach places.
- Paint tray.
- A piece of wallpaper. It is used in order to evenly distribute the composition on the roller.
This set of tools is quite enough to carry out high-quality painting of the ceiling with a water-based composition. Now you can start preparing the surface and the room for finishing.
Incorrectly used tools and materials can reduce the quality of finishing work. Therefore, their choice must be approached very carefully. Here you need to take into account many factors, ranging from the quality of the material and ending with the characteristics of the microclimate in a particular room.
Surface preparation
Before proceeding with the decoration, it is necessary to carefully prepare the surface itself and the room. Remove all furniture from the room. Large items, such as a cabinet, are installed in the center. The space must be organized so that there are no obstacles to the work.
It is advisable to cover the objects that remained in the room, the floor and walls with a film. In the future, this will save you from thorough cleaning after painting. Now you can proceed to the direct preparation of the surface. The preparation process is carried out as follows:
- The ceiling is thoroughly cleaned of the old coating. If we are talking about the elimination of whitewash, then it can be defeated with plain water. The old finish must be carefully removed. This will ensure a quality application of the new finish.
- The surface is leveled with putty. Before applying putty, the surface must be treated with a primer solution. This will ensure a secure fastening of the putty. After that, you need to carry out grinding.
Painting can only be done after the surface has dried.
Preparation for painting
Paint application technology
To paint the ceiling with streak-free water-based paint roller0430, you must follow some rules. The first layer is applied with liquid paint. This allows you to achieve maximum adhesion of the substance to the ceiling surface. The roller is moistened in the tray and carefully rolled along the edge to eliminate excess material. You can also use a prepared piece of wallpaper for this.
Painting must start from the corner and move along the wall. A small roller with a long pile is used under the wall. The main area will be covered with a large roller with medium pile. To facilitate the work, it is better to give preference to a tool with an elongated handle.
Layers must be applied parallel to each other. In this case, the overlap should be no more than 5 cm. To avoid the formation of streaks, the application of the material should be carried out in one direction. When the first layer is applied, the surface must be inspected from different angles. This will allow you to identify unshaded areas.
These areas need to be repainted. In this case, the movements should be slow and coincide with the previous direction. If the first layer has already dried up, then you should not paint over problem areas, as this will negatively affect the appearance of the finishing coating. It is best to mark this place and pay more attention to it when applying the second layer.
The second layer is applied perpendicular to the first. And this should be done only when it is completely dry. If you apply a second coat on a dry surface, this will lead to the formation of streaks. To know exactly when you can start finishing staining, you need to study the instructions on the jar with the substance. This indicates the time for its complete drying.
When carrying out painting work, it is worth considering the features of the paint substance. This applies in particular to the manufacturer of the material. So, high-quality paints can be applied only in two layers, and less high-quality paints can be applied three times. Compliance with the technology will ensure uniform and high-quality application of the finishing material.

There are many options for finishing the ceiling, but whitewash is the most popular of them. It is inexpensive and looks very good if the paint has been applied correctly. Usually the ceiling is recommended to be thoroughly cleaned of the old layer of lime or chalk before applying a new one. However you can put the next coat of paint and directly on top of the old one. The main thing is to know how to do it in order to guarantee a good result. There is nothing complicated here - having the necessary knowledge, anyone can handle it on their own, without spending a lot of time doing all the necessary work.
How to whitewash the ceiling?
- chalk;
- lime;
- water-based paint.
Each of these options has its pros and cons.
Table. Materials for whitewashing the ceiling.
| Material | Advantages | disadvantages |
|---|---|---|
| Chalk gives the ceiling an exceptional, radiant whiteness, so the room will look very good. | This material gradually crumbles, thus, additional dust appears in the room. In addition, it is not waterproof, so it is not suitable for painting the ceiling in the bathroom. |
| Lime whitewash kills the fungus, so in rooms where it is present, it is worth using it. In addition, lime is resistant to moisture and is well suited for painting the ceiling in any room, including the bathroom (and this is where the fungus can be found most often). In addition, lime whitewash hides small surface defects, sealing cracks and cracks. | Lime quite often causes allergic reactions. It cannot be perfectly white, unlike a chalky solution. |
| This type of paint has an excellent appearance, while it is the water-based emulsion that fits very well on the old coating, it adheres perfectly to the existing whitewash and does not begin to peel off over time. | Water-based paint has only one drawback - it is necessary to carry out work with its use at a temperature not lower than + 5 ° C, but this does not matter when painting the ceiling in a room. |


If you do not want to wash off the old whitewash, you need to keep in mind that lime cannot be applied to the chalk and vice versa - otherwise the paint will not lie well, dirty stains will form on the ceiling.
On top of the chalk, you can put a new layer of chalk or water-based paint, and lime can be covered with the same emulsion or lime. At the same time, it must be borne in mind that enamel and oil paint are absolutely not suitable for painting over an old layer of lime or chalk.

Instruments
There are three main ways to apply whitewash for which you can use:
- roller;
- brush;
- spray.
If do roller painting, the paint will lie in an even layer, there will be no streaks or stains. In order to get a good whitewash using this tool, the coloring composition will need to be applied in two layers. In addition to the roller itself, you will need a container for the solution, something for mixing and a paint tray. You also need a small brush to put paint on the sections of the ceiling at the junctions with the walls - it will not work with a roller to do this carefully without staining the walls.
Whitewash brush can be purchased at every building supply store. It is inexpensive. While brushing, the paint splashes heavily, so you need to carefully protect the furniture in the apartment, as well as your eyes.

With a sprayer whitewash can be easily applied in a very neat even layer. In the event that the paint will be applied by sprayer, care must be taken to ensure that it is free of lumps. Its consistency should be more liquid than that of whitewash, which is to be applied with a brush or roller.
How to choose water-based paint
If everything is more or less clear with chalk and lime, then choosing a suitable water-based emulsion is a more difficult task. There are many varieties of these paints, which differ in composition and properties.
- Polyvinyl acetate water emulsion - the most affordable.
- Paints with acrylic additives- Most Popular. They are suitable for any surface and are resistant to abrasion (although this property is not so important in the case of ceiling paint).
- Silicone water-based paint fits well over old whitewash, even without the use of a primer. It has a high vapor permeability and is perfect for painting the ceiling in the bathroom or in the kitchen. This type of coloring composition will reliably protect the surface from the appearance of a fungus on it.
- Water emulsion paints with latex have very good water resistance, they can be washed with detergents. For the price they are superior to all other water-based emulsions.

In order to make the best choice, carefully read the label before buying. It should indicate the purpose of the paint, the degree of its hiding power, the consumption per square meter and other parameters that you need to pay attention to. A correctly selected water emulsion will make it possible to make a snow-white and durable coating, it will not turn yellow over time and is guaranteed to protect the ceiling from the appearance of fungus.
Painting with water-based paint
In order to get a good finish over the lime, it is best to first coat the old layer with an acrylic primer. After that, you need to check the surface for strength by trying to scratch it. If it does not crumble, then you can apply paint.

But when painting over chalk, this is not necessary - water-based paint will bind it well and will hold on even without soil.
Before starting work, you need to prepare the room. It is necessary to take out or carefully cover with a film all objects so that they do not get dirty with paint.
If you are applying paint with a brush, lay the strokes first perpendicular to the windows, then parallel. If the last layer is laid parallel to the light source, the stripes will not be visible after drying.
Painting with a roller is a simpler and more convenient process in which you need to follow these steps:
- pour the paint into the paint tray;
- dip the roller into the bath, and then roll it along the slope, evenly distributing the paint over the surface and allowing the excess to drain;
- lay the first coat of paint perpendicular to the windows;
- wait for the composition to dry completely;
- then add a second layer, which should be parallel to the window opening;
- carefully paint over the sections of the ceiling at the junctions with the walls with a brush.

Applying paint from a spray gun is even easier - just put three even layers, you do not need to follow the direction. The main thing is not to miss a single square centimeter of the surface when applying each of them.
Chalk painting
It is not difficult to prepare a chalk solution for painting the ceiling; for this:
- for 10 liters of water you need to take 5 kg of chalk and 50 g of wood glue;
- the consistency of the solution should be such that it does not drain from the knife, but if the mixture pours from the blade, you need to add more chalk;
- you can add blue to the composition, in which case the ceiling will be snow-white, without a yellow tint.

The technology of painting with chalk is fundamentally no different from the technology of applying a water-based emulsion. First, choose one of the options - application by brush, roller or spray gun. Then, in the process of painting, do not rush and carefully make sure that the composition lays down in an even layer. In this case, the new look of your ceiling will definitely please you.
Lime mortar painting
In order to make a solution of lime for painting the ceiling, you need:
- take 2.5 kg of lime, add 100 g of salt soaked in water and a small amount of blue;
- after mixing all the components of the mixture, add water to them so that the total volume is about 10 liters.

The basic application rules are the same as for chalk and water-based paint.
Important Points
When whitewashing the ceiling, it is necessary to take into account the specifics of the room. For example, in the bathroom you need to use a special composition that will be resistant to moisture and protect the ceiling from the appearance of fungus. Otherwise, the paint will quickly lose its appearance and may even begin to crumble quite quickly.
It is also important to keep safety in mind while painting. In order to avoid getting whitewash in the eyes, on the skin and in the respiratory tract, you need to use goggles, rubber gloves and a respirator. If this is not done, the coloring composition can cause allergies or even chemical burns.
How to wash old whitewash from the ceiling
Although the ceiling can be painted over old whitewash, the best option for obtaining a quality finish is to pre-clean and level the surface. Old whitewash, which does not hold well and peels off, must be washed off. If this is not done, you will not have to count on a good result. If the layer of lime or chalk that is already on the ceiling is thin, even, and holding up well, painting directly on top of it would be a good option.

In order to wash off the chalk whitewash, you must:
- take a foam sponge and moisten it in water so that it is wet, but drops do not drip;
- after that, it is necessary to run a damp sponge over the ceiling over and over again, washing off one layer after another, while it must be moistened as often as possible;
- then you need to carefully wipe the ceiling with a wet cloth - you also need to dip it in water as often as possible.
Washing off the lime layer is a little more difficult because:
- the first step is to moisten the entire ceiling; for this you can use a spray gun;
- using a spatula or scraper, it is necessary to remove the soaked layer of lime;
- and finally, you need to thoroughly wash the ceiling with a damp cloth or sponge to remove lime and dust from it.

Removal of old whitewash: a - moisten the ceiling, b - remove the soaked coating.
It is better to work in sections - while you are removing soaked lime from one of them, the other will be saturated with moisture. Thus, you can quickly go through the entire ceiling.
In order to wash off the old whitewash, you can also use special compounds.
- In the hardware store you can buy a special wash. It must be applied to the ceiling with a sprayer. When it dries, a crust will appear on the ceiling, which must be removed with a scraper. After that, the surface will simply need to be washed with a cloth.
- Another option is to add vinegar to the water (one large spoon per 5 liters will be enough) and 50 ml of bath foam, mix thoroughly and apply to the ceiling surface. After waiting 20 minutes, it can be cleaned with a scraper and then rinsed thoroughly with a wet cloth.
- Another way is to make a paste by mixing water with flour. It must be applied to the surface of the ceiling and allowed to dry, after which you can easily remove the whitewash.
Video - Removing old whitewash
Whitewashing the ceiling by the hands of professional craftsmen
Despite the fact that it is not difficult to whitewash the ceiling on your own, you should not discount such an option as contacting a professional master.
This solution is good because:
- it will help save time;
- turning to a good master, you can be sure that you will get an excellent result;
- the master will need a minimum of paint in order to whitewash the ceiling.
At the same time, as mentioned above, whitewashing actually does not take much time. Therefore, in order to save time, it makes sense to contact the master in the first place if you are a busy person and are used to always hiring professionals to perform certain jobs.

Due to the fact that the master uses up a minimum of paint, contacting him can cost a little more than painting the ceiling with your own hands. The main thing in this business is to find a really good specialist who, at the same time, will take a little for his work. The main thing is not to hire hacks who, working through their sleeves, can make whitewashing even worse than you would have done - such masters also come across. They take little for their work, but such savings will cost dearly in the end - you will either have to redo everything, or stay with a poorly painted ceiling.
Whitewashing a ceiling with old paint is a simple and inexpensive way to improve a room's interior. You can not always use it, but if the previous layer is thin, even and holds well, chalk, lime or water-based emulsion applied directly to the old paint will hold well. If you approach the matter correctly, your new ceiling will become really beautiful, and such a painting result will please you for more than one year.
Video - Whitewashing the ceiling with your own hands
Ceiling painting is the most common way to decorate a room. It provides cleanliness and tidiness without requiring excessive costs.
Any person is capable of carrying out such an event on their own, but for this it is necessary to carefully prepare the surface, as well as choose the right paint and tool.
For painting ceilings in rooms, water-based type paint is most often used. It is a polymer suspension dissolved in water. After evaporation of moisture, a dense, sufficiently strong and moisture-resistant film remains on the painted surface.
The following advantages contribute to the popularity of water-based paint: harmlessness to humans during painting and during operation, no pungent odor, vapor permeability, ease of application and subsequent care.
Currently, water-based paints are presented in a wide range and differ in composition, purpose, and specific properties. The following main varieties are distinguished:
- polyvinyl acetate base. This is the cheapest option, but it is not resistant to moisture, and therefore can only be used in completely dry rooms.
- acrylic paint considered one of the most common varieties. It has insufficient resistance to moisture and steam, which limits its use in rooms with high humidity. Ideal for living rooms and bedrooms.
- silicate paint.(silicate) is introduced into its composition, which significantly increases the water resistance. It has good adhesion with plaster, concrete floors.
- Silicone paint. The main advantages are increased vapor permeability, dirt repellency, elasticity. It can be used in kitchens and bathrooms, applied directly to plaster without additional primer. The main disadvantage is the high cost.
- latex base. Paints with the introduction of latex have high strength, elasticity and water resistance. They can be washed with almost any detergent. However, latex emulsion is the most expensive option.
Water-based paint differs in the nature of the resulting coating:
- Matte type. It does not give glare on the ceiling, masks small surface defects well, and contributes to the visual effect of increasing the height of the room. Disadvantages - rapid contamination and difficulties with washing.
- Glossy type. This paint is easy to clean and has an increased resistance to abrasion, attractive appearance. The main drawback is the visibility of even small cracks, as well as glare from lamps.
- Semi-gloss or semi-matte type. Such paints occupy an intermediate position between these options. They are devoid of their shortcomings, and therefore enjoy increased attention.
When choosing a water-based paint, you should carefully study the instructions on the bank. It clearly indicates the purpose and features of the material, incl. the possibility of wet cleaning and the use of detergents.
In addition, the degree of coverage of the surface must be taken into account. This will avoid excessive paint consumption.
Preparatory stage
The quality of the final, finishing coating largely depends on the correctness and thoroughness of the preparation of the ceiling surface for painting.
The preparatory stage includes the removal of all previous coatings, the elimination of defects and surface leveling, providing improved paint adhesion by applying a primer, cleaning from dirt, grease and dust.
Removing the old layer of paint
The first step in preparing the ceiling for painting is to remove the previous coatings - whitewash or paint. The more thoroughly the cleaning is carried out, the easier it will be to level the ceiling.
The most commonly used technology is:
- The ceiling is abundantly moistened with a foam roller or a spray bottle. Humidification is carried out 2 times with an interval of 15-25 minutes, and so that the water soaks the previous coating well.
- Next, you should provide a draft in the room, which will accelerate the peeling of the coating.
- Without waiting for the ceiling to dry, the swollen layers are removed with a spatula.
- After completion of the procedure, it is recommended to treat the surface with a solution of copper sulfate (4-5%), especially in places where there was mold, rust, water smudges.
If the old coating is held firmly and cannot be easily removed, then aggressive solutions can be used. The following options are recommended:
- 2-3% hydrochloric acid solution;
- a mixture of lime and drying oil in a ratio of 20: 1, diluted in water to the desired consistency;
- water-lime solution of a thick consistency with the addition of denatured alcohol (50 ml per 1 liter).
The solution is applied to the ceiling with the utmost care and aged for 12-20 minutes. The procedure is carried out 2-3 times until the coating is completely dissolved.
Old whitewash (chalk or lime) from the ceiling is simply washed off. To do this, you can use a paint roller, abundantly moistened with water. In the presence of a thick layer, you can use a spatula. The final flush is provided with a sponge.

Ceiling leveling
After removing the old coating, a thorough revision of the ceiling is carried out, identifying all defects. Cracks need to be patched up. To do this, they are slightly expanded with a spatula, and then filled with putty. Concrete sags are removed with a chisel or chisel.
The leveling of the surface for painting is carried out with a ready-made putty mixture for internal work of a thin layer overlay. It can be processed with fine-grained sandpaper. Usually putty is applied over the entire surface with a spatula and carefully leveled.
Sometimes whitewash adhesive putty is used, which is distributed over the ceiling with a roller. After puttying, the surface is sanded with sandpaper manually, with a trowel or with a grinder.
Surface primer
The final stage of preparing the ceiling - primer. The use of a deep penetration primer mixture ensures reliable adhesion of the paint layer to the ceiling base.
It is applied in a thin layer over the entire surface with a brush, roller or spatula. After the composition has hardened, the final grinding of the ceiling and cleaning of dust is carried out.
How to paint with your own hands without streaks?
In order to paint the ceiling without stripes, certain rules must be taken into account. After the primer has hardened and the preparatory stage is completed, you can proceed directly to painting.
painting tool
The ceiling can be painted using the following painting tools:
- Paint brush. To work on the ceiling, flat-type brushes are used, most often with natural or nylon-polyester bristles. It should be borne in mind that a good tool has a thick bristle that quickly restores its shape. The main brush is considered to be 150 mm wide. Difficult areas are painted with a medium brush 50 mm in size. To finish the corners and edges, you will need a 25 mm wide tool.
- Paint roller. For large ceilings, it is considered the main painting tool. The roller is selected according to the length of the handle and the size of the pile. When painting the ceiling, an elongated handle is used, but its specific size depends on the personal preferences of the master. The length of the pile of the coat depends on the type of surface to be painted: for a smooth ceiling, a short pile coat is used; when painting directly on plaster or drywall, preference is given to a pile of medium length; a roller with a long pile is needed when painting embossed ceiling surfaces.
- Electric spray gun. This state-of-the-art painting tool facilitates the process and improves the quality of the coating by applying thin layers with an even distribution of paint.
In addition to the main painting tool, you need to take care of auxiliary devices. First of all, when working with a roller, you will need a special container (tray) and a platform for distributing paint over a fur coat. For painting with a brush, you need a convenient, portable container for paint.
Staining rules
When painting the ceiling, the following rules should be followed:
- Staining is carried out with parallel strokes with overlapping stripes. The joints of the strips must be provided before the paint dries.
- Painting is done in 2 or 3 layers. The first layer of paint is applied parallel to the light flux from the window, and the second - in a perpendicular direction. If there is a third layer, it goes to the window. Each layer is applied after the previous layer has completely dried.
- Painting begins from the corner farthest from the entrance, followed by painting the joints with the wall.
- Work must be carried out only in good lighting.
If a poorly painted area is found, it should not be painted over separately. Such a site will be noticeable against the general background. In this case, you will have to apply another layer of paint to the entire surface. To detect poor-quality work, it is necessary to inspect the ceiling from different angles, from all sides.
Features of painting with a roller
The most common technology for painting the ceiling with a roller. To work, you will need 2 types of tools (wide and narrow roller), a brush 25-50 cm wide and a tray (bath) with an inclined platform. Water-based paint is poured into the tray, where the roller is lowered. To evenly distribute the paint over the fur coat, it is rolled several times on an inclined surface with light pressure.
The first strip is drawn from the far corner with a wide roller, retreating 4-5 cm from the wall. When painting, the tool is held at an angle of approximately 45 degrees and moves towards itself. Do not press hard on the roller handle. The next strip is applied in parallel with an overlap of 4-6 cm.
In the corner and along the wall, the ceiling is painted with a narrow roller, and directly the corner and the joint with the wall with a brush. If an excessive amount of paint is applied, then it is removed by rolling the roller with the paint already used up.
How to paint with a brush
When painting ceilings of a small area or complex shape, a paint brush 10-15 cm wide is used. The paint is poured into a small container, easy to carry and hold in your hands. The neck should allow free dipping of the brush into the paint. At the base of the tool, it is recommended to fix a paper cup or cloth to prevent paint from dripping.
When carrying out work, it is important to correctly measure the pressure on the tool. Excessive pressure leads to smudges. It should be uniform and optimal. The hand is held at approximately a 45-degree angle and is carried similarly to a roller. Narrow brushes are used to paint corners and joints.
Spray gun
Before using the spray gun, you must read the instructions for the device. According to her recommendations, the desired consistency of paint is prepared and the container is filled. The nozzle of the spray gun is located at a distance of 65-75 cm from the ceiling and is kept at the same height throughout the painting. Movement of a bar of the device is made smoothly and in regular intervals. It is important not to linger in one place.
Painting on plaster is best done with a spray gun. If it is not available, you can use a household vacuum cleaner with an air injection function. To do this, a special nozzle for whitewashing is put on the hose and a container with paint is fixed. The highest quality coating is obtained if a layer of primer from the thick consistency paint used is first applied to the plastered surface with a brush or roller.
Common painting mistakes
 When painting the ceiling with your own hands, the most common errors are:
- Peeling paint. Such a defect most often occurs due to excessive layer thickness or the use of too thick paint, as well as poor surface preparation. The error is corrected by washing off the defective area and applying a new coat of paint after the surface has dried.
- The appearance of a crystalline, saline plaque. The fault is the moistened ceiling base. The way to fix it is to thoroughly dry the ceiling, clean and putty the surface.
- Banding. It can occur with uneven pressure on the brush, the presence of defects on the surface.
- Poor quality painted surface folds, stains, tubercles). They occur when the concentration and consistency of the paint is incorrectly selected.
- Spots. Marbled, rusty, non-drying spots may occur. The reason is usually due to poor-quality preparation of the ceiling, when fatty areas, mold, moisture after flooding by neighbors, etc. remain on its surface.
- Color defects of various types. They appear when the pigment is unevenly mixed or low-grade dyes are used.
At detection of visible defects of painting it is necessary to remove this layer. Usually, water-based paint is washed off. Further, inaccuracies in surface preparation are eliminated, putty and primer are applied, and processing is carried out with special compounds. After the ceiling has been thoroughly dried, the painting procedure is repeated, but taking into account the previous mistakes.
You can paint the ceiling, in principle, with any paint and in any color. It all depends on the imagination of the owner of the premises. A white ceiling is the most common option, as white color gives a sense of space and elegance. The choice of compositions for coloring today is so great that without special knowledge it is very difficult to choose which one is specifically needed to obtain the desired result.
Peculiarities
When repairing premises, they mainly use:
- paints based on organic solvents;
- water soluble paints.


The compositions of the first group are characterized by a sharp unpleasant odor during application and drying due to the evaporation of resin esters and solvents included in their composition. In everyday life they are called oil, but this is a common name that has almost nothing to do with the actual composition. Among them are oil-alkyd, nitro-enamels and epoxy paints. After drying, they all form a durable film that is not washed off with water.


Such compositions for painting the ceiling today are used only in rooms not intended for domestic needs. They are applied on surfaces not treated with gypsum-based plasters and fillers (cement-based compositions only).


The second group includes paints, the solvent for which is water. Common to them is the consistency of the emulsion, which includes particles of polymers, pigment and water. They are classified according to the polymer used.
When painting, the surface dries to the touch in 1-2 hours, completely - in 6-8 hours, the emulsion does not smell during operation and drying. It is not a mistake to call such paints water-dispersion, since an emulsion is a kind of dispersion solution.
To apply a water-based coating, the initial surface must be carefully prepared. The composition of the mixtures for preparing the surface for painting does not matter.


Kinds
Water-soluble paints differ from each other in the type of polymer that is their basis, and there are:
- acrylic;
- latex;
- vinyl;
- silicone;
- silicate.

Silicone and silicate compounds are used where the surface needs to be given additional properties such as water repellency, antifungal protection, vapor permeability. They are semi-gloss, that is, slightly gleaming.


For painting ceilings in rooms intended for permanent residence, water-dispersion solutions based on latex, vinyl and acrylates are used. All of these compounds, after application, give a deep matte, matte, semi-matt, semi-gloss or glossy surface.
Silicone and silicate are used if the painted surfaces are exposed to aggressive environmental influences (water vapor, chemical fumes).


Water-soluble paints are produced in two types: base "A" and base "C". When buying, be sure to check this marking. What's the Difference? The white color of the coloring composition is given by the pigment titanium dioxide. The more it is in the composition, the greater the “hiding power” (translucence through the layer or the density of one layer) the composition has. Accordingly, with the help of such a solution it is easier to obtain a perfectly evenly painted surface with less consumption.
But since this pigment is not cheap, the price of the same volume from different manufacturers directly depends on its quantity.

Base C is translucent and intended for tinting in dark colors. On base A, which has titanium dioxide in its composition, it will not be possible to obtain a dark color, no matter how much tinting paste is added. All the same, the color will be in the pastel palette.


From the point of view of environmental friendliness and ease of use, there is practically no difference in water-soluble formulations. All of them are almost odorless, dry quickly. And performance characteristics depend on the amount of polymer that forms the basis of the paint. The smaller it is, the less resistance of the painted surface to washing and abrasion. This is usually reflected in the name of the paint in numbers.
If you take cans with the same name (of the same manufacturer), then marking 2 will mean ordinary, not very resistant paint. When painting with such a composition, tinted in color, after an attempt to wash the dirty area, a stain of a different color will remain.

No. 3 is more stable, there will be almost no stain. Paints with higher markings give a strong film that can be washed without problems and stains. The same marking usually applies to reflective performance. The higher the number, the more shiny the finished surface will be.

Surface preparation
To get a painted ceiling that looks like a stretch, that is, perfectly even in plane and color, its surface must be prepared.
Ceiling preparation includes the steps of removing the existing coating (whitewash or old paint) to the slab or drywall, sealing and gluing the joints between the floor slabs, if the slab is not solid, possibly plastering failed areas, puttying the entire surface with several types of putty to eliminate defects in the form pores, scratches, followed by grinding the resulting surface.


Preparation directly depends on the initial state of the floor slabs and the selected paint. In houses where people have lived for many years, they can be whitewashed and already once painted.
If the ceiling has been whitewashed, then the whitewash must be washed off. This is done with hot water, a roller, a spatula, a sponge and an old terry towel. The whitewash is wetted in sections with a roller with hot water once or twice, removed with a spatula, after which the floor slab is washed with a richly moistened sponge and wiped with a terry towel.


As a result of the correct removal of whitewash, a clean gray concrete ceiling should be obtained. It is acceptable if there is whitewash that has eaten into the pores. After that, the ceiling is puttied, depending on the chosen paint, from two (for deep matte) to five times (for glossy).

If the surface has been previously painted with a water-based paint, it is necessary to check how the old coating holds up. Sometimes, if the ceiling was done perfectly, it will be enough to wash off the dirt from it and paint it once in the direction of the light falling from the window.

To assess the quality of the old coating, the ceiling must be wetted by arranging a small draft. It is necessary to moisten up to two times, keeping for 30-40 minutes. If defects are revealed in the form of bubbles or delamination of paint, they are cleaned off with a spatula and a coarse abrasive. Defective places are puttied with a polymeric finishing compound, and after it has completely dried, they are sanded “to zero” with a painted surface.
Transitions and influxes of putty are unacceptable. A new coat of paint will emphasize them, the ceiling will be damaged.

Updating or repainting the ceiling is not difficult at all. To correct all the irregularities, you must first clean it, remove the chandelier and carefully primer.
Tool selection
To apply the coloring composition, you will need two rollers of different sizes, a soft brush, a bath with a corrugated surface for wringing, a telescopic extension.

The brush should be soft so as not to leave bristle marks. You should never buy fully synthetic brushes, as they become unusable after five to ten minutes of use. Natural bristles tend to "fall out" of the clip, remaining on the painted surface. The best option is a brush with mixed bristles. It serves for a long time, the pile does not lose.

The roller should not be foam rubber or synthetic thin thread. The first leaves bursting bubbles, which are then visible to the naked eye. The second loses the villi-threads, which are extremely problematic to remove. To paint the ceiling, a roller coat with a pile of various heights is selected.
The higher the pile, the more shagreen surface you can get. If you need a perfectly smooth ceiling, the pile height should not exceed 6 mm. Rollers with a very low pile (the so-called velor ones), if they are of poor quality by the manufacturer, will leave diagonal stripes from the seams on the ceiling surface.

A wide roller serves to roll the main surface, a small one rolls out the paint applied with a brush. This is due to the fact that the texture of surfaces painted with a brush and a roller is different from each other. If you do not roll out the coloring composition applied with a brush with a roller, then visually this place will look darker or lighter than the main surface. The pile height of the rollers should be the same.
The bath is necessary to wring out excess paint from the rollers in order to avoid uneven application. The telescopic extension allows you to paint the ceiling while standing on the floor, rather than crawling on a stepladder. You can also use a spray gun.


How to breed?
The puttied and sanded unpainted surface of the ceiling looks quite decent. Defects, if any, will appear only after applying a layer of paint. Amateurs believe that the paint itself is able to hide their shortcomings. This is a completely wrong approach. Vice versa, it emphasizes and reveals all the defects that remain after surface preparation.
Only after applying the first layer, you can clearly see all the scratches, small and not very pores, the influx of one layer of putty on another. Therefore, the first layer, which, in essence, is a surface primer, must be made with a highly diluted composition. It must be diluted in certain proportions.


If defects appear, they are eliminated, and after that the main layers of the coating are applied. If there are pores that are trying to hide with paint, then with each layer they will be visible more and more. As a result, the more poured on the defect, the more voluminous and noticeable it is. For the main coloring, the water-dispersion composition must be diluted if it is thicker than the consistency of kefir. Otherwise, you can get shagreen areas that differ from the rest of the ceiling surface.

Application
Before painting the ceiling, it is first “circled” around the perimeter, starting from the corner farthest from the window. With a brush, carefully paint over the joints of the ceiling and walls, capturing a strip from 4 to 6 cm wide, and roll out the paint after the brush on the ceiling with a small roller. If a ceiling plinth is provided, it is painted at the same time. This is due to the fact that it is simply impossible to paint over the corners well with a large roller. In addition, it can stain the walls or leave drops of paint on the baseboard.


The roller is wetted in the paint so that it is completely saturated with it. If at least a small, not wetted area remains, there will be “non-painting”. For uniform application, the roller must be wrung out after soaking so that the paint does not flow from it in a stream and does not drip everywhere. Since the primer was applied over the light, the second coat must be applied in a perpendicular direction, that is, already along the window.
The last layer must be applied in the direction of the light. You can paint in sections of 1 m by 1 m, with each subsequent square entering the previous one or in stripes to a width slightly greater than the width of the roller. In either case, the roller rolls until it is practically dry.

When all the paint collected with a roller remains on the ceiling, you immediately need to roll out on your own the possible paths of drops that form along the edges of the roller. If this is not done, stripes visible to the naked eye will remain on the ceiling. Each layer of paint is applied in one pass. If you apply in areas that will have time to dry, you will get visible borders between them. We must always remember that paint, like any material, also has its own thickness.


When applying the coloring composition with your own hands in perpendicular directions, non-painting of the surface is practically excluded. If, nevertheless, some of the sections “shine through”, correct it with a small roller, be sure to roll the paint dry so as not to get a stain that differs in texture from the main surface. All work must be done in stages.
For information on how to properly paint the ceiling without streaks, see the following video.
If it happens that when painting you overlooked areas on which more paint was applied than on neighboring ones, they will look like dark spots due to the higher relief. In this case, before applying the next layer, it is necessary to grind them with a fine abrasive.

If during the preparation of the ceiling small concave areas (pits) were invisible, after painting they will look like spots due to the light hitting the relief. Any slide in oblique light gives a shadow. In this case, it is necessary to level such places with neighboring ones using a finely dispersed finishing putty. After that, grind the edges of the area to zero with the rest of the surface so that the boundaries of the area are not visible, after which you can first roll it up with a small roller, diluted with a solution, and then apply the last coat of paint to the entire ceiling.
To track all possible surface defects during work, and not after reaching the final result, illuminate the ceiling with oblique light using a carrying lamp.

To avoid a striped ceiling, all operations are done in a perpendicular direction.
Any layer is applied only after the previous one has completely dried. Otherwise, the soaked, not yet dried and hardened putty will stick (“wound”) on the roller, and the resulting defects will have to be puttied.

When the temperature in the room changes, the paint can “sit down”, that is, shrink in places to such an extent that cracks can occur. It can also dry out too quickly. Therefore, it is best to turn off the heating elements, close the windows and leave a bucket of water in the freshly painted room.

Water-soluble compositions must not be painted on surfaces that have already been painted with alkyd or oil paints. For example, they are not suitable for tiles. After drying, the painted canvas will go into small cracks - this is the so-called craquelure effect. But if you are stylizing your room antique, this may be appropriate.


If the ceiling is already painted, made to "excellent" and it only needs to be refreshed, just vacuum it, go over it with a slightly damp microfiber cloth. It will only be necessary to tint it again if the paint has turned yellow from time to time. It can only be washed with clean water.

If the neighbors from above flooded the painted ceiling and stains from rusty water remained on it, first go through this area, and then the entire surface of the ceiling with a solution of chloramine (“Whiteness”), and the stains will disappear.

