How to open the indoor unit of a Panasonic air conditioner. Do-it-yourself air conditioner cleaning: the process of cleaning a home air conditioner, operating recommendations. When independent dismantling is undesirable
Knowledge of how to remove an air conditioner from a wall with your own hands may be needed in several cases:
- if you are planning to move;
- if it is necessary to carry out repair and restoration work;
- if you plan to replace the air conditioner with a new one and do not want to pay for dismantling the old one.
To begin with, when changing the location, you should deal with disconnecting the air conditioner from the wall completely, that is, both units. IN in this case It is important not only to carry out high-quality dismantling, but also to comply with the rules for transporting split system modules.
How to remove the outdoor unit from the wall
First of all, they provide for the presence necessary tools. To remove the air conditioner yourself you will need:
- adjustable or gas wrench;
- hexagons;
- open-end and socket wrenches;
- indicator screwdriver;
- pipe cutter;
- pressure gauge or pressure gauge station.
Instead of a pipe cutter, you cannot use wire cutters and similar tools, as they will spoil the quality of the copper pipeline.

First, the external module is dismantled - the compressor-condensing unit or KKB.
Step 1. Divorceable or wrench On the end side of the KKB, open the valve plugs.
Step 2. Close the liquid tap external unit. Use a hex wrench.
Step 3. To ensure that all the freon passes to the external module, start the air conditioner in cooling mode for 30-40 seconds. As soon as the compressor began to work only on suction, the valve from gas pipeline connect the pressure gauge station and wait for the readings to reset to zero. Immediately close the freon return valve.
Step 4. The system is completely de-energized. Before proceeding to the next step of removing the air conditioner from the wall, indicator screwdriver check the absence of current by inserting it into the terminal with the phase.
Step 5. Now the freon line is cut with a pipe cutter, since it is a non-removable structural element. The remaining ends must be insulated from moisture and debris. You can use electrical tape for this.
Cut off connecting tubes at a distance of 15-20 cm from the fittings. If the dismantling of the capacitor module is carried out for the purpose of repair and restoration work, then there is no need to cut the copper tubes.
Step 6. Carefully disconnect the drainage pipeline and interconnection wires. ends electrical wires And drainage tube It is also advisable to wrap it with protective material.
Step 7. Now we begin to dismantle the device itself. How to properly remove the external air conditioner unit from the brackets? To remove it from the nuts and bolts, use an open-end or socket wrench. Since the KKB usually has considerable weight, it is advisable to take a second person as an assistant.
Step 8. The brackets are removed from the surface of the building or balcony by unscrewing shut-off valves socket head.
After the air conditioner has already been removed from the wall, they begin to pack it. To do this you will need a multi-layer cardboard box, polystyrene foam and soft packing tape on a roll.
KKB can only be transported in vertical position to avoid water hammer during subsequent work. Before installing the unit in a new location, you should let it stand for 2-3 hours.
If transportation is planned for winter time, you need to remove the air conditioner from the wall so that all the freon does not leak out. For this purpose, a pressure gauge station must be used. But most experts advise draining the refrigerant and then completely recharging the circuit.
How to remove the air conditioning compressor

The most serious malfunction of a split system can be a breakdown of the compressor. It occurs when:
- poor-quality installation - lack of evacuation, violation of the rules for laying the freon pipeline;
- using a split system in an unacceptable temperature range;
- factory defect.
In this case, you will also have to remove it yourself. KKB air conditioner and take it apart. Some climate control equipment can do without complete dismantling, but it is problematic for a non-specialist to do this, since in this case access to many elements is severely limited.
The outdoor module has been dismantled, how now to remove the air conditioning compressor? In fact, there is nothing supernatural here:
- Remove the protective cover from the external unit housing;
- Disconnect the lines going to discharge and suction, as well as electric wires, suitable for fan and compressor;
- Unscrew the fastenings with an open-end or socket wrench and remove the compressor from the vibration dampers.
It is worth considering that before removing the air conditioning compressor, it is necessary to check the degree of oil deterioration. If it has bad smell and changes color when tested for oxidation, then replacement + flushing of the KKB will be required. If the properties are normal and the oil oxidation test is negative, a simple replacement will be sufficient.
How to remove the indoor unit from the mounting plate

Everything is clear about how to remove the air conditioner compressor and the outdoor unit itself from the wall with your own hands. All that remains is to figure out how to dismantle the internal module. This process also takes place in several stages:
- Remove the protective cover from the housing;
- Unscrew the fasteners;
- Disconnect all connecting communications: freon line, electrical interconnect cables, drainage pipeline. First turn off the power;
- The block is removed from the plate by opening the fastening latches;
- Unscrew the mounting plate and dismantle the plastic wire with the remaining copper tubes.
When removing the air conditioner indoor unit from the wall, extreme care must be taken not to damage the mounting latches that hold the unit to the mounting plate.
Be sure to caulk the ends of the copper freon tubes in the same way as for the external unit.
Pack the indoor unit in a thick cardboard boxes, covering it with foam and wrapping it in soft bubble wrap. Evaporation block can be transported in any position, unlike KKB.
If any element of the indoor unit of the air conditioner needs to be replaced or cleaned, it may also require its removal from the wall or partial disassembly into its components. It looks like this:
- Remove the front panel and wash it reverse side a stream of water with a cleaning agent or soap;
- Remove the guide plates air flow, removing them carefully from the grooves. Some models have special latches for this;
- Unscrew the screws, carefully pull the lower protective part towards you and slightly lift its top, then remove it from the latches;
- Disconnect the supply wire and drainage;
- Disconnect the interconnect wires from the corresponding terminals, having previously recorded their location;
- Remove the tray with the hose. For some models it may be stationary, then it is lowered a little;
- Now remove the tangential fan by lifting up the evaporative heat exchanger.

All elements are washed with water and a cleaning agent. You can use a steam generator for more thorough cleaning. When the parts have dried, they are fixed in reverse order in place.
If you need to dismantle the control board, first remove the protective cover from the electronic unit and disconnect all wires (connectors for indicator panel sensors, air damper drive). Then unscrew the board from the fastening elements using a screwdriver or simply disconnect it from the latches.
When indoor unit They are not dismantled, but disassembled; there is no need to cut the freon line.
Monoblock systems can be dismantled in almost the same way. The only difference is a slightly different electrical circuit and nozzles with working fluid.
When independent dismantling is undesirable
You should not remove the air conditioner yourself in the following cases:
- if there is a split system of column, duct or cassette type;
- if the user does not have the necessary tools, materials and instructions for the device;
- when a person lacks confidence in his own abilities.
In these situations, it is better to contact professional installers.
Before you start independent actions, you can watch a video on how to remove the air conditioner yourself:
Partial or complete dismantling air conditioner is produced according to various reasons- renovation of an apartment, moving, installation in another room, and so on. Standard approach- call employees of a specialized company to properly remove the split system and pay for this service. A more economical option is to dismantle the air conditioner yourself, having understood the intricacies of the procedure. This is not to say that it is simple, but with the right approach it is quite feasible.
About the methods and difficulties of dismantling with your own hands
As a rule, owners of private houses and apartments install 2 types of air conditioners - monoblock (mobile) and split systems. There are no particular problems with the former, since in such models all the main elements are enclosed in a single housing, and to move the unit it is enough to simply disconnect the air duct.
In addition to monoblocks and “splits,” there are other types of climate control systems - cassette, duct and column. But usually such equipment is installed in offices, shopping centers and other premises large area, in private homes it is used quite rarely.
The split system consists of two sections located inside and outside the home. They are connected to each other by two highways, along which in different states of aggregation refrigerant circulates - freon. Through a copper tube of small diameter it flows in the form of a liquid from the external unit to the internal one. Along the highway large diameter the refrigerant gas moves in the opposite direction. This gives rise to a number of difficulties that await the ignorant user when attempting to dismantle them independently:
- Complete or partial loss of freon as a result of unqualified disconnection of main pipelines.
- Air containing moisture entering the tubes and heat exchangers. If the split system is installed incorrectly in another location, incompressible moisture will enter the compressor and may harm it.
- Clogging of copper tubes when pulling them out of the wall and during transportation. Moisture or sand in the freon circuit is the quick “death” of the compressor.
- When disconnecting the lines from the pipes of the internal section, you can accidentally twist the threaded fittings soldered to them.
- Disconnecting power wires without marking the terminals where they were connected leads to confusion during the re-installation process.
- The drainage pipe that leads condensate to the street is cut too short.
- Loss during transportation of screws and other small parts, not secured after dismantling.
Most of the listed cases lead to expensive repairs of your air conditioner in a specialized workshop, so before removing the split system, you must carefully study the instructions below.
There are three ways to dismantle the indoor and outdoor units:
- simple disassembly with release of refrigerant into the atmosphere;
- with preservation of freon in the system using the “by eye” method;
- using special equipment, allowing you to completely save the refrigerant in the circuit.
Gives the best result last method, although all three apply in certain circumstances. So that you do not have any problems with installation removed air conditioner and him further exploitation, it is recommended to act according to the third option, having previously familiarized yourself with the freon preservation method.
Preparatory activities
First of all, you need to prepare the following set of tools and accessories:
- Phillips and flat head screwdrivers;
- set of open-end wrenches;
- stationery knife;
- hex keys measuring 5...10 mm;
- pressure manifold or pressure gauge with tube and threaded connection, designed for maximum pressure 10-15 Bar;
- masking tape and marker;
- insulating tape or regular tape.
You will definitely need a pressure manifold if you plan to install a split system in another room, so it is better to rent it, but buying it will be too expensive.
Also for convenient and safe management work, a stepladder is required to easily reach the indoor module installed under the ceiling. External section located on the wall apartment building, it is better to pull it through the window, having previously tied it with a rope. The services of an assistant will be useful here.
An important preparation step is to ensure that the refrigerant remains intact. least losses. For this, the operating principle of the air conditioner is used, thanks to which all the freon can be collected in one place - the circuit of the outdoor unit. Having prepared the tools, proceed according to the instructions:
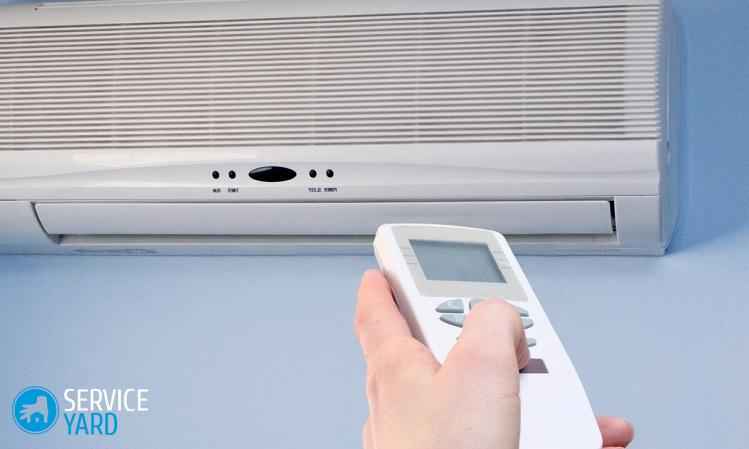
- Covering the infrared element on the remote control with your hand remote control, switch the split system to “Turbo” mode and set the minimum temperature. Remove your hand from the element and point the remote control at the air conditioner. In this way, you start the compressor immediately at full power.
- Connect the hose from the pressure gauge to the service fitting located on the side of the outdoor unit, after which it will immediately indicate the pressure in the system. In some models, these pipes are hidden under a cover; it must be removed.
- Unscrew the 2 nuts - plugs located at the ends of the fittings. Under them you will find valves that can be adjusted with a hex key. Select the appropriate hexagon size.
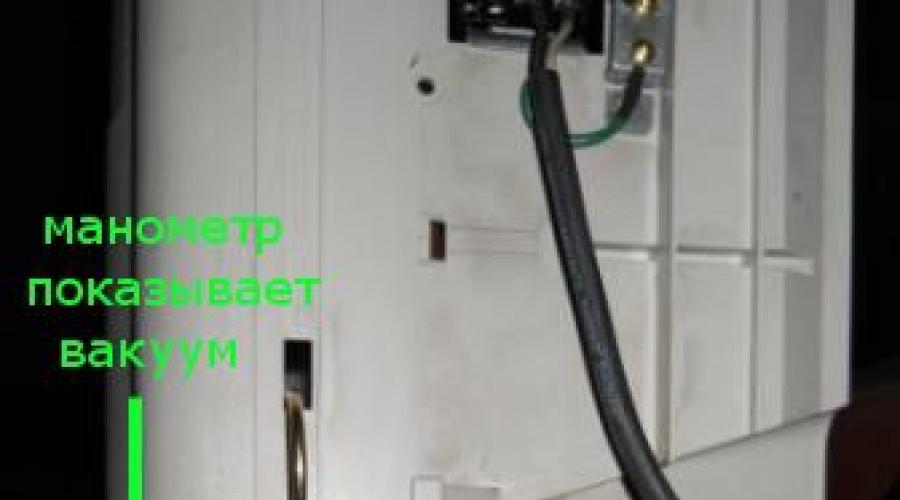
- Turn off the tap of the liquid refrigerant line (this is a thinner tube) and monitor the pressure gauge. At this time, the compressor draws in freon gas through the second tube.
- When the device needle drops to zero and begins to go into the vacuum zone, close the second valve and quickly turn off the air conditioner using the remote control. That's all, the refrigerant is in full volume in the circuit of the external module.
In split systems filled with different brands freon (sometimes R22 and R410), the diameter of the thread of the service fitting where the pressure gauge is connected is different. For R410 you need a special adapter, which should be prepared in advance.
The refrigerant is stored using the “by eye” method without a pressure gauge manifold. After closing the liquid valve, wait about 40-50 seconds, then close gas tap and turn off household appliance. The disadvantage is clear: you will not know how much freon managed to get into the outdoor unit, and keeping the compressor running for a long time with the line blocked is unacceptable. The result will appear when next installation"split" and its launch.
Instructions for removing the external module of a split system
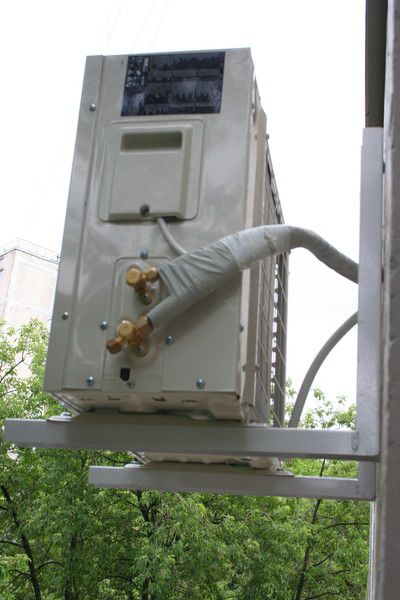
Outdoor unit The air conditioner has to be dismantled when moving or moving it to a new place. To repair an apartment, it is not necessary to remove the outer section, but you will still have to disconnect the freon lines, cable and drainage. The work is performed in the following order:
- Unscrew the pressure gauge hose used when pumping refrigerant and replace the end cap nuts.
- Using an open-end wrench, unscrew the union nuts holding the copper tubes to the fittings and bend them to the side. Using adhesive tape or tape, protect all open holes in the lines and pipes of the external module so that debris and dust do not get inside during operation.
- To disconnect electrical cable, disconnect the device from the power supply and remove the cover covering the terminals (located above the freon valves). Before unscrewing the wires, place a strip of masking tape over the terminals and label them with a color marker to document the wiring order. Disconnect the wires and remove the cable.
- Tie the disconnected lines to the bracket of the outdoor unit so that the copper tubes do not dangle or bend, otherwise they will have to be replaced.
- Unscrew the 4 nuts securing the external module to the bracket, tie it with a rope and, together with an assistant, remove the unit.
Professional refrigeration technicians often practice a slightly different approach: they do not unscrew the union nuts and do not remove the freon tubes from the fittings of the outdoor unit, but bite them off. Then there is no need to wrap the ends of the pipelines with tape to protect them from moisture and debris, because they are flattened with wire cutters. During subsequent installation, the flattened ends are cut off and flared for connection with a union nut.
After disconnecting the cable cores from the terminals, tighten the contact screws and tighten them, as they may fall out and get lost during transportation.
It is better to remove the bracket itself later, when you untie the freon circuit pipelines from it. If the lines extend out of the wall no more than a meter, then there is no need to tie them down. The tubes should be carefully aligned to make it easier to pull them in from the inside. The bracket is most often attached to 4 anchor bolts, unscrewed with a regular open-end wrench.
Correct disconnection of highways from the external section - photo gallery
The lines are disconnected after unscrewing the union nuts. Screw the plugs that close the port valves into place. Unscrew the cap to disconnect the wires. Having marked the location of the wires, disconnect the cable. After disconnecting the cable, the screws on the block must be tightened. According to the rules, copper pipelines must be bitten off. The bitten off tubes must be plugged.
How to remove the outdoor module while saving freon - video
How to dismantle the indoor unit of an air conditioner yourself
To remove the internal module from the wall, you need to disconnect all communications from it - cable, tubes for freon and condensate. The place where the pipelines are twisted is usually located in a housing niche located in the lower part. Depending on the split system model, there are 2 ways to get to this niche:
- Unlock 3-4 plastic latches securing bottom part block to the mounting plate. Move the bottom of the housing away from the wall and insert any rod between them, remove the communications harness from the niche.
- If your split model does not have latches, then you need to remove the front plastic panel, having previously dismantled the blinds and additional covers (when available).
When you get to the tourniquet, make a longitudinal cut on it stationery knife, which will allow you to move the insulation and grab the nuts with wrenches. Don't make the cut too long, otherwise you'll have to change it later. thermal insulation material. Perform further operations in this order:
- Use two open-end wrenches to unscrew the joints of the lines. Important point: the drive soldered to the short tube of the block itself cannot be rotated; it must be held in place with a wrench while unscrewing the union nut.
- Wrap the ends of the pipelines with electrical tape or tape to protect them from dirt.
- Find the joint between the drain pipe and the outlet pipe and disconnect it. You should not cut the corrugation anywhere, so that later it will be more convenient to join it back together.
- Remove the cover of the electrical compartment (located on the right side of the case or under the front panel), make notes using a marker and tape, then unscrew the screws and disconnect the cable cores. Tighten the screws back and screw on the cover.
- When all communications are disconnected, grab the case from both sides and remove it from mounting plate, lifting it up a little. Give the block to your assistant.
- Remove the mounting plate by unscrewing all the dowels.
Considering that condensation may remain in the pan of the indoor module, it is advisable to protect the wall before dismantling plastic film. If you are removing the conditioner for apartment renovation, then such precaution is unnecessary.
After removing the inner section from the wall, place all the unscrewed parts on it, tighten the screws and put on the mounting plate. Place the protruding pipes in a niche, securing them with masking tape. Use the same material to secure the opening front panel so that it does not dangle during transportation.
The last step is the dismantling of communications laid along the wall or inside it. There are no difficulties here, the main thing is not to bend the copper tubes under a small radius. Such treatment at the bend reduces the flow area, and it is quite difficult to align the tube with an oval profile. From outer wall Pull out the harness carefully so as not to damage the insulation. If the hole has been sealed polyurethane foam, then it must be cut out in parts. When finished, roll the tourniquet into a ring and secure with tape.
Procedure for dismantling the indoor module - photo gallery
To disconnect the electrical wiring, you need to remove the cover of the electrical compartment. Before disconnecting the wires, write down the order of their connection. Cut the harness running in the niche with a knife and get to the junction of the tubes. Unscrew the connecting nuts. Place of connection of the drainage tubes. Disconnect the cable running in the same harness. The indoor unit can be easily removed with both hands. Final stage- removing the mounting plate Having tilted the housing, it must be fixed in this position
How to remove internal blocks of different designs - video
Disassembly in winter
If the outside temperature has dropped to -5°C or more, it is recommended to refrain from dismantling for the following reasons:
- it will not be possible to pump the refrigerant into the external module;
- in cold weather, you cannot disassemble connections, unscrew plugs or close service ports;
- As a result of disassembly, service valve seals often fail.
In a situation where, without removing the split system when negative temperature not to be avoided, be sure to warm up the fittings of the outdoor unit construction hairdryer. Then unscrew the plugs and close both valves, thus retaining some of the freon remaining in the outdoor unit circuit. Then slowly unscrew the lines from the fittings and disconnect them, releasing the second part of the refrigerant into the atmosphere. Then proceed according to the algorithm described above.
Personnel from specialized companies use pressure gauge stations to pump out freon in winter. But if you rent such equipment, then dismantling will cost more than paying specialists, and the result will be dubious.
At temperatures above -5°C, you can perform work according to standard instructions, but it is advisable to use a pressure gauge to control the pumping of refrigerant. If you act “by eye”, you may not guess the holding time and will still lose some of the freon. It is equally dangerous to keep the compressor running without cooling (and it is cooled by circulating freon); it can fail due to overheating.
You will successfully dismantle your home air conditioner if you get to work during the warm season and follow the instructions provided. You must not miss a single detail, act very carefully and without haste. Do not neglect the pressure gauge, since the loss of refrigerant will negate all savings from this procedure.
Sooner or later any user household air conditioner is faced with an unpleasant problem - after turning on the split system, a cool breeze bursts out of the blowout hole, filled with the sweetish smell of stagnant mold.
This only means one thing - it’s time to carry out maintenance on your split, or rather, wash it thoroughly.
Here you can do two things - call a specialist and part with a certain amount of money, or rely on own strength and disassemble the air conditioner yourself.
This guide is for disassembling the indoor unit of a split system (using the example Toshiba RAS-07EKH) will also help those who are faced with the problem of an air conditioner breakdown and want to fix it on their own.
And the last thing - the disassembly algorithm is standard, and is suitable for most modern split systems.
What you will need
Yes, in general, a little. Several positive and negative screwdrivers different diameters and (for some models) a set of hexagonal sprockets.

If you have stocked up on such a simple arsenal, it’s time to get started!
And in order to completely dispel the last doubts, I would like to clarify that during all the operations described below, the internal unit of the split system is not removed from the wall, copper route does not disconnect, freon does not drain.
Let's start cleaning the air conditioner!
Disassembly process
First of all, turn off the power to the air conditioner and remove the protective filters of the indoor unit. This process is described in detail in the manual for any split.
Now you need to remove the front panel. Unscrew the two bolts under the protective plugs,

and pull the frame towards you (two latches hold it on top).
The inside of the lid is covered in dust and mold; it belongs in the sink.

Now remove the air flow direction blade. To do this, you need to apply a little force and remove it from the grooves.

We get this picture.


Now disconnect all electrical wiring, remembering to write down the location of the wires.

If you are too lazy to write, and your knowledge of radio engineering is worthy of respect, you can use electrical diagram, located on inside front cover.

Be sure to disconnect the ground wires before removing the card from the socket.

Now we press out the fastening brackets,

and remove the electronic unit housing along with the transformer.

Press out the three support latches and carefully remove the drain along with the outlet hose.

Look at those ugly brown spots.

The exhaust hole of the indoor unit, as well as the fan blades, are also covered with a disgusting coating that emits a stench.

But let's continue
Unscrew the motor support bolt,

very carefully lift the radiator and remove the motor mount,

after which we remove the blade along with the engine from the cell.

We carefully put the radiator back so that it does not fall.

Removing the thermal lock of the motor pulley mounting bolt is not easy.

To avoid burning the energy-transmitting rubber element, use a thin soldering iron to carefully heat the head of the bolt, periodically trying to unscrew it. I succeeded on the third try.
When the blade is separated from the motor, all dirty elements should go to the wash.

A bottle of Feri, a long bristle brush and a powerful jet of shower hose will help you get rid of annoying mold.
Reassemble in reverse order.
Conclusion
As you can see, the design of the indoor unit household split system quite simple, if not primitive.
So if your hands grow out of the right place, and your wallet is not bursting with an abundance of unnecessary junk, it is quite possible to service your favorite air conditioner on your own...
There are situations when it is necessary to dismantle the air conditioner. The reasons can be completely different - the old split system does not work, you may be moving, or you are planning to renovate the room. This problem can be solved by calling a specialist from service center. But if you want to save money, have some skills and desire, then you can cope with this task yourself. We will tell you below in our article how to remove the air conditioner from the wall during renovation, while avoiding negative nuances and mistakes, and how to hang wallpaper underneath it.
How to wallpaper under an air conditioner?
This is quite difficult task. There are people for whom “it’ll do just the same,” and there are others who want to do everything perfectly.
There are two ways to hang wallpaper:
- Carefully apply new wallpaper, sliding a couple of centimeters under the device. This method will not bring the desired result, since it will be noticeable to the naked eye that the wallpaper is not completely glued under the air conditioner.
- Remove the air conditioner for a while and stick the wallpaper perfectly.
How to remove an air conditioner from a wall during repairs so that you are pleased with the end result - we will consider in detail below.
Precautionary measures
Before you figure out how to remove the air conditioner from the wall with your own hands, you need to understand how it works in order to avoid unpleasant consequences. This device consists of 2 blocks - external and internal. Two lines connect them, and the refrigerant moves through them. Freon in liquid state circulates through a tube of smaller diameter from the indoor to the outdoor unit, it also runs in the opposite direction, but in a gaseous state through a thicker copper tube.
This part contains problems that can ruin all your actions when trying to remove the air conditioner with your own hands:
- Complete or partial loss of freon can occur if you disconnect the main pipelines incorrectly.
- Air containing moisture may enter the heat exchanger and tubes, which may cause damage to the air conditioner after it is reconnected. Incompressible moisture enters the compressor and damages the device.
- Entry of small particles into copper pipes pulling them out very quickly leads to system breakdown.
- Handle the threaded fittings that are soldered to the tubes very carefully. If they are damaged, expensive repairs will be required.
- Be sure to mark the terminals so that you can easily reconnect the air conditioner without mixing up the wires.
- Do not cut the drainage pipe too short, through which condensate is discharged outside the outdoor unit.
Important! Read the instructions carefully before starting to dismantle the air conditioner so that it does not need to be repaired in the future.
Preparatory stage
It is necessary to prepare a number of tools, without which it is impossible to complete the task, before answering the question of how to remove the air conditioner from the wall during a DIY repair.
Required tools:
- Pipe cutter
- Gauge manifold.
- Hex socket wrenches.
- Open-end wrenches.
- Side cutters.
- Adjustable wrenches.
- Drill.
- Phillips screwdriver.
- Construction knife.
There are times when you need to acquire safety equipment.
Important! When removing the device, two people must be involved in order to carry out the work without risk to life and health.
Freon release
There are three options for dismantling the air conditioner yourself:
- Disassembly with freon release.
- Preservation of gas inside the device.
- Using a special technique, with the help professional equipment save freon completely.
All methods are used, but the third gives the best effect without any losses.
To remove the air conditioner from the wall with your own hands correctly, you need to study the design of the split system, which consists of a closed circuit filled with freon. It consists of the following components - a compressor, a system of copper tubes and an evaporator with a condenser, which connects the entire system and ensures the selection and supply of refrigerant.
To turn off the air conditioner without losing freon, you need to pump it into the condenser yourself, for this:
- Close the valve between the device and the thin-diameter tube while the equipment is operating in cooling mode.
- After a minute, when all the refrigerant has been pumped into the condenser, close the valve on the thick tube. With this action you will turn off the freon supply and “close” it in the trap.
Dismantling with video
To dismantle the external unit, you need to disconnect the copper tubes. To do this, they need to be cut at a distance of about 20 cm from the fitting, and then the sections must be caulked to ensure complete sealing.
Important! Copper tubing cannot be reused because extension is strictly prohibited.
Outdoor unit
Remove thermal insulation after working with copper pipes. It is best when two people work: one outside the room, and the second inside. Removing the device is faster this way:
- One turns off the power, and the second disconnects the wires, having previously marked the terminals at the place where they are connected.
Important! You have to manually straighten the tubes so that they fit through the holes in the wall without any problems.
- The end of the cable is also screwed to them, which is dragged inside the room.
- Then the nuts that hold the outdoor unit on special brackets are unscrewed.
- Then the two of you remove the block and move it inside the room.
Important! The outdoor unit that you have removed must be stored exclusively vertically.
Indoor unit
How to disassemble the indoor unit so that freon does not leak out? Dismantling the internal unit of the device has some nuances, without knowledge of which you will not be able to do all the work correctly, which can lead to breakage of delicate fasteners.
Here's how to remove the indoor air conditioner unit from the wall for wallpapering correctly:
- Remove the housing cover using the indicators located on the bottom of the unit.
Important! Each manufacturer installs the lid differently. Read the instructions carefully to understand how to do it correctly.
- Disconnect the electrical cable by unscrewing it from the terminals and carefully pulling it out of the system.
- Disconnect the pipe and place a container first, because water may leak out of it.
- Remove the heat insulator and then disconnect the freon pipe. Carefully unscrew the tubes, as you did when removing the outdoor unit, screw them on with caps or wrap them with electrical tape.
Important! You can also cut the tubes, squeeze them and then twist them. The main task is to prevent the entry of polluting components into them.
Cleaning your air conditioner should not be limited to just caring for the external elements. Dust gets everywhere, accumulates and interferes normal operation mechanisms. You can invite a technician from the service center to Maintenance, but many craftsmen cope with this task on their own.
In order to carry out all maintenance work yourself, you need to know the structure of the internal unit of the split system. We will tell you everything about the design climate control technology. We will give recommendations according to which it was possible to safely disassemble the unit, clean it and reassemble it again.
Although the device of specific models from different manufacturers varies circuit diagram, according to which such climate control equipment is assembled, has common basic elements.
The internal block of a modern split system consists of:
- front panel;
- filter elements;
- fan and evaporator;
- engine;
- blinds;
- drainage systems;
- indicator panel, etc.
To properly disassemble the device, you need to carefully disconnect individual elements V correct sequence. First, you should carefully study all accompanying documents received when purchasing the device.
Basic structure of the indoor unit: 1- front panel; 2,3 – filters; 4 – fan; 5 – evaporator; 6 – blinds; 7 – panel with indicators; 8 – vertical blinds
In them you can find a lot of useful information on how to disassemble the internal unit of this split system for execution. If for some reason there is no documentation, it makes sense to search for the necessary information on the Internet.

The mesh filter, designed for primary purification of the air entering the indoor unit, must be regularly cleaned of contaminants using detergent
General procedure
First you need to prepare to disassemble the indoor unit: disconnect the device from the network, prepare necessary tools and materials. You will need various screwdrivers, hexagons, a rag, a container to drain condensation, a stepladder, etc.

Large air flows constantly pass through the indoor unit of the air conditioner, and dust particles remain inside. You need to periodically remove this debris for the device to work correctly.
Different manufacturers use Various types fastenings: bolts, latches, clips, etc. Particular care should be taken when working with plastic fasteners. Excessive force will cause the element to break. Instead of cleaning the device, it will need to be repaired.
First, remove the front panel of the indoor unit. You will have to unscrew the bolts or disconnect the clips; you can carefully pry them off with a straight screwdriver.
After this, it is removed from the body strainer and blinds. Usually these elements, which need to be cleaned quite often, are simply inserted into the housing. Manufacturers provide the possibility of their easy dismantling.

It is important to consider which side the condensate drain tube is connected to. With some Panasonic air conditioners connected to the left, this tube will have to be disconnected to remove the condensate collector
Now you need to find and disconnect the drainage tray, if possible. Sometimes it is built into the body. At this stage, you will need a container for the accumulated liquid, as well as a rag, in case the water spills. In LG air conditioners, such an element is usually attached to one bolt; there are clips located at the bottom; they need to be snapped off.
Then you should remove the impeller shaft. A lot of dust usually accumulates in its grooves. This element is usually removed from the bottom or side. If the design allows, it is preferable to use the first option, it is simpler.
They do it like this:
- Disconnect the radiator mounts located on the left side of the case.
- Loosen the impeller fastening screw on the right.
- Carefully lower the shaft down, holding the loosened bolt with a screwdriver so as not to touch the blades.
All operations must be performed slowly and carefully. The screw that holds the impeller in place is very tight. It must be unscrewed so as not to damage the thread. You don't want to unscrew it all the way because it can be difficult to put it back in exactly the same position.
If it is not possible to remove the shaft from below, you need to use a more complex option:
- Disconnect the wiring from the control unit.
- Remove the fasteners and disconnect the unit from the split system.
- Remove the motor mounts and remove the casing from the shaft.
- Disconnect the shaft and engine by bending the radiator tubes.
- Remove the impeller and clean all elements.
When reassembling the device afterward, it is very important to connect all the elements correctly. The blades of rotating parts must not touch the walls of the housing or other components of the device.
Attention will also be required when connecting the wiring. It is better for inexperienced craftsmen to first draw a diagram or photograph the wires so as not to confuse anything while connecting them.
Disassembly using the example of a Panasonic air conditioner
Even such a high-quality device with good filters not protected from dust getting inside the case. The space between the turbine lamellas turned out to be very small here. Dust accumulates in these narrow gaps, which cannot be removed with a standard vacuum cleaner.
Panasonic has the ability to remove the turbine for cleaning without any problems. Although it's not like that simple procedure, as when processing filters. There is no need to remove the housing from the wall; all operations can be performed while standing on a stepladder.
The electronic control unit with indication and other elements of this type are located on the right from the point of view of the master, who stands directly in front of the device. You need to start by disconnecting the case. It has screws on the bottom sides and is held in place with latches on the top.
First you need to unscrew the screws. They are located on the sides and hidden by neat decorative plugs. To find them moving part the housing will have to be raised. Pry off the plugs with a straight screwdriver, then use a Phillips screw to unscrew the fasteners.

In order to disassemble the air conditioner, you need to unscrew the screw, disconnect the condensate collector, then unscrew the screw holding the heat exchanger, then loosen, but do not remove the hidden turbine screw. Finally, you need to lift the heat exchanger and pull out the turbine
Now the case needs to be lifted with a gentle upward movement to disconnect it. There may be a click as it is held in place by three plastic hook latches. Now you can remove another part of the housing, which consists of a cover, a motor and a condensate trap.
This block is attached to grooves located quite deep in the body, but can be easily removed. You need to carefully pull it down with moderate force. If the entire block does not separate at once, you can first release the fastening on the left, and then on the right.
At this stage, you need to pay attention to the position of the hose through which the condensate is discharged. If it interferes (this happens when connected on the left side), then it must first be disconnected from the condensate collector.
The moisture container is not completely separated from the body, since it is additionally connected to it with a pair of thin wires. You need to take care of a stand for this part of the air conditioner in advance or hang it on a cord, rope, etc.
The weight of the condensate collector may cause the wiring to break. As previously mentioned, at this stage accumulated condensate may spill out. It is better to immediately pour the moisture into suitable container. It's very likely that some of the water will spill, so it's best to keep a rag handy.
About what to do if climatic equipment constantly flows into the room it treats, you will learn from it, which we strongly recommend reading.
The removed condensate collector will provide access to the technical contents of the unit: on the left, the head of the screw securing the heat exchanger and the rubber bearing of the turbine will become visible. The screw needs to be unscrewed, but the bearing should not be touched; it must remain in the grooves that hold it.

If the split system long time not cleaned, dust accumulates on its internal elements, and mold appears, which is dangerous to the health of residents
Now you need to rotate the turbine with your hands to find the place on its right side where it is secured with a screw on the engine shaft. One lamella is missing here. The screw is recessed deep. It needs to be unscrewed, but should not be removed to facilitate reassembly. After this, lift the heat exchanger with moderate force.
It is secured with latches and you should hear a click. Here you need to act carefully so as not to cut yourself, the edges of some parts are quite sharp. When the heat exchanger comes out of the latches and is lifted, a vertical gap will appear through which you can carefully remove the turbine, after first removing the bearing.
A few words about cleaning
They operate simultaneously: use a brush to treat the available space, and keep the edge of the hose of the turned on vacuum cleaner nearby to immediately remove debris. Some people treat the inside of the unit with dry steam if they have access to a steam generator.
You can then use a cleaning agent, for example in the form of an aerosol. It is kept for some time, you need to act according to the instructions. Then the surface is treated clean water using a brush or spray bottle to remove the cleaning agent that has dissolved the dirt. You will need a container to collect the draining water.
Now you need to wash the turbine, filters and other elements and dry them. This can be done using common home remedies, but there are convenient kits available for this purpose. Then the device is reassembled. All fasteners must be in place and carefully tightened or latched.

Special means, designed for cleaning climate control equipment, can effectively dissolve accumulated contaminants. Through allotted time the composition should be washed off carefully
Parts removed from the device can be washed hot water, brush. Exists household chemicals, specially designed for such equipment. But also ordinary laundry soap will give a good result. Of course, you need to protect parts from damage.
For example, hard bristles can seriously damage the mesh filter. A lot of dust accumulates on the impeller; every groove needs to be processed. All filter elements are thoroughly washed. They should be dried before installation.
The surface of the evaporator and rotor, as well as the condensate container, are treated especially carefully. It doesn’t hurt to check the condition of the tube through which moisture escapes. If you clean it with a piece of rigid cable, you can find serious dirt there. They are simply pushed out and the tube is washed out.

A special kit for cleaning air conditioners consists of a large plastic bag convenient size and a set of devices that give it the desired position
Some craftsmen decided to abandon disassembling the indoor unit. They remove only the front cover and filter, and then cover the wall with polyethylene and rinse the indoor unit with a thin stream of water under high pressure. Is not The best decision, since you can break the air conditioner and damage the decorative finish.
If the cleaning measures did not give the expected result, the full functionality of the split system has not been restored, you will have to. You will find repair instructions in our recommended article.
Conclusions and useful video on the topic
How to disassemble the indoor unit:
To perform such disassembly requires attention, time and patience. The procedure does not require complex instruments or special skills. But inattention during operation is unacceptable, since this can completely ruin the split system.
Would you like to tell us about how you cleaned the internal components of the climate control unit? with my own hands? Do you have useful information, which will be useful to site visitors? Please leave comments in the block below, ask questions, post photos on the topic of the article.