How to clean the grout between floor tiles. How to clean the grout between floor tiles: practical tips. Prevention and protection of seams
4792 0
Covering bases with decorative ceramics has long ceased to be something exotic, but at the same time, due to the many advantages of tiles, it has not lost popularity. Modern technologies lead to the emergence of new species ceramic tiles with improved characteristics, however, the method of constructing them decorative covering remains unchanged - the orderly laying of sheets on an adhesive composition with the subsequent arrangement of joints of adjacent elements.
Inter-tile joints, made with a fixed width or with a systematic variation of this parameter, are rubbed down after installation of the tiles - filled to the full depth with special hardening compounds, and the overall impression of the finishing of the room depends, among other things, on the aesthetics of such design of the joints.
However, grouting compounds are significantly inferior to ceramics in durability, especially in shelf life decorative characteristics– evenness, uniformity and color of the outer surface. This difference is most relevant for floor cladding exposed to aggressive factors - moisture, dirt, and especially abrasion. Since changing the floor ceramic coating due to contamination or wear of the grout is absurd, let's look at how to effectively clean between tile joints using available funds depending on the type of problem.
Cleaning joints of floor ceramics
To make tile joints, mixtures based on reactive resins that have zero permeability are rarely used. In most cases, cement-based compositions are used, which after curing form a less smooth surface and have a certain porosity, which promotes surface contamination with subsequent penetration of dirt inside. Therefore, we will consider methods for cleaning joints filled with cement adhesive mixtures.

Indoor floors public buildings with high traffic, people experience a high abrasive load, so they are faced with hard tiles natural stone(granite, marble), often – dark color with seams of minimum width. As a rule, such joints are filled with grout mixtures, also in dark colors, so that the cladding natural stone looked monolithic. The seams of such finishing, even covered with street dirt, do not stand out against the general background and do not require thorough cleaning. But in some cases, for example, after painting works indoors or accidentally spilled paint, even these interfaces need careful cleaning.

As for the floor cladding of cultural buildings, offices, housing, especially rooms for sanitary and hygienic purposes (bathrooms, showers, baths), to improve aesthetics and facilitate control of their cleanliness, tiles for finishing are chosen from brightly colored materials, light colors. The seams of such ceramics are rubbed with white or bright colored compounds that stand out against the general background and are additional elements registration Such joints especially require periodic thorough cleaning of dirt and grease deposits.

Cleaning joints by steaming
This technology has been used recently and is suitable for removing fresh surface contaminants, including fungus. Using a special device - a steamer, which looks like a floor polisher, the ceramics are exposed to steam without an accentuated effect on the seams, with the simultaneous mechanized removal of softened layers of dirt. For household use It is hardly advisable to buy this unit, but in companies specializing in consumer services population, the use of such equipment is cost-effective.

Cleaning tile joints with special compounds
If the contamination of the grout is not caused by any specific impact such as spilled paint, then the seams can be cleaned with confidence of achieving a positive result using products specially designed for this purpose.
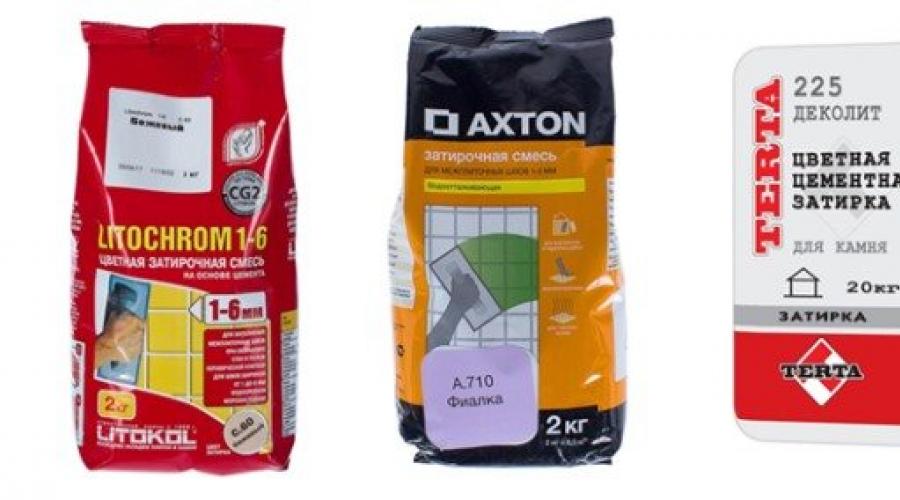
From special cleaning products tile joints both on walls and floors, it stands out for its efficiency MellerudFugenReiniger– composition for household use made in Germany.

The instructions on the packaging contain all the necessary information on using the product and observing safety precautions, so the consumer can only follow it to achieve results.
VALO Clean– an equally effective product from a Russian manufacturer for cleaning tile joints with smooth and rough surfaces, successfully coping with even stubborn, long-standing stains. Recommended for use in premises regardless of their purpose - residential, Catering, medical institutions, etc.

VALO Clean for cleaning joints should not be confused with products of the same name for other purposes (removing grout, washing sanitary ware, etc.) - the area of application is clearly indicated on the bottle.
Groute from the Canadian company EcoMist - an absolutely non-toxic composition based on components of plant origin (cereal extracts, potatoes and tree sap) for surface cleaning of tile joints with restoration of the original color without bleaching, removes old mold and dirt stains.

Using Grout does not require any tools personal protection(gloves, mask, glasses).
In many cases, it is possible to successfully wash ceramic joints without the use of special products, using household cleaning and detergent compositions.
If the grout white, the task is simplified - to restore its whiteness, bleach in the detergent is not only not dangerous, but even desirable. But to refresh colored joint filler, you can use only household chemicals without chlorine-containing components.

For cleaning the grout of floors finished glass mosaic, you cannot use detergents with a high concentration of alkali or acids (Sanfor, Sanox, Sarma, Dosia) - such compositions can make the glass dull or distort its color.
The method of using each type of household composition is described on its packaging, and from the available tools for applying, cleaning and washing off solutions, the following are used, regardless of the chosen product:
- An old toothbrush or hard clothes brush.
- A piece of penofol or woolen cloth.
- Foam rubber or clean rags.
- Bucket for clean water.
Refresh floor seams using artisanal methods
Without having special or universal cleaning agents on hand detergents, tile joints can be successfully cleaned with compounds prepared from food and household ingredients.
To restore the whiteness of the seams between sheets of tiles on the floor of a bathroom or kitchen, you need to take baking soda, lemon juice and 9 percent vinegar in a volume ratio of 0.5: 0.33: 0.25 - a mixture of juice and vinegar is slowly poured into the soda while stirring. The resulting composition is diluted with one and a half liters of water, after which the solution is ready for use - applied to the grout and rubbed into it with a toothbrush. After half an hour, the bleached joints are washed clean water.

Water solution successfully removes most contaminants ammonia, prepared in a ratio of 1:15. The finished product is applied to the seams, and after 15-20 minutes the dirt is washed off with warm water using dense foam rubber.
A good effect when bleaching floor joints is also achieved by using a solution of hydrogen peroxide, which is applied to the joints with a brush or a piece of foam rubber, and after a quarter of an hour is washed off with clean water. But this method, like using lemon juice or soda, is not suitable for restoring colored seams.

Get a better understanding of folk ways Watching this video will help restore the color of floor ceramic grout:
Mechanical methods for refreshing floor tile joints
Without resorting to any chemicals, renew the joints ceramic cladding You can use sandpaper. To do this, you need to take a sheet of this abrasive material and fold it in half or three times - with the abrasive facing out. Depending on the width of the finishing seams, sandpaper can be wrapped around a plate of suitable thickness that has one straight side. Using the resulting sandpaper rib, you need to clean the joints by longitudinally moving along their surface, removing the contaminated layer of mortar from the grout, but without going deeper than 1 mm.
After the procedure is completed, a special protective layer with antifungal additives.
If the floor tiles are made of dark natural stone (granite, marble), then unwanted layers at the joints that stand out in color can be removed with a metal brush - the hardness of such tiles guarantees the absence of scratches after the procedure is completed.
Conclusion
When planning to restore the color of the grout composition of ceramic floor cladding, the following rules must be observed:
- Before the grout restoration begins, the entire area of the cladding should be thoroughly washed.
- After finishing refreshing the joints, you need to cover their surface protective composition– taking into account the factors that led to the restoration.
Olga Nikitina
Reading time: 4 minutes
A A
The seams between tiles sooner or later become dirty. The reasons for this are calcareous deposits, humidity, drops of grease, soot, mold, poorly washed off cleaning agents and detergents. But, nevertheless, the problem of cleaning tile joints can be solved!
General rules for caring for tile joints:
- You can use store supplies- for example, liquid to protect seams "Atlas Dolphin", this product is used if the seams have not yet become dirty, or with a deep cleaning agent such as Ultrastripper. In addition to popular "Sif", "Dr. Muscle", well-proven viscous disinfectant for cleaning tiles and joints between them BOZO.
- Mold discovered in time in a small area is easy to eliminate special felt-tip pens. The waterproof dye contained in them masks the affected areas of the tile joints.
- To clean tile grout without resorting to expensive cleaning products, you can prepare paste mixture of bleach and baking soda . This option is suitable for those who used grout without color pigments. Otherwise, the bleach will neutralize the color. After mixing the components to a viscous mass, apply with a spatula to the seams of the tiles. Wait until the mixture dries and rinse with water using a brush. The brush should not be hard, so that the bristles do not leave scratches on the tiles and damage them. tile joints. Alternatively, you can use bleach and a washcloth. Do not forget about protective equipment - rubber gloves are a must. Chlorine-containing products are effective on initial stage the appearance of fungus.
- Fungus caused by high humidity can be deleted table vinegar. Tablespoon vinegar mixed with teaspoon water softener, 2/3 cup warm water and a tablespoon of ammonia is a good disinfectant.
- Professionals advise cleaning tile joints using an environmentally friendly method - using steam. Thick hot air destroys any type of pollution. Specialists use equipment that works on the principle of a steam cleaner. The structure of the grout is not disturbed, there are no smudges or streaks. After treating the seams with hot air, you need to wash off the dirt warm water. At the end of cleaning, it is recommended to treat the seams and tiles with antifungal disinfectants.
- Fine sandpaper will help mechanically remove dirt and small fungus from the tile seams. Cleaning outer layer grouting, and contamination is eliminated.
- Do not use soap to clean seams. The washing mass, consisting of alkalis, favors the spread of mold spores.
Homemade tile grout cleaner recipe:
Now I would like to tell you how to prepare bleach for tile joints with your own hands.
- First you need to put on rubber gloves, because health comes first!
- Provide air access to the room.
- Then mix soda with water in a ratio of 1:14, i.e. for 1 cup of soda - 14 cups of water, add 2/3 cup of lemon juice and half a cup of vinegar.
- When mixing soda with lemon juice or vinegar, a corresponding reaction occurs with the formation of foam. Therefore, this procedure must be done carefully and carefully.
- Mix the resulting solution and apply it to the tile joints using a sponge.
- After washing, do not rinse the solution from the seams for about 15 minutes.
- After the time has passed, rinse the surface with clean warm water.
Many who have used this recipe are happy with the result.
The most common building material for cladding walls, floors in kitchens and bathrooms is ceramic tiles. This is due to her excellent operational properties and the ability to choose the desired color. That is why the question of what is the best way to wash it becomes extremely acute.
Before you start laying ceramic tiles, you need to think through everything down to the smallest detail, namely how to protect the seams between the products, which can darken and become a breeding ground for germs. This way, a special liquid will help prevent contamination. She needs to go over each seam at least 2 times. You can buy it at a hardware store.
To remove stubborn construction dirt from matte surface Experts advise using a scraper or a stiff brush, as well as a concentrated acid mixture. Today, such chemicals as Professional, Karcher, Powerfix, Tana have proven themselves well.
Self-removal of contaminants mechanically - safe method for matte tiles, glossy ones require more careful care.
Cleaning tiles: rules

- Cleaning tiles After grouting the joints, it should be done using a viscose or synthetic sponge, a special compound and wearing rubber gloves.
- Before washing the surface, it is necessary to assess the degree of contamination. The choice of cleaning product for tiles and grout depends on this.
- With regular use of abrasive substances, the tiles may lose their shine.
- Before washing the tiles on the floor, use a steam cleaner or vacuum cleaner.
Cleaning ceramic tiles: traditional methods

1. A tiled surface can be easily cleaned with chalk dissolved in water. To do this, you need to go over the entire wall with the composition, and then wipe it with a dry cloth. The tile becomes shiny, and the grooves between the joints become light.
2. You can clean the tiles in the bathroom and give them a shiny look using a mixture of water and 6% vinegar (3 tablespoons of vinegar per 1 liter of water).
3. To make the tiles shine, use a cloth moistened with denatured alcohol.
4. Cleaning floor tiles and walls can also be done using a solution of ammonia and water (2-3 tablespoons of ammonia per 1 liter of liquid). After treatment, the surface should be wiped with artificial suede.
5. To remove traces of grease, replace the ammonia solution with the same amount of vinegar. In very dirty areas, use undiluted vinegar, which is then immediately washed off with water.
6. You can clean the tiles after repair using an abrasive grinding paste or a regular soap solution. However, the first can only be used for unglazed surfaces.
7. A composition of 3 liters will help to wash off soap residue on the tiles in the bathroom. hot water and 2 tsp. salts of phosphoric acid. After the procedure, the surface must be rinsed with clean water.
8. Darkened tiles can be washed using any liquid detergent or powder. It should be left for 3 hours and allowed to saturate the surface. After this, remove stains with regular warm water and a sponge.
9. The fungus is cleaned with a solution of bleach and water. To do this, use a brush with soft bristles and then treat the surface special means against mold.
10. Chlorine bleach will help remove stains from mustard, blood, coffee, ink, and juice. It must be diluted with water and applied to the stain, leaving for 10 minutes, and then rinsed with clean water.
11. Traces of rust from unglazed tiles can be easily removed with a 5% aqueous solution of hydrochloric acid.
12. Light stains from hard water can be removed using regular white vinegar, which is used to wipe the surface of the tile.
Cleaning joints between tiles

Cleaning methods
- With the help of steam.
- Masking seams.
- Folk remedy.
- Using compounds containing chlorine.
- Using household cleaning products.
The best tile grout cleaners

1. If there is accumulation in the seams a large number of dirt - use a toothbrush, treating the dirty areas with any known cleaning agent (for example, Cif, Silit, etc.). Leave it on for 10 minutes and wash it off with warm water. Then wipe the joints with a soft cloth.
2. If fresh blackness appears in the seams, use a cleaning agent containing chlorine (for example, “Whiteness”).
3. Folk remedy to remove dirt between seams:
- ammonia;
- toothpaste;
- baking soda;
- vinegar 6%;
- lemon juice diluted with water.
Preparation of the solution:
- Before preparing the solution, open windows and doors - create a draft;
- use rubber gloves;
- After renewing the seams, leave them to stand for 15 minutes and wipe with a clean cloth.
4. If affected by fungus small areas seams - mask them with a felt-tip pen with waterproof filler. If big square— paint the seams with moisture-resistant (water-based) paint.
5. In addition, a steam generator can be used to clean the joints between the tiles. Here it is enough to direct a stream of hot steam at required area, and then remove dirt and thoroughly rinse the cleaned seam.
6. Remove fungi, heavy pollution can be done using fine sandpaper.
7. If cleaning no longer helps, you need to replace the grout. To do this, the old one is removed and a new one is applied, but with special protection against contamination.
8. To clean the grout, you can use oxygen bleach, which will restore the color of the grout and require a minimum of effort. Simply mix it with warm water and pour it onto the stained area. Leave for half an hour to an hour and rinse with clean water.
If you neglect to clean the walls and floors after each bath, sooner or later disgusting dirt and mold will appear on the walls and floors. Water, lime and dust accumulate in the joints between the tiles, which is an excellent breeding ground for fungal growth.

Peculiarities
Tiles – excellent finishing material, which is classified as durable and easy to maintain. However, rarely does anyone manage to avoid darkening, against which the usual wet cleaning is powerless. The sloppy appearance of tile joints that were recently white will upset any housewife.
Before we move on to learning how to clean seams, let's figure out why tile seams darken. The level of contamination depends on the purpose of the room in which the tiles were laid. Often in the hallway and kitchen the coating quickly loses appearance, because these rooms are more polluted than others. The tiles themselves are washed regularly, but cleaning the seams is much more difficult, so this space is not cleaned often. The method of dealing with darkening must be chosen depending on the type of contamination. They are caused by food and detergent residues, dust, and street dirt.
Unfortunately, the grout loses its original appearance very quickly, since it has rough surface, in which dirt easily gets stuck. Therefore, when thinking about the renovation and design of a room, it is important to take care of practicality and choose a darker grout, otherwise snow-white seams will not please you with whiteness for very long.

Cleaning away dirt
Even after general cleaning tile joints may have a sloppy appearance. But there are still ways to return the seams to their original state, and there are quite a lot of them.
The choice of method depends on the color of the grout and the type of tile itself. The key differences between these methods are the use of household chemicals or home remedies. Both of them are quite effective.
Soda and vinegar
It is necessary to make a mixture of water and table soda in a ratio of 3 to 1. You should get a thick paste that is suitable for cleaning colored joints, but can be harmful natural materials made of limestone and marble. The operating algorithm is as follows:
- The paste is applied to the joint with fingers wearing rubber gloves so as not to cause microtrauma to the skin of the hands;
- A solution of water and vinegar is made in a ratio of 1 to 1. The solution is poured into a container with a spray bottle;
- The product is sprayed onto the applied paste. The mass begins to bubble, therefore the process has begun chemical reaction;
- Wait until the bubbling stops;
- Clean the joints with a stiff brush;
- Swipe wet cleaning several times to wash off any remaining solution.


Oxidized bleach
- Oxidized bleach in a volume of 2 tablespoons is dissolved in 2 glasses of water;
- It is necessary to test the liquid in an inconspicuous place before applying it to the entire tiled surface. In some cases, the grout will change color, so make sure you don't ruin the grout;
- We water the seams with solution.
- We clean in small areas so that puddles of liquid do not collect on the floor;
- Rub the solution into the joint with a brush. You need to go especially carefully around the corners and edges;
- At the end, you need to rinse the floor thoroughly.

Hydrogen peroxide, baking soda and dishwashing liquid
Make a paste of 3/4 cup baking soda, 1/4 peroxide and 1 tablespoon dish soap. This method is very effective due to its components:
- Baking soda works as an abrasive;
- Peroxide reacts with baking soda, thereby having a whitening effect;
- Dish detergent easily removes grease.
Apply the paste evenly with a brush to the joints and leave for a quarter of an hour. Wash the seams with warm water several times.


Steam cleaner
Steam cleaners perfectly clean and disinfect the gaps between tiles without using chemical substances. This household appliance You don’t have to buy it; you’ll probably find offers to rent it. A steam cleaner that comes with a hose and a brush attachment will work for you.
Clean with a steam cleaner according to the instructions. After turning on, wait until the device reaches required temperature. The instructions will indicate how long you need to wait. The steam method is effective not only for removing dust and dirt, but also mold.

To summarize, it becomes clear that it is easier to maintain constant cleanliness between the tiles than to then fight an unequal battle with old dirt and try to scrub off fungal settlements. To prevent stubborn stains from recurring, apply to joints. protective agent, which will prevent dirt and mold from penetrating into the grout.
Removing mold
Another enemy that is extremely difficult to overcome is black mold. Her disgusting growths on the walls and floor between the tiles can cancel out even the most expensive and sophisticated bathroom renovations.
There are several methods that can get rid of this blackness. Let's start with homemade recipes, because many housewives do not welcome the use of chemicals in everyday life, fearing harm to health. In addition, home methods are much more economical than buying expensive cleaning products.

The most effective recipes to kill mold:
- Paste of soda and chlorine powder. Bleach or any other cleaning powder containing chlorine will do. The resulting mixture of soda and bleach effectively brightens and disinfects the surface. But as mentioned above, mixtures containing bleach are not suitable for colored seams. When working with aggressive substances such as chlorine, wear gloves and a protective mask. The mass is applied with a spatula to problem areas until dry. Then all this is washed off with water.
- Citric acid, soda and vinegar. Another working home method for combating mold is a solution of water, vinegar, citric acid and soda. If the moldiness is insignificant, then you can treat the affected areas with vinegar without dilution, then rinse off.
- Ammonia. Dissolve two tablespoons of ammonia in two liters of water. Then spray the solution onto the affected surface. After a quarter of an hour, go through with a damp cloth and wipe dry. The antimicrobial effect of ammonia will help get rid of black plaque.
- Steam. A steam generator will help deal not only with dirt, but also with mold. The device supplies hot steam under pressure, which softens and pushes out dirt from the tile joints, and heat destroys mold and mildew.
This method is certainly the most pleasant and convenient. When cleaning, you don’t have to breathe in caustic chemicals and create dampness in the room. However, there is a risk of getting burned, so you need to work carefully.


Household chemicals
It is not always possible to get rid of blackness using home methods, and then you should turn to specialized means aimed at combating mold. Household chemicals does not always give the desired results, and the smell of vinegar and bleach is not pleasant. Today you can buy many effective means, which will get rid of mold and protect against its occurrence in the future. The most popular means include:
- "Atlas Dolphin"- This is a protective emulsion; it does not clean, but creates a film that prevents the deposition of dirt and bacteria. It is applied immediately after grouting or after cleaning the seams. This protection will help keep your bath clean.
- "Bozo"– a concentrate that removes lime and rust, disinfects and eliminates odors. It is diluted in a ratio of 1 to 4, but the fungus is directly treated with pure concentrate.
- "Mellerud" - An excellent product for cleaning bathroom tiles. Quickly removes soap and lime stains, refreshing the color of grout and tiles. For routine cleaning, it is recommended to dilute 125 g of product per bucket of water. For old stains, use without dilution.
- "Snowball"– a special pencil that whitens seams and kills fungus. The product is effective for shallow lesions.
- Melamine sponge- This is not an absorbent cleaning item, as you might think, but a detergent. It is a kind of eraser that erases dirt and erases itself. Just wet the sponge and try to clean off the dirt.


All these substances are much stronger and more concentrated than homemade components, and this is certainly a plus, but the minus is their high toxicity, so it is better to carry out the work in a respirator, ensuring ventilation of the room.
In advanced cases, more serious measures are needed, since the fungus has managed to settle deep in the grout. The best thing, of course, would be to remove old tiles, clean and disinfect the surface and put on a new one. If major renovation is not included in the plans, you will have to deep clean the seams.
Mold should never be left unattended. Fungal spores are extremely dangerous to health, which, as you know, is most expensive.
Grouting is tedious and hard work, but it's worth it. The work can be done with a spatula, but it is better to use a drill with a half-disk attachment, this will somewhat simplify the task. Before work, the tile joints should be wetted with water and vinegar to make the grout more pliable. After this, the joints need to be washed, dried and treated with antifungal agents, and then grouted again.
The seams between the tiles in the bathroom can safely be called the weakest link in the wall decoration - during the operation of the room they become so dirty that even expensive tiles lose their attractiveness against the backdrop of this dirt. There is no way to avoid this - unfortunately, these are the operating conditions of this premises. The only thing that can be counteracted by this phenomenon is regular cleaning of the seams from dirt. This is what we will talk about in this article, in which, together with the site okuhne.net, we will deal with the question of how to clean the seams between tiles - we will look at different variants solutions to this issue and choose the best one among them.
How to clean the seams between tiles photo
How to clean the joints between tiles: chemical method
What's happened chemical method cleaning tile seams from dirt? This is a simple matter of washing them using modern detergents. But their use is somewhat limited - the fact is that they can easily cope with smooth surfaces, but not with rough and porous ones, which, in fact, are the seams between. As a rule, dirt eats into them, and modern household chemicals turn out to be a weak assistant in this matter, especially if we're talking about about loyal household chemicals. If you want to try your luck with similar means, then it’s better to look for strong acid-based solutions, but you shouldn’t count on any comforting results with their help - the most you can do is lighten the seam a little, but no more.

How to whiten the seams between tiles photo
Among all similar household chemical compositions Special attention It’s better to turn to the good old Pemolux, the effectiveness of which has been proven by time. But you shouldn’t count on it too much if we are talking about serious old pollution. All chemical cleaners are used in the same way - they are applied to the seams, after which they are allowed to sit for the reagents to do their job. After this, the seams are washed with warm water. To increase the effect of their impact, you can additionally use a brush.
In principle, in some way, chemistry works, but it only works when the dirt has not yet had time to completely penetrate the structure. That is why such care of the tiles, or rather the seams between them, must begin from the very beginning of the tile’s operation - in general, it should not be brought to a critical moment!
How to clean tile joints: mechanical technology
Somewhat mechanical method solving the question of how to clean the grout in the bathroom is more effective - it doesn’t matter how deep the dirt has penetrated into the grout structure. You simply pick up a scraper and gradually, centimeter by centimeter, clean off upper layer grout along with dirt. Yes, the work is difficult, tedious and painstaking, but it is productive.

How to clean grout in a bathroom photo
If we talk about devices that can be used to perform such work, then here we can only highlight sandpaper or a kitchen scraper. It is highly not recommended to mechanize this cleaning method and use all kinds of attachments on a drill - the only thing you will achieve in this way is damage the enamel. Everything needs to be done by hand, which is the disadvantage this method. Alternatively, you can use non-hard metal brushes, but they remove the grout layer in streaks that are noticeable. A brush and sandpaper are, of course, good, but a small semicircular chisel, which is usually used by woodcarvers, has proven to work best in practice. In principle, it is quite simple to make it from a thin tube, cutting it in half and sharpening the edge on a grinder.
How to clean tile seams: the traditional way
In most cases folk technologies are always more effective than cleaning products modern technologies. Using them to clean the seams between tiles is difficult and simple at the same time. Essentially, it is a mixture of chemical and mechanical technology - at the same time it allows you to whiten the seams between the tiles and clean them. Despite this, you still have to work a little - of course, if you want to get a good result.

Folk way to clean seams photo
This technology consists of self-cooking reagent from improvised means and, of course, using it in practice.
This composition is prepared from ordinary baking soda, vinegar and lemon. The recipe is simple - six glasses of water, half a glass of soda, a third of a glass of vinegar and the same amount of lemon juice.
The liquid thus obtained is applied to the seams, it is given a ten-minute exposure so that the resulting “acid” does its job, after which all dirt is easily washed off with clean water. Strengthen the effect of such exposure homemade solution You can use a brush - it will help the solution penetrate faster into the grout structure. As a rule, in order to completely clean the seams from dirt, this operation must be performed 2-3 times.
Cardinal technology for cleaning seams
Let’s just say that there are some contaminants that cannot be removed using the methods described above. In most cases, this is old dirt with traces of mold and other impurities - there is no point in fighting such dirt. Especially with, no matter how you wash it, or scrape it, or poison it household chemicals, anyway, after a while it will appear again - a tenacious muck, you can’t say anything. It is better to destroy such pollution in drastic ways. Yes Yes - old grout you will have to completely dig it out, treat the cleaned seams with a special primer (for example, Ceresit CT 99), and then apply new grout prepared with the addition of the previously specified primer.

How to clean tile grout photo
I agree, the job is not easy, but if you don’t want to change the tiles in the bathroom, you can do it. The situation is somewhat alleviated special devices, for example, scrapers - their direct purpose is to remove glue from seams, but they also cope with grout quite simply. Essentially, this is a handle on which wide diamond-coated blades are attached - the thickness of one blade is 1.5 mm, and if your seam is wider, then several blades are installed on the machine. Although you can get by with just one - in this case, the knife needs to be installed slightly diagonally. With this approach to business, diamond blades for cleaning seams are quickly ground down.
A method for protecting the seams between tiles from contamination
Having once decided the question of how to clean the seams between tiles, few people will want to return to it again - after working hard for several days, you will probably curse everything on which this world rests. But you will curse the master even more when you find out that there are special compounds to protect seams from contamination. Applying them is a painstaking task, and not every master will want to get involved with this work. But it’s in vain, since these remedies really work. They fill the pores in the grout and thereby prevent dirt from penetrating into them - after treating the seams with similar compounds, the grout is easy to clean, just like the glossy tile itself.

How to clean tile joints photo
Application of materials of this type on the seams is somewhat problematic - in terms of the fact that manufacturers strongly do not recommend that the protective liquid get on the tile itself. According to them, stains may form where the tiles come into contact with the liquid. It is for this reason that, in order to avoid such a turn of events, it is recommended to cover each seam on both sides with tape, which, as you understand, is quite troublesome. In general, you should not count on the master to do this work for free and efficiently. You won’t be able to control it either, since this liquid is absolutely colorless and is not visible after application. In a good way, if you want high-quality protection of seams from dirt, then do it yourself. What is the name of this liquid, you ask? A bright representative Similar products can be called ATLAS DELFIN (it slightly embellishes the white seam with a yellowish tint) and Ceresit CT 10 Super.
In principle, that’s all, all that remains is to add just a little. One little advice– if you don’t want to solve the problem of how to clean the joints between tiles with enviable regularity, do not use white grout in the bathroom. Contrasting seams also look very nice and clean white tile in these rooms it is used very rarely, so replace white grout any other is quite simple!