How to sheathe the inside of a log house with plasterboard. Covering wooden walls with plasterboard Installation of plasterboard walls in a wooden house
Read also
When the construction stage is completed and the turn of finishing approaches, the question of choosing the material arises. If the walls are not level, then plasterboard sheathing is ideal. In this case, you can do redevelopment, add various designs and additional partitions or create arches, with the help of which you can conditionally divide the room into several zones.
This finish provides good protection from moisture to wooden walls and retains heat inside the house. This material is easy to work with, so anyone can handle it.
Advantages of finishing plasterboard walls in a wooden house
If you choose between clapboard and drywall, the second option will be cheaper. This finishing material It is considered environmentally friendly, therefore safe for health, and it can also be used as wall insulation.

Drywall is easy to install and is lightweight. It can be used for both walls and ceilings. With its help you can hide all defects and surface irregularities, cover wires and pipes.
A structure made from a profile to which drywall is attached can be used for insulation or vapor barrier. It will help further protect the house from freezing, mold and mildew on the walls.
There is absolutely fireproof plasterboard for finishing walls in wooden house. It is not subject to combustion due to its special staff. Thus, it will ensure the safety of the entire house and will not allow the flames to flare up.
In addition, the perfectly leveled surface allows you to come up with different original options interior You can make paintings or panels, paint or wallpaper, create various variations ceilings or use tiles.
Is everything so good if you use drywall in a wooden house?
Finishing nuances
Besides large quantity advantages, drywall also has quite a few disadvantages that should be taken into account when working. We list the main ones:
- Quite fragile material. Sheets must be carefully moved and transported, otherwise their integrity may be compromised. If you make walls from plasterboard, you need to remember that hanging heavy objects on it will not work. Or profile design will have to be strengthened in advance.
- It will not be possible to work with drywall if the thermometer is at work area falls below 10 degrees Celsius.
- Due to the use of a frame in plasterboard finishing, the area of the room is significantly reduced.

Drywall is a fireproof and environmentally friendly material. Construction stores offer different types this material. Which type to choose for interior decoration walls wooden house drywall?
Types of drywall
On construction markets presented the following types of this material:
- Standard drywall is a pressed gypsum mixture lined on both sides with sheets of cardboard. Can be used in rooms with low humidity.
- Moisture-resistant drywall. This material contains special additives that prevent the formation of fungi, mold and moisture accumulation.
- Reinforced plasterboard. It is based on fiberglass additives, so this material is stronger and more durable.
- Mixed type of drywall - it combines both types: moisture-resistant and reinforced. This material is not afraid of fire, moisture, or open rays of the sun.
Preparing walls in a wooden house
Newly built wooden building It should stand for about six months for the foundation to settle. Only after this is finishing done. Only houses made of laminated timber do not shrink so much, so you don’t have to wait so long. The walls need to be cleaned and the old coating, if any, removed from them.

Then you need to treat the wooden beam with a special solution, insulate it and seal all the cracks. To do this, you can use moss, tow or sealant. Be sure to sand the logs.
Frame installation
Finishing walls with plasterboard in a wooden house involves installing a floating frame, because despite the fact that the time for the house to settle has been waited, the settling process does not end there. To create structures, you can use profiles made of both wood and metal.
Is it possible to attach drywall to wooden blocks? The answer will be simple - why not?
Wood frame
As is known, natural wood exposed to rotting processes and fungal infection. Sometimes insects even appear in it. To ensure durability and moisture protection, it is necessary to treat and impregnate with special antiseptics bars and then dry them thoroughly.
Under the load-bearing supports, take a block of at least 75 by 25 mm. For crossbars, planks 50 by 25 mm are suitable. The support should be equal to the width of the drywall sheet. To ensure the reliability of the frame, you need to fasten the crossbars as often as possible. And the support should be located in the center of the sheet. Place the crossbars where the panels meet. Use plastic dowels as fasteners.

Tip: attach the block to the wall, drill a hole for the dowel all the way through so that a mark appears in the wall. Drive the dowel into the wall, and then, again attaching the block, tighten the screw.
Metal carcass
Before covering the walls in a wooden house with plasterboard, install a metal frame. It is more durable and reliable. The supports are also installed with the same measured distance and checked with a level. But they need to be attached to the sheathing, which rests securely on wooden base. Self-tapping screws are also used for fastening.
When finishing the walls of a wooden house with plasterboard, some people glue the sheets directly to the walls, believing that they are quite smooth. However, this method is only suitable for concrete or brick walls.
There is also another method for finishing walls after shrinkage - creating new structures using sheets. In this case, the frame should be placed a little further from the walls and sheathed with sheets. It turns out that the partition is from scratch.

A lattice is created from the profiles, and a thermal insulation layer is laid between it. Then there is a vapor barrier layer of film. The film is secured by laying the sheets on top of each other, and then running tape along the seams. You can also install electrical wiring and hide pipes in the frame structure. It is better to insulate the wires in corrugated pipe. It is necessary to first leave small distances in the frame racks, into which the cable can then be laid. It should fit tightly, for this you can use jumpers.
Install the frame so that there is a distance of 3-4 cm to the ceiling, and about 1 cm to the floor. To allow air to circulate freely during temperature changes, you can close such gaps with a plinth.
When the timber is prepared and the frame is built, you can move on to the next stage - covering the walls with plasterboard in a wooden house.
Installation of drywall sheets
As a rule, this work is carried out by qualified builders. However, you can do it yourself. Let's look at how to cover the walls with plasterboard in a wooden house with your own hands.

After completing the installation of drywall sheets, the stage begins finishing. It is better to glue all the seams between the sheets with a special mesh and putty.
In this article we looked at detailed instructions finishing a wooden house with plasterboard with your own hands. Turn your ideas into reality, create original multi-level ceilings, make shelving and partitions, or simply cladding walls. Make the structure reliable and durable so that you can hang it on it in the future. new wall decorative elements.
A wooden house or cottage is the dream of many. Such a home turns out to be very beautiful and cozy. But when it comes to interior decoration, many fall into complete prostration. Many questions immediately arise that cannot be answered immediately. Of course, you want to leave everything in its original form, preserve the wooden structure, but this is not always possible. Much depends on real conditions and financial capabilities.
Various types of materials can be used for interior decoration. The quickest and easiest way is to cover the walls with plasterboard in a wooden house. Drywall will help smooth out complex defects. And already on it you can lay various decorative coverings.
Drywall is used when there are significant uneven walls from inside the house. Especially when it is not possible to use a layer of putty or plaster.
Exist various advantages and the disadvantages of this material that need to be taken into account when installing it yourself.

Advantages:
- has excellent sound insulation properties;
- bends well, you can create various configurations;
- due to the installation features, when lathing is used, it turns out additional layer thermal insulation;
- perfectly levels walls and other surfaces;
- does not require special conditions for work;
- installation does not take much time;
- significant defects can be leveled;
- All communications are well laid and do not require additional channels.
Flaws:
- “eats up” some area, sometimes quite noticeable;
- needs further finishing;
- is not the final look, you need to apply a decorative layer;
- can create an additional sound effect - “drum”;
- afraid of moisture;
- can only be used inside buildings;
- for hanging heavy objects interior design, you have to make overheads in advance or use long anchors.
Rules for working in a wooden house

In general, all work in a wooden house, unless we are talking about laminated timber, is better to start six months after construction. At first, the structure undergoes significant shrinkage. This leads to deformations that are reflected in all work performed.
- It is better to fasten gypsum board sheets with gaps. That is, you need to retreat a couple of centimeters from the ceiling and floor. Such gaps are closed with skirting boards.
- It is advisable to leave a small distance (1-2 mm) between the sheets.
- We must not forget about the vapor barrier device.
- The walls must be carefully treated before installing drywall. Seal all cracks and cover with a protective compound.
Installation of various types of lathing
GKL sheets can be mounted directly on the wall, but this is not always possible - it will not be possible to straighten out serious curvatures. The best solution there will be a sheathing device. It comes in two types: wooden or metal.
Wooden structure
It is arranged in houses that have long stopped shrinking. That is, it can continue, but the indicators are completely insignificant.

- Selected required lumber, it is treated with antiseptics and fire resistance compounds.
- The beam for the racks must be at least 75*30. The rest is from 50*25 mm.
- The necessary markings are made.
- A horizontal beam is attached to the floor and ceiling. On opposite walls - it is mounted vertically. Thus, a closed square or rectangle is obtained.
- The resulting profile is set to vertical racks. This is done every 60 cm.
- Attach horizontal ties.
- Insulation is placed in the resulting squares and a vapor barrier is made.
- We must not forget about communications.
Everything needs to be leveled well; a level is suitable for this. The reference point is the largest protrusion of the wall. Self-tapping screws with washers are used for fastening. This completes the installation of wooden sheathing inside the house; next will be the installation of gypsum plasterboard sheets.
Metal structure
The metal frame is mounted quite simply. It's easy to do it yourself. For this purpose, a special metal profile and additional fittings are used. The profile is cut to the required size.
 Installation of lathing from metal profiles
 - Careful markings are made from the inside of the house.
- Before installation, all necessary values are measured.
- 10 cm retreat from opposite walls.
- Using plumb lines, determine the location of the upper and lower guides.
- Racks are installed, 60 cm apart. They are secured using hangers.
- Cross members are attached.
Advice! For new houses, a movable type of sheathing is used. It differs in that the fastening occurs on wooden sheathing, and the crossbars are attached through grooves in the supporting profile.

This material can be installed very quickly. Immediately, before the start of sheathing, measure required size. If the sheet is larger, then the excess is cut off with a simple hacksaw. Next, if necessary, you can cut it with a construction knife.
The sheets have different sides, this must be taken into account when finishing. Facial will be white, there will be no markings on it. The reverse side is dark in color, there is a special marking on it, it is turned towards the wall.
Installation is carried out using special screws. It is taken into account that their pitch is 100 mm. Next comes the interior finishing. It consists of sealing all cracks and joints. Possible irregularities are leveled out; they form in the places where the window blocks will be located.
All that remains is to decide on the decorative coating.
As a conclusion
Drywall in a wooden house - perfect solution many problems. It is distinguished by fast and simple installation, which does not require special skills. Using drywall, you can level out any unevenness in interior walls and ceilings. The main thing to remember is that it is better to use it after the building has settled.
Covering walls with plasterboard in a wooden house is a great way to short time Carry out interior decoration of residential and utility rooms when minimum costs. But, as with the use of any building material, repair and decoration in this way has positive and negative aspects, as well as its own subtleties, without taking into account which the result may not be quite the expected result.
 Drywall in a wooden house
 How to do cladding correctly wooden walls GKL and what do you need to know about such work?
Plasterboard sheets are a universal finishing material. It allows you to create perfectly smooth wall surfaces in almost any room, but there are drawbacks to this finishing method.
| Positive aspects of finishing with plasterboard | Negative aspects of finishing with plasterboard |
| Versatility. The material is suitable for all types of premises (residential/non-residential). You can sheathe the walls in a wooden house or any other (brick, concrete). | Low moisture resistance. If flooded, the finish will quickly deteriorate. |
| Allows the alignment of almost any differences in walls and ceilings (even with a significant difference of 80-100 mm). | Relatively fragile material. |
| The ability to create walls from plasterboard of any shape; the material bends perfectly and takes the desired shape. | When creating structures, it reduces the volume of the room. |
| Plasterboard structures allow you to hide all engineering communications in them. | |
| Installing drywall can significantly reduce the cost of interior finishing. For minimal decor A small amount of plaster is needed. | |
| Safe for health, non-flammable.
| |
| Easily combined with other finishing materials. |

Despite the shortcomings, plasterboard finishing in a wooden house is great option quickly swipe interior renovation in a newly built house or to restore an old one. It is only important to take into account some specifics of the room and purchase necessary materials .
 Scheme for using gypsum boards in the house
 How to level walls with plasterboard in a wooden house and what will be needed for this?
Stages of covering a wooden house with plasterboard
Before purchasing the required amount of materials, you need to determine what type of frame the interior will have: wood or metal.
Metal or wood
The walls of a wooden house are quite suitable for finishing with gypsum plasterboard, made from the same material. But, there are some nuances that need to be taken into account before attaching sheets to such a frame:

It is desirable that the slats or timber for the frame be free of knots and other defects. Special attention You need to pay attention to choosing even planks, otherwise they will make it difficult to install the sheathing, and the walls themselves in the home will be crooked.
 Metal carcass
 However, if there are no problems with the wood, then this is suitable for assembling a frame for plasterboard finishing.
With metal profiles there is no such problem, you just need to stock up required quantity. You should definitely pay attention to the quality of the protective zinc coating and the wall thickness of the products (standard 0.6 mm).
What is needed for finishing
The basic list of materials and tools is the same as when working with drywall in conventional buildings. will be needed.
- Drill and screwdriver with a set of drills and bits.
- Grinder and metal scissors (for cutting profiles). If it is built wooden frame, then a hacksaw for wood is quite enough.
- A knife for drywall or a regular stationery knife, but with a supply of blades.
- Plastering accessories: spatulas (300 mm and 50 mm wide), nozzle, mixer;
 Kit necessary tools and materials
 Materials you will need:
- Putty - starting and finishing.
- Serpyanka for joints.
- Primer.
- Drywall.
An important condition for finishing wooden walls with plasterboard is their initial treatment with antiseptics against rotting and fungus!
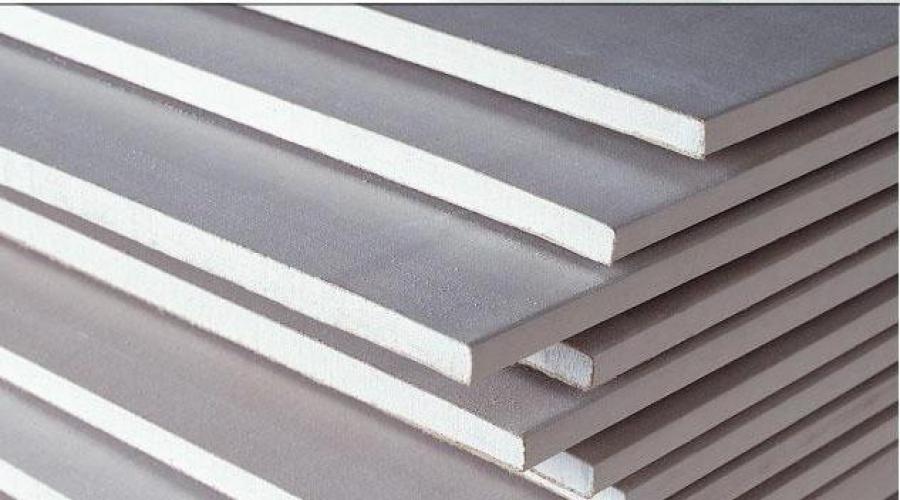
 Types of GK sheets
 Drywall is purchased taking into account the room in which it will be installed.
In toilets, bathrooms and kitchens, the use of moisture-resistant sheets is highly recommended. Stove and ventilation pipes are finished with material. In other rooms, as cladding, a standard wall sheet is quite suitable.
Preparatory stage
At the preparatory stage, before sheathing the walls, you need to carefully inspect them for changes, and if it is being restored old building, you need to check the tree carefully.
It is worth knowing that in a new house, after construction is completed, you cannot immediately begin installing drywall on wooden walls. It takes time for the wood to shrink and dry out.
If there are places with rot or fungus, they are thoroughly cleaned and treated with antiseptics. Severely damaged areas need to be restored.
In a new wooden house, before covering the premises with plasterboard, it is necessary to treat all surfaces with an antiseptic, as well as with a special impregnation that preserves the wood.
 Antiseptic treatment
 If the surfaces are perfectly flat (which is extremely rare), you can fasten the drywall to the wall. In other cases, determine the difference in height differences and select optimal distance on which the frame will be mounted. After this, you can begin assembling the base and finishing the walls with plasterboard in a wooden house.
Installation of metal and wooden frames
As mentioned above, when smooth walls or with minor differences (a few millimeters) you can attach sheets without a profile directly to wooden walls. However, this happens extremely rarely, and before attaching drywall to a wooden wall, you need to build an appropriate frame. How this is done is shown in the video:
Wooden frame
The sheathing is assembled under from slats or timber of the appropriate section. Initially, elements are installed on the floor and ceiling that will act as guides. Fixation can be achieved with ordinary self-tapping screws.
The same slats are mounted on the walls on the left and right. Then they begin to install the main racks from the same timber. If the distance from the walls of a wooden house is significant, direct hangers are attached to them, with which the sheathing is connected to the load-bearing surface.
 Wooden frame for drywall
 With guides, the slats are attached with mounting angles or straight hangers bent at right angles. Wood screws are used as fasteners. In order for the structure to be rigid and reliable, you need to install transverse slats made of timber on a wooden frame, which are installed on the base using mounting angles. The frame on the ceiling is assembled in a similar way.
When ready, insulation is placed in it (if necessary) and wiring is laid.
Metal carcass
Using the frame, it is assembled according to the same principle as in conventional brick buildings, finishing them with gypsum board.
 Frame made of metal profiles
 Finishing stages:
- Initially, guides from the UD profile are installed according to the markings.
- Next, you need to install direct hangers to the walls.
- The frame posts are inserted into the guides and connected, to which the hangers are bent and secured with “bugs”. The number of profiles is calculated based on 3 pieces per sheet of drywall. Moreover, adjacent sheets of sheathing are joined to the outer slats.
- Also required crossbars, made from rack profile.
When the frame is ready, insulation is placed in it and the wiring is pulled through.
 Wiring in a profile frame
 On the ceiling, the structure for plasterboard is assembled using PNP and PP profiles.
Base sheathing
Sheets of material are secured using self-tapping screws with a length of at least 20 mm. Fastening drywall is done using a screwdriver or drill with variable speed control.
The sheet is installed on the frame and one edge is mounted, and then the opposite. When screwing in a self-tapping screw, you need to control the pressing force so that the head does not damage upper layer material, while it is slightly recessed into the surface (1–1.5 mm).
The use of gypsum boards in an old house in this video.
If you need to cut a sheet, first make markings on its surface on the front and back sides. Then an incision is made. By cutting through the cardboard, you can easily break off the desired piece. Irregularities in the cut can be easily smoothed out with the same knife or a regular plane.
You need to attach drywall to wooden blocks, just like to metal slats, using self-tapping screws and a screwdriver.
 Attaching drywall to the profile
 After erecting walls, creating a roof, laying engineering communications it's time to start finishing works in the house. Plasterboard wall covering – The final stage construction. The building material is designed to level the foundations, create sound insulation, insulation and make the interior attractive.
Drywall has gained popularity due to its environmental friendliness and ease of working with it. At the same time with high quality the material has an affordable price, which captivates owners who decide to build a wooden house.
Using drywall to create unique interiors
Professionals include the main advantages of gypsum board cladding:
- surface leveling;
- additional insulation;
- excellent ;
- Masking of utility lines;
- Creation unique design and interior decoration.
GKL is suitable for covering walls in a wooden house. It is recommended to create metal sheathing for finishing with plasterboard, since a wooden frame is less resistant to the negative influence of external factors.
How to choose the right material
When preparing for cladding, the question arises of what material to purchase for the job. Manufacturers produce various types plasterboard, which can be used to sheathe walls or ceilings in a wooden house:
- standard gypsum boards are used for covering walls in rooms with normal humidity levels;
- moisture-resistant material has low level water absorption and suitable for tiling kitchens and bathrooms;
- fire-resistant gypsum has a technical purpose and is used to increase fire safety.
The type of drywall is chosen depending on the room in which the walls are covered. The choice also depends on the type of work: insulation, leveling surfaces with plasterboard or performing decorative elements. This affects the feasibility of creating a project and the amount of materials purchased.
Before starting work, measure the walls, determine the perimeter of the room to calculate the amount of plasterboard and insulation. Don’t forget about the vapor barrier layer that is attached from the inside to the wooden wall.
Preparing for work
To create high-quality plasterboard sheathing, purchase and prepare the following tools in advance:
- building level;
- roulette;
- pencil;
- perforator;
- drill;
- screwdriver;
- gypsum board knife;
- putty knife;
- self-tapping screws
 Sheathing the walls yourself will not be difficult
 Covering wooden walls from the inside requires preliminary preparation grounds. To do this, seal all the cracks, cracks and holes in timber house with help polyurethane foam. Wooden walls are treated with a special solution that prevents the appearance of mold, mildew, and protects against swelling. Builders recommend using deep penetration mixtures.
Preparation for processing:
- remove old nails, staples and other dangerous objects;
- correct defects that may affect the creation of the skin.
After ventilation, begin processing wooden bases antiseptic agents.
Sheathing with plasterboard is a quick process. The speed depends on the professionalism of the craftsmen, the quality of materials and tools. It is important to create the frame correctly. If to preparatory stage If you take it responsibly, the whole plating process will not take much time.
Read also:– stages of work with photos and videos
Carrying out installation
The frame for plasterboard is made from metal profile or wooden blocks five centimeters wide. Sheathing involves creating perfectly smooth surfaces. Therefore, the sheathing must be assembled correctly, without distortions, strictly in vertical position. During the work, use a building level.
First, the guides are installed, then the transverse profiles are attached to them. If the base area is small, experts do not install crossbars.
The structure is strengthened wooden beams, if you plan to hang heavy ones on the walls decorative elements or objects. It is convenient to hide electrical wires behind the sheathing.
After installing the frame, they begin to install the insulation. It could be:
- ecowool;
- mineral, basalt material;
- expanded polystyrene.
 The room can be properly insulated behind the frame structure
 Drywall sheets are cut to specified sizes. This procedure is performed special knife. The material is secured using self-tapping screws. During installation, builders leave small gaps between the sheets of drywall in the areas adjacent to the profile, which are then sealed with special mixtures.
There are also frameless method drywall fastenings. However, this option provides that the walls under the gypsum board are smooth. To fix the material to the wall, special adhesives are used.
Read also:– stages of work with photos and videos
Sheathing methods
Each cladding method has its own advantages and disadvantages. The frame design ensures reliability and strength of fastening. Communications are hidden behind the sheathing and insulation is laid. The frame is able to withstand any finishing material, including ceramic tiles.
However, this method also has disadvantages. Creating a frame for plasterboard sheathing requires additional costs for the purchase of profiles and components. It is difficult for an inexperienced craftsman to assemble the structure with his own hands. In addition, a bulky frame hides a certain amount of space, which is unprofitable for tight spaces.
 The choice of cladding method depends on the preferences of the owner
 Frameless sheathing does not require additional costs, easy to install, compact. However, the strength is much less frame structure. Sheathing cannot be created on uneven surface or with defects. Glued gypsum boards will not withstand heavy finishing materials. Soundproofing material cannot be laid.
Installation of drywall on a metal profile
Finishing
After the plasterboard covering work is completed, the builders begin further finishing of the walls, which involves:
- high-quality sealing of joints;
- puttying at joints;
- surface priming;
- final puttying.
Creating a reliable protective layer will have beneficial influence on the condition of the surface. It will protect the walls from external negative factors. The right finish will allow you to create flat surface and prepare it for further facing work.
After completely dry paint is applied to the base, wallpaper is glued, and tiles are laid. Covering the walls of a wooden house with plasterboard is quite simple. The main thing is to strictly follow the technology and advice of experts. Then it will go quickly and will not cause difficulties even for novice builders.
Drywall - universal construction material for interior decoration, leveling walls, forming partitions and complex structures decorative in nature. It can be used in houses made of any materials - stone, concrete, wood. Finishing a wooden house with plasterboard is an inexpensive and optimal solution for arranging living space in any style and shape.
The essence of drywall
There are many materials based on gypsum: plasters, sheet products, blocks for assembling walls and partitions. It is sometimes difficult to find differences between them, but gypsum plasterboard (plasterboard sheet) is separate species sheet material, which cannot be confused with anything.
GKL is a “sandwich” of 2 sheets of cardboard, between which a pressed gypsum sheet 0.65...1.25 cm thick is enclosed. The mineral itself is light and porous, and therefore has a number of unique properties:
- The small mass of the sheet distinguishes it favorably from other finishing materials in terms of the same volume and thickness;
- High porosity favors heat retention indoors (this is especially true when covering external walls on the room side);
- Drywall absorbs sound, again due to its high porosity;
- The plaster itself does not burn, so it can be hidden under sheets electrical wiring, as well as other communications;
- Sheets can be cut into any shape without special equipment;
- Low cost GCR is one of the main factors why the material is often chosen for finishing walls and ceilings.
The only thing to remember is that plaster and cardboard are afraid high humidity, water getting on their surface is generally unacceptable.
All these qualities make drywall a popular material for interior work, especially among owners of private wooden cottages, where walls made of timber or logs need leveling sheathing.
Drywall in a wooden house: what can be sheathed
As already mentioned, gypsum board sheets are a universal leveling and finishing material. It is suitable for use on surfaces that are not subject to mechanical stress, since gypsum is very fragile. Plasterboard in a wooden house can be covered with:
- Ceiling;
- Walls;
- Partitions.
From sheets and a frame for them you can create:
- Cabinets and niches;
- Bar counters;
- Arched openings;
- Multi-tiered ceilings and other structures.
All of the above types of structures and products can be created independently, using a single technique for working with this combined material. Let's look at the process using the example of wall and ceiling cladding.
Methods of fastening sheets

Covering walls with plasterboard in a wooden house and finishing other structures can be done in two ways:
- 1) Frame method;
- 2) Frameless.
If we're talking about on the creation of partitions, multi-tiered and suspended ceilings, shelving, you can’t do without a frame.
Frameless fastening method plasterboard sheets simple: a sheet of plasterboard is attached to the wall using glue. This installation method is used to level the surface for finishing and facing works(for wallpapering, tiling). Bonding is only possible for relatively level base. This method is not suitable for finishing on logs.
We will consider the frame method of installing drywall in detail, since it is the same for creating any structures from gypsum plasterboard.
Metal or wooden frame
Finishing walls with plasterboard in a wooden house begins with aligning the frame to the leveled surface. There are 2 types of it:
- Metal;
- Wood.
Wooden houses can shrink significantly; timber or logs constantly exchange air and release moisture. These are uncomfortable conditions for metal, which lead to corrosion and deformation. In addition, installation of a steel frame is a labor-intensive process and requires the inclusion of a large number of additional parts, which will not be easy for a professional to deal with. Specialists very rarely install in wooden houses metal frames due to their low efficiency and high labor intensity.
For the construction of a frame in a wooden house, a small cross-section of softwood timber is ideal. From it you can assemble a strong frame for a partition, wall and or ceiling.
How to build a frame for plasterboard sheathing
In the case of a wooden house, you can go in different ways:
1) If the cladding is carried out in a house that was built several years ago and has settled sufficiently in height, you can mount a fixed frame of slats. To work you will need:
- 75×25 mm slats for guides for gypsum board joints;
- 50×25 slats for sheet guides;
- Self-tapping screws;
- Metal corners for fastening slats;
- Screwdriver;
- Ruler, pencil and stationery knife for marking and cutting gypsum boards.
Horizontal slats are attached along the lower edge and under the ceiling. In this case, the lower one lies on finished floor, the top one does not reach the ceiling 1-2, see. The placement of vertical guides starts from the corner. The distance between the main slats according to central axes should be equal to the width of the sheet. Internal slats are set in increments of 400 mm, i.e. 2 auxiliary slats for 1 sheet with a width of 1205 mm.
The slats are fastened to the wall using self-tapping screws or nails. The installation of each guide must be accompanied by checking verticality with a level or plumb line. To horizontal floor and ceiling rail main and auxiliary elements can be attached either metal corners, or with self-tapping screws, directing them to the support point at an angle of 45°.
It is important to check not only the strict verticality of the guides, but also the evenness of the plane to which the drywall will be attached. For control, it is optimal to use a long, flat rod or a building rule.
2) The movable frame is suitable for installation in a newly built house, in which the rigid frame given above is deformed when the structure shrinks. You will need the same set of tools, only as a moving element you need to purchase crab attachments and PAZ 2 strips. The plank is attached to the wall motionlessly; a crab pre-installed on it with a rail can move along it within 6 cm when shrinking. They tell you more about installation masters in the video. The work algorithm also applies to wooden frames.
3) One more interesting way installation of a movable frame without complex devices. The mounting is carried out not to the wall, but to the ceiling. To do this, nylon plugs are inserted into the places marked on it. They will protect metal and wood from negative impacts Each other. Holes are drilled in the ceiling beam at the attachment point, into which a long bolt and washer are threaded. It turns out that the upper part of the frame is not firmly fixed, but suspended. Thus, we leave the structure the opportunity to maintain its integrity and not change its position when the main wall shrinks and the ceiling lowers.
The guide rails are screwed into the ceiling and floor beams and to the walls along their length.
Fastening drywall

The frame is exposed, now we’ll figure out how to properly cover the walls with plasterboard in a wooden house with your own hands.
The standard width of a gypsum board sheet is 1205 mm. This size should be used as a guide when attaching sheets to slats.
The sheet is fixed to the guides using self-tapping screws. Alignment begins from the corner bars, orienting the drywall to the middle of the main vertical bar. Screw the sheet onto the screws with a screwdriver. It is important to insert the fastener to the required depth: the head must fit into the plane of the sheet, but the paper must remain intact. Otherwise, the product becomes vulnerable to external influences, and the fastening loses strength.
The pitch between the screws should be 30 cm.
Completion of work and preparation for finishing
When the sheets are attached to the frame, you can immediately begin sealing the seams. For this you will need:
- Gypsum mixture;
- Spatulas;
- Reinforcing polymer mesh;
- For external corners- metal perforated corners.

The solution is diluted according to the instructions in a small amount. Remember: the plaster sets within 20 minutes!
Use a spatula to seal all recessed screws, leveling the surface of the sheet using a crisscross movement of the spatula with the solution.
The joints of the sheets are filled with a gypsum mixture, on top of which a polymer reinforcing sickle tape is pressed. It is designed to strengthen the joint and protect against spillage, chipping and cracking of the mortar after hardening. More gypsum mixture is applied on top of the tape layer to mask the unevenness of the surface.
Plasterboard covering in a wooden house is now complete. Using the same principle, you can create a frame for a shelving unit, cover a shaped opening, or create a multi-tiered structure. Setting up the frame only at first glance seems difficult; once they get to work, even an inexperienced novice builder will quickly get involved and be able to independently assemble the frame for plasterboard sheathing in a wooden house.