How to learn to plaster walls at home yourself. Plastering walls with your own hands - the secrets of professionals and step-by-step technology for applying the solution. Plastering a brick wall
Read also
When doing a major renovation of an apartment, office or house, you will definitely encounter the need for plastering work. This process is very labor-intensive and requires professional skills. Therefore, it would be better to entrust this work to specialists. But if, in order to save your renovation budget, you decide to finish the walls yourself, then before mixing the solution, read the complete guide to plastering walls with your own hands given in our article.
Plastering walls can be done in several ways.
- In the plane, using the rule (without beacons). This option is suitable if the walls are generally quite smooth, without drops or strong deviations.
- Alignment of walls according to beacons. The second method is suitable if the walls have significant deviations and unevenness.
Requirements for plaster
The basic requirements for the quality of plastering work are set out in SNiP III-21-73. It is especially important to know them if you decide not to do the work yourself, but to hire workers. The quality of work is divided into 3 parts: for simple, improved and high-quality plaster.
- With simple plastering, vertical deviations are allowed no more than 3 mm per 1 m, but no more than 15 mm over the entire height of the room. Thus, the maximum wall deviation for ceilings of 2.5 m is 7.5 mm. Smooth unevenness is acceptable for every 4 square meters. m. - no more than 3 pieces. Their height or depth should not exceed 5 mm. Horizontally, the maximum deviation is 3 mm per 1 m.
- SNIP for improved plaster requires stricter compliance with tolerances. Vertically - no more than 2 mm per 1 m, but no more than 10 mm over the entire height of the room. The presence of smooth irregularities is acceptable - no more than 2 pieces. for 4 sq. m., less than 3 mm deep. For each meter horizontally, a deviation of no more than 2 mm is permissible.
- The most stringent requirements in SNIP are specified for high-quality plaster. Vertical deviations should be less than 1 mm per 1 m, but not more than 5 mm per room height. The maximum allowed presence of 2 irregularities per 4 square meters. m., less than 2 mm deep. At 1 m horizontally, a deviation of no more than 1 mm is permissible.
Aligning walls with beacons

It is in this way that significant unevenness in the wall can be removed. Beacon profiles will serve as a limiter so that the work is completed perfectly evenly with a tolerance of 1 mm/sq.m.
Cost of work
The price for plastering work starts from 600 rubles. per sq. m. Let's calculate how much you can save if you don't hire workers.
First of all, you need to buy a hammer drill and a 2 m long bubble level. All other consumables will be listed below. 6,000 rubles will be enough for all these accessories, so you will save after leveling one wall of 15 square meters. m.
If you need to level walls with an area of 90 square meters. m., then the savings will be at least 30,000 rubles! You will have the entire tool forever, and if you already have it, then it would be a sin not to use it. If we plaster the walls ourselves, we will definitely be confident in their quality.
Choosing a mixture for plaster
To better understand the process of leveling walls, look at the following on plaster:

- The last stage is grouting the plaster. To make this easier, it is better to start grouting before the solution dries. To do this, you need to dilute the plaster in small portions to a thinner consistency. Before grouting, moisten a small area of the wall about 1 square meter.
- Apply the solution to the malka and spread it in a thin layer. Then level this square with a hammer at a 45 degree angle, using strong pressure.
- Continue smoothing the square until the solution stops accumulating on the flour, while removing any excess. The surface should be flat and smooth.
- Repeat these steps, but smooth each new square overlapping the previous one. Try to work without breaks, being distracted only by mixing the solution.
Note! If you are laying tiles, the minimum layer of plaster should be 10 mm. In addition, there is no need to grout, since for maximum adhesion of the tiles to the wall it will be necessary to create artificial unevenness.
The result of the work is shown in the photo:
Plastering facades
Plastering external walls (facades) using lighthouses uses almost the same technology as indoors. The main thing here is to observe the temperature regime. The temperature outside should be above zero.
For facades, a mixture based on cement and sand is usually used. For greater durability, you can attach a metal mesh to the facade and plaster over it. It is especially important to use a mesh if the walls of the house are made of sand-lime brick.
We have looked in detail at how to properly plaster walls using beacons. Now you can do this work yourself without any problems. Don't be discouraged if you don't succeed the first time, everything comes with experience, and you will definitely learn how to make the walls perfectly even. We also recommend that you read our article about.
Reviews about us
Kyiv
Very friendly, punctual and responsible guys. They suggested the best way to do it and what materials to buy based on their experience. They work carefully, do very high quality work, there is something to compare with.
The Let's Do-Repair company is truly a pro.
Kyiv
I contacted them because I needed some repairs before selling my apartment. The apartment was inherited from my grandmother, and renovations were done in it a long time ago. After the surveyor arrived, I was advised to make some cosmetic repairs so that the apartment would subsequently be given a good price. In general, everything was done as I wanted and not at all expensive. Thank you very much.
Kyiv
I ordered an apartment renovation (three rooms, kitchen, bathroom). The work was completed even a couple of days ahead of schedule. In the process of purchasing building materials, assistance was provided in choosing based on the requirements: price and quality. Adequate craftsmen brought all our ideas to life. I was very pleased with the efficiency and quality of the work performed.
*according to the results of an independent survey conducted in 2017-2020
All human labor requires physical strength, waste of time, nerves, and financial costs. This rule does not bypass the construction sector, namely, plastering walls, which will be discussed further.

Plastering walls with your own hands is not an incredibly difficult process; anyone can learn it; you just need to prepare yourself psychologically. It has been proven that plaster directly affects the improvement of sanitary and hygienic standards, heat and sound insulation, protects the room from atmospheric influences (snow, rain, heat, wind), and also increases fire resistance, which adds a huge plus to such labor-intensive work.
What tools will you need when plastering walls:

Preparing the room for plastering
It’s great when we plaster an empty room, but often renovations have to be done in living rooms that need to be prepared. We make sure to take out all possible furniture, move anything that is difficult to transport to the center of the room, and cover it with either plastic films or newspapers. Treat the wiring with care; it is better to insulate it.
Having cleared the room, we proceed directly to preparing the surface for plaster. First you need to decide on the choice of application method; as you know, they come in two types:
- “wet” – traditional, implies the application of mortars (cement, gypsum, clay);
- “dry” - in part it is not plaster, but rather wall cladding using various building materials, for example plasterboard sheets, etc.

The next step is to avoid defects when plastering; here you need to have a little information that will contribute to success, which is:
- Using solutions of normal fat content.
- Do not allow lumps of lime to get into the solution (the lime must be well quenched) - it will lead to tubercles on the plastered surface.
- Do not apply the mixture to a very dry, dusty or dirty wall.
- It is not advisable to apply the next layer of plaster to the previous batch that has not set.
- It is better to take river sand that is not coarse-grained, in order to avoid surface roughness.
Having mastered the small subtleties, we move on to cleaning the ceiling and walls. Accordingly, we remove the whitewash; hot water and an ordinary spatula, scraper, and hammer will act as an assistant. We move on to the old wallpaper, using the previous equipment to help: generously moisten the surface itself with warm water and then remove the remaining paper with a steel brush or scraper.

The prepared surface may not turn out to be perfectly smooth, having many small nuances that will ultimately affect the result of the work from a negative side; they must be eliminated. It is necessary to carefully inspect the walls and ceiling. Without putting it off, clean all detected cracks, chips, and other obvious defects from dirt, thoroughly wet them with water using a brush (sponge) and seal them with a new mixture.

Upon careful inspection, you may find so-called dummies that need to be eliminated. Therefore, the surface moistened with water is cleaned, then the cleared area is plastered with lime mortar. If the plaster peels off, then that piece should be removed, the surface washed, and plastered.

Materials for applying plaster
A very important factor influencing plastering work will be the material from which the walls are made. There are brick, concrete, wood and other walls that require a variety of cleaning methods, taking into account individual qualities.

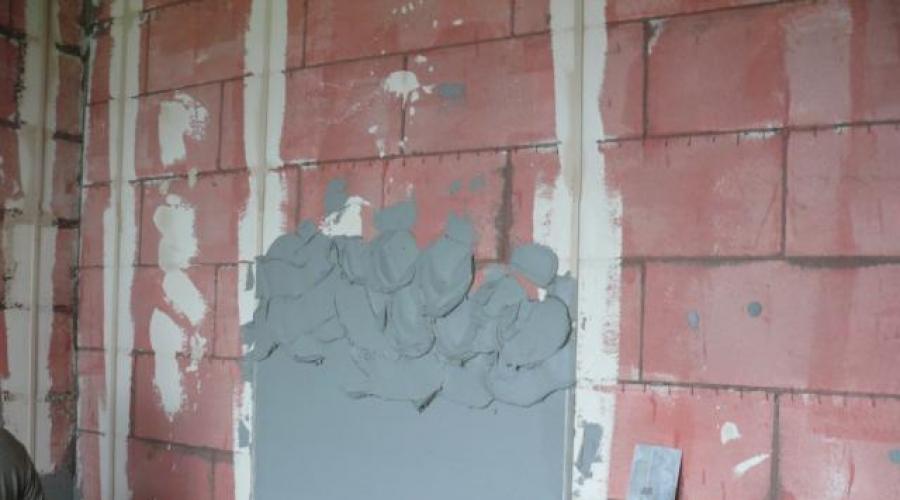
Preparing the surface of brick walls for plaster
Initially, we get rid of the old plaster, if any. To make it stick better, moisten it several times with a damp sponge. We remove the plaster layer, a spatula and a hammer can help here: we tap the necessary areas with a hammer, and pick out the cracks that appear with a spatula. Then we pass the surface with a brush (iron) or use a grinding machine with the desired attachment.

The final stage of preparation is applying a primer, always in two layers. As soon as the first one dries completely, we cover the walls a second time.

Preparing concrete block walls
Concrete walls are easier to clean than previous ones, because the plaster sticks there much worse. Here the cleaning will take only two stages:
- We wet the whitewash generously using a sponge, then brush it off with a brush (iron). Then rinse the surface well. You can use a paste to cover the wall with a thick layer and, after drying, brush off the unnecessary material.
- The second stage is the application of notches (shallow), which guarantees the best result. Some builders replace notches (after all, the work is not easy) with a simple, simple method of priming the walls, the well-known deep-penetrating composition (with the addition of sand). True, this method may not always work, so it’s better to play it safe by treating a small area.

The next step is quite important. For an “iron grip” of the plaster with the surface, we deepen the seams between the bricks by 5-7 mm. Again, it is advisable to clean the wall, only this time use a soft brush, followed by a damp kitchen sponge.
Preparing wooden walls for plaster
Everything is simple in preparation for plastering wooden walls; as soon as you hit the wall with a hammer, the previous mixture itself flies off to the floor. To avoid excess debris and dirt, first place plastic film under your feet.
There are small nuances that should be taken into account when plastering wooden walls, which are as follows:
- the solution used is held firmly, after having previously filled the wooden wall with slats, called shingles (stuffed diagonally and secured with nails);

- before and after filling the sheathing, it is recommended to treat the wall with a wood antiseptic to protect it from mold and harmful insects;

- the wall has dried well - feel free to proceed with the next steps.
Display of beacons
Having previously prepared the existing surfaces, we begin to place the beacons, which are an integral part of plastering the walls, using our own efforts. As a result, plastering the walls on beacons with your own hands promotes even application of the mixtures used.
To place the beacons, we will need a dowel-nail (self-tapping screw), driven into the edges of the wall from above and below, opposite each other. After that, we proceed to stretch the thread or fishing line from edge to edge in the horizontal direction. Then, along the entire perimeter of the wall, every 1 m 80 cm, self-tapping screws are hammered (wall made of foam block, gas block) or a dowel-nail (brick, concrete wall), to which the same thread (fishing line) is strictly tied. Using a level and a rule, the level of the wall is determined.

Step number three is throwing on the plaster mortar. Focusing on the stretched threads, we throw the batch available for work into small tubercles, into which we press a special metal beacon.

Solutions for plastering walls
Now that the surface has been prepared and the beacons have been placed, it is necessary to move on to the most important “culinary masterpiece” that exists at the construction site, the preparation of a “dish” under the quiet name - solutions for plastering walls.
An excellent and durable result is guaranteed if plastering is carried out in three layers:
- The first, so-called “spray” is the strongest solution, with a consistency reminiscent of sour cream, which is thrown onto a surface with a thickness of 5 mm (concrete, brick walls) and 9 mm (wooden walls). To carry out this process, you can use a trowel or manually, wearing thick rubber gloves.
- The second layer is called “soil” - the dough-like mixture is applied with a thickness of no more than 10 mm, using such improvised construction tools as a wide spatula or trowel, after which it is leveled until a smooth surface is obtained.
- The finishing one, also known as the third one, is called “covering”. Just like the first covering layer, it should resemble a creamy mixture. It is made from fine-grained sand, which is sifted through a construction sieve with cells measuring 1.5x1.5 mm.
Naturally ready-made bags of plaster can be purchased at any hardware store, but very often mixtures are made independently, using cement, lime, and gypsum. The most durable is plaster, which is based on cement. To prepare, take one part cement (3:1) to three parts sand.
Often other well-known solutions are used:
- lime mixture - take 1:3, where 3 parts are sand, similarly one part is lime;
- cement-lime - includes the following proportions 1:5:1 (where 1 part includes cement and lime, and 5 parts sand);
- gypsum-lime mixture - one part dry gypsum (in other words, alabaster), respectively, three parts doughy lime mixture.
Methods of applying plaster to walls
Plastering walls with your own hands requires certain skills and an understanding of application technology. The technology for applying plaster to walls includes three main points: the main conditions are the conditions under which the solution is applied; the next aspect is the tools used; Methods of applying the solution play an important role.
As mentioned above, plastering walls for a result that will please you and last for a certain number of years must take place in three stages, in other words, layers, for which certain work skills have been developed.
The foundation layer is spray. The strength of plaster depends on the correct application of this initial and very important layer. Throw slides of the initially prepared mixture using a wooden splinter or trowel from the bottom to the top of the wall. The main thing at this stage is to spray the wall correctly - we stand close to the object and make a sharp wave of the hand, or more precisely with a brush, which allows you to “splatter” the solution for better adhesion to the plane. Using the rule, you should level the resulting layer of plaster: install it along the guide beacons, press on the plaster mixture and pull it up, distributing the batch with these movements.


The next step is to apply the primer, only making sure that the first layer has set well. Due to its properties, the mixture for the second stage, which is plastic due to its properties, is applied using a wide spatula (for convenience, you can remove the medium-width spatula from the container and transfer it to the wide one).
If the plaster runs along the beacons, then the second layer (primer) should be leveled along the pre-recessed slats, just following the rule.


The final stage will be the well-known covering, the thickness of which should be about 2 mm. The essence of this layer is to smooth the surface and correct all previous defects. The end result is a perfectly smooth surface. The coating is applied to the wet primer; if it has had time to dry, then it should be moistened with a roller. To achieve the desired maximum level walls, builders often illuminate surfaces with a light bulb so as not to miss a single detail that could distort the result.
The dried finishing layer should be rubbed off. Grouting basically goes through two stages, which involve roughing and smoothing (finishing) work. The rough grout is moved in a circle, note, in the opposite direction of the clock hand, using a wooden or plastic float. The last step is the final sanding of the walls: we use the same float, only with felt material. Here the movements go from top to bottom (from ceiling to floor), then give way to horizontal ones.

Many modern companies in the construction industry keep up with the times and acquire machine stations. Machine plastering still has a number of its advantages, the most important of which is incredibly smooth snow-white walls that can be immediately covered with wallpaper. The speed of plastering is also undeniable, financial and labor costs are minimized, and there is also a significant saving in the materials used.
High-quality cement plaster of walls with your own hands depends on many factors, which are the stages explained above, but the most important is a properly prepared batch. The cement mixture is prepared in different proportions at each stage:
- spray - 1: 2.5 - 4, where respectively 1 part of cement and 2.5-4 - sand;
- soil – 1: 2 - 3 (cement: sand);
- covering - 1: 2, the components of the proportions are similar to the previous ones.
Plastering walls with gypsum plaster with your own hands is in most cases used as a finishing layer, due to the fine fraction and giving a well-groomed and even appearance.
Sometimes gypsum plaster plays the role of a basis for further wall finishing, without changing the application technology in such cases. But often the initial scope of application of this mixture is finishing work. It is also a good assistant in repairing cracks, chips and leveling significant irregularities and other obvious defects. A significant advantage of gypsum plaster is its ease of application compared to cement plaster and, of course, its versatility of use.
Home renovation is always a personal matter and only you can decide what and how you will do it yourself or hire specialists, choose cement or some other plaster, install beacons, or do without extra costs. Everything is in your hands and the comfort in your home also depends only on you.
Plastering walls is a complex, dirty, costly, but at the same time necessary undertaking for almost every renovation. In this article we will look in detail at when and in what cases walls need to be plastered, what type of plaster to choose in your case, what the mixture consumption will be. And of course, we will tell you in detail, with photos and videos, how to apply plaster on the walls with your own hands.
We decide on the type of plaster, brand and consumption
Before starting work, you first need to decide on the type of plaster that is best suited for your work. To determine the amount of dry mixture required, you need to calculate the area of the walls of the room and the thickness of the wall plaster layer.
You can find out the thickness of the layer, which will allow you to achieve ideal evenness, using a thin thread stretched in several places, in the horizontal and vertical directions. Using a regular ruler, the level of maximum and minimum differences is measured. Beacons are installed at the minimum value point.The easiest way is to take measurements using a level ( laser level).
We calculate the consumption of plaster and soil
The consumption of plaster depends on many parameters. On average, experts calculate based on a value of 3-3.5 sq.m. from one bag of 30 kilograms, provided that the layer thickness does not exceed 10 mm. Accordingly, the master initially needs to decide on the thickness of the applied layer and compare the resulting figure with the consumption indicators indicated on the bags with the mixture.
Below, we have provided a consumption calculator that will roughly calculate everything.A prerequisite for plastering walls is their primer. Since this product is relatively inexpensive, no one thinks about the required quantity, buying with a reserve. On average, for processing 1 sq.m. area of the wall, 200 ml of primer is consumed. However, this indicator is conditional, since the primer can be applied in several layers, it all depends on the absorption rate and the material of the walls ( You need to check the information on the primer packaging).
Plastering is the restoration of a surface for subsequent finishing. At this stage, defects are sealed and the base is leveled. To perform plastering, you must have experience in carrying out this type of work. They hire a team of professional craftsmen. However, even a beginner can perform restoration using a solution. To do this, the amateur should familiarize himself with the videos “Learning to plaster walls: video tutorials”, and also carefully study the recommendations given below.
Before considering the question of how to learn how to plaster walls (video instructions will be given at the end of the article), you need to find out whether it is necessary to plaster the surface.
The use of the material is advisable if the surface has cracks, potholes, drops and other defects. In this case, the solution helps to get rid of imperfections in the building base. However, professionals recommend using plaster even if there are no defects on the surface. The material protects the building foundation from the destructive effects of moisture and other negative environmental influences.
What should you consider when restoring a foundation?
Hobbyists who plaster surfaces with their own hands are advised to consider the following points:
- for restoration of the building foundation, only high-quality material should be chosen;
- Before use, the mixture should be stored in a dry place;
- the solution must be prepared in strict accordance with the instructions.
Choosing a mixture for plastering
Before you learn how to plaster, you need to understand how to choose the material for restoration.
According to the degree of readiness, they are distinguished:
- Ready-made compositions. Such materials do not require preparation. The products are used immediately after opening the package. The disadvantage is the high price.
- Dry mixes. This product needs cooking. After mixing, the solution is used within half an hour. Because of this, you have to prepare the mixture in small portions and apply the material in several approaches. This is the main drawback of the product. The advantage of dry mixtures over ready-made materials is their reasonable cost.
The following types of material are distinguished by purpose:
- Ordinary composition. Designed for leveling surfaces and masking defects.
- Decorative. Used to apply the finishing coat. The material has an unusual texture, due to which it creates an original texture on the surface.
Classification of material by composition:
- Sand-cement composition. This is budget material. The product is easy to apply, but will require an industrial mixer or a drill with a mixer attachment. Non-professional finishers are recommended to work with this composition, since the product is affordable and easy to use.
- Gypsum composition. The material creates sound and heat insulation of the surface, does not shrink and does not crack after hardening. Disadvantage: it absorbs moisture, so it cannot be used for facades or in rooms with high humidity. The material can be used by non-professional finishers.
- Acrylic material. The operational period of such coating is 50 years. The product is recommended for use even by beginners.
- Silicone plaster. This is ready-made material. The product is suitable for surfaces of any type. The product is easy to apply, does not shrink and has a long service life. However, beginners who are just thinking about how to learn how to plaster walls are not recommended to use such a tool. The product is expensive, so it is better to practice on another product.
- Silicate composition. It is characterized by increased strength and resistance to mechanical damage. The product contains liquid glass, which means it hardens quickly. For this reason, the material is not recommended for use by beginners mastering plastering work.
Types of dry mixture
Types of dry mixture:
- Simple material. The surface differences after shrinkage of the product are 3 mm. The product is recommended for use in finishing rooms where aesthetics are not important. These include warehouses and garages.
- Improved composition. After the material shrinks, the surface differences are 2 mm. The material is used for finishing institutions - schools, administrations and other institutions.
- High quality mixture. The surface differences after shrinkage of the product are 1 mm. The material is used for finishing residential buildings and apartments.
Required materials and tools
The video tutorial below demonstrates how to learn to plaster walls. However, before starting finishing, you should prepare the necessary materials and tools:
- plaster;
- a clean plastic bucket for preparing the material;
- lighthouses;
- falcon;
- scraper;
- grater and industrial grater;
- trowel;
- rule;
- Master OK;
- level;
- plumb line
Rules for plastering a building base
If you want to learn how to learn how to apply plaster, it is recommended that you familiarize yourself with all the stages of finishing.
Preparing the premises
To prepare the room for plastering the walls, you need to remove the interior items. If the floor covering will not be changed, then the floor is covered with film and the material is fixed with boards, bricks or other weights. It is also recommended to remove the lighting fixtures and cover the wires.
Surface preparation
Instructions for preparing the construction base:
- dismantle the old covering;
- tap the walls to identify unstable areas and get rid of them;
- increase surface defects, treat cracks and potholes with a primer and fill with repair mortar;
- Clean the walls from dust and dirt.
Priming the base
Priming is a mandatory step before applying plaster and should not be neglected. The primer protects the building base from mold and mildew, and also improves the adhesion of the wall to the material. The primer is applied with a brush, roller or spray, as shown in the photo below. It is recommended to treat the walls twice with a break for the composition to dry.
Installation of profiles
Rules for placing beacons:
- step back 3 cm from the floor and ceiling and 5 cm from the corners of the wall and screw in the screws at these points;
- a fishing line is tied to the fasteners vertically and horizontally;
- under the vertical line, the solution is fixed in small sections at a distance of 10 cm from each other;
- a beacon is attached to the train;
- profiles are fixed along the entire perimeter of the wall in increments of less than 1.5 m.
Preparation of the solution
Only dry mixtures need to be prepared. According to the instructions, the material is combined with water, the solution is mixed using an industrial mixer or a drill with a mixer attachment. The proportions of dry mixture and liquid are indicated on the packaging.
The thickness of the solution depends on which layer the material is being prepared for. For the first and third layers, prepare a material with the consistency of sour cream, and for the second – a dough-like mass.
Application of the composition
The video in this article demonstrates how to properly apply the solution to a surface. This is done as follows:
- Using a trowel, sketch the material onto the surface. This will be the first layer, which is called the spray.
- Using a wide spatula, apply the second layer of mortar - primer. The material must extend beyond the profiles. Level the composition as a rule until the solution hardens. Remove excess product with a spatula.
- Apply a third layer of material. This will be the cover.
Completion of plastering
- After applying the last layer, until the solution has hardened, dismantle the beacons.
- Fill the voids with the solution and level the composition over the surface using a spatula.
- Using an industrial float, grout the material. To do this, moisten the surface with water, press the tool against the wall and use circular movements to eliminate imperfections.
- Apply the primer, wait for the product to dry and proceed to decorating.
To ensure that the finish lasts for a long time, consider the recommendations of professionals:
- if the surface has a porous structure, then the primer is applied in two layers;
- if gypsum material was used for restoration, then grouting of the surface is carried out within 4 hours after completion of plastering;
- after applying the solution, the profiles must be dismantled;
- if ceramic tiles are laid after plastering, then the material does not need careful leveling and you can get by with one layer of material;
- if the walls are being prepared for painting, then the paint and varnish material should be applied 14 days after treating the surface with gypsum and a month after applying cement-sand plaster.
You can learn how to plaster using the video tutorial below.
Plastering the surface is a finishing stage that even a beginner can learn to perform. The main thing is to familiarize yourself with the rules for selecting and applying the material.
Using mortars, decorative and protective surfaces are created and walls are leveled. They are used for various reasons, and... The correct use of universal technologies allows you to successfully solve various functional and aesthetic problems. This article talks about how to plaster walls with your own hands as a beginner. Videos, step-by-step instructions, comments and other materials will help you learn the nuances of professional techniques.
Read in the article
What is plaster: learning general information
The purpose of using this technique is to create a durable layer that eliminates unevenness and other defects of the original surface.

Homogeneous solid plaster provides good protection from wind and other adverse external influences. It performs full-fledged work and improves economic performance during the operation of the property.

This is a suitable base for pasting. In the process of work, they create high-quality external and internal corners, connections with frames, floors and ceilings. On such surfaces it will not be difficult to attach other parts later without the formation of cracks.

This photo shows an example of a spectacular one. The unique appearance was created based on techniques that are discussed in detail in this article.
Related article:
Composition and types of coating, manufacturers, examples of using decorative mixtures, how to prepare them yourself, instructions for application - in this material.
From the examples above, it is not difficult to understand the basic requirements for a suitable mixture:
- To securely adhere to a variety of surfaces, it must have good, but not excessive, adhesive characteristics. Otherwise, the composition will stick to the tools, which makes it difficult to accurately perform work operations.
- The appropriate consistency is determined in the same way. As a rule, they prefer to use a thickness similar to that of full-fat sour cream.
- After hardening, it is desirable to obtain a surface that is resistant to mechanical stress. This will prevent damage due to careless handling.
- Health safety is a must. Wall plaster is used inside residential premises, so maximum attention is paid to environmental friendliness.
- Washable, color, antiseptic properties can be provided with appropriate additives. But in any case, the durability of the layer will come in handy. Its creation involves labor-intensive wet processes, so it will be beneficial for any owner to increase the interval between.
The listed criteria meet a mixture of sand, water,... It is supplemented with lime and gypsum to improve ductility and adhesion to a certain surface. Below are popular "recipes". With their use, high-quality wall plaster will be created. Video lessons along with written step-by-step instructions will help you independently understand the important nuances of technological processes.
What is the difference between plaster and putty: the correct use of construction technologies
Not only the composition, but also the application features are similar. What is the difference is described in this part of the article. In both versions, the main components are sand, cement and water. However, on large areas it is more convenient to work with relatively large fractions of fillers. Putty is used for sealing small cracks, joining elements from, and other “delicate” operations. In this case, small components that form a smooth surface are useful.

The plaster is applied sequentially, in layers up to 10 mm. For thicknesses greater than 30 mm, reinforcement is used. As noted above, this technology can provide good insulation from external influences.

This tool is most often used for masonry. However, it is also used for plastering walls. Stir with a trowel, scoop up and throw the solution onto the wall. Using the narrowed part, work operations are performed in corners and cracks are sealed.

The narrowed trapezoid shape is well suited for neatly filling seams with the mixture. In particular, such a tool is used when forming surfaces from sheets. It is also convenient for them to separate old plaster and remove dirt from cracks.

This tool is used to work with figured pilasters and other complex elements. The tapered front part of the blade is well suited for dosing and distributing solution in hard-to-reach places and on curved surfaces.


This tool received this name from the name of the special technology of decorative finishing. walls are made using plastic mortars. Apply thin layers with careful leveling of the smallest irregularities. For high-quality and fairly quick reproduction of work operations, a perfectly smooth large work surface is useful. The rounded corners of the trowel prevent scratches.
For your information! Experienced craftsmen purchase identical blades in several sizes. Large ones are used for stirring and spreading, creating the first plaster coating. To apply subsequent layers and perform “jewelry” work, compact tools are used.


From this photo it is not difficult to understand the principle of working with the tool. It is moved with support from the beacons to form a flat surface.


This tool removes uneven surfaces. The photo shows a grater with a replaceable blade.
Use specialized mechanization tools


To perform certain operations, in addition to gloves, you will need a respirator. Other personal protective equipment. The list of necessary purchases is compiled after selecting a specific technology, taking into account the characteristics of the property and other important factors.
How to prepare a solution for plastering walls
- When plastering walls with your own hands using factory-made mixtures, use the official instructions of the manufacturer.
- The created solution should be well fixed on a vertical surface.
- It is necessary to obtain such a consistency that there are no difficulties when smoothing with the rule.
- A mixture that is too dry will form lumps and uneven surfaces. If the moisture concentration is excessive, the solution flows down.
- Be sure to specify the period within which the finished composition must be completely used. If you lack qualifications, it is better to prepare a small amount for the work cycle.

If there are no special instructions for creating a solution, use the following algorithm of actions:
- Prepare a container of the required size. A light plastic bucket is suitable, which is not damaged by a construction mixer and can be quickly cleaned of dirt. Unlike metal analogues, it does not produce loud sounds when in contact with metal working tools.
- First, pour in clean water. There is no need to boil it, but it is necessary to exclude colored impurities and strong odors.
- Dry ingredients are added gradually, mixing thoroughly.
- When the lumps are eliminated, leave the solution for 3-4 minutes. Next, check the viscosity, add water and other components in the correct proportions until the desired consistency is obtained.
For your information! For standard cement-based formulations, wall plastering in one batch should be completed in 45-60 minutes. If the composition contains gypsum, the work will have to be completed twice as fast.
The most important stage of finishing work: preparing walls for plastering
- The base for applying a new layer must be strong, so the old and other coatings are removed.
- Check the condition of the walls. If detected, cracks are sealed and elements to strengthen the load-bearing frame are installed.
- If dampness is detected, eliminate the source of its occurrence. They repair and install high-quality equipment.
- Next, you need to prevent the walls from absorbing moisture from the plaster mortar. For this purpose, they are used depending on the wall material.
- Special compounds improve the adhesive properties of the surface. If mechanical processing is used for this, the final stage is to remove contamination from the working area.


How to plaster walls without beacons with your own hands: video and useful tips
This technology is used in basements, technical rooms, attics and other objects where it is not necessary to create an ideal surface.
| Photo | How to level walls without beacons: step-by-step instructions with expert comments |
 | If you do everything correctly, you can ensure high quality with economical consumption of building mixture. It should be noted that such techniques are indispensable when working in cramped conditions, when it is necessary to plaster walls behind pipes and. |
 | Pre-remove the solution build-up and seal large holes. The brick is old, so the standard solution (wetting with water) will not work. Careful processing required. |
 | There are corners in the design. They will need to be covered with plastic or metal covers. |
 | To create the first layer, no casting is used. Use sequential treatment of small areas, rubbing small doses of the solution into the wall. It is at this stage that all voids in the masonry can be filled. A wide spatula makes leveling the surface easier. When performing smooth movements, it is not difficult to notice and eliminate depressions and bumps. |
 | Next, the rule is to check the evenness of the wall section and install the corners. Mark the places (recesses) where unevenness needs to be removed. |
 | Start applying the second layer. After fixing the plaster on the wall, they again use the rule to control the surface. They can also use excess solution. |
 | After 30-40 minutes the finishing layer is applied. At this stage, small doses of the solution are used, since in fact only corrective actions are needed. On a fairly flat surface, the material consumption is small. It is especially important here that there are no lumps or foreign bodies in the mixture. In a real situation, the time is set taking into account the characteristics of a certain recipe. |
At the final stage, after hardening, the top layer is treated with a grater. Experienced craftsmen remove small defects with a spatula. When plastering walls with your own hands without beacons, you can save consumables. But here you will have to spend more effort and time to get good results. But in some cases, perfect quality is simply not necessary.
Video of siten plastering without beacons using gypsum mortar:
What are the differences between plastering walls with your own hands using beacons: video with professional comments
| Photo | Plastering walls using homemade beacons: step-by-step instructions |
 | After removing old decorative and insufficiently durable coatings, construction defects are eliminated. Next, apply the primer with a paint roller. |
 | Mark the installation location of the beacons in such a way that when performing work operations, the rule rests on two reference lines simultaneously. |
 | Marks are made at a distance of 5 cm from each edge of the instrument. If the 250 cm long rule is selected, the distance between the beacons should be 240 cm or slightly less. |
 | Holes are drilled according to the marked marks. Plastic dowels are driven into them with a hammer. |
 | Screw in self-tapping screws with wire rings. Similar operations are performed on the other side of the wall. |
 | To accurately set the desired level, wooden pegs are used. The dimensions of these elements and the corresponding position of the string are selected taking into account the position and geometric features of the wall. |
 | Use a bubble level to control the vertical. If necessary, change the position of the strings. When suitable pegs are selected, screw the screws until they stop to tighten the wire tightly. |
 | Mix the solution in accordance with the manufacturer's official recommendations. This procedure does not require the ideal state of the finished mixture, but it is more convenient to work with high-quality consumables, without lumps. |
 | Using a plaster spatula, apply the solution near the string. Remove excess parts from the surface of the tensioned wire. After hardening, remove small irregularities from the surface of the created beacons with a spatula. |
 | Start mixing the ingredients. Dry ingredients are poured into water. Next, use a construction mixer. At this stage, you should create a high-quality solution with a uniform structure and optimal density. |
 | Apply the mixture using trowels (trapezoidal trowel). For preliminary smoothing, use a wide spatula. |
 | Next, the rule is applied. They use it to pull the solution to the side. Lighthouses serve as longitudinal supports. Small movements up and down make this operation easier. |
 | Continue plastering the walls in the same way. After completing the treatment of the entire area, it is necessary to wait 10-15 minutes until the top layer “sets.” Afterwards, remove small irregularities with a grater or a wide spatula. |
Watch this video of lighthouse plastering for beginners:
It shows how this technology creates a high-quality, flat surface. It can be painted and wallpapered without additional processing after drying.
In this video, leveling the wall using beacons with your own hands is done with preliminary reinforcement:
This technique can be used instead of creating special irregularities. The mesh will also provide increased resistance of the layer to mechanical stress.
Additional consultation: setting beacons without errors

A drawing of the premises will help to accurately establish the placement lines of vertical beacons.

The locations of their installation are marked in the figure, taking into account the length of the rule. As with the strings, here you need to make the distance less than this leveling tool. It is necessary to leave a sufficient distance to internal corners and other obstacles.

This figure shows the principle of field construction. Instead of nails, it is more convenient to use self-tapping screws that are screwed in to the required depth. First, install screws at points 1 and 3. A cord is pulled between them and elements 7 and 8 are installed. Verticals (1-2; 3-6-4) and others are controlled using a plumb line. If necessary, change the position of the screws to obtain a clear line.

Diagram (1) shows installation using specialized fasteners. Bubble (2) and laser (3) tools are used to check surfaces. Using a stretched string (4), the exact level of one line is established.
Correct selection and use of different materials
It will be possible to find out in the apartment after a detailed familiarization with the features of different recipes. It is quite convenient to work with ready-made building mixtures. They are sold dry, so subsequent dilution with water and mixing will be required. The main advantage is the carefully selected composition. The disadvantage is the relatively high cost. With the right choice of ingredients, you can create a professional-grade solution.
Features of plastering walls with your own hands with cement mortar: video and written instructions
The first layer of wall plaster is called “spray”. It is applied with a liquid solution to fill the smallest pores and cracks as evenly as possible. When setting occurs (but before it dries completely), apply a second, thicker one. A rough surface is created on it. The mixture for the next layer is created from fine sand with the addition of lime. This will increase ductility. The following table shows the technical parameters and quantities of ingredients. Knowing the proportions, you can change the parameters taking into account the characteristics of a particular project.
| Ingredients/Layer Options | Layer of wall plaster | ||
| First | Second | Third | |
| Cement (M-400), kg | 10 | 25 | 5 |
| Sand, kg | 81,2 | 274 | 81,6 |
| Hydrated lime, kg | 5,6 | 21 | 5,6 |
| Water, l | 16,8 | 53 | 15,4 |
| Layer thickness, mm | 3-4 | 10-15 | 1-3 |
The video shows an example of plastering walls with cement mortar using beacons:
How to plaster walls with gypsum plaster: video, important nuances
When using mixtures on this basis, rapid hardening must be taken into account. It should also be noted that it is slightly less resistant to moisture without special additives. In this case, a more dense structure without pores is obtained, which worsens the insulating characteristics. However, the surface is smooth. It should be noted that it is easy to apply to different surfaces.

The accompanying documentation for factory dry mixes indicates:
- Minimum and maximum layer thickness.
- Operating temperature to which individual parameters correspond.
- Consumption per 1 sq.m.
- The amount of solution that is obtained from one package;
- Time:
- maturation and life of the solution in an open container;
- drying a layer of a certain thickness;
- set of nominal strength.
- Density and strength of the finished layer.
- Grain.
- Color and shelf life of plaster in original packaging.
For interior work, you can use homemade plaster with an increased setting time. Create two separate solutions from water and one/three parts of gypsum/lime, respectively. Then they are mixed and used for their intended purpose.
In this video, the master talks about leveling walls with gypsum plaster:
How to make finishing plaster on walls with your own hands: video, basics of quality work
For high-quality plastering of walls, you need to create an ideal, flat surface. At the same time, good adhesion is needed for reliable fixation of the finishing decorative coating. You can solve this problem using the following recipe:
- For 5 kg of gypsum take 15 kg of chalk (powder). The ingredients are mixed.
- Next, a solution (5%) of wood glue is added to the container.
- The required amount of liquid is determined experimentally by stirring the mixture until smooth with the consistency of very thick sour cream.
Important! Without sufficient experience, it is better to work with a small amount of solution, as it sets very quickly.
Lime is added to them if outdoor work is planned. Similar solutions are used for other rooms with high humidity. Plastering brick walls is often preceded by removing the old coating. Such surfaces have a lot of unevenness, so you should count on a relatively large consumption of materials. When creating thick layers, mesh reinforcement is used.
How to plaster a brick wall indoors with your own hands is described in this video:
Concrete walls: smooth, durable surfaces are not always good
When preparing such coatings, the joints between the slabs are carefully sealed. Smooth factory products have low adhesion, so you will have to use a special tool (bush hammers, hammer drill bits) to create special damage. The necessary adhesion is ensured using primers, and gypsum is added to the solution. The listed operations increase the cost of plastering walls. However, it should be noted the high strength of the corresponding building structures and the absence of deformations during operation.
Preparation and high-quality plastering of wooden walls
In this case, removing old plaster is not difficult. To secure the mortar, a lattice structure of slats is used. Such a base does not provide high strength. The entire structure is quickly destroyed. The only inconvenience is a large amount of dust.
Instead of slats, use a chain-link net with a wire thickness of 2.5 mm or more. Pre-clean the surface freed from outer layers. Wooden parts are treated with preparations that protect against rotting.
For your information! Pay attention to the fiberglass mesh. This material provides the necessary reinforcement strength, but is not damaged by corrosion processes, like metal products.


Using this video, you can quickly figure out how to plaster a house with your own hands:
No matter how accurate the theoretical knowledge is, in this case practical experience is necessary. In order not to waste time and money on correcting deficiencies, it is better to practice in small areas in advance. Separate experiments are carried out before plastering the walls with your own hands on new (complex in shape) surfaces.
Do not use instructions for the composition of building mixtures as immutable dogmas. Of course, there are certain general limitations. However, it is impossible to provide for various humidity and temperature conditions and the technical parameters of individual components. The skill of the performer and personal preferences for the consistency of the solution also matter.
Taking into account the creative component, it makes sense to get more data on plastering walls. Use the comments on the article to communicate and share experiences. Ask questions. This mechanism for obtaining information will help eliminate errors.