How to string a clothesline on a balcony. How to hang a clothesline on a balcony and loggia: modern solutions for a fashionable interior How to properly pull a clothesline
Read also
The scientific and technological development of society could not come up with a more efficient way to dry clothes than clotheslines on a balcony. You can meet them in new buildings and houses of the "old school", which is due to common sense. It is much easier to leave laundry for a few hours on the balcony than to dry it in the bathroom or buy a separate unit. It is important to remember that not every rope will cope with the task.
Selection of clothesline material for the balcony
In order for the laundry to dry as efficiently as possible, it is necessary to carefully examine the potential piece of rope. It is a mistake to think that the only significant characteristic in this case is the strength of the material. Yes, this indicator is important, but it is not the only one. High-quality clothesline should not get dirty and absorb color, otherwise white fabrics will soon cease to be such.
Depending on the size of the balcony, the amount and the prevailing type of linen, you can choose one of the following types of material:
- Equipped with a PVC sheath metal cable - the thread is durable and resistant to prolonged tension. In addition, environmentally friendly drying material will appeal to those who care about nature.
- Ordinary twisted rope is a budget option in all respects, while having a number of disadvantages. Firstly, even a slight wetting is enough for impressive sagging. Secondly, you need to hang such a rope only if white fabrics will not be placed on it. This is explained by the ability of its surface to actively absorb external pollution.
- Plastic ropes - they are more expensive, but this fact is due to a number of obvious advantages. First, the material can withstand increased loads. Secondly, the buyer has the opportunity to hang a rope of the color that he likes.
- Traditional jute is characterized by wear resistance and the ability not to stain linen. In addition, the material is environmentally friendly.
- Polypropylene - in addition to environmental safety, the rope made of this material does not accumulate moisture and is not electrified.
When choosing a rope for a balcony, you must carefully study its characteristics. The main ones are strength, resistance to stretching, low degree of interaction with moisture. In addition, the rope should not accumulate dust and the color of those things that are dried on it.
Outdoor clothesline design for drying clothes on the balcony
The buyer of rope should remember that it comes in two types. It is a material for indoor and outdoor use. The difference between them is at the level of the ability to withstand the prolonged impact of the vagaries of nature.
Fabric for outdoor use is attached to the balcony or on the open loggia, which reduces the load on the available space.
Regardless of the type of room and the characteristics of the linen, the balcony will need reliable brackets. The stronger the mount, the less likely the linen will fall.

To achieve a good result, the following recommendations will help:
- Fix strong steel brackets on both sides of the balcony;
- Buy in the store corners made of a similar material;
- It is necessary to make sure that the corners are equipped with holes that allow you to securely tie the clothesline;
- In order to simplify the process of hanging clothes, the profile with corners must be placed not perpendicularly, but at an angle;
- It will not be superfluous to install a spacer that does not allow the profile to deform.
For a small balcony, external fastening of clotheslines is appropriate. In this case, you do not have to sacrifice the available space. Metal corners and brackets are used as the basis of the rope fixation system. They are installed at a slight angle, which reduces the number of difficulties at the time of hanging and removing the washed linen.
Existing types of fasteners or how to hang a clothesline on a balcony
These are divided into factory and homemade. Opens a list of popular and inexpensive ways to equip a balcony with fasteners 2 metal corners screwed into opposite corners of the wall.
Using an electric or hand tool, it is necessary to make holes in them, where to fix the rope. In addition to this option, there is another one suitable for regions with a temperate climate.
Instead of metal corners, wooden bars with built-in hooks are taken. The bars are fixed in opposite corners of the room. The greatest difficulty is to pull the rope as evenly as possible.

Regardless of which type of attachment is chosen, there are some precautions to be taken into account:
- Before buying, you need to make sure that the fasteners are made of stainless steel;
- Factory fasteners are always supplied with an indication of the maximum allowable load;
- Unlike home-made, factory-made rope fasteners are more popular due to the presence of the necessary elements, made with maximum precision;
- The placement height is selected so that it is convenient to reach the linen.
Existing latches for the balcony are divided into factory and home-made. The first option is more preferable due to the precision with which it is made, and the second - the ability to adapt to existing conditions.
We hang the rope on the balcony correctly
The work begins with the choice of the frame and the type of fabric, after which you can pick up the tool. It is necessary to adjust the length of the ropes in advance so that it does not sag even when peak loads are reached.
If we are talking about homemade fasteners, then in this case you need to tie the cable in advance. At the next stage, the structure is installed on a concrete or wooden base.
It is useful for beginners to know that the choice of tool for work is carried out taking into account the base, and not the design of the dryer.

To work, you need to have the following on hand:
- Roulette;
- Simple pencil;
- Several dowels;
- Perforator;
- Building level;
- A hammer;
- Curly screwdriver.
How to attach clotheslines to the balcony (video)
After preliminary marking has been made on the ceiling, the bracket is fixed. This is done with a drill that creates recesses at a height of up to 150 cm from the floor level. At the specified point, the bracket and roller mechanism are attached. The base is fixed on the ceiling and the final adjustment of the degree of tension of the ropes for drying clothes takes place.
Installing a clothes dryer on the balcony
In order to dry your laundry easily, affordable and inexpensively, it is recommended to stretch the clotheslines on the wall-mounted balcony. This is an inconspicuous device, without which it is difficult to do without.

Benefits of locating clothes dryer on the balcony
The process of drying washed things on a glazed balcony or loggia has its advantages and disadvantages. Of the positive, protection from adverse conditions and foreign odors should be noted. Of the inconveniences - the limited movement around the balcony room while drying things. It is recommended to choose in advance the appropriate option for drying clothes on the balcony.
Using cables designed for fastening on a closed loggia or a glazed balcony, you can safely go to work and not be afraid of rain, which will wet things. When the windows of the apartment overlook a busy roadway, when hanging clothes outside the premises, the clothes are saturated with exhaust gases and dust. For this reason, it is better to dry clothes even on small loggias.

Rope locations on the balcony
Before deciding on the installation site, you should choose the most suitable dryer model. They can be stationary or easily moved.
To use clotheslines for drying clothes on the balcony as efficiently as possible, they should be correctly installed. Traditional places for installing cables on the balcony:
- Removable structures. They are located outside the premises. The design principle is that two metal corners or pipes, in which holes are drilled, are installed opposite each other. The cables are pulled in parallel.
- Ropes stretched under the ceiling of the balcony will allow you not to put your underwear on public display. The cable should be located along the room. The design is mounted on the ceiling or walls.
Most often, simple designs for pulling clotheslines have a drawback - the ropes sag during operation. And if there is a need to free up the balcony space, they cannot be quickly removed or untied. The models do not differ significantly in the installation method, but differ in the location of the dryer mounts.

Structures for pulling ropes
Everyone knows the way when the clothesline mount on the balcony is bent nails stuffed on a wooden plank. You can replace such a simple option with special hooks. They will have a more attractive appearance and securely hold the rope cable.
The second option is the installation of metal brackets with holes. In terms of reliability, these fasteners have no equal. When pulling the rope, not separate segments are used, but a single piece. You will need to tie knots at the beginning, end and on each fastener. Thanks to this method of fastening, the likelihood of sagging under the weight of the laundry is minimized. The design will be reliable.

Ceiling mount
Mounting the dryer on the ceiling is suitable for small or geometrically complex balconies. The height adjustment function allows you to free up usable space. On sale there is a convenient and easy-to-install rope device - the Liana dryer. The design consists of two functional units. One is attached to the wall and the other to the ceiling. A frame with rods is attached to the surface of the ceiling. The whole structure is connected with ropes, and the holder is fixed on the wall. The principle of operation is to raise and lower the boom with two parallel cantilever elements.
Ceiling systems have many advantages:
- the floor and wall zones remain free, you can move around the room without difficulty;
- almost invisible if they are not used;
- will not require large expenditures.
Wall systems
Wall-mounted clothes dryers are most suitable for installation on large balconies. The most common and practical model is the inertial dryer. The structure is divided into two parts:
- Housing equipped with a drum with a spring system and ropes. According to consumer reviews, a year after operation, clotheslines begin to sag. If the model has a tension adjustment function, then the disadvantage can be corrected without difficulty.
- On the opposite side, special hooks are mounted on the wall to fix the retractable part with ropes. If necessary, the ropes can be easily hidden in the body.

Clotheslines for a balcony with a wall mount are suitable for small rooms and are designed for laundry weighing up to 6 kg. More functional in practice - console wall devices, they can withstand weight up to ten kilograms. The model looks like an "accordion" made of metal, it is mounted on the wall, and if necessary, laid out.
Which ropes are best
For every economic person, the question is important: what kind of drying rope to choose so that it serves for a long time and does not lose its appearance. It is recommended to pay attention to such features as strength, wear resistance. It shouldn't stretch. The most suitable clothesline options for drying clothes:
- A metal cable in a PVC sheath will be strong and durable. The material is not subject to deformation, moisture resistant, does not stain things. The only caveat is the high cost.
- The plastic cord is resistant to moisture and does not stain laundry. Minus: after a while, the tension disappears, and the rope sags under the weight of the clothes.
- Rope made of polypropylene has good wear-resistant properties, does not deform. The product has an advantageous price / quality ratio.
- Jute cords are durable, environmentally friendly, their surface is not electrified.
- Cotton rope is a durable and environmentally friendly product. From the influence of moisture, it quickly loses its appearance and dust spots appear on it, which can leave dark marks on clothes.

Synthetic fiber rope is stronger and does not stretch when wet. The surface layer is less prone to contamination. Such a rope can be cleaned of dust with a wet cloth.
Do-it-yourself dryer installation
Self-installation of the Liana dryer is not difficult to perform, for this, the following steps are performed:
- At the installation site of the ceiling-mounted clothes dryer and brackets, markings are made.
- Holes are drilled using a perforator.
- Brackets are fixed with self-tapping screws.
- In the most convenient location for operation, a cord holder is mounted on the wall.
- One rod is taken and fixed in the device. A longer cord is pulled through the left roller, after which their long and short parts are pulled through the right element.
- Special height clamps are put on the ends of the rope.
- After installation work, the operation of the rods is checked, each separately.

In practice, on balconies and loggias, any kind of ropes and various systems for drying are used. The main thing is that as a result, the design for drying clothes on the balcony is comfortable. It is not necessary to buy expensive products.
How to string a clothesline on a balcony
How to pull a clothesline on a balcony? It would seem that it could be simpler: I chose the most suitable material and fixed it in the required place. However, even such a simple operation requires a scrupulous approach and certain knowledge from the performer.
Choice of clotheslines
Currently, manufacturers of special equipment offer a lot of ready-made structures for drying clothes, which include all the necessary components (ropes, brackets, fasteners), and the task of the contractor in this case is only to fix the elements to the enclosing structures of the balcony or loggia. When it is supposed to independently manufacture the dryer, then special attention should be paid to the choice of clothesline.
Metal rope in pvc
So, today the most high-quality type of clothesline is a metal cable sealed in a PVC sheath. This is due to the high mechanical stability of the material, because the service life of such cables can reach 5-6 years, and during operation, their deformation and stretching are practically excluded. In addition, due to the use of a soft PVC shell, linen is not smeared and is securely fixed on weight.
The only limitation of the sheathed cable is its high cost, which, by the way, indirectly indicates the good quality of the material. In view of what, when choosing a clothesline of this type, it is better not to experiment and immediately purchase good quality products (Chinese analogues are enough for a maximum of a year).
Plastic rope with nylon insert
It is also quite often used by consumers to dry clothes. However, unlike the previous version, this is due to its low cost. Giving preference to a plastic-based rope, it should be understood that its service life is not long (about 1 - 2 years), and when drying a large amount of laundry on such a rope, sagging can form.
Polypropylene rope
Although it is made from non-natural raw materials, it has good consumer characteristics. It is durable, does not attract dust, and is available in a wide range of colors and sizes.
jute rope
Ideal for drying baby clothes, because in addition to high strength, this material has good environmental properties and does not cause allergic reactions.
Traditional clothesline
Good for short-term use (hiking, in the country, etc.). Whereas with constant use, dust noticeably settles on it (it can leave marks on linen), and the material itself is greatly stretched.
Preparation for work

Of course, before pulling the clothesline on the balcony, it is advisable to carry out a series of preparatory work, namely, to prepare the holding brackets and install them in a given place.
Moreover, if we talk in more detail about the first part of the work, then it is more justified to use rolled metal (corner, U-shaped profile, etc.) as brackets for fixing the clothesline, although in some cases (with a small load) such elements can alternative materials can also be used, whether it be a wooden beam, a metal pipe, a perforated rail.
As for the very preparation of the elements holding the rope, it lies in the fact that holes are simply drilled in the body of the material in increments of 120 - 200 mm. Moreover, given the purpose of these holes (a rope is threaded through them), they must be located strictly symmetrically on both opposite brackets. If we talk about the diameter of the holes, then it must be larger than the size of the rope in order to ensure the free introduction of material.
In addition to making perforations for fixing the clothesline, at the preparation stage, holes should be drilled to directly fasten the brackets to the fence structures. And of course, to open the resulting paintwork structures for outdoor work (rust will not stain linen).
The installation of the retaining profiles should be carried out in such a way that it is convenient to subsequently dry the laundry. That is, based on individual factors (type of building, physiological characteristics of the user, etc.), it is necessary to select the most suitable place and install the brackets. Moreover, if these structures are planned to be fixed to the wall, then it is advisable to use anchor bolts or dowels with screws (at least 6 mm in diameter). When the brackets are located on the outside of the balcony or loggia, it is more justified to fix the material with the help of hardware (M8, M10), using at least two on each side.
Hanging clothesline on the balcony
It does not cause any particular difficulties and lies in the fact that the rope is simply threaded into the holes of the brackets with a snake and tied only at two end points. Moreover, in order to exclude sagging of the dryer, it is best to stretch the clothesline starting from the most distant hole and ending with the closest one.
- When drilling holes, be sure to remove the chamfers in order to exclude the possibility of cutting the rope during operation with sharp edges.
- It is more justified to carry out external installation of brackets from such a condition that the elements tilt upwards relative to the balcony parapet by 15-20 degrees (it will be more convenient to hang / take off linen).
- In order for the brackets not to rush towards each other, it is justified to use additional metal spacers.
In addition, a good option for external fastening of the clothesline is the use of mobile rings and special clamps, due to which you can easily move the ropes to any convenient place within the dryer.
How to pull the rope can be found in the video
How to easily make clotheslines on the balcony
The balcony perfectly serves not only for a relaxing holiday, but also a practical place to store a variety of things. In addition, in apartments, the balcony is most often used for drying things. Over the years, the mechanism for drying things has changed a bit, but clotheslines on the balcony are still popular. They can be placed inside the balcony and on its outer side.
How to choose clotheslines for the balcony

When choosing clotheslines for a balcony, you should pay attention to their strength and lightness, as the frequent use of low-quality materials can lead to their short service life. What type of clothesline to choose for the balcony?
- The plastic thread comes in a variety of colors and is strong enough to dry laundry. But she has the property to stretch and sag over time;
- jute - wear-resistant, practical, have a beautiful appearance and are created for supporters of environmentally friendly materials. Most often they are chosen for drying children's clothes;
- polypropylene rope is made of environmentally friendly material and has high strength;
- the metal cable, which is in a PVC housing, is considered the most durable and will last more than one year;
- ordinary twisted rope lasts a long time, but when moisture gets in, it quickly sags and collects a lot of dust.
Ways to stretch the clothesline on the balcony

There are several options for how to pull the clothesline on the balcony. The design can be made independently or bought in a store. The owners of small loggias, which often serve as additional rooms or greenhouses, take out the drying of linen outside the balcony. In any case, for external or internal drying, a strong bracket should be made on which to install corners with holes made.
Attaching a clothesline to a balcony has several important advantages. Among them:
- the ability to avoid sudden rain;
- linen will not be blown away by the wind;
- clothes will not be saturated with the smell of the street or exhaust gases.
Types of clothesline fasteners on the balcony
The clothesline is attached to the balcony in several ways:
- on the ceiling inside the balcony;
- on interior walls
- on the wall from the outside.
How to make clotheslines on the balcony

On the walls, you can install clothesline fasteners on the balcony in the form of metal corners with holes or in the form of wooden bars with hooks. When installing, pay attention to the height of the mount, as it should not be too high or, on the contrary, interfere with the passage. Also fastening the clothesline on the balcony is easy to install on any type of surface. Before installation, the place is strengthened with an additional profile. You can replace a home-made design with a store-bought version that is easy to install, and all the little things are thought out in it, from fastening to ropes. In addition, modern mechanisms are so arranged that, if necessary, they are hidden. The system is ready to withstand weight up to 6 kilograms. But with constant use, the ropes also begin to sag.
How to hang a clothesline on your balcony

Two planks are attached to two walls, the width of which is up to 10 cm. Their length is chosen as desired. To tension the ropes, nails or hooks are easily used, which are screwed into the planks.
How to tie a clothesline on a balcony

After mounting the structure, you should tie a clothesline on the balcony. First, it is tied with a strong knot to the outermost nail or hook. Further, it is pulled to another bar and also wrapped around the first fastener. Then the rope is tied to the second mount and pulled to the first bar. The entire procedure applies to all remaining fasteners.
Making clotheslines on the balcony is easy enough. It is possible to install them yourself or buy a finished design. Each option undeniably deserves attention and has its own advantages and disadvantages.
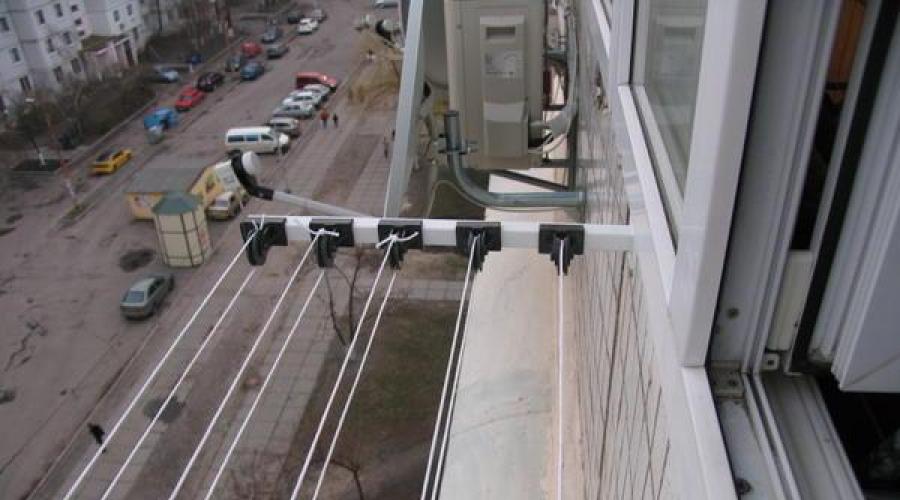
In general, we have approximately the following picture. On the side concrete walls of the loggia, duralumin corners were screwed onto a pair of self-tapping screws. And already to the corners, in pre-drilled holes, four pieces of stainless steel wire are wound. In principle, such a design served for quite a long time (decades), with periodic repairs of course. Old wooden plugs loosened over time and flew out of concrete, new ones made of plastic were installed in their place. But as they say, nothing lasts forever. At some point, a self-tapping screw was pulled out of the wall again, or rather a euro screw along with a pvc dowel.
It would be possible to continue to change the dowels and screws. Or, in the end, screw this corner not with two self-tapping screws, but with four. But recently, very often began to catch the eye, anchors of various shapes and sizes. And since I haven’t had to deal with anchors yet, I had to collect a little information about them in Google.


After that, 4 pieces of anchor-bolt and 8 pieces of anchor-ring were purchased in obi. I took the bolts to replace the self-tapping screws in order to screw this corner back, in case the wall would not be drilled well with a drill. And if everything goes like clockwork, then I will throw out these terrible corners, and in their place eight anchor rings (anchor ring) will remain shining. There were no cute anchor rings without a nut in the obi, I had to take these (photo below), which have a nut in the most visible place. On the other hand, the balcony itself is not yet a standard of beauty. I don’t remember the exact depth of the holes for these hooks, something like 8x40 or 8x45 mm.


Since the hooks are 8 mm, we also select a similar drill, make a mark on the drill with a marker or tape so that the hole is deeper than the length of the anchor, by 5-10 mm, after which we climb onto the wall with a puncher and drill holes. We don’t press hard, a puncher with a good drill will do almost everything on its own, except that you need to hold it so that it doesn’t drill too much :-) In my case, these drills came with a Black and Decker KD975KA puncher.

A little lower you can see the old pvc dowels in the wall, so I decided to use them, wedge between them and eventually get four holes for the anchors. I just drilled the old holes with blue dowels with the same drill so that the anchors went into them.

Before hammering the anchor, blow out all the dust and sand from the hole with a rubber bulb. I don’t have a pear, so I use this miniature brush, which also does an excellent job of this task.

If the wall is not loose and the drill goes quite tightly with the walls of the hole. You may have to break the walls of the hole a little by tilting the puncher to the sides. All this so that the anchor does not jam and it is easier to hammer it flush with the wall with a hammer. Of the eight anchors, I only had one rested with a horn halfway, I thought that everything was already there, I would have to unscrew the hook and pick out or drill out the sleeve from it. But somehow he still scored it, although at the same time the hook bent a little and riveted from the hammer.

I almost forgot that the drill or drill did not dance along the wall, when you are just starting to drill, mark small holes in the wall with a pistol dowel or other piece of iron. For this, I use a homemade core (photo below), which I made from a valve from some kind of diesel engine, slightly turning the edges of the plate and the stem on the emery. I really liked its shape, it just asks for a hammer, and besides, it’s hard to get past such a hat with a hammer.
By the way, you may need a construction pistol dowel if you drill a concrete wall not with a perforator, but with an impact or conventional drill with a drill bit. In this case, if during drilling you feel that the drill is standing still, perhaps some granite or diamond stone has come across on the way :-) Take this dowel with pliers so as not to dry your fingers and try to split it with several powerful blows of a hammer, while preventing dowel jamming in the wall (that is, we periodically rearrange it). Then you try to drill again, if it doesn’t work again, then it’s probably reinforcement, in which case we check the tip of the drill or dowel for the presence of magnetized metal filings. Here it will already be necessary to install a drill for metal or step back a little to the side.

After installing the anchors, we tighten the nuts, thereby wedging the sleeves in the holes.


At the same time, I grabbed a rope in the obi, I squeezed something 600 rubles for a clothesline reinforced with steel wire, so for a start I bought such a miracle for 100 rubles. A little later, already at home, an autopsy showed that this clothesline, the PVC sheath, is larger than the nylon core. Apparently it is designed to hang only socks and shorts on it, I suspect that carpets and fur coats are generally contraindicated for her, not to mention its use in the open air. Let's see how long it lasts, and then we'll see, maybe I'll put the stainless steel wire back in place.

I bought heat shrink for electricians, and since I don’t know how to knit any sea knots, I decided to use it as a fixation for the tails sticking out of the knots.

Rope skipped whole at once through all the eyes. There are not many advantages here, this is the presence of only two nodes, and the speed of fixing. Then there are some minuses, in the event of a break, all four strings, along with rags, will be on the floor. Over time, when the rope is stretched, there will be a lot of slack when using only one string. But I've given up on it for now, as I doubt that this rope will survive the winter at all.


A little green blunderer, clad in concrete formwork, from a bird's height ... the ninth floor :-)

A fragment of the video with the already fixed rope on the balcony.
In general, hanging a clothesline on the balcony with your own hands was not so difficult. All anchor holes were drilled fairly easily. Each of them took no more than a minute, apparently the use of a new drill, which had not even smelled concrete before, had an effect. Something tells me these hooks aren't going anywhere now. I don’t know what load these anchors were originally designed for, but after pulling the nuts, these eyes sit in the concrete like dead, they don’t hang out, they don’t break out with their hands. As I wrote earlier, I didn’t have to deal with anchors before, so over time it will be clear, if anything falls out, I’ll write about it here.
Usually a person has several knot schemes in his arsenal. They are quite enough for the belt, to connect the ends of the rope in case of a break. To make a knot for a tie, to “build” an elegant bow, to mount fishing tackle, practice is already required. Everyone can take a step forward and learn how to knit self-tightening knots. It will take a piece of rope, a little time and desire. In addition, many of the simple schemes are useful for domestic needs.
Application
Self-tightening knots are used not only by climbers and sailors. Some sources claim that there are about twenty such schemes. Knowing them all is not necessary even for a professional. But some universal combinations can be useful to a simple layman.
When relaxing in nature, the “constrictor” knot will securely fix the hammock, the “gazebo” knot will help to equip a canopy from the rain. For hostesses, there is a “burlak sea loop” if it becomes necessary to pull a clothesline from sagging or organize drying for collected medicinal herbs. When walking a dog, sometimes it becomes necessary to leave the pet securely tied to a support for a while. A simple "cow knot" will come in handy. It knits easily and quickly allows you to release the leash.
For fishing line should be in the arsenal of any fisherman. They are also useful for securely fastening the boat. For those going on a mountain hike, knowing the knots for belay equipment is a must.

Peculiarities
The principle of operation of such schemes is laid down in the definition itself. Pulling one or both ends tightens. Moreover, the stronger the force, the stronger the connection will be. But it should be remembered that some self-tightening knots reliably “work” only with constant tension. If the force is expected to change or be jerky, the connection may loosen.
Self-tightening knots are tied around any secure support. They hold especially well on a non-slip cylindrical base: a tree trunk, a stump, a branch, a power pole, and the like. The simplest knitting pattern involves only three movements. They form a semicircle, wrapping the free end around the base.
Continuing the movement, it is brought under the main rope and passed into the now formed loop. In fact, this is the same node as with But, in the loop formed during its formation, there is a support. Now, when pulling the main rope, the free end will be pressed against a hard surface, which will prevent the structure from untying.

Varieties
To increase the reliability of the scheme described above, you can do a few more simple manipulations. After tightening the knot, the free end is re-thrown around the support, wound behind the main rope and passed into the newly formed loop. Such a knot is called "with a half bayonet." You can make one, two or more reinsurances, if the length of the rope allows. Such self-tightening knots will be more perfect, they will stay on the support even with a variable load.
In order not to be afraid of accidentally untying them at all, you can use a “constrictor”. This translates from Latin as "boa constrictor". And these reptiles, as you know, when holding the victim, form very strong rings. The constrictor is often impossible to untie at all and the rope has to be cut. However, if you do not apply excessive force, the knot will do a good job of tightening the neck of the bag, and securing the clothesline. In case of emergency, it is best suited to clamp a damaged artery or vein during bleeding.

Circuit variant
More complex knots are based on basic combinations. So, based on the above diagram, you can make several more connection options, including self-tightening knots for fishing line. On the one hand, they become a little more difficult to perform, but on the other hand, they make the basic combination universal. Depending on the situation, you can easily switch from it to other types of fasteners.
For example, the simple self-tightening knot described above can be made quickly untied. To do this, before tightening the loop, the free end of the rope is passed in the opposite direction (not completely) to form another loop. For the resulting free “tail”, if necessary, you can pull to effortlessly untie the fasteners. The scheme in this design is called the "boat assembly". At the same time, it keeps the boat well on the pier and allows you to quickly sail away from the shore, only by pulling on the edge of the rope.
Complication
Using a simple self-tightening knot as a basis, you can easily move on to the noose pattern. To do this, before tightening, the free end is wrapped three times around the rope that formed the loop. With uniform tightening, the connection is securely fixed due to repeated pressing force to the support. It is problematic to untie such a knot without loosening the main rope.
A self-tightening knot with a loop can be useful in everyday life for shortening a sagging clothesline. With it, you can temporarily "hide" (make inactive) a section of the cord with damaged fibers, which theoretically can break under load. The advantage of the "burlak sea loop" knot is its ability to tie on any section of a fixed rope that does not have free ends.

There may be several options. The easiest is if there is already a loop of rope or fishing line at one end of the bracelet. This is done because it is difficult to work with one hand without outside help. In this case, a massive knit is knitted at the other end.
It should be of such a size that it can butt-fit through the hole in the hinge. The knot is knitted with the expectation that when it is “fastened”, the strap will need to be slightly pulled. After threading into the eyelet, the force will be weakened, but the loop will not be able to come off on its own.
So that the self-tightening knot for the bracelet cannot accidentally untie, it is easiest to use the scheme described above. The free end is threaded into the eyelet, turned in the opposite direction, wound under the main ribbon and passed into the loop formed. You can use for these purposes and the variants of the schemes shown in the photographs above.

Fishing: how to make a self-tightening knot
Oddly enough, in order to fix the end of the fishing line (cord) on the reel, in principle, you can use the same simple scheme, especially if you additionally strengthen it with two or more “half-bayonets”, and even put a layer of adhesive plaster on top. However, fishermen usually use a different scheme for this - with a tightening loop.
For the convenience of such fastening, the spool is removed from the reel. A loop is knitted at the end of the fishing line in any convenient way. It is best to do this with the "eight", but this is not important. After that, at a certain distance (15-20 cm) from the formed knot, the main fishing line is captured, folded in half and threaded through the eye.
The new loop formed at the same time is stretched a sufficient distance to allow it to be put on the spool. Self-tightening knots on the spool with a sealing loop, on the one hand, will keep the line from slipping, and on the other hand, allow it to be removed and changed if necessary, without cutting the connections. If the loop still slips, it means that it was placed on the wrong side when putting it on the spool, and it should be rotated 180 degrees.
The scientific and technological development of society could not come up with a more efficient way to dry clothes than clotheslines on a balcony. You can meet them in new buildings and houses of the "old school", which is due to common sense. It is much easier to leave laundry for a few hours on the balcony than to dry it in the bathroom or buy a separate unit. It is important to remember that not every rope will cope with the task.
In order for the laundry to dry as efficiently as possible, it is necessary to carefully examine the potential piece of rope. It is a mistake to think that the only significant characteristic in this case is the strength of the material. Yes, this indicator is important, but it is not the only one. High-quality clothesline should not get dirty and absorb color, otherwise white fabrics will soon cease to be such.

Depending on the size of the balcony, the amount and the prevailing type of linen, you can choose one of the following types of material:
- Equipped with a PVC sheath metal cable - the thread is durable and resistant to prolonged tension. In addition, environmentally friendly drying material will appeal to those who care about nature.
- Ordinary twisted rope is a budget option in all respects, while having a number of disadvantages. Firstly, even a slight wetting is enough for impressive sagging. Secondly, you need to hang such a rope only if white fabrics will not be placed on it. This is explained by the ability of its surface to actively absorb external pollution.
- Plastic ropes - they are more expensive, but this fact is due to a number of obvious advantages. First, the material can withstand increased loads. Secondly, the buyer has the opportunity to hang a rope of the color that he likes.
- Traditional jute is characterized by wear resistance and the ability not to stain linen. In addition, the material is environmentally friendly.
- Polypropylene - in addition to environmental safety, the rope made of this material does not accumulate moisture and is not electrified.
When choosing a rope for a balcony, you must carefully study its characteristics. The main ones are strength, resistance to stretching, low degree of interaction with moisture. In addition, the rope should not accumulate dust and the color of those things that are dried on it.
Outdoor clothesline design for drying clothes on the balcony
The buyer of rope should remember that it comes in two types. It is a material for indoor and outdoor use. The difference between them is at the level of the ability to withstand the prolonged impact of the vagaries of nature.
Fabric for outdoor use is attached to the balcony or on the open loggia, which reduces the load on the available space.
Regardless of the type of room and the characteristics of the linen, the balcony will need reliable brackets. The stronger the mount, the less likely the linen will fall.

To achieve a good result, the following recommendations will help:
- Fix strong steel brackets on both sides of the balcony;
- Buy in the store corners made of a similar material;
- It is necessary to make sure that the corners are equipped with holes that allow you to securely tie the clothesline;
- In order to simplify the process of hanging clothes, the profile with corners must be placed not perpendicularly, but at an angle;
- It will not be superfluous to install a spacer that does not allow the profile to deform.
For a small balcony, external fastening of clotheslines is appropriate. In this case, you do not have to sacrifice the available space. Metal corners and brackets are used as the basis of the rope fixation system. They are installed at a slight angle, which reduces the number of difficulties at the time of hanging and removing the washed linen.
Existing types of fasteners or how to hang a clothesline on a balcony
These are divided into factory and homemade. Opens a list of popular and inexpensive ways to equip a balcony with fasteners 2 metal corners screwed into opposite corners of the wall.
Using an electric or hand tool, it is necessary to make holes in them, where to fix the rope. In addition to this option, there is another one suitable for regions with a temperate climate.
Instead of metal corners, wooden bars with built-in hooks are taken. The bars are fixed in opposite corners of the room. The greatest difficulty is to pull the rope as evenly as possible.

Regardless of which type of attachment is chosen, there are some precautions to be taken into account:
- Before buying, you need to make sure that the fasteners are made of stainless steel;
- Factory fasteners are always supplied with an indication of the maximum allowable load;
- Unlike home-made, factory-made rope fasteners are more popular due to the presence of the necessary elements, made with maximum precision;
- The placement height is selected so that it is convenient to reach the linen.
Existing latches for the balcony are divided into factory and home-made. The first option is more preferable due to the precision with which it is made, and the second - the ability to adapt to existing conditions.
We hang the rope on the balcony correctly
The work begins with the choice of the frame and the type of fabric, after which you can pick up the tool. It is necessary to adjust the length of the ropes in advance so that it does not sag even when peak loads are reached.
If we are talking about homemade fasteners, then in this case you need to tie the cable in advance. At the next stage, the structure is installed on a concrete or wooden base.
It is useful for beginners to know that the choice of tool for work is carried out taking into account the base, and not the design of the dryer.

To work, you need to have the following on hand:
- Roulette;
- Simple pencil;
- Several dowels;
- Perforator;
- Building level;
- A hammer;
- Curly screwdriver.
How to attach clotheslines to the balcony (video)
After preliminary marking has been made on the ceiling, the bracket is fixed. This is done with a drill that creates recesses at a height of up to 150 cm from the floor level. At the specified point, the bracket and roller mechanism are attached. The base is fixed on the ceiling and the final adjustment of the degree of tension of the ropes for drying clothes takes place.
Examples of clothesline to the balcony (photo)


Specialization: master in the construction of plasterboard structures, finishing work and laying flooring. Installation of door and window blocks, facade finishing, installation of electrics, plumbing and heating - I can give detailed advice on all types of work.
If washing machines have taken over all the laundry concerns in modern conditions, then the organization of the process of drying clothes still falls on the owners of the house, and if you have a balcony, then it is there that you can install a special design for these purposes. I will tell you about several options, consider all their pros and cons, so that you can make an informed choice. We will also consider options for home-made designs for those who like to craft with their own hands.
The first option - outdoor drying systems
This is a separate group of clothes dryers, which has a number of features, we will start with the advantages:

| Space saving | Since the structure is located on the outside of the balcony, it does not take up space inside, which allows it to be used for other purposes. You just hang things out the window, and you don’t have to worry about dampness on the balcony, which is important when storing various items there |
| Quality drying | Any housewife knows that clothes dry much faster outdoors than indoors. In addition, during the warm season, the drying time will be much shorter, and you will be able to dry a lot more things in a day. |
| Lighting is not disturbed | Probably, many are familiar with the situation when, due to the many things hanging on the balcony, you have to turn on the light in the room even during the day, and such a picture does not look the best. When the dryer is located outside, the view from the window will always be excellent, and the light will enter the room without any obstructions. |
But this option also has disadvantages, and very significant ones:
- Things can get caught in rain and other precipitation if there is no one in the house or apartment;
- If there is a busy road near your place of residence, then dust and other harmful substances will settle on the linen;
- If someone throws a cigarette butt from above, a fire may break out, and if they smoke from below, things will smell of tobacco smoke;
- The balcony from the outside will not look very attractive because of this design.
Now let's deal with the design of the dryer, it consists of the following components:
- Two brackets with rollers for linen cord and fixing plates on one side. They must be made of steel to withstand heavy loads;
- Cord made of synthetic fibers - it almost does not stretch over time, does not rot and retains strength for at least a dozen years.

As for the manufacturer, I personally came across the products of the OknaTrust company, it is its kit that is shown in the photo above. Drying is of high quality, reliability (can withstand up to 50 kg) and at the same time its price is quite democratic - a set will cost you about 1000 rubles.
It is worth talking about how to fix the structure, everything is also quite simple here:
- Brackets are taken and located in the place of future attachment, the distance between them can be up to 4 meters. Points for drilling holes are marked on the surface;
- Then holes for fasteners are drilled, I advise using anchors with nuts with a diameter of 8-10 mm, since the structure must withstand significant loads;
- The bracket is put in place and fixed with anchors, after which a cord is pulled and tied between the rollers, such a system allows you to move the cord when hanging and removing linen, which makes it possible to stand still when working.

If you have a french balcony, then there may be problems with fastening, I advise using plates on both sides, with which you can press the holders to the railing, this is the easiest solution.
Balcony interior dryers
This group of products includes several types at once, each of them has its own characteristics, so I will consider them separately. If desired, you can use two types of structures, it all depends on a number of conditions - sometimes one option can become more convenient, and sometimes another.
The second option - wall structures
This group of products, in turn, is divided into several options, I will talk about the most popular of them, which have proven themselves best among users.
First of all, you need to talk about inertial wall dryers, which consist of two components:

- A case with a spring-loaded drum that pulls the cord and allows you to quickly tuck it into the case if necessary. It is important here that the system is tight enough and provides a good stretch;
- Hooks or a special bar are attached on the other side, the structure clings to them when it is needed.
This option can withstand loads up to 6 kg, judging by the reviews, after about a year of use, the ropes begin to sag, if the design has a drum spring tension function, then you can make a good stretch again, if not, you will have to install a new system.
As for manufacturers, the products of the German brand "Leifheit", as well as the Italian companies "Melicone" and "Gimi" deserve attention. In terms of cost, it all depends on the model, design and manufacturer, for example, the popular Gimi Rotor 6 model will cost you about 1300 rubles.

The second option is compact cantilever designs, this is an excellent solution for small spaces. when you need to clean the system when not in use. When the dryer unfolds, 5 rows of tubes come out, which are used for hanging things, look at the photo below, and you will understand all the features of this type of product.

Another type of such structures is a system in which the crossbars do not fold inward, but converge according to the principle of a telescopic design, again, you can understand the features of the system by looking at the photo: everything is simple and clear.

As for the cost, these options will cost you from 1000 to 2000 rubles. depending on size and manufacturer. The design may include a towel holder at the bottom, but this option is more suitable for bathrooms than for balconies, although on the other hand it is an additional place for drying.
Console options can withstand a load of about 5 kg, so it is unlikely that you will be able to dry a lot of things on them, keep this in mind.
The third type of wall dryers is sliding systems, they are made of, so they can withstand loads up to 10 kg. When folded, such drying takes up little space, it can be safely placed even on a small balcony.

In terms of cost, they do not stand out from the general range and cost about 1,000 rubles, so if you are thinking which option to choose, then you can only be guided by personal preferences, although this option outperforms the two described above in terms of reliability.

Linen wall dryers are attached with dowels or self-tapping screws, it all depends on the basis on which the installation is carried out. The most important thing is to ensure a reliable fixation of the structure.
The third option - ceiling systems
This is the most popular type of product today, which is not surprising, because the designs have a number of advantages:
- Do not take up valuable space on the floor or on the walls: the ceiling is usually always free, and in this case it will perform a useful function, which is important;
- They are not striking: if nothing hangs on them, then the drying is almost invisible. They do not interfere with the opening of doors, which is also important;
- The laundry rises up and creates a minimum of interference during drying.

Of course, there are certain disadvantages, they also need to be considered:
- Hanging small things on thick crossbars is not very convenient;
- Installation can cause certain difficulties, especially if the ceiling on the balcony is not durable.
And this type of product is divided into separate types, I will start with the classic hanging version, it is quite simple: a structure of several crossbars is lowered and raised by a rope that passes through two blocks at the points of attachment to the ceiling.
Such a solution, for all its simplicity, looks best and can become a kind of decoration for your balcony. And the cost is very attractive: from 600 rubles and more.

Retractable systems, or, as they are also called, accordion dryers, differ in that the system is lowered and raised due to a simple design, which is shown in the photo below. To lower, you need to pull the rope on one side, to raise, use the rope on the other side, everything is simple and clear.

This type of structure can withstand an average of about 5 kg, I do not advise hanging more, since the sliding structure deforms under load and quickly fails. The cost starts from 900 rubles and may vary depending on the size and brand.
Finally, the most popular and frequently used solution today is the “liana” design, its main feature is that you can separately adjust the height of each of the crossbars. This is very convenient when drying things of different sizes, but the design is much more complicated.

As for the features, they are as follows:
- Most often in the design there are 5 or 7 rods for drying;
- Drying length can be different - from 100 to 250 cm, so you can choose the best option for any space;
- The design falls very low, which increases the convenience of placing linen on it.

The price range varies widely - from 600 rubles and above, when choosing, pay attention to the material of manufacture, it is better that it be steel with a polymer coating.
Now let's deal with the installation, if the first two options are quite simple (you need to attach brackets to the ceiling, after which you can use the system), then the last type is more difficult to install.
The process looks like this:
- First of all, the rods are fastened at the desired width, this is done with the help of anchors;
- Next, you need to pass the cord through the system and fasten special caps on it, before tying, the knots need to be accurately adjusted to the position of the bar;
- A locking bar is placed at the bottom, which will hold the cords in the desired position.

The fourth option - floor systems
If the usual clothesline on the balcony for clothes or ceiling and wall structures do not suit you for any reason, then floor drying will be the best solution, it has a lot of advantages:
- Mobility - the design can be placed not only on the balcony, but in any other room or even on the street;
- A wide range of sizes - you can find drying of any size;
- You can fold the system at any time and put it into storage;
- You don’t need to fix anything - you just put the dryer on the floor and lay it out.

When buying, pay attention to the strength of the tubes and the reliability of the design, cheap Chinese options can bend even from 5 kg of laundry. It is better to buy something more expensive and stronger. As for the cost, solid products will cost you from one to five thousand, depending on the size and manufacturer.
If you have children and have to dry a lot of laundry, then I advise you to pay attention to multi-tiered structures.

Option five - electric dryers
Structures of this type come in different designs - floor, wall or ceiling. As for modification, there are two main options:
- Traditional models that dry clothes with heated rods or fan heaters that blow from top to bottom. Their price varies from 2000 rubles and above;

- The cover design allows you to dry things on a hanger, which saves you from having to iron the folds for a long time. This option can dry up to 10 kg of laundry, the height of the cover is approximately 150 cm, which allows you to fit any clothes there. The cost is about 3500 and above.

Of the shortcomings, it should be noted that such designs, like all electrical appliances, require careful handling. Yes, and energy costs will be rather big - about 1 kW per hour of work.
Electric dryers can be used just like regular dryers if they are not plugged in, so you can save electricity when drying time is not important.
If you want to save money, you can build a drying system on your own, I will talk about the options that I consider the most convenient:
- The external structure is done like this: first of all, you need to weld or bend the brackets for attaching to the balcony, then the rollers are bolted to them, which can be bought in building fastener stores. There you can also take tensioners, which are called lanyards, with their help you can always keep the cord taut, an example of such a design is in the photo;

- If you are making ropes inside, then it is also better to pull them through turnbuckles, the work is simple: hooks are attached to the wall, on which small blocks are hung. A cord or cable is passed through them, that is, it is connected in a circle, a lanyard is placed at the junction, which stretches the structure. This option has one drawback - the design is under the ceiling, and you will have to constantly climb onto a stool before hanging up the laundry;

- And another option that I really like is using a hanger holder from a closet or a suitable pipe. These elements are attached to, after which hangers are hung on them, this is very convenient for drying clothes, as it is leveled in a natural position.
