How to draw your own font. How to create your own font: the most basic information for beginners

Instructions
Click the "Create new" button font"(for the English version - "New").
In the top line, select “Insert” – “Characters”. In the Fonts line, select font Arial or Times New Roman. Find the index of the first "A" font a (if you plan to create font, then “A” select Russian), which will be displayed when you select a character in the Selected Character field. Similarly, find the index of the letter “I” (or Z for font A).
In the “Add these character” field, enter these two numbers separated by a “-” sign (for example, “$0310-$034F”). The template is ready.
Draw your own set of characters in Photoshop, saving each letter in a separate graphic file. You can also write what you need on paper, then scan it and save it in Photoshop as separate files.
Select the appropriate template in Font Creator and click on “Import Image”. Select “Load” and open the folder in which you saved the letters.
Adjust the letter settings in the appropriate fields (Threshold and beyond). After making all the settings and importing the letters, click on the “Generate” button.
Double-click on the square with the letter. Adjust all paddings using the corresponding lines that will appear on the display (using the mouse). The lowest line is responsible for adjusting the maximum limit for letters with additional elements(c, y, z). The second line from the bottom will serve as a support for the letter. The third from the bottom is responsible for small letters, and the fourth is the height of large letters and numbers. The fifth line indicates the edge line of the top line.
note
Creation and high-quality rendering own font takes quite a long time.
Sources:
- Typewriter font
Tip 2: How to make changes to the Photoshop font set
By default, the Graphics Text tool Adobe editor Photoshop uses all the fonts installed on your computer's operating system. Therefore, the easiest way to add new fonts to the list is to install them using standard OS tools. However, this is not the only way.
Instructions
In modern Windows versions Installing a new font is very easy using Explorer. Start the procedure by launching this application - press the Win + E key combination, select “Computer” in the main menu or double-click the icon with the same name on the desktop.
Then navigate through the Explorer directory tree to the folder where the font file you want to add to the list of Photoshop fonts is stored. Such files most often have a ttf or otf extension, and right-clicking on them brings up a context menu that contains the “Install” item. Select this command, and the font will be added to the set of operating system and application applications, including the graphic editor. Depending on which tool is currently active in Photoshop, updating the font list may require restarting it or simply switching to another tool (such as the Brush tool) and back again (Text).
You can add to the list of Adobe Photoshop fonts without installing the fonts into the operating system. To do this, you need to place the file with the new font in a special folder on the computer’s system drive, which is automatically created by the graphic editor during installation. This is also most conveniently done using Explorer - launch it, go to the directory with the new font file and copy it (Ctrl + C).
Then go to the system drive and in the directory called Program Files, expand the Common Files subdirectory, and in it - the Adobe folder. This folder contains a separate storage of Photoshop fonts called Fonts - open it and paste the copied file (Ctrl + V).
Removing any font from the list of the graphic editor is done in a similar way - you need to either uninstall the font from the operating system, or delete it from the folder of Adobe's own fonts specified in the previous step.
Video on the topic
For employees of design companies or for individual designers, an outstanding one is almost always required. Depending on the wishes of the client, the main emphasis is still placed on individuality in the execution of the work.
Of course, with the huge availability of custom fonts, which can be found in thousands on disk or downloaded from , creating a font seems like a waste of time. But you can spend even more time searching for the right font online, and store-bought font sets on disk may not be suitable for the project at all. Unfortunately, there are too many bad fonts.
Many beginning designers want to create a font themselves. This is commendable, because Helps develop a sense of style and individuality. Another thing is that this path cannot be easy. If the user is faced with such a task for the first time, then you can purchase a special computer program to create a full-fledged font. The most famous of them are, of course, Photoshop, as well as Illustrator, Flash, Corel and many others. But such programs are very expensive.
In such a situation, you can go another way - or rather, a proven traditional one. You can draw the required font using colored pencils, paints, felt-tip pens, and then digitize it using special programs. At first glance, such an idea seems anachronistic in the age of global computerization. But when drawing the required text on paper, the designer immediately knows what it will be like on printed products(booklets, postcards, packaging, etc.).
If the user has artistic skills, then creating a font on his own is not particularly difficult. Executed in a similar way (digitized). It may need some processing after scanning, for example to remove halftones. For this you can choose free utilities, with which the user can make corrections. In addition, utilities can automatically recognize minor defects and make the necessary adjustments to the drawing. The font is then imported in Tiff or Bitmap format into a curved font program.
Keeping up with the times, you can draw a font using a special pen (stylus). Included with the tablet, developers often include a disk with special programs that allow you to create a full-fledged font based on the user’s design, and adjust it or modify existing ones using a font editor.
Video on the topic
Sources:
- creating a font in 2018
In the Explorer menu, open the “File” section and select “Install font”.
As a result, a dialog box will open in which you need to select the drive and folder in which the font to be installed is placed (double-click the folder). The program will scan the specified folder and in the “List” window fonts» a list of found names will appear. Select the desired fonts from among them. You can select several fonts located in different parts list - to do this, click each next one while holding down the CTRL key. Or you can select a group located between two lists - to do this, click on the first font of the group, then scroll to the last one in the list and click it while pressing the SHIFT key. If you uncheck the checkbox that says “Copy fonts to the Fonts folder”, they will remain in the same place, and if not, then their copies will be created in the system folder, and you can delete the original files.
Sources:
- In this tutorial we will learn how to install additional fonts
The authors of many Adobe Photoshop tutorials use English names of buttons, commands and program functions when describing them. In this regard, sometimes the question arises - how to make the text of the Photoshop interface in English?

Instructions
If you first installed English version program, and then put a cracker on top, then you can use the following method. Launch Adobe Photoshop, click the menu item “Editing” > “Preferences” > General.” In the window that appears, select “Interface”, in the “User Interface Text Options” field, find the “Interface Language” item, specify “English” in it and click the “OK” button in the right top corner menu. If you try to change this setting by initially installing the Russian version of Adobe Photoshop, nothing will work: the only option in the “Interface language” setting will be only Russian. In this case, you can use another method.
Close the program and open Windows Explorer and go to the directory C:\Program Files\Adobe\Adobe Photoshop CS5\Locales\ru_RU\Support Files. Keep in mind that instead of the C drive and the CS5 version in your case, there may be other options, depending on where the program was installed and what its version is. Create a new folder in this directory, which you can give any name. IN in this case Leave the default name – “New Folder”.
Find the file called tw10428, it is responsible for the Russification of the program. Cut and paste it into the folder you just created: right-click on the file, select “Cut,” right-click on the folder icon and select “Paste.” Open Adobe Photoshop and enjoy the English interface. Keep in mind that in earlier versions of the program, for example in CS2, a similar operation will also have to be done with the tw12508 file. Together with tw10428, it will be located in the C:\Program Files\Adobe\Adobe Photoshop CS5 (64 Bit)\Required directory.
Video on the topic
note
If you need to return the Russian language to the program, do reverse actions: Cut the file tw10428 from the “New Folder” and paste it again into C:\Program Files\Adobe\Adobe Photoshop CS5\Locales\ru_RU\Support Files.
Creating your own unique font is interesting not only for designers and developers, but also for ordinary Internet users. On the Internet you can find several software tools for this purpose - both professional and amateur.

The technology for improving the quality of screen fonts using the Microsoft ClearType anti-aliasing method in some cases has the opposite effect - the clarity of texts becomes unacceptable. This may be due to both individual characteristics the user’s vision (increased color sensitivity) and monitor settings (abnormal resolution, improper gamma correction, etc.). If you are not satisfied with the clarity of screen fonts, try disabling or adjusting ClearType settings.

Instructions
Start by right-clicking on your desktop background image if you are using Windows XP. Select the “Properties” line in the context menu that drops down, and the system will launch the component with settings related to the image on the screen. You can also do this through the Control Panel, which is opened by a link in the menu on the “Start” button. In the panel, select the “Appearance and Themes” section and click the “Screen” link.
In the Screen Properties window, select the “Appearance” tab and click the “Effects” button. Next, you will have a choice: disable font anti-aliasing altogether or disable ClearType anti-aliasing.
Uncheck the "Apply the following screen font antialiasing method" checkbox if you want to disable antialiasing completely.
Leave the "Apply the following screen font smoothing method" checked, and select "Normal" from the drop-down list below if you decide to disable ClearType only.
Click the OK buttons in both open windows and the procedure will be completed.
If you have Windows 7 installed, start the procedure by pressing the win key or clicking the Start button. In the main OS menu that opens, enter the text ClearType in the “Search programs and files” field. In the search results, click the “ClearType Text Customizer” link, and the system will launch the “ClearType Text Customizer” component.
Uncheck the Enable ClearType checkbox and click Finish.
If you decide to try other ClearType settings, instead of the previous step, click Next and follow the instructions in the Screen Font Smoothing Setup Wizard. When it is finished, close the window by clicking on the “Finish” button.
Video on the topic
Windows Tools allow you to use external fonts to create documents and graphic images V different styles. To set the required character set, an automated interface is used, implemented in the system by default. To set the font, like on a typewriter, you will need to download the TTF file and copy it to the system directory.

Instructions
Download a typewriter font online. Today, there are several resources that allow you to download character sets stylized for different typewriters. Go to the site you like and download the desired file.
Fonts are usually supplied in RAR or ZIP archives. To install the character set you will need to unpack this document. After the download is complete, right-click on the resulting file and select “Extract”. Select the folder where you would like to extract the symbol set in the window that appears and wait for the extraction procedure.
Once the extraction has been completed, navigate to the directory where the extracted font files were saved. Click on the TTF document and select the “Install” option. After the operation is completed, the required character set will be copied to the system.
If you have downloaded several typescript fonts, use the Fonts tool, which is located in the Start menu - Control Panel - Appearance and Personalization. By going to this section, you will see all the files installed on your system.
Select the typewriter character sets in the folder where you extracted the downloaded archive and move them to the Fonts tool window. After the operation is completed, all files will be installed and you can close the manager window.
Launch the program through which you edit and create documents. In the window, select the font to use and start typing. The installation of the typewriter character set is complete.
If you don't like the downloaded file, you can use the Fonts tool. To do this, select the name of the unnecessary character set and click on the “Delete” button located at the top of the window. After clicking the button, unnecessary fonts will be permanently deleted from the system and will not appear in the programs you use.
Sources:
- Typescript fonts
When typing a test, creating a program interface or website pages, sometimes it is necessary to make all the text or a certain fragment of it transparent. Text transparency on a computer is very conditional and is implemented according to the same principle in different programs. The implementation of the principle can be considered using the program example Microsoft Word.

You will need
- Basic computer skills.
Instructions
First, pay attention to the background color on which you plan to type your text. Find out the code for this color. To do this, select “Format” in the main menu of the program, in the submenu that appears, move the cursor to the “Background” line, then select the “Other colors” line. In the window that appears below the spectrum, the code of the selected color is written. This is what you need to remember or write down.
Next, open the “Format” line in the main menu, then “ Font". In the font properties window that appears, activate the " tab Font". In it, click on the color selection bar (under the line "Text Color"), then select the line "Other colors". In the color selection window that appears, enter a pre-known background color code. After this, the text will merge with the background, that is, it will be transparent .
Helpful advice
To see transparent text, simply select it.
Inconvenient small font - very current problem for people with low vision. Indeed, small font size makes the user strain his eyesight, it becomes impossible to perceive information, and using a computer causes discomfort.

Instructions
If the small screen resolution causes discomfort, then you should set the necessary parameters in its settings. Enter the desktop menu, to do this, right-click on an empty space and select the “Desktop Properties” menu item.
You will be offered a choice of fonts in three sizes with sample letters. Check the appropriate “Large font” box. Click the "Apply" button.
If you are not satisfied with the changes, return to the previous tab again and select other options, increasing the font to “Very Large”. Click the Apply button again.
If you are not satisfied with the font in the text editor, you need to go to the “Fonts” menu item. This can be done either in the page control panel or by right-clicking on the page. Select the desired font from the drop-down list.
If you do not need to change the font in the document, but need to increase the page resolution on the screen, use the “Scale” tab in the “View” menu. By clicking the “% to real resolution” icon, assign the desired page parameters.
All browsers also provide the ability to change the font size. To do this, go to the “View” menu in the settings, open the “Page” section, then the “Scale” subsection. Select the desired font size. In some browsers, this function is duplicated in the form of CTRL and “+” hotkeys. They need to be pressed at the same time. You can also increase or decrease the font size by pressing the CTRL key while scrolling the mouse wheel.
Video on the topic
Create your own font
Hi guys. As promised, I’m telling you how to make your own font.
I’ll say right away that I’m not giving a link to download the program here, but it won’t be difficult for you to find it yourself. The program is called High-Logic Font Creator, I started with it, and this the simplest way turn the letters you drew into a real font. If you notice any errors, please write, because all this was done almost intuitively, and I do not at all pretend to be a masterful execution :) And as usual, clicking will open larger images.
Friends who deal with fonts professionally, don’t swear, there will be practically no terms or rules here. The post is intended for those who have always wanted to create something like this, but did not know how to approach :)
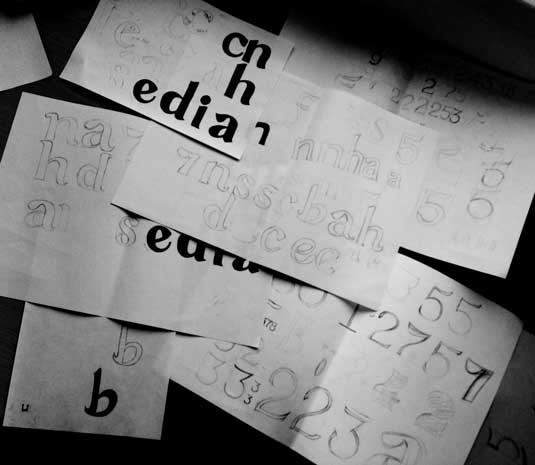
So, the first thing we need to do is draw letters, numbers, symbols, that is, everything you need. I drew this set for stock, today I will turn it into a font. There are no small lowercase letters, so draw those in as well to make the font full. 
I draw everything in Illustrator, but it's up to you. Many people simply write on paper and scan, that’s also an option.
Next you need to save each letter separately. That's it, now open the program.
Our first action is quite obvious: File - New... We see the window:

In the window, enter the name of our font in the Font family name field, select Unicode, Regular, Don't include outlines. These are my settings :)
Click OK, we see that a font template has opened with all possible letters, numbers and other symbols.

I don’t remember what the default font is, I have the Arial font template set. To change the font, add letters, you need to go to Insert - Characters, it's in the top panel. You can also add Cyrillic there, but we won’t do that for now.
Next, the most important thing is to add our letters. Find the capital letter A and double-click on it.
We see a window with a bunch of cells and stripes.

We panic, close the program, take a deep breath, and go back. Now Dina will explain everything.
Each strip has its own purpose, but first things first. In this window, right-click anywhere and click Import Image.
We remember where we saved all our letters, find our A, open it. Another window:

There is nothing complicated here, move the slider, click on everything you see, the preview will tell you which settings are best to set. The picture shows mine, you can try the same. Click Generate. Here is our letter:

So, what we see: two vertical stripes and five horizontal ones.
The letter should be located between two vertical stripes, they indicate the distance before and after the letter. Don't place them too close or directly on the letter, otherwise it will be a mess.

And now about horizontal lines. I won’t burden you with terms, I’ll explain it popularly:
1. The topmost bar is the maximum distance above the baseline (4).
2. Second from the top is the height of capital letters.
3. The third is the height of lowercase letters.
4. The base line along which all letters are lined up.
5. Maximum distance below the baseline (4).
To change the parameters of horizontal lines, you need to open Settings in the Format tab. I recommend Googling the parameters of some popular fonts and using them as an example if you want to change something. But I didn't do anything like that :)
As you can see, I increased the letter to line 2, CapHeight, all that remains is to adjust the vertical stripes. I want there to be a decent distance before and after the letter, so I move the letter itself away from the left line, and take the right one by the black triangle on top and move it closer to the letter. Like this:

This is exactly what I will do with all my capital letters. If you are adding lowercase letters, make them height up to line number 3.
When we have positioned the letter, we simply close this window. All letters will fall into place, and this is noticeable:

I have a letter Q with a tail, I don’t want it to stand out from the general row of letters, so I place it on the baseline and leave the tail below.
Do the same with all lowercase letters (p, q, y, g, j), and some, on the contrary, may be slightly higher than the capital letter (d, b, k, f).

I don’t need numbers yet, so my picture looks like this:

If you can’t wait to try the letters in action, then go to File - Save as, save the font in the .ttf format suggested by the program.
We install the font, go to the text editor, find our font, check it. Works!

Well, now you can indulge. We take the worst photo of the May 9 fireworks, do some magic in Photoshop, type in the text, and voila! :)

Not that hard, right? Be sure to try it and show us the results :)
High school and university students, often doing homework, have to do a large number of written exercises. For example, our social studies teacher gives us an assignment every lesson, which requires us to find material in the library or the Internet and write it by hand (only for this we can get an “excellent” grade), even if the material found is correct, but printed on a computer, don’t expect anything higher than a B...
Based on all of the above, I came to the conclusion: I need to make a font for the computer that duplicates my handwriting. In my opinion, I did it successfully. My own mother would not be able to tell where I wrote by hand and where I typed it on the computer. Many of my friends liked this idea, and they began to ask me how I did it all. And so as not to explain it to everyone a hundred times, I decided to write this article - a plan for completing the work with detailed comments.
So, in this article, I will tell you how to make a font that imitates your handwriting.
For work we will need:
1) sheets of blank paper in A4 format;
2) black gel pen;
3) printer;
4) scanner;
5) High-Logic FontCreator program (I suggest downloading from the official website of the program).
To download, click on the provided link.
1 step
Take a landscape sheet of paper and write on it all the letters of the Russian alphabet (lowercase and uppercase), numbers from zero to nine and punctuation marks: period, comma, semicolon, colon, quotation marks, dashes, parentheses, etc. If anyone needs, you can add other symbols that will be useful to you when writing, such as @, №, $, #, ^, %, *, etc. Write beautifully, display each letter so that later all your work does not go down the drain.Step 2
Scan the sheet with the letters written. And those people who managed to fit all the characters on one page will eventually receive one big picture.Step 3
Then open the FontCreator program from the manufacturer High-Logic. Her window looks like this.
In the window that appears, you need to enter the name of your future font.

Click “OK” and the following appears. window.
In this window, open a picture with your letters. Select the letter “A”, copy it and return to FontCreator, open the cell with the letter “F” and paste your letter there. The red dotted lines can be moved, arrange them as shown in the following figure.

The letter must be on the Baseline and must NOT extend beyond the top horizontal line (WinAscent), and must NOT extend beyond the bottom horizontal line (WinDescent), otherwise it will be cut off. Vertical left line should be where the letter begins, and the vertical right line is where the letter ends. If the letter extends beyond the vertical lines, then when printing there will be an overlap of one letter over another, this also does not suit us.
Now I’ll explain why we inserted the letter “A” into the cell with the letter “F”. This program designed for creating fonts using Latin letters. On the contrary, we need to make a font for Russian letters. Therefore, the RUSSIAN font we made will be on the LATIN layout. To make it more convenient, we will insert Russian letters into cells with Latin letters, in accordance with the keyboard.

Insert the letter “Y” into the cell with the letter “Q”
Insert the letter “C” into the cell with the letter “W”
Insert the letter “U” into the cell with the letter “E”
Insert the letter “K” into the cell with the letter “R”
Insert the letter “E” into the cell with the letter “T”
Insert the letter “H” into the cell with the letter “Y”
After you place all the letters in the cells, you will get a picture like this.

Now you can test the resulting font. This can be done by pressing the “F5” key, or by going to “Font - Test...”

If you are happy with everything, save the resulting font and place it in the “C:\WINDOWS\Fonts” folder. The font is installed, and now you can select it, for example, in Microsoft Word and print text with it. Below is the text printed in my font.

A lot has been written in articles about design, especially about the history of their creation. We have read about many techniques for creating fonts. But where, exactly, should we start?
If you are a designer or illustrator and this discipline is new to you, then where should you start?
We found useful information, which was collected from many sources, and decided to make a general review article.
1. Start with a brief
Creating a font is a long and painstaking job, so it is very important to have a clear understanding of what this font should be.
Developing a brief will certainly require research and thought. How will your font be used: will it be needed for a specific project or for personal use? Is there a problem that your font would solve? Will your font fit into an array of similar designs? What makes it unique?
There are many options. Fonts can be created, for example, specifically for academic texts or for posters. Only when you know how your typeface can be used will you be ready to start designing.
2. Fundamental choice
There are a number of decisions to keep in mind. Will it be a sans serif or sans serif? Will it be handwritten text based or more geometric? Will the font be designed for text and suitable for long documents? Or maybe it will display text in creative style and will it look better in large size?
Tip: It is assumed that sans serif font design is more difficult for beginners, since the capabilities of such fonts are more specific.
3. Pitfalls in the early stages
There are several pitfalls:
– You may decide to start with computerizing handwriting, which can be a useful practice exercise. But because handwriting is so individual, your font may not have much success due to its specificity.
– You should not use existing fonts as a basis. By slightly reworking a font that is already familiar to everyone, you will not create a better font and will not develop your skills.
4. Use your hands
There is a lot of material on how to draw fonts using computer programs, but we strongly recommend that you draw it by hand first. Trying to do this on a computer will make your job much more difficult.
Try to create beautiful shapes of the first few letters on paper, and only then start computer work. The following letters can then be constructed based on existing forms, according to key features.
Tip: By hand you can usually draw smoother, more precise curves. To make it more convenient, do not be afraid to rotate the sheet of paper the way you need.
5. What characters to start with
Creating specific characters first can help you set the style of your font. Well, then these symbols will be used as guides. Typically, the "control characters," as they are called, in Latin are n and o, and capital letters are H and O. The word adhension is often used to help test the basic proportions of the font (but some write it as adhencion because the letter s can be very insidious).
6. Transfer the font to your computer
There are many ways to transfer a drawing to a computer. Some recommend tracing programs, but many prefer to do this work manually so they have full control over the points and shapes.
Many programs need a clear and vibrant design, so once you like your font, trace it with a fine pen and fill in the shapes with a marker.
Hint: If you processed the drawn font as described above, then you can simply take a photo of the drawing and work with it.
7. Program selection

Many designers like to use Adobe Illustrator. For drawing separate forms and experimentation is great for him. But later it becomes obvious that it is not suitable for creating fonts. You will want to work with a program that allows you to work with letter spacing and word creation.
An excellent program is FontLab Studio, but new software such as Glyphs and Robofont are gaining more and more popularity. These programs aren't cheap, but Glyghs has a "mini" version on Mac App Store with some missing features which is not good because these features are important for beginners.
8. Using programs
Don't forget to place extreme points letter shapes (top, bottom, right, left) to better control the process.
9. Words
When you have finished all the work on smoothing out the shapes, look at how it looks in full text. Make it a goal to analyze how the font looks in a line, paragraph, and so on. And don't wait until you've done the entire alphabet.
This online tool will help you create text using letters you already have.
10. Tests
It is very important to see how your font will look in different sizes. Following your brief, evaluate the resulting font, see if the text can be read if you set the font size to small.
You need to understand how your font will behave when its size is changed. And yes, this can create a lot of problems, but you don’t want to give away raw results.
11. Print

12. Think global
So you've created something you're proud of. Have you made a font for Latin only? What about the Cyrillic alphabet? What about the 220 million Devanagari readers? The non-Latin market is growing.
13. More tests

Try using your font on older projects and see how the text looks. Give the font to your friends so they can test it and tell you what they think. Or just ask experienced designer so that he can give you his feedback.
Font Creation Tools
1.FontLab Studio
One of the most popular font design programs. Available on Windows and Mac.
2.FontCreator
The program is available on Windows, has an intuitive interface and is perfect for beginners.
3. Fontographer
Another powerful font editor from FontLab that allows you to create new fonts or modify existing ones. Available on Windows and Mac.
4.FontForge
This program works on Windows, Mac, Unix/Linux and has been translated into many languages. It also allows you to create new fonts and edit existing ones.
5. Type 3.2 Font Editor
OpenType font editor, available on Windows and Mac OS X. Quite simple and contains a sufficient number of functions.
6.FontStruct
7. BitFontMaker 2
Another free tool with which you can create dot fonts.
8.Fontifier
A free trial ($9 per font download) online tool that lets you create fonts from handwritten text.
9.YourFonts
Another online tool (also almost $10 to download) that lets you create a font from handwritten text.
10. Glyphe
A free and fairly powerful font editor. Great for beginners and those who don't want to spend money on buying software.
11. iFontMaker
This app is available on iPad and Windows 8. It allows you to create a font from a sketch and edit existing fonts.
12.FontArk
Free tool for a limited time. With it you can create fonts and download them.
13. MyScriptFont
A free online tool that allows you to create TTF and OTF fonts from handwritten text.
14. BirdFont
There is a free and premium version. The program runs on Windows, Linux, Mac OS X and BSD.
It seems to me that many of those who are passionate about drawing letters and creating lettering at some point have the thought: shouldn’t we turn all this beauty into a font? So that you can not only admire a specific composition, but also print these beautiful letters on a real keyboard and create even more beauty... Well, at least that’s how it was for me :) When I realized that you can create a font yourself, it literally happened to me a revolution of consciousness (probably this is exactly what is called an “aha-moment” in English).
And I started trying to figure out how to do this. There was little information, and what there was was incomprehensible and complex. I got lost in this dense forest of terms and almost abandoned the idea of learning how to create fonts. But by some miracle I didn’t give up, I continued to try and made my first font Bronks - far from ideal, but very valuable in terms of experience. By the way, I already wrote about how the Bronx was created. And today I want to tell you in more detail about the process of creating a font as a whole, so that it would be easier for you to understand whether this is “your” activity and whether you would be interested in trying it.
FONT STARTS WITH BRIEF
DRAWING GLYPHS IS THE WORK OF THE DAY :)
Having gathered my courage, that is, inspiration, I usually wait until I have at least half a day free (ideally the whole day) and sit down to draw glyphs. Glyphs are characters in a font, both letters and numbers, and all these signs like plus, comma, question mark and so on.
How broadly I draw a font—that is, how many glyphs I create—depends directly on the target audience. It is clear that the more glyphs, the more valuable the font, but at the same time there are glyphs that are worth spending time on, and there are those that are not so much (for example, if you are creating a standard handdrone font for small businesses, wide language support will be much more relevant than all, all, all mathematical signs, many of which, to be honest, I saw for the first time in the Glyphs program :)). I will talk in detail about which glyphs should be drawn necessarily, and which ones additionally and in what quantity, in the workshop about creating a font that I am working hard on (about it at the end of the note :)).
I can briefly say that I would advise making the first font simple and concise, otherwise, if you immediately try to make both the initial and final versions of the letters, and add the Cyrillic alphabet to the Latin alphabet, then you simply will not complete the font (and if you do complete it, it is unlikely will pay off, because in type making you cannot do without mistakes, the ability to see small blots and details that affect the quality of the font appears only with practice). Therefore, it is best to get by first standard set A-Z, a-z, 0-9, basic punctuation marks.
Why do I devote half a day to drawing a font? Because when you “catch the wave,” that is, you feel for a certain style, the atmosphere of the font, it is better to draw everything in one go, while the hand is being developed. This probably applies more to handwritten fonts (I haven’t tried others yet). If you put it aside and try to draw the rest of the letters later, they are guaranteed to be different, and it will take time to “tune your hand” again and start to fall into the general style.
Font rendering is the most creative process from all the action. If you naively believe that creating fonts is all about creativity and a celebration of inspiration, I hasten to disappoint you: creativity and drawing letters take up at most 20% (usually less) of the time it takes to create a font. The rest is technology: scanning, processing, alphabet alignment, tuning, export to a program, spacing and kerning, code settings, testing and all that stuff. Therefore, if you only want to draw letters, and it’s boring for you to even think about the technical part, then it’s better to create lettering.
DIGITAL PART OF THE PROCESS
Once the font is drawn, it's time to digitize it. My processing chain looks like this: scanner - photoshop - illustrator. In the scanner I set the maximum settings, in Photoshop I increase the contrast and clean up the contours a little, in Illustrator I make a trace, find the alphabet (that is, I arrange the letters in sequence, try to “assemble” a few words to check how everything looks) and clean-clean- I'm cleaning the letters.
About the cleaning stage - I used to think that “why clean, it’s cursive" But later this detail was revealed: the more points in the vector, the greater the likelihood that the font will be buggy in every possible way - from the refusal of Glyphs (or another program in which the font will be assembled) to export the file, to the inability of end users to use it without errors. Therefore, a minimum of dots is the key to comfort, and yes, you still need to clean them, even fonts with texture.
I clean letters in Illustrator in several ways: firstly, with a magic eraser from Astute Graphics (part paid plugin, which I'm talking about), unfortunately free alternative I don’t know of even approximate quality, secondly, with a standard illustrator’s pencil - I highlight the outline and make it more accurate.
After that, I prepare the font for export - this is a separate big story, about which there will most likely be several videos, - and I transfer the letters to Glyphs.
A GOOD FONT PROGRAM IS IMPORTANT
Assembling a font, that is, turning vector letters into functioning ones, the kind that can be typed on a keyboard, in theory can be done in different programs. If you Google it, you will find impressive lists options for every taste and budget. I don’t list names here because I’m not ready to recommend something I don’t know/have never tried. I work in the Glyphs program and only know that all serious type designers (those who sell fonts) make them either in Glyphs or in Fontlab. This is most likely due to the fact that cheaper/free programs do not provide all the options that are needed to create interesting font stories.
At one time I chose Glyphs because I wanted, on the one hand, to immediately get used to the “correct” font program (that is, one that can be used to create really thoughtful, complex, element-rich fonts, and not stick around for a month in some free one). only to later find out that you cannot create conditional ligatures there), on the other hand, I was not ready to pay several times more for Fontlab. Apparently, the choice was the right one - I know people who switched from Fontlab to Glyphs and say that the latter has a clearer interface :)
A good font program is important, because this is where the magical transformation of just letters into a functioning font occurs. If the program does not allow you to create language support, you will not be able to create it. If you can't add an alternate set of capital letters, then you won't be able to add them, even if you've already drawn them.
After exporting to Glyphs I configure a lot different pieces: letter groups, spacing (negative space to the left and right of letters, if roughly), kerning (distances between specific pairs of letters), adding language support, ligatures (special variants of letter combinations), initial and final variants (with long tails-swashes- flourishes and all that) and alternative sets, if proposed. Along the way, the code is configured so that everything works for the end user as I intended, and without problems. This stage, which I described in a couple of sentences, is actually what takes about 70% of the time when creating a font :) And I’m describing it briefly not because I’m greedy, but because about kerning alone you could write a note in three times longer than this, and it will still not be enough. In the course about fonts, I will dwell on all these points in great detail (right now I’m trying to find the line between “not detailed enough” and “too much information to digest”).