Like a garage roof. Types of roof structures for garages. Installation of a pitched roof
There are several design solutions for garage roofs. However, in order to reduce the necessary costs as much as possible and get the most economical option, you need to settle on the option of a pitched roof. Moreover, it can be attached to residential building and provide direct access to the house.
The shed roof for the garage is widely used due to its simplicity, reliability and budget. The cost-effectiveness of this design is ensured by the shed roof of the garage itself and its technological characteristics.
Construction of a pitched garage roof
A pitched roof consists of:
- rafter system, which is the base on which all its components are attached and which absorbs the load on the roof;
- sheathing, constructed similarly to other types of roofs, which serves as a supporting surface for the roofing;
- insulating materials designed to retain heat and protect against moisture;
- roofing;
- additional elements that strengthen the rafter system.
The garage where they arrange pitched roof, must have logs or mauerlat (bars) at the upper ends. They will become the support for the future rafter system. As a rule, they are attached to walls using wire through anchors that are driven into the wall or placed specifically in the masonry.
Garage roof truss system
The main element of the rafter system is the rafter (a wooden beam of a certain section). As is known, it can be
- suspended (supported by ends);
- layered (also has an intermediate load-bearing support).
If the span formed by the supporting walls is less than 4-5 m, as in the case of a garage, you can limit yourself to installing only horizontal elements (crossbars) on the rafter frame. At the junction of the mauerlat and rafters, sockets for fasteners are made. The rafters are installed in their position and securely secured with nails or anchors.
corrugated garage roof
How to make a pitched garage roof practically
Considering the size of the garage, a simplified rafter system with horizontal rafters can be made for it. Wooden beams can be laid along or across the garage. However, a transverse arrangement is considered more appropriate. This arrangement is more advantageous, if only because the timber along the width of the garage can have a shorter length.
Beams for an average garage (about 4 m wide) have a cross-section of 100x50 mm; for a larger garage width it is better to use 100x60 mm or more. Beams are laid in increments of no more than one meter.
After completing the installation, wooden beams must be fixed with screws or corners to the walls of the garage or subsequently laid with bricks.
Installation of sheathing and insulation for a pitched garage roof
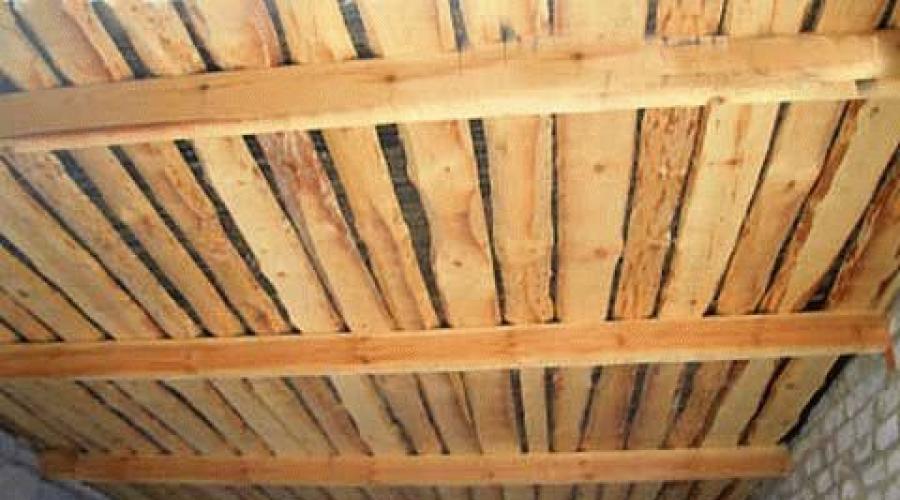
As soon as the work on installing and securely fixing the beams is completed, they begin laying the sheathing. The material for the sheathing can be either edged or unedged board(naughty). Last option is considered optimal because it costs two times less than edged, and the final form is difficult to distinguish between them.

It is recommended to lay several edged boards, which usually come with shalevka, on the sides of the roof to eliminate gaps. If shalevka is used for flooring, it is cleared of bark. When laying and nailing, it is necessary to ensure that there are no large gaps. Compared to edged board flooring, of course, small gaps are possible, but this is not comparable to the difference in price of these materials. After insulation and filing, the gaps will become almost invisible.
The next stage is the installation of waterproofing, which should protect the interior of the garage from penetrating water. For these purposes they use various materials, say, roofing felt or special roofing films (hydrobarrier, eurobarrier).
The most budget option remains roofing felt. It is laid from the bottom up so that a small overlap of a couple of centimeters is formed. In this case, water coming from under roofing material, will roll down without getting under the bottom, that is, of the board.

The roofing film is laid in the same way, secured with stainless nails or staples. Ruberoid is simply nailed down.
Laying roofing on a garage roof
Next on wooden flooring The garage roof is being laid. The choice of roofing materials for a pitched garage roof is quite large, and each material has its own individual characteristics and benefits.
- Corrugated sheeting is resistant to precipitation and can be reused, although it is already relatively inexpensive.
- Slate looks good, is easy to install, service life is 30-40 years, but is not always justified for small garages.
- Seam roofing - strips of thin sheet metal They are easy to install and reliable, but this option is not cheap.
- Roof tiles or metal tiles - more suitable for covering capital stone garages of large and medium size
- Roll materials (rubemast, roofing felt, roofing felt, etc.) are inexpensive, easy and quick to install and, most importantly, durable and effectively protect the room. If roofing felt can last up to 10-15 years, then its modern analogs can last up to 30-40 years on average.
Capital or frame technology for constructing a garage

Of the popular technologies existing today, two can be distinguished: capital and frame. Unlike the first, which requires a variety of building materials and equipment, the frame is based on factory-made technical units– you just need to carry out the final assembly.
A frame garage with a pitched roof has some advantages:
- excellent thermal insulation,
- fast construction,
- cheap solution.
In addition to this for frame garage Due to the lightweight walls, a massive foundation is not required.
Shed roof for garage: simple and economical
A shed roof for a garage does not require high skills in roof construction. However, it is better to entrust it to professionals, since the installation of a garage roof has
How to properly cover a garage roof with your own hands

The installation of the roof is a fundamentally important stage in the construction of a garage. To make a garage roof with your own hands, you need to wisely choose its shape and design, decide on the type and color of the roofing. Despite the fact that the garage is an auxiliary building, the configuration and shade of its roof are part of the architectural and landscape composition of the site, which has considerable aesthetic significance. We suggest you figure out how to properly make a garage roof so that it not only looks good against the background of its surroundings, but is also stable, reliable, and durable.
What roofing material to cover the garage roof with?
Selecting material for arrangement roofing garage, take into account the shape, slope and expected service life of the roof, climatic conditions and financial aspects.
Types and features of roofing materials:
- Ceramic and metal tiles. Durable and expensive material that requires professional installation.
- Flexible tiles. Roll material at a budget price, easy to install, but characterized by a short service life.
- Profiled sheeting. Low cost, light weight sheets, easy installation - the main advantages of the material. Disadvantages include weak thermal insulation capacity, possibility of corrosion, noise.
- Ondulin. Durable, lightweight, wear-resistant sheet material With optimal ratio price/durability. A simplified installation scheme is one of the main reasons why most homeowners choose ondulin for self-construction of a garage roof.

Roof shape for a garage: nuances of choice
The configuration of the garage roof can be absolutely any, so an important point in its construction is the choice of shape, design and calculation of the load, and calculation of the amount of material required. Flat or single-pitch with a slope, gable gable or mansard, hip or hipped - the roof design significantly affects the labor intensity and final cost of building a garage.

Advantages of a pitched roof as an option for building a garage with your own hands:
- Affordability.
- Reduced volumes of structural and roofing materials.
- Rational use of building space.
- Simplicity and speed of installation work.
The roof structure includes:
- Mauerlat.
- Rafter system.
- Insulating layers (moisture, steam, heat insulation).
- Lathing.
- Roofing flooring.
Mauerlat installation
The installation of the roof begins with the installation of the Mauerlat- wooden beam with a section of 150×100 / 150×150 mm. Muerlat plays key role in redistributing the load of the weight of the roof on the walls of the garage, serves as a support and improves the strength parameters of the roof structure. Before installation, the timber must be treated with fire retardants and antiseptics to protect against fire, prevent rotting and damage by wood borers. Having laid several layers of roofing felt for waterproofing, the mauerlat is fixed along the upper edge of the walls, flush with their internal plane, and then additional brickwork is made on the outside. The Mauerlat is fastened to the wall using staples, pins, fittings, and wire.

Quite often, a simplified method of installing a mauerlat is used, using instead of timber edged board 150×50 mm. The first row of boards is secured along the top of the walls with anchor bolts no less than 200 mm long, the next row is nailed with 100 mm nails. This method good because of the absence of embedded elements and the simplified process of raising boards to a height in comparison with timber.
Installation of the truss structure
The rafter system is the frame of a pitched garage roof, which evenly distributes the load from wind, precipitation, and the weight of the roofing material. When covering a garage with a span of up to 4500 mm, trusses without struts are used, in other cases - with struts. The pitch of the rafters affects bearing capacity frame and the reliability of the roof, but an unreasonably short distance will make it heavier and increase the load on the walls and foundation. Too much big step will reduce the resistance of the garage roof to external influences. As a rule, the installation pitch of the rafters is calculated based on the dimensions and weight of the roof deck module.

As rafters when installing a garage roof, a beam with a cross-section of 100-200 mm by 50 mm is traditionally used, such a length that after arranging the roof deck, an overhang of at least 200 mm will form. During the installation process, the rafter legs are cut into the crown of the Mauerlat with a double tooth or secured with studs, bolts, metal corners/ plates. Steam and moisture-proof membranes are laid overlapping along the top of the rafters, fixing the edges insulating material staples or tape.
Installation of sheathing and roofing
The lathing gives the roof structure the required rigidity and serves as the basis for laying the roofing covering. The lathing is mounted perpendicular to the rafters, installing wooden slats of 50x50 mm with a pitch of 100 mm for rolled materials, with a distance of 500-800 mm for sheet materials. Roofing material is laid in accordance with technological scheme recommended by the manufacturer is, as a rule, a series of operations to secure the coating to the surface of the sheathing.
How to properly make a garage roof with your own hands: Video, expert advice
How to cover a garage roof yourself. Selection of roofing materials and roof shape. Main stages of construction.
We build a simple roof for a house, garage or bathhouse with our own hands
 Having completed the construction of the walls, it is time to think about the structure that crowns the building. If we're talking about about a small country house, garage or bathhouse, then her choice is not difficult to make. The simplest roof for such objects is single or gable. It can be calculated and built on your own, without involving a team of carpenters.
In this article we will look at common options roofing structures, let's talk about important features their selection and installation.
Types of simple roofs and their main elements
Any roof consists of load-bearing frame and protective roofing.
The frame includes the following elements:
- Rafters - inclined beams (serve as the load-bearing basis of the roof).
- Ridge beam (connects the upper connecting points of the rafters).
- Lathing - flooring made of boards or OSB boards, laid on the rafters and serving as the basis for the roofing material.
- Counter-lattice - used when installing a warm roof (creates air gap for ventilation of insulation).
- Mauerlat - wooden beam (mounted on longitudinal walls). The lower parts of the rafters are attached to it ( rafter legs).
- Vertical posts, horizontal ties and struts (used to strengthen the truss structure).
- Fillers are boards nailed to the lower ends of the rafters to create a roof overhang.

The design of a simple roof for a house is determined by several factors:
- width of the span to be covered;
- purpose of the attic space (residential or non-residential, walk-through or non-passage);
- view interfloor ceiling(wooden beams, reinforced concrete panels).
If the width of the building is small (up to 4.5 meters), and there are no plans to arrange living space in the attic, then you can choose the option of a pitched roof. It is economical and easy to install.
The rafters of such a roof can be supported directly on the walls. To do this, one of them needs to be made higher than the other. This will create the slope necessary for rainwater to drain.
If you decide to install a pitched roof on walls of the same level, then to create a slope, you need to include wooden posts in its design. After installation is completed, they are sheathed with siding, OSB board or blockhouse.

For asbestos cement slate The roof slope must be at least 22 degrees. For metal tiles, ondulin, and bitumen tiles, the roof slope should be at least 15 degrees. When calculating a simple pitched roof, remember that snow load is a serious factor. To reduce it, it is recommended to make the slope steeper. Otherwise, you will have to increase the cross-section of the rafters and sheathing, which will lead to an increase in the cost of the structure.
If the span width is from 4.5 to 6 meters, then the rafters need to be reinforced with braces (inclined racks made of timber). They will reduce the deflection of the rafter legs under the influence snow load. The lower ends of the braces are embedded in the masonry, and when using vertical support posts attached to them using staples, nails or jagged metal plates.

Shed roofs are most often used for small structures such as garages, sheds, bathhouses or gazebos. Gable design with a large elevation angle – best option for arranging an attic space.
Main docking points
The main condition for the strength of any roof is the proper joining of all its parts. Therefore, when drawing up a sketch drawing, you need to pay attention to the nodes (connection of the Mauerlat to the wall, rafters to the ridge and floor beams).
The installation of a simple roof begins with laying a horizontal wooden beam - a mauerlat, on which the rafters will rest. It is attached to the masonry through threaded steel anchors (in brick walls) or to studs concreted in an armored belt (gas silicate masonry, expanded clay concrete, foam block).
The floor beams are fixed to the wall using anchor pins, and the Mauerlat is attached to them with nails or long screws.


Note also that the roof small house, barn or garage can be installed without a Mauerlat, fixing the lower ends of the rafters directly to the floor beams.
Next important node– fastening the upper ends of the rafters to each other and connecting them to the ridge beam.
There are several ways to create this node. The rafters can be connected with a bolt and tightened with a nut (node 1). You can use a piece of OSB board (node 2) or secure them with a metal toothed plate (node 3). For closer contact of the rafters with the ridge beam, notches are made on them.

It should be noted that ridge beam, which increases structural rigidity, is most often used on large roofs. It is also placed in buildings with gables made of brick, blocks or logs that serve it supporting walls. Building small sauna, garage or country house, you can do without this element. A small roof will be provided with sufficient rigidity by lathing or decking made from OSB boards.

If you are planning to make a simple roof with your own hands, you should familiarize yourself with the recommended sections of rafter legs.

Dimensions cross sections other elements of a simple roof can be taken from table No. 2

Features of constructing a simple roof
The installation of the roof begins after the completion of the walls, installation of beams or floor slabs. Having aligned the outer rafters, they are attached to beams or mauerlat and fixed with temporary ties. After this, a beacon cord is pulled between them. Ordinary rafters are placed along it and secured one by one using lathing.
If there is a capital pediment, installation is simplified, since the ridge beam laid on it serves as a support and beacon for installing the rafters.

Installation roof frame at altitude is a labor-intensive task. Erecting small roof more convenient to assemble roof trusses on the ground. In this case, on the walls you will only have to connect them using lathing into a single structure. Having assembled one truss, it can be used as a template for marking and cutting rafters, tie rods and beams.
When preparing to build a roof, be sure to do detailed diagram indicating the dimensions of all elements and detailed elaboration of the nodes. It will be useful to you for calculating the purchased lumber and will help you complete the installation efficiently and quickly.

If the attic space is residential, then the roof structure needs to include not only insulation, vapor barrier, but also a counter-lattice - wooden block section 30x50 mm. It is nailed to the rafters on top of the vapor barrier film to create ventilation gap, and the main sheathing is attached on top. Without this “trifle,” the insulation will get wet from diffusion moisture in the cold season, and wooden parts structures will begin to rot.

If a solid OSB board deck is used when installing an insulated roof, then a counter-lattice is placed under it.
To protect the walls from rainwater, any roof needs overhangs. For a lean-to structure, they are made not only in the lower part, but also in the upper part. If the length of the rafter legs is not enough to form eaves overhangs, then they are built up by nailing “filly” boards.
The minimum size of roof overhangs must be at least 20 cm. To protect the gables from moisture, the length of the roof on each side is increased by 20-30 cm, creating front overhangs. The ends and lower planes of the overhangs are sheathed with wind boards.
A simple roof for a house, garage or bathhouse - single-pitched and double-pitched structures
Features and options for constructing a simple roof for country house, bathhouse or garage with your own hands. Schemes, photos and videos of construction work.
Nowadays, the garage is used as part of the design ensemble of a personal plot, where all buildings are erected in the same style. To successfully fit the structure into the overall picture, it is best to choose a gable roof for it. It is very practical and, with the right level of skill, can be made with your own hands.
Gable roofs are easy to construct with your own hands and easy to use.
Gable roof- covering a building with two slopes, that is, a structure that has two inclined surfaces. The frame of this roof, due to its design features, combines ease of construction and maintenance with long service life and reliability. These characteristics make the use of a gable roof a reasonable solution when building a garage.
The simplest is a symmetrical gable roof. Symmetry gives an even distribution of the influence of external factors on the mauerlat and load-bearing walls of the building. There is no possibility of bending the rafters along the length; various spacers and supports are placed in any necessary place in the structure.
Advantages and disadvantages
A gable garage roof is a structure that uses external fences of the structure (walls) for support. The roof planes are connected at the highest point of the roof - the ridge. Geometrically, the base and two roof slopes form isosceles triangle .
This garage floor has several positive qualities:
- The removal of water masses and snow is simplified. The slope improves water drainage, which reduces the load on the roof, and the need to remove snow from the roof appears infrequently. In regions with heavy snowfall in winter, a gable roof is the best garage structure that can withstand snow loads.
- The saving will be the refusal to use hired construction crews – House master is able to independently build a gable roof on his garage.
- The shape of this roof reduces heat loss in heated garages. This is the most energy efficient design for covering outbuildings.
- The gable roof makes it possible to easily organize storage space for tools and other things in attic.
- You can increase the ceiling height.
Please note! The building has a gable roof and looks like independent building, in contrast to structures with one slope. It can be placed not only near the house - beautiful garage with a gable roof it looks good anywhere.
The main disadvantage of the standard gable roof– a lot of wood parts that need high-quality processing antiseptic compounds and fire retardants (anti-flammation agents). In addition, the inclined design pushes the walls, so it is not suitable for garages with weak walls.
Calculations

Calculation formula for a gable garage roof
It is important to understand that the rafter system is assembled from a mass of triangular structures. If the slopes are made with different slopes, then it will need to be divided into separate parts and the possible load calculated. After counting each part of such a roof, the data obtained is added up.
When building the roof of any garage, the first step is to create a project that will indicate all important parameters designs. Before work, it is necessary to determine the three main characteristics of the gable roof structure: the type of covering, the slope of the slopes and the installation height of the ridge. Calculations are carried out taking into account future loads on the frame. The total mass of the future roof is calculated taking into account the average weight of the materials used.
To prepare a working diagram, perform the following calculations:
- Taking into account the future slope of the slopes, the height of the ridge is calculated. The height from the ridge to the bottom of the roof is considered as the height of an isosceles triangle, which is formed by the base of the structure and the slopes. The calculation is made using the formula - h = 0.5*b/tg(α/2), taking α as the roof slope and b as the width of the building. To create a roof slope of 20-30 degrees and arrange storage in the attic, it is enough to place the ridge at a height of 1.5 meters.
- After this, the size of the rafters is found using another formula - l=0.5*b/sin(α/2), where α is taken as the slope and b as the width. The length of the rafters needs to be found to find out which type of rafter frame is best to use for this garage. To form an overhang of the cornice, which protects the walls of the building from precipitation, add 30-50 cm to the resulting size.
Calculation of slope steepness
The slope of the slopes affects what kind of roofing you can use. For most buildings, the optimal slope slope is 20-30 degrees. It makes it possible to cover the roof with rolled materials, slate, corrugated sheets or soft tiles. For metal tiles, a slope of at least 35 degrees is required.
Calculation of possible load

Table for calculating possible load
Several types of loads are possible on the rafter system:
- Constant loads.
This is the weight of everyone structural elements, heat-insulating material, lathing, etc.
The weight of roofing materials can be found in the table; the data is given per 1 sq.m.
- Variable loads.
They influence periodically and with varying strength. These include the impact of precipitation, the mass of snow, and the strength of wind gusts.
A roof slope is very similar to a sail: if it does not have enough strength to withstand the effects of wind, the roof may collapse. This indicator is calculated using the formula: wind load = indicator adopted for the region in which the garage is built. This figure is multiplied by special coefficient, which can be found in SNiP “Loads and Impacts”. It also takes into account where the area with the garage is located. For example, if there are buildings around high buildings, then the loads on it will be weaker. A detached garage is exposed to strong winds.
- Snow loads.

Snow load calculation
Equal to the mass of snow multiplied by a special coefficient that takes into account the pressure of wind flows. According to SNiP 2.01.07-85, the weight of fallen snow per 1 sq.m. roofing is 80-320 kg/sq.m.
Please note! If the slope exceeds 60°, then the load from winter precipitation does not affect the calculations - the fallen snow will simply slide off the surface and have no effect.
- Special loads.
Such loads are taken into account in regions with possible storm winds, tornadoes or seismic activity. In our country, it is enough to provide a margin of safety.
The impact of several factors simultaneously creates a synergy effect - this feature also needs to be taken into account.

Calculation of the total load on the rafter legs
Calculation of roof slope angle

Calculation of roof slope angle
The slope of a gable roof is calculated taking into account the roofing material intended for installation. They have their own requirements:
- Ondulin, profiled flooring, slate, metal tiles require a roof slope of 20-45 degrees;
- Soft roofing requires a roof slope of 5-20 degrees.
It must be taken into account that increasing the angle creates more space in the attic, but at the same time increases the amount of material needed, which increases construction costs.
Attention! The slope angle of a gable roof should be more than 5 degrees.
Rafter installation step
When building a gable roof, take the distance between the rafters within 0.6-1 meters. The choice of distance depends on the weight of the roof. The number of required rafter legs is found by dividing the length of the roof slope by the distance between the rafters + 1. The found number shows how many legs are needed to create the slope.
Rafter size

Calculating the size of rafters using the Pythagorean theorem
The length of this roof element is calculated using the Pythagorean theorem.
- Roof height “a” - the size is determined independently, taking into account the possibility of creating storage space in the attic and the cost of material;
- “b” – 1/2 the width of the building;
- “c” – located as the hypotenuse of the triangle, equal to the length of the rafters without the overhang of the cornice;
- “d” – overhang of the cornice, determined independently.
Important! To the found size, add at least 0.6-0.7 m to create the necessary cuts and make the overhang of the cornice.
Keep in mind that the industry produces timber longer than 6 meters. If an even longer beam is required to build a rafter system, it will have to be spliced (connected from several parts).
Reliable methods of connecting timber (using long nails and pins) can be seen in the photo.

Beam connection options
Rafter section
The required height and width of the rafters is determined taking into account several points:
- Future load on the structure;
- The material used - for example, logs, sawn timber and laminated veneer lumber can withstand different weights;
- Rafter size;
- Wood from which the roof is constructed;
- Spaces between rafters.
Calculation of the beam cross-section during the manufacturing of rafters with a known rafter length is carried out according to the table.

Timber section calculation table
Timber and boards for a gable roof:
- Mauerlat thickness – 100x150 mm;
- The thickness of the tie and rafters is 100x200 mm, sometimes 50x150 mm timber is used;
- Struts and purlins – 50x150 mm;
- Rafter stand – 100x150 mm;
- Lezhen – 50x150 mm (less can be taken into account the width of the stand);
- Sheathing parts – 20x100 mm, 25x150 mm (including roof material).
Required materials and tools
The following tools will be required:
- Medium hammer;
- Rubber or wooden mallet;
- Nail puller;
- Building levels of several sizes;
- Long plumb line;
- Plastic or wooden slats approximately 1.5 meters long;
- 5 meter tape measure;
- Power tools: screwdriver, electric drill, grinder, etc.;
- Regular hacksaw;
- Slick;
- 2 stepladders;
- Stapler.
Required materials for work:
- Metal corner for fastening rafters;
- Metal staples;
- Anchors, nails and wood screws;
- Beams for making mauerlat;
- Material for making rafters;
- Beam for sheathing.
It is necessary to use high-quality wooden elements. Use only dry, pre-prepared wood. It is advisable to prepare material from coniferous species– it is stronger and lighter than raw wood. If you bought material that was deformed during drying, you will have to bring it to the required condition in advance using a plane.
Attention! Material with humidity up to 18% is suitable for work. Raw wood will bend when drying, which will compromise the strength of the structure.
Preparatory work
The work of building a roof for a garage is complex and time-consuming. Most operations are performed at heights in uncomfortable conditions, so it is advisable to involve assistants. Before starting work, all materials must be delivered and prepared. First of all, you should deal with the lumber - stack it so that the wood does not deform, and perform the necessary processing.
The treatment consists of applying compounds that have fire-fighting and antiseptic properties - this will reduce the risk of fire and make the material resistant to fungal development, biological damage and infection of wood by insects. Antiseptic preparations are sold ready-to-use and in the form of a concentrated solution. The concentrate must be diluted with water according to the attached instructions. To improve the quality of processing, it is advisable to first remove small sawdust and dust from all surfaces.
The material is coated on all sides using a roller, turning over as processing progresses. After impregnation, the lumber is stacked and kept until the solution is absorbed. At this time, the base of the walls is being prepared for attaching the Mauerlat.
Top edge load-bearing wall the garage on which the Mauerlat is mounted must be well leveled. First of all, waterproofing is laid on top of the wall - rolled roofing felt is suitable for this. It is placed on mastic or “dry”. The Mauerlat fastenings are placed between the rafters; it is advisable to install anchors in increments of 600-800 mm. Since we already know the distance between the rafters, after attaching the Mauerlat, markings are made for the rafter legs.
Instructions for constructing a gable roof for a garage
The work can be divided into a number of stages.

Mauerlat is attached to the top of the wall
The timber intended for making the Mauerlat is attached to the top of the wall on which the rafters will be laid.
For garages made of brick or porous material, the Mauerlat is mounted along the entire upper part of the wall.
Mauerlat connection
The timber soaked in antiseptic solutions is sawn at an angle of 90 degrees. The parts of the Mauerlat are joined using bolts of at least 8 mm in diameter. Cannot connect powerdata wooden dowels, wire or nails.
Installation of timber
The beam is attached to the top of the wall. They do this in two ways:
- With a shift to the side;
- In the middle of the wall.
To protect the timber from dampness, before installation, a waterproofing layer of ordinary roofing material is spread on the wall surface. Since the structure is subject to serious wind loads, the Mauerlat must be securely fixed to the top of the wall.
Mounting methods
- Anchor bolts. Excellent for walls made of monolithic concrete.
- Wooden dowels. Used when attaching to wooden walls, but they need to be reinforced with additional fastening.
- Studs or staples. Suitable if the walls are made of porous materials.
- Hinged mount. Installing the Mauerlat using this method ensures the necessary displacement of the rafters during possible shrinkage of the building.
- Soft wire. Used as a reinforcing fastener.
Making rafters
Rafter structures can be made in 2 ways:
- Installation of rafters directly on the roof. Work is rarely done this way, because taking measurements, trimming and other work at height is difficult. But this allows you to perform all the actions without assistants (with small size trusses);
- The connection of all elements on earth. In this case, large parts of the structure (pairs or triangles) are assembled on the surface of the earth, after which they are lifted upward. This method speeds up work at height. But a lot of parts of the truss structure require lifting equipment or the involvement of assistants.
The prepared rafter pairs are lifted onto the walls and attached to the Mauerlat. At the bottom of the rafters, a cut is prepared in advance.
Attention! Since cuts on the Mauerlat will significantly reduce its strength, cuts are prepared only on the rafters. To make identical cutouts exactly to size, use a plywood template.
Installation methods truss structures shown in the figure.

Rafter installation options
The first rafter pairs are placed on opposite sides of the roof.
A cord is pulled between the outer pairs of rafters - it will make the subsequent installation of rafter pairs easier, and at the same time indicate where the roof ridge should be. After this, the remaining rafters are placed in the places marked for them.
Ridge installation

Rafter connection options
The ridge knot is equipped by connecting the rafter legs at the top.
This is done in several ways:
- Without support beam;
- With rafter beam. This is how garage roofs are made large area. Subsequently, the timber can be used as a support for the rack;
- Method of laying on timber. Modern method ridge unit devices.
- Cutting.
When the rafters are installed, it is necessary to securely fasten all parts of the structure.
Installation of sheathing

There is no way to do without lathing
It is necessary to make a sheathing; the roofing material is attached to it, and it helps to move along the roof during work.
The sheathing pitch is selected taking into account the roofing material used:
- For laying metal tiles – 350 mm;
- For laying slate and corrugated sheets – 440 mm;
- For soft roof you need a solid sheathing.

Differences between warm and cold roofing
After attaching the sheathing, the roofing covering is laid on it. It is placed overlapping so that the seams are sealed. At the end of installation of the covering, the drain is attached, the gables are insulated and sheathed.
Remember! If you are building a heated garage, then it is necessary to insulate the gables and roof slopes. Fibrous non-flammable materials are suitable for this purpose. heat insulating materials– for example, you can use polystyrene foam or basalt wool.
Features of care and operation
The roof must be cleaned and thoroughly inspected annually.. Constant monitoring will allow you to notice the threat in time and prevent subsequent destruction.
A roof made of corrugated sheets is functional and lasts a very long time thanks to a reliable polymer layer - it protects the roof covering from corrosion. Constant exposure to moisture and low temperature, UV radiation, and various contaminants cause the destruction of the polymer coating. For this reason, cleaning roofs is necessary work to increase service life. It is convenient to clean with a stream of water, directing it along the slope from top to bottom.
Snow rarely collects on polymer coating, A matte coating does not allow it to slide down. Roof cleaning is carried out using tools that cannot damage the material. A wooden scraper with a soft rubber pad is suitable for this.
Soft roofing is subject to the same influences as other coverings. Timely preventive inspections will allow you to detect defects in the roofing carpet in time and quickly eliminate the shortcomings.
Behind the roof covered natural tiles, almost no maintenance required. Cleaning the covering from fallen snow is done with scrapers, a shovel and a soft broom, which will not damage or move the tiles. Seasonal inspection includes monitoring the strength of hooks and detecting leaks. Work is performed in soft shoes every 4 years.
The construction of a gable roof on a garage requires compliance with safety requirements, like any work at height, and it is necessary to adhere to electrical and fire safety rules. This is the only way the roof will serve you for a long time and without extra costs.
1.
2.
3.
4.
5.
6.
When building a garage Special attention paid not only to laying a reliable foundation, walls, but also to the roof. Work should begin by determining its type, shape and necessary materials for installation.
This article will help beginners in coordinating certain actions at each stage of arrangement, and for experienced builders will suggest some original options roofs
As a rule, the question of how to make a garage roof arises not only when designing a new garage, but also in case of leaks in the old roof.
What types of roofs are there?
The main classification of roofs describes the features of flat and pitched roofs.
Flat roofs are those that are located under small angle slope - up to 2.5 degrees, while there is no attic space in them (read: " "). Roof covering executed from soft types materials: roofing felt, fiberglass, bikrost. Such a roof is, perhaps, the only option for a garage cooperative, where, due to the close location of the garages, it will be difficult to choose something else.

A pitched roof for a garage is built with your own hands with an attic space, where a slope of about 15-60 degrees is assumed. In addition, it differs from flat roofs more complex design, in which wooden or metal rafters must be present.
Types of pitched roofs

As you determine the type of roof, you should select the appropriate materials for it.
Features of roofing materials
Single-pitched and flat roofs Experts recommend covering with roll bitumen, tar or plasticized glass-based materials.

The equipped garage roof is not yet ready for use warm garage because it is not insulated.
How to properly insulate a roof
So, let’s look step by step at how many layers a gable roof on a garage with insulation from the premises consists of.
- Decorative design from plywood or lining.
- Vapor barrier layer - attached to the insulation. When carrying out work, you need to ensure that the entire roof is covered with a film or membrane for tightness. For convenience, you can glue a special tape, while the coating is laid overlapping.
- Laying thermal insulation (insulation) requires maintaining a gap from one beam to another no more than the width of the material.
- Waterproofing membrane attached to the insulation. The special structure of the diffusion material allows moisture and steam to escape without allowing the reverse effect.
- A well-designed counter-lattice provides several functions at once: it serves as the basis for the lathing, holds the waterproofing layer in a certain position and ensures ventilation of the under-roof space. The slats should be installed to the rafters along their entire length.
- The sheathing elements are placed on top of the counter-lattice.
- The final layer is the roof covering.

The recommendations given in the article refer to the most common garage roofing systems, while the primary factors are the specific location of the garage and external conditions. So, for example, a gable roof made of corrugated sheets looks great on a separate building, however, despite the ease of installation of such a structure, it is practically impossible to create it on a garage cooperative.
Many car enthusiasts value and love their cars very much, so if possible they try to hide their car in a warm and cozy garage. However, not every car enthusiast has a warm and cozy garage. But many car owners decide to build their own garage.
Of course, build brickwork It’s not at all difficult to do, the difficulty lies in building the garage roof. Therefore, many initially have a reasonable question: how to make a garage roof with your own hands?

It is possible to build a garage roof on your own if you have basic builder skills and have general idea about the final result of the construction.

The simplest and best option when building a roof on a garage is a pitched roof. Assembling such a structure will not be a big problem or difficulty, and this option also has its advantages:
- does not require any experience or knowledge
- does not require large financial expenses
- The construction process will not take much time, usually no more than 3-4 days
- the design of such a roof has long term operation


Features of calculating a roof for a garage
It should be noted that a pitched roof has several various types structure structure. Therefore, situations occur when the garage roof has an extension from a residential building, but the most correct option this is when the garage structure is separate and not adjacent to other buildings.

Determining the slope angle
In the process of designing a garage, it is very important to correctly and correctly slope the slope; this is necessary for water drainage during rains. In this case, it is necessary to install supporting walls with different levels. However, the slope of the slope depends on various nuances.

Peculiarities climatic conditions. In this case, it is recommended to make slopes based on the climate, for example, with a climate where it rains a large number of precipitation in the form of rain and strong and gusty winds, the slope is recommended to be no more than 5-7°. But if the climate is more severe with big amount snow, in this case the slope is recommended to be no more than 25°.

Selection of roofing material. Certainly one of critical issues in roof construction, how to cover the garage roof? Basically, bitumen-polymer rolls or the so-called “roofing felt” are used for roofing garages; it is also good to use slate or sheets of steel or metal tiles for such purposes.

However, they all have different slope angles. For example, “roofing felt” has an indicator of no more than 10°; for slate it is recommended to have a slope of no more than 20°, but for metal tiles a slope of about 25° is typical.


External view of the architectural panorama of the site. In this case, it is necessary to maintain almost the same slope of all roof structures; this is necessary to create a single general panorama of the site.

Calculation of the rafter frame
In our modern times, it is not so difficult to calculate the necessary parameters when designing if you use special modern programs or construction calculators. In this case, you just need to enter all the parameters of a garage with a pitched roof and the result will automatically give you all the most necessary information.

Level of complexity of the rafter system
In the process of building a pitched roof on your own, it is very important to make the entire structure very durable. In this case, it is necessary to additionally install special structural reinforcement units.

As a rule, a garage with a pitched roof for one passenger car has approximate dimensions of 3.0 x 5.5 meters, however, if desired, it can be changed in the direction of decreasing or increasing the dimensions.


Assembling a pitched roof for a garage
Before purchasing materials, it is necessary to accurately count everything again, and only after that can you purchase everything necessary for construction. In fact, building a shed roof for your garage is not that difficult.

You just need to do everything consistently and slowly. It is advisable that you have a drawing of the roof, which will serve as a clear guide to action.

Roof insulation is also important. Therefore, many do not know how and how to insulate a garage roof? The process of insulating a garage is considered almost the final stage of construction. To insulate a garage, you can use almost any insulation.

The insulation is laid between the rafter beams, and they must fit tightly together. For insulation lean-to garage You can use insulation with a thickness of 20 cm.


Thus, you can do the garage roof repair yourself. At the same time, there is nothing complicated in the construction process. The only difficulty is that in some moments the help of assistants will be required. This is due to the fact that the beams and rafters are long and heavy and they need to be held somewhere, so helpers are needed here.

If you have any difficulties choosing a roof design, here you can see colorful and illustrated photos of a garage roof. You may like some option.

Photo of the garage roof


In times of shortage of materials, outbuildings were built from the remains of boards and everything that was left after the construction of the house. Of course, this did not cause them to lose functionality, but they significantly spoiled the appearance of the site. Teter garage is built as part of an architectural ensemble, made in the same style and color scheme. In this article we will tell you how to make a high-quality gable roof for a garage with your own hands, we will figure out how to draw up a project and carry out installation correctly.
A gable roof is a simple structure consisting of two inclined planes, called roof slopes. They rely on external walls garage and converge at the ridge connection, which is the highest point of the roof. The two slopes and the base of the roof form an isosceles triangle. This method garage floors have the following advantages compared to other options:
- Ensuring the independent removal of snow and rainwater from the roof. The inclined surface of the slopes of a gable roof facilitates the drainage of water and snow masses, due to which the load on the rafter frame does not increase, and the need to clean the roof of snow rarely arises. In regions with high rainfall in winter time gable roof garage - a real alternative single-pitch structures, which often fall during snowfalls.
- Economical. To make a gable roof with your own hands, you need a few building materials. The lumber from which the rafter frame and roofing materials are made have affordable price, therefore, the total cost of work on covering a garage will not be much higher than the cost of constructing lean-to analogues of the same area.
- Easy to assemble. A separate savings item could be the refusal to involve in the construction of the roof professional workers, since even an inexperienced craftsman can correctly make a gable roof for a garage with his own hands.
- High energy efficiency. Thanks to its shape, a gable roof reduces energy losses when heating rooms. It is considered the most energy-efficient way to cover commercial buildings. Therefore, if you install heating in the garage, a do-it-yourself gable roof is the most correct option.
- Organization of storage. The garage, first of all, is reserved for the maintenance of cars and other equipment, however, it must have space for storing seasonal tools, wheels and spare parts. The gable roof allows you to organize spacious shelving in the attic; they are easily made with your own hands in accordance with the needs of the owners.


Note! A garage with a gable roof, unlike single-pitch ones, looks like an independent structure. It can be located not only near the house, but in any convenient place on the site. Experienced craftsmen It is recommended to make slopes with a slope of 20-30 degrees and use the roofing material that was used for the house for covering in order to maintain a uniform design style.
Design
The first step in building a gable roof for a garage with your own hands is to create a project that reflects the main design parameters. To begin work, you need to determine three main characteristics: the height of the ridge, the slope of the slopes and the type of roofing. Calculations when creating a project are performed taking into account the loads placed on the frame elements. Counting total weight roof to determine how deep the foundation is required. To sketch a working diagram, you need to correctly make the following calculations:


Important! The choice of suitable roofing material depends on the angle of inclination of the slopes. A slope of 20-30 degrees, which most experienced roofers recommend for a garage roof, allows it to be used as a covering. soft tiles, corrugated sheets, slate or roll materials. But metal tiles, popular for DIY construction, require a slope slope of 35 degrees or more.

Rafter frame
The basis of each gable roof is a rafter frame, a set of elements that ensure the stability and stability of the roof structure. The garage roof is built on the basis of rafters made of coniferous wood impregnated with antiseptic and fire-resistant substances. Depending on the layout of the building, weight and coverage area of the roofing material, use 2 different types rafter systems:

Note! When calculating the rafter system, the weight of its elements is taken into account, since it increases the load placed on the foundation. To avoid overloading, leading to deformation of the base of the building, a balance should be maintained between the thickness of the section and the number of rafters. The size of lumber is selected in accordance with tables that take into account the length of the rafters and the pitch between them.
Installation
The most crucial moment if you are building a roof with your own hands is the installation itself. To avoid mistakes, it is better to sketch out a schematic drawing that reflects all the dimensions of the frame elements, the distance between them, and the method of fastening. The work is performed in the following order:

Note! If the garage premises will be heated, the slopes will be thermally insulated, as well. For this, non-flammable fiber insulation is used, for example, basalt wool or expanded polystyrene.

Video instruction