How to glue cheap paper wallpaper without bubbles. Let's look at how to glue paper wallpaper correctly. The whole work process
Fashionable construction news as original painting walls, non-woven wallpaper, eco-design in no way diminish the popularity of paper wallpaper. They are cheaper, wallpapering with such wallpaper is allowed in almost all types of premises, they easily allow air to pass through and are environmentally friendly. How to glue paper wallpaper Right? If you get the hang of it, even a teenager can paper a room. Working with such material is simple and quick; up-to-date information will tell you how to properly glue paper wallpaper.
DIY wallpapering
Before you start gluing the walls, you need to prepare the walls and working material. Here are some rules:
- The roll is cut into strips taking into account the pattern or pattern on the wallpaper.
- The length of the strips is equal to the height of the wall, taking into account the cutting.
- The unevenness of the walls must be correctly corrected before gluing the selected paper wallpaper. Sheathing with plasterboard or plaster treatment is suitable.
Is it possible to glue wallpaper onto wallpaper?
This topic is often raised by people who do not want to bother removing a layer of old coating or cannot complete the process. Is it possible to glue wallpaper on vinyl wallpapers or any other type? The answer to the question is whether it is possible to glue new wallpaper onto old ones only when the old ones are too firmly attached to the walls. But this is not a reliably accurate solution, because the reaction of the new coating is unknown.
To check if it will be possible to carry out quality work, spread a piece from a new roll and stick it to the wall. Let it dry and observe: if the sheet is glued evenly, the old coating does not fall off along with the new one, and does not peel off, then you can paste the room. Professionals take no risks and clean thoroughly old layer before gluing the new one.
What kind of glue is needed
Paper trellises have an excellent ability to tolerate almost any glue. Is it possible to glue paper wallpaper with non-woven glue? Yes, this glue is allowed for use. If you are not afraid of fiddling around and want to save money, make your own homemade paste. It is boiled from flour and water, cooled and it is ready for use. Two-layer samples of this finishing material are better glued with a still warm agent.
Special product for sticking paper strips, they are sold in the form of a powder, for the preparation of which you need to add warm water and leave it in the room where the work will take place for 12 hours. It is necessary to stir periodically so that a quality product is ready for use. To such specialized means include Methylane, Humilax, Bustilat, CMC. Each of the names is a proven adhesive for paper-based vinyl wallpaper.

Gluing technology
Before you begin repair work on pasting walls, you should stock up good mood And necessary tools. The latter include:
- Graphite pencil - for marking.
- Metal ruler – for convenient drawing of straight lines and trimming tapes.
- A special knife is used to cut the roll into the required strips and parts.
- Scissors – for cutting strips in hard to reach places, holes for pipes, sockets, switches.
- Tape measure – for measuring the required cut length.
- A plumb line or level - for the correct vertical drawing of the position of the glued strip.
- Container for preparing glue.
- Wallpaper brush – for smoothing when pasting. Best suited with a hard fleecy surface.
- Stick, spatula, construction mixer– for stirring adhesive solution.
- Wallpaper and painting spatula.
- A soft roller is suitable for smoothing sheets if you are interested in how to glue wallpaper for painting (smooth, self-adhesive or embossed).
- Paint roller and a bath for uniform application glue on strips of wallpaper.
Wallpapering on drywall requires mandatory preparation: treatment with putty and primer. Joints need to be carefully processed plasterboard sheets to avoid unevenness with a special tape followed by applying putty. Do not open windows and doors when pasting, otherwise all the work and materials spent will be in vain - the trellises may become covered with bubbles or fall off
As for the process of how to glue wallpaper on concrete walls, then it is more labor-intensive. Here you need to consider, first of all, whether the walls need leveling. If the walls are smooth, then they are first cleaned of dust and dirt, then a special primer or heavily diluted wallpaper glue with water is applied. Excellent for processing acrylic primer.
How to properly stick wallpaper on a wall
Preparing the premises for work is the first important stage. Furniture is removed from the room or moved aside, covered with film. Next, the walls are cleaned, putty is applied to eliminate unevenness and other defects, and the corners are leveled. The final obligatory touch is painting or whitewashing the surface of the ceiling, after which they work on the walls. After pasting the walls, the edges are framed with the borders you like.

Where to start
Begin pasting the walls near the window:
- Using a plumb line, draw a straight vertical line.
- Next, glue is applied to the canvas, the edges and corners are carefully coated, and the tapes are carefully folded inside out. Try to avoid creases when folding the strips.
- If the canvas is heavy, then additionally for greater gluing you need to coat the wall with glue.
- After gluing the first strip, all subsequent strips are glued end-to-end, without gaps between them.

In the corners
Corners are considered difficult areas for gluing paper strips. Don't try to stick a full piece of tape into a corner, the best solution will leave an allowance of a couple of centimeters on adjacent side, and glue the next piece of fabric on top of it. Then, using a sharp wallpaper knife, cut through the place where the double joint is and remove the remains. This method is real option sizing perfect angle.
Wallpaper with a pattern
If the trellises are not white or plain, but include a pattern, then they need to be cut into strips before sticking so that the images match. The task is simplified if the manufacturer with reverse side wallpaper is applied by rapport - marks that show how to cut the sheets so that the patterns match correctly. To avoid accidentally staining the strips, they are stacked in stacks of 10 pieces with the pattern facing down.

How to wallpaper the ceiling
When cutting strips, you should take into account the evenness of the ceilings: if the ceilings are flat, then cutting into strips is done in advance; if not, each subsequent section must be measured individually. How to glue ceiling wallpaper? To facilitate the gluing process, you need an assistant (as well as how to glue meter wallpaper or wide), which will support the second edge of the strip.
The first strip should be applied near the wall, smoothed from the center to the edges. Use a roller or soft cloth to avoid any bubbles or kinks. Under the lamp, you should make a small cut in the canvas crosswise. Don’t be afraid that the cut looks ugly; after running the cord through it, you will hide the joints of the strips with a lampshade.
Video: how to properly glue wallpaper
Paper trellises are an excellent option for interior work in rooms: relative to others, they are inexpensive and practical option. It is easy to glue such a covering yourself if you get used to it and study the information on pasting. How to glue selected paper wallpaper correctly so as not to spoil the appearance of the room? The specialists in the videos will tell you all the tricks for flawless work, and there will be no difficulties.
Vinyl wallpaper on paper basis
Paper photo wallpaper
Pasting paper wallpapers is not easy, as they have a loose structure and are prone to tearing and mechanical damage. But if you follow the necessary rules, you can create good design, cozy and psychologically favorable environment.
Features and types
Advantages of paper wallpaper:
- environmental cleanliness;
- ease of gluing;
- easy to remove from walls;
- breathe well, resist the formation of fungus and mold.
They cannot be used in rooms with high or medium humidity. They are difficult to clean and wash and will last no more than 10 years. Another disadvantage is fading when exposed to direct sunlight. How to glue paper-based wallpaper is shown in the following photo:

Main types:

How to properly glue paper wallpaper, look at the photo:

Rules for gluing
In order to properly glue paper wallpaper, you must follow a certain sequence:
- be sure to lubricate with glue inner side wallpaper and walls;
- for optimal wetting of surfaces after spreading the glue, you should wait 1.5-2 minutes; adhesives should not be applied in advance;
- It is not recommended to rub the joint. Do not press down the wallpaper with a plastic spatula;
- use special glue for paper-based wallpaper;
- with a low density of wallpaper materials, overlapping gluing is allowed; with a thicker wallpaper, it should be glued end-to-end;
- to avoid wrinkles and bubbles, ensure the necessary conditions for drying. There should be no draft in the room.
How to correctly paste wallpaper on paper:

Pasting stages
Preparation for gluing canvases. Cleaning surfaces from remnants of old coatings, paint, plastering and priming walls. If you have difficulty removing old materials, you need to moisten the walls and then remove the residue with a spatula or knife. You can steam old finishing materials with a hot iron. Before gluing, turn off all electrical switches and sockets. If possible, remove the baseboard.

Pasting should begin from the right side of the window, and the edge should also be cut on the right. It is important to carefully cut the rolls, leaving a small margin. For this you can use special knife, level or ruler and triangle. Draw a straight line with a simple pencil, bend the wallpaper along it and cut it off.

We make vertical markings on the wall before gluing the first sheet. When pasting corners, leave a margin of 5 cm, extending onto the other wall. If bubbles or folds form on the surface, make 3-4 cuts and again glue the wallpaper overlapping.
You can watch the video to see how to apply paper wallpaper:
Wallpapering with embossing
To improve adhesive properties, we treat the walls with plaster and leave them to dry for a day.

Features of gluing embossed coatings:

How to glue embossed wallpaper is shown in the video:
We glue with our own hands
Single-layer wallpaper is thin and has a fragile structure, so it should be applied with extreme caution.
- It is recommended to apply glue evenly over the entire canvas in a thin layer, carefully and carefully coat the edges. Leave for 1-2 minutes. Immediately wipe off any remaining adhesive with a soft cloth. light movements hands;
- when finishing premises thin materials It is important that the walls are smooth. The process of wallpapering is preceded by thorough putty and primer of the wall surfaces;
- It is advisable to glue thin sheets in pairs; they should be supported in the middle so as not to tear or cause mechanical damage;
- It is advisable not to cut through such coatings, because the cuts will stand out against the background of the walls, so smooth out all the folds at once. The wallpaper should fit tightly to each other, so overlapping and not end-to-end pasting is used.
How to beautifully glue thin overlapping wallpaper:

We glue new ones onto old ones
Is it possible to glue new wallpaper onto old paper wallpaper? Since they are thin on paper, they allow you to stick other materials onto old coatings. When gluing, consider the following:

Watch how to properly remove old paper wallpaper in the video:
Functionality of the room
In terms of functionality, paper materials are best suited for bedrooms. This is due to their environmental friendliness and naturalness. As a rule, the sleeping area is used for relaxation, so the surfaces will be practically uncontaminated. In addition, most of these coverings are light-colored, which corresponds to the purpose of the bedrooms.

In modern living rooms, paper wallpapers are rarely used; embossed and structural wallpapers are popular among them. Vinyl, non-woven, and fiberglass are actively chosen for finishing halls. Kitchen - function room, which is often covered with coverings with simple kitchen designs.

When choosing paper wallpaper, remember that their service life is short, but your room will be environmentally friendly and safe for health. Follow these rules and tips, and the creation of a successful design project in your home is guaranteed! Imagine and create!
Today you will learn in detail how to glue wallpaper on paper. But first you need to decide how suitable this material is for finishing. After all, it has not only positive qualities, but also a lot of shortcomings and they must be taken into account.
Instructions will be given below about all these questions. Also in the video and photo you can get additional and necessary information.
Price of this material for finishing is quite low and this attracts the consumer. But just after applying the coating you need to get a positive effect, and not think about how to redo it. Therefore, before gluing, you need to carefully weigh everything to understand how much in your case this type finishing will be optimal. Let's look at what we get after application.
Let's start the review with the advantages:
| A wide range of | Thanks to the variety of textures, patterns, colors, performance characteristics And technical properties, paper wallpapers are very popular.
|
| Ease of use | One of the huge advantages of paper wallpaper is its ease of use as a finishing material.
|
| Environmental friendliness | This type of wallpaper best option for people who care about their health and the health of their loved ones.
|
Now let's take a look right away negative qualities material:
| Discoloration | Just like most wall finishing materials, paper sheets are subject to prolonged exposure to sunlight tend to fade or fade.
|
| Poor moisture resistance | They absorb moisture well, so they are not recommended for use in rooms with high humidity.
|
| Low noise insulation | One of the serious disadvantages of paper canvases.
|
| Rapid wear | If we talk about paper wallpaper, they come in single-layer and multi-layer (duplex).
By carefully studying the information from the manufacturer, you can easily decide on the choice of paintings. They will fully match not only in texture, color and pattern, but also in wear resistance, moisture resistance, density and light fastness. |
Rules for wallpapering
Now let's look at how to hang paper wallpaper in more detail. After all, the order in which the work is done is important here. Special attention You need to pay attention to preparing the base plane, otherwise the coating will not stick.
The procedure for preparing for wallpapering
One of the most complex and difficult to resolve issues in renovation is the choice of design and building materials. It is especially difficult for people who, together with their spouse, cannot come to a mutual decision.
The choice of wallpaper is no exception. Controversial issues arise at the stage of their selection. Using tips professional designers, solving this problem will be a little easier.

So:
- Depending on the category of the space being repaired and the price range, the range of paper wallpapers can be divided into single-layer cheap ones (usually used for arranging country houses) and multilayer options. The second type of wallpaper is of the highest quality, reliable and is not afraid of wet cleaning.
- For large living spaces, canvases with large three-dimensional patterns are selected; for small and narrow rooms, they try to use a small pattern that is not able to hide the lack of territory.
- The entire room should be finished in the same style - from wall coverings to the smallest elements of interior and decor.
- IN dark rooms You can’t use cold and bright saturated tones. To brighten such rooms, light and warm shades should be used.
- Each color carries its own mood: most colors have an exciting, refreshing, irritating and even depressing effect.
High quality preliminary preparation plays an important role in the outcome. To prevent unwanted defects from being revealed after painstaking repairs, it is necessary to carry out measures to clean the walls, leveling and priming (see).
Attention: Method for removing old wallpaper: lightly moisten, wait for a while, peel off. Another folk way– iron the old areas with a hot iron through a cloth soaked in soda solution or ammonia.
- Before the beginning repair work the power is completely turned off, protection is removed from switches and electrical sockets. A measured sheet of wallpaper is applied to the surface to be pasted, marking a cut in the shape of a cross at the location of the electrical outlet. This will allow you to glue the canvas more tightly to the wall by bending or cutting off excess corners.
- It is advisable to dismantle the baseboards. After completing the repair, it is better to purchase new ones so that the bottom of the wall looks completely smooth.
Glue selection
There are many brands of glue that differ in their characteristics and price range. To stick paper wallpaper, you can use any type of adhesive base that suits you.
- The most popular is CMC powder glue. If storage rules are followed, it has a long shelf life (be sure to store in a dry place).
- To prepare the glue, the powder is dissolved in warm water, stirring the lumps. Water is added in small quantities, bringing the composition to a jelly substance. The glue is kept for half a day until large particles are completely dissolved, stirring several times.
- It is also possible to use wallpaper glue “Gumilax” or “Bustilat”, which are similar in operating principle to CMC. It is important to read the instructions before starting work.
- There is also paper for sale for gluing wallpaper, but even when used, the glue does not change.
Attention: Paper wallpapers are classified as finishing material, for which the use of any adhesive base is suitable. Almost all brands of wallpaper glue will work for them.
If a specialized industrial solution is unavailable, paper wallpaper can be applied to a warm paste. To prepare it, mix water with flour, bring to a boil, remove from heat, stir and wait until it cools a little.
How to stick paper wallpaper correctly
You bought the required number of rolls of paper wallpaper in the store, which you liked for their design properties and technical specifications. The time has come to start work. Now let's look at how to glue paper wallpaper in order.

When you turn the roll, you immediately notice that the paper sheets have one or two edges at the edges:
- If the wallpaper is dense in texture, you will have to glue it closely to each other, otherwise the joint will be noticeable. In this case, the edges are completely cut off. The situation is the opposite, if the wallpaper is thin, you can glue the canvases overlapping, cutting off the edge on only one side (it’s more convenient on the left). Gluing the first sheet begins strictly from the window.
Attention: One of important stages is the correct cutting of the canvas. Special care and prudence are required, otherwise there is a risk of ruining more than one paper meter. For everything to be clear and error-free, you need to:
- Measure the height of the pasted wall surface. You definitely need to add a few centimeters “in reserve” (for wallpaper with large patterns it should be at least thirty centimeters, for small patterns ten is enough).
- Having cut out the first strip of canvas, we compare it with the specified parameters. If the height requirements meet, we cut out the second and subsequent stripes in the same way as the first.
- You should pay attention to the direction of the drawing, since it is easy to make a mistake in this matter and spoil the work you have started. You need to pay special attention to wallpaper with a plant theme.
Attention: Use a special wallpaper knife to cut wallpaper. If you use regular scissors, the edges will turn out uneven. For precise cutting, use a level or a triangular ruler to mark the line along which the canvas is folded, then carefully cut.
- To correctly paste the first sheet, mark a vertical line on the surface to be pasted, from which the countdown of the work will begin. For convenience and accuracy, marks are often used laser level, as a last resort, a plumb line with a cord rubbed with chalk. All other wallpaper sheets are pasted by analogy with the first panel, focusing on the severity of the original mark. Always start gluing wallpaper from the window, on each new wall make a new vertical mark.
In most cases, special difficulties are encountered when finishing a corner (especially since it is ideal straight corners rarely found in apartments). Following the basic principles, this work is performed according to the following scheme:

- We cut the panel so that when gluing, the width of the overlap on the other wall is no more than five centimeters.
- In places where folds form, neat cuts are made with scissors and the surface is leveled.
- A new piece of canvas is glued immediately from the corner, having previously marked a vertical line.
- Paper sheets with a thin structure are glued immediately after applying the glue. Otherwise, they will become very wet, and it will be impossible to stick them neatly. Thick wallpaper is coated with glue and waited for some time. After good impregnation, they are transferred to the wall. Excess glue that appears must be immediately removed with a damp cloth so that after drying there are no defective spots left.
- While the wallpaper is drying, you should not use an electric heater, and you should also avoid drafts. Only as a result of natural drying will paper wallpaper be permanently fixed on the wall surface. The paper border is glued last on a completely dry area (see).
Attention: Remains, trimmings and excess pieces of wallpaper should not be thrown away. They can be used for finishing small spaces near windows or doors, and also as patches.
- There are often times when it is accidentally damaged small area pasted surface. If there is residual material, you can select the desired pattern, cut and glue a new piece to the damaged area. If done carefully, the damaged area will not be noticeable.
Now you know how to glue paper wallpaper correctly. The most important thing in repairs, including wallpapering, is a positive attitude. Even an experienced finisher will do a much better job if he does the finishing in a team. And if the whole family and even children are included in the process, the result will be the most impeccable, despite minor errors and oversights.
The question of how to glue has arisen for everyone who has at least once done own apartment repair. It would seem that there is nothing complicated about this, but not everyone’s results meet their expectations. Applying wallpaper correctly is an art, and with the advent of new types, the technology for working with them also changes. But paper wallpaper is always at the peak of popularity. They are loved for their variety of colors and patterns, low cost, environmental friendliness and ease of operation. They are suitable for either, or office.
Often duplex wallpaper has a textured surface. The pattern is obtained by rolling under pressure textured roller on a still damp piece of paper. After this, paint is applied. Such duplex wallpaper is called embossed. They should be glued end to end.
- Embossed wallpaper is the most durable among paper wallpapers. They are not only durable, but also have high decorative qualities.
Non-woven
Paper products are particularly durable and have a pleasant-to-touch surface. non-woven wallpaper. They are easy to glue since the glue is only applied to the wall. Among the features of this type is durability; they can be repainted several times.
Advice! When purchasing colored wallpaper with a pattern, it is important to ensure that all rolls are from the same batch. Shades may vary greatly, which will affect the final result.
Vinyl
Paper-based vinyl wallpaper is the most wear-resistant. The top layer is a vinyl coating of various textures and colors. This wallpaper is durable and heavy. Visually, they can be easily confused with embossed paper ones, but the latter are inferior in quality.
Selecting wallpaper glue
What glue to use for paper wallpaper? It all depends on the thickness of the coating. Universal option– CMC adhesive on a cellulose basis. It is suitable for both thin and embossed wallpaper, even vinyl wallpaper. The only difference is in the concentration of the solution.
Important! The thinner the paper, the more liquid the composition should be.
When purchasing special adhesives, you should pay attention to the manufacturers' recommendations. Adhesive for paper backing is usually inexpensive and comes in three types: for light, medium and heavy wallpaper.
- For embossed, non-woven and paper-based vinyl rolls, vinyl adhesive works equally well.
Advice! Any wallpaper can be pasted over using PVA or bustilate. These compounds guarantee reliable adhesion of the paper to the wall, even for heavy canvases.
Wallpapering
Before gluing paper wallpaper, you need to decide how it will be done - end-to-end or overlapping. Typically, a roll of paper has a side edge. Thin wallpapers can be glued overlapping, due to the edges of the canvas they will fit well to each other.
Advice! If the fabrics are thick or embossed, the edge will only get in the way, and unaesthetic stripes will appear at the joints. In this case, it is better to cut off the edge and glue the wallpaper itself end-to-end.
Non-woven and vinyl wallpapers are also glued end-to-end; the technology can be seen in the video.
Advice! On the wallpaper label you can find information about how many centimeters are required to fit each strip. These data must be taken into account when calculating the required number of rolls. When purchasing, it is always better to take one more than required.
Preparing the walls
Before you start gluing, the walls need to be carefully prepared:
- . Use a spatula to carefully pry off the joints and peel off the fabric. If the wallpaper is firmly glued, then it should be moistened with warm soapy water. In some places you can make cuts so that water gets onto the glue.
- Clean painted walls with sandpaper or a wire brush. All peeling areas must be sanded thoroughly. Water based paints or whitewash must first be soaked and the residue removed with a spatula.
- The cleaned base must be cleaned of dust and inspected for defects - unevenness, cracks, etc. All defects must be treated with a primer and puttied. When the putty has dried, sand it down to the same level as the wall, and then coat it with primer again.
- Wallpaper will stick better if the walls are first coated with a primer. This may be a special penetrating composition for water based or highly diluted glue.
Tools
The right tools will make the wallpapering process easier:
- Scissors or utility knife.
- Pencil and tape measure.
- Wide brush and roller.
- Glue tray.
- Sponge and soft cloth.
Marking and cutting
Measure the height of the wall. Roll out the roll with the wrong side up and make a mark on it corresponding to the measurement. Cut into several strips of the required length.
Advice! If the ceiling or floor is uneven, then when cutting it is worth adding another 5-10 cm to the height of the wall, this will help to stick it accuratelystripes. When cutting wallpaper with a pattern, you need to take into account the tolerance. Add a value from 5 to 30 cm to the length of the wall and cut the wallpaper into appropriate pieces.
Fold each piece of paper with its short sides towards the center and leave for a few minutes so that the paper is well saturated with glue. This must be done before gluing paper-backed vinyl wallpaper or other heavy types. This action will help avoid bubbles and prevent peeling. Advice! It is better to glue thin wallpapers immediately, in some cases, like with, applying glue only to the wall.
Advice! Before gluing or heavy embossed ones, it is advisable to also apply glue to the walls using a roller.
When the strips are saturated, you can start gluing them:
- The first strip is applied to the corner closest to the window.
- The canvas is leveled from top to bottom. First, press the middle and level it to the edges using a dry soft cloth. While the top part is being smoothed out, there is no need to unroll the bottom.
- Excess glue must be removed immediately with a damp sponge.
- Each strip is tightly fitted to the previous one, butt or overlap, taking into account the tolerance.
- The joints need to be ironed additionally, preferably with a rubber roller. This way they will be less noticeable.
- Lastly, the doorway is covered.
Advice! When gluing wallpaper, you should make overlaps on the ceiling and floor - 5 cm in each direction. When the canvas is smoothed, sharp stationery knife you can cut off the excess.
In the list of materials in demand in interior decoration, paper wallpaper is far from the last place. Invented back in medieval China, they are practically the cheapest and, most importantly, environmentally friendly solution, with the help of which you can create a cozy and pleasing environment without much effort. But in order for an interior made with paper wallpaper to serve as long as possible without causing unnecessary hassle, it is important to study the basic criteria for their selection and understand the practical intricacies of gluing and caring for them during operation.
Types and features of paper wallpaper
Paper - fibrous material, into the structure of which moisture and fat easily penetrate. It is an excellent springboard for dust and can even absorb odors. All this must be taken into account when decorating the premises - if you choose the wrong wallpaper, the atmosphere that reigns here will very soon leave its indelible imprint on it.
Protection of the paper web from aggressive operating factors is provided by a number of modern technologies. In accordance with them, the following types of paper wallpaper are distinguished:
- Smooth
The basis is paper different varieties, sometimes with a light-resistant base, and the design is printed on the front side.
- Duplex
They have 2 layers, thanks to which they do not tear, and, if necessary, can be easily removed from walls or ceilings.
- Embossed
Also double-layered, but the front side is embossed, i.e. has a certain, often patterned, relief.
- Structural
Manufactured with the addition of seals - sawdust, crushed nut shells, etc., due to which they acquire a unique facial relief.
- Acrylic (foam wallpaper)
They are a two-layer canvas, on the front side of which a thin layer of foamed acrylic is laid - the result is quite unusual designs.
- Moisture resistant
This type of wallpaper has a moisture-resistant coating, thanks to which it can be cleaned and washed.
Obviously, the more aggressive the atmosphere in the room being finished, the more wear-resistant the wallpaper should be and the more it will cost. But the most important thing when buying is not to confuse different kinds canvases. For example, some paper wallpapers are practically indistinguishable appearance from vinyl, which cannot be said about their price. In short, make sure you don't accidentally overpay for features you don't need.
Preparation for gluing
Paper wallpaper is a fairly simple material to work with, which is not difficult to handle even if you have no pasting experience and alone. But first, it is necessary to properly prepare the surfaces to be finished: dust, remnants of whitewash and old wallpaper, etc. will not allow the gluing to be completed properly, and defects in the rough finishing will immediately appear on the front side of the canvas.
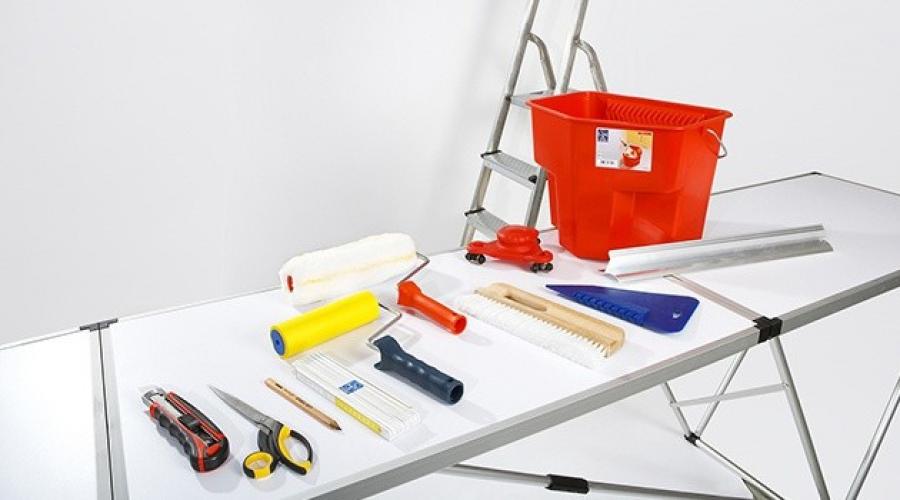
To hang paper wallpaper you will need:
- roller or brush;
- wallpaper brush;
- tracer;
- plumb line;
- construction knife;
- sponge;
- container for glue;
- wallpaper table;
- ladder;
- roulette;
- long ruler;
- wallpaper glue.
Having collected everything you need, you can begin preparatory work. They are performed in the following order:
- Removing old wallpaper, whitewash and peeling plaster
Old wallpaper can be removed very easily if you first scratch it and moisten it with a soapy solution using a sponge. It is most convenient to work with a metal spatula. Those areas that come off poorly will have to be moistened again.
- Removing paint residues
Oil paint or enamel is removed using coarse sandpaper. Water-based emulsion and whitewash, similar to old wallpaper, are first soaked in a soap solution and then removed with a spatula.
- Elimination of defects in pasted surfaces
For high-quality gluing of paper wallpaper, it is necessary to carefully plaster all the cracks and smooth out any unevenness on the walls or ceiling, after which they should be cleaned using a plaster mesh.
- Primer
Before wallpapering, the surface of the walls and ceiling must be primed. This will ensure normal adhesion of the glue and prevent the formation of air bubbles under the wallpaper.
- Cleaning
After finishing preparatory work must be carried out indoors wet cleaning. This will avoid contamination of the new wallpaper during the cutting process.
Preparation for gluing paper wallpaper in the photo
Fabric preparation
Wallpaper is sold in rolls, which are printed immediately before starting work. But first you need to mark the walls. To do this you will need a plumb bob and a tracer. If you don't have the latter, you can use a level, a long ruler and a pencil or chalk. You should mark the top level of wallpaper (for rooms with high ceilings) and vertical lines to indicate the joints of the canvas.
There are two methods of wallpapering: butt and overlap. If the first option cannot be used, gluing the canvas should be done in the direction towards natural or electric lighting.
Immediately before gluing, you can perform wall stripping: apply a 10-cm strip of glue along the corner lines, as well as the area along the baseboard and ceiling line. After 2-3 minutes the wall will be ready for gluing.
When starting to cut wallpaper, you should wipe the surface of the table or, in the absence of the latter, the area of the floor on which you will temporarily stack the cut pieces of canvas. The cutting is carried out with a 3-5 cm margin on both sides of each segment for a small overlap along the line of the plinth and ceiling. The finished stack is shifted with a 10-15 cm indentation, due to which, when applying glue to the top sheet, you will glue the joint strip on the next one. And remember that paper tends to get wet quickly, so the glue should be applied in a moderate layer.
After gluing, the top strip is folded in half, after which the same action, only in the opposite direction, must be repeated. The folded strip is set aside, after which you can proceed to the next one while the previous one is soaked in glue. It’s not worth using more than 3-4 strips: you may not be able to complete the pasting in time, since wallpaper glue dries very quickly in air.
Selection, preparation and application of wallpaper glue
For gluing paper medium density Glue is ideal for lightweight wallpaper, for example, KMC. As for its quantity, it depends on the area to be pasted, which, like all the necessary proportions, must be indicated on the packaging. When purchasing, it is very important to pay attention to the presence of a quality certificate. The glue must not contain substances harmful to health.
Preparation of wallpaper glue:
- 5-7 liters of water are poured into a pre-prepared container;
- the water is shaken and the dry adhesive mixture is poured into the resulting whirlpool;
- the resulting mass must be thoroughly stirred and then left for some time to swell.
Thickened wallpaper glue should be uniform. If you find lumps, they can be easily eliminated by re-mixing the mass.
The glue should be applied evenly to the back side of the wallpaper, distributing it over the entire surface. It is most convenient to use a roller for this. After applying the glue, you need to wait 5-7 minutes so that it is well absorbed by the paper web.
If the glue accidentally gets on the front side of the wallpaper during application, it must be removed with a damp sponge. You shouldn’t put too much effort into this - it’s better to use more water. This will preserve the structure and color of the front surface.
Some types of wallpaper glue have special additives that reduce its setting time. Therefore, before cooking, you must carefully read the instructions, otherwise you will face unpleasant surprises in the form of a composition that thickens too quickly.
Technology of pasting walls and ceilings with paper wallpaper
You need to glue wallpaper quickly and carefully. That is why it is advisable to work together. Paper wallpaper is almost always laid with a slight overlap, otherwise, due to the low wear resistance of the canvas, the joints will fray very quickly.
The sheet of canvas that you glued first, after 5-7 minutes, is unbent so as to gain access to the upper edge. Next, you need to stick the top strip on the wall - just on the section of the wall that you treated with glue. Now, holding the canvas by the top, you need to carefully unbend it and stick it on the wall. At the same time, using smooth arcing movements using a dry sponge or rag, you need to smooth the wallpaper until it sticks properly.
Small air bubbles can be left alone. When the glue dries, the paper wallpaper will shrink slightly and allow air to escape. If large bubbles have formed, they need to be carefully pierced with a needle and the air removed. In such areas it won't hurt to add glue. This can be done using a syringe, while the edges of the canvas are best glued using a brush.
After gluing 4-5 sheets, it is very desirable to remove the indents - after the glue dries, carefully cutting them off without affecting the main sheet will be very problematic. Do not forget to control the orientation of the pattern on adjacent sections of the canvas - it must match.
Wallpapering the ceiling is done in the same way, with the only difference being that the canvas should be placed perpendicular to the direction of lighting. Please note that wallpaper on the ceiling is always glued end to end.
The joint lines between adjacent sheets need to be rolled with a narrow rubber roller. It wouldn’t hurt to carry out this operation when gluing wallpaper onto overlapping walls - as practice shows, this is where they most often come off due to the different microstructure, and therefore the absorbency, of the front and back surfaces of the wallpaper. You also need to remember to cut out the fabric in the currents for placing switches and sockets. It is advisable to do this before gluing - after the hole, all that remains is to correct it with a stationery knife.
If you have thoroughly prepared for gluing, you have chosen reliable glue If you cut and paste the paper wallpaper correctly, it will serve you for as long as possible. Of course, provided that you protect them from damage, moisture and dirt.