How to prepare plastic windows for winter. Preparing windows for winter. How to repair a sticky knob that won't turn to the desired position
Read also
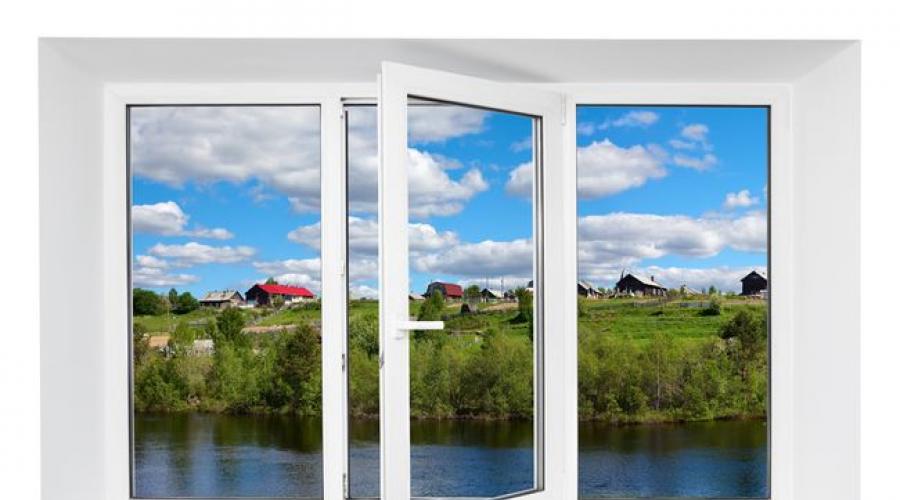
At first heating season- it's time to think about how to prepare plastic windows for winter. To complete the work you will need a Phillips screwdriver and a hex key.
First of all, wash the windows, profile, window sills and slopes. We recommend using non-aggressive detergents in small quantities and a soft sponge. For achievement best result You can open the window sash and use a sharp object to remove dirt that has accumulated in the drainage channels. For these purposes, you can use a toothpick or match. Clean drains will freely drain excess water and prevent ice from forming in these places.

In the cold season, the seal should be additionally protected with technical Vaseline or silicone grease. The sealant is coated with the product around the entire perimeter. This approach will protect the material from freezing and drying out.
In order to ensure smooth running The moving parts of the window unit should also be lubricated with Vaseline or a silicone-based compound. Dust does not stick to silicone, which allows you to keep your windows clean.
If you see special kits for caring for seals and fittings on sale, don’t pass them by, be sure to purchase them. Manufacturers recommend performing this treatment twice a year.

A loose window handle is one of the common problems plastic windows. In order to return it to its original state, turn the handle to the “open” position (so that it is parallel to the window sill), then turn the handle cover located at its base by 90 degrees. Under the trim you will find two screws that need to be tightened with a Phillips screwdriver.
The next step in preparing plastic windows for winter is checking the tightness of the sash. For such an experiment, you will need a regular piece of paper, which you need to insert into the flap of the sash, and then close it. If the leaf is removed with some effort, then everything is in order with the density. If the paper is removed from under the seal without any hindrance, then it’s time to adjust the window fittings to " winter mode".

Setting up is quite easy. To do this, open the sash; on the end part you will see roller bushings. U different manufacturers bushings may have different kind, but in production the middle position is always set. You need to insert a hex key into this sleeve and turn it so as to ensure maximum pressure. In this way, the fittings are adjusted to suit the required season. After this, all that remains is to close the sash. The increased force on the handle will indicate that all actions were performed correctly. The sash will close tighter. The next fitting adjustment should be made with the onset of spring. This approach will avoid premature wear of the seal.

As you can see, there is nothing complicated in preparing plastic windows for winter. For further defect-free operation of window systems, it is important to maintain normal humidity air (no more than 45-50%) and provide correct work exhaust and supply ventilation. You can check their effectiveness using the same piece of paper. To do this, bring it one by one to everyone ventilation holes. More accurate data can be obtained by using an anemometer. Do not forget that windows should not be perfectly sealed, as this leads to the formation of excess moisture in the air. Arrange airing sessions for the apartment at least 2-3 times a day.
Modern window systems, contrary to the opinion of ordinary people, they require constant maintenance. Of course, they do not need to be sealed for the winter or painted every season as is the case with their wooden counterparts.
For full functioning, metal-plastic double-glazed windows need to be switched to a mode appropriate to the time of year. How to implement self-adjustment plastic windows for the winter? And how important is it to do this?
Seasonal Maintenance
The main feature of opening windows is that they do not have vents. For better ventilation of the room, the system provides rotary doors. During operation plastic double glazed windows it can be noticed that in winter time a draft appears. Don't panic - this is not a manufacturing defect, but simply the seasonal mode is set incorrectly. Conversion of plastic windows to winter and summer mode s is a mandatory maintenance procedure.
The tilt and turn mechanism of the glass unit must be adjusted depending on the season of the year
During long-term use, drafts may also appear. This occurs due to the loosening of the hinge screws of the rotary-locking mechanisms. By independently adjusting the windows for the winter, you can easily save 3-7 thousand rubles on calling specialists.
Leak test
How to prepare plastic windows for winter? With the onset of cold weather, it is necessary to carry out a preventive inspection of the state of normal locking of the sashes in winter mode. Leak tightness can be checked in several ways:
- Tactile. By running your hand along the frame, you can determine the presence of serious drafts.
- Fire with a match or lighter. Deviation of the flame from the vertical indicates the presence of blowing.
- A sheet of paper. They leave him in the closed door and try to pull him out. If the leaf comes out easily, it means the sash is not closing tightly.
 If the paper sheet is easy to pull out through the sash, then the window is not airtight
 Having determined problem areas, begin to regulate the system to optimal requirements.
Switching winter/summer modes
When installing double-glazed windows, installers set the initial neutral parameters for locking the sashes. All positions will be adjusted for optimal functionality. However, then it is necessary to adjust the settings - ideally twice a year.
Why is this necessary?
Seasonal adjustment is often forgotten, leaving the sash pressure in a neutral position. As with any violation of operating rules, consequences arise over time:
- drafts from under the sash even with correct installation adjustments;
- if the summer mode is set, then in winter this will not provide sufficient pressure locking mechanism, which will cause heat loss from the room;
- if you leave the winter position, then due to the constant strong pressure of the sash on the seal, the latter will quickly become unusable;
- in the absence of seasonal adjustment, the normal microclimate of the room is disrupted, including an increase in humidity levels (there is a risk of condensation and mold).
 Wrong mode operation may lead to the formation of condensation on the glass
 To do this, you need to correctly set the winter and summer modes of plastic windows in the sash settings.
Adjustment mechanisms
Before you begin changing the mode, you need to determine the locations where the adjustment devices are located. In most cases, the system provides for the presence of special mechanisms - trunnions, which, depending on their position, determine the degree of pressing of the sash required for the season.
They are on the ends metal-plastic window or doors. The number of such mechanisms may vary depending on the size and manufacturer of the glass unit (from two or more).
 Locations of possible locations of eccentrics - different manufacturers have them in different places
 The trunnions may differ in appearance, but they perform the same adjusting function.
 Options appearance eccentrics
 At the edge of the eccentric there is a mark, which serves as an indicator of the desired mode. By default, it is set up - this is a neutral position, which needs to be changed in accordance with the season.
 Risk indicating the selected mode
 How to switch
The process itself is quite simple, you only need one tool - a simple hexagon (usually 4 mm), or less often an asterisk.
You need to set plastic windows to cold season mode before the onset of frost, when the temperature is still plus 5–10°.
Open the glass unit and inspect the ends. Usually there is one eccentric on the side, the second on top.
 Mark indicating adjustment mode
 Most likely, the regimes will be in a neutral position, and the risks will point upward. Having picked up the right tool, change the position of the marker.
To set a plastic window for the winter, turn the notch on the regulator towards the outside of the room. With the onset of the warm season, the position of the marker should be moved by the mark inside the room. Accordingly, if there are several such regulators, then the modes are transferred by turning all available eccentrics to one position.

You need to constantly switch modes according to the season - this is what will ensure normal functionality, balance of ventilation and sufficient energy saving in your home.
What other adjustment methods are there?
If, when checking for tightness of the locking cold air still penetrates from above or below the sash, then most likely the problem is in incorrect alignment of the sash geometry.
The figure shows the main points where adjustments to the fittings may be required. The window design provides several adjustment options:
- horizontal and vertical shift;
- setting the position of the lower corner;
- degree of pressing against the frame.
 Location of adjustment points
 How are optimal modes set?
Setting the vertical position
This is done by setting bottom loop. Remove the protective cover. There are two adjustment points here - horizontal and vertical. To raise or lower the sash, adjust the screw located on top of the hinge. To raise it, turn it clockwise, and vice versa if you need to lower the height.
 Vertical position adjustment
 Horizontal adjustment
To perform this operation, both loops must be configured.
There is a second screw on the side of the lower canopy, designed to change the horizontal position. When it is turned from left to right, the sash moves towards the hinge, and vice versa when turning it back.
 Adjusting the lower canopy
 Drafts can also form through the upper corner of the window that cannot be locked. To do this, set the pressure on the upper hinge, the adjustment screw of which is located on the side. We twist it and achieve the desired result - evenness and tight fit.
 Setting up the top canopy
 When changing the horizontal position, it is necessary to leave a gap of several millimeters between the hinge and the sash. Otherwise, if you tighten it too tightly, the ventilation mode will not work.
Changing the degree of sash pressure
The clamping mechanism is another device in the form of a plate located on the frame. It is designed to prevent burglary by pressing the sash from the street side.
 Pressure plate ensures tighter closure
 When turned clockwise, a tongue extends, which will contribute to a tighter closure.
Adjusting the top corner fit
For pressing top corner There is another adjustment screw between the windows and the frame. To get to it, you need to open the window in two directions at once. To do this, press the lock on the end of the sash, as shown in the picture.
 Locking loop and tongue locks allow the top corner to be pressed against the frame
 Pull it all the way, turn the handle to ventilate, and then pull the top edge of the sash towards you. Access to the clamping mechanism is open. One of the plates has space for a hexagon. By turning it, you can adjust the tightness of the upper corner of the sash.

These are the main problems that may appear throughout long period operation, when the operation of the system gradually weakens the initially set modes. But immediately after installation, all these settings are regulated by the installers themselves from the supplier company - they are obliged to ensure the correct operation of the system.
Of course, if you have no experience or it is not clear how to make the adjustment yourself, it is best to contact an installer. They will send their specialist who will do everything necessary procedures, placing the shutters in the desired position.
If the adjustments don't work
A situation may arise when the sashes are adjusted correctly, plastic windows are converted to desired mode season and all the mechanisms close well, but problems still arise:
- draft;
- condensate;
- freezing.
Such nuances can arise in several cases:
- Defective windows. This happens quite rarely and only when ordering from dubious companies.
- Incorrect installation. At installation work must be respected the right technology: maintaining the gaps between the frame and the opening, high-quality fastening and mandatory sealing with construction foam.
- There is no finishing on the slopes. Polyurethane foam without protection, it quickly deteriorates under the influence of ultraviolet radiation and moisture.
- Seal wear. Possible due to prolonged or improper use of double-glazed windows.
When a malfunction is identified, it is eliminated. The windows should now function correctly and provide a sufficient seal.
And their timely adjustment and lubrication are measures with which you can make your apartment warmer. As a result of such preventive procedures, the service life of the windows will be further extended. In this article we will tell you how to prepare for winter period time of plastic windows.
First step. Window cleaning and washing
Preparing your windows for the cold period, like any decoration of balconies and loggias, should begin with regular washing. Neither too cold nor too warm weather is suitable for such a task as washing windows. Indeed, in the first case, the windows will freeze, and in the second, the water will dry out instantly. That's why best time for washing windows - warm autumn or spring weather.
After you wash the window sill, profile, sashes, special means clean the glass, you can consider that your window is ready for further processing.
Second step. Removing the mosquito net
remember, that Mosquito nets your windows may get damaged, so it is best to remove them during this period of time.
Third step. Checking the tightness of the sash
Using normal white sheet paper, you can check the tightness of pressing the sash to the window. If the leaf comes out too easily when the sash is closed, then before the onset of winter you will need to switch the sash closing mode to “winter mode,” which will ensure a tighter joint. If it is easy to remove, we can conclude that there are no problems. As a rule, the fittings for transfer are roller pins with markings and are usually located at the end of the window.
Having inserted the hex key into the trunnion, you need to scroll it until the pressure reaches its maximum - this is necessary to change the switching mode to the winter version.
After completing the translation, you should check the operation of the fittings; adjustment may be required. Then you can make sure that the window is easy to close.
Fourth step. Cleaning and lubrication of fittings and sealing rubber
The next step will be tidying up internal structure window. Sealing lubricant on seals and fittings is used to protect homes from cold drafts that can seep into even the smallest cracks. Having thoroughly wiped the rubber seal around the entire perimeter of the window, you need to treat the seal itself with some glycerin-based product, for example, a specialized treatment pencil. It will not be superfluous to lubricate all moving elements of the fittings.
Fifth step. Flushing the drain holes
It is necessary to carefully monitor the drainage holes and clean them regularly, since their purpose is to combat the formation of condensation or ice on the window surface. Often, the amount of condensation in winter increases due to temperature changes, so to avoid excessive fogging of the glass, be sure to clean the drainage holes. Cleaning can be done not only with a vacuum cleaner, but also with wooden sticks, toothpicks or matches.
By following the steps described above, you will fully prepare your windows for the coldest period of the year - winter!
Evgeniy Sedov
When hands grow out the right place, life is more fun :)
Content
Plastic window designs Different companies have similar adjustments. When installing them, the average pressure density values are set. Over time, due to wear or other factors, the sash may sag and begin to catch on the frame or impost. As the temperature drops, cold air from outside can begin to enter the room. In all these cases, it is necessary to adjust the windows, which you can do yourself if you know how to adjust plastic windows for the winter by switching the pressure settings from summer to winter.
What tools are needed to adjust a plastic window?
Plastic window systems have become the most popular product that is installed during the construction or renovation of both a simple apartment and a luxurious multi-story mansion. With all the diversity window fittings, used in their creation, all systems use similar mechanisms. Preparing plastic windows for winter begins with the first cold snap. The main tools you may need to adjust windows are:
- hexagonal L-shaped key 4 mm wide;
- flat screwdriver 4 mm;
- Phillips screwdriver;
- pliers.
How to set windows to winter mode
In order to prepare Euro-windows for the winter period, seasonal adjustment of the pressure of plastic windows is necessary, during which the following actions must be carried out:
- Adjust the opening sash vertically and horizontally - it should not cling to the frame and clamping strips.
- Adjust the clamping force to the frame. The pressure is adjusted using adjustable trunnions or eccentrics, the number of which on euro-windows is 4-5 pcs., on doors - 6-8 pcs.
- If there is traction at maximum pressure to the frame, it is necessary to replace the seal. Then check the traction at the middle position of the trunnions or eccentrics.

The clamping to the frame is based on the engagement of the rounded elements of the sash by the clamping strips when the handle is turned down. These are about round elements those made in the form of an oval are called trunnions, and those made in the form of a round element with a displaced axis of rotation are called eccentrics. The trunnions are rotated using pliers. Installing them vertically creates minimal pressure, which means summer pressure mode, and horizontally creates the strongest possible pressure. By rotating the eccentric with an adjusting hexagon, you can adjust the pressure from weak to stronger and back.

Determine the need for replacement rubber seal You can inspect and check the traction. You can change it in parts - at the same time you save cash. When you go shopping for a sealant, you should take a sample with you and buy a longer piece. It is better to trim off the excess when sticking than to leave a gap. Buy a seal made of high-quality rubber. Will need to buy one for him special glue. Before inserting the seal into the groove, apply glue over the entire area of contact with the seal, glue it, close the euro window while the glue dries.

Window adjustments and adjustments are made in case of large gaps or when it clings to the frame. It is necessary to adjust the opening sash vertically and horizontally in the following cases:
- if it catches on the upper part of the frame, open the sash and use the short side of the L-shaped key to slightly push it out on the upper canopy;
- if due to sagging the sash catches bottom part frames, you need to do the same with the lower canopy;
- if it clings to the vertical part of the frame or impost (the middle vertical part of the frame), you need to use the short side of the L-shaped key to slightly push it on both canopies in the direction opposite to the place of such contact.

How to adjust plastic windows yourself
Windows can be adjusted independently if available. the necessary tool. The only parts that can break and require replacement are the handle and rubber seal. By adjusting the window pressure, the switch is switched to winter mode. In this case, the handle turns with force, the sash is strongly pressed against the frame, and the seal is strongly compressed. In the spring, it will be necessary to loosen the clamp, since opening for ventilation occurs frequently, which can lead to severe wear of the closing mechanism and seal.

To switch to winter mode, you must take the following steps:
- Check for inward or outward draft around the perimeter with a lit match - even a slight breeze will deflect the flame.
- If there is draft, it is necessary to open the sash and adjust the locking pins (eccentrics).
- Trunnions come in 3 types - oval, round with a slot for a screwdriver or a hexagon.
- If the oval trunnions are located vertically and the eccentrics are shifted towards the frame, it is necessary to turn them to the middle position with an appropriate tool to increase the clamping force.
- Then you need to check the traction again; if it remains, switch the trunnions (eccentrics) to winter mode. To do this, you need to rotate the oval trunnions to a horizontal position, and move the eccentrics completely away from the street.
- If after checking the draft remains, you need to replace the seal.
- After replacing the seal, check the traction when adjusting the trunnions or eccentrics in the middle position.

How to tighten hinges on plastic windows
The top hinge is adjusted using an L-shaped hexagon. On the top hinge there is one adjustment for the horizontal displacement of the top bar. The displacement control process is carried out at open window the short side of the hexagon in the adjustment hole, which is located at the end of the sash. The range of displacement of the upper part is from -2 to +3 mm. Use a wrench to turn the screw part turn and check for ease of closing.
The lower hinge is adjusted using the same tool. The difference is that on the lower hinge, in addition to shifting the bottom bar horizontally, there is a screw for shifting the entire sash vertically. Horizontal displacement is carried out in a manner similar to that for the top hinge. Vertical displacement is carried out with the window half-open, for which you need to insert the long side of the hexagon vertically from top to bottom into the canopy hole with the decorative casing removed. Such a change is possible within the range from -2 to +2 mm.

Setting up plastic windows when shrinking a house
Strong displacement of load-bearing building elements as a result of shrinkage of a new building can cause strong care sash from the frame, require reinstallation of the plastic window. If the opening is severely skewed, you will have to straighten it or order a new Euro-window. Internal adjustments The opening and clamping mechanisms can be adjusted for horizontal or vertical displacement within 2-3 mm. For this you will need standard set tools:
- special hex key 4 mm wide;
- screwdriver 4 mm;
- pliers.

How to set the horizontal and vertical axes
To align the sash horizontally or vertically, it is necessary to adjust the plastic window in the awnings. Alignment in the horizontal plane is made by end adjustments on the upper and lower canopy with the window fully open. The hex key is inserted with the short side into the hole. When the key is rotated clockwise, the sash is attracted to the canopy, counterclockwise - to the impost. The maximum adjustment range is -2 to +2 mm.
Adjust the offset in vertical position it is possible on the lower canopy in cases where the sash touches the frame or to change the size of the gaps. To do this you will need a hex wrench. You need to open the cap on the canopy, insert the hex key with the long end down into the top hole. By rotating the bolt clockwise, the sash can be raised, and counterclockwise, it can be lowered. The maximum height adjustment range is -2 to +2 mm.

What to do if the plastic window does not close
A sash adjusted to fit the gaps at the top, bottom and sides may not close in two cases. The first is associated with a broken handle, the second with the incorrect operation of one of the pin-clamp pairs. To check, you need to open the window and, pressing the double opening latch with your left hand, turn the handle down. If it has turned to the extreme position, then there is a closing problem in one of the trunnion-clamp pairs. You can determine which pair is not working one by one by unscrewing the clamping bars with a Phillips screwdriver.
? 
How to adjust the handle on a plastic window
The design, diagrams and photos of the location of fittings, adjusting bolts, moving parts of the Euro-window, troubleshooting methods and prices can be found on the Internet on sites on this topic. Adjusting the handle involves installing it correctly in accordance with the list below. The opening handle has four positions:
- down – closed;
- to the side - open;
- up – ventilation mode;
- in the middle position between the top and side – partial ventilation.

Replacing a faulty one
If your handle is broken, you must:
- use a screwdriver to unscrew the upper and lower fastening screws (or screws) located perpendicular to the plane of the sash;
- insert a new handle in the same position in which the faulty one was removed;
- fasten it with two screws (or screws);
- return the protective plate to its original position.

If the handle on a window or balcony becomes loose, you must:
- slightly pull the top and bottom of the protective plate on the handle and turn it to a horizontal position;
- Using a screwdriver, screw the handle tightly;
- return the protective plate to its original position.

All elements of the canopy and closing the sash are located outside the structure. The main actions when the elements of this mechanism become dirty are cleaning and lubrication. If the window has not been opened for a long time, dried dirt or rust can be removed using a can of universal penetrating lubricant VD-40. After cleaning and washing, you need to lubricate the fittings and adjust them.

The eccentrics are round elements that engage the clamping bars. The axis of their fastening is shifted relative to the center of the circle, so when rotating, the distance from the axis to the point of contact with the pressure bar changes. As this distance increases, the pressure of the sash against the frame increases. The eccentrics are rotated using a hex key or screwdriver. The amount of pressure change varies from 2 to 5 mm, depending on the design of the eccentric. It is necessary to adjust the clamping force twice a year when switching from summer to winter mode and back.

What to do if the window handle is jammed
Among possible breakdowns the locking mechanism may jam the handle. There is no need to apply great force to the handle to open it - the fittings should be taken care of to extend their service life. Jamming is possible in three situations: the window is open for ventilation, wide open or closed. If the handle jams in the first two cases, a distortion during opening or a special lock may be triggered. If the sash hangs on one bottom hinge, the following operations must be performed:
- turn the handle up;
- pressing the top hinge to the frame, set the handle to the right;
- close the window and turn the handle down;
- Pressing the sash against the frame, carefully turn the handle up and open for ventilation.
The rotation lock can be activated as a result of a sharp turn of the handle at a large angle when opening. The lock is released by pressing the unlocking button or turning the corresponding lever. Its location can be found on the website of the company that developed your hardware. If you have difficulty opening, try pressing the sash firmly against the frame and turning the handle.
Stiffness in turning or jamming of the handle when closed window possible with shrinkage and strong (more than 2-3 mm) subsidence of a window or doorway. This is extremely rare and difficult case, which can lead to frame bevel or mechanism failure. Without specialists construction company or installers will not be able to solve this problem with simple adjustments. Jamming is possible due to lack of lubrication of the bolt mechanism. To prevent this and increase service life Maintenance It is advisable to do it once or twice a year.

How much does it cost to adjust Euro windows in Moscow?
Repair and adjustment of plastic windows is carried out by many companies in Moscow, St. Petersburg, and other cities of Russia, which know how to adjust PVC windows and can supply new spare parts. Prices for such services vary by region of the country; they depend on the brand of the hardware manufacturer. A visit by a specialist for a technical inspection and drawing up an estimate in Moscow will cost from 500 to 1000 rubles. Minimum cost ordering in Moscow – from 2000 to 3000 rubles. The cost of main work is indicated in the table:
|
Name |
Unit |
Cost, rubles |
|---|---|---|
|
Setting up fittings (without removing) |
||
|
Door adjustment (without removal) |
||
|
Adjustment, repair, partial overhaul of the mechanism (without replacing fittings) |
||
|
Adjustment, repair, partial overhaul of door hardware (without replacement) |
||
|
Reinstalling the glass unit during adjustment |
||
|
Reinstallation of the double-glazed door (the price of the double-glazed window is not included) |
||
|
Cleaning and lubrication of accessories |
||
|
Replacing the seal (the price of the seal is not included) |
||
|
Replacement complete set rotary fittings |
||
|
Handle white/colored Found an error in the text? Select it, press Ctrl + Enter and we will fix everything! |
The article provides detailed instructions how to prepare plastic windows for winter.
Finding a place to blow
First way. Run your hand along the entire perimeter of the window, in all areas where it can blow. The latter primarily include the joints of the frame with the slopes and fittings. Check the slopes and window sill carefully.
Second way. Using a lighter or candle. Allows you to detect even the slightest draft.
Remember
At self-insulation plastic windows, you automatically lose the warranty on them.
It is also inevitable that ventilation will deteriorate; preparing windows for winter essentially means sealing them.
How to insulate internal slopes
- We identify voids between the slopes and the wall. To do this, tap the surface. Where the knock is loudest, there is most likely empty space.
- We remove the lining. There is insulation underneath. Most often, polyurethane foam plays its role.
- If minor problems are found, then we simply add it to the voids. Remember to shake the can well before foaming.
- If the situation is more serious, the foam will have to be replaced completely. To do this, you need to remove all the old foam and thoroughly clean window hole, and then foam everything again.
- When the foam dries and rises (12-20 hours), you need to cut off the excess. Instead of foam, you can use other insulation, for example, plasterboard, mineral wool, foam plastic, sandwich panels.
- Check the cladding for damage and whether there are cracks on it. It may also have to be changed. As facing material can be used plastic panels or PVC.
We insulate external slopes
- External slopes need to be plastered. To do this, after removing excess foam, cut off another layer of about half a centimeter.
- Prepare the putty according to the instructions indicated on the package and apply it to the slope.
- Run the staple along the slope. If you see depressions in the layer, wait until it dries and apply another layer.
- Remove roughness from the surface. To do this, you can rub it with a mesh.
How to replace seals on plastic windows
You will need the seal itself, special glue and rubber scissors.
- Pull out the seal that has become unusable. This can be easily done by prying up the bead holding the glass unit.
- Thoroughly clean the original surface and degrease it. The latter can be done, for example, with alcohol or solvent.
- Coat the frame around the perimeter with glue and carefully insert the sealing tape. It is not recommended to pull or squeeze the tape; it should be in a free state.
- All that remains is to trim off the excess and seal the joint.
To better understand how to replace seals on plastic windows, watch the video.
How to adjust the pressure of plastic windows
The pressure is adjusted by rotating the eccentrics. They are located on the fittings, behind the clamping parts of the handle.
If the pin is round
You will need a 4mm hex wrench.
On the very surface of the round pin there is usually a special indicator, a mark. If it is on the street side, then the pressure is weak and needs to be strengthened.
Rotating the trunnion clockwise leads to a tighter clamping of the sash, counterclockwise - on the contrary, it weakens it.
If the trunnion is oval
You will need pliers.
A pin in a vertical position is evidence of a weakened clamp; the closer to the horizontal, the stronger it is.
How to adjust the sash relative to the frame
To adjust the height of the sash, use the lower hinged hinge.
Rotating the hex counterclockwise lowers the sash, clockwise – raises it.
To move the sash to the right/left you need to turn the bolt located at the bottom of the canopy.
Adjustment of the upper part of the window, due to location adjusting bolt, do only with an open window.
Now you know how to prepare plastic windows for winter, you can also stick a film, just keep in mind that it will be extremely difficult to remove it later.
Energy saving film sticker
Heat saving is achieved using a special metal coating from which infrared rays are reflected.
You will need a hairdryer Double-sided tape, sharp scissors.
- Thoroughly clean the window sill, frame and glass. Degrease them.
- Cover the frame with double-sided tape
- Cut the film so that there is a margin of 2 cm on each side.
- Gradually removing protective layer, glue the film.
- Blow hot air from a hairdryer onto the film. If necessary, carefully pierce the air bubbles with a knife.