Image of the ornament. Ornaments for drawing. Types of ornament. Simple and beautiful patterns for drawing. The benefits of drawing using zentangle and doodling techniques
Read also
The sense of beauty and aesthetic needs are inherent in us by nature. Even in ancient times, as soon as a person consciously distinguished himself from the surrounding world, he sought to decorate his life by applying charcoal drawings to the walls of caves, and various ornaments to tools, clothing, and dishes. Primitive, imperfect, made by a rough, undeveloped hand, nevertheless, these obvious traces of our ancestors’ craving for beauty are very, very significant. After all, they are the origins of those magnificent embroideries, whimsical architectural stucco moldings, elegant and exquisite lace products that surround us now, causing sincere delight and surprise.
Types of ornaments
The subject of our conversation today is various patterns for drawing, which can serve as decoration for dishes, paper products, photo frames, the basis for embroidery, etc. Ornament refers to artistic decorations applied in one way or another to objects. They must be in harmony with the surface on which they are applied, emphasizing and enhancing the aesthetic component of the product. That is why patterns for drawing are closely related to the shape of the object, its purpose, size and style in which the thing is made. Traditionally, artists divide ornamental art into such types as geometric, plant, animalistic, and human symbolism.

Description
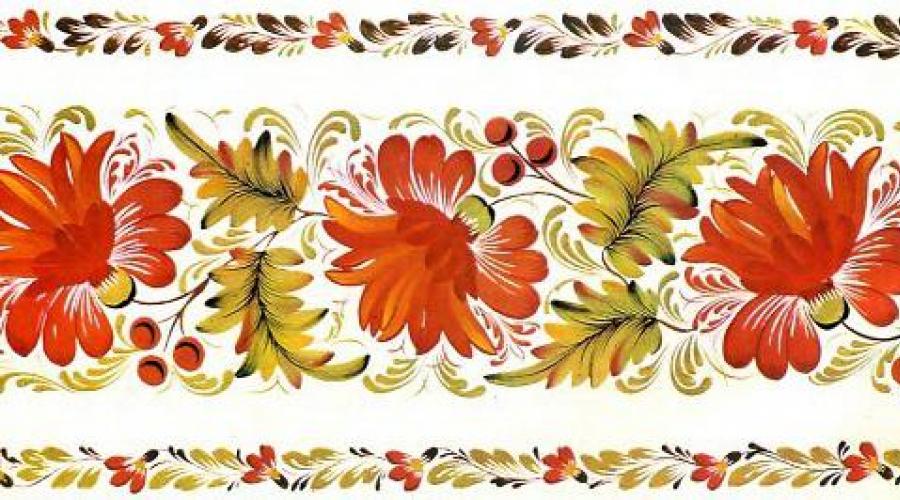
The first, as a rule, includes various kinds of geometric shapes. Such drawing patterns contain parallel and intersecting lines, crosses, rhombuses and squares, circles and trapezoids in different variations and alternations. Plants consist of interlacing branches, stems and leaves, blossoming flowers and buds, fruits and berries, trees. Ornaments for drawing with animal motifs include schematic images of bears, deer, fallow deer, hares, as well as birds: roosters, pigeons, turtle doves, peacocks. Symbolic drawings of people are divided into male and female and often hint at their occupation or profession. And, naturally, almost all patterns for drawing differ according to nationality. Each nation and even small nationalities have their own - original, associated with a unique culture and philosophical and aesthetic views.

Russian antiquity
In passing, we note that not every design is or is considered an ornament. One of the main requirements for it is the unity of compositional elements and the presence of repeating alternations in the scheme. The so-called movement of the drawing is also important. For example, Russian ornaments are most often applied in a circle, clockwise, or, as they used to say in the old days, “in the direction of the sun.” It is not for nothing that connoisseurs and connoisseurs of art consider them one of the most expressive manifestations of world fine culture. Russian ornaments were formed under the influence of the cultures of the West and East, the Caucasus. Borrowings were adapted and creatively reworked by artists in accordance with the Russian “soil”, national traditions dating back to paganism. Such drawings often served as amulets, as if they were magical protection from bad influences or evil forces. Or they reflected the people’s understanding of the foundations of the universe. The decorative pattern was applied either entirely to the product, covering its entire area, or to some part, emphasizing the expressiveness of the thing.

Ancient geometry
Traditional among the ancient Slavs, descendants of today's Russians, Ukrainians and Belarusians, was the same geometric pattern, sometimes reminiscent of complex pictograms. Especially common was a stylized image of the sun, which the pagan Slavs worshiped. Often there was a swastika - full or partial, which was also considered a symbol of the sun, the bracelet. Later, geometry gives way to decorative weaving in designs - it was also called magical or mimetic. One of the main decorative elements is the rosette. It is drawn with a different number of petals: four, six, eight, ten. And it personifies the same sun, which for the Slavs was the center of the universe. In later times, from about the 12th century, Old Russian geometric patterns were combined with floral ones. This is especially clearly seen in the drawings that decorated handwritten books. This is how arabesques appeared in the fine arts of the ancient Slavs - under the influence of the cultures of the peoples of Asia and the East.

Drawing and myth
Some types of ornaments in Russian decorative art are of a mythological nature. First of all, these are plant and zoomorphic. This may include an image of the sacred tree of life (most often an oak tree), on the branches of which sit birds, personifying the forces of nature. Sometimes a snake-dragon was drawn next to them. According to ancient folk beliefs, she embodied lightning and patronized homes. In addition to the cult of the sun, the ancient Eastern Slavs widely practiced the cult of fire. This is where the roots of a tradition that has survived centuries are located. We are talking about two-headed birds, which later became part of Russian state symbols. Few people know about this, but the types of ornaments with this element go back to the pagan worship of the fire element and the spirits “responsible” for it. And another bird was very often painted in decorative patterns. This is a duck, the personification of the World Duck, the ancestor of animals and birds. In ancient handwritten books and chronicles, Russian ornaments often feature interlacing grape vines, curls, fine detailing of the flower calyx, and veins on the leaves. Often animals and plants were depicted in a mixed form, when the snake’s tail smoothly merged into the bends of the branches. Typically, a similar design decorated capital letters in chronicles.
Artistic art of the East
What is a picturesque oriental ornament? Naturally, there is no uniformity in it; each region has its own traditions and differences. For example, arabesques. This type of pattern was widespread in medieval eastern states and is translated as “Arabic”. It consisted of a complex interweaving of geometric and floral motifs, stylized flowers, leaves and climbing stems. Often, elegant script was wedged into it - inscriptions made in Arabic script. The national ornament of the Persians usually included images of griffins and other fantastic creatures. There were also flowers and leaves and fruits. And also fish, stylized in the shape of diamonds. The ornaments of the peoples of China and Japan consisted mainly of large painted flowers with intricately curved stems and leaves.

From the shores of Hellas
Greek ornament is original and interesting in its own way. It came to Rus' from Byzantium, with the spread of Christianity and the establishment of close cultural and political ties. The name of the ornament is meander, and it is a continuous broken line consisting of right angles. Like other ancient types of decor, the meander has an ambiguous symbolic interpretation. It represents human destiny, the path of life, and straightness symbolizes a virtuous character. Upon closer examination, you can see a swastika in some variants of the ornament. According to the Greeks, it meant mystical grace and happiness. In addition, according to the philosophical views of the ancient Hellenes, a continuous meander line was equal to the sign of infinity, the change of times, generations, and human races. The old was shrinking and dying, the young was unwinding and gaining strength.

Conclusion
In addition to the aesthetic, drawing an ornament also has purely practical benefits. This process develops the eye and memory, abstract thinking, observation, the ability to isolate the main thing and see small details. Forms accuracy of movements, understanding of perspective, the role of compositional elements. And cultivates a subtle artistic taste. Of course, we must not forget about the cognitive function. By studying the principles of constructing national ornaments, the graphic designer learns new things about the culture, worldview and way of life of the people, their beliefs and superstitions.
Every pattern is a combination of colors, shadows and lines, regardless of what it is intended for. If you look closely at embroidery designs, ornaments for wooden objects, or pieces of mugs, you can be convinced that they have common details. Sometimes you want to learn how to draw patterns on your own to decorate household items or just for fun.
How to draw patterns on paper?
In order to draw patterns on paper, you will need: actually, a sheet of paper and a pencil, and to draw a pattern using a stencil, you may also need cardboard, a sponge, a shoe knife and paints.
So, first you need to decide for what purposes the drawing will subsequently be used. This will directly determine what materials will be needed to create it, what elements will need to be drawn. If the pattern becomes part of a design on paper or an ornament for embroidery, then its location on the sheet should first be determined. It can be either part of the frame or located in any part of the sheet.
By the way, its color scheme will directly depend on the purpose of the ornament. The outline of the embroidery pattern should be monochromatic, but at the same time you will need to clearly represent all color combinations. The design for subsequent wood carving or lace pins should look self-sufficient in a monochromatic color scheme. It will also be necessary to think about which elements will be selected as additional ones, because they must belong to the same style as the main pattern. You shouldn’t forget about those nuances that will be constantly repeated.
Now it’s time to think through the main part of the pattern, namely its main elements. For floral ornaments, they should be leaves, flowers or berries. You will also need to choose their location. You may have to connect the elements together with other secondary elements using stems or other lines.
For an ornament in a geometric style, you should choose triangles, circles, and squares as the main elements. You need to try placing them on a small sheet of paper in different areas and in different sequences, and then choose the one you like best. You can connect elements to each other using straight, dotted, and broken lines. You can also first try to draw the lines one by one in combination with the main element, and then choose the most appropriate one.
Now on a large sheet of paper you should arrange the elements of the ornament in accordance with the pre-selected pattern and connect them. If, at the end of the process, you have a feeling of incompleteness when looking at the drawing, then supplement it with other details. But before that, you should mark in the drawing those places where they will look most advantageous.
If the pattern subsequently becomes part of an easel drawing, then it should be made in the same style in which the main drawing will be made. A pattern that will be used as a sketch for embroidery or for other purposes in needlework should be outlined with a felt-tip pen, and then transferred to fabric or a wooden surface.
Learning to draw with a pencil
Patterns are present in all branches of art: from folk art of various nations of the world to modern abstract works. In general, at the first glance at the patterns, it begins to mistakenly seem that they are very complex in execution, and it is almost impossible to draw them yourself. But if you take a pencil, a sheet of paper and stock up on patience and diligence, you can very easily be convinced of the opposite!
- Do you think how to draw patterns beautifully? Take simple diagrams as a basis. Even the most complex ornament begins with them. First of all, you should select the basic elements; their roles can be: dots, circles, droplets, waves, loops, rectangles, crosses. Any of these shapes can be chosen as the starting point for drawing the pattern. Using dots you can draw a simple pattern.

- You just need to follow all the stages of drawing correctly. So, taking a pencil and a sheet of paper, you can begin the creative process. If you cannot draw straight lines yourself, then you will need graphic paper, or you can use a regular stationery ruler. You should take a piece of paper and draw dots on it in a row.
- Now the points should be outlined with shapes in the form of droplets.
- Then, on top of each drawn droplet, draw one more.
- After this, you should draw a small circle above the resulting picture, above each of which, in turn, you need to draw a curl turned to the left, and then the same curl, only to the right.
- In general, if you look at it, drawing patterns is drawing simple shapes in a row, one after another. By the way, each element can be painted in a different color, or you can decorate the picture after finishing the work.
- Now you can start drawing a more complex pattern.

- So, you should draw several points in a row, each of which then needs to be circled in a small circle.
- Now each circle should also be circled in another circle.
- Then you will need to draw petals to each resulting circle, and a small circle below.
- At the bottom along the edges of each resulting flower you need to draw a couple of droplets, each of which will be turned in different directions.
- Afterwards, under each element you should draw a spiral, and between them - a small circle. The latter should be circled in the same circle, only larger in size.
- Afterwards, under each flower you should draw 3 petals. That's it - another pattern is ready!
- Now you can try to draw an ornament using another technology. Instead of dots, waves in 2 rows should be drawn as the basis of the ornament. Then draw loops from the top of each wave.
- Between each of the loops you should draw a circle, and at the bottom of the picture you should draw a straight line.

- Now, from the drawn horizontal straight line, vertical stripes should be drawn to the upper wavy line.
- Then at the bottom you should draw another straight horizontal line, and under it - a row of circles. That's it - now your creation is ready!
Ornament is a pattern built on the rhythmic alternation of depicted motifs.
The term “ornament” is associated with the word “decoration” (from Lat. ornemantum- decoration). Ornament is part of the material culture of society, one of the oldest types of human visual activity, which in the distant past carried symbolic and magical meaning and symbolism. Each era, style, and national culture developed its own system, so ornament is a sign that works belong to a certain time, people, or country. The purpose of the ornament was to decorate objects, fabrics, and homes. At the same time, it carried both magical and informational meaning. Thus, the ornament applied to the neck of the vessel “protected” it from the penetration of evil spirits. The same applied to clothes, home, interior items, etc. Ornament reached a special development where conventional forms of reflecting reality predominated: in the Ancient East, in pre-Columbian America, in Asian cultures of antiquity and the Middle Ages, in the European Middle Ages. Since ancient times, in folk art, principles and forms of ornament have evolved, which largely determine national artistic traditions.
Depending on the nature of the motifs, the following types of ornaments are distinguished:
- geometric- consists of points, lines and geometric shapes.
- vegetable- made up of stylized leaves, flowers, fruits, branches, etc.
- zoomorphic- includes stylized images of real or fantasy animals
- anthropomorphic- uses male and female stylized figures or individual parts of the human body as motifs
- combined.
All Oornaments represent an alternation of repeating parts. The minimum area of a repeating pattern is called rapport(from French rapport - return). Repeating repeat horizontally and vertically forms a repeat grid.
Motive- this is part of the ornament, its main element. The motif can be simple, consisting of one element, or complex, consisting of many elements plastically connected into a single whole. The repeat of an ornament includes a motif (or group of motifs) and the distance to the adjacent motif (group).
According to the nature of the alternation of rapports, all ornamental compositions are divided as follows:
1. Ribbon ornament- rapport is repeated many times, developing in one direction. In this case, the motifs in a ribbon ornament can be located in a straight line; such an ornament is called a “straight stripe”, or a striped ornament. In some cases, the rapport is repeated along a curved contour, called a “border”. In architecture, decorative arts and costume, most often the ribbon ornament has a horizontal direction. But it can also be located vertically or along an inclined line.
When constructing, the composition is based on various types of symmetry: mirror symmetry, vertical, horizontal or diagonal. And various principles of rhythmic construction of elements - repetition, alternation, including color and tone.

2. Centric ornament- based on central axial symmetry, when rapport rotates around a central axis. The motifs in such an ornament are placed from the central point along the rays, filling the entire surface limited by the circle, and when rotated they are completely aligned. The most typical example of a centric ornament is a rosette, which represents the motif of a blossoming flower. This is a very ancient type of ornamental construction, known back in Ancient Egypt and gaining the greatest popularity in Gothic art.

3. Mesh pattern- repeating rapport fills the entire surface to be decorated, developing in two directions - horizontally and vertically. The cell of such a repeat grid can have a variety of shapes - in the form of a square, rectangle, regular triangle (equilateral), rhombus, parallelogram, regular pentagon and hexagon, etc. This type of ornament is often used in architecture when decorating floors, walls, ceilings, and also in a suit when designing textiles - almost all fabric patterns are mesh patterns.

Description of the stages of work.
1. Let's consider one of the options for constructing a square geometric pattern. Let's draw a square 4 by 4 cells. At first it will be built as a centric ornament. Those. the report will rotate from the center of the square. And then we will make it tape and mesh.
2. Draw auxiliary diagonal lines and rhombuses.

3. Connect the corners of the large square with the corners of the small rhombus. We get an interesting pattern. Please note that the report in this case is one-eighth of a square. This part rotates 45 degrees around the center.
4. We choose which form - more complex or simple - we like. Erase the extra construction lines.
5. From one blank you can make many different ornaments in shape and color.
6. Choose one of the options.
7. Now this square will be the report of our ribbon ornament. We can rotate it 90 degrees. We decorate the ornament with additional elements.
8. We make a mesh ornament from our ornamental square. We can use an additional element and alternate colors a little.


Whimsical Celtic patterns inspire creative people to create a variety of products, including exquisite women's jewelry, wedding rings, clothing, home decor, stained glass, wrought iron fences and gates. Celtic motifs open up endless possibilities for woodcarvers to decorate their products and make a variety of souvenirs.
Ornate patterns that have come down to us from time immemorial seem mysterious, fabulous and magical. The ancient Celts endowed each design with a special sacred meaning and considered themselves not to have the right to change their design, since they believed that the patterns were bestowed by the gods. However, higher powers did not forbid the Celts from intertwining and combining ornaments with each other, which led to the appearance of intricate intricacies of lines and intricate labyrinths.
At first glance, these patterns seem extremely complex, however, once you understand the principles of their creation, you can draw any pattern. We offer several ways to draw simple Celtic patterns for beginners.
Method 1
1. Draw a shape using two rounded rectangles.
2. Draw another similar shape, placing it horizontally and orienting it in the center of the first shape.

3. Erase several lines at the intersections as shown in the figure.

4. Draw two circles.

5. Erase several segments on the circles at the interlacing points.

6. Color the resulting ornament.

7. If necessary, add a background to highlight the design.

Method 2
1. Draw a square.

2. Add to each side of the square pieces equal in length to the side of the square.

3. Draw lines perpendicular to these segments equal to twice the length of the side of the square.

4. Add four rectangles as shown in the picture.

5. Trace these rectangles to form the design.


6. The final appearance of the ornament.

Frame in the form of a Celtic ornament
1. Draw the reference lines of the future ornament.


2. Circle the resulting drawing with two lines on the outside and inside.


3. Erase the center reference line and shape the intersections to create weaves.

4. The Celtic ornament is ready.

Drawing a Celtic Clover Leaf Knot
1. Draw two perpendicular lines of equal length - vertical and horizontal. Step back from the center of the intersection by a third of the length of each segment and place points.

2. Starting from these points, draw four heart shapes. From the bottom point of each heart, draw a line towards the bottom point of the other heart as shown in the figure.

3. Draw a parallel line along half of each heart.

4. Close the gaps created between the drawn lines, forming a weave.

5. Draw the other halves of the hearts.

6. In the center of each heart, draw a drop shape and complete it with a line drawn to the inner border of the heart towards the bottom point of the next drop shape.

7. Circle each drop with a parallel line.

8. Connect the resulting figures to each other.

9. In order to get a beautiful weave, some lines at the intersections must be erased.


10. Now the Celtic knot can be colored and, if desired, supplemented with other elements in the form of triangles, droplets, stars, etc.

11. Ready-made ornament.

Ornament of ovals and hearts
1. Draw four intersecting lines of equal length as shown in the figure. Place a dot in the center of each of the eight segments.

2. Starting from a point, draw eight oval shapes and complete them with segments drawn towards the starting point of the next oval, leaving gaps to form future intersections.

3. Trace each oval with a parallel line.

4. Close the gaps to form a weave.

5. Draw eight small hearts complete with connecting lines going from the bottom point of each heart to the bottom point of the next heart.

6. Trace the resulting figures with parallel lines.

7. The result should be the following ornament.

8. All that remains is to erase the unnecessary lines at the intersection of the ornament of hearts with the ornament of ovals and, if necessary, color the drawing.
Every pattern is a combination of colors, shadows and lines, regardless of what it is intended for. If you look closely at embroidery patterns, ornaments for wooden objects, or pieces of mugs, you can see that they have common details. Sometimes you want to learn how to draw patterns on your own to decorate household items or just for fun.
How to draw patterns on paper?
In order to draw patterns on paper, you will need: actually, a sheet of paper and a pencil, and to draw a pattern using a stencil, you may also need cardboard, a sponge, a shoe knife and paints.
So, first you need to decide for what purposes the drawing will subsequently be used. This will directly determine what materials will be needed to create it, what elements will need to be drawn. If the pattern becomes part of a design on paper or an ornament for embroidery, then its location on the sheet should first be determined. It can be either part of the frame or located in any part of the sheet.
By the way, its color scheme will directly depend on the purpose of the ornament. The outline of the embroidery pattern should be monochromatic, but at the same time you will need to clearly represent all color combinations. The design for subsequent wood carving or lace pins should look self-sufficient in a monochromatic color scheme. It will also be necessary to think about which elements will be selected as additional ones, because they must belong to the same style as the main pattern. You shouldn’t forget about those nuances that will be constantly repeated.
Now it’s time to think through the main part of the pattern, namely its main elements. For floral ornaments, they should be leaves, flowers or berries. You will also need to choose their location. You may have to connect the elements together with other secondary elements using stems or other lines.
For an ornament in a geometric style, you should choose triangles, circles, and squares as the main elements. You need to try placing them on a small sheet of paper in different areas and in different sequences, and then choose the one you like best. You can connect elements to each other using straight, dotted, and broken lines. You can also first try to draw the lines one by one in combination with the main element, and then choose the most appropriate one.
Now on a large sheet of paper you should arrange the elements of the ornament in accordance with the pre-selected pattern and connect them. If, at the end of the process, you have a feeling of incompleteness when looking at the drawing, then supplement it with other details. But before that, you should mark in the drawing those places where they will look most advantageous.
If the pattern subsequently becomes part of an easel drawing, then it should be made in the same style in which the main drawing will be made. A pattern that will be used as a sketch for embroidery or for other purposes in needlework should be outlined with a felt-tip pen, and then transferred to fabric or a wooden surface.
How to draw patterns with a pencil: features
Patterns are present in all branches of art: from folk art of various peoples of the world to modern abstract works. In general, at the first glance at the patterns, it begins to mistakenly seem that they are very complex in execution, and it is almost impossible to draw them yourself. But if you take a pencil, a sheet of paper and stock up on patience and diligence, you can very easily be convinced of the opposite!
- Do you think how to draw patterns beautifully? Take simple diagrams as a basis. Even the most complex ornament begins with them. First of all, you should select the basic elements; their roles can be: dots, circles, droplets, waves, loops, rectangles, crosses. Any of these shapes can be chosen as the starting point for drawing the pattern. Using dots you can draw a simple pattern.

- You just need to follow all the stages of drawing correctly. So, taking a pencil and a sheet of paper, you can begin the creative process. If you cannot draw straight lines yourself, then you will need graphic paper, or you can use a regular stationery ruler. You should take a piece of paper and draw dots on it in a row.
- Now the points should be outlined with shapes in the form of droplets.
- Then, on top of each drawn droplet, draw one more.
- After this, you should draw a small circle above the resulting picture, above each of which, in turn, you need to draw a curl turned to the left, and then the same curl, only to the right.
- In general, if you look at it, drawing patterns is drawing simple shapes in a row, one after another. By the way, each element can be painted in a different color, or you can decorate the picture after finishing the work.
- Now you can start drawing a more complex pattern.

- So, you should draw several points in a row, each of which then needs to be circled in a small circle.
- Now each circle should also be circled in another circle.
- Then you will need to draw petals to each resulting circle, and a small circle below.
- At the bottom along the edges of each resulting flower you need to draw a couple of droplets, each of which will be turned in different directions.
- Afterwards, under each element you should draw a spiral, and between them - a small circle. The latter should be circled in the same circle, only larger in size.
- Afterwards, under each flower you should draw 3 petals. That's it - another pattern is ready!
- Now you can try to draw an ornament using another technology. Instead of dots, waves in 2 rows should be drawn as the basis of the ornament. Then draw loops from the top of each wave.
- Between each of the loops you should draw a circle, and at the bottom of the picture you should draw a straight line.

- Now, from the drawn horizontal straight line, vertical stripes should be drawn to the upper wavy line.
- Then at the bottom you should draw another straight horizontal line, and under it - a row of circles. That's it - now your creation is ready!
How to draw patterns: video
You just need to remember that any pattern is nothing more than a repetition of forms. To make a drawing more complex, you just need to continue it - element by element. For inspiration, you can look through various books that present ornaments of different nationalities and cultures. Try to make an original pattern by combining several elements of different styles.