Making a homemade sharpening machine for drills. Device for self-sharpening drills Homemade machine for sharpening drills with your own hands
Read also
If you constantly deal with sharpening hard workpieces, the surface of the drill will very quickly become unusable. It will become dull, become very hot and eventually lose its former strength. All this is a consequence of “letting go” of the metal. That is why such a tool needs periodic sharpening using special devices.
How to make homemade devices for drill sharpening, what templates exist for this and what you need to prepare for work, you will learn from our article.
Features of sharpening drills
 Drills are inexpensive devices, especially if we talk about those that are widely used for household needs. However, if possible, then after they become dull, it is better to sharpen the tools than to buy new ones.
There are factory-made devices designed for sharpening, but buying them will cost you a lot, and this will not make up for the savings from not purchasing new tools. That is why many craftsmen collect machines for sharpening with your own hands.
 It is worth noting that dulling applies to metal drills, since wood tools are practically not susceptible to this, with the exception of cases of use at high speeds with resinous workpieces. Also cannot be sharpened pobedit tips for stone or concrete.
But many people sharpen metal drills using all the additional devices with their own hands, but the accuracy of such work is far from always ideal, so it is advisable to use at least a minimum of mechanics.
How to properly make a tool for sharpening drills with your own hands: training video
 To make such a device yourself, you will need a control tool (template). No matter how the drill is sharpened, the accuracy is checked with a special template.
Simple ferrous metal drills have an edge angle of 115 to 120 degrees. If the metal is different, then the sharpening angles will also be different:

 You can prepare immediately several templates depending on the listed values and, in accordance with them, sharpen with your own hands. The same drill can be used for different types workpieces, you just need to change the angles of the top of the workplace.
A simple but very convenient pulling device is bushings different sizes , which are attached to the base. You can make them yourself, based on special drawings. Remember that the tool in the sleeve should not dangle, and the quality of drilling may deteriorate, even if the error is only one degree.
 You can make a large clip based on aluminum or copper tubes depending on the standard parameters of the drills, or take a block from soft material and make a lot of holes in it. It is very important to place a convenient support in the sharpener, thanks to which you can move the sharpening device at the desired angle and hold the stop.
The listed sharpening devices have been manufactured for many decades in a row and are still in demand. For assembly sharpening machine With your own hands, you can take an oak block instead of a corner.
The simplest sharpening machine can be assembled by simply installing a workbench or table opposite the side of the emery. Even such a simple device provides high quality and accuracy of work.
Features of sharpening on a simple device
 You can find it on the Internet ready-made drawings devices for sharpening drills, or sketch them yourself, but for this you need to understand the principle of working with a drill.
During work Absolutely forbidden allow the drill to move around its axis. If it turns at least a millimeter, it will be damaged, and you will have to grind off a small distance to re-process it.
After finishing the work, the drill should cool down, also take measurements using templates. The edges must be perfectly symmetrical down to tenths of a millimeter. This is especially important if the drill has a minimum diameter.
Sharpening may be accompanied by the following errors:

 How to use improvised means with your own hands assemble a twist drill sharpening machine for metal?
For the basis of the device, you can take any sharpening machine that is capable of working properly, there is no axis runout, and it maintains speed under load.
The task looks like this:
- the tool rest must stand strictly horizontally on the same axis with the rotation of the emery;
- the design must be safe, reliable and durable;
- it should be possible to sharpen both manually and semi-automatically;
- the shape of the tool rest should facilitate the free lowering of the drill shank to the desired angle.
 No specific parts are required to make this device; almost everyone has everything they need home handyman. Workpieces are processed Bulgarian, welding or sharpener.
For semi-automatic mode, a swinging stop is assumed, so you need to make a loop connection. Choose exactly for no backlash bolt, bracket and tube holes.
The platform must move By vertical axis so that you can change the sharpening angle of the drill. This axis can be fixed, and the tool rest should swing, while resting on the horizontal axis, which, when sharpening, provides the necessary articulation.
 Support plate made of metal 4 mm thick, and the main parts of the structure should have a thickness of 3 mm, respectively. This ensures its high strength. The tool rest is rigidly connected to the emery body. Attach it to protective casing This is not possible, so screw the bracket using the metal “cheek”.
Then we screw the guide plate itself for drills with a thickness of 5 mm to the support plate. In it, to fix the drill during processing, sawing triangular groove.
The design has a rotation angle of 90 degrees, which allows for point different methods . Starting from the Leontiev method and ending with pressing at a certain angle and creating acute angle edges due to the curvature of the sandpaper.
 During processing, the drill will not only stand firmly in the groove, it can also be fed along the groove to the abrasive, and the sharpening angle will not deviate. Due to the partial excess of the plane of the support plate above the axis of movement of the disk, it is possible to achieve the desired shape of sharpening the back of the edge.
Before performing work, the drill should press against the plate and align the cutting edge parallel to it. The adjustment is now complete and you can bring the tool to the sandpaper. Sharpening must be done slowly and carefully, carefully monitoring the angle.
Thanks to this homemade tool, it is possible to achieve high precision sharpening and practically no template is needed. True, it will take time to install the machine and adjust the angle, but then you quickly and easily sharpen drills in the right quantity.
But if you need to sharpen a drill equipped with a carbide attachment, you can attach a swinging plate to a fixed angle. To do this, place several washers under the axle nut.
Using an emery wheel in a homemade sharpening tool
 For universal sharpening work, white wheels based on electrocorundum are mainly used. They are used for sharpening shovels, axes, knives and metal workpieces.
For the purpose of processing carbide drills or high-speed metals, you need to take abrasive green wheels based on silicon carbide marked 64C. But for household needs, a wheel grit of 25N is sufficient.
 Sharpening drills requires a finer fraction in the area from 8H to 16H. Remember that silicon carbide-based abrasives get very hot during operation, so the drill cannot be kept in contact with such abrasive for a long time. Let the metal cool down after 2-3 approaches and cool it in soda water.
Edge quality depends on direction abrasive rotation. Its working surface must run over the cut (go from top to bottom).
Peripheral emery surface when processing it must be smooth. It can be adjusted with a CBN-based nozzle. If the disk has a small diameter, it is permissible to use pliers in which the CBN cutter will be held.
So, we looked at how you can assemble and use devices at home of varying complexity for sharpening drills and more. Choose suitable option you can depending on your household needs.


The quality and accuracy of drilling depends on the sharpness of the working tool. In addition, unlike a table knife, the drill must be sharpened correctly. Experienced mechanics can straighten the cutting edge on a regular sharpening machine, simply holding the drill in your hands (at least according to them). But this method requires skill and many years of experience. Even if you have steady hand, and an excellent eye - without understanding the process, you will simply ruin the instrument.
A few basic rules for sharpening (using the example of twist drills for metal):
For a better perception of the material, let’s remember the structure of the drill.

- Do not press the tip against the sandpaper for more than 2-3 seconds at a time. The metal heats up and the so-called “tempering” occurs, that is, deprivation of hardening. Accordingly, the necessary hardness of the metal is lost. The first sign is the presence of temperature discoloration on the edge.
- For drill diameter up to 4 mm: each time the sandpaper plane touches, the drill is held in one position: rotation around its axis is not allowed. For larger diameters, the sharpening geometry is slightly different.
- On twist drills, only the back surface of the cutting part is sharpened.
- The cutting edge should be directed towards the rotation of the sharpener (for mechanical sharpening).
- The main angle (2φ in the illustration) depends on the type of material being processed.

Which drills should I sharpen and how often?
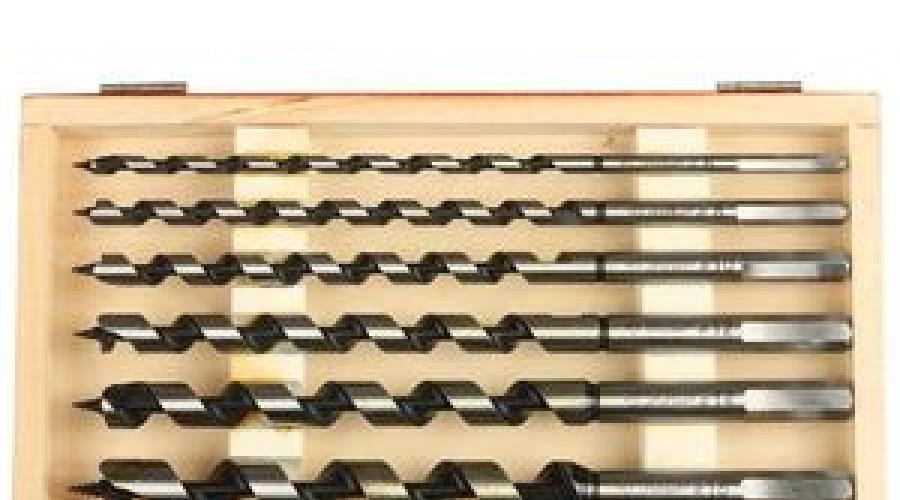
Feather and other special wood drills cannot be repaired at home, and they do not become dull so quickly. Pobedite tips for concrete cannot be sharpened in principle. The most popular tool remains - twist drills for metal. Of course, they are also used for processing wood (plastic, rubber and even stone), but this is not relevant to the topic.

Twist drill. The cutting edge has small size, therefore, during operation, it quickly heats up due to friction (there is no dissipation area). The main reason for dullness is overheating. At correct use wear does not occur as intensely. Characteristic signs blunt drill:
- A creaking sound is heard during operation.
- Instead of curled shavings, sawdust comes out of the hole.
- Instant heating of the tool without moving deeper.
Important: Do not use a dull drill; wear from overheating will only progress.
So, it's time to sharpen the tool. You don't want to ruin the drill and want to mechanize the process.
Mini sharpening machines are at your service:
All devices are divided into two types: attachments or stops for universal tool, And independent devices narrow specialization. Let's look at the most popular of them, from simple to complex:

This is just the device for those who have a steady hand and a diamond eye. In fact, it only allows you to hold the drill in a given position without fear of injuring your fingers. Angle control is visual, according to the position of the “wings” relative to any landmark. There are few advantages: instant readiness for work, compactness and price. The disadvantages are obvious: manual control of the process does not add accuracy.

In fact, this element is not a special device for drills. It simply allows you to fix the tool at a certain angle. The accuracy will be higher than previous version. Most stops allow you to set the angle of inclination, and even have a marking scale. And yet you have to rely on firmness of hands.
There are also more advanced stands: with replaceable elements and adjustment of not only the angle, but also the height. The devices are mounted not on the emery body, but on the workbench: which makes them more universal.

In fact, such a stop can be adapted to any electric sharpener. An additional bonus is that with the help of such a stand you can sharpen knives, cutters, screwdrivers, chisels, etc.
Semi-professional guides for all types of drills

This is a fairly advanced tool that allows you to control sharpening characteristics with micron precision. All linear parameters are securely fixed, the values are set according to the markings. The drill is mounted in the groove, accidental displacement or rotation around its axis is excluded.
For sharpening, the possibility of both linear movement and movement of the edge along the arc path is provided (for conical sharpening of drills large diameter). Linear movement (along the axis) can be controlled by the master, or a limit stop can be installed.

From the point of view of processing quality, the device has practically no shortcomings. But for proper sharpening, the operator must know the parameters of the drill. That is, there is no automation: therefore the tool belongs to the professional category.
As a development of the line - a guide with its own sharpening unit. There is no need to install a stop on the workbench and change discs. In fact - you have a semi-automatic table machine for sharpening.

Important note: All listed devices are designed to work with standard electric sharpeners. Therefore, before starting to process drills, it is advisable to install a special emery disc.

They are specialized power tools to perform a single task: sharpening twist drills.

Even a person who is far from technology can use the machine (although why does he need sharp drills?). The operator only needs to determine the diameter of the drill and immerse it in the appropriate hole. It is convenient to work, errors are practically excluded. However, all drills are sharpened with the same comb. The price to pay for ease of use is the lack of flexibility in settings. For home use – the best choice: especially if there is an additional attachment for sharpening knives and scissors.

There are versions for masters. The drill is installed taking into account the sharpening parameters, the process can be controlled by the operator.

The sharpening angle, the method of edge processing (linear or conical), and the depth of metal removal are selected. The drill is not located in a common holder, but in an individual cartridge.

Industrial sharpening equipment for a metalworking shop
During intensive use of drilling machines, a separate post is required to restore the functionality of the tool. Professional stands for sharpening drills of any diameter save time and effort, but the cost of such equipment is too high for home use.

The information obtained will help you choose a sharpening device without extra financial costs. In addition, there are replaceable nozzles for hand power tool(for example, a drill). But this is a topic for another article.
To quickly and efficiently drill holes, you need sharp drills, which tend to become dull over time. This tool is best sharpened by a drill sharpening machine. You can also use special devices at home.
1
A drill sharpening machine is a highly specialized automated equipment designed only for sharpening drills. According to the area of use they distinguish the following types these devices:
- Industrial – have greater power; they can be used to sharpen various drills with a diameter of 20 mm or more. The main purpose of such equipment is intensive work in large enterprises with high degree profile specialization. IN industrial equipment the drill is sharpened in a fully or partially automatic mode at the desired angle using a fastening unit (special clamp).
- Household - used exclusively for small production or at home. The design of these machines is characterized by low power, compactness and mobility. They can be used to sharpen medium and small size which are used most often in everyday life.

A household machine for sharpening drills has a lot of important advantages over all other devices and devices used to restore the sharpness of a tool, among which the following are worth noting:
- works from electrical network with standard voltage;
- high degree of productivity;
- ease of operation;
- high level of sharpening accuracy and functionality;
- affordable price, within the acceptable limits of the capabilities of any home craftsman;
- It has light weight and compact size;
- a convenient ergonomic control system provides regulation of the speed and intensity of sharpening.
2
All household machines are designed for sharpening high-speed steel of a certain diameter range of equipment that is structurally incorporated into the device. Many machines can sharpen tools equipped with carbide inserts– for this purpose, a diamond wheel is supplied or purchased additionally. Typically, their capabilities include sharpening drills with a cone angle at the apex in the range of 90–140° along the back surface with backing and sharpening of the cutting transverse edge. But specialized modifications for metal drills are also produced:
- left;
- with a two-plane backing;
- high-performance;
- three-pronged;
- others.

Most convenient in home use machines with a universal chuck for clamping drills various diameters within the technically permissible range of sizes, as well as devices equipped with a set of removable cartridges that are mounted on the body of the machine itself and are always at hand.
Such equipment is usually equipped with a window through which you can observe the centering of the drill in the working area of the machine. The machine comes with standard accessories: CBN wheels, a set of collets, keys, spare parts. Can also be supplied additional accessories: diamond wheels, additional set of collets, lamp for working area and others. The most famous types of such machines: Drill Doctor, G.S. and their Chinese counterparts.

According to the range of sizes of drills processed, these machines produce two main types (with different extreme diameter values): from 2 mm to 13 mm and from 13 mm to 34 mm. Their disadvantages: poor sharpening of thin drills (the precision of the machines is not designed for this) and the inability to sharpen very thin ones. For tools of small diameters, you will need a special machine for sharpening drills - for example, VZ-389SP, designed for sharpening tools measuring 0.4–4 mm and equipped with a 30x optical device to control the sharpening process.
3
Before selecting a machine for sharpening drills, it is necessary to determine the future scope of work for it, because when purchasing you need to be guided by certain operational parameters . If the device is intended to be used at home (for example, in a country house or garage), then you can purchase a low-power, inexpensive model– taking into account that the machine will not be in constant use, the equipment high power it will be completely useless. In addition, industrial devices are designed for sharpening large diameter drills and consume much more than household models, amount of electricity.

When purchasing a machine, please pay attention Special attention for the presence of a special regulator designed to adjust the spindle rotation. This option will make work as efficient and safe as possible.
Another important parameter is the size of the drills, which should be determined by the range of intended work. The household machine you choose should have enough low level noise produced, especially when the equipment is planned to be used for other purposes separate room, but directly in the residential area.

It is also necessary to pay attention to the design of the model you like - it is best if it is as simple as possible. In this case, any breakdown will not cause much trouble - it will not be difficult to find and purchase the necessary one. new part and install it in place of the failed one. It should be noted that most foreign models in terms of their Maintenance quite expensive, but find the required part replacement is sometimes difficult. And the last recommendation: you should choose a machine for sharpening drills only in specialized retail outlets and stores where a warranty card and technical passport will be issued.
4
At enterprises, in some cases, the driller sharpens the drills himself by hand on conventional sharpening machines, which are equipped with a special device for this purpose. To do this, he must first study the rules for sharpening drills and take special preparatory courses. The drill sharpening device used is steel structure, equipped with a movable clamp for a drill with an adjustable angle of inclination relative to the rotating grinding wheel and having a mount for fixing on the body of the sharpening machine.
There are also frequent cases when an enterprise does not use any devices at all when sharpening by hand on a conventional sharpening machine. In this case, the drill right hand hold by the shank, and with the left hand - as close as possible to the cutting part. The cutting edge of the tool is pressed against the side surface of the abrasive wheel and at the same time the drill is gently rocked with the right hand, trying to ensure that its back surface accepts the required form and acquired the correct slope. You need to remove the metal in small layers, lightly pressing the tool against the circle. It is necessary to ensure that the cutting edges of the drill are the same length and have the same sharpening angles.

Mistakes made during manual sharpening, can lead to the following drill defects:
- cutting edges of unequal length;
- the angles formed by the cutting edges with the tool axis are different;
- The cross blade has a one-sided groove.
As a result of these defects, the drill will:
- beat;
- incorrectly, one-sidedly loaded on the cutting edges - may break;
- drill holes larger in diameter than the drill itself.
After sharpening the tool, you should check the width of the transverse edge and the correct position relative to the cutting edges, the length of the latter, the angle: in plan φ, the inclination of the transverse edge, the clearance angle α, double sharpening φ1, at the apex 2φ. To check all these parameters, enterprises use special templates. The correct location of the jumper is determined using optical device. In some cases, enterprises check the runout of the drill and use it for this purpose. special device.

Metal drills made from high-speed steels are sharpened on grinding wheels made of white and normal electrocorundum on a ceramic bond with a grain size of 16–40, hardness SM, as well as on wheels made of CBN. When sharpening tools equipped with carbide inserts, synthetic diamonds are used, as well as green silicon carbide with a grain size of 16–40.
5
Not having special machine, at home you can use the following equipment to sharpen drills:
- ordinary sharpening machine;
- electric drill;
- homemade sharpening devices.
To use a simple sharpening machine, it is better to purchase a special device, because before you yourself learn how to properly sharpen a tool without it, you can ruin more than a dozen drills. This device for sharpening drills has approximately the same structure as the industrial one described above. There are options not with mounting on the machine body, but with separate installation on a horizontal surface near the rotating grinding wheel. Such a device can be homemade. It can be made of wood: a beam with several holes for the diameter of the required drills, drilled at an angle to ensure the desired sharpening angle, is attached to its base. It is possible to provide for a change in the inclination - the sharpening angle.

In the case of an electric drill, a special attachment is used for sharpening drills. Unfortunately, they are available on sale only for sharpening at an angle of 118° and only for tool sizes of 3.5–10 mm (domestic) and 2.5–10 mm (imported). Moreover, both of them are only for drills with a spindle neck with a diameter of 43 mm. The body of these attachments has 15 holes for drills of different diameters. The attachments are equipped with a stone, the sharpening surface of which is located at a certain angle, and a leader for it, inserted into the drill chuck.
By changing the length of the leash once (shortening it), the attachment is configured to work with one specific drill. They work with it as follows: a leash with a stone at the end is inserted into the drill chuck; the nozzle is put on the spindle and secured with a screw; start the drill and insert drills into the hole of the nozzle body of the appropriate diameter. You can also make such a device yourself. IN homemade nozzle it will be possible to provide the required sharpening angles and tool diameters.

Homemade devices can be made in the form of conventional sharpening machines. It is better to immediately provide a method for fastening and sharpening drills, so as not to come up with additional devices for this.
The modern market is saturated with many types of different equipment designed for sharpening drilling tool. When using it, you do not need to have any special skills or training. For example, such devices include industrial devices riss 8100v, which have high cost. To save money, you can make a tool for sharpening a metal drill with your own hands.
Specifics of device operation
IN household electric drills and screwdrivers are often used for drilling various materials made of wood, concrete, metal and ceramics. Many users of such equipment have repeatedly encountered a problem that causes the working part of the drilling tool to become dull during operation.
 When working with metal, intense heating of the cutting part of the drill may occur, which exposes it to rapid wear and further unsuitability for use. To avoid this, it is necessary to periodically check the geometric standards of the cutting part and, if possible, sharpen it to the required parameters. Twist drills are usually used for drilling metals. Additional checking of the tool before performing work extends its service life.
When working with wood, the cutting part is practically resistant to wear, and concrete drills are equipped with hard pobedit plates, which do not need sharpening and are used until they are completely worn out.
Tools for sharpening drills
How on industrial device, and on a device for sharpening drills made by yourself, it is recommended to use a specialized template necessary to comply with the requirements for the tool. Using a template makes it possible to set the required angle of the cutting part of the drill, which ensures high accuracy during operation. During drilling work, it is necessary to individually select the sharpening angle of the tool, depending on the materials used.
When working with metals, you can use reference data that provides information on the required standards when setting the sharpening angle. Sharpening angle parameters for metal drills:
- Steel, cast iron and hard bronze - 116−118;
- Brass, soft bronze - from 120 to 130;
- Copper - 125;
- Aluminum - 140.
IN simple adaptation To sharpen drills, you can use a sleeve with an internal diameter that must coincide with cross section drills and fixed on a rigid base at the required angle. The bushing is selected from high accuracy - so that its internal diameter coincides with the cross-section of the tool being sharpened. It is strictly forbidden to allow weak fixation: this sharply reduces the quality of sharpening.
Can be used wooden block, in which the holes are to be drilled different diameters, which will make the device universal.
An important component is the tool rest, which performs the following functions:
- ensures correct fixation of the object being processed and its movement relative to the grinding wheel;
- is an excellent support during sharpening work.
Drawings of a device for sharpening drills can provide significant assistance in assembling it. They can be found in various sources information. Studying the working principle similar designs, you can develop your own version, which may differ from the basic one in its individual characteristics.

When working with sharpening devices The following rules must be followed:
- The tool being processed must be firmly fixed during work, which prevents it from rotating around its axis;
- At the end of the sharpening work, you need to let the drill cool down, then measure its angles using a template. The working surfaces of the cutting parts should not differ from each other.
Even if the angles are correctly chosen and their symmetry coincides, strong runout may occur due to the difference in the length of the cutting edges, which can lead to drill breakage. If the cutting parts are asymmetrical, the drilling process slows down and the cutting part of the tool overheats. This makes the hole broken and increased in diameter.
Screwdriver attachment
Can be used for sharpening drills traditional devices: sharpener, electric drill or screwdriver, with the addition of additional modifications.
For sale there is a ready-made industrial device for a screwdriver and electric drill, which is used as a mini-sharpener and allows sharpening at different angles.
To sharpen the cutting part of the tool to homemade device, a number of conditions must be met:

Emery wheels are used to sharpen drills and drills. The most common in everyday use is a white circle made of electrocorundum, designed for sharpening shovels, axes, knives, hoes and other household equipment.
For hard-alloy pobedit drills for concrete, abrasive wheels marked 64C are used. Grinding disc grit is recommended to use grade 25H. When sharpening rapid blades, use a disc grade from 8H to 16H. When working with silicon carbide emery working surface drill, heats up to high temperatures, therefore it is recommended to cool the metal using water and soda.
How to sharpen drills with the correct sharpening angle without much effort and skill? Unfortunately, many of us do not succeed the first time. This device is very simple in design. Therefore, each of you will be able to repeat it. Many people know that the edges of bolts and nuts have the same angle as a standard drill sharpening. We will use this. We will not weld two nuts together to get the correct pattern. The design is a little different.
To start, you need any nut. The larger the diameter, the larger the diameter of the drill that can be sharpened in it.
The nut has 6 faces, 2 of which we need. Take a caliper and mark 4 mm from the edge of the nut. We turn the nut the other way around and make a mark on the edge that is one and a half mm larger than the first one. We make a triangle on 2 sides. Cut with a hacksaw or grinder. The result was a nut with cuts.


We weld another one. The device is almost ready. He misses the puck, which we throw into the middle. You will also need a bolt; it screws into a small nut.
The cuts in the nut have different depths, which differ by 1.5 mm. This difference is hardly noticeable to the eye. We insert the rod, fix it, and apply a ruler. The gap between the ruler and the round timber is smaller on the left than on the right. That is, the device has a certain angle. Where the gap is smaller, the master made a mark.
Operation of the device mechanism
We take a straight, unsharpened drill and place it in the device. Where the mark is, the drill must be placed, as shown in the photo and video. We fix the drill so that it sticks out a little from the edges. The drill will be sharpened on the working side. IN the above example Can be clamped with a diameter of up to 8 mm.
When we start grinding down the edge of the drill using sandpaper, there is a guide in the form of a plane of the edge of the nut, which sets correct angle sharpening.
This is a great device for those who cannot find the right angle by eye.
The video shows how to position the tool relative to the sanding wheel. From the 6th minute you can see how the drill is processed.
Alexander Polulyakh.
In addition to this video tutorial, another DIY device using bolts and nuts.
Drawing
https://drive.google.com/file/d/0B8iB5ht2WrqOMEJiZlRtZ2VWdVE/view