Making podiums for acoustics. Practical recommendations for creating a podium with your own hands How to make acoustic podiums with your own hands
Car owners and car enthusiasts have probably encountered the problem of poor sound from their audio system inside the car. This current problem can be solved by minor modifications to the car interior, as well as by installing new fasteners speakers made with your own hands. The article below shows the process of improving the audio system based on the domestic VAZ2106 car, and of course this idea can be implemented on any car. The main task in the project was to install 16.5 cm speakers in podiums on the car door.
Design development of the podium base
A very important point in designing a podium is the shape of the podium itself, since it serves as the basis for the entire structure. The main task is to do the work wisely, carefully, so that innovations do not spoil the appearance of the interior, and also do not interfere with the convenient use of the door opening handle, the window lifter handle, so that nothing unnecessary interferes with the tight closing of the doors. We draw the shape of the base of the podium on cardboard, then cut it out along the contour.
The next stage of work is to draw the part on plywood 6-8 mm thick using the previously cut template. Using a jigsaw or other hand tool, we cut out two parts for the right and left car doors.
Speaker platform
Next, you need to start working on the decorative ring, which will give a more aesthetic appearance to the structure itself. After measuring the dimensions of the speaker and its protective mesh, you need to make a seating ring in the plywood. The inner diameter of the speaker seat must match the diameter of the speaker ring itself. The outer diameter is equal to the outer diameter of the protective mesh. To this measurement you need to add 5-6mm for the decorative ring.
We cut out a template for a decorative ring from the same material from which we cut the podium. We coat the decorative ring with glue and glue it to the base of the structure. For greater reliability, after the glue has dried, the decorative ring must be nailed to the base.
Attach the rings to the base
The rings need to be attached to the base itself with wooden or metal slats, which are pre-cut to appropriate sizes, which depend on the degree of inclination of the ring relative to the base, as well as your desire, how far you want to move the speakers forward. Tilt determines the direction of the speaker. One speaker requires four rails that secure the ring to the base.
The attachments are attached to the base and to the ring with self-tapping screws. Their rigid fastening will ensure the durability and reliability of the structure.
Polyurethane foam as a filler.
To create a curved shape, you need to use polyurethane foam. After it dries, round shapes without sharp corners can be cut out of it, and the foam material is also easy to process. In order for the foam consumption to be moderate, you need to insert a metal or plastic pipe into the hole, putting cellophane on it in advance, so that after the foam has hardened, the pipe can be easily removed from the hole.
The foam is applied in an even layer, starting from the ring in a circular motion to the edges of the podium. When the foam has not yet dried, it is necessary to apply a second layer of foam, especially around the decorative ring. It is more convenient to cut off the excess after the foam has hardened than to apply another layer again and wait for it to dry.
Giving the frame the required shape
After the foam has completely dried, you can begin the most important operation - cutting off the foam and forming a blank for the future mounting of our speakers. To do this, use a sharp utility knife to cut off the excess foam.
We need to start first at the base, then at the top, and then slowly shape our workpiece. After completing the process of removing unnecessary foam, we bring the shape with coarse sandpaper to an almost perfect condition.
Surface leveling
Level the surface and apply a thin layer of putty mixed with PVA glue. This process is necessary to prevent the frozen foam filler from shedding. It is better to use fiberglass-based putty in this process.
Apply one layer of putty. After the first layer has dried, apply the second and third as necessary. After the putty has completely hardened, we finally process the surface to the desired condition.
To protect the podium from mechanical stress, the podium must be covered with fiberglass impregnated with epoxy resin. Epoxy resin must be mixed with hardener following the instructions. It is applied in an even layer to the surface of the podium. Then we place the fiberglass fabric on the podium and carefully smooth it with a rubber spatula. This is necessary to prevent the formation of folds so that the fabric completely follows the contours of the podium. We saturate the surface of the fabric with epoxy resin and leave it to dry.
After complete drying, we cut off the remaining fiberglass fabric and remove excess epoxy resin.
We cover the podium with artificial leather
The final stage of production is covering the podium with artificial leather. The sequence of tightening is approximately indicated in the photograph by arrows, and the sequence of actions is also numbered. A hair dryer helps soften the skin and smooth it out into an even layer. Lastly, the leather of the ring is stretched and secured with a stapler; excess artificial leather is cut off with a stationery knife.
The podium is attached to the car doors using self-tapping screws screwed into the base of the podium from the back of the trim. The trim is reassembled, with podiums installed on it, door handles are screwed on, and all decorative elements are installed.
For more reliable fastening of the podium to the door, special protrusions are provided, you need to look as shown in the figure. With their help, you can use self-tapping screws to tighten the very base of the podium structure to the iron base of the car door. This allows you to create a more rigid structure.
To improve the sound quality of the audio system installed in the car, it is necessary to install additional speakers or replace the original ones with better and more powerful ones; you can also make efforts to improve the speakers. To do this, you will need to independently make a podium for the interior for new or updated speakers. Each design is made according to an individual sketch.
Let's look in detail at how to make a podium with your own hands and install it in your car yourself.
Preparations for work
To make your own, you will need a number of materials and devices:
- plywood or chipboard from 8 to 12 mm thick and an average size of 800 by 800 mm;
- putty;
- polyurethane foam;
- epoxy glue, PVA glue;
- aerosol varnish and paint;
- electric drill;
- jigsaw;
- Bulgarian;
- Screwdriver Set;
- sandpaper;
- drawing materials (pencil, chalk, ruler, compass).
Required information before installation
- Installing an acoustic podium is necessary, since a speaker without a structure, for example, in a car door, will not provide clear sound, in addition, you will hear metal vibration;
- thanks to the variable shape of the workpiece design, it is easy to attach it to the car without cutting through the iron of the body;
- The podium, in addition to eliminating third-party sounds, will add low frequencies and improve sound transparency. This also requires a good acoustic system, for which the factory design of the car does not provide space. That is why you will need to make it yourself;
- The best are considered to be structures made of wood, which is the highest quality acoustic material;
- the podium also helps create surround sound in the interior of your car;
- At the same time, the installation of this design provides you with services in improving and modifying the interior design of the car. They allow you to focus attention on the speakers and hide unsightly views of the system;
- In addition to wood, chipboard, podiums are made of carbon fiber and fiberglass. Any design can be additionally trimmed with leather, carpet or any other material.
IMPORTANT! When installing the podium, it is necessary to securely secure the speakers. The better and more firmly they are fixed in the structure, the better and deeper the sound will be. Acoustic shelves are sometimes used to add rigidity.
Stages of manufacturing and installation of the podium
1. Mold making
First of all, before starting to install the structure, you need to decide on a suitable location for it. When conceiving a form, you are limited only by your own creative imagination, but you must not forget not only about the aesthetic and design side, but also about the practical one.
IMPORTANT! When developing and installing the structure on their own, very often beginners do not take into account that the podium can interfere with the view of the rear view (podium towards the rear speakers) or make it impossible to open the doors or operate the power window. Please pay attention to this when making the model.
- Take a sheet of cardboard;
- draw a picture of the invented shape;
- cut out the template;
- attach the template to the plywood and trace it with a marker;
We drill holes in the plywood for the jigsaw blade and cut out the base blank for the future product.

Advice. For an audio system, experts advise using birch plywood, as this wood provides richer and higher quality sound.
2.Preparing the base for the speakers

IMPORTANT! The chipboard or plywood used must be at least 6-8 mm thick.

3. Assembly and filling of the podium

Advice. The stiffer the future podium frame is, the better. Most often, polyurethane foam is used for filling; some professionals also use epoxy resin, but working with resin requires skills, while anyone can handle foam; with its help, the podium can be given any shape.
- After the foam has dried (the period is indicated on the can), remove the excess with a knife, giving the workpiece the desired shape;
- Next, take sandpaper and sand the product to a smooth surface;
- level the surface with a thin layer of putty (putty can be mixed in advance with PVA glue to prevent shedding);
- We repeat the process of polishing the product.
To make the podium structure more rigid and protect it from mechanical damage, the workpiece can be treated with epoxy resin or covered with fiberglass.
- Apply a thin layer of resin to the surface of the workpiece;
- We put fiberglass on top, carefully smoothing it out, leaving no folds;
- treat with another layer of resin and let dry;
- cut off the excess and sand it.
4. Painting or tightening the workpiece
- Painting
The finished structure can be primed and painted with aerosol paint, applying it in several stages, the main thing in this matter is to avoid smudges. After the paint has dried, the surface must be coated with aerosol varnish.

- Faux leather covering
Artificial leather is best suited as a material for upholstery, because in appearance and physical properties it is most similar to upholstery. Most often, tension runs from the ring to the ends of the product, where each side must be tightened more than once. To perform this task, use a hair dryer. At the end of the work, the leather must be secured with a stapler, and the excess pieces must be cut off.
5. Installation of the podium
The most common mounting method is to screw it in with self-tapping screws from the back of the car trim. Before doing this, do not forget to install the speakers in the workpiece seats and securely fix them.

IMPORTANT! You can mount various speakers into a homemade structure, however, as professionals advise, you need to make sure of good sound and powerful bass before final mounting.
Ideally, to ensure ideal sound in a car, you should also take care of sound insulation. If the podium is installed, for example, in car doors, it is necessary to insulate them with special sound-absorbing materials. Also, in the podium design itself, it is necessary to provide and build an acoustic stage, selecting the position of high and low frequencies; you can also consult installation studios regarding the correct placement of speakers in the car.
You may not achieve ideal studio sound, but installing a podium yourself will cost you several times less, and by trial and error you can choose the best place in the car that will provide you with high quality sound.
For a more dynamic and visual overview of the procedure for creating and installing a podium, you can watch the attached video:
Many car enthusiasts prefer to listen to the radio or their favorite tracks while driving. In this case, special attention is paid to the quality of acoustics inside the car. A standard acoustic system does not always allow you to embody all the subtleties of your favorite composition in a high-quality manner. Therefore, in some cases, in order to improve sound quality, car enthusiasts resort to the simplest method - they try to make podiums for speakers with their own hands.
Modern fashion for car audio
Today, most modern vehicles come with standard speakers. However, lovers of loud music in cars are often not satisfied with their sound, so they buy larger speakers. In this case, a different kind of problem arises - how to install large-sized equipment in the cabin so that, on the one hand, it does not disturb passengers, and on the other, to create truly clear sound?
One of the common ways to solve the problem is to make podiums for speakers. They can not only improve sound quality, but also take the performance of the speaker system to a whole new level.
A DIY acoustic shelf allows you to mount speakers of different sizes and shapes
What are podiums
The acoustic podium is the base for the speaker, thanks to which it is fixed in the desired position. The podium serves as a speaker mount, for example, in a car door or pillar.
Those speakers that are built into the podiums give a completely different sound: richer and deeper, with clearly distinguishable high and low frequencies.
What are speaker shelves used for?
We can say that the podium performs several functions in the car interior:
- the variety of appearance of the podiums helps to hide an unattractive sound system or emphasize the strengths of the interior design;
- expands the acoustic capabilities of the speakers in the cabin;
- podiums can be made from various materials and decorated with leather, wood, velor and other types of finishing fabrics to create a unique interior;
- in complex-shaped podiums it is easy to place non-standard and large-sized speakers, for example, a horn.
What types of podiums are there?
Podiums are divided into only two types: external and internal.
External ones can be considered podiums that are mounted directly in the car interior - for example, on the rear parcel shelf. However, most often, car enthusiasts use internal podiums in car doors to better fix the speaker and improve the character of the sound.
Traditionally, most cars already have standard speakers or holes for them. Usually their sizes depend on the make of the car. Domestic cars typically have speakers with a diameter of 130 mm. Foreign cars can have built-in podiums of larger sizes - 160, 200 and even 250 mm.
Car door speakers are usually round or oval in shape. Depending on the car model, podiums must take this feature into account. In general, the shape of the podium can be absolutely any, since the main purpose of this element is to securely fix the speaker in order to give volume and purity to the sound.
Round speakers of different sizes can be installed in the doors of any car
How to make universal podiums for speakers
In most cases, you can do without investing in the purchase of factory podiums and make the element yourself. This is not as difficult as it might seem at first glance.
To successfully make a podium you will need the following materials:
- plywood 6–8 mm thick;
- degreaser;
- cardboard;
- polyurethane foam;
- putty;
- glue;
- epoxy adhesive;
- nylon tights;
- dye;
- fabric or leather for covering.
In order to put your idea into practice without any difficulties, it is best to prepare the necessary tools in advance:
- scissors;
- hacksaw/jigsaw;
- pencil;
- stationery knife/blade;
- sandpaper;
- putty knife.
Almost all the tools and materials for making podiums are available in the household of an experienced craftsman
Dimensions and shape of the acoustic podium
The technology described below involves the manufacture of podiums for speakers located in the front or rear doors of the car. Most often, there is one speaker with a diameter of 13 centimeters in the door. However, regardless of its size, the podium manufacturing technology will be the same:
- First you need to figure out what kind of podium shape is suitable for the interior of your car.
- It is necessary to measure both the dimensions of the existing speaker and the dimensions of its protective mesh.
- The diameter of the speaker ring will correspond to the diameter of the seat for it in the podium. And the outer diameter of the ring will be equal to the diameter of the protective mesh.
- Once you have approved the form, you need to draw it on a piece of cardboard.
- The resulting template must be carefully cut with scissors.
- Next, we apply the template to a piece of plywood and trace it with a pencil.
- For two doors we will need two plywood blanks that can be cut with a hacksaw or jigsaw.
- It is necessary to cut out the hole in the podium as accurately as possible, since if the proportions are violated, the speaker in the pocket will not be securely fixed.
Photo: correct procedure for making a shelf in a car door
Upholstery with artificial leather is one of the most labor-intensive stages in design.
Video: how to make a podium in a car door with your own hands
The process of creating podiums - from coming up with the shape to cutting the foam and polishing the workpiece - turns into a real art for creative people. Every car enthusiast can feel like a sculptor creating a masterpiece!

Homemade podium in a car door" width="960″ height="667″ />
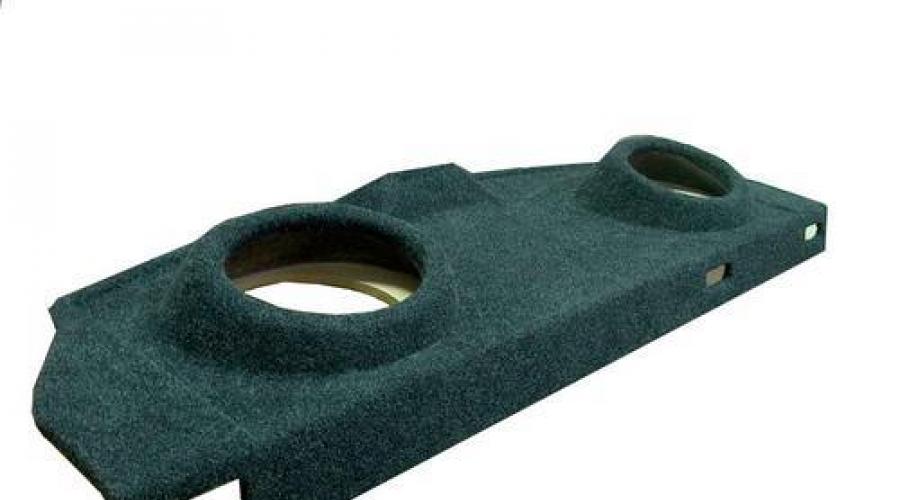
Made of plywood and treated with polyurethane foam, this podium is no different from the factory one
Making a podium in machine racks
The option of placing shelves in racks is more complicated due to the fact that they will need to be dismantled. However, it is quite possible for a neat car enthusiast to independently manufacture podiums on racks.
So, the work consists of performing the following steps:
- Dismantling the racks.
- The position of the speakers and their height on the stand should be carefully calculated so that they do not obstruct the driver’s view.
- In the right place you will need to screw the speaker cup with self-tapping screws.
- After this, you can use nylon to give the stand the desired shape.
- Next, the product is treated with epoxy glue to give it greater strength.
- To make the stand look smooth and even, you can lightly sand its surface with sandpaper, and then apply epoxy glue again.
- Then a layer of putty is applied, and after it dries, the final sanding of the stand is carried out.
Photo: the main stages of making shelves in racks
 Dismantling the racks must be carried out with the utmost care so as not to damage the interior trim.
  The choice of mounting location for the speaker cups is decisive at this stage of podium manufacturing
  Podiums are ready for decoration
In general, the process of manufacturing podiums in racks is similar to the technology for processing podiums for car doors.
Video: how to make your own shelf in racks for tweeters and tweeters
Algorithm for making a podium for a car ceiling
The podium on the ceiling of the car is characterized by large dimensions, since the largest speakers are usually located in this place.
Despite this, any car owner can make a podium on the ceiling - you just need to very carefully install the structure:
- It will be necessary to dismantle the headliner so as not to damage it during operation.
- The shape and appearance of the podium are selected based on the size of the speaker.
- Usually plywood and polyurethane foam are also used.
Obviously, the procedure for manufacturing ceiling podiums is similar to the similar process in the production of door podiums.
It is noteworthy that these schemes for the manufacture and further design of podiums are suitable for any type of speakers - both round and oval. Regardless of the available speaker dimensions (13, 16, 20 and 25, as well as oval 6*9), the podium will fulfill its main purpose - to improve the sound quality of the acoustics in the cabin and securely fix the speaker in the desired position.
Photo: step-by-step production of a plywood shelf
 The procedure requires caution, as it is easy to damage the interior trim.
Installation and fastening of the podium in the car
The traditional method to securely secure a homemade podium is to screw it with self-tapping screws from the inside of the casing. This, on the one hand, will ensure the quality of fastening, and on the other hand, will not spoil the appearance of the entire structure.
To carry out this procedure, you will need only two tools: a screwdriver and soundproofing materials.
Main stages of the procedure
The process of installing and fixing any podium in any part of the car is as follows:
- Take a ready-made podium with a speaker built into it.
- The podium is screwed on the inside of the casing with self-tapping screws.
- However, to achieve a truly clear sound, you will need to experiment with the installation - some screws will be tightened all the way, and some will not. That is, you need to give the podium such a position so that the speaker can reveal its sound to the maximum.
- It is recommended to soundproof the doors and ceiling (in this case you can achieve even clearer sound).
- After completing all the work, reassemble the ceiling, racks or doors (depending on where exactly the podium was mounted).
Video: how to install a podium in the salon with your own hands
To enjoy clear and powerful sound in your car, there is no need to overpay for expensive speakers and factory-made podium elements. Most car enthusiasts are able to assemble a podium for the speakers in the car on their own from available means.
To improve the sound quality of the audio system, car enthusiasts install additional speakers in the car. The special design is made individually for each type of speaker system and removes restrictions on the choice of audio system. To make your own acoustic podium, the following materials are required: plywood with a thickness of 8 to 12 mm, wooden blocks - 6-8 pcs., epoxy glue, mounting foam, aerosol paint and varnish, putty, electric drill, jigsaw, PVA glue, knife, screwdriver, screws, cardboard, sandpaper.
If you plan to place the podium on the door, first determine where the audio system will be mounted on it. Based on the diameter of the speaker and its height, calculate the approximate dimensions of the finished structure. Analyze whether the product will interfere with the passenger when entering or exiting the car. Decide on the shape of the podium. Make a cardboard template for the door trim where the speaker is attached. Place the template on the plywood and trace with a marker. For an audio system, it is better to use birch plywood, which provides rich and high-quality sound.


The correct placement of the speakers in the car, ensuring acceptable sound, will be indicated in installation studios, but you will have to pay well for this. Therefore, it is cheaper to learn how to make podiums yourself, use trial and error to find a place in the cabin that will provide high sound quality, and make an individual acoustic device.
Even in ancient Roman architecture, podiums were used in the arrangement of homes and public places. Today, with the help of the podium, many designers are improving the proportions of space, and also dividing the room into zones for greater functionality. The podium resembles a step, which, as a rule, has a height of no more than 25 cm. Of course, if necessary, the structure can be higher, but in this case it is multi-tiered with a wide platform at the top. The podium can act as a decoration, while also performing practical functions. In this article we will talk about how to properly organize space using a podium, what materials it is made from, how to properly place this structure, in addition, we will talk about the features of making a frame podium bed.
The meaning of the podium in the interior
Using the podium, you can adjust, expand the usable area, place communications, and zone the room. It can be used as a piece of furniture and an additional source of lighting. Now let's talk about each meaning of the podium separately.
Zoning of space. According to the characteristics of human perception, those objects that are raised higher attract attention more than those that are lower. The part of the room that is located on the podium stands out, making the necessary accent in the interior of the room. Any functional area will look quite appropriate on the podium, be it a children's room or a bedroom, an office, a kitchen or a dining room.
The use of podiums in one-room apartments and studio apartments is especially important. After all, they are multifunctional premises.
Correction of room proportions. The podium visually changes the perception of space. This result can only be achieved with proper installation. You can expand a narrow room with a round podium. The angularity of a square room is perfectly shaded by a corner podium.

Placement of communications. In a podium made using frame technology, you can easily hide communication systems, wiring cables and wiring of video and audio equipment. If you make a podium in the bathroom, then pipes and other elements of utilities will be hidden under it.
Expanding the usable area of the room. It is possible to provide drawers in the design in which things can be stored. This is a very significant detail in small apartments.

Podium as an additional source of lighting. At the end of the podium you can mount decorative lamps or an LED strip of the appropriate color. The style of the interior will be successfully emphasized with the help of lighting fixtures. Additional lighting will be provided in the recreation area or guest part of the room.

A podium serving as furniture. Podiums often serve as a cozy bed or sofa. To do this, they are upholstered with foam rubber and draped with fabric. Thus, an ordinary bed can be replaced with a beautiful multi-level design. The berth can be pulled out from a special niche in the structure or placed on top of the podium. If you make a bed in a niche, then the upper part of the podium can be additionally used as you wish. For example, as an office, home theater, living room or children's room.
Where to install correctly
Make a podium not possible everywhere. When choosing a place for it, it is important to take into account some features of a particular room, and the structure itself. The ceiling height in the room in which the podium will be made must be at least 2.75 m. Otherwise, the podium will look ridiculous, visually reducing the space.
The location of the structure in the center is unacceptable. Firstly, it will be very inconvenient to walk around such a bulky podium. Secondly, it will be more reminiscent of a platform for theatrical performances, which is why its original purpose will be lost. The structure cannot be built in a walk-through area.

The choice of a suitable location for the podium is in many cases determined by the configuration of the room. Its boundaries can be defined by arches, niches and partitions. In a narrow rectangular room, a podium the width of the wall looks great.
If the structure is made as a sleeping place or for storing things, then it needs to be installed in the place where a cabinet or bed would fit. Rounded podiums give the room coziness and comfort. However, such structures are more difficult to furnish.
Construction type
Podiums are made of a wooden frame or monolithic concrete. By the way, the frame is sheathed with one of the types of flooring material. Each type of design has its own undeniable advantages and disadvantages.
Monolithic podium. Concrete is poured into pre-made formwork, which will exactly repeat the shape of the finished podium. Then its surface is leveled using a screed. Then the floor covering is laid. It can be parquet, tiles, carpet, linoleum, laminate, etc. The monolithic podium is incredibly reliable and durable. It does not rot, does not absorb moisture and can withstand heavy loads. Its main drawback is its weight, because even a not very tall structure creates a colossal load on the ceiling. A monolithic podium can only be made in private houses; in apartments it will most likely damage the interfloor ceiling.

Frame wooden or metal podium. The design is lightweight, so it does not load the floor. This type is ideal for apartments. It is easy to install a frame podium with your own hands, which makes it possible to manufacture multi-stage structures without much effort. To improve the reliability and strength of the frame, its proper rigidity should be ensured. For this purpose, intermediate logs are installed in the structure.
Frame podiums can be built both in houses and apartments. The main thing is to choose the right source material for the frame and finishing of the finished structure.

If the room has high humidity, then the base is made of metal profiles and sheathed with tiles or wood-polymer composite. In rooms with normal humidity levels, the frame is made of wooden beams. The base is sheathed with multilayer plywood or OSB. If laminated veneer lumber is used as a log, it must first be treated with special antifungal impregnations and fire protection agents.
Simple bed
It is important for every city resident to have their own corner where they can fully relax and unwind. This is due to the inexorably growing rhythm of life. A comfortable bed is often the main assistant for a healthy rest. If you live in a small apartment, then don't think that you won't have to sleep on a double bed. Previously, in small apartments the only solution was to purchase a book-bed, but today this position is far from the only one. Today's technologies and innovations make it possible to achieve maximum comfort even in small spaces. Now podium beds are replacing book beds more and more often.

There are two types of podium beds. One of them is to build a podium and lay a double mattress on it. So, you can also place spacious drawers under the bed for storing things, for example, bed linen, a spare blanket with pillows, toys for children, etc. The second type of podium is a platform and a retractable bed. On the site there can be an office, a playroom or even a kitchen. Thus, it is very easy to optimize the space, because the bed will not disturb anyone during the day.

So, in order to build a simple podium in an apartment with drawers, you should first develop a sketch, determine the number of drawers, and decide on the type of finish of the frame. Then you should collect the necessary tools:
- Tape measure, pencil and long ruler.
- Hammer.
- Self-tapping screws and dowels.
- Drill.
- Screwdriver.
- Jigsaw.
- Screwdriver.
- A construction stapler will come in handy if carpet is used to finish the podium.
Materials and fittings are selected depending on wishes. Now it is necessary to mark out the space for the future location of the podium bed. The process is very similar to laying a wooden floor on joists, with the only difference being that the mattress will lie on the surface of the podium at the final stage.
The most economical option for a podium bed would be a design consisting of installed stable legs, a rectangular wooden frame with a rolled chipboard sheet. Ultimately, a purchased mattress is placed on such a structure. This type of bed can be assembled in just a day!
So, the chipboard needs to be secured not only to the legs, but to the perimeter made of boards. In accordance with the markings, the beam is attached to the screws. Such a simple frame will become the basis for mounting the legs.

A podium bed with drawers is more expensive and more difficult to make. The process consists of fastening the timber around the perimeter of the structure and then installing the boards. To correctly calculate the size of the podium, it is necessary to take into account the size of the room in which it is installed. The frame should be 5 cm higher than in the case of installing a simple podium without drawers. The thickness of the board used should be 22 mm. It will be needed for the construction of the outer panels of the podium, as well as the transverse strip, which is installed in the center of the structure. In the production of internal parts of the blocks, chipboard with a thickness of 19 mm is used. The supporting frame is constructed from the inside of the block. Initially, you should install load-bearing bars measuring 47x27 mm - they are installed horizontally, and then the support bars. To distribute the load on the support bars evenly, one of them is installed in the center, and two are placed at the edges. The bars are fastened using screws.

To make drawers, you should purchase the required amount of boards with a thickness of 16 mm. The parts should be prepared first and then assembled. The bottom is made using plywood having a thickness of 10 mm.
As for the sizes of the boxes, they should be calculated taking into account the internal space of the podium.
A special glue is used to connect the parts. Using clamps, tighten the structure until the glue dries completely.
Pull-out bed
To make a retractable bed, you must first think through the retractable system, because it must withstand heavy loads. To do this, you should purchase guides and rollers. The frame is made without any special snags, one might say traditionally. The biggest problem in installing a pull-out bed.

The podium, however, like the floor in the entire room, must be level. This is due to the fact that furniture will be installed on it, and you will have to walk on the structure. The height of the structure is first measured on the walls. Using a level (ideally a laser level, but a regular one will do), draw a straight line along the walls in contact with the podium, which should correspond to the dimensions and height of the finished structure.
To make the frame, as in the cases described above, timber is used. The support bars are attached either to the floor or to the wall. This depends on the size of the podium, as well as the presence of niches. A structure that is small in size is usually attached vertically to the wall with anchors.
The strength of the structure directly depends on the distance between the posts; the standard step is 40 cm.
Now you can assemble the upper part of the frame. To do this, horizontal bars are laid on the racks, which are connected to each other at an angle of 90°. The connection nodes can be fixed with metal corners. This is especially important when constructing a large podium.
The inner surface, in cases where it is not used for niches, should be filled with foam plastic or mineral wool. These materials will serve as good sound insulation. This will reduce the booming sound created when walking by the empty interior space. Examples of these processes can be seen in the photo.

The sheathing of the frame must be durable, so sheet material of appropriate quality is used for this purpose. These can be gypsum fiber boards, boards, OSB or USB, plywood sheets. Sheets of sheathing material are secured with nails or self-tapping screws. To prevent surface deformation when the cladding material swells, be sure to leave expansion joints 2–3 mm wide.
In cases where the internal space is used, the frame should also be sheathed on the inside. If there are no internal niches, then the end of the podium should also be sheathed.
As for finishing, it is carried out using a wide variety of floor materials. This could be parquet, carpet, cork, laminate, linoleum, tiles, etc. The process of finishing the front part of the podium deserves special attention. It is sheathed in the same way as the top of the podium in cases where it has a smooth border. If it is wavy, then a flexible material that can be easily bent is used for cladding. It is recommended to use flexible plywood, PVC skirting boards, metal profiles made of aluminum or brass, and MDF panels.
The bed is made in the same way as a drawer, the main thing here is to maintain its exact size and correctly install the guides and rollers. The quality of these moving parts plays a key role, so saving on their purchase is extremely risky.
After the production of the podium has come to an end, you should walk along it. This is done to evaluate creaks and deflections. If there are defects, they must be eliminated.
In cases where the production processes are completed in the correct sequence, furniture installation can begin.
If you have questions on the topic, do not hesitate to ask them to the specialists working on the site. Perhaps you used some tips? Then share how the material presented helped you. In any case, your comments will benefit readers.
Video
Learn the podium construction process by watching the video:
Photo


