What is the best material to make a steam room floor from: tips, instructions, diagrams and videos. How to make traditional poured floors in a Russian bathhouse - first-hand personal experience Bathhouse with a poured floor
Fluid floors are the simplest solution for flooring in traditional Russian baths. The fundamental difference between pourable floors and other types is that water escapes throughout the entire area of the room through small cracks. The further path of the drained water depends on constructive solutions, we will talk about them below.
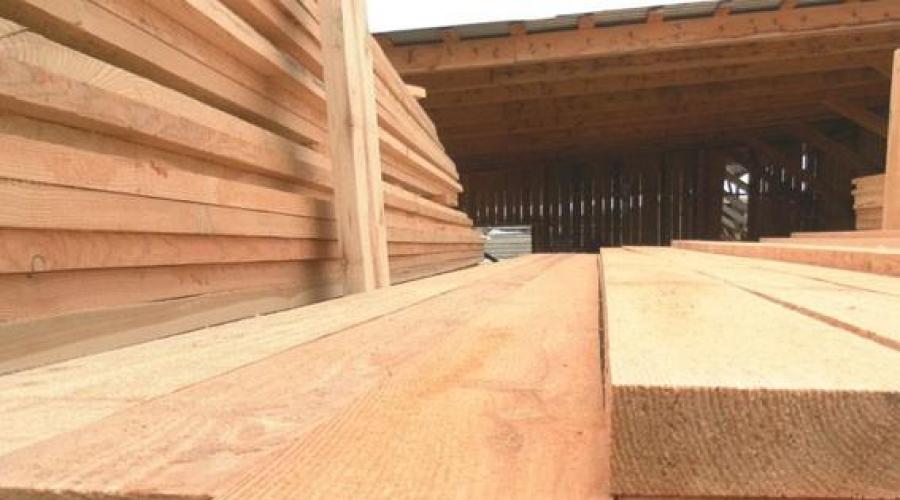
Previously, lumber was not considered scarce and expensive material, during the construction of the baths, thick boards and logs were used coniferous species wood This choice of materials made it possible to guarantee long time operation of the bathhouse, despite very difficult conditions For wooden structures.

The bathhouses stood for several decades, the structures were rotten - the bathhouse was jacked up, one or two crowns were replaced along with the floor coverings, and the building was used again for several decades.

Modern construction technologies allow us to achieve the same long service life of the bathhouse with significantly lower lumber costs. There is a wide variety of very effective impregnations that reliably protect wood from putrefactive processes.

Let's consider the technology of installing pouring floors for various designs Russian baths.

Quite common foundations for Russian baths, in terms of cost and operational characteristics satisfy most developers. And for flooring and wooden underground structures - perfect option. Provide the highest possible natural ventilation, reduce the likelihood of developing fungal diseases of wood, etc.
Practical advice. When arranging such foundations, take necessary measures in order for the building area of the bathhouse to be on a slight elevation, this will ensure rapid drainage of water outside the building. This is especially important on heavy clay soils. Do not allow puddles of standing water to appear under the bathhouse.

Step 1. Calculation of quantities and preparation of materials. Measure the length and width of the steam room, find out its area. To cover use edged boards 35÷40 mm thick, buy them with a small margin. In addition to the boards, you will need a plinth and nails approximately 100 mm long.
Soak the boards with an antiseptic. Impregnate only dry lumber; carry out work in a shaded place and in calm weather. You need to soak it at least twice.

Please note that the boards should absorb the antiseptic and not dry it in the sun.
Floor beams or joists also need to be treated.

It is advisable to lay the floors on beams; if they were not installed during the construction of the log house, they will have to be laid on joists. To do this you need to do preparatory work.

At least two layers of roofing material must be placed between the joists and posts. After 10-14 days the logs can be laid. The ends of the logs are fixed to the crowns of the log house metal corners and self-tapping screws.

Prices for roofing material
roofing felt
Step 2. Cut all boards to size.

To avoid deformation, the length of the boards should be 1÷1.5 cm less than the size of the steam room. Before cutting the boards, check the dimensions of the bath; if the width of the room at the corners is not the same, then you will have to adjust each board separately. It is better to cut by hand electric saw. Before working with any electric tool check its serviceability and the condition of the cutting element.

Step 3. The distance between the boards should be within one to one and a half millimeters; this width of the cracks is sufficient for rapid drainage of water, and small gaps minimize the negative impact of possible drafts. By the way, you shouldn't be afraid of them, a large number of does not allow too many gaps throughout the entire area of the room high speed air movement through them.

It is highly advisable to make the cracks the same throughout the entire floor; for this you should use a template. For these purposes, we recommend taking ordinary wooden rulers. They are perfect in thickness, and the corners of the boards will not be damaged. Place the rulers vertically along the edges of the board being nailed; after fixing the first ruler, they are removed and installed between the next ones.

Place a ruler or other template between the floor boards during installation.
Start laying the boards from the threshold; as a rule, there is a shelf on the opposite wall, under which you can hide an uneven floorboard.
Step 4. Nail in. Each board needs at least two nails; they should be nailed along the edges and only under small angle. In this position, the nail passes through several annual rings, which minimizes the risk of cracking of the lumber.

Important. Floorboards, regardless of width, must be nailed with two nails to each joist or beam. Otherwise, they will certainly warp over time, which causes great inconvenience during bath procedures.
If the last board does not fit the tire, measure exact dimensions and saw off the excess part. That's all with the boards, you can move on to the baseboards.
Installation of floor skirting boards

The profile of the skirting boards does not matter, choose which one you like best. Skirting boards are nailed with nails 30÷40 millimeters long, the specific values depend on its thickness and width.

Prices for different types of skirting boards
Step 1. Take measurements of the steam room around the perimeter. Skirting boards have standard length two meters, and most steam rooms are wider and longer. This means that the moldings will have to be joined. If in ordinary premises uneven joints can be sealed with wood putty or colored sealant, but this method of eliminating errors cannot be used in a bathhouse, the putty will quickly fall off. Try to make the joints of the skirting boards in inconspicuous places: behind the stove, near containers with water, under a shelf, etc. Of course, be very careful when cutting the skirting boards; the tool must be sharp and in good working order.

Step 2. Check the corners of the bath, they should all be exactly 90°. File the end of the baseboard at a 45° angle. For even cutting, use a factory-made miter box or make the device yourself.

We recommend cutting with a hacksaw - the cut area is much smoother. Always apply the left plinth to the miter box on the left, and the right one on the right, to the side away from you. Otherwise, instead external corner it will turn out to be internal and vice versa. If you rarely work with a chair, we advise you to write on its sides where to install the left and right ceiling and floor plinths on the outer and inner corners.

Video - How to join skirting boards
It is somewhat more difficult to cut the baseboard if the angle of the steam room is different from straight. If you don’t have enough experience, we advise you to try cutting any slats for the first time. Install them in Right place so that they rest against the walls. Use a pencil to mark where the slats intersect.

From these marks, draw straight lines to the corners, make a cut along the lines. Check what you got. Everything is correct - excellent, repeat the same operations with the baseboard. A large gap has appeared in the gley - think about where you made the mistake, repeat all the operations again, taking into account the mistake. This does not take much time and will save expensive material.

Step 3. Start nailing the baseboard from the corner of the bathhouse, step back 2-3 centimeters from the cut point, nail the nails at an angle at a distance of 30-40 centimeters.
Step 4. Using the same method, nail the baseboard on all sides of the steam room. Check their position and, if necessary, remove any burrs or lint using sandpaper. If there is a noticeable difference in height at the joints, then first remove them with a sharp chisel, and then correct them with sandpaper.

That's all. In Russian baths, as a rule, the floors are not varnished or painted, but if you really want to, do it finishing coat. Just keep in mind that no matter what durable coatings you haven’t used it, they will still peel off - the operating conditions are too harsh.
Now let's look at how to make pouring floors in bathhouses strip foundation.

If your bathhouse is located on sandstones, there are no problems; you can lay the drain floor using the method described above. The sand will absorb all the water without any problems. If the soil under the bathhouse is clay or loamy, then preparatory work will have to be done. The fact is that the strip foundation forms under the steam room closed space, the constant presence of water in it has a very negative effect on all wooden structures of the building. To drain water, a cement-sand screed should be made.
Preparatory work
Inspect the foundation, check for ventilation and service holes in the tape.

Water can be drained to ventilation holes only if they are located at the required distance from the upper plane of the foundation strip. This distance should be at least 20 centimeters. If the holes in your bathhouse are located higher, then you will have to make a special one to drain the water.
What does the vast majority of articles on the Internet offer? Under the steam room, make a screed in the form of a funnel with installation in the middle drain pipe. We suspect that this method of solving problems is recommended by those who have not done anything with their own hands. Why? Let's briefly look at this technology and point out its disadvantages.

- Along the perimeter of the steam room, you need to select soil with a smooth depression in the middle of the room, then pour sand in the same way. Disadvantages - quite a lot earthworks, requiring care and numerous checks of the geometry of the recess.
- The drainage pipe should be installed in a funnel. The disadvantage is that you need to dig a separate trench under it, make sure that the proper slope is maintained and that it exactly coincides with the existing hole in the foundation strip. Doing this is not just difficult, but very difficult.
- Make the screed with an inclination towards the center of the funnel. The disadvantage is that it is technically impossible to complete the work in one day; you need to wait until the first half of the screed hardens and only then start concreting the second half. But that's not all. We assure you that such work can only be performed by real professionals. If you only saw the trowel in the photo in the article, don’t even start making a funnel-shaped screed for water drainage. And further. No matter what measures you take, a temporary gap in laying the screed in the middle of the funnel will definitely cause a crack. It is clear where the water will go.

What do we offer? The screed under the pouring floor should prevent water from entering the ground and drain it beyond the perimeter of the bathhouse underground. We offer an option to achieve this task with much less effort and less time wasted. And yet, according to our algorithm, almost anyone can make a screed and drain the water on their own, the main thing is that there is a desire.
Our option - The screed under the pouring floor is flat with a slight slope towards one of the walls of the bathhouse, preferably in the direction where the stove is located. There elevated temperature and the water dries better. The slope of the screed is within one centimeter per linear meter, for a bathhouse 4 meters wide, it is enough to make a slope of 4 ÷ 5 centimeters.
Advantages of the method:
- there is no need to engage in labor-intensive and complex from a construction point of view work on laying the outlet pipe. According to a simplified technology, you first need to make the entire screed, then in the lowest place near the wall make a hole in the tape just below the level of the screed. Insert a piece of pipe into the hole and seal the gaps between the pipe and the hole made in the foundation on both sides with mortar;
- The volume of excavation work is significantly reduced. You just need to throw a small layer of earth from one wall to the opposite and level it with a shovel. But this can only be done when there is a special vibrating plate or a reserve of time for natural shrinkage. Of course, then a sand cushion is poured and compacted. Less work?
It is on this simple version preparing the underground for the poured floor and stop.
Prices for vibrating plates
vibrating plate
Step-by-step instruction
| Step, No. | Description of work | Illustrations |
|---|---|---|
| Step 1 | Decide on a specific water outlet location. It is advisable that it be located behind the stove. But this is not always possible - the water must come out from the side of the bathhouse opposite the facade or into a special storage tank. Structurally, it can be difficult to satisfy two conditions at the same time. | |
| Step 2 | Use a shovel to slope the area under the steam room and gradually remove the soil in small layers. Using a hydraulic level, check the slope; it should be approximately one centimeter per meter of length. Prepare the site taking into account that a sand cushion up to ten centimeters thick will be poured on top. | |
| Step 3 | Add sand and compact it. Level the area with a long lath, sloping towards the water outlet. | |
| Step 4 | Install beacons for the screed. The thickness of the screed is no more than five centimeters; take slats of the same width and install them on a sandy base. Fix the slats in several places with mortar on both sides. Check the position of the slats with a level and a rope. For these works there is no need to comply high accuracy, the main thing is that the water drains from the surface. Problem areas can be easily corrected later. If you are in a hurry, sprinkle dry cement on the mortar near the slats and after a few seconds, remove the damp cement from the mortar. Repeat this operation two to three times. Such simple steps will allow you to work with slats in just a few minutes, their stability will be quite sufficient. | |
| Step 5 | Screed with a semi-dry mortar. To make it, you need to reduce the amount of water; when squeezing the solution in your hand through your fingers, no water should appear and at the same time the shape should be preserved. | |
| Step 6 | Level the solution with a lath, remove small depressions and elevations with grout. Continue working in this way over the entire area of the steam room. |
The semi-dry solution allows you to continue work the next day. Wooden slats-beacons do not need to be removed; they will serve as additional preventers from the appearance of cracks in the screed.

Semi-dry screed - photo
Now all that remains is to use a hammer drill to make a through hole in the foundation strip for water to drain. Make it 2-3 centimeters below the level of the screed; the hole should have a slight slope outward. Insert a pipe into the hole, check its position and carefully seal the gaps between the pipe and the hole with mortar.
The next day, check the base for drainage quality. Pour a bucket of water into the high place and watch how it goes and in what places it lingers. If necessary, correct the plane of the screed and eliminate places where water stagnates. At the drainage section of the foundation, make a small groove with a slope towards the pipe.
Practical advice. So that the fresh solution has good adhesion with the old one there is no need to use expensive mastics. Moisturize well problem area water, add thin layer cement and use a brush to thoroughly rub it over the surface.
That's all, now you can put flooring using the technology described above.
1. Do not nail the boards under the shelves; after taking bath procedures, place them on their edges

At first glance, it may seem that there is logic, drying should speed up. But that's not true. To make sure of this, it’s worth remembering about ventilation, it doesn’t matter what type it is: or. The amount of air removed from the room depends on the size of the inlet and outlet openings. By removing several floorboards under the shelf, it appears that we are enlarging the entry hole, and rightly so. Only the outlet hole remains the same, as much air as came out through it will continue to come out.

The total area of all the cracks in the floor is always greater than the area of the outlet vent; there is no point in removing several boards. This will not improve the drying of the floor, but on the contrary, it will worsen it. If in the normal state air flowed evenly through the cracks throughout the entire area of the room and dried the entire floor area, now it will flow mainly through the expanded hole, and most of the flooring will dry much more slowly.
2. Arrange the flooring from separate panels and remove them after the bath to dry

And we don’t recommend doing this; other than headaches and wasted work, there will be no result. Again, due to the fact that the drying of the panels will be very uneven. There is no need to invent a bicycle, believe the centuries-old experience of our ancestors, provide normal natural ventilation of the underground and high-quality ventilation of the room.

3. Boards need to be planed on both sides
Flooring materials must be passed through a thicknesser; they must be smooth on both sides - smooth boards absorb moisture less.

Now what's really going on. Planed and unplaned boards get wet equally in thickness; there is no wetting of the pile negative influence does not provide. And during drying, the pile, on the contrary, accelerates the drying time of lumber due to a significant increase total area surfaces. Next, capillary phenomena are triggered, the roughness quickly sucks moisture from the body of the board and speeds up its drying. Planing on both sides does not improve the drying process, but only reduces the thickness of the boards. You should not convert commercial wood into shavings; do not waste time and money in vain.

Video - Bathhouse and floors in it
Video - About the correct design of a Russian bath
The classic Russian bathhouse has a wooden pouring floor. Why torrential? When washing, water pours directly onto the floorboards and goes into the cracks between them. The water seems to “spill” through the floor and then goes underground. It must be said that nowadays, in the construction of bathhouses, pouring floors are increasingly being abandoned in favor of a waterproofed floor, however, pouring floors are still widespread, especially far from big cities. Why do people choose poured floors?
The first advantage of a poured floor is the simplicity of its design. Anyone can make such a floor in a bathhouse.
There are several options for laying pouring floors in a Russian bath:
The boards are laid on the joists with a gap. Water goes into the cracks between the boards.
The boards lay tightly, without any cracks, with a slight slope towards one of the walls of the bathhouse. Near this wall there is a drain in the form of one long slit through which water enters the gutter. It is important that the water rolls along the boards, in this case it will not stagnate.
An option that has long been used in Russian villages: the floor in the steam room consists of two halves, sloping towards the center, where a gutter made of three boards is located to drain water. One edge of the floor boards rests on this gutter. The gutter is blocked from drafts by a damper.
In general, the gutter can be located in any convenient place. The main thing is that the boards should be positioned with a slight slope towards it, and the water would roll into the gutter along the boards. The water drain is often made round; in this case, a regular ball can be used as a damper. With any flooring option, it must be completely isolated from the walls of the bathhouse and the foundation. The problem of waterproofing is solved extremely simply - by strengthening it on the wall even before laying the floor boards with roofing material or galvanization.
The second important advantage of a pouring floor is low price materials for its construction. To install a poured floor, a minimum of lumber is required. There is no need for a heavy strip foundation, which costs a lot. In addition, to build such a foundation you will have to hire qualified performers. All that is needed for a bathhouse with a pouring floor is a light columnar foundation.
Third advantage. Wooden floors
Natural wood, environmentally friendly safe material. The wooden floor is “warm”. When the stove is fired in a bathhouse, it heats up quickly, even in winter. By wooden floor It’s pleasant to walk and, importantly, without the fear of slipping.
The fourth advantage of a pouring floor: easy repair if necessary
Repairing a flooded floor comes down to replacing rotten floorboards and joists. The work is simple and can be done on your own. The cost of repairs is not high.
Unfortunately, it is the need to periodically replace rotten floor boards that is the main disadvantage of flooded floors. Even in a well-built bathhouse, the service life of a pouring floor rarely exceeds ten years. In most cases, this period is much shorter.
To summarize what has been said, poured floors in your bathhouse are justified if: You do not want to invest significant money in the construction of a bathhouse.
The bathhouse is used periodically, from time to time. What is usual for summer cottages.
There is no reliable power supply in your area. Unfortunately, this is a problem for many dacha plots and villages in the outback of Russia. In this case, the only option is a pouring floor.
A shower floor in a bathhouse is a classic. The design of a poured floor in a bathhouse is simple, and the technology is even simpler: the plank flooring is laid along the joists without sealing the joints, this is as easy as shelling pears. During baths water procedures, and also when washing and cleaning, all the water flows down through the cracks. Further - depending on the situation. In the most severe case The water sits there for some time, seeps out, deteriorates, evaporates, etc. in a windproof, cold underground. The result for the bathhouse is the possible appearance of so-called heavy steam. This is a very unpleasant feeling of stuffiness, unpleasant odors, leading to a reluctance to stay in a given room for a long time.
Do-it-yourself shower floor in a bathhouse
A wooden floorboard has a lot of advantages, but as a living, capillary material, it will always absorb water and rot. Unless, of course, this tree is stained oak or “iron wood”. Complete antiseptics and painting to protect bath floors from water are not an option. Therefore, they do it “simpler” - organize heating and ventilation of the underground with hot air from the steam room. In a bathhouse built on stilts, this problem is easily solved. To do this, you need to fulfill several conditions:
- Both rooms - the washing room and the steam room - have a common pouring floor and a common underground with a tray below.
- The washing and steam compartments are separated from other rooms by a common fence, and this partition is as airtight as possible.
- The windows and doors are closed, and the air draft for the combustion chamber comes only from the washing compartment. Fresh air from the street enters the bathhouses only and only through ventilation ducts conducted through the pile grillage and passing under the convection heaters of the stove.
- The stove is heated in the steam room on the washing side, and the stove is located in the partition between the steam room and the washing room.
When the stove begins to heat up during combustion, a draft occurs and fresh outside air is taken in, which passes through the ventilation duct under the convector and heats up. According to the laws of physics, the heated air goes upward, to the ceiling of the steam room, and when cooled, it goes down, and, since there is draft in a sealed room, more warm air goes through the pouring floor below, into the underground. But, since the underground is insulated, the air does not go out into the street, but again into washing department and from there in a circle - into the furnace of the stove. The more the air heats up, the faster this cycle occurs, while not only the steam room and washing room are blown through and warmed up, but also the underground.
Ventilation ducts go from the outside through holes made in the grillage (vents that are optimally designed at the foundation stage), then pass between the floor joists and go to heating devices oven (convector).
The entire system is designed specifically with future underground ventilation in mind. The foundation can be strip, pile-screw, bored piles or piles using TISE technology. A grillage made of timber, with a cross-section according to calculation, is mounted on the piles, securing it to the piles using anchor bolts. Logs are laid along the grillage and secured with screws or nails. Be sure to do antiseptic and fire retardant treatment of all wooden structures - grillage, strapping for joists and joists. A sealed tray will be installed under the grillage simultaneously with the installation of ventilation. The material for making the pallet can be plastic, stainless steel, or polycarbonate, with a supporting frame made of timber or boards.
The pallet consists of two parts - a contour frame and a base made with a slope to allow water to flow to a certain point, the lowest, optimally in one of the corners of the grillage. The shape of the pallet is simple, rectangular or square, the board (bar) for the supporting frame is taken with a thickness of 50 mm. The pallet will be installed directly on the ground or drainage bedding, depending on the ground conditions, but treatment of wooden structures with a fire-retardant compound is mandatory in any case. A practical option for assembling the bottom of the pallet - structural plastic, durable, bio-resistant and affordable. Possible to use monolithic polycarbonate thickness from 3-4 mm. Fastening is carried out using special self-tapping screws with thermal washers. The pallet is attached to the grillage bolted connection or on self-tapping screws. All joints are sealed. Access to the drain must be free for its operation and periodic cleaning.
A pallet is not needed if the underground can be insulated in another way, for example, if the bathhouse is built on a strip foundation, you can close the ventilation holes (vents in the strip) while the stove is burning.

Ventilation ducts of the pouring floor in the bathhouse
The most the hard part– ventilation duct. It is more practical to connect it to the heaters in the gaps between the joists running closer to the stove. There must be a vent in the grillage. If the grillage is made of timber or a thick plank, then you can drill holes in it. The frame of the ventilation duct will be the logs themselves. The supply fan is installed outside, the openings are closed with grilles. The bottom and cover of the ventilation duct can be assembled from boards, plywood, OSB sheets, with sealing. Under the stove there will be a ventilation duct cover, partially secured with a permanent fastener. For cleaning and maintenance of the ventilation duct, the cover can be made of two parts, the second part is removable. There should be gaps in the lid, which should be protected from debris and dust with a fine grille or mesh. The lid closes at the top glass magnesium sheet with slots at the level of the ventilation duct openings. When sealing the joints, the channel will be thermally insulated. An additional supply anemostat can be mounted at the outlet of the ventilation duct to regulate the air draft.

Flooring in a bathhouse
The construction of flooring is no different in technology from a conventional poured floor. If applied wide boards with a thickness of 40 mm, their weight will allow you to avoid making fastenings. In this case, maintenance of the pan, cleaning and checking the ventilation duct is even more simplified. It is possible to additionally dry the boards by removing them and placing them on edge during periods when the bathhouse is not heated. The tray is easy to wash and clean.
pros this decision– quick heating of the bath, always fresh air and warm dry floor. In such a steam room, after heating the bath, not only the shelves, but also the floors will be hot. You can forget about the problem of heavy steam and mustiness; floor boards last a very long time. The only negative is a consequence of good ventilation - part of the heated air is removed, so you have to heat a little more.
Spilling floors – good tradition a real Russian bathhouse. They are easy to do, inexpensive and, with proper care quite adequately replace a waterproofed base. And walking on the boards is much more pleasant than walking on cold tiles. Therefore, even at the stage of constructing the log house of my bathhouse, I decided that I needed just such floors, pourable ones. It turned out that making them is very simple. Judge for yourself.
What should good poured floors look like?
The poured floors are wooden, they are made from boards that are not closely fitted to each other, but at a distance of several millimeters. The floor ends up with visible cracks. This is its main meaning: the water used for washing does not stagnate on the boards, but immediately spills through the cracks into the underground space. From here the water is through drainer the pipe is redirected outside the bathhouse. Some bathhouse owners don’t bother and leave this water to soak into the ground. In my opinion, this is a very bad idea.
Yes, it’s simple: you don’t need to waterproof the underground space, do drainage, or take care of the sewage system. But all this simplicity will negatively affect your health and the health of your family. All used water will not be absorbed into the soil and will settle on its surface. soap flakes with remnants of dirt, bath leaves, branches. Let's get a real breeding ground for fungi. And fungi, as you know, secrete huge amounts of harmful substances, causing allergies, pulmonary and many other diseases. So I don’t advise anyone to make a blatant “sewer” under the bathhouse! All used water must be diverted away.
An approximate diagram of pouring floors that you can use as a guide
Construction process of pouring floors
1. Organization of underground space
This is the most important thing in poured floors, take my word for it. It is imperative to ensure a quick outflow of used water into the sewer system so that the subfloor dries quickly, if possible. Otherwise you will get rot, mold, fungi and other “delights” that have no place in the bathhouse. I did this: I removed the inside of the log house fertile layer, poured clay there, and then a gravel-sand cushion, spilled water, and trampled it down. At the same time, the surface sloped towards the wall with a drain below. Then it was time for waterproofing. I used roofing felt - I laid it in one layer on the surface of the subfloor, and I tarred the seams with hot bitumen. In theory, the subfloor has already been waterproofed. The water will go down the drain without being absorbed into the soil, but the surface of the subfloor will remain wet. And this, again, will lead to dampness and fungal growth.
The subfloor must dry completely, and this requires ventilation, that is, a constant influx fresh air to the space under the bathhouse. My log house stands on a strip foundation, so I initially provided for the presence of holes in it - vents. Through them, air penetrates perfectly into the “basement”. The vents should almost always be kept open, closed only when heating and steaming in the bathhouse. Otherwise the whole hot air will go safely outside.
2. Installation of posts to secure the logs
The height of the underground space, from the ground (covered with roofing felt) to wooden boards pouring floor, ideally should be 200-300 mm. Thus, the logs of the wooden floor should not lie directly on the roofing material, but should be raised. This is done by laying them on posts. I installed columns with a height of 270 - 300 mm from brick, placing them in increments of 80 - 100 cm. After this, the bricks were completely plastered with ordinary cement mortar.
3. Waterproofing
I covered all surfaces of the underground space (columns, surface of the subfloor) with hot bitumen. It turned out smooth surface, to which leaves, soap flakes and other bath waste do not cling. The purpose of this action was to provide additional waterproofing and ensure the rapid flushing of all kinds of bath waste into the sewer system, so that nothing remained under the floor.
4. Attaching the logs to the posts
As a lag I used metal channels, covered them with bitumen - it seems to me that they will not be demolished. In general, beams made of hard wood, for example, larch, are traditionally used for lags. They must also be covered with bitumen, otherwise they will rot after a couple of weeks of use.

5. Creating a boardwalk
For the boardwalk, I used 40 mm thick larch boards. They were previously planed on both sides so that drops of water would not stagnate on the fibers.

I laid the boards on the joists with the convex side up (they were slightly warped when drying) with gaps of 5-6 mm. Several floorboards above the drain and near the opposite wall are removable. This solution allows me to lift the boards after washing and clear the subfloor and drain of debris. Additionally, dry the space under the floor so that the floor can last longer.

The boards closest to the wall are removable; they can be placed on edge while drying and cleaning the subfloor.
Disadvantages and advantages of pouring floors: which will outweigh?
Finally, I would like to emphasize that if you need a durable floor, then the option with pouring floors won't suit you. Despite all the tricks, ideal ventilation, rules for creating a floor, the wood above the water intake will still rot. Our task is to ensure that this process begins as late as possible. If you encounter the disadvantages of poured flooring in a year or two, you will immediately feel the advantages. They are:
- low cost
- ease of implementation
- good maintainability
- warm surface natural wood, pleasant for feet
Sazonov Dmitry