Interior of a cardboard house. Toys, houses made of cardboard boxes. How to make a cardboard house for children with your own hands
Children love playhouses and are ready to build them themselves from anything - tables, chairs, pillows, cardboard boxes... Boys are more attracted to the process of building a house with their own hands, and girls will be happy with a ready-made doll house, where they can leisurely play real life. We'll tell you how to make one out of a cardboard box original house with your own hands - any child will be happy to live in this!
Mill house out of a box
The large box itself is already a house, but if you work on it a little, a lot of delight is guaranteed! I offer you a version of a cardboard house made from a box with windows, a door, a pipe and even a screw that can be turned.
You will need:
- Large cardboard box
- Screw stick
- Screw
- Rope
- Scotch
- Double sided tape
- Acrylic paints
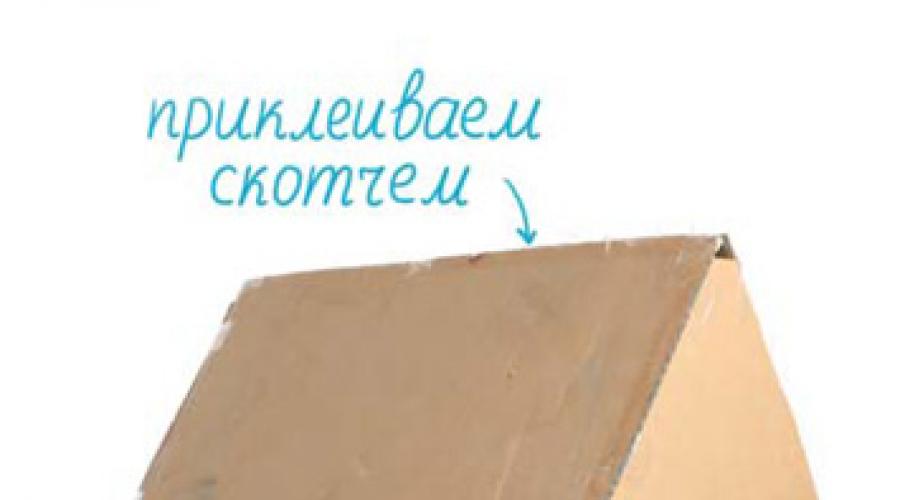
- Use two large box flaps to form an acute-angled roof of the house and glue them together with tape. Cut out a pediment for the roof from small flaps and glue it with tape.

- Cut skylights in the roof.

- Cut a door at one of the ends. To make the door open and close easily, first cut the part where it will be attached to the wall of the house, and immediately seal the cut with tape. Then cut out the door on the other three sides, open it wide and tape the fold in the open position.
- You can make shutters for skylights in the same way.
- Cut the pipe as shown in the photo. To mark the correct bevel of the pipe, use the corners that remained after cutting out the pediment. Glue the pipe with tape.

- Attach the pipe to the roof and trace it around. Cut a hole for the pipe and tape it to the roof.
- Cut out the windows at the end.
- For the propeller, cut two rectangular blades. Glue a circle into the center of the screw on both sides for strength. Place a small stick under the roof of the house and tie it with a rope, as in the photo. Screw a screw with a washer into the end of the stick and place the screw on it.

- Paint the mill house: first cover it with primer acrylic and let it dry, then paint the bricks on the walls, tiles on the roof, paint the screw and pipe.

Decorate the inside of your cardboard house: you can paint pictures and furniture on the walls, hang a lamp from the ceiling, curtains on the windows, and lay a rug on the floor. Safe, non-heating garlands will add coziness.

Idea as a gift
Anastasia Shukevich made a dollhouse “Little Red Riding Hood’s House” with charming details: folding doors and red voluminous tiles on the roof! The house is made from a box from dishwasher, painted water-based paint, tiles and window frames- made of cardboard painted with children's gouache. The gouache layer is fixed with hairspray so that the paint does not get dirty. The walls inside are covered with gift wrapping paper.
Tatiana Makurova
Comment on the article "Box plus fantasy: DIY children's house"
You can submit your story for publication on the website at
More on the topic “Do-it-yourself cardboard house”:
Box plus fantasy: do-it-yourself children's house. We sew a simple house for a cat with our own hands! In order to sew a cat house Parisian house from cardboard cubes for a baby. DIY toy house. You are well done! Stunned, how beautiful!
House for dolls made of cardboard: [link-1] I made a house and furniture. How to make a children's house from a cardboard box: photos and diagrams. Boys are more attracted to the process of building a house with their own hands, while girls will be happy with a ready-made doll house where they can...
Section: Adoption (do-it-yourself house made of cardboard under a log). And I will brag. “Four hands” with her mother, Katya glued the logs onto the adhesive surface of the film. IN window openings Instead of logs, they placed a second layer of film - very similar to glass.
BUT! Since I propose not just to embroider houses, but to build them, then let our houses carry some kind of functional load. See other discussions: Box plus fantasy: DIY children's house. Look through the eyes of children at the Cardboard House.
house - box. I continue to delight my friends with crafts on the theme of houses. DIY toys: a cardboard house with an attic and a cat. For example, you can decorate a children's house with your child's drawings, paint it with paints, paste wallpaper and even...
Box plus fantasy: do-it-yourself children's house. Knitting patterns for beginners with descriptions. Patterns, techniques, photos, diagrams Mom and Katya cut out and glued together the frame of the house and a rug for the floor from cardboard boxes. How to make a doll house and doll furniture...
The base is a piece of thick rubber with cardboard (rubber, cardboard, rubber) everything will stick into it well and the cardboard will not let it fall out. The grass and stadium surface are simply made of colored paper. The fence can also be made of cardboard, opaque, and draw a lattice on it.
Something is constantly being altered in the house, my little brother was born, and from time to time something breaks there, so I have to finish it. This is the embodiment of her childhood dream) Dollhouse And doll furniture do it yourself: master class with photos on how to make a doll house.
From a cardboard box and plastic bottles. Well, they adapted bells and matches. So we made towers from juice and milk cartons, and the walls from cardboard, then painted them and cut out the teeth on top.
Box plus fantasy: do-it-yourself children's house. Children love playhouses, and are ready to build them themselves from anything - tables, chairs, pillows, cardboard boxes... Socks for orphanage. This is the ad I read in the handicraft community.
children's houses: for the article. - gatherings. Child from 3 to 7. Education, nutrition, daily routine, visits kindergarten and relationships with teachers, illness and Dear mothers! I really need your help. I'm a journalist, I wrote an article about children's toy houses.
Box plus fantasy: do-it-yourself children's house. Well, let’s say, I can make a house and a toy for a child myself, what’s the big deal? Birthday in the cartoon studio - 15% discount. Birthday in the Kitchen of Homemade Animation All children love cartoons!
Little house. Toys and games. Child from 3 to 7. Education, nutrition, daily routine, visiting the nursery. I made a house for my beautiful daughter out of a box from a new refrigerator. And there's a lot more you can do wonderful crafts from TV boxes, washing. cars and...
My son Sena is just over 3 years old. He has a clear penchant for music, favorite hobby- conduct recorded orchestral works with a brush in hand. The staff there is large, covering the entire A4 sheet. A few months later we were building houses from LEGO.
House for Barbie. Toys and games. Child from 3 to 7. Education, nutrition, daily routine. My eldest daughter, almost 8 years old, has been dreaming about a house for Barbie for 2 years, but buying that junk is in books (" Funny Games"or "With Your Own Hands", Rosman) there is "your doll's apartment" from cards...
Box plus fantasy: do-it-yourself children's house. Children love playhouses, and are ready to build them themselves from anything - tables, chairs, pillows, cardboard boxes... About the children's playhouse. I wanted to buy my daughter a Casabella playhouse...
Would you buy your child a large cardboard house that looks like a real one inside and out? Co removable roof, windows and It turns out a pocket approximately 13x15. Box plus fantasy: do-it-yourself children's house. How to make a cardboard house with your own...
It is very difficult to tear a modern child away from gadgets. They are so accustomed to playing games on phones, computers and tablets that playing in the yard or with dolls at home practically no longer interests them. You can only captivate a child with something truly interesting. What could be more interesting than construction? own home! Remember yourself as a child. Each of us made a house under a table or in a closet and felt comfortable there. What if you and your child can’t make his own house from an ordinary cardboard box together? This will be his residence in the apartment and his private property. Every child dreams of this!
On the Internet you can find a lot of articles about building a house for children from cardboard boxes. However, almost all the instructions are very complex, and it will not be easy to follow them without preparation with your child. I found for you simple instructions with which you can make from any cardboard box in 10 minutes cozy place for your child's games.
What we need:
- The bigger the cardboard box, the better. For my experiments, I bought a box measuring 800*600*600 mm. Why her? Well, because it is the largest of the boxes that could fit into the trunk passenger car. Of course, I wanted to buy the largest box measuring 1200*800*800 mm, but it wouldn’t fit into a passenger car. So let's choose the first size.
- Corrugated cardboard sheet 1200*800 mm. It will be needed to give greater strength to the roof. You can do without it.
- A simple pencil. You can use a pen or marker.
- Stationery knife and scissors. Use these two tools. It is better to make the initial cuts with a stationery knife, and cut large parts of the box faster and more conveniently with scissors.
- Large metal ruler or corner. The box is large, so the ruler should be large.
- Scotch tape and PVA glue. It's better to buy paper masking tape. It sticks well and you can apply PVA glue to it.
Have you found or purchased the right box, prepared your tools and are ready to start studying the instructions? Then let's begin! My instructions will be divided into 7 simple steps.
Manufacturing process:

On the small flaps of the box, mark the middle and draw lines to the bases of the flaps. Let's learn about an isosceles triangle.

Work for scissors: cut off the unnecessary part from the upper small flaps along the drawn line. We cut off all the lower valves, but do not throw them away. We will need them for the roof.

Making a roof. We glue the lower large valves with tape. These flaps will be the top of the roof.

We secure the roof into a single structure using masking tape.

We cut out a sheet of corrugated cardboard for the roof to provide greater strength. We glue the roof using PVA glue onto the roof.

On one long and one short side of the house we draw windows and cut them out with a stationery knife.

On the second long side of the house we draw a door and cut it out in the same way with a stationery knife.
The house is ready! The facade of the house can be decorated with colored cardboard or painted by hand with your child.
Don't rush to throw away cardboard boxes if you have children in your home. Such a thing, unnecessary at first glance, will serve as an excellent house for dolls, toys, or even for the child himself. We will tell you how to make a cardboard house in this article.
How to make a cardboard house for dolls
You can make a house for a doll from a small cardboard box. To create such a product, you need to stock up on:
- cardboard boxes of suitable size;
- glue, tape;
- scissors and a sharp stationery knife;
- watercolor paints and brushes;
- colored paper;
- any finishing materials, for which there is enough imagination.
A multi-story cardboard dollhouse is made as follows:
- The boxes from which the floors are supposed to be built must be secured with tape along all edges so that the house does not fall apart during the game.
- Then you need to cut out windows in them. To begin with, it is better to draw them evenly with a pencil, and then cut them out with a stationery knife along the intended lines.
- To create a multi-story house, the boxes need to be placed on top of each other and glued together.
- Now you need to make the roof. To do this, take two cardboard sheets of suitable size and fasten them at an angle of 45°. The roof is installed on the top box.
- In order for the house to have separate rooms, it is necessary to make partitions. Like everything else, they are made from cardboard and installed inside boxes.
- In principle, the dollhouse is almost ready, the most interesting thing left is to decorate it. You can decorate such a toy structure in any way you like, for example, cover it with colored paper or fabric, decorate it with ribbons, lace, beads, buttons or something else. If you want to involve your child in the process, then cover the walls of the house with plain white paper, and let the child paint them at his own discretion.
- Just like the outside, the inside of the house also needs to be decorated. Unnecessary remnants of wallpaper, fabric, oilcloth will come in handy here.


How to make a cardboard house for a child
It's no secret that kids simply love to build small makeshift homes for themselves from everything they can get their hands on. You can help your child and make a cardboard house for him from a large box that was left over, for example, from a refrigerator or washing machine. The process of creating such a craft is similar to the previous one:
- The cardboard house must be durable, so tape all its joints and corners from the inside with tape.
- Draw the windows with a pencil and cut them out with a utility knife. Make the doors in the same way.
- If the box is too low for a child, the top can be cut off and an L-shaped roof can be attached in its place.
- You can decorate such a house with any available materials. You can cover it with paper or wallpaper, simply paint or paint it. Can be used natural materials for decoration: cones, branches, leaves.
All details children's house It is better to fasten with tape or a stapler, since glue will not work desired result and the house will fall apart.


In the interior of any apartment you can find an original and interesting toy house made from a variety of materials.
A popular option for such a decorative element is ceramics, polymer clay and... cardboard.
Yes, despite the apparent simplicity and even junkiness of the material, products made from it can be both elegant and original.
How to make a decorative New Year's house
Preparations for the New Year and Christmas holidays begin, perhaps, from the beginning of December. appear on the shelves Christmas decorations, artificial Christmas trees and other attributes of winter celebrations. You can decorate your interior with toy houses.
To work you will need:
- Cardboard.
- Glue Moment “Crystal” or “Gel”, glue pencil.
- Non-writing pen.
- Pencil, ruler, eraser, stationery knife, office clips.
- Curly scissors “fine wave”.
- Plain paper.
- Scheme, tracing paper.
- Decorative paper (for scrapbooking or with an original pattern, packaging).
- Decorative elements: cotton wool, sparkles, ribbons, stars, etc.
First stage. Transfer the diagram onto cardboard using tracing paper, drawing lines with a non-writing pen. Remove the paper with the diagram and fill in the spaces. Draw all places for future folds along a ruler.
Second phase. Cut out pieces from beautiful paper that correspond to the size and shape of the walls, and paste them over the future house. It is better not to use PVA glue with thin stationery cardboard, since the cardboard may get wet and the product will fail. And it will no longer be possible to correct such a defect. A glue stick can also “lead” cardboard, so it’s best to use Moment glue.
 Third stage. Bend along the lines and glue along the additional “wings” of the fasteners with Moment glue. For convenience, the internal parts can be additionally secured with office clips during the gluing period.
Fourth stage. Roof. Cut out a corresponding rectangle from cardboard and bend it in half, first drawing a fold line with the tip of a non-writing pen.
Fifth stage. Since the house is small, the most elegant part of it is just the top. Cut strips 1-1.5 cm wide from brown decorative paper, trim the edges with curly scissors. If you have a figured edge hole punch at your disposal, then you can do the same thing with it, but then the strips of paper should be wider - it all depends on the depth to which the hole punch cuts the pattern.
Glue these strips on both sides of the fold of the roof, forming tiles. Glue cotton wool to the very bottom edge and sprinkle it with glitter. Next they go decorative elements- snowflakes, etc. The house is ready.
DIY cardboard diagrams
There are a lot of templates for toy houses, but sometimes you want to make something of your own, unique, meeting only your requirements. Making your own house diagram is not so difficult - general principle described in a small master class. To do this you will need:
- A sheet of paper in a square.
- Pencil, ruler, scissors.
First step. Fold a sheet of paper in half. At the bottom of the sheet from the fold point, A, move 5 cm to the left (point B) - then the width of the lower part of this wall will be 10 cm. From the bottom point, A, move up 14 cm along the fold - Point B. From this point, move 8 cm to the left (point G). Draw lines (along ABC points) - you get a trapezoid figure. From point B up on the fold, place point D at a distance of 6 cm. Connect point D and point D - this is the silhouette of the future roof.
 Second step. Unfold the sheet of paper and symmetrically transfer the drawing to the second part. Add “wings” to the drawn lines on each side - they will be needed when assembling the house.
Draw a rectangle 1 cm wide for each line along its entire length. You will need 2 such parts.
Third step. The side walls will be 14.5 cm in height, and Bottom part the width can be arbitrary. The roof is 24 cm long (divided in half by the fold), the width depends on the depth of the house. You will also need 2 such walls.
The scheme is ready. At the same time, it is not necessary to observe the strictness of the figure; you can cut it out immediately without measurements; the walls and roof can be figured. However, in this case it is better to use thin, flexible cardboard to make it easier to fit the roof and the second part of the walls to the curves.
Cardboard version for children
Everyone in childhood built huts at home, lowered the tablecloth from the table to the floor, enclosing their Child's world games from adults, entire “halabudas” were built on the street. You can also make a children's playhouse out of cardboard. A refrigerator box is best for this - at least. Using a sharp stationery knife, cut out windows and hatches in it according to the template. To the windows with inside curtains can be attached. The larger the box, the more players it will fit in and the more interesting the games will be!
Doll's house: master class
 Large doll houses made of cardboard, they are somewhat reminiscent of the models that everyone made at school. This attribute for girls' games is easy to make if you have thick thick cardboard, for example, a TV box or microwave oven. A refrigerator box is unlikely to be suitable - large-sized equipment is packaged in thick cardboard and is considerably deformed. If suitable material not in the house, you can get them at the nearest store by simply asking for a box of alcoholic drinks.
To work you will need:
- Cardboard;
- Long ruler, pencil;
- Stationery knife;
- High-quality tape, glue Moment “Crystal”;
- Finishing paper - real wallpaper, sheets from glossy magazines, etc., pieces of fabric, glue.
First step. Determine the number of floors of the house and the height of the future inhabitants of the house. The average width of the block is 30 cm, height - about 20 cm - so that the dolls themselves, their furniture and other small things can fit. The depth of the block is 15 cm, this distance is enough for a child’s hand.
Second step. Cut out the corresponding parts from cardboard. They will be required: 4 parts measuring 30*15 - this is the floor/ceiling; 6 parts 20*15 - side walls; 3 parts (for a three-story house) measuring 20*30 are the rear walls. In addition, you will need partitions for the rooms, their size is 19.5 * 15 cm, their location is arbitrary, as well as the number, but on average one per floor.
Third step. Roof. It will require 2 parts 15 by 21 cm and an additional part that will fix the roof arch. This could be a 15 x 4 rectangle of plain cardboard, folded along the long side. In addition, similar parts will be required to fix the roof and floor - 20 * 4, in the amount of 2 pieces, and the back of the roof - a triangle with sides 30−21−21 cm.
 Fourth step. Immediately wallpaper the walls from the inside, the ceiling can be covered with white paper, and pieces of fabric imitating carpet can be glued to the floor.
Fifth step. Assembly. All parts of the blocks are glued together with Moment glue. The work is painstaking and cannot be rushed. The next stage of assembly should not be started before the glue in the previous block has dried.
Sixth step. A side porch can be attached to such a cottage. For the porch you will need a piece of cardboard 8*9 cm, and two straws for a cocktail. The porch canopy is glued to the wall of the house at an angle, it is supported by posts - straws.
Seventh step. Garage for cars - after all, residents have such luxury cottage, almost a castle, you can’t help but have your own car. The garage is a box measuring 20*10 cm - but here the dimensions may vary depending on the size of the car.
Cardboard dollhouse: photo


Teremok with a mill
If the dolls require not a city cottage, but country house, then it’s better to limit yourself to two floors and add just a few details. For example, the house must have a stove or fireplace, and there must be a chimney on the roof. The fireplace is made from matchbox, pasted over with paper with a corresponding pattern. The chimney pipe is made from a sleeve from toilet paper or a piece of cardboard rolled into a tube. The main thing is to cut the pipe at the desired angle.
In addition, a village house will require additional surroundings - for example, a mill and benches near the house, a small shed for horses. A shed for horses is made according to the same principle as a porch, just the hitching post should be longer. The bench can be made from popsicle sticks by gluing them to the base sides.
The mill is a narrow, high house with blades attached to one side. They can be drawn on cardboard and cut out, or made from skewers and jute.
cat house
No member of the cat family can resist a simple cardboard box, and this also applies to representatives of large cats. Even lions, tigers and lynxes are happy to climb into the boxes, rub, chew the edges and roll around in them. What can we say about domestic cats - as soon as you bring home a box of shoes and take out a new thing, the container is not already owned by the tailed pet, and it can be difficult to take it away.
 If your cat has a weakness for all the boxes in the house, you should consider a permanent, on-duty pet box. However, in order to appearance didn’t stand out too much and didn’t catch the eye, the box needs to be refined.
- Before you start doing anything with the box, make sure your pet likes the box. Animals are primarily guided by the smell if you brought a container of washing powder or other household chemicals, be prepared that the cat will not like it.
- Do not use harsh materials for finishing. chemical smell- for example, Moment glue is absolutely not suitable; it should be replaced with hot-melt glue from a glue gun or masking tape.
- The inner bedding for an animal should not be tightly fixed, because periodically it needs to be removed and washed, especially if we're talking about about a house for kittens.
- It is best to take cardboard of such density and thickness that it can support the weight of the animal when it is on top.
How to make a cat house with your own hands
To work you will need:
- A cardboard box of the right size and density, tested and approved by your pet.
- Upholstery fabric like jacquard or tapestry; carpet remnants are ideal.
- Glue gun and glue sticks for it.
- Ruler, pencil, sharp utility knife, scissors.
- The shape for cutting out the entrance is a round plate or rectangle.
- Internal litter.
 First stage. Decide on the size of the entrance. To do this, you need to measure the width of the cat's chest and add 3-4 cm. Draw a circle on one of the sides and carefully cut it out with a sharp utility knife.
Second phase. Make a pattern on the fabric that matches the future cat house and cut it out. On the side of the box where the entrance will be, duplicate the entrance pattern from the inside out. If it is a circle, then two circles should be drawn on the wrong side - with a diameter like the one cut out in a box, and inside it a circle with a smaller diameter of 1.5-2 cm. The smaller circle is cut out, and the remaining gap is cut with fringe.
Third stage. Wrap the box in cloth and make sure everything is done correctly. Glue glue gun fabric to all sides except the one where the entrance is.
Fourth stage. Glue the side of the box with the entrance, wrapping the fringe inside the box and gluing it inside. The cat house is ready, all that remains is to put the bedding in it, and you can let the tenant in!
Attention, TODAY only!
Do you throw away cardboard because it takes up too much space? But it can become material for your creativity. For example, you can build a house...
From Masterweb
12.04.2018 00:01Do you throw away cardboard because it takes up too much space? But it can become material for your creativity. For example, you can build a cardboard house for children or for pet. Find ideas for such crafts below.
Little house for dolls
Do you have a little daughter? Then make a doll house for her from cardboard with your own hands. Any girl will be delighted with such a present. If you have a lot of free time, then assemble a home for Barbie, and if time is short, then make a small shelter for miniature toys. How to assemble a house? The first step is to draw a pattern. It should consist of three walls, one pediment, a floor, a roof and a partition between floors. Let's start creating. Cut out the details. There are two ways to fasten the workpieces together. One is to glue the cardboard using a hot gun, and the other is to create grooves in the pieces. You can combine two mounting methods for reliability. First connect the walls together, then attach the floor to them. After this, insert the partition between the floors, and the last step is to attach the roof. You can decorate the front part of the house with cardboard, which will serve as a pediment.
Big doll house

Want to do stable design and at the same time not spend a lot of time creating crafts? Build a large open house out of cardboard. Before starting work, you need to draw a pattern. It will consist of two side walls combined with gables, a rectangle connecting two parts of the future building, and three partitions between floors. We transfer the pattern to cardboard and cut out the parts. In accordance with the photo attached above, cuts need to be made in the blanks. They will play the role of grooves. Thanks to this fastening, the structure will stand stably, and if necessary, it will be easy to assemble. Once the grooves are made, you can start cutting out the windows. They can be of any shape and located in any part of the building. To make your home more attractive, frame each window with a curly frame. Use multi-colored gouache mixed with PVA glue for this purpose.
New Year's house

Children love to make such crafts for New Year's holidays. A cardboard house can play the role of a candlestick or become one of the decorative details of the room. How to assemble such a craft? You need to start with a sketch. Draw a picture of the house you want to design. If you don’t often do prototyping, then you need to start with manufacturing one-story building simple design. The drawing is ready, now you should draw its development. Contrary to popular belief, this is done simply. If your spatial thinking is poor, first make your project out of plasticine. When the pattern is ready, transfer it to cardboard and then cut it out. Glue the pieces together using a hot gun. Paint the craft with gouache or immediately make a model from white cardboard. Complete the project with fir trees and a fence, and then dust the craft artificial snow or small foam.
Tea house

It’s always nice to make not only beautiful, but also utilitarian products. One of them is a cardboard tea house. A master class on making such a product is given above. The roof of this craft is removed and the base is filled with tea bags. Such a house can be placed on a table or used to decorate one of the shelves in the kitchen. How to make a tea house with your own hands from cardboard? Above is a pattern, you need to print it out or redraw it. First, let's assemble the base. It consists of four long rectangles and one small square. We first fasten the walls of the structure together, and then glue the floor. The cutout for the door must be made immediately. At this stage, you need to check whether the bags can be removed from the hole; if necessary, the hole can be enlarged. We cover the base with beautiful paper with a suitable print or paint the house by hand. Now you can assemble the roof. We glue two rectangles together and insert a strip between them. We make gables and make a floor near the roof. You can decorate the part with rectangles curved on both sides. Cover the roof with colored paper or paint the detail.
House for children

Do you want to please your child? Make a cardboard house for your children with your own hands. For babies best entertainment- This is to hide in a shelter. The cardboard house will become permanent place games for a child. How to give such a gift to your child? Make a pattern. You can draw it on the wallpaper that remains after the renovation. You need to design the structure with reserve so that your child can enjoy his shelter not just for one season, but for several years. Two side walls need to be combined with the gables. Long walls are rectangles. And for the stability of the structure, the roof should be made of rectangles folded into the letter “P”. These large "clips" will cling to the projections that need to be created in the gable. Cut windows in the long walls of the house, and cut out a door in one of the side parts. You can attach it using springs or an old door mechanism.
House for a cat

Do you have pets? Make a cat house out of cardboard. This design will be very primitive, but your pet will be able to appreciate the work. What should an animal's house look like? Take 8 old cardboard boxes. The first row of the structure will consist of four boxes. Connect them together using tape or glue. Cut through holes in a chaotic manner. But don't touch the floor of the house. The second row will consist of three boxes. Arrange them in the form of a corner on the first tier. Make slits in each wall, and also be sure to make several holes that will lead to the lower tier. Glue the remaining box with a third layer. Cut passages in it. The house is ready. You can decorate it in any way so that it looks good in your interior.
Packaging house

The holidays are coming soon and you decide to give your friends sweet gifts? Then make a house out of cardboard. Such packaging can be filled with purchased sweets or homemade sweets. How to make a house? Attached above is a template. You need to print the pattern and then cut out the stencil. Take colored cardboard and transfer the drawing onto it. Now cut out the blank and glue it. All that remains is to decorate the craft. You can paint your creation or make an applique from colored paper. If you fill the box with homemade sweets, be sure to wrap them in foil or cellophane. This is necessary so that the product does not become saturated with oil and does not lose its presentable appearance.