Tool for cutting corners on wood. A homemade device for precise cutting of boards with a hand-held circular saw. We make a miter box with our own hands
A miter box is a device that carpenters have been using for centuries to saw off trim, baseboards, baguette strips and other parts that require miter joints. What are the features various types such tools, let's figure it out together.
Is a hand miter box an amateur tool?
This word came from German language – Stöße(joint), Stoßlade- miter box. This device is a rectangular tray with slots on the sides, usually at an angle of 45º. It is usually made of wood, less often of plastic and aluminum alloy. A “box with cuts” type tool can be factory-made, or you can make a miter box with your own hands. This simple design used for cutting wood and metal parts. Used in piece production.
Miter boxes of simple design are in demand. Many well-known companies, along with all sorts of complex tools, also produce such “boxes with cuts.” When purchasing a miter box, it is advisable to choose a product from brands that have already proven themselves. For example, model Fit 41255 made of hard plastic, designed for cutting wood, metal and plastics. Parts can be sawn at angles of 22.5º, 45º, 90º and 135º. The kit includes two eccentrics for fixing the part. Weighs 700 g, length – 310 mm, maximum width of the workpiece – 120 mm. Can be equipped with a saw.
Recognized among wide circles of masters is Stanley 1-20-112, which is made from impact-resistant plastics using injection molding, is equipped with two eccentrics, you can cut workpieces at angles of 22.5º, 45º, 90º vertical plane and at 45º – horizontally, dimensions– 310x130 mm. Can be rigidly attached to a workbench. Convenient to use also BISON 15375-75, this miter box is made of impact-resistant ABS plastic; grooves are cut into the base, which allow you to saw the workpiece to the end without damaging the device. Miter box STAYER 15402 (PROFI) differs from other models in that you can cut parts at any angle in the range from 0 to 180º, the graduation step is 15º. A fixing screw is provided to securely fix the angle.
Miter box as a professional tool
In a workshop environment, when higher productivity is required, simple miter boxes no longer meet the requirements, and it is more rational to purchase professional ones. mechanical devices, With metal body and a rotating carriage. In such tools, instead of side walls with cuts, there is a special rotating design, with securely fastened saw blade. Almost all rotary models are equipped with axle saws. This is a hand saw with a blade thickened and reinforced with a special overlay. This fairly rigid design allows you to perform all sawing operations as accurately as possible at any angle.
All professional miter boxes have a graduation from 0 to 180º, in addition, almost all of them can cut in two planes. The most popular brands: Fit, Champion, Stayer And Bison.
- FIT Pro 41321– rotary miter box, supplied with the saw, working part length – 600 mm. It is made of steel, aluminum alloy and durable plastic. The built-in clamp securely fixes the workpiece. The saw blade is made of high-quality steel.
- Champion 180– rotary miter box, length – 0.5 m, equipped with a bow saw, blade with a pitch of 1.4 mm. There is fixation at 45º and 90º, as well as angles for cutting workpieces for polygonal (4, 5, 6, 8 and 12 angles) products. It is possible to adjust the depth of cut, maximum height– up to 200 mm. Maximum width workpieces – up to 200 mm.
- Miter saw Bison– professional, rotary model for cutting workpieces in vertical and horizontal planes. The saw is mounted on the device body on a rotating axis and can be adjusted to the required angle. You can install blades for working with workpieces made of non-ferrous metals, alloys and steel. The saw is made using precision equipment from a material that provides structural rigidity and strength. On work surface scales in centimeters and inches to determine the dimensions of the workpiece, there is also a scale in degrees.
- Miter saw Stayer used for precise sawing of workpieces, the accuracy of setting angles is quite high here, the base of the miter box is marked - allows you to work without additional measuring instruments. Cutting depth up to 600 mm, workpiece width up to 160 mm. The base of the device is metal, the tension of the saw blade is adjustable.
- And here is the company's miter box Küpper- an even more functional product. The device differs from other types of this class in that not only the saw rotates to the desired angle, but the entire carriage moves along a guide on the body of the miter box. This allows you to fix the carriage at any point on the workpiece without moving it. To set a given angle, you need to combine the required values on the scales of the carriage and body. Sawing can be carried out in horizontal and vertical planes. For working in a vertical plane there is a special hinge with a scale. You can work in both planes at the same time. The workpieces are fixed with removable clamps. There is a function that allows you to set the desired cutting depth, this is important when making parts with “spikes”. Maximum cross section blanks – 150x150. The length of the canvas is 0.7 m.
How to make a miter box and how to use it?
Whatever tool you come across for miter cuts, the principle of working with it is the same, so we will outline in a few words how to use a miter box correctly. Let's say we, then the first thing we do is measure the angle at which the walls meet, divide it by 2, and mark the cut line on the product. The parts of the plinth should already have the length of the wall and on each side where the corner will be cut, have a margin of 5 cm. The front side of it is placed in the miter box; the markings should coincide with the slot on the tool, i.e. become its continuation. We firmly press the plinth to the box and cut it with a hacksaw; we also cut off the adjacent part, only we place it on the other side of the slot. We clean everything with sandpaper, try it on the wall, if everything matches without gaps, you can fix the baseboard to the wall.
If you don’t want to buy a factory copy of the tool, you can develop own plan How to make a miter box, although you will have to tinker with its accuracy, this is where it is important to measure seven times and cut only once. Find a board made of durable wood up to 1.5 cm thick; if there is no very strong (deciduous) one, then coniferous will do, but the thickness should reach 2 cm. We grind and make blanks for the bed and sides, a width of 15 cm is enough. What remains connect them into a box at right angles.
You can only use self-tapping screws, but our advice is to additionally coat the ends with glue and use. Secure the entire structure with a clamp and leave to dry, removing any excess glue that appears.
Now it’s time to mark and create the slots, here you need to measure the angles; in the simplest case, a square will help you. First, we apply a 90° mark on both ends (two lines opposite each other), then retreat 15 cm and draw oblique lines for 45° angles and others that you will presumably need in further work, between each next mark, retreat a distance equal to the width of the box, this will ensure maximum term product services. All that remains is to cut the slots with a thin and well-sharpened hacksaw and sand them. This is how we made our miter box, we already know how to use it, so we can start renovating the house.
Industrial machines as miter boxes
A manual miter box is quite suitable for the production of small batches, but cannot satisfy the demand for cutting in mass production. In industry, miter saws or miter boxes with electric drive are used.. The working body of a cross-cutting machine is a head with a fixed saw blade. The head can be rotated relative to the table in a horizontal plane at an angle of 45º in both directions. IN modern production machines with a rotation of 15, 22.5, 30 and 55º can be used. The machine can be used as a regular circular saw; the disc can be changed in a few minutes.
First of all, when choosing miter saws, you need to pay attention to power - for a home workshop, optimally no more than 1.6 kW and 5-6 thousand revolutions. Cross cutting machines produced by most companies specializing in the production of power tools. The leader, of course, Bosch, GCM 10 J– an excellent leading model German company, assembled in China. Power 1 kW, speed 4.5 thousand per minute. The design of the electric motor provides reliable dust protection. Table rotation angle is 45º in both directions, maximum cutting depth is up to 90 mm, workpiece width is up to 130 mm. The weight of the installation is about 15 kg.
Keeps up with the leader and Hitachi C 8 FSHE– this Japanese model is popular among both home craftsmen and professionals. Power 1.05 kW, speed – 5500 rpm, cutting angle 45º. You can process wood, aluminum, laminate, polymers. The cutting depth is 75 mm, the width of the workpiece is up to 312 mm, and the weight is also about 15 kg. The kit includes LED lights, dust collector, laser pointer. And here is a domestic representative ANCOR Corvette has all the same advantages as its imported counterparts, but costs about half as much and weighs 18 kg. In addition, the dust collector must be purchased separately!
Among large quantity construction tools There are all kinds of additional devices designed to make the hard work of craftsmen easier. Those involved in carpentry are familiar with this slightly strange name - “”, which means an assistant tool for cutting boards or any other profiled material at a structurally fixed or independently determined angle. For ideal design of internal and external projections, the angle is usually 45°.
The material intended for sawing at an angle can be different: skirting boards, door and window casings, baguette materials, slats, cornices, etc. The miter box is rigidly fixed on the workbench, the material is sometimes pressed with a clamp - such a device is safe and convenient to use.
Classification division
Despite the apparent simplicity of execution and use, the miter box has its own classification:
- simple– the most popular modification is a form of industrial or self-made, most often plastic, with several side slots that serve as guides for the saw. Designed for sawing slats, bars, corners made of wood, drywall and other materials at angles of 45 or 90°;

- rotary– with a hacksaw from 290 to 600 mm mounted on a metal or plastic base with the possibility of its rotation from 15 to 135°;
- electric– a tool that is an electric saw mounted on a rotating base.
Rotary and electric miter boxes are professional tools , designed for sawing in two planes. The strongest and most durable are those made of hard wood and metal (from aluminum alloys) products. It is recommended to use metal miter boxes for molded parts of small thickness, wooden ones for small volumes of work.

How to use a miter box?
Mastering the miter box is not at all difficult. In addition to the tool itself for correctly organized work required:
- a hacksaw for direct cutting of wood or plastic coated with veneer (for a hacksaw it is important to take into account the pitch of the teeth);
- assembly knife for cutting foam plastic;
- ruler and pencil for notches and marks in the initial stages of development;
- sandpaper for treating surfaces after cutting in order to remove unevenness, roughness and burrs.

Sawing slatted material
Often when laying external or internal wiring, as well as in other cases, it is necessary to qualitatively cut the slatted material (for example, a cable channel) at an angle of 45 or 90°.
For this purpose, a rail or cable channel is fixed in the body of the miter box with an emphasis on the end wall and a hacksaw for wood or metal (depending on the material of the rail) accurately makes the desired cut.
After carefully removing possible irregularities and burrs from the cutting site, the parts will fit together almost perfectly, without the slightest gap.
Jewelry fitting
The miter box successfully copes not only with sawing at the desired angle, but also with careful millimeter adjustment of the material. Without rigid fixation of the material in the mold and grooves directed at a certain angle, the cutting part of the hacksaw will “walk”, and the cut will not be made accurately, but only with some approximation. Only using a miter box will help remove the “extra” millimeter of length.

Working with ceiling plinths
Installation foam baseboard into the tool is produced in the same way as rack material. Depending on the the right type The hacksaw cuts along the corresponding grooves. Thanks to the frequent step of the cutting part of the hacksaw, the place where the skirting board is cut will be smooth and without additional processing.
For a tighter fit both in the internal and external corners of the walls, the plinth in the miter box can be rotated in a convenient way.
Things to remember:
- to avoid serious cracks at the joints, before starting work, you should check at what angle the planes of the walls meet;
- for an internal corner, the surface of the plinth adjacent to the wall should remain longer; for finishing the external protrusion, on the contrary, the edge adjacent to the wall becomes shorter;
- for adjustment, especially for beginners in the construction business, it is recommended to leave 3-7 mm: not ideal smooth surfaces and the curvature of the plinth will “eat up” this reserve;
- for high-quality cuts of various materials, it is important to use a cutting tool intended only for its type;
- the junction can be covered by external or internal decorative elements - for example, corners. In this case, it is advisable to cut at an angle of 90°.
Ceiling plinths carefully sawn on a miter box, without unsightly finger-thick gaps, will effectively complete the framing of the surfaces and give the room a finished look. With the acquisition of some experience, working with a miter box will allow you to design the most complex building construction.
Other uses for miter boxes
The miter box is a tool not only for construction and repair work, cutting cable channels and ceiling skirting boards. It is useful wherever precision and accuracy of cutting is required, for example, for making a baguette frame when decoration photographs or paintings.
Whatever the purpose of the miter box, when cutting using it there will be much less waste than with manual measurements and cutting “on the knee”.
When planning the premises of their apartment, many people think about how difficult the work can be. However, everything is not so scary: you can install the ceiling plinth with your own hands - the main thing is to know about some of the features of the materials from which this finishing element is made.
Different materials and their features
- Tree . The most durable material in comparison with the other two below, the advantages of which are hardness, impact resistance and the ability to withstand certain mechanical loads. However, wooden skirting boards (another name is fillets) glued to the ceiling are also relatively easy to process - they can be cut (a hacksaw is used for this) and varnished. Wood will add warmth to the interior. One of the disadvantages is the higher cost than that of polystyrene foam. However appearance Wooden fillets last longer than foam fillets.
- Styrofoam . Perhaps this material is the most fragile - it is not resistant to mechanical damage, scratches and even minor impacts. The advantages are light weight, the ability to be painted various colors and ease of processing (it can be cut stationery knife– really, very carefully).
- Expanded polystyrene . This material can be considered a type of polystyrene foam, although its strength characteristics are slightly higher (extruded polystyrene foam is denser than polystyrene foam). As for processing, polystyrene foam is just as easy to cut with regular sharp knife, and also has light weight, and this is an important factor when taking into account the load on the walls.


Both foam plastic and expanded polystyrene have one significant advantage: the softness of the material allows you to press the baseboard as tightly as possible to the corners and to each other, as a result of which there are no gaps. In addition, modern polystyrene skirting boards are made in such a way that they have a small recess - especially for hidden gasket electrical wiring.
Useful. can transform the appearance standard apartment in an elegant stylish interior.
Miter box - a tool for cutting skirting board corners
There are two ways to cut corners - with a tool (miter box) and without it. We will look at both methods.

Miter box made of plastic
A miter box is a carpenter’s tool, which is a small rectangular tray (you can make it yourself from wood or buy it ready-made from plastic or metal), the walls of which have grooves. The grooves guide the hacksaw blade at a certain angle to the axis of the tray.
Important: The cutting angle of the edge of the plinth is always oblique and equal to 45°, when elements intended for butt installation in the corners of the ceiling are processed. The oblique cut ensures a tighter fit of the fillets.
Making a miter box with your own hands
Unfortunately, not everyone has a full arsenal of carpentry tools at home, but you can make something like a miter box yourself. To do this, a rectangular tray is knocked together from planks, then grooves are sawed into the walls - at an angle of 45°.


Homemade miter box made of plywood
To measure the angle, you can use 2 knocked down boards and a protractor or a regular one. right triangle- here's the miter box and it's ready!

Method 1 - trimming the edge of the baseboard using a miter box
It is worth noting that ceiling corners can be both internal and external, and the difference between them lies in the methods of joining and different angles slices. The former are present at the junctions of two walls and the ceiling, the latter - when decorating protrusions, columns, outer edges of niches, pilasters, etc.
The angle of inclination of the groove in the miter box can be 45°, 60°, or 90°. Professional carpenters purchase a miter box with rotating mechanism– it’s very convenient to turn in this cutting tool when cutting skirting boards.
Cutting "internal" corners
Important! To cut the “internal” corner, the fillets should be placed on the bottom of the miter box with the upper part - the one that will be glued to the ceiling. Wherein Bottom part The slats should be pressed tightly against the wall of the tray.

Step 1: correct measurement the length of the plinth according to its markings on the wall, applying a “notch” with a pencil on the material for the future cut.
Step 2: placing the material in the miter box. From correct placement the baseboard in the tray will depend on the correct cutting of the edges of the fillets, and, accordingly, the accuracy of their placement on the ceiling.

Step 3: after the plinth is installed and tightly fixed in the miter box (you can simply press the material firmly with one hand), a hacksaw is placed in the groove at 45°. Now the material can be cut. The edges of the second plinth, which will be installed adjacent to the first, are cut in the same way, only as if in mirror image(the plinth is installed in reverse side, the edges are also cut at an angle of 45°).
Important: when cutting the edges of fillets, jeweler's precision is required - otherwise the material will be damaged, and the appearance of the skirting boards at the joints of the walls will also be damaged. If polystyrene foam baseboards are used, then the edges can be cut off with an ordinary sharp knife without a miter box. However, it should be remembered that cutting corners should be done from the front side.
Cutting "external" corners
The difference between cutting an “external” corner and an “internal” one is that the baseboards should protrude slightly from the edge of the wall - for the so-called overlap.
We repeat steps 1, 2, 3 in the same way as cutting “internal” corners. However, it should be remembered that the upper part of the plinth (one of the edges) should have a small allowance. The second (adjacent) overlay is cut in the same way, only mirrored to the first.

The easiest (and best) way to cut the edges of a wooden ceiling plinth is with a metal hacksaw - with fine, fine teeth. Then the cuts will be more neat and even. And polystyrene foam can be cut well with an ordinary sharp knife (or a construction knife) - but the blade must be well sharpened, otherwise the material will crumble when cutting.
When installing platbands, floor and ceiling plinths, it becomes necessary to cut the workpieces at right angles, as well as at an angle of 45 degrees. Despite the simplicity of the products, the accuracy and quality of the cut plays a decisive role.
If the angles do not match, the pairing turns out to be ugly, and sometimes it is not possible to connect such halves.
If on plastic ceiling moldings mistakes can be corrected with plaster, which will not be visible when painted, but with a wooden floor plinth, and especially with platbands around the door - this trick will not work.
Quite a long time ago, when all skirting boards were made of wood or plaster, the problem of geometrically correct cuts was solved once and for all. The craftsmen came up with a device called a carpenter's miter box.
A good oak miter box worked for decades and was passed down from generation to generation. A plaster stucco In general, it was made immediately in the required shape. Today, with the variety of moldings available, every homeowner can create a ceiling “like in Smolny.” But to fit and cut workpieces correctly, you need to understand how the miter box works.

The operating principle is simple. The device is a profile in the shape of an inverted letter “P”, in internal corner which the workpiece is laid. On the vertical walls, cuts are made at the desired angle, along which the saw blade or knife moves.

It is desirable that the miter box material be stronger than the material blanks. Otherwise, the device will wear out quickly. The grooves are quickly broken by the saw teeth, and the processing of workpieces becomes less precise. Another problem is the alignment of the saw teeth.
This forces us to increase the width of the groove in the miter box. Modern products are made from durable plastic, solid chipboard-based composites, or metal. The angle in professional miter boxes can be set to any angle, turn hacksaw blade fixed with magnets.
Moreover, the most advanced models are sold complete with hacksaws. The design even includes guide rollers to prevent the blade from “walking” during operation. Errors when cutting the workpiece are reduced to a minimum.

How to use a miter box correctly
The workpiece is pressed against the sole with its wide sides and inside side wall of the miter box. The teeth of the hacksaw blade are directed towards the thrust wall, and force is applied in the same direction.
Movements are smooth and wide. We must try to ensure that the hacksaw goes as far along the workpiece as possible. How less movement you do when cutting - the better the cut you will get.
The miter box is manual carpentry tool for precise cutting of boards and other lumber at the required angle. Doing wooden frame When installing platbands and skirting boards or performing any other work related to cutting boards, you will definitely be faced with the need to create a perfect corner cut - the so-called miter joint. In order for the joints of the parts to fit tightly and have no gaps, the cutting angle must be as accurate as possible. Here a miter box becomes an ideal assistant.
There are several design options this device. In our article we will dwell in detail on the main types of miter boxes, tell you how to choose and correctly use this hand tool to create a flawless burr.
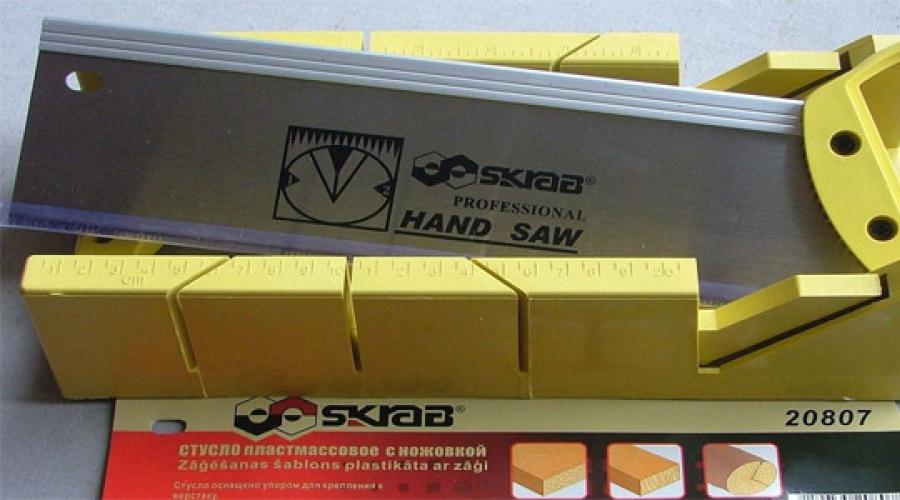
A box-type carpenter's miter box is the classic and simplest design, which is a box with saw grooves located at strictly fixed angles. The tool is used for cutting wooden and plastic blanks at the required angle and creating miter joints.
Modern box-shaped models are made of impact-resistant ABS plastic, less often wood and metal. They are equipped with adjustable clamps for fixing the workpiece, and they also often have a mount for installation on a workbench. The tool is universal. With it, you can make cutting angles in both vertical and horizontal planes. The standard model of a box miter box has grooves for creating angles of 22.5°, 45°, 90°, 135° (in the horizontal plane) and 45° (in the vertical plane).
Advantages: affordability, possibility of fixing on any surface, small sizes and weight, ensuring ease of transportation and the ability to cut corners in two planes.
Flaws: the dimensions of the sawn workpiece are limited by the width of the miter box; The accuracy of the bevel is very mediocre, the smoothness of the cut also leaves much to be desired; no way to ask required value cutting angle; Sawing occurs in short movements, which is why the blade often jumps out of the guides, and the work itself takes a lot of time.
Despite all its shortcomings, it is advisable to choose such a tool for household purposes: repairs, household work in the country, etc.
What saws are best to use with a miter box?
Complete with a miter box, a special axing saw is usually used. Thanks to the steel backing, the saw does not bend during operation, which contributes to a more accurate and accurate cut. In this case, the saw blade itself acts as a limiter for the cutting depth.

You can cut with a regular hacksaw, but the quality of the cut in this case will leave much to be desired. The cleanest and most accurate cuts are provided by blades with fine teeth, a large number TPI (teeth per inch) and minimal setting (or no setting at all).
Rotary mechanical miter box
When there is a need for high precision cutting at any angle in the vertical and horizontal plane, the capabilities of a box miter box become insufficient. In this case, it is advisable to purchase an adjustable mechanical miter box - a precision hand tool for high-precision sawing of wooden, plastic and even metal workpieces of small and medium thickness.

A mechanical miter box consists of a metal frame, a rotary carriage and a saw, precisely fixed in the guides of the rotary assembly. Sawing occurs according to predetermined parameters. The clamping system rigidly fixes the workpiece to improve the convenience and accuracy of sawing operations. Precision miter boxes are equipped with back saws or bow saws, with the ability to adjust the blade tension. Provided that high-quality saw blades are used, a mechanical miter box provides a cut no worse than a miter saw.
Advantages: accuracy of sawing operations; long blade stroke, increasing cutting quality and speed; the ability to adjust the depth of cut and make cuts at any angle; ability to work with workpieces of various lengths and thicknesses; Cut quality comparable to that of a miter saw.
Flaws: By the standards of mass production, sawing operations on such a tool take a lot of time.
Compact magnetic miter boxes
Simple and functional cutting devices wooden boards at a given angle. They are plastic or metal guides that can be adjusted. Magnets built into the guide attract the saw blade, ensuring its fixation during operation. How to cut a corner with a miter box like this? required quantity degrees – clearly shown in the photo.

Advantages: cheap; compactness; accuracy not inferior to a box miter box; possibility of cutting at a given angle; minimum division step.
Flaws: working with boards of limited width; low quality cutting compared to a rotary miter box; low productivity.
Despite all their shortcomings, such devices are optimal for household use. With them you can always accurately cut trim, ceiling or floor plinth, without the need to purchase a full-size miter box.
Miter boxes for creating dovetails and straight tenon joints
A set of simple metal guides, fixed with a screw clamp, will help in creating a perfect design. The devices allow you to make smooth and precise cuts much faster and with less effort. Magnets built into the body of the product keep the saw in contact with the guide surface, ensuring convenience and precision of cutting.

There are two varieties of such miter boxes: with an inclined guide surface for creating dovetail joints and with a right angle for cutting straight tenon joints. The wood between the tenons is removed manually using a sharp chisel.
