Infrared heated floor under linoleum: detailed step-by-step installation instructions. Choosing the right electric heated floors for linoleum Installation of heated floors for linoleum
The use of infrared heated floors allows you to achieve the most comfortable temperature in the room. They can be combined with almost any type of floor finishing material.
However, having chosen an infrared heated floor, you need to select suitable materials and take into account the nuances of installation.
The operation of infrared floors is based on the principle of secondary convection - they are initially heated physical bodies(interior and household items, humans, animals), and then the surrounding air.
– these are two layers of film, between which heating elements are located. Power source is electricity supplied through electrical conductors. Thermal energy is emitted by carbon paste applied to the film. Heating is carried out due to the IR rays of carbon semiconductors.
Rod IR floor is a thin mat made of carbon rods. This system is based on composite material. Thermocouples with electrically conductive bars have built-in bendable rods. When heated, IR radiation is produced by a thermal film made of polymer into which the heating element is sealed. The advantage of this system is self-regulation of temperature. The heating plates themselves serve as a thermostat.
This heating system has a number of both positive and negative qualities.
Pros of IR heating system
The advantages of this heating include:
- warm infrared rays similar to the warmth of the sun and creates the greatest comfort for a person. Their healing effect proven by scientists;
- Unlike alternative heating systems, this one does not dry out the air. This feature allows you to achieve the most favorable climatic conditions in room;
- IR flooring technology is compatible with the most big amount modern floor coverings: ceramic tiles, laminate, carpet, parquet and linoleum;
- Possibility of installation in buildings of any geometry. The film can be laid in rooms with a non-standard layout, on balconies, loggias;
- small film thickness. Makes it possible to use in buildings with low ceilings, as it will not significantly raise the floor level;
- ease of installation. Provided that the floor on which the film is planned to be laid is smooth and free of defects, there is no need to fill the screed. Laying is carried out using the “dry installation” method;
- long service life. Most manufacturers give warranty obligations for uninterrupted operation for 15-20 years;
- possibility of self-assembly, without the involvement of specialists;
- minimum screed height during installation rod system. The height of tile adhesive or concrete does not exceed 2-3 cm;
- energy saving. Provided that thermostats are installed, it is possible to program temperature conditions or their automatic or manual correction.
Cons of IR floors
There are relatively few of them:
- After installing infrared film heating, you cannot rearrange the room. Bulky furniture and household appliances should not be installed at the film locations - this can lead to overheating of the floors;
- the need to install thermostats in each room;
- If you don’t have basic skills, it will be difficult to install and connect the system yourself. It is not always possible for a non-professional to connect the contact to the film. It has to be cut off and connected to another contact;
- laying a heated floor under linoleum on a concrete floor with defects leads to its deformation. Therefore, sometimes a new screed is still necessary;
- if infrared heating is used as an auxiliary to stationary heating, then the air may be overdried;
- high price of rod systems.
Which IR heated floor is preferable for linoleum
Manufacturers offer two types of IR heating systems. Each has its own advantages and disadvantages and when choosing a system you should make it based on your individual needs.
| Film floor | Rod floor |
|---|---|
| Safety and reliability of operation | |
| Both types work using infrared radiation, guarantee period shelf life – 15 years. | |
| 1. Does not require preliminary work when laying, it is mounted on a flat surface concrete surface using the dry installation method. 2. Heats up when furniture is placed on an insulated floor. | 1. Laying in a screed made of concrete or tile mixture. 2. Does not overheat when covering work areas with furniture and household appliances. |
| Versatility | Versatility |
| Can be used to insulate floors, walls, ceilings and other flat surfaces | It is used only for floor insulation, including in rooms with high humidity. |
| Energy saving | Energy saving |
| Increased energy savings compared to alternative systems heating | |
| Price | Price |
| A budget option. | High price. |
| Thermoregulation | Thermoregulation |
| A thermostat is required. | Independently lowering the temperature in heated areas of the home and lowering it near cold areas - window and door openings. |
Which linoleum is compatible with IR heating systems
When using incompatible brands of linoleum, it may become deformed. Linoleum can warp, stretch, or, conversely, shrink.
Also, when heated, some types release hazardous substances and toxins or have an insulating backing that prevents heat conduction.
When choosing linoleum for laying over an infrared heating system Special attention it is worth paying attention to its labeling. It must have information about compatibility with warm electric floor systems.

Materials and tools
You can lay heated floors under linoleum with your own hands.
To do this, you need to prepare the following available materials and devices:
- heating kit (infrared sheet, insulator, contact clamps);
- temperature sensor and thermostat, hollow corrugated tube;
- wiring;
- double sided tape;
- polyethylene film;
- plywood sheets;
- insulation (heat-reflecting substrate);
- nails;
- knife, scissors;
- pliers, pliers;
- screwdriver;
- tools for wall chipping (hammer and chisel, wall chaser, grinder, hammer drill).
Instead of tape, you can use a construction stapler or furniture nails for fixation.
Installation procedure for IR film floors
Installation of infrared heated floors under linoleum is carried out in several stages.
Preparatory activities: laying plan, marking and preparation of material
Before installing the infrared floor, you should draw a diagram. A room is drawn on a sheet of paper in compliance with the proportions, marking the placement of furniture and other large interior items. The location of the thermostat, temperature sensor, and the location of the film sheets, taking into account their sizes, should be indicated on the diagram.
The film can be laid lengthwise or across the room. It is optimal to place strips of IR film longitudinally - this will help minimize the number of connection points.
The markings will help in the calculation required quantity films, electrical cables and related materials.

When drawing up a scheme for laying infrared floors, a number of nuances should be taken into account:
- the floor is not laid under large objects;
- Thermal mats can only be cut along special lines specified by the manufacturer;
- the manufacturer does not provide for the possibility of cutting the film at an angle of more or less than 90 degrees or forming a figured fabric;
- when installing a film heated floor under linoleum, the IR sheet is laid in parallel rows;
- overlapping strips are not allowed;
- You should leave a small gap between the film and the walls;
- the strips should be laid with a side overlap, leaving a gap of about 1 cm between the copper busbars;
- to save connecting wires, connection points are planned on the side of the wall with a thermostat;
- wiring must be planned so that they maximum amount was laid under the baseboard;
- if planned a large number of small pieces of film (up to 1 m), then purchase additional terminals in advance;
- All layers of the IR heating system, except for the IR film, are laid over the entire area of the room.

When planning the installation of infrared heated floors under linoleum, it is necessary to take into account that the total power of the elements connected to one temperature controller, must be< 3,5 кВт. В противном случае желательно провести отдельную проводку и использовать выключатель-автомат.
Before laying a heated floor, it is necessary to remove debris and sweep thoroughly.
If there are irregularities, potholes or other defects on it, they are eliminated using tile adhesive or a cement-sand mixture. TO further stages You should start only after it has completely dried.
Also during preparatory activities The markings should be transferred from the plan directly to the working surfaces. This will make subsequent installation much easier.
Mounting algorithm
The second stage is the installation of heated floors under linoleum:
- Installation of thermostat. It is fixed at a level of 1-1.5 m from the floor. At the marked place, a recess is drilled according to the dimensions of the thermostat (if it is built-in) and a groove is laid from it, into which a corrugated tube with a temperature sensor wire and an electrical wire will be placed.

- Laying a heat-insulating layer. Rolled heat insulation is laid on the prepared surface with the reflective side up. To prevent it from moving during further work, this layer should be secured with double-sided tape.
- Installation of IR film. According to the diagram, the cut film is laid, then it is fixed on the heat insulating layer double-sided tape.

- Installing a temperature sensor. installed at an equal distance between two strips of IR film in close proximity to the thermostat. The temperature sensor is secured with tape. To avoid the occurrence of irregularities, special notches are cut out on the substrate at the locations where the temperature sensor and contacts are located.

- Fastening electrical cables. It is attached to one of the ends of the heating film using clamps. The contacts are attached in such a way as to ensure the tightest contact with the conductive conductors. The strips of IR film are then connected using contacts and wiring. All places where current-conducting contacts are installed are insulated using self-adhesive pads.

- Testing the operation of heated floors. It is necessary to turn on the current supply and wait for the system to heat up. All strips should warm up to the same temperature. All insulated wire connections must be checked with an indicator screwdriver. It is necessary to make sure that there is no voltage in these nodes. All errors must be corrected.
- Waterproofing. A polyethylene sheet with a 10-20 cm overlap is laid on the IR layer, which is fixed with tape.
When connecting the heating elements of adjacent film strips, the contact clamps must be placed so that the end of the wire is inside the film and in contact with the contact. A grommet is placed in the resulting hole and riveted.
Laying decorative flooring
Linoleum is a covering material that cannot be laid directly on thermal film. Experts and manufacturers recommend using sheets of plywood 1 cm thick as a backing for it.
Plywood sheets are secured with nails. They are hammered in very carefully so as not to damage the elements that conduct current. To do this, nails are driven exclusively around the perimeter of the sheet. The plywood must be dry and without visible damage.

Fastening is made only through the transparent edge of the heating elements.
Before you start laying linoleum, you need to test the IR floor again.
Linoleum is laid using standard technology. The covering is spread around the perimeter of the room and left for 1-2 days. Then, in rooms with small footage, the edges are secured with plinths. In large rooms, linoleum must be glued.

It is advisable to lay linoleum at an air temperature of +18°C and a humidity of less than 65%.
Safety precautions
When laying heated floors under linoleum, adhere to the following safety rules:
- installation, testing and final connection of the system is carried out exclusively when disconnected from the network;
- The infrared floor under linoleum should not be heated to more than 28-30°C;
- It is imperative to use a protective layer over the IR film to prevent deformation of the heating elements.
Video: installation of infrared heated floors under linoleum
Modern markets building materials and electricians offer a wide range of floor coverings and underfloor heating systems. Before the invention of electric floor heating systems, linoleum was banned, but today this type of coating, which has its own advantages and disadvantages, is widely used together with underfloor heating systems. However, film heated floors under linoleum must be chosen very carefully and carefully to avoid possible problems during operation.
Warm floors and linoleum
So, the question of whether it is possible to lay linoleum on warm floors has been sorted out. These coatings are quite compatible, but there are all the nuances here. What kind of systems are combined with such a coating?
Electric floor heating can be represented by a heating cable, thermomat or infrared film. Any of these options is suitable for laying under linoleum covering, but it is preferable to use IR film systems, since they have all the necessary qualities for this:
- You can lay such a covering without a screed, which will significantly save money, time and the height of the walls. Linoleum for warm water floors is used extremely rarely precisely because a screed is needed, which will reduce the height of the ceilings;
- laying the IR system and linoleum takes only 2-3 days, after which it can be safely put into operation;
- It is easy to lay a film heated floor under linoleum with your own hands, even after all repair work has been completed.
The only drawback is that IR film is sensitive to moisture, so in the bathroom and other wet areas This kind of flooring is not installed. And it is not advisable to use linoleum in a humid environment.
At the very least, laying linoleum under a warm infrared floor is cost-effective. Even the highest quality linoleum flooring costs less than average quality floor tiles. Laying warm infrared flooring under linoleum is also possible because this heating system allows this type of coating, as indicated in the instruction manual.
However, if you put an infrared heated floor under linoleum, then you should take into account the safety of this coating. Therefore, when choosing it, ask about the safety class and whether it is possible to use it with the systems in question. As a rule, serious manufacturers believe that linoleum will heat up and independently indicate the composition of the raw materials and make notes about the harmful substances contained in it.

Which linoleum is suitable for infrared heated floors?
An affordable price does not prevent linoleum from being a rather “capricious” type of coating. When cheap material is heated, it can stretch, warp or shrink. Budget brands can release toxins harmful to the human body when the temperature rises. At the same time, expensive samples with an insulating substrate do not allow heat to pass out. Therefore, linoleum under warm look the floor needs a special one.
Since the invention of infrared floor heating systems, manufacturers have developed special type linoleum, which can withstand temperatures up to +35ºС without releasing toxins and maintaining dimensional stability. Therefore, when choosing a linoleum coating for laying over an infrared heating system, it is necessary to carefully study the markings to determine the compatibility of the material with electric heated floors.

Too thick a coating has Negative influence on the quality of thermal conductivity, however, it is also not advisable to lay linoleum that is too thin, otherwise any unevenness will come out. Therefore, it is worth choosing a coating of medium thickness, and after the linoleum is laid on the infrared floor, it should be kept for 36-48 hours at room temperature before turning on the heating system.
It is also worth noting the nuances of fixing the linoleum covering on the floor. If it is attached to a screed, you can use adhesive mastic or double-sided tape. And if you plan to install a film heated floor on a system, then it is preferable to use only mastic, since its composition is capable of high-quality fixing of the material, as well as ensuring the passage of heat.
When choosing linoleum for underfloor heating systems, you should pay attention to those features that are inherent in a high-quality coating. In addition to high thermal conductivity, there must be a high degree of resistance to fading and discoloration, and there must also be resistance to deformation, which often occurs when exposed to high temperatures.
Multilayer polyvinyl chloride linoleum has this quality, and goes well with almost all underfloor heating systems. This coating has a large number of design options, patterns and colors, which will allow you to decorate any interior. However, when too high temperatures(more than + 30 ºС) it is undesirable to use polyvinyl chloride.
The ideal choice for use on film heated floors would be medium-thick linoleum, which has a high degree of resistance to chemical and mechanical influences.

Design and calculations
Installation of any infrared heated floor under linoleum requires the installation of a protective layer 3-5 mm thick made of plywood, gypsum fiber board, hardboard or fiberboard sheets. This type heating floors and linoleum coverings, as a rule, is used in the arrangement of kitchens, corridors, staircases intended for winter Garden, and other similar premises.
First you need to designate the configuration and area of those areas of the floor where the equipment and covering will be installed. The cake of a heated floor system under linoleum includes five required layers:
- Heat-reflecting substrate (Izolon, Infralex). It is allowed to use thermal insulation with lavsan or polypropylene metallized outer layer. Laying aluminum foil materials under the IR floor is strictly prohibited.
- Infrared film floor. The equipment includes rolls with longitudinal panels with carbon stripe coating, as well as at least one temperature sensor and thermostat. The panels are connected to electricity in parallel using the terminals and wires included in the kit.
- Polyethylene. Sheets of film with a maximum thickness of 2 mm are placed on top of the IR heating system after it has been assembled and tested. Polyethylene protects the film floor from moisture and water, serving as a waterproofing agent.
- Protective hard layer. Sheets of hardboard, plywood or other similar material are laid on top of the polyethylene. This measure makes the coating more stable and hard.
- Linoleum. Secured with mastic. Only brands that are compatible with electric heating floors
When designing the system, it must be taken into account that the film heated floor is not laid under a large household appliances or furniture with low legs or without them at all, since they absorb a large amount of heat without radiating it. In addition, household appliances may fail due to overheating. In this case, an insulating substrate and a rigid layer are installed on the entire surface of the floor so that its height is the same.
Keep in mind that if there is a floor inside, then the IR sheet should be at a distance of 5 cm from it. It is also worth maintaining a distance of at least 20 cm between the infrared film and heat sources (fireplace, oven, pipes).

How to lay an infrared floor under linoleum with your own hands?
First of all, you need to prepare the heating elements for installation:
- The IR film must be cut along special lines along the heating strips every 250 mm.
- Contact clamps are installed on the cut heating elements. In places where current-carrying copper strips and double-layer film pass, the tip of the wire is installed so that it is located on the contact strip inside the thermal film. Then a grommet is inserted into the hole, which must be riveted using a special stapler or hammer.
- The cutting lines of the contact strip are insulated on both sides using a waterproofing strip. Protected copper wires cross section 1.5 sq. mm. brought to the tip and clamped with pliers.
- Then the junction of the copper busbar and the electrical wire with the tip on both sides is insulated using a waterproofing strip.
- The parts of the canvas are connected parallel to each other. In this case, the total power of the heating elements connected to the thermostat should not exceed 3500 W.
If the total power of the heating system goes beyond 3500 W, then it is better to make a connection using a separate electrical wiring with its own safety circuit breaker. In addition, the heating elements must be connected using a magnetic starter.

- After this, you need to lay thermal insulation with a reflective layer and secure it with tape.
- IR sheets are laid on the thermal insulation layer with copper strips down. In this case, the contacts of adjacent strips must not be allowed to touch each other. To prevent the strips from moving, the heating sheets are attached through a transparent rim, which is located on the sides of the element, using furniture nails, a stapler or regular tape.
- Electrical copper busbars must be 5 mm from any supply section of the element. The wires must be positioned so that their base is under the baseboard. In areas where contact strips are insulated and thickened, cutouts can be made in the thermal insulation to even out the finish coating.
- After this, it is necessary to conduct a thorough inspection of the system and check the reliability of the wires and insulation.
- Then you need to measure the degree of resistance of the heating sheets. If there are sources of possible short circuit systems, they must be promptly eliminated, and the system must be checked again for operability.
- Now you need to secure it under the cutting line temperature sensor, which, together with the heating elements, is connected to the thermostat.
- After this, the thermostat turns on for a few minutes. After 5-7 minutes, you need to check the effectiveness of the system: touch the canvas with your hand - you should feel the pleasant warmth of a comfortable temperature.
- Then the infrared film must be covered with a vapor barrier material, and the joints must be secured with tape.
- Now on vapor barrier material a protective rigid layer should be laid and secured to the primary screed with screws and carefully leveled. In this case, you cannot attach the layer closer than 1 cm from any feeding area of the elements.
- Finally, linoleum material is spread and secured onto the heated floor in accordance with the manufacturer's instructions.
Warm floors under linoleum can act as an additional source of heating. If you plan to use them as the main heating system, then it is worth equipping a water system and covering it with laminate or ceramic tiles.
Linoleum is one of the most affordable floor coverings. That's probably why there are so many different options By color scheme, by properties, by cost. There are only five main groups of this coating: natural, rubber (Relin), alkyd, polyvinyl chloride (PVC), nitrocellulose. Each group contains materials with and without a base. In this case, the base can be either natural - fabric, jute or felt, or synthetic - fiberglass, polyester, foamed PVC, etc.
Linoleum for heated floors
There are indeed a lot of varieties of linoleum, but not all of them can be used in heated systems. You definitely can’t use a coating on a felt or “shaggy” jute base; material with a base on foamed PVC is also not suitable. These materials have a high degree of resistance to temperature changes (that is, they will transmit heat poorly).
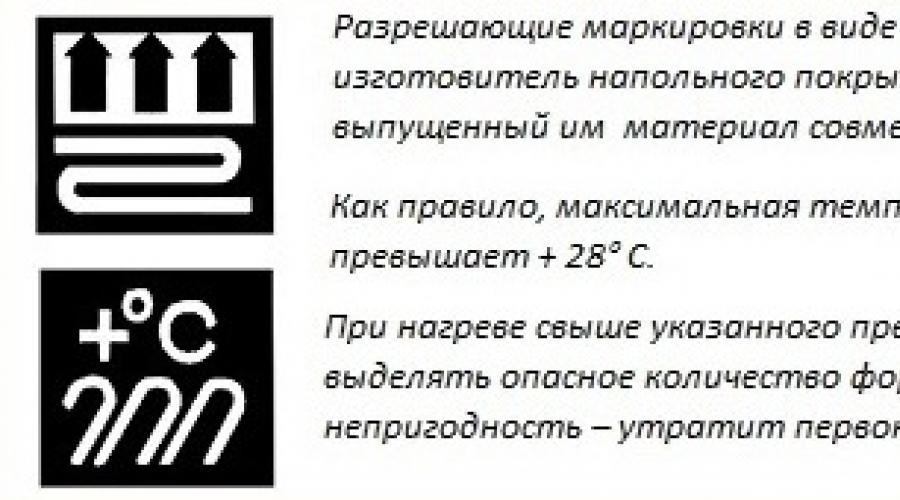
All the rest, in principle, can be used. But with one limitation: do not heat them above 27 o C. This is the limiting temperature at which the coating behaves normally. Further heating will only lead to negative consequences: will start to stand out harmful substances, the coating may crack, warp (ripple), lose, or change color. Therefore, we either maintain this temperature, or lay special heat-resistant linoleum, specially designed for heated floors. They have special markings: they have pictograms on them. You will see some of them in the picture.
Due to temperature restrictions, heated floors with linoleum can only serve as additional heating, but not the main one: that is, radiators or other heating devices are required.
Of all these groups, the most suitable coating is natural linoleum (also called marmoleum). Polyvinyl chloride (PVC) fits a little worse when heated - it can smell unpleasant when heated. The rest, although they can be used, do not provide the most top scores: alkyd ones conduct heat poorly, rubber ones are generally rarely used for housing, because they feel best at low temperatures, nitrocellulose ones withstand a humid environment well, but quickly catch fire.
So, which linoleum is suitable:

But coatings of both types cannot be used on a “shaggy” or foam base. The best option is thin and dense. But then even the slightest flaws in the foundation will be visible. Finish coating specialists talk about this (watch the short video).
Despite the fact that it seems that the choice is small, in reality sellers will offer dozens, even hundreds of options. In one online store alone, there are more than 500 pieces of semi-commercial vinyl linoleum, more than half of which are compatible with heated floors. Among them there are well-known brands such as the German Tarkett or IVC, and there are domestic or less well-known ones. But your task is to find those that are specially produced from those offered (look for pictograms).
What type of heating is best to use with linoleum
If the coating is chosen correctly, it is compatible with any heating element. It is only important to maintain the temperature conditions during operation and to have a perfectly flat base. The mode (not higher than 27 o C) is easy to withstand if it is installed, and it is provided in any systems - cable and infrared. Flat base you still have to do it - fill the screed, or install the slabs during “dry” installation.

There are several more options that can be installed quickly without a screed: this cable mats from the Danish company Devi (Devi) - and similar heaters from German company Thermomat TVK-130.
The Devidry underfloor heating mat looks like a rug, but it is a real heater: a heating cable and a layer of foil are hidden between two layers of foamed polymer for better heat transfer. “Thermomat” Thermomat TVK-130 has a completely different look: a cable is fixed between two layers of reinforced foil. And this shiny coating also fits under linoleum. The installation technology here will coincide almost to the smallest detail with that described above.

Cable mats for “dry” installation under linoleum
These three options can be used immediately after installation: no need to wait. All other methods involve the installation of a screed and therefore at least 28 days must pass after installation - during this time the screed will set. You cannot turn on the heating earlier. This will not speed up drying, but will damage the electric heater and cracks form in the screed.
You can lay any type of screed under linoleum,... The heated floor cake for any of these heaters looks the same:


The metal mesh can play another role: it can serve as a grounding element. To do this, the mesh elements are connected (it is better to solder the conductors, but it is quite possible to twist them in several places with bare copper wires), and one of the wires is connected to the ground bus. In case the elements electric heating floors have protective shells; they just need to be connected to the corresponding bus on the same thermostat and nothing else needs to be grounded. Then you can put not metal, but polymer mesh. But if there is no shell, then metal grid required.

- The last layer of the “pie” is the screed. Usually this cement-sand mixture with the addition of a plasticizer. But, if you want to have better thermal conductivity, use special mixtures for heated floors. They are more expensive, but have more suitable characteristics. There should be enough solution so that there is a layer of 2 cm above the cables or mats. Above the water heating pipes, the minimum layer is 3 cm (or better, 5 cm). What else you need to pay attention to is to ensure that the screed is perfectly (or almost) leveled. Linoleum behaves well on flat surfaces. If there are even the smallest irregularities, it will become deformed. And in the case of heated floors, it turns out even worse: air accumulates in these places, which expands when heated, which leads to the appearance of bubbles and swelling of the coating. Therefore, it may be worth using self-leveling compounds for filling. This will guarantee a smooth surface.
After the screed has dried (at least 28 days per natural conditions) can be covered. .
Film floor heating options are distinguished by a lot of positive consumer and technical qualities. They form the most favorable temperature background. They do not require a mandatory screed device, are easy to install, and work perfectly in tandem with almost all coatings. You can install an infrared heated floor under linoleum with your own hands, if you know the rules and subtleties of installation.
Infrared floor paired with linoleum
Affordable prices do not prevent linoleum from being a rather “capricious” coating. Heating may cause budget brands to warp, stretch, or shrink. Cheap material When the temperature rises, it can release toxins. Expensive representatives with an insulating backing nullify all attempts of heat to pass through them and reach the consumer’s feet.
Coating suitable for infrared heating
Before the advent of film floors, the proximity of linoleum to “warm floor” systems required serious technical tricks or was outright excluded. Direct cooperation with electrical or water circuits was allowed only to marmoleum - natural linoleum. Although serious claims are made against it regarding heat retention.
With the introduction infrared systems For heating, linoleum has joined the ranks of materials that allow you to install a “warm floor” underneath. In addition, manufacturers of numerous types of coating have introduced significant changes into the formula, which ensured resistance to temperature increases up to +35ºС and dimensional stability.
However, when choosing linoleum for laying over even an infrared heating system, you should carefully study the markings. It must indicate the compatibility of the material with electric heated floors. If the manufacturer's assurances turn out to be false - the coating will deteriorate from contact with the heating system, the money for it must be returned.
You can get acquainted with good options and purchase linoleum on the website Remontnick.ru. There they will advise you and help you choose what you need.

By the way, no one will compensate you for losses that occurred due to violations of film floor installation technology. They will not return lost funds if the conditions for installing linoleum on top were not met. infrared heating. Therefore, it is worthwhile to thoroughly and thoughtfully familiarize yourself with the technological requirements for the design of film systems.
Warm floor compatible with linoleum
The consumer is now presented with a wide variety of film heating systems.
There are options with a solid carbon heating element or with large rectangular segments. With their help, large health centers and public organizations. Such systems are installed mainly in screeds.

In everyday life, so-called striped films are most often used. The heat-generating carbon in them is arranged in transverse stripes. The edges of the strips on both sides are clamped with copper and silver busbars, which impart energy to the elements, ground and prevent sparking. From external and inside infrared heating systems covered with a thin polymer film.
Depending on the function assigned by the manufacturers to the copper and silver busbars, film floors are laid up or down with the side with the copper strip. This technical point indicated by manufacturers in the instructions, you should pay close attention to it before installing a specific brand of infrared film.

Otherwise, the installation processes for all types of infrared heated floors are similar. Performed in stages with obligatory preliminary calculation, design and preparation before construction.
All types of film heating before laying linoleum require the installation of a protective layer of plywood, hardboard sheets, gypsum fiber board or fiberboard with a thickness of 3 - 5 mm.
Nuances of design and calculations
Let's look at the calculation procedure for specific example devices of the film system of the Caleo brand, produced for laying linoleum. Let's take into account that specified type coatings are mainly used in the arrangement of bathrooms, corridors, multi-storey kitchens and low-rise buildings stairwells of private buildings and other similar premises allocated for the winter garden.

Standard arrangement of layers in a pie
A heated floor linoleum floor will include five required layers, these are:
- Thermal reflective substrate. It is recommended to use materials such as Isolon or Infralex. It is allowed to use thermal insulation with a polypropylene or lavsan metallized outer shell. It is prohibited to lay materials with a base made of aluminum foil under the IR floor.
- Infrared film floor. The system includes longitudinal panels with a carbon striped coating, at least one temperature sensor and a thermostat. The panels of the film system are connected to the power source in parallel using the terminals and wires provided in the factory kit.
- Polyethylene. Placed on top of the heating system after it has been assembled and tested. Plays the role of waterproofing infrared electric floors. Maximum thickness 2 mm.
- Protective hard layer. Made from plywood, hardboard or similar material. Required for installing heated floors with a flexible finish.
- Linoleum. Only brands that are compatible with electric floor heating are suitable.
When designing, it is necessary to take into account that directly film heated floor infrared type Do not place under furniture without legs or with low legs. It is unwise to heat objects that do not require heat supply, but are capable of consuming an impressive amount of it.

But an insulating substrate and a rigid layer are placed over all areas of the room in order to maintain a single height level of the floor. Waterproofing, despite its insignificant thickness, is laid similarly over the entire area to prevent water from penetrating into electrical system during wet cleaning.
Drawing up a laying diagram
For competent design, it is necessary to draw up a plan or elementary diagram with scaled actual dimensions. A hand-written project will help you correctly calculate the footage of thermal film and related consumables.
The panels of the heating system, waterproofing and heat-reflecting substrate are attached to each other with single- or double-sided tape.

In addition to these nuances, design must take into account the following:
- IR thermal film can only be cut along the lines designated by the manufacturer. Cutting at an angle and forming shaped panels is not allowed.
- Laying is done in parallel strips. It is not allowed to overlap one panel with another.
- Between low standing furniture and the film floor should leave a gap of at least 3 cm. An equal gap should be left between the edge of the panels and the walls: it will ensure heat removal in case of overheating.
- It is recommended to lay the cut strips of thermal film with a side overlap so that there is a gap of at least 1 cm between the copper bars of adjacent panels. This arrangement will ensure uniform heating of the floor.
- The heating system panels should have the maximum possible length in order to minimize the number of connection points.
- The connection points must be located on the side of the wall on which the thermostat will be installed. Thanks to this, the footage of wires required for connection will be significantly reduced.
- The laying of wires must be thought out so that the main array of them is located under the baseboard.
It should be remembered that when cutting a film floor into short sections up to 1 m in length, additional insulation and the use of additional terminal clamps. Those. will have to purchase installation kit in addition to what is included in the package.
You need to decide in advance on the type of thermostat, which can be built-in or overhead. To install the built-in version, you will need a corrugated polymer pipe, used when laying in a fine, for open wiring required plastic cable channel. For arrangement large area or floors in adjacent rooms may require additional temperature sensors.


Additional electrical and insulation
If you plan to connect several sets of film flooring to one thermostat, then the power consumption is determined by adding the powers of all elements. The wire for connecting parts of the IR floor to the thermostat is selected in accordance with the result.
You should purchase the cable required to connect the thermostat to the power supply, because The factory kit provides a wire only for connecting the film heating to the thermostat itself. You need to select it according to maximum power, required for the functionality of the system.
Do not forget that electric heated floors are installed with the obligatory inclusion of an RCD in the network with response parameters of 30 mA, acting on the wiring for 100 ms. Required circuit breaker category C, designed to protect a current-carrying branch of 10 A.
If to devices automatic protection Other electrical appliances will be connected; their power should be taken into account when calculating. For film floors consuming 2 kW or more, it is recommended to arrange a separate branch with its own automatic machine.

Installation of film floor pie
Let's assume that after design and calculations we have purchased a set of infrared floors with the most suitable width and the missing components of the cake in the required quantity. It remains to figure out in what sequence and how to correctly lay the infrared film floor under the finishing linoleum.
Laying the substrate and heating system
The first step is to lay a heat-reflecting substrate, the strips of which are glued together into a single sheet with tape. In large rooms with an area of more than 20 m3, it is recommended to connect the substrate with double-sided adhesive tape in order to prevent its movement relative to the subfloor. Instead of double-sided tape, fixing with a construction stapler is suitable.

- We cut out the thermal film according to the instructions of our own project.
- We try on the “pattern” for the future installation location. If necessary, we trim, slightly change the width of the side indentation and the gap between the walls and the heating system.
- Having decided on the position of the individual panels, we proceed to assembling the heated floor.
- We lay the underfloor heating panels strictly with the copper busbar facing down.
- We isolate the exposed contacts of the panels from the edge opposite to the connection side. We simply seal the cutting areas of the silver and copper busbar with bitumen tape so that contact with external environment both metal strips.
- We install the contact clamps on the current-supplying strip of thermal film. To do this, we slightly peel off the polymer shell in order to insert one side of the clamp under it, and place its second side on top of the copper busbar.
- After checking the correct installation, firmly fix the clamp with pliers.
- In accordance with the described diagram, we equip all contacts of the film floor with clamps on the side connected to the thermostat.
- We connect the strips with wires so that phases are connected to phases and zeros to zeros. For this purpose, the package includes wires of two different colors. We remove the insulation from the connected ends of the wire and insert them two or one at a time according to the design diagram into the clamp.
- We isolate the connection points secured with pliers with two pieces of bitumen tape on both sides.
- We connect the circuit to the thermostat.
- IN convenient place install the temperature sensor with its convex side down and connect it to the thermostat. We cover it from below with bitumen tape. The system sensor under the linoleum must be positioned so that movement on it is eliminated or is the least intense.
The infrared floor heating system has been assembled; the final work remains on arranging the circuit and laying the finishing material.


The final stages of installing an infrared floor
To ensure that individual parts of the system do not stand out under the coating and are not subject to unwanted mechanical stress, they should be “sunk” in the insulating substrate. To do this, we cut out “windows” and “trenches” in the heat-reflecting layer under all convex parts: temperature sensor, contact clamps and wire routes.

Next, we test the operation of the film floor by connecting power to it. For a control check, set the thermostat to + 30º C. We check the operation of each contact and the safety of the insulated points with an indicator screwdriver or similar device. After making sure that the infrared system is functioning normally, we cover it with polyethylene and lay down a hard protective layer.
If necessary, a hard layer assembled from plywood, gypsum fiber board, hardboard, etc. We fasten it to the rough base with self-tapping screws so that the fixation points pass through the transparent edge of the film floor. It is more convenient to work with material that has a joining chamfer along the edge.
Don't forget that the infrared system needs to “breathe”. Therefore, along the perimeter of the hard flooring there should be a gap of 1-2 cm, which after installation finishing coating covered with a plinth.
To the constructed and secured rigid base we glue double-sided construction tape, used in laying linoleum, and lay the finishing coating itself.

The video will clearly demonstrate the essence of installing an infrared heated floor for further installation of linoleum:
Calculation diagram and one of the options for laying an infrared film floor:
Review of film heating systems offered for sale, tested in practice:
There are not too many rules for constructing infrared floor heating systems with linoleum as a finishing coating. However, each of them must be observed for the sake of long service film version. It is worth using thermal film from a trusted manufacturer, and selecting components only from the same brand.
Many owners of apartments and private households in personal experience made sure that home heating using the system underfloor heating much more comfortable than traditional heating of rooms with radiators. Very often, linoleum is laid on the floor in houses and apartments. Let's see how to lay heated floors under linoleum, depending on its type.
Laying heated floors under linoleum

Regardless of the heating source - water or electric, there are general rules laying heated floors under linoleum. Heating elements are placed in an area free of plumbing fixtures and bulky items. Heating system mounted with thermostats to prevent the floor heating temperature from exceeding 28 degrees. Warm electric floors under linoleum can be done in two ways: with a screed under the linoleum and laying hard slabs under the linoleum, that is, without a “wet” process. Must be laid under an electric heater thermal insulation material, which reflects heat and directs it upward. It is advisable to use the material in rolls, coated with metallized Mylar or polypropylene film. Attention! You cannot use material that has a reflective coating of aluminum foil. Under linoleum, experts recommend using a lining with a soft layer, for example, isolon with a thickness of 3-5 mm.
Stages of installing heated floors under linoleum
- Surface preparation - remove all excess and level out unevenness.
- Thermal insulation - so that the floor directs heat only upward, you should spread it under the heating element roll thermal insulation with reflective coating
- Laying electric heating film - mark the film, cut it along the lines where there is no graphite layer, lay it out at a distance of 10 cm from the wall, do not allow stripes to overlap
- Connecting heating elements - the heated floor is connected through a thermostat, the maximum area of connection to the thermostat is 15 m2
- Installation of protective material - according to its characteristics, linoleum belongs to the type soft materials and under external influences it bends and can damage the infrared film, so rigid sheets of glass magnesite or gypsum fiber sheets are laid on top of the heating film and vapor barrier
- Laying linoleum - cut and laid out around the room PVC sheets should remain in a free position for a day, then the canvases are fastened with double-sided tape, and if cracks form between the canvases, they should be filled with special glue

Laying electric heated floors under linoleum
An electric heated floor with an infrared heating element is able to consistently provide the proper temperature conditions, which are optimal for linoleum flooring. According to special markings on the film, it is cut into strips of the required length. To minimize the number of connection points, it is recommended to cut the film into strips of such length that they can be laid along the long side of the room.

Laying water-heated floors under linoleum
After organizing the main layers under the water floor - subfloor, hydrobarrier insulation and vapor barrier, they begin laying the heat reflector. Then piping is carried out from a single pipe in increments of 20 - 50 cm. The pipe system is filled with screed, the layer of which above the pipes should be min. 45 mm. The screed is aligned along the beacons. After drying, completely smooth surface I'm laying linoleum.

The difference in the installation of heated floors
Electric heating for heated floors under linoleum is possible in two heating formats - cable and infrared film. The installation diagram of the heating cable is identical to the installation of pipework. The film format is the installation of a roll film heater. Installation electric heaters It is easier and faster than for water coolant.
Linoleum for warm water floor
Polyvinyl chloride multilayer linoleum is used to cover heated floors. The power indicator of a heated floor under linoleum should be no more than 150 W/m2. This power ensures heating of the floor covering to the recommended temperature of 26 - 28 degrees Celsius. The floor surface on which it will lie roll material must be perfectly clean, since random grains of sand will appear on the surface of the coating over time. High-quality synthetic multilayer linoleum is great option coverings. And yet the ideal coating is linoleum made from natural ingredients.
Advantages of film heated floors under linoleum
<A universal solution for heating a room with floor covering The infrared heated floor is made from linoleum. It provides a gentle floor heating mode and does not negative impact on the invoice and performance characteristics multilayer linoleum. Installation of heating strips is so simple that even a beginner in construction can handle it following the instructions.
Infrared radiation is perfectly perceived by the human body. According to doctors, it not only helps people feel good, but also helps cure many diseases. This fact becomes a strong argument in favor of installing infrared heated floors under linoleum.
 film heated floor under linoleum