Ideas and main stages of DIY toilet repair. Renovating a toilet where to start: design, cost, important points Where to start renovating a bathroom in an apartment
Quickly and inexpensively repair a toilet with your own hands + photo ideas. To obtain an excellent result, skill alone is not enough - theoretical knowledge is also required. If you want to master the technology of finishing work, then doing a toilet renovation yourself will be an excellent training, since the small area of the room will help save both time and money, and you will also have the opportunity to practice various types works
Naturally, the design and renovation of a toilet can be carried out according to a variety of plans, but in this article you will find the simplest and most popular option, which takes into account the preparation of the room for renovation, cladding with, and installation of hanging ceiling structure, and installation of plumbing.
So, we are dealing in a small room, for example, 1.2 * 0.85 meters. Therefore, we need to perform the most compact version design, and at the same time use materials that are accessible and not the most difficult to work with. When making a choice about where exactly to start working in the toilet, you should assess the condition of the room, and if it becomes clear that a complete reconstruction is needed to bring the room into an acceptable appearance, first of all you will need to remove the old finish.
For this:

Laying communications
On at this stage you should start laying all communications that will be responsible for the operation of the sanitary unit. Let's include here sewer pipes, as well as water supply pipes and electrical wires.
Note, that in typical panel buildings, very often it is in the toilet that there are vertical pipes with hot and cold water. In order not to carry out a complete reconstruction, it is in this place that the distribution unit should be laid, and all pipe bends should be hidden in a special cabinet in a box.
When doing renovations in a toilet with your own hands using photo ideas, you should:

Important! You should consider in advance whether you need a boiler. If necessary, lay out the pipework in advance for its further installation.
- The wiring for installing sockets for the boiler should also be laid in a groove. For lighting on the ceiling, we run the cable in a plastic corrugated channel, which can be fixed with wire hangers.
- From timber that is impregnated with an antiseptic, or metal profile you can form a box in order to disguise risers, pipe routing and other elements. It is necessary to sheathe the box only before finishing, so as not to damage the gypsum board during work. This is where the preparation ends.
Finishing
Ceiling
When you think about what kind of renovation to make, you should first think through and approve the order of finishing work. Professionals can work in a variety of patterns, but it's best to work from top to bottom to minimize the likelihood of contamination or damage to the final finish, and then you won't have to waste time masking already finished surfaces.
For these reasons, it is better to start from the ceiling:
- Along the perimeter of the room in the upper part, beat off a straight line at a distance of 5-7 cm from the ceiling. Please note that the indentation will depend on the size of the recessed lamps. If you are installing light bulbs small size, 4 cm is enough.
- Install along the line on the walls starting profile made of galvanized steel, or timber.
- For later, use metal hangers to attach the guides - they can also be made from timber or a metal profile. Installation and fixation of parts to the wall is carried out with dowels for quick installation.
- After the work is completed, you can run wires over the frame to the installation location of the lamp.
- To the profile, which is fixed along the entire perimeter, attach a special ceiling plinth with grooves for plastic panels. To attach to wood, use galvanized staples, which can be hammered in using a construction stapler.
- The most practical and inexpensive option is to cover the ceiling with plastic panels. Cut the PVC lining to size, and then install it on the ceiling - we insert the ends into the grooves of the plinth, and fix the edges of the locks on the frame beams using a stapler.
- Then make a hole in the plastic panel through which you can bring out the wires to connect the lighting fixture. Usually we install the devices themselves at the end of the repair, so as a temporary structure for lighting, use an incandescent lamp socket, which is taped to the wires with electrical tape.
Walls
After the work on the ceiling is completed, you can begin to work on the walls. Repairing a toilet with your own hands also involves finishing, and most often tiles are purchased for these purposes - the small area makes it possible to minimize purchasing costs and reduce labor costs, but the finishing is durable and hygienic.
The sequence of work is as follows:
- Check the walls with building level, and if necessary, level the rough coating. For good cladding, it is very important that differences on the surface are no more than 0.5 cm per 1 m, and anything less than this can be compensated for by the thickness of the adhesive layer.
Note, that during leveling it is advisable to start knocking down all the protrusions using a hammer drill, and then grind the surface. The fact is that plastering in a room such as a bathroom is inconvenient, time consuming and even expensive!
- Treat the walls with an antiseptic primer - it will not only help improve the adhesion of the glue, but will also prevent the appearance of fungus under the tiles.
- Cover the frame of the box, which is made to cover the pipes, with moisture-resistant plasterboard (green).
Then soak the tiles in water for about a couple of hours. This life hack will make it possible to greatly improve the adhesion of tiles to glue, and this is important, especially if you have little experience and work extremely slowly.
- We make the adhesive mixture; for this you need to dilute the dry powder in cold water. The glue should be thoroughly mixed using a drill with an attachment - we do this at least twice so that there are no lumps.
After this, you can begin facing:
- Take a building level and mark the surface of the walls, drawing lines along the bottom edge of all rows. Make indents between the rows - the thicker the tiles, the wider the seams can be made.
- Using a float, apply glue to the wall. Use the serrated side to form grooves so that the mixture is evenly distributed.
- Do not apply glue to too large an area, be guided by how quickly you complete the work - the surface with the adhesive composition should not dry out under any circumstances!
- According to the markings, we lay the tiles against the wall, press them and level them. Carefully remove excess glue with a spatula.
- To keep the seams the same size, install plastic crosses.
Tiles should be laid in rows, from top to bottom. To obtain beautiful drawing, you can lay the tiles offset, but then each piece must be shifted by ½ the width. The accuracy of installation should be checked using a plumb line and a building level, and if necessary, adjust the position of the tiles, as well as add or remove glue.
When everything is dry, all that remains is to wash the lining and wipe it with a clean cloth. If you do everything carefully during the process, it won't take that much time in the end.
Floor
Before carrying out DIY floor repairs in the toilet, a condition assessment was carried out. Most often it is necessary to restore the waterproofing layer of the floor, so the first part of the work will need to be completed before finishing the walls.
- To begin, clean the base again from debris and dust, and then impregnate it with a penetrating primer.
- After this, apply a waterproofing mastic based on your hands. liquid rubber or bitumen. This layer will protect against leaks. The material should extend slightly onto the walls!
- Pour a leveling screed over the waterproofing with a thickness of up to 5 cm. To do this, you can use a self-leveling compound with rapid hardening - the price is of course higher, but time will also be saved.
- After the screed has dried, you can treat the surface with a primer.
- For work we use only floor tiles, since they are not too slippery and much more. The use of wall tiles will lead to a new renovation in the next couple of years.
- Using a float, apply cement-based tile adhesive to the base. Distribute the composition evenly and you can begin cladding.
- The tiles should be laid either in rows or in order.
- As with wall trim, keep gaps the same size using cross stitches.
At the end of the work, the glue should dry, and then you can grout the seams, dry the grout, wash and wipe the floor dry.
Cost of consumables
To find out how much the renovation will cost, you should know the area of the toilet, as well as the materials that will be used, and whether you will carry out the finishing work yourself or contact specialists. Even with the most accurate calculations, you should budget for approximately another 25% of the total amount for additional expenses. The price of tiles varies widely, as there is both a budget segment and very expensive models. Interestingly, although the water supply fittings themselves small size, their cost is impressive. In addition, when calculating how to make repairs in the toilet, keep in mind that you will need such little things as sealant, gaskets, fasteners, etc.
Conclusion
Toilet repair is, in a sense, a testing ground for testing yourself as a novice finisher, builder, electrician and plumber. When focusing on the recommendations given, as well as step by step video DIY toilet renovation with photo ideas, you will succeed, and in the future you will be able to cope with other, more complex projects.
Summer is a time not only for vacations, but also for renovations. Everyone wants to put their apartment in order, but not everyone has enough money to do this: the crisis has passed only in words, but in reality “things are still there.” But we are Slavs, which means we’ll get out of it, because the saying “no need for inventions is cunning” really works.
Today we will look at the cheapest (oh, sorry - the most economical) option for repairing a toilet. So!
Toilet- this is not only (pardon the expression) a latrine: it is a place where not only you, but also your guests go. And if the toilet has ragged walls, cracked tiles, and there are holes on the floor, then such a place can be called a toilet purely hypothetically: in fact, such a place is easier to call a “toilet” or “stove” (excuse the expression). Naturally, after visiting such an “attraction” your guests will have a not very positive opinion of you - fact!

How to correct the situation in this matter?
It's clear that repairs are needed. But, as mentioned just above, you may simply not have money for expensive tiles, plumbing fixtures, etc.: all this costs a fair amount. But did you know that if you need to renovate a toilet, you can get by with a fairly small amount of money?
How? Let's see;
There is no need to put expensive glue on the toilet tiles

- Firstly, this repair option has long become boring and even if the tiles are very beautiful, it’s still just a banal tile.
- And secondly, why spend money on tiles when you can buy regular foam tiles for this purpose?

Yes, yes: those same patterned tiles that are glued to the ceiling! The advantages of this repair option are obvious:

1 incredibly low cost;
2 very small specific gravity, which will allow you to significantly reduce repair time: foam tiles do not “float”, they do not need to be constantly held and adjusted;
3 adhesive paste for gluing foam tiles is very inexpensive;
4 no need to buy grout separately: as a grout for joints, use the same paste on which you glued the tiles;
5 tiles come in different varieties color shades, so it’s not necessary to glue white tiles: there is turquoise, blue, yellow, etc.;
6 foam tiles are very easy to cut to size (unlike tiles, which are very difficult to cut even with a tile cutter). In general, continuous advantages!
The only thing that is required of you is to make the walls even. To do this, shoot down old tiles

(or remove old paint) and, using the “level”, perform an algorithm for leveling the walls using mortar.

The smoother the walls are, the cooler the foam tiles will look on those walls!

After pasting the walls and ceiling foam tiles, do not forget to glue the top plinth (padogu): so to speak, for a better “calico”

The ceiling, of course, should also be covered with the same tiles. In general, everything ingenious is not only simple, but also economical, fast, understandable and beautiful!

And the last tip: if you want to visually increase the area of the toilet,then put blue tiles on the floor!

DIY toilet installation
Rarely when we go to visit friends, we admire how the toilet is installed in the toilet. But, when we need to use the services of a restroom, then we can appreciate the convenience of this necessary element. Is it difficult to install a toilet yourself? Let's try to figure this out.

First, decide on the toilet model. Pay attention to the fastening systems in the product design. Basically they are the same, but in some cases they may differ. Attention should also be paid to preparatory work. So, let's get to work.
Preparatory work
Before you install new toilet, decide which method you will use to secure it. The simplest is to screw it to the floor using strong dowels with filler. It is important that the intended location is level. Otherwise, when tightening the bolts or screws more tightly, the mounting ears in the toilet will simply burst.
Another method of attaching a toilet is cement pouring. In this case, it is necessary to ensure that the screed is sufficiently thick. Otherwise, it won’t withstand the load - and then it can turn out very funny.
Before installing the toilet, you must check the communications in advance. The water supply must be at the required distance to the cistern. The sewage system must also be in in good condition(pipes must be sealed and have the required slope). All this needs to be taken care of in advance so that later you don’t have to remove the toilet every now and then to carry out the necessary work.
Toilet installation
After we have prepared the base for the toilet and checked all suitable communications, we can proceed directly to the installation of the “chair”. Before attaching it to the base, we connect the drain pipe. Thanks to modern technologies this can be done quite quickly and without any difficulty. To do this, you can use a corrugated siphon. If the flush tank requires fastening directly to the toilet structure, be especially careful. Even with small cracks or chips, such toilet models become unusable.
Some additionally process the connecting gaskets silicone sealants. This will provide maximum protection against leakage. Drain pipe there is no need to process such materials, as this may complicate renovation work, if such are required. In addition, all connecting elements are ideally sized to each other. They are also equipped with rubber gaskets that provide protection against leakage. There is no need to worry that the pipe is not securely fastened. The point is that in sewer system no pressure is created. Therefore, such connecting systems are quite reliable.
If the flush cistern is attached to the toilet itself, care must be taken to ensure that it is not broken by those who will use the “services” of the toilet. The fact is that when a person sits on the toilet, he can automatically lean his back against the raised lid. As a result, negative pressure is exerted on the tank, and it can come off the mount. Therefore, it is recommended to install such toilets near the wall of the room. Even if someone leans their back against the tank, it will not break.
Sooner or later, all of us have to face such a problem as renovating a toilet room. Unlike other rooms, for quality repairs It may be necessary to replace sanitary ware, water pipes, and install meters. And the cost of finishing can vary significantly, depending on the chosen material. In this article we will look at how to do quality work at minimum costs and where to start repairing the toilet.
For convenience, the entire process of repairing a toilet can be divided into separate stages.
Before starting all work, it is necessary to work out the design and layout of the bathroom, select the expected type of finishing materials and plumbing fixtures, and draw up an estimate taking into account unforeseen expenses.
Cleaning the premises
A complete renovation in a Khrushchev-era building involves clearing everything installed in the toilet. Only the supply pipes, riser and bare walls and ceiling should remain. For convenience, it is better to carry out the work in the following sequence:
- We knock off the old tiles from the walls using a hammer drill or a hammer and chisel. Old plaster or it is also better to remove wallpaper by first soaking it with water. If we carry out finishing on the old coating, we will have to reduce the size of the room by 3-5 cm, which for such small space undesirable. Moreover, it is unreliable and short-lived.
- We remove the tiles on the floor. We clean the resulting surfaces with a metal brush attachment on a drill.
- We wash the whitewash from the ceiling and wash away dust and dirt from the walls.
- Now you can start dismantling the plumbing. To do this, shut off the cold and hot water. If you are renovating a combined bathroom, you will need to disconnect the sink along with the faucet and drain. Usually, after old sinks, the mounting brackets remain - they also need to be dismantled.
- The toilet itself can be left until the last minute so that it can be used. Before removal, drain the water from the tank, unscrew the toilet fastenings to the floor and knock off the place where it drains into the riser, if it is cemented. We remove the drain pipe all the way to the riser; it will no longer be useful.
The better the room is cleaned at this stage, the easier it will be to do finishing work later, especially with tiles and wallpaper. The exception is finishing with PVC panels, for which it is enough to make a frame on top of the old walls.

Replacement and repair of communications
Having gained open access to the riser and supply pipes for hot and cold water, you can begin to replace, repair, and install meters. In old houses, the wear and tear of all communications reaches extreme values, so it is worth taking care of replacing the riser and pipes in your apartment. The most the best material the riser will be made of reinforced polypropylene, and it is better to entrust all work on its replacement to specialists from the housing office. It will be faster and better than replacing it yourself. Responsibility for the work performed and possible accidents will lie with the installers and the management company.

Further intra-apartment wiring can be done on your own using metal plastic pipe or corrugated stainless steel. Plastic pipes cut well and are easily connected to each other using fittings and a special soldering iron. This connection turns out to be very reliable and durable, and a wide range of pipes and fittings allows you to build wiring of any configuration in the bathroom.
The pipes themselves are gray or white They look quite aesthetically pleasing, but it would be more correct to put them in special boxes, which will then be covered with finishing materials.
For a small toilet this is optimal solution– the riser is closed vertically, and the pipe distribution is horizontal box from moisture-resistant plasterboard or plywood. Additional sound insulation can be placed in the vertical box.
It is also possible to lay the pipe in a specially hollowed out cavity in the wall. This option looks more aesthetically pleasing and takes up less space. You just need to make sure that the valves that shut off the water to the apartment are easily accessible.
Preparation and finishing of surfaces
It is best to start with the walls and ceiling. So concrete walls quite simple, but brick or cinder block walls may require. In general, the planes in such small rooms rarely have strong deviations, otherwise you will have to resort to cladding with plasterboard or PVC panels.

For puttying we will need two spatulas - a working one, 30 cm long, and an auxiliary one, 5 cm long, putty mixture cement-based, for example Vetonit. Preferably a drill with a special attachment and a bucket. Ready mix with a short spatula it is applied to the main one, and then spread from bottom to top along the wall. By changing the angle of inclination of the working tool, you can fill deep depressions and level the already applied putty. After 3-4 hours you can re-treat problem areas. The time for complete drying of the putty is 24 hours. Then the wall is sanded and primed.
After leaving the walls to dry, you can start leveling the floor. For this, a quick-drying screed is used. The mixture is prepared based on 1 m2 with a thickness of 1 cm, 12-13 kg of dry material will be required. Pour the resulting solution thin layer on the floor, and then level it with a spatula, checking the installed beacons and level. It is necessary to obtain a flat horizontal surface.

When all preparatory work done, it’s time to implement your toilet renovation ideas. Start off finishing also better from the walls and ceiling.
Wall coverings
When choosing a material, you must be guided by the same principles as for a bathroom or a combined bathroom. In old houses, the toilet is a small, unventilated room with high humidity, in which wet cleaning will be carried out periodically.
Therefore, preference is given to moisture-resistant materials that do not absorb odors and are easy to clean.
Most Popular:
- PVC panels are cheap, quickly glued, and do not require preliminary preparation of the walls. Very wide choose, including models with a 3D effect and pronounced texture. An excellent option for redecorating a toilet.
- Ceramic tiles captivate with their characteristics and noble design. It is durable and does not form fungus or mold. This type of coating always looks expensive; the only disadvantage is the cost and difficulty of installation.
- Wallpaper for the toilet, washable vinyl and non-woven wallpaper, as well as glass wallpaper are well suited. It is better to avoid paper or natural ones due to their high hygroscopicity and ability to absorb odors. You can use liquid wallpaper, but in any case, careful preparation of the walls will be required and waterproofing is desirable to avoid the appearance of mold and mildew.
- Paint on acrylic or oil based- most a budget option, but not distinguished by beauty.

Wallpaper in the toilet

Walls made of PVC panels
Laying tiles is similar to the work carried out on the floor in the toilet, and the features of installing plastic panels are worth considering in more detail.
- We measure the area of all walls minus the windows and doorway. We also include the costs of covering technological boxes and make a small reserve for trimming and fitting. All PVC panels are available in lengths from 2.5 to 3 meters, standard width 30 cm. We calculate the whole number of strips and additional elements - corners, skirting boards, connecting profiles.
- We attach lathing to the walls from wooden slats or metal profile. They should be located horizontally and as often as possible for greater rigidity of the entire structure. Fastening is carried out using dowels. At this stage, we attach the mounting rails for fastening hanging cabinets, mirrors and water heaters, and lay the wiring to sockets and switches.
- The fastening of the first panel begins from the corner. We fix it using a self-tapping screw with a press washer or small nails, each subsequent one is inserted into the groove of the previous one. This ensures a seamless coating, and it is impossible to make a mistake with such an assembly.
- Excess material can be cut off with a knife or grinder. After completion of the work, the corners are covered with additional elements, and the joints of the floor and ceiling with plinths.
- Headlining pvc panels is carried out similarly.

Tiling walls and floors
Ceramic tiles are available for sale in any size, color and to suit any budget. This material is very durable and practical, which is why its popularity is so high. The only disadvantages include labor intensity and a large amount of dust and debris.
Let's look at how to renovate a toilet using tiles:
- Walls and floors must be pre-prepared and primed. You can additionally apply an antifungal primer, and if the installation is on top of drywall, then a special mixture such as concrete contact, for better adhesion. All communications and wiring are laid in cable channels.
- We begin laying tiles on the floor from the corner near front door. For walls, you need to screw a base metal profile around the entire perimeter, carefully aligning it with level.
- The glue is sold dry and prepared in small portions immediately before installation, so that it can be used within 30 minutes. Kneading is carried out using a drill with an attachment.
- Apply the glue with a notched trowel from bottom to top; the layer of glue should approximately correspond to the thickness of the tile. The first tile is placed in the corner, the next one next to it, and so on. We attach plastic crosses in between to ensure evenness of the gaps.
- Floor tiles can be laid in one go, while wall tiles can be laid in one go heavy weight It’s better not to glue more than 3-4 rows in one go. It would be right to take a break for a day so that the glue finally sets on the wall.
- The tiles are cut using a special tile cutter; you can use a grinder with a special abrasive disc. During this procedure, defects are possible, so the number of tiles should be purchased with a reserve.
- After the tiles are completely glued, the crosses can be removed and the seams can be filled. cement grout– fugue. This is done rubber spatula, and the shade of the solution is selected to suit color scheme toilet. It is better to choose a dark or dark grout mixture for the floor. gray– it won’t get so dirty underfoot.

Plumbing installation
When all the dirty finishing work is completed, you can begin the final stage of toilet renovation. You should start by installing the toilet.

- Having installed the toilet on the floor, they try it on and use a marker to mark its location and mounting points.
- We move the toilet to the side and drill holes for the dowels that secure it to the floor.
- We screw the toilet and cover the bolt heads with decorative caps.
- We connect the toilet pipe with a corrugated pipe to the pipe on the riser. We seal with special rings with cuffs to make the connection airtight.
- Install on top cistern on a special platform or attach it to the wall. We assemble the insides of the tank - float, valve, flush lever and connect it to the cold water supply pipe according to the instructions.
If the size of the room or a combined bathroom allows, then it is necessary to install a sink and faucet. For ease of installation, it is better to assemble and connect the mixer before attaching the sink to the wall. Having attached the washbasin to the wall using dowels or anchors, we proceed to connect the flexible hoses to the pre-installed threaded fittings. Lastly, we install a siphon and a drain into the sewer system with a rubber seal.

After installation is completed, the entire system must be flushed big amount water. All identified leaks are repaired. Now you can cover the communications and drain with a decorative pedestal or cabinet. The joints between the floor and the toilet can be filled with silicone sealant.
In the presence of minimal tool and finishing skills, you can easily realize your creative ideas for toilet renovation. You can do this yourself - quickly and inexpensively.
Tsugunov Anton Valerievich
Reading time: 6 minutes
Repairing a toilet in an apartment is not the best simple task, despite the seemingly small amount of work. The lion's share of difficulties is associated precisely with the size of the room and with the installation of plumbing and pipes in the toilet: risers, wiring, sewerage. Of course, it’s better to entrust specific work to professionals, but cosmetic repairs can be done without outside help. Let's find out how to do it, saving time, nerves and money, and find out where it should start.
What is the order of work in the toilet?
Even minor repairs toilet in panel house will require performing a large number of different tasks. In that small room there are many different communications: pipeline, sewerage, heating, lighting. Often the toilet itself needs to be replaced. In some cases, a defective report may be required major renovation.
First you need to decide on the sequence of repairs in the toilet. Renovation in an old house or in a new building begins with the development of design and calculations necessary materials. It is advisable to perform further stages of repair in the following order:
- removing old coatings from ceilings and walls;
- replacement of heating risers and sewer pipes;
- replacement of wiring (if necessary);
- cleaning the premises;
- preparing the floor, pouring the screed, laying the floor covering;
- installation wall coverings(wallpaper, tiles, panels);
- if necessary, assembly of a plumbing cabinet;
- toilet installation;
- installation of a new door.
Even the most modest toilet renovation takes a long time and requires a significant investment, since plumbing is expensive. Most inexpensive option repairs in the toilet - simple cosmetic ones, when they do not change the drain or wiring, but only refresh the ceiling and walls.
Toilet design
Quite often, the toilet is a tiny room in which, as they say, it’s impossible to turn around. In houses of the 137 series there is a toilet, in which, in addition to the riser and pipes, there is also a air shaft, so small that there is practically no space between the toilet and the door free place. In such a small space, design development before starting renovation requires a special approach. When thinking through it is necessary to take into account some important nuances.
- The central object of the toilet is the toilet. First of all, it should be comfortable. Snow-white sanitaryware looks best, although other colors can be chosen. The main thing is that it fits the overall interior.
- A great option for a small room is a built-in toilet. This practical solution: the tank and sewer pipes are put away in a plumbing closet; dirt, dust, and germs do not accumulate on them. Cleaning becomes much easier. In addition, the toilet on the installation moves several centimeters deeper into the toilet, which makes staying in a small room more comfortable.
- Most often, heating risers and water meters are installed in the toilet. It is also recommended to sew them into a beautiful plumbing cabinet. The interior will only benefit from this. A folding hatch should be provided opposite the meters and taps so that you can turn off the water or check the readings at any time.
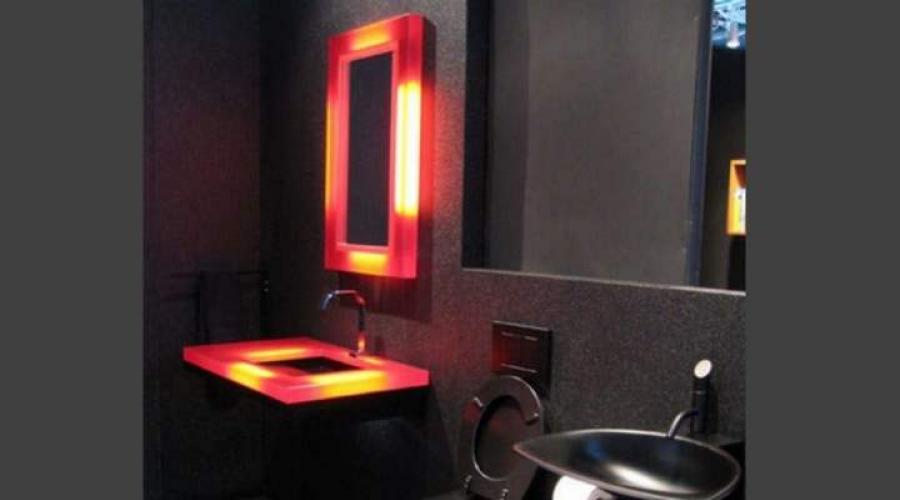
If you are tired of standard solutions, you can search for ideas on the Internet and create unusual interior toilet in a new building. Interesting option The following photo demonstrates.
You can decorate the toilet with wallpaper or paint the walls in an unusual way, but you should avoid aggressive tones or excessive variegation.
A black and white toilet will look stylish and unusual, especially if you choose black high-tech plumbing fixtures.
Materials for toilet renovation
The load on the toilet room is quite specific. There is often high humidity here, pollution and unpleasant odors. Therefore the toilet should be used Decoration Materials, do not absorb odors and dirt, are resistant to high levels of humidity, and are easy to clean.
For repair and alignment floor surface In the toilet it would be advisable to use self-leveling floors. The mixture must be prepared on a cement base. For finishing, it is advisable to use porcelain stoneware tiles.
To level the walls of a toilet in a new building, you can use plasterboard, but only its moisture-resistant modification ( hallmark – green color sheets). Recommended for frame aluminum profiles, because wood quickly rots from dampness and is affected by fungus. You can glue tiles, paint or wallpaper onto drywall.
The ceiling surface can be painted or a suspended ceiling made of PVC film can be installed, which will help prevent damage to the finish in the event of a leak in the neighbors above.
Doors to the bathroom can be either standard or smaller, as in houses of the 137 series. And this creates many problems for owners, since finding such a canvas can be problematic. Here we can give only one recommendation - the door should be solid.
We are starting renovations
When all questions regarding materials have been resolved and a design has been chosen, you can begin the repair process. Where to start renovating a toilet? From the dismantling of old materials: removing the toilet, removing coverings, wallpaper, removing garbage, etc.
Repairing a toilet in a new building is easier to do: there is no need to change pipes or dismantle the old finish.
The next stage of repair is installation new sewer. Now they use plastic. It is much lighter and cheaper, but is not inferior in strength traditional materials. When purchasing any plumbing kits, you need to check that all rubber gaskets are in place. If there are not enough of them, problems may arise with sealing the connections.
Then they change the pipes and wiring. Risers are now also made of polypropylene. They must be firmly attached to the wall, especially a pipe with hot water, because under the influence high temperatures they may become deformed. With the economical option, the pipes are not touched, since this significantly increases the cost of repairs. If the toilet is wall-hung, the installation is installed at this stage of the repair.
Doing electrical wiring in a toilet in a new building, you need to remember that the wires must be hidden in a special corrugation, and distribution boxes and wire connections must be taken outside this room.
Another point is ventilation. Often it becomes clogged, so it is necessary to clean it and close it with a special grill.
For efficient work For ventilation, it is advisable to equip forced exhaust.
The renovation is completed by installing the toilet and assembling the plumbing cabinet.
Repair cost
Knowing how to repair a toilet and what work lies ahead of you, you just have to decide whether you can do everything yourself or whether it’s better to entrust some of the work to professional craftsmen.
The price of a turnkey cosmetic renovation of a toilet in Moscow ranges from 14–25 thousand rubles; in St. Petersburg such repairs will cost 10–22 thousand rubles. The price for a major overhaul with replacement of pipes starts from 35 thousand rubles.
You can save money by doing some of the work yourself, for example, dismantling the old coating, making a screed, etc. If you have no experience in performing any operations, you can watch training videos or look through photos in search of inspiration.
Each owner of his own home tries to create in it all the conditions for comfortable stay. In fact, it’s easy to do, you just need to use your imagination, and your home will sparkle with new colors. Repairs are always a big financial expense and a lot of problems, so most people are reluctant to start it. At the same time, many nuances should be taken into account to ensure that the interior design is not only beautiful, but also practical. This is especially true for the toilet and bathroom, since both of these rooms are associated with high humidity and temperature. This is where many questions arise. What materials and plumbing equipment choose? What style should the room be designed in? How to save money without sacrificing quality? Let's look at all this in more detail and find out where to start repairing a toilet with your own hands. This article will be especially useful for people who have no experience in construction and finishing works. After reading it to the end, you will learn how to quickly and easily transform your bathroom beyond recognition.
Where to begin?
If you do not want to order a turnkey toilet renovation, but plan to handle everything on your own, then it is very important to have at least some idea of where to start. Many people think that the first thing they need to do is purchase building materials and plumbing, however, as practice shows, they later face many problems that entail extra financial costs. To avoid most beginner mistakes, it is recommended to first prepare the room for the upcoming renovation. This means not just removing everything unnecessary from the room, but preparing all working surfaces - walls, floor and ceiling for further work. This will be discussed in more detail below.
Preparing the premises
Let's look at this in more detail. So, where to start renovating your toilet and bathroom? First of all, you need to understand that in the vast majority of apartments the restroom has a very small area. As a rule, it is 1.2 x 0.85 meters. Such dimensions greatly limit the possibilities, so you need to immediately decide on an interior design project.
In this case, everything happens in the following sequence:
- We disconnect the toilet from the communications, unscrew the fixing bolts and take it out.
- We assess the condition of the pipes. If it is deplorable, then we will also dismantle them.
- Most often, the walls in the toilet are tiled, so we remove them and then clean the work surface using a hammer drill and a special nozzle.
- If you want to carry out quality repairs, it is recommended to immediately start replacing the wiring. We remove the electrical cable from the groove and cut it.
It is worth noting that in some apartments the toilet is combined with a bathroom, so there is constantly increased dampness in them, which creates ideal conditions for the growth of fungus and mold. To prevent this, you need to treat the walls with special antiseptic agents.
We have described in detail preparatory stage, so now you can consider the further sequence of repairs in the toilet. Floors, walls, and ceilings require an individual approach, so below we will look at each of them in more detail.
Laying communications

What is she? Where to start repairing a toilet in a new building, when reconstruction is not needed, but only bringing the room back to normal? In this case, you will not need to prepare anything in advance, since the working surface is already suitable for finishing.
The first step is to connect water supply and sewerage, as well as electrical wiring to the toilet installation site. Without this, the bathroom simply will not be able to function. If you live in a panel house, which are most often built today, then the restroom will already have risers for hot and cold water. To minimize physical and financial costs, this is where it is best to install a distribution unit. To make the room more aesthetically pleasing and attractive appearance, all pipes are hidden in a special box.
If you don’t know where to start renovating a toilet, then just follow the following sequence:
- The first step is to install the toilet and connect it to the drain riser. For this, a corrugated plastic pipe is usually used, laid under small angle.
- Next, the riser is connected directly to sewer drain using the same pipe, which is connected at a slope of about two centimeters per linear meter. Clamps are used for fixation.
- A tee is inserted into the riser responsible for supplying cold water, through which water is supplied to the drain tank. If you want your bathroom to have a sink for washing hands, then immediately make separate outlets for hot and cold water. Best to use hidden installation so that they are not visible.
- If the heating of water for the bathroom will be carried out using a water heater located in the toilet, then immediately make the piping to connect it.
- Electrical wiring should be laid exclusively in grooves. In this case, the cable is placed in a special corrugated box, which eliminates the possibility of it mechanical damage And short circuit.
- The risers are hidden in special boxes, the frame of which can be made of a wooden beam impregnated with an antiseptic solution, or a metal profile. Then it is sheathed at the final stage of repair with finishing material, for example, clapboard.
That, in fact, is everything in the toilet that goes to initial stage. Next, further work will be described in detail and tips will be given that will help you deal with everything much easier.
Room decoration
So, you already know where to start renovating a toilet or bathroom, so now you can talk directly about the finishing. It is important to understand that working with walls, floors and ceilings has certain features that must be taken into account. This will be discussed in more detail below.
Ceiling finishing
Where should we start? Redecorating toilet rooms (photos of some interior design projects are simply breathtaking) it is better to start from the ceiling, since this way you will not damage the wall decoration and you will not have to think about how to disguise the defects later. Some repairmen may disagree with this, however, as practice shows, this approach is more appropriate.
The sequence of repairs in the toilet when finishing the ceiling is as follows:
- Along the perimeter work surface a straight line is drawn at a distance of approximately 5-7 centimeters from the ceiling. The exact spacing is determined depending on what types of lighting fixtures you will use.
- According to the markings on the walls, galvanized or wood profile.
- Metal guides are attached to the ceiling using special hangers and dowels.
- When the frame is completed, electrical wiring is supplied to the intended location of the lamps.
- A ceiling plinth with special grooves designed for installing plastic panels is fixed to the profile.
When planning a bath and toilet renovation, it is recommended to decide on the materials in advance. Which ones to use depends solely on your preferences and financial capabilities. The best option from the point of view of cost and practicality is lining. She is cut at required sizes and simply inserts into the installed ceiling cornice. They also have holes cut in them for lighting fixtures, which are connected at the very end.
Wall decoration

So where should you start? Many people do not want to order a turnkey renovation, because very often the craftsmen do not pay enough attention to the walls. It happens that the work is handed over, and later uneven working surfaces and other defects are discovered, which greatly spoil the overall impression. But you don’t need to hire anyone, because if you can handle the ceiling, then the walls won’t create any special problems for you.
It is best to use tiles as a finishing material. Firstly, it has excellent performance characteristics and durability, secondly, it is very easy and simple to care for it, thirdly, since the area of the restrooms in many apartments is small, you will not need a large amount of material, and therefore, repairs will not require significant financial costs.
So, the materials have been purchased, you can continue repairing the toilet. The sequence of work when finishing walls is carried out according to the following algorithm:
- Carefully inspect the work surface and use a building level to check how level they are. If there are even slight curvatures, they need to be leveled to increase the tightness of the tiles. The permissible error is 5 millimeters per square meter.
- If leveling is necessary, you must first remove any protrusions with a hammer drill or sand them. This mandatory stage, because if during the operation of the bathroom the finishing materials begin to be plastered, then you will not have any problems with this.
- Before gluing the tiles, the walls are treated with an antiseptic primer. It will not allow mold and fungi to multiply, so your toilet will always be clean and tidy.
- The frame of the box in which the pipes will be hidden is covered with plasterboard, which has increased resistance to moisture.
- To improve the quality of adhesion, the tiles should be placed in water approximately a few hours before working with them.
- Glue is being prepared. To do this, you simply need to dilute the dry mixture in water in the proportions specified by the manufacturer on the label. It is very important to stir everything well so that it is homogeneous and without lumps.
So, the above instructions answer in detail the question of where to start repairing a toilet. When all preparations are completed, cladding can begin.
It is performed according to the following scheme:
- Markings are applied to the working surface under the level. It is important to take into account that the thicker the tile, the wider the seam needs to be made.
- The adhesive is evenly applied to the wall with a spatula. It is very important to distribute it so that it is of the same thickness over the entire area. Don't try to cover a large area at once as it dries quickly. Do everything slowly and little by little.
- Based on the previously applied markings, the tile is applied to the wall and pressed firmly. Excess glue should be removed immediately.
- Plastic spacers must be installed between the tiles. This will allow you to maintain the same thickness of seams everywhere. The gluing is carried out in rows in the direction from the floor to the ceiling. If you want to give the room a more original appearance, then each next row should be applied with an offset of half the width. It is recommended to check the accuracy of installation using a building level and, if necessary, adjust the position of the tiles.
That's all, now you know where to start repairing a toilet in an apartment, as well as in what sequence all the work is performed. After the wall cladding is completed, the room is closed and left for at least 12 hours to allow the glue to dry completely, and then the seams are sealed with a special putty. It not only improves the attractiveness of the walls, but also prevents water from penetrating under the tiles, thus extending their service life. At the very end, all that remains is to thoroughly wash the walls, after which they will shine with their beauty.
Floor finishing

So, the toilet renovation has already begun, but to complete it completely, we still need to lay flooring. Here, as in the case of other parts of the room, it is very important to assess its condition. As practice shows, waterproofing very often becomes unusable, so it needs to be replaced.
The work is performed in the following sequence:
- The base is completely cleaned of any debris and dust, after which it is treated with a primer deep penetration.
- Next, a special polymer mastic is applied, best made on the basis of bitumen, which will act as waterproofing. Thanks to this, the likelihood of flooding neighbors living on the floor below you will be almost completely eliminated. The layer thickness must be at least 150 millimeters.
- After waterproofing, a concrete screed 50 mm thick is poured. It is best to use quick-hardening mixtures for this. Of course, they cost more than usual, but their quality is much higher, and you will also save a lot of time.
- After the screed has dried, it usually takes 3-4 days, and the working surface is primed.
- It is better to use for cladding floor tiles. It has greater strength and durability, so it will be much more difficult to damage it, and it is also not so slippery when water gets in. If you choose wall tiles, be prepared to replace them just a few years after the renovation.
- The process of gluing tiles is the same as in the case of walls. First, an adhesive mixture is applied to the floor, after which the tiles are laid in rows. When it dries, the joints are grouted. The tiles can be laid either in rows or offset.
That, in fact, is the whole process of work. Now you have a detailed idea of where to start renovating a toilet and how to bring it to the very end. Now all you have to do is arrange the bathroom, and you can start using it.
Plumbing installation

This article discussed the renovation of a toilet step by step. If you strictly adhere to the instructions described in it, then you will certainly be able to do everything correctly. high level. However, this is not the end, since you still need to install and connect the plumbing equipment, and this is also a very labor-intensive process.
It is performed according to the following algorithm:
- The toilet is installed in the designated place. At the same time, to prevent it from fidgeting on the tiles, it is recommended to place it on a special rubber lining.
- We make marks for the holes for the fixing bolts and drill them.
- We install the plumbing fixtures and fasten them with anchors, after which we connect them to the drain using a corrugated pipe.
- Next, screw the flush cistern to the toilet. The kit includes all the necessary fasteners, so you don’t have to buy anything extra.
- We connect the equipment to the water supply system.
- If you also planned to install a sink in the restroom and supplied hot and cold water for this purpose in advance, then there should not be any special problems with this. The sink is simply mounted on the wall and secured with anchor bolts. It is recommended to use an additional bracket, which will give the sink more stability.
- We connect it to the sewer drain through a siphon and install taps for hot and cold water.
When all work on the installation of plumbing equipment is completed, it is recommended to check the quality of all connections so that there are no leaks anywhere. After this, you can begin to install lamps in the ceiling and start using the bathroom. This, in fact, is the entire turnkey repair, which you can handle yourself without involving professional builders.
Price issue

If you have read this far, then you are no longer worried about starting a toilet renovation. However, we still need to talk in detail about how much it will cost to decorate the interior of the restroom. It’s worth noting right away that by doing everything yourself, you save a decent amount of money, but you will still have to spend money, since these days construction and finishing materials are quite expensive.
To get accurate numbers, it is best to go to the store in person and do all the calculations yourself, since prices can vary greatly depending on the region. In addition, 30 percent should be added to the calculations obtained, which will go to cover rejection and possible additional costs. By the way, if you have been planning to update your bathroom for a long time, but did not know where to start renovating the toilet, then it is better to immediately decide how much money it will take and whether you can afford it.
The table below will make this task a little easier for you.
| Material | Quantity | Price in rubles |
| Waterproofing mastic | ||
| Tile adhesive | ||
| Antiseptic primer | ||
| Floor tiles | Square meter | |
| Screed mixture | ||
| Drywall | ||
| Accessories for drywall | Set | |
| Square meter | ||
| Universal mixer |
In addition to all of the above, you will also need to purchase new plumbing equipment. It is very difficult to determine prices for it, since everything here depends on the individual preferences of each person. You can purchase both a budget option and luxury plumbing from worldwide famous brands. When choosing a toilet and sink, you should start from your real financial capabilities. If you used inexpensive tiles for tiling the room, then there is simply no point in having a European toilet. It’s better to do everything in unison so that everything in the interior harmonizes well with each other.
Conclusion
Here, in fact, our article, dedicated to answering the question of where to start making repairs in the toilet, has come to its end. All information contained herein is supported by practical experience, so if you strictly follow all the tips and recommendations, you will be able to cope with everything, and the quality of the repair will be in no way inferior to that performed by qualified specialists.
As for what style to design the restroom, it all depends on your imagination. There are quite a lot unique ideas, the implementation of which will not require large financial costs. For example, a great option might be modern style, distinctive feature which is minimalism. Despite his inherent asceticism, he looks very attractive and relaxed.
Don't be afraid to experiment with design own apartment. After all, only you know all your preferences, with the help of which you can create everything the necessary conditions for the most comfortable stay. Due to the fact that today the market is rich in various building materials, you can furnish your home in a modern and stylish way.