Horizontal box for pipes made of plastic panels. How to make a plasterboard box in the bathroom - step-by-step instructions. Plastic box
Wanting to make their bathroom more neat and convenient, many people decide to hide the plumbing and sewer pipes. The best way to do this without transferring communications and with a minimum of dust - build a box for pipes in the bathroom. You can assemble a plumbing box with your own hands; there are several options available for this.
The most common option for hiding pipes is to assemble a box from moisture-resistant plasterboard. This is due to the fact that ceramic tiles, which are most often used to decorate bathrooms, can then be glued onto the drywall. Let's consider the main stages of constructing a gypsum plasterboard box.
Stage 1: marking
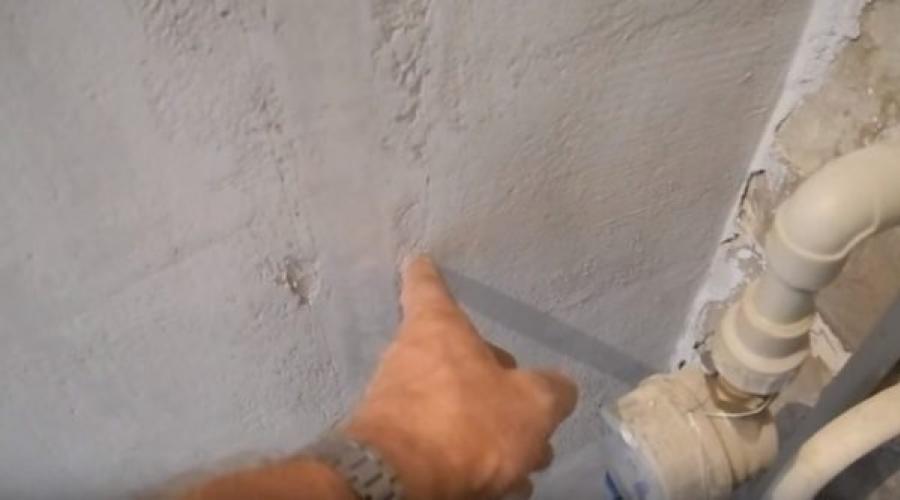
Before starting to assemble the frame, markings are made at the installation site of the box. The initial mark is placed at a distance of 30–50 mm from the most protruding element of communications.
 The frame stand is located at a distance of at least 3 cm from pipes and other communication units.
 Next, using a level, a vertical line is drawn along the surface of the wall, indicating the line of fastening of the frame. A similar mark is placed on the other wall, as well as in areas where horizontal pipes are closed.

Note! It is advisable to select the size of the box for tiling in such a way that whole tiles are used to cover all protruding parts. In addition to saving tiles, this allows you to create a neat and complete cladding.
Stage 2: frame construction
Assembly of the frame begins with the installation of a guide profile, which is attached to the walls with dowels along the marking lines. The step between the attachment points is 20–30 cm. The guide profile is also attached to the ceiling and floor to form the angle of the frame and install the front pillar. To ensure that the corners of the frame below and above are located in the same plane, first the guide profile is attached at right angles to the ceiling. Then a plumb line is tied to it and a point is marked on the floor where the lower corner of the frame should be located.

A rack profile is screwed to the guide profiles located on the floor and ceiling with self-tapping screws, which is fixed with 3-4 horizontal jumpers for additional mounting rigidity.
Note! Reinforcing jumpers are mounted taking into account the future location of inspection hatches that provide access to valves and meters.

After assembling the vertical part of the frame, if available horizontal pipes a frame is assembled for them according to a similar scheme:
- A guide profile is attached to the wall and floor, which sets the dimensions of the future box.
- The front frame element is attached to the guides using jumpers cut from the rack profile.
All jumpers are also installed taking into account the location of the sewer outlet for connecting the toilet, inspection hatches and shut-off valves.

Stage 3: framing the frame
The finished frame is sheathed with moisture-resistant plasterboard, cut into pieces required size. GKLV is cut sharp knife: first, the cardboard is cut along the line on one side (with a slight penetration into the gypsum core), then the sheet is broken along the cut line and the cardboard is cut on the second side. The sheathing is fastened to the frame using black self-tapping screws in increments of 15–20 cm. The place where the inspection hatch will be installed is not covered with plasterboard or a hole is then cut out.

Note! It is advisable that at this stage the inspection hatch has already been selected by type and size and purchased so that you can immediately try it on for a tight fit.
Types of hatches used for plasterboard boxes:

Stage 4: finishing
Before finishing the box must be prepared, this is done in the following sequence:
- All seams between the drywall are opened with a knife, then, along with the corners and other edges, they are sanded.
- The seams are filled with putty, and sickle tape is glued on top.
- Corners are also processed putty mixture and glued with serpyanka.
- After the putty has dried, the box is treated with a primer in two passes, with a break for each layer to dry.
Plasterboard box most often lined ceramic tiles: A continuous layer of tile adhesive is applied to the back of the tile, which is smoothed with a notched trowel. The tile is applied to the drywall and pressed, then the next one is glued. Having completed the installation, the seams are rubbed using conventional technology, and the corners are closed. decorative elements color suitable for finishing.

It is written in detail about laying tiles on drywall.
Plastic box
Another frequently used material for hiding communications is PVC panels. A plastic box for pipes in the bathroom is most often constructed if the walls and/or ceiling are covered or planned to be covered with plastic. Let's look at how to do it right plastic box with your own hands when hiding sewer riser in Khrushchev.

Frame assembly
The frame, as for a gypsum plasterboard box, is assembled from guides and rack profiles according to a similar scheme:
- The guides are attached to the wall using dowels.
- The outer corner is formed using a profile secured with jumpers. Fastening all elements metal frame carried out by so-called bedbugs or flea beetles - metal screws 13 or 16 mm long.

Advice! If behind the pipes there is free space, you can use any corners to secure a wooden shelf, and then install an additional hatch in the casing. In this simple way it will work comfortable spot for storage household chemicals or other items.

Frame covering
Conventional plastic panels are used to cover the frame. Depending on the size of the frame, you can choose a strip width of 10 or 25 cm. The frame is sewn in the following order:

If pipes pass through the box that are not planned to be closed (for example, heating pipes or a heated towel rail), then to carefully handle them proceed as follows:
- The starting profile is attached to the frame close to the wall.
- Cutouts are made in the plastic panel at one edge for approximately half the diameter of the pipe.
- The panel is cut to width and inserted into the space behind the pipe.
- A cutout is also made in the next panel for the remaining diameter, and the panels are connected to each other.
This method allows you to make a neat outline of the pipe, and the remaining gap is subsequently filled with sealant.

Note! During the covering, marks are made on the plastic panels where the hole for the hatch will be located and its size.
Final stage
When the box is completely sheathed, according to the marks made in advance, holes for hatches are cut using a jigsaw with fine teeth.

For installation on plastic boxes, plastic folding or rotating hatches are used, which are selected according to size. The hatch is attached using silicone sealant, which is applied along the edges of the product. The hatch is then pressed against plastic sheathing, and the protruding sealant is removed.

If there is no handle in the opening hatch cover, opening it is not very convenient. For convenience, you can use a regular self-tapping screw to screw on a plastic furniture handle that matches the color.
 To make it more convenient to open the hatch, a handle is screwed onto the door.
 Outer corner closes plastic skirting board, which is fixed with silicone sealant.
Advice! It is recommended to secure the outer corner with masking tape while the sealant is setting so that it does not come off.

The final touch is to fill the gaps between the pipe and the plastic lining with white sealant.

Collapsible box options
In conclusion, let's look at four ways to do collapsible box in the bathroom, so that in case emergency situations or replacing risers to provide access to them without having to break the entire structure.
Method 1
The plasterboard box is assembled independently frame structure, which is not attached to the wall. The box itself is glued to the already laid tile with a one-component polyurethane glue. To remove the box in the pipes that come out of it, provide quick connectors"American" type. If full access to the riser is necessary, the glue is carefully cut with a knife or other sharp object, and the box is carefully set aside.
Method 2
Another option for a removable box is that the frame is attached to the walls, as usual. Then plasterboard blanks are cut out along the frame to cover it, but are not screwed to the guides. The sheathing is fixed to the frame after gluing the tiles to the drywall: to do this, a hole is made in it and a self-tapping screw is screwed in. If access to the pipes is necessary, the screws are unscrewed, and all cladding (plasterboard + tiles) is carefully removed.
Method 3
To make it easier to disassemble and dismantle the plasterboard box, some craftsmen suggest setting the tiles on transparent silicone instead of cement tile adhesive. This method of fixation works fine if the base is drywall. When a thin layer of silicone is applied to the tile, it does not float on the base, and if necessary thick layer sealant, it is necessary to use plastic crosses to prevent the tiles from slipping. If necessary, disassembling such a box is much easier than when the tiles are glued with cement glue. From the edge inspection hatch the sealant layer is cut off hacksaw blade. Moreover, due to the fact that transparent silicone is used, it is visible where the screws securing the drywall are located and the entire structure can be disassembled.
Method 4
The simplest and a budget option collapsible design- this is to assemble a box from PVC panels without installing a rigid frame. The essence of the method is as follows:
- The guide profiles are glued to the tile cladding using liquid nails.
- The starting profile is attached to the guides in the same way.
- Plastic panels are inserted into the guides, and the front corner is connected using external corner with a wide shelf.
This design has no rigidity, but if access to the riser is necessary, it can be disassembled in just one minute.
When carrying out renovations, quite often you have to level the walls and ceiling, hide pipes in the bathroom and toilet, hide radiators in the kitchen, make a backlit ceiling, so installing a plasterboard box is a perfect solution similar problems.
A plasterboard box can hide a sewer riser, level the surface for suspended ceiling, eliminate the curvature of walls and much more.
All work on the manufacture of the structure can be done with your own hands, but you must know the manufacturing technology.
You can make 2 versions of the device from plasterboard: a corner one, which has two edges, and a ceiling or wall one with three edges.
Below are instructions on how to make a box from plasterboard.
Making a corner device
Making a corner box from plasterboard with your own hands is not difficult. Basically, the corner option is installed in the toilet and bathroom due to small area premises.
Installation begins with markings. To do this, you need to make marks on the ceiling corresponding to the width of the device, and on the wall - its length.

If the structure is vertical, then the length and width are laid out on the walls. Having made the marks, you need to draw lines using a building level.
Now you need to mark the volume of the structure, which is marked as follows: extreme points fastening the corner element, then from the lines marking the dimensions of the structure, perpendiculars are lowered to the end parts of the structure.
If the box is horizontal, then the markings are done on the walls, if it is vertical – on the floor and ceiling.
The next step is to install metal profile, which is attached according to the finished markings.
For fastening, holes are made with a hammer drill and dowels are driven in. It is recommended to fasten the profile on one side of the intended line.
When fastening, the shelves of the two profiles should be located at right angles to each other.
Then the corner part is trimmed and installed.
Installation of this element is carried out as follows: the corner element is inserted into the profiles at the place where they intersect. The corner element is secured with self-tapping screws. Then comes the finishing.
Now you need to make stiffening ribs from the profile, attach one edge to the profile on the wall, and the other to the corner element. The stiffening ribs are secured with ties.
The profile frame is ready, now you need to cover it with plasterboard. It is better to cut the plasterboard sheet so that the structure is made of solid strips.
Therefore, you first need to cut off the material for the sides.
The width of the stripes corresponds to the width of the edge. Then measure the size of the remaining edge and cut the strip so that it extends to the edges of the side edges.
Drywall sheets are also secured with metal screws at a distance of 15–20 cm.
When the installation of the plasterboard box is completed, its finishing begins. It is quite possible to make it yourself.
The coating can be painted, tiled, etc.
Ceiling or wall option
Assemble a plasterboard box in a toilet, under a bathtub or in another room with your own hands for a ceiling or wall type possible even for a novice builder.
To create ceiling structures, first, markings are made for the plasterboard box on the ceiling.

At the location of the plasterboard structure, two parallel lines are drawn that go onto the walls (during installation ceiling version) or on the floor and ceiling (when installing a wall version).
The distance between the lines corresponds to the width of the structure, and the lines perpendicular to them, which need to be drawn on the walls, correspond to the height of the structure and indicate the attachment points of the corner elements.
Installation of the guide profile and preparation of corner elements is carried out similarly to the corner version.
Now 2 are made from the profile corner element, which must be located in such a way that it is possible to install stiffeners.
Now the frame for the plasterboard box on the ceiling is being strengthened.
Strengthening the wall and ceiling frame performed in the same way as during installation corner option, with the only difference that the stiffeners are installed on three sides, at a distance of 60 cm.
The installation of the frame is completed - it is sheathed with plasterboard and its finishing begins.
It is possible to make a plasterboard box on the ceiling with lighting. Installation robots can be made by hand.
A backlit device is made as follows: first you need to make markings for lighting and secure the electrical wires.
They must be mounted in such a way that they do not interfere with the installation of the device.
Then you need to prepare the transverse guides and insert them into the frame. The guide profile is aligned to the wall at a right angle and secured with self-tapping screws. Then the entire structure is secured.
After installing a ceiling device with lighting, the ceiling looks like a multi-level one. The backlit device can be made over the entire ceiling area or as a device in the form of geometric shapes.
When making the box, all wires must be hidden. After this, for lighting it is necessary to make holes, having previously made markings on the drywall.

The material, previously cut into strips, is screwed to the profile according to the markings, then the lighting is carefully inserted into the holes.
Having completed the installation of the illuminated ceiling box, the drywall can be puttied, painted or decorated with decorative trim.
Installation Features
The construction of a plasterboard box has several nuances that are recommended to be taken into account when doing the work yourself, so that this design did not cause any inconvenience and served for many years.
For example, when making a box to hide a sewer pipe, you must take into account that the couplings with bends on the pipe, the so-called revisions, cannot be closed without leaving access to them.
For such couplings, a special opening must be left during installation to provide access from the outside. This window is closed with special plastic doors.
Access is also needed to the joints internal sewerage and the central riser, since after some time repairs may be required.
When installing a plasterboard box under the bathtub to cover the water supply or radiator, there must be an opening at the locations of meters, valves, vents and other elements.
To make such an opening, you need to make holes 4 mm larger than the size of the door that will cover the hole. This can be done both before and after installing the plasterboard battery box.
If an opening is left for access to the inspection of the sewer riser in the bathroom or toilet, then it must be located on the front side of the structure.
If the hatch is intended for access to valves or other elements of the water supply system, then it can be located on the side.
In the toilet or kitchen, in places where pipelines pass through the structure, the hole must be made larger than the diameter of the pipe.
There should be a gap left that can be filled with polyethylene foam.
Thus, installing the box will allow you to hide communications in the bathroom and toilet, level walls and corners, hide radiators in the kitchen, level the ceiling, and also make the ceiling illuminated.
All this can be done quickly, inexpensively and for many years.
After reading the article, you learned how to make a drywall box yourself.
. On this page we will show you step by step how to make a plastic box and a plastic ceiling from panels in the bathroom.
Bathroom in Minusinsk, plastic ceiling and plastic box.
Plastic ceiling I do it a little differently, not like in most cases, but it seems to me that this method is simpler and faster than the others. The plastic ceiling is done at the end, after the tiles have been glued and embroidered, and electricity has been supplied for spotlights (if there are any, of course). In the photo I have a ceiling without lamps; the lamps in this bathroom are wall lamps.
Unlike the ceiling, it is better to make a plastic box before laying the tiles. In my photo, the box was made before laying (meaning from the profiles), and I closed it with plastic after laying the tiles. The pipe box is made before laying the tiles for the reason that when laying you need to know to what place to glue the tiles or where to start (depending on what pattern or design).
Well, before making a box, you need to replace the hot and cold pipes if necessary. cold water, install a heated towel rail, change sewer pipes and install pipes from meters to sanitary fixtures. My photo shows wiring made from polypropylene. IN in this case polypropylene wiring and sewer drain did it myself iron pipes and the towel was made before me.
So, the photo shows: two branches (cold and hot) go up from the water meters to polypropylene taps and from them to the outlets to the water heater. From cold water the tap goes down to the toilet, then cold and hot water goes to the faucet for the bath, kitchen and tulip. The sewer outlet to the toilet is located in the corner; the toilet will stand at an angle of 45 degrees to the wall.

The pipe box is made from a plasterboard profile 27*28 and 60*27.

Screw on the plastic panel

After the tiles have been glued to the box, we screw on the plastic panel. Our panel is black with flowers; its design matches very well decorative inserts. Before screwing it on, they made a hole in it for the heated towel rail pipes, water meters, a hole for the cold water tap to the toilet, brought the ends of the pipes to the water heater, and inserted U-shaped plastic corners along the edges (the edge of the panel with tiles). When screwing the U-shaped corners, bend the edges a little (be careful not to break them), screw the panel to the profile with a screw (metal/metal screw with a press washer) and, releasing it, smooth the edges by hand. If everything is done correctly, the edges should not move away from the panel anywhere.

The plastic corner had to be trimmed a little
After screwing the panels to the profile, we close the outer corner with self-tapping screws plastic corner, I have it 3*3 cm wide. I glue the corner with “liquid nails” glue.

Glue “liquid nails” Moment Installation white under the gun.
I made the holes in the plastic for the water meters to match the size of the plumbing hatch 20*30 cm, taking into account that it was easy to crawl through it and turn off the water heater taps. The hole for the faucet under the toilet is made in the size of a plumbing hatch 10*10.

On the right, a U-shaped corner covers the edge of the plastic, on the left outside corner covers the plastic. Hatch 20*30 is installed horizontally.
Making the ceiling.
When edging the ceiling, I use aluminum corners for slatted ceiling white(full name “White edging for slatted ceiling”). They are 3 meters long and, in my opinion, 2*2.5 cm wide. For a bathtub like mine, it takes 4 of these corners.

The corner is cut to the length of the wall. On the side that will be pressed against the tile, “Moment Installation White” glue is applied (with sponges) and pressed against the wall; while the glue dries, the corner can be fixed with masking tape.


To ensure that no gaps are visible between the corner and the tile, carefully squeeze the “Moment Installation” glue into the gap using a gun, run your finger along it, removing excess glue, and if necessary, if the glue has squeezed out onto the panel or corner, wipe it off with a damp sponge. So we apply glue along the entire perimeter of the edging. The glue must be wiped off with a sponge almost immediately, as it dries very quickly.

The edges will lie on the edging plastic panels. In order to fix the middle of the panels from sagging, we attach a 60*27 profile to the ceiling in the center of the ceiling in a direction perpendicular to how the plastic panels will be laid. The profile is attached to 2-3 straight hangers, its edges should approach the corners of the edging and, if you look from bottom to top, be higher than the upper edge of the corner of the edging by the thickness of the plastic panel from which the ceiling is made. In the future, the edge of the plastic panel will be inserted between the profile and the edge of the corner and so fixed, and the middle of the panel will be screwed to the profile with a metal/metal self-tapping screw with a press washer.

It is better to start screwing the plastic panel from the “visible” edge and move it to the less “visible” edge. Before screwing the panel, it must be cut on the floor along the right sizes in such a way that its edges fit freely onto the edge of the corner of the edging, without resting against them, but also without sliding off them. If the edge of the panel in the corners moves slightly away from the edge of the edging corner (a gap is formed), then you can press the panel on top with something, for example, a piece of tile (but this must be done immediately, and not after you further insert the next panels, since then you may no longer be able to reach the corner).
And it’s also important - start placing the plastic panel against the wall with the groove that is inserted into the next panel, and the edge of the groove into which the next panel is inserted is screwed to the profile (if you do the opposite, you won’t succeed, since you won’t be able to insert next panel).


Before screwing the panel on, it must be cut to the required dimensions on the floor.

Start placing the plastic panel against the wall using the groove that is inserted into the next panel, and the edge of the groove into which the next panel is inserted is screwed to the profile

if you look from the bottom up, the profile should be higher than the upper edge of the corner of the edging by the thickness of the plastic panel

We assemble panels and, if necessary, cut holes in them for spotlights
If you have spotlights in the ceiling, then before making the panels, you need to mark the places where they will be, and when assembling the panels in in the right place a hole is made in the panel according to the size spotlight and insert it into the panel.
When installing the outermost (last) panel, it usually has to be cut to the required width. Its width should be such that when its groove enters the panel, its reverse edge lies on the edge, without resting against it, but without falling off it.


When all the panels are assembled, to ensure that there are no gaps, I once again apply Moment Installation glue to the edges between the edging and the panels. With not very much skill, the ceiling turns out smooth and without any cracks, curvature, etc. similar shortcomings. When assembling the ceiling in the bathroom, which is shown in the photo, it took me about 2 hours of time.


Finished plastic box in the bathroom
Engineering communications are an integral attribute of the bathroom. They make the room functional and provide the opportunity to receive hygiene procedures. However, even in modern designs, water supply and sewerage networks are often far from aesthetics and violate the harmony of the interior. To hide pipe structures and make them completely invisible, you can use several methods. One of them is the construction of a box in the bathroom from plasterboard, which is easy to assemble with your own hands. You just need to purchase the material and follow the technology for installing the structure.
Materials and tools
To make a decorative box in the bathroom, you will need the following equipment and tools:
- pencil and tape measure;
- long ruler and square;
- a hacksaw or jigsaw for wood (in case of installing a frame made of bars);
- impact drill, which is used as a screwdriver and hammer drill;
- metal scissors or grinder (when working with a metal profile).
In addition, for work you need a level and a knife. The list of materials that will be required to make a do-it-yourself box in the bathroom includes:
- . Its quantity is calculated based on the size standard sheet and dimensions of the planned box. It is advisable to use moisture resistant drywall, because there is high humidity in the bathroom.
- Material for the frame. In its capacity they can serve as wooden blocks, and a special metal profile. When using lumber, it is necessary to pre-treat it with products that will provide protection from moisture and prevent the appearance of mold and mildew.
The elements of the box are connected to each other using self-tapping screws and dowels. To work, you will need two types of fasteners: to fix the profile or bars to the walls and drywall to the frame.
Installation technology
To build a plasterboard box, you must first decide on its location and approximate dimensions. Then, using tools, make the desired design.
When making markup, you need to consider the following:
- the dimensions of the finished box will differ from the intended parameters by the thickness of the drywall sheets and subsequent finishing;
- The dimensions of the structure must prevent the material from adhering to the pipes and ensure a gap of 3-5 cm on all sides.
If you intend to do it, then it is advisable to choose its width as a multiple of its size. This will allow you to avoid cutting the material.
Frame construction
To make a frame with your own hands, you need to fix the profile or bars along the contour on the floor and ceiling, and then connect them, starting from the wall. After this, the racks are installed, which form the front surface of the structure. In the case when the height or width of the box exceeds 1.5 m and 25 cm, respectively, then jumpers should be provided. When using wooden blocks as a basis for a frame, the cut points must be processed special composition. This will prevent squeaking during operation of the structure.
Drywall installation
Knowing the dimensions of the box for a plasterboard bathtub, the material is cut. It is advisable to cut the sheathing sheets in such a way that there is minimal amount parts. Fix the drywall to the frame using self-tapping screws, placing them every 15-25 mm.
Sewerage
If a box in the bathroom is built to disguise the sewer network, then it is necessary to provide a hatch for access to the inspection. It is a coupling on a pipe with a hole that is closed with a lid or outlet. The inspection is intended to clear blockages in the sewer network. Access to the connection point should also be provided internal system removal of domestic waste and central riser.
In this case, it is better to place the hatch on the front surface of the box, and you can close it using plastic doors. You can make a cover yourself by cutting it out of plasterboard and covering it with ceramic tiles, which are identical to the finish of the bathroom.
Very often, renovation work in the bathroom and toilet is carried out in order to make the image of the room more attractive. The presence of communications sometimes spoils even the most fashionable and stylish renovation. A box made of plasterboard can hide unsightly communications. You can make a box in a plasterboard bathroom with or without doors with your own hands. To do this, you must first study the instructions, after which you can begin repair work. Moisture-resistant plasterboard is best suited for making the box.
A plasterboard box will help not only hide communications, but also provide them with reliable protection from unexpected mechanical rooms. This material allows you to make convenient design, which will provide free access to the pipes at the right time. In order for repair work to be successful, it is necessary to carefully prepare for it.
Correctly selected tools are the key to successfully completed repair work. For work you will need: a hammer, a tape measure, a pencil, a level, a plumb line, a knife.

First of all, the master should draw markings that will allow him to determine the dimensions of the frame. It is important to note that the profile should not come into contact with the pipes. Allowances should be made for sewing plasterboard sheets.
How to markup:
- Determine the top marking point, taking into account the floor drawing.
- Draw a straight line from the top mark to the very bottom.
The success of the entire construction depends on the correctness of the markings. In order to make the markings clearly and evenly, it is necessary to use a plumb line and level. After execution preparatory work, you can begin assembling and installing the frame.
How to make plasterboard boxes in the bathroom: installation of the frame
Before assembling the frame, you need to select the material for the profile. It is best to use aluminum. This material is ideally combined with drywall and also has anti-corrosion qualities.
Usage wooden beams When installing the frame, it will make the work silent and allow you to create additional fastenings.

It is important to use a sufficient number of beams, which is determined depending on the height of the profiles. The beams prevent the profile from deforming under the weight of the plasterboard sheets. Special attention It is important to pay attention to the process of cutting plasterboard sheets.
Stages of work:
- Cut out two sides.
- Install side panels.
- Cut out the third panel.
- Apply last panel to the top of the side sheets.
When attaching self-tapping screws, it is important to pay attention to the fact that they need to be embedded into the profile. In this case, do not touch the end sides. Do not forget that you need to cut holes in the box that will provide access to communications.
Sheathing and how to make plasterboard boxes in the bathroom:
Elements for covering the frame must be solid. The edges of the side parts must correspond to the frame profiles. The last part is used to close the side panels.
When fastening elements, it is important to take correct measurements and take into account the spaces between the screws, which should not exceed 2.5 cm.

Places for monitoring the serviceability of the pipeline are also made from sheets of plasterboard. Special magnets are used to secure them. The box can be made completely collapsible.
Decorative finishing options:
- Ceramic tile;
- Dye;
- Decorative plaster.
After installing the box, the bathroom will look much more attractive. The noise level from the pipes will be significantly reduced. It is important to make sure that the box does not interfere maintenance pipes
Technological holes: how to cover pipes in a bathroom with plasterboard:
When forming the box, it is important to leave meters, valves, valves, gearboxes and compensators accessible. Holes in the material must be cut larger than the size of the doors themselves. The door is secured after the frame is installed.
In order to keep track of sewer drain, the hole must be located in the front of the box.

The door can be placed on the side if it is used to regulate the condition of valves and pipes. The holes for pipes in the box should be made small bigger size. The space between them is filled with foamed polyethylene or tow.
Door components:
- Frame;
- GKLV;
- Push lock;
- Seal;
- Door.
For the manufacture of doors and the frame itself, moisture-resistant plasterboard is used. It is treated with a special impregnation that is resistant to humid air. GKLV prevents the appearance of fungus and mold. After installation, it is better to cover the box with ceramic tiles. Then the bathroom will look stylish, the pipes will be protected from mechanical influences, and the box will be protected from moisture. The bathroom needs a special finish that will not deteriorate from exposure to moisture and temperature changes.
Making a box in the bathroom from plasterboard (video)
The bathroom is filled with pipes that negatively affect appearance premises. This is why we close them with a box. It can be made from materials various types. One such material is drywall. It is better if it is moisture resistant. You can make the box yourself by first studying the instructions and making markings. It is important not to forget to leave the inspection doors in the box so that there is constant access to communications in the event of their breakdown.