Plasterboard boxes. DIY plasterboard box. Video: plasterboard niches with lighting for the kitchen
Read also
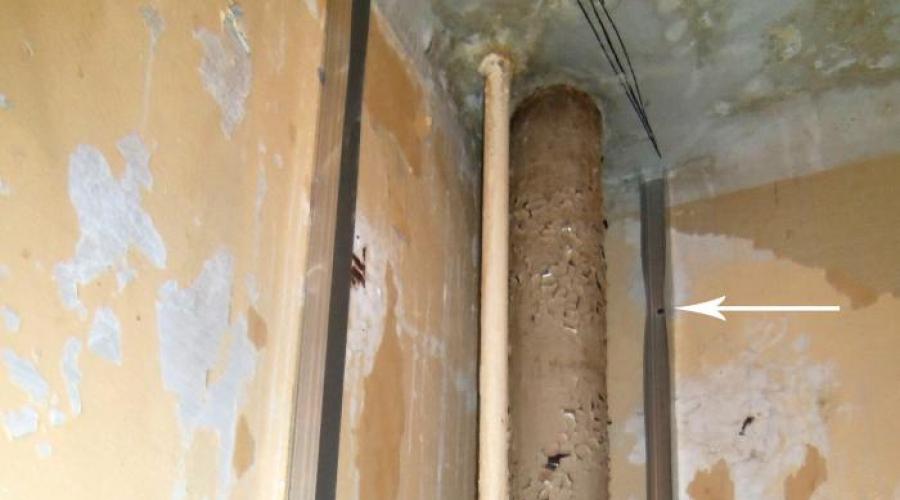
When repairing plumbing units, it often becomes necessary to close cast iron sewer pipes, which, to put it mildly, do not look the best. One of the most acceptable options is to install a box made of metal profiles.
The assembled frame can be covered with plasterboard, plastic panels or gypsum fiber sheets. The choice of cladding option depends on the finishing of the plumbing room.
If you decide to use plastic panels, then the frame is sewn with them immediately, directly onto the metal profile. But as practice suggests, it is better to cover the box with moisture-resistant plasterboard or gypsum fiber sheet.
The advantages of gypsum materials are obvious. You can put wallpaper on them, lay tiles or mosaics. You can finish it with decorative plaster or simply paint it. It all depends on the thickness of the wallet and the imagination of the homeowner.
In this article we will talk about installing a box under ceramic tiles. During installation, moisture-resistant gypsum fiber sheet (GVLV) was used. Moreover, it was mounted in two layers to increase rigidity.
Tools required for installation:
- Hammer and drill with a diameter of 6 mm.
- Metal scissors.
- Drill.
- Drill diameter 4 mm.
- Countersink with built-in drill with a diameter of 2.8 or 3 mm.
- Screwdriver.
- Building level or plumb line.
- Roulette.
- Riveter for aluminum blind rivets.
- Marker or pencil.
- Square.
- Guide profile PN 27x28 – 3 pcs.
- Ceiling profile PP 60x27 – 2 pcs.
- Aluminum rivets with a diameter of 4 mm – 20 pcs.
- Dowels with a diameter of 6x40 mm or dowel-nails 6x40 mm – 20 pcs.
- Self-tapping screws 3.5x25 mm – 100 pcs.
- Self-tapping screws 3.5x35 mm – 100 pcs.
- Moisture-resistant gypsum fiber sheet – 1 pc.
First, we find the most protruding sections of the pipes. This is done using a square and a building level. It is necessary to check the vertical inclination of the pipes with a level. Then, applying the square to the wall and moving it towards the pipe, we mark the points that are most outside the dimensions. This must be done on both sides of the sewer riser.
We retreat three centimeters from the previously made marks and draw two vertical lines using a level. We measure the distance from the floor to the ceiling and use metal scissors to cut off pieces of the guide profile of the appropriate length.
Using the previously drawn lines, we fasten the guide profiles to the wall using dowels with a diameter of 6 mm and self-tapping screws measuring 3.5x35 mm. You can also use dowel-nails of the same parameters. It is better to drill holes in concrete walls with a hammer drill, but for brick buildings you can also use an impact drill.

In some bathrooms, the partitions between the bathtub and toilet are made of lightweight concrete. They are thin, only about 60 mm thick. It is necessary to drill the holes very carefully, especially if tiles are already laid on the other side.
In order not to break through such a wall, you must:
Turn off the impact mode of the hammer drill and work without it, in drilling mode.
At the end of the drill, make a limiter equal to the length of the screw by winding a little insulating tape or putting on a drilled wine stopper.
Next you need to draw the dimensions of the box on the ceiling. Applying a square to the walls, draw perpendicular lines along the ceiling with a pencil. The intersection point of these lines will be the angle of the structure. We measure both distances from the walls using a tape measure.

We first cut the guide profile to the overall size. Then we cut it at the inflection point and fold it at an angle of 90 degrees, as shown in the figure.

Then we fix it to the ceiling with dowels and self-tapping screws. You can do it simpler and mount the corner of the box from two sections.
Now we need to find the bottom corner point of our design. We cut the ceiling profile from floor to ceiling. We insert it into the upper corner profile and adjust it using a level so that it stands strictly vertical in both planes.

The outer corner of the profile will also be the lower corner point.

We make the lower corner in the same way as the upper corner profile. It will be shorter due to the presence of horizontal sewerage. We fix it to the floor, just like the upper structure.

We install the cut ceiling profile first in the lower corner and then in the upper. Then, using a drill with a 4 mm diameter drill installed, we make holes in both profiles. We secure the entire structure with aluminum rivets.

Next, we add several stiffening ribs to enhance the load-bearing capacity of the metal frame. It is necessary to ensure that when drilling holes, the profiles do not move to the side. It is advisable to install stiffeners at the joints of gypsum sheets.

Now it's time for the sheathing. We take the dimensions and cut the gypsum fiber sheet. The box can also be sewn up from pieces. The main thing to remember when installing the second layer of GVLV is that the joints of the first sheet should not coincide with the second.
Cutting gypsum fiber sheet is a little more difficult than cutting drywall. First, cut through the GVLV with a knife along the marked line. Then we place a profile or block under the cut and break the sheet. Gypsum fiber sheet is a rather fragile material and requires careful handling.

We screw the cut pieces to the profile with self-tapping screws measuring 3.5x25 mm. You can use self-tapping screws for GVLV. But it is better to pre-drill the profile, so it will deform less. You can use a special countersink with a built-in drill with a diameter of 2.8 or 3 mm. Then the GVLV and the profile are pierced, and an additional hole is formed in the sheet under the screw head.

The second layer is mounted with longer screws measuring 3.5x35 mm. The pitch with which the screws are screwed is approximately 150 mm. After installing the GVLV, it is primed for better adhesion of the finishing coating to the gypsum. If painting or wallpapering is meant, then the gypsum fiber sheet is also puttied.

In old apartments, problems arise with water and heating pipes, hoods and ventilation, and electrical wires that interfere and spoil the interior. You can cope with such a problem on the ceiling by building a plasterboard box with your own hands, under which you can easily hide it all. Typically, this need arises in the kitchen, bathroom or toilet.
Hidden pipes in the toilet
Drywall, which is popular today, is a material made from a layer of gypsum hidden in paper. Standard sheets are 2.5 m long and 1.2 m wide.
Thanks to these dimensions, one whole sheet is enough to construct the box. To do this, you will also need the materials from which the frame is prepared (wood or metal).
The construction of the box is completed by directly covering the finished load-bearing frame with plasterboard elements. To attach the profile to the wall and drywall to the profile, simple self-tapping screws are used.
In order to hide communications, one plasterboard sheet of standard sizes is usually enough. It is preferable to choose a waterproof sheet, especially if we are talking about a box in the toilet or on the ceiling.
To build a frame base, wooden blocks or metal profiles are used. The wood is pre-treated with corrosion protection agents. Metal does not need processing.
 Frame construction
 The next stage is attaching the base for drywall to the walls and ceiling. If you are sawing wooden blocks, additionally cover the cut areas with protection. And special mastic on top of the usual protection.
Next, install the drywall. For greater convenience, the sheet is cut so that the walls are solid and not made up of pieces. Initially, the side walls are installed; all elements must be the same size. Protrusions beyond the edges of the frame are not allowed. Having installed the sidewalls correctly, measure the front wall.
Do not close the box tightly and completely. Be sure to provide an inspection window for access to water supply or sewerage pipes.
After installation, they proceed to finishing the box; it is very important to use moisture-resistant materials if the box is installed in a toilet. Having completed the finishing work, you can decorate the structure, and at this point the installation of the box is considered complete.
Box finishing
The final stage of work with the box is its finishing. The work depends on the material to be processed. Ceramic tiles or paint are used to decorate plywood, drywall or MDF. Covering with plastic panels does not require finishing. Closing the box with such material does not reduce the area of the room and does not spoil the appearance.
In addition, this method is used to close the pipes running under the bathtub. To do this, a frame is initially constructed from guide profiles, after which it is covered in the same way with the selected material. Remember about mandatory access to communications.
 Ready decorated box
 Puttying the box is one of the important stages of direct decoration. In this case, it is necessary to correctly design the corners. An even angle is obtained by using special metal corners, which are applied to the corner on top of a layer of starting putty. They are pressed in using a spatula, and then the excess putty is removed.
Another layer of special mixtures is applied to this corner. Repeat these steps until the surface is completely leveled. This makes it easy to make an even angle yourself.
You can watch the video on how to hide pipes yourself
Having processed the corners, the surface is primed and then covered with starting and finishing putty. After drying the surface, grind the putty using a special grater with fine-grained sandpaper.
Remember that to solve lighting problems, you can install several small LED lamps in such a “niche”. This means that after constructing the box, such lamps will need to be properly connected to electricity.
After installing and finishing the box, the appearance of the room will change significantly. The interior of the room will become complete and harmonious. In addition, such measures help reduce the noise level from pipes.
Photo gallery
Several options for constructing boxes for placing communications in them:
 Box under the ceiling for placing electrical wiring
  Frame for the future box
  The convenience of the box is obvious
  Only with a box can you achieve an aesthetic look in the room
  Ceiling box to hide wires
  If necessary, take care of the door in advance
  Horizontal design
  After covering with plasterboard, all joints must be puttied.
  Drywall for the bathroom is the ideal solution
  Ceiling frame for suspended ceiling
 Reading time ≈ 3 minutes
Hiding communications and installing unique lighting cannot be done without installing a plasterboard box. Assembly of the structure is carried out quickly and allows you to achieve the most aesthetic appearance of the room. To make boxes, you need to purchase profiles, plasterboard sheets, screws, and dowels. Designing structures is easy and simple.
The main purposes of different plasterboard boxes
You can make a neat box from plasterboard with your own hands to hide pipes or to remove lighting. The location of the structure can be either horizontal or vertical. They can be mounted at the junction of walls, along the wall or on the ceiling.

To begin work, you need to draw up a drawing taking into account the size of the area where the work will be performed. Next, study information on how to make a box from plasterboard and prepare the following tools:
- pencil, level, tape measure;
- rack and guide profile;
- drywall (regular or moisture-resistant);
- screws, dowels and self-tapping screws.
Next, you need to transfer the markings, prepare the sheets (cut them) and you can directly install plasterboard boxes in an apartment or house. If the structure is small, the work will take about 3-4 hours. It may take 1-2 days to install the ceiling box.
Features of assembling a plasterboard box in the bathroom
The correct installation of the box in the bathroom is carried out according to the following scheme:
1. Marks are placed on the wall above the pipes (about 5-10 cm higher), on the floor (with a distance of at least 5 cm from the pipes).

2. The lines for fixing the profiles are outlined, the lines are transferred to the wall (a right angle is marked) from which the pipes come out.

3. A guide profile is mounted along the markings on the walls using dowels.

4. Parallel supports are made of a rack profile and fixed to the guide with self-tapping screws. Additionally, jumpers are mounted: they will give the structure strength. They are installed at a distance of about 30 cm between the rack and guide profiles.

5. A rectangular hole for the hatch is cut out on moisture-resistant plasterboard sheets.

6. Sheets are screwed to the frame.

7. The joints are grouted (it is important to remember that joints on perpendicular surfaces should be at different distances from the wall). The box in the plasterboard bathroom is being finished: painting, laying tiles.

8. The hatch frame and the hatch itself are installed.

At this stage, a convenient and practical box for plasterboard pipes will be completely ready. The presence of a hatch on it will provide easy access to communications for their repair.
Installation of a ceiling box in the kitchen
The plasterboard structure on the kitchen ceiling allows you to properly illuminate the work area. But its manufacture is more complex. It is recommended that before starting work, you begin to study the supporting photos and video lessons. This will help eliminate errors when assembling elements and connecting wires. Step-by-step instructions will also help:
Markings are placed on the ceiling and walls.


The guide profile is mounted according to the markings.


Two hangers are mounted at a distance of 15-20 cm from each other: they will support the transverse profile that fits into the guide elements.

Small pieces of the profile are mounted perpendicularly between the side profiles on the walls and the ceiling; they must be fixed to the upper end profile.
In the house, many people are faced with a situation where it is necessary to hide certain functional elements: pipes, communications, hoods, etc. In order to hide these visually unpresentable parts, a plasterboard box is used. Today, this material is used more often than others due to its following advantages:
- easy to process;
- simple installation;
- external finishing of any version of a plasterboard box is possible with a wide variety of materials: tiles, wallpaper, painting;
- allows you to create a unique interior;
- strength and reliability;
- ease of construction;
- installation of additional lighting elements is possible.
If you wish, you can make a box from plasterboard with your own hands. Just a few nuances will help you cope with this.
The production of a plasterboard box is carried out based on its purpose and the chosen design of the room decorations.
First you need to decide on the type of material, since not all plasterboard sheets are suitable in this situation. Depending on the purpose and installation location, the following plasterboard options are used:
- ordinary. Such a plasterboard box is placed in any room where there is a normal level of humidity;
- moisture resistant. Thanks to impregnation with a special composition, this material is used for boxes that will be installed in bathrooms, toilets, kitchens, garages and other rooms where there is high humidity;
- fire resistant. It contains special additives that prevent it from burning. Often used for a plasterboard box installed in the kitchen or for a fireplace.
Note! The thickness of the plasterboard sheets is also determined by the purpose of the box. For walls, a thickness of 12.5 mm is best, and for arches and design elements - 6-9 mm. For the ceiling, sheets 9 mm thick should not be used, because they may not be able to withstand the required level of load.
Also, when determining the design of a gypsum plaster box, its purpose should be taken into account:
- boxes on the ceiling. They are the most common, since they are the basis for constructing multi-level ceilings;
- designs for walls. It will be the easiest to assemble such a box, but its installation should be carried out carefully, in compliance with all necessary technologies;
- device for hiding pipes and communications. It looks like a special compartment. Such structures are often used to decorate baths, kitchens and toilets;
- corner box for fireplace. Complex design, requiring precise drawings and compliance with many nuances;
- hood design. One of the simplest options for assembling boxes. Can have a variety of shapes;
- battery device. It is used very often in repairs and has a simple design.
Based on the purpose, the complexity of the chosen structure is determined and the necessary materials are calculated to assemble it. This is very important, especially if the assembly will be done by hand.
Tools
Making boxes from plasterboard requires a certain set of tools, which includes:
- dowel;
- self-tapping screws;
- screwdriver;
- laser or construction level;
- hammer;
- roulette;
- perforator;
- special scissors (for metal);
- spatulas;
- construction knife (a stationery knife is also allowed);
- square
Tools
Also, to make a plasterboard box with your own hands you will need the following materials:
- guides and other profile options - based on the chosen design;
- sealing tape;
- putty and primer;
- serpyanka;
- plasterboard sheets.
Secrets and nuances of installation
A common question is “How to make a box from plasterboard?” To do this, you need very little - the necessary tools and materials, plus knowledge of installation technology.
Installation requires appropriate preparation. This stage involves the following actions:
- marking the working surface. It is necessary to draw the contours along which the support bars or profiles will then be attached. Remember that the markings will be somewhat narrower than the plasterboard structure itself;
 Marking
- When carrying out marking work, be sure to use a level.
- installation of guide bars or profiles;
- securing one/several posts that form the protruding front edge of the box;
- if the width of the contraction is 25 cm and the height is 1.5 m, jumpers must be installed between the support posts.
- The jumpers are installed at a distance of one meter from each other.
 Finished box frame
Note! When using wooden blocks instead of a profile, the cut points must be additionally treated with a special mastic made for working with wood. This will add stability to the structure and will also significantly increase sound insulation.
Thanks to this, the box will not creak due to possible thermal deformations of the structure.
Once everything has been installed, you can begin attaching the plasterboard sheets. To do this you need to do the following:
- cut the sheets so that the box consists of single strips. You should not assemble strips from individual pieces;
- First you should cut the sheets for the side edges. Their width should be the same as the width of the support posts. The stripes should not protrude beyond the supporting elements;
- The sheets are fastened with self-tapping screws 35-45 cm long. The sheets must be installed to the edges every 20-25 mm. In this case, there is no need to carry out additional fastening between the racks using jumpers. Since at such a width this will not play a significant role;
 Attaching sheets to the frame
- then we measure out the remaining edges and cut them. The stripes should be on the side edges of the already attached edges.
Once all the plasterboard sheets have been installed, you can begin puttying work. Using putty, you should first form the corners of the box in the places where it adjoins the wall. A perforated plastic corner will help you do this carefully and quickly. Its fastening is carried out with starting putty.
After this, we apply a finishing layer of putty to the surface of the structure. Then, after drying, you can begin to prepare the surface for final finishing work.
Adhering to all installation technology, you can easily and very quickly assemble a plasterboard box of any design. It will become both an effective method of hiding unwanted elements and will bring novelty and originality to your interior.
Today, the construction market offers a huge variety of finishing materials intended for furnishing premises. The most common and versatile is drywall. It is with its help that you can build boxes of various designs and purposes.

Peculiarities
The undoubted advantage of a plasterboard box is its ability to mask unsightly interior elements. Sewer pipes, risers with cold and hot water, wires and other communications can be hidden from view by such structures. In addition, they are installed to level the ceiling, correct the curvature of the walls, and they can also be the basis of built-in cabinets.

Like any other building material, plasterboard has its own characteristics that must be taken into account when working.
Drywall is produced in sheets, which are glued layers of different materials. In the middle of the sheet there is a layer of gypsum, which is covered on both sides with cardboard. Gypsum is a brittle material. To increase its strength, it is impregnated with special additives. Cardboard is also impregnated with a special reinforcing compound, so this finishing material can withstand quite heavy loads.

A plasterboard box consists not only of plasterboard sheets, but also of a frame on which these sheets are attached. The frame itself can be made of either wood or metal. The wooden frame consists of bars with a cross-section of 40x40 or 50x50 mm. To prevent rotting processes, the bars are treated with antiseptic agents and primer compounds.

The base of another type of frame is galvanized metal profiles with a curved U-shape, suitable for working with such material. They do not require special processing, so they are a more profitable option for making boxes. Profiles are divided into guides and main ones.

Advantages and disadvantages
Installing a plasterboard box indoors has many advantages, thanks to both the material itself and the design as a whole:
- Plasterboard material is environmentally friendly, so it is used for any premises. With its help, you can change the space in a fairly short time, which is important for carrying out complex work.
- It is easy to handle, the sheets can be given almost any configuration. And covering the surface with plasterboard does not present much trouble.
- The box is installed using both frame and frameless methods. It all depends on the location of the structure. Wooden bars or metal profiles, which are the base, go well with plasterboard sheets.
- The durability of the material is also important. A properly installed structure will last for many years.

But there are also disadvantages to using such structures. First of all, this is, of course, the loss of several centimeters of area. After all, the device, despite its attractive appearance, requires some free space, so this nuance must always be taken into account before installation.

Plasterboard sheets have some load restrictions. When transporting and working with such material, care should be taken as there is a possibility of the sheet cracking.
Kinds
Plasterboard boxes are divided depending on their location, purpose and number of edges. Most often it is built on the ceiling. Ceiling structures are among the most popular and widespread structures, allowing not only to hide significant defects and communications, but also to change the shape of the ceiling, creating multi-level compositions of different configurations. The ceiling box is a good location for the LED strip and spotlights mounted into the canvas.

A plasterboard box is often mounted on a wall for various purposes. In addition to hiding communications. it can also perform other functions: the surface of the walls can be leveled, small structures serve as shelves or niches, the installation structure can occupy the entire wall or a small part of it. Depending on the location, the boxes are divided into angular and straight. Straight views have three faces - two lateral and one central.

The corner version, unlike the wall and ceiling, consists of two planes. Such forms are mounted at the junction of two walls and are used to hide pipes, and are also erected under the hood. The box itself has an L-shaped appearance, and its edges are joined at right angles, having an oblique cut of cutters.


Scope of application
The installation structure is installed in rooms with different purposes. The location depends on the functionality. In the kitchen, a plasterboard box is usually installed for additional illumination of the work area. Sometimes it is made and then installed to hide a battery consisting of one or more sections. This design is located around the heating radiator and is attached in two ways.


In the first case, the upper plane is screwed to the bottom of the window sill, and the lower plane is attached to the floor surface. When using the second method, instead of the floor, the box is fixed to the wall. In order for warm air to circulate properly, special slots are made in the box.

The box intended for lighting can be mounted with either two sides or 3 sides. The modification depends on the intended installation location and height.


Wall, ceiling and mixed types of systems are installed in the kitchen. For hoods, as a rule, ceiling boxes are used that have a rigid rectangular shape and mixed-type structures, and the walls adjacent to the corner are L-shaped.

In the toilet, the box is often installed to hide the sewer drain pipe, and in the bathroom to close the water supply system. Due to the special microclimate of these rooms, plasterboard sheets must be moisture resistant. And the pipes themselves, around which the structure is built, are often covered with condensation, so the use of moisture-resistant material is an essential necessity.

In the bedroom, living room and other living rooms, the box can be used not so much to disguise unsightly interior elements, but rather for practical purposes. A small box in the form of a shelf for a TV, books and other things can significantly transform the interior without a large investment of money and time.


Sometimes a box in a room serves as a decorative and at the same time functional element. It is installed to hide the hanging parts of curtains (hooks). This option is mounted on the ceiling surface along the window opening. In addition, the structure serves as a platform for placing the LED strip.

Where there is lighting, there are wires. For the safety and aesthetic appearance of the room, a distribution box is installed. Installation of a distribution box is necessary to properly organize the switching of wires and cables.

The junction box, marked by manufacturers with the letters IP and two numbers indicating the level of protection against dust particles (first number) and humidity (second number), has a high degree of protection from external factors.

How to do it?
In order to build a plasterboard box with your own hands, you need to carry out the preparatory work correctly.
These include processes such as:
- determining the installation location;
- marking;
- preparation of material and tools;
- the installation itself.

Marking the installation site requires auxiliary means, which include a pencil, tape measure, building level and square ruler. To install the frame, you cannot do without a drill, a screwdriver, a hammer, a hacksaw for metal and a cutter for connecting profiles. Forming a box is impossible without a suitable construction knife and a roughing plane. The materials used are 12.5 mm thick plasterboard sheets and rigid metal profiles.

Having decided on the installation location, you can begin measuring the future box, using the tools prepared for this process.
To determine the future dimensions of the box, the location of the object matters. If it is planned to be installed on the ceiling, then this location is considered horizontal. The marks that determine the width of the structure in this case will be located on the ceiling surface, and marks corresponding to its length will be placed on the wall. When the object is positioned vertically, marks corresponding to its length and width are laid on the wall surface, and to determine the volume of the future structure on the floor and ceiling. To determine the boundaries of the box, you need to mark the most protruding parts, and set aside the necessary centimeters from them.

When taking measurements of the future structure, it is worth remembering that the gap between the edges of the box and the object itself must be at least 5 cm. You should also take into account the subsequent external finishing, namely thickness and integrity. If the finishing of the outer sides of the box is supposed to be tiles, then when marking you need to take into account its width so as not to adjust the tile material to an already designed model. After applying the markings, you must accurately connect all the marked points. When outlining the contours of the future box, you must use a square. Correctly constructed lines running from the marks to the object must be in a strictly perpendicular position.

Marking for a vertically located object begins from the ceiling. To ensure the accuracy of the contour, you need to lower the plumb line from the upper corner point, the lower corner point should coincide with the upper mark. After checking the markings, you can begin installing the structure. In order to install the box quickly, and most importantly, correctly, you need to follow certain rules. There are step-by-step instructions on this subject, thanks to which all work is divided into stages.

Installation of the frame is no less important stage than marking. Metal profiles need to be installed along the finished contours. First, we attach the racks to the wall, having previously drilled holes for this process and hammered dowels into them. For stronger fastening, the distance between the holes should be within 50-60 mm. The guide profiles must be secured first to the ceiling surface and then to the floor. Afterwards, you can begin attaching the front pillars coming from the upper guide profiles, using notches or screws.

To maintain the structure in a level position, additional profiles should be used - the so-called stiffeners. They must occupy a strictly perpendicular position in relation to the rack profiles, and be located from each other at a distance of no more than 1 meter. The installation of stiffeners is important if the height of the entire structure is more than 1.5 m, and the width of the edges is more than 25 cm. In addition, they are the basis on which plasterboard sheets (gypsum plasterboard) are subsequently attached.

For horizontally located objects, installation of the structure begins with fastening the guide profile (UD) along the entire perimeter. Then the vertical jumpers are screwed on. Having fixed them, you should begin installing the guide profile. The lower part of the box can be assembled on the floor, and only then can this structural element be secured to the upper half. After preparing the frame, they begin to form the box itself. The edges of the future structure of the desired size and shape are cut from the prepared sheets of drywall. First you need to take measurements of the width and length of the sides and mark these indicators on the sheet. Then you can start connecting the marks. An incision is made along the outlined contours.

In order not to spoil the material, you must follow some rules:
- The sheet is cut along the contours using a ruler and a stationery knife. The process itself should take place without haste and unnecessary pressure. The edges of the cut are processed with a roughing plane with a slight bevel of 22.5 degrees. When joining the gypsum boards, an angle of 45 degrees is formed, thanks to which the sheets adhere firmly to each other.
- After preparing the sheets, you can sew up the frame using 35-45 mm screws for fastening, in increments of 25 mm. For small frame boxes, self-tapping screws are the most acceptable way to fix sheets. If gypsum boards are used to level walls, then polyurethane foam can be used as fastening. The total cost of the foam required for fixation is lower than the cost of the metal profiles used, in addition, it helps to retain heat in the room.


But, it is worth remembering that it will not be possible to disassemble the structure without damaging the drywall sheets secured with polyurethane foam; you will only have to break it. Therefore, when remodeling, it is easier and more profitable to dismantle sheets screwed with self-tapping screws.
A plasterboard box is, in fact, a simple structure, intended in most cases to hide some decorative elements. But, during installation, you should not forget about the practical repurposing of this structure, as well as some of the nuances of the installation itself.

Installation of the box, starting from marking and ending with fastening the sheets, should be carried out using a building level. You can use either a simple tool in the form of a ruler with a central location of a flask with liquid, or a more precise, modern device like a laser level.

Each stage of work must take place under the control of this device, otherwise the constructed structure may turn out with significant deviations, which will not have a very good effect on its operational characteristics.
For the stability and strength of the box, the size of the frame is of great importance, or rather, its stiffeners. When the length of these frame elements is more than 80 cm, additional fasteners are installed - these are U-shaped holders, with the help of which the structure is supported in a level position.

When installing a box with curved shapes, it is better to use a jigsaw for cutting sheets. Thanks to it, the cuts are quite even, smooth and beautifully outlined. To form round holes for sockets or ceiling lamps, it is better to use special crowns that are attached to a drill.

Window for access to pipes
When installing a box for objects such as a sewer pipe or water riser, it is necessary to cut a hole in the sheets, which will facilitate access to the special elements of these objects. In a sewer pipe, these are couplings that have an outlet or hole that is closed with a special lid. The device is designed to clear the blockage, so you cannot block access to it with a sheet.

In addition, the sewer pipe has a connection where the internal sewer pipe meets the central riser. In case of an emergency or simple replacement, it should also be accessible. This requirement also applies to water meters, valves, compensators, check valves and reducers when lining water pipes.

For an aesthetic appearance of the entire structure, the hole for a special window is cut taking into account the installation of the door. When forming it, it is necessary to take into account the size of the sash frame; as a rule, it is 1-3 mm smaller than the hole. Installation of a window in a frame can be done both before and after installing the sheet on the frame.

Holes in the box are also formed in places where pipes or other sheathed objects exit beyond its boundaries. The cutout should be slightly larger in diameter than the pipe. The resulting gap is filled with materials that weaken the transmission of vibration vibrations from the pipe to the structure.

Beautiful examples in the interior
Today, durable and lightweight plasterboard is the best finishing material, and the basis for beautiful interpretations in the interior is an ordinary box. Finishing the ceiling, walls and other surfaces, forming interior items and installing structures that transform the room is possible only on the basis of the box.

With the help of a box, you can give the ceiling and walls any shape, even the most unusual: install lighting fixtures in the right places, form beautiful shelves and niches that give the interior of an apartment or house a special unique look. Thanks to the plasterboard box, the disadvantages of the room turn into advantages. The main thing is to position the structure correctly, then an ordinary apartment will turn into a beautiful and cozy home.