DIY trees in the snow. DIY artificial snow
Read also
We offer another fun way to spend time with your child - make artificial snow. This snow will be useful for home decoration, postcards, and winter crafts with children. All these 7 methods are very simple and inexpensive. You can find all the ingredients at home.
Shining Snow
It will turn out cold, soft and fluffy. Simply mix two boxes of cornstarch or cornmeal, shaving cream and glitter.
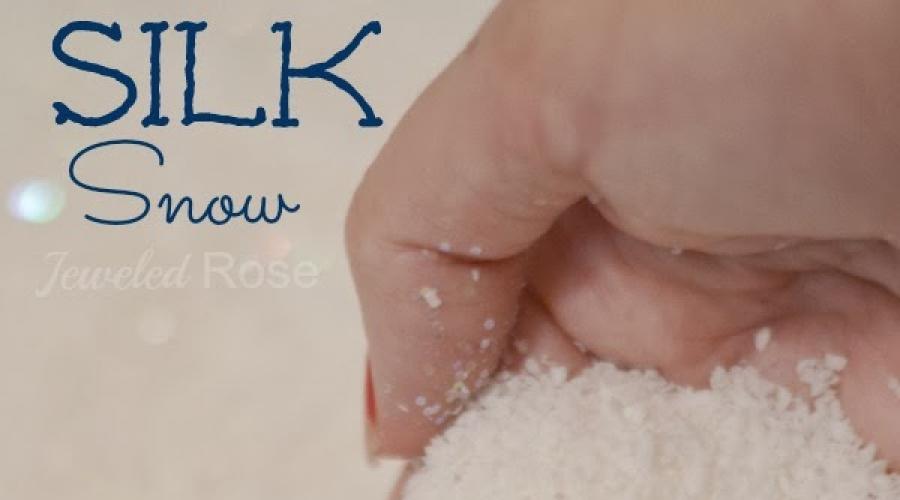
"Silk" snow

Ingredients:
- frozen white bars of soap;
- cheese grater;
- sparkles.
Leave the soap in the freezer overnight. In the morning, take it out and grate it. You will get fluffy snow, to which you can add glitter and mint extract. It molds perfectly, and you can make a snowman or any other figure.
Shaving foam snow

Ingredients:
- 1 can of shaving foam;
- 1.5 packs of soda;
- glitter (optional).
Squeeze the contents of the foam can into the container and gradually add soda. You will have a very nice mass of snow from which to sculpt figures.
Foamed polyethylene snow

Ingredients:
- foamed polyethylene (used as packaging material for equipment, glass, shoe inserts) or polystyrene foam;
- fine grater.
We wear gloves. Grind the polyethylene or polystyrene foam and... voila! Fluffy cereal all over your house!!! If you add sparkles, the snow will also sparkle. You can powder anything with this snow if you first lubricate the surface with liquid (diluted with water) PVA glue.
Snow from a baby diaper

Cut open the diaper and remove the sodium polyacrylate from it, then tear it into small pieces. Place the resulting mass in a container and fill with water. Pour gradually, in small portions, until the pieces of polyacrylate begin to resemble snow. Just don't overdo it or it will end up too wet. To make the snow look more realistic, place the container in the refrigerator, but not in the freezer.
Frost from salt

Ingredients:
- salt (preferably coarsely ground);
- water.
Prepare a concentrated salt solution. To do this, fill the pan with a small amount of water and place it on low fire. Add salt until it stops dissolving. Dip the branches of spruce, pine or any other plant into the hot solution and leave for a while. The process of crystal formation is much faster in warm water! Let the water drain and leave the plants to dry for 4-5 hours. Sparkling frost is guaranteed! If you add to saline solution brilliant green, food coloring or ink, then the frost will turn out colored!
Snow made from PVA and starch

Ingredients:
- 2 tablespoons starch;
- 2 tablespoons PVA;
- 2 tablespoons silver paint.
Mix (grind) the ingredients thoroughly. This kind of snow is suitable when you need to decorate the surface of a product with a voluminous white mass.
Based on materials from the site more-idey.ru
We continue the winter New Year's theme. Today you will find out, how to make artificial snow from:
- salt;
- napkins or yarn;
- foamed polyethylene;
- polystyrene foam;
- starch (soda) and shaving foam;
- soap or paraffin.
Both adults and children love the New Year's fairy-tale atmosphere. But festive mood consists of little things: home decorations, Christmas and other New Year's decorations, a large numberin colorful packaging, spicy, citrus or “Christmas tree” aroma, etc. Do you have Christmas mood? Are there any snowdrifts outside the window? Sometimes for authenticity New Year's fairy tale There's really not enough snow.
I suggest making artificial snow from improvised materials for DIY decoration and “homemade” frost for interior decoration or children’s play.

There are many easy-to-use and inexpensive ways get artificial snow. The choice of method depends on what you ultimately want to get and where you will use this snow later. When working with children, choose the simplest and most safe ways. For example, the process of “frosting” twigs with salt crystals will interest a child, and there will be nothing terrible if he licks this twig. But the stage of dissolving salt in hot water must be carried out under the careful supervision of an adult.

DIY artificial frost
If you want to get a frosted twig to decorate your interior, use salt crystals.This process is simple, interesting and educational for the child. A real magical “action”: salt crystals form right before the child’s eyes.
To simulate frost on the branches, dissolve 1 kg of coarse salt in 1.5-2 liters of boiling water. Dip dry and clean twigs into the resulting hot salt solution. We wait for the solution to cool, carefully remove the branches and let them dry, observing the formation of crystals. Instead of twigs, you can “frost” dill umbrellas, rowan bunches, Christmas tree decorations, etc. 
Artificial frost from napkins or yarn

Don't want to do such painstaking work? Use “Grass” knitting yarn


Artificial snow made of polyethylene foam
This material is widely used when transporting goods, it is used to cushion breakable objects, and it is also inserted to maintain the shape of the product in new shoes. To obtain artificial snow, it is enough to grate a piece of such polyethylene on a fine grater. It turns out quite plausible.


If you want to decorate your home with snow-covered branches, use artificial foam snow.Break the foam into balls using a fork. Cover a large spreading twig with glue, and while it is still wet, sprinkle it with foam balls.


Artificial snow from diapers
To obtain artificial snow, you will need ordinary diapers, in particular, sodium polyarylate - their internal contents. Pour this substance into a convenient container, add a small amount of water, mix and wait until the filler absorbs the water. As a result, you form a gel. Next, we divide this gel into pieces by hand until snow flakes form.


Instructions
In order to create snow patterns on glass, the easiest way is to buy artificial frost in aerosols. As a rule, it can be found in pavilions Christmas decorations or stores that sell handicrafts and creativity. Such frost can be sprayed onto windows, creating fancy patterns that, unlike the frosty patterns on, will remain in their original form for a long time. When applying patterns it is worth considering important rule- there should not be any in the room high humidity, so you should not apply it in the kitchen and bathroom. You can also use artificial frost on glass Christmas trees.
Artificial frost can also be made in. Most often it is used to decorate Christmas tree branches. There are two ways to make "snow cover". The simplest one is to cover the twigs with office glue and sprinkle them with small polystyrene foam. The second method allows you to make frost more natural. For this you will need regular table salt. The coarser the grind, the better the result. Take 1.5 liters of water, add 1 kg of salt and bring to a boil. Dip spruce or pine branches into the prepared solution and leave for 5-6 hours. After this time, carefully so as not to knock off the formed crystals, we take out the branches and let them dry. To make the frost stick better, you can spray the branches with hairspray. Here you can also use your imagination and use varnishes with multi-colored sparkles - then your branches will sparkle brighter and shimmer.
You can also create artificial frost on glasses that will stand on the festive table. To do this, you need to dip the edge of the glass in syrup or egg white, and then in coarse sugar - sweet frost will be a great addition to the New Year's entourage!
Video on the topic
note
You can create frost yourself. For this we need a tin can, table salt and a crushed piece of ice. Put two glasses of crushed ice, a glass of salt, again two glasses of ice, salt again, etc. After a while, water droplets in the air will cover the outer walls of the jar, turning into small ice crystals, and soon the entire jar will be covered with a thin layer of ice. layer of frost.
USEFUL TIPS. Frost from salt. Any twigs are suitable to create such a bouquet. These can be spruce or pine branches, willow twigs, willow or any shrub. Branches hardwood You can take fresh or dry. To prepare the solution, take 2 parts salt and 1 part water. The water must be hot, otherwise the salt will not dissolve. The collected branches should be immersed in the prepared solution for at least 24 hours.
More recently, our parents and their grandparents, when decorating their houses for the New Year, placed cotton wool imitating it under the trees and between the windows. It didn’t look unattractive, but it only partially resembled snow. Nowadays we can make artificial snow that will look like real snow and even be cold.
Instructions
First we'll have to get some diapers. Yes, yes, ordinary diapers, because they contain main component, which we will need when creating artificial sodium. It is not sold in stores in its natural form, but there is plenty of it in diapers. From a size 5 diaper, two or three handfuls of fake snow.
Having taken a sufficient number of diapers, you will have to carefully cut them with scissors and pour the contents - that same sodium polyacrylate - into a previously prepared container. For these purposes, you can take either a basin, or get by with a smaller container - everything will depend on how much snow you want to get in the end.
After the contents of the diapers are poured into the container, pour some water into it, mix, and wait a while until the sodium polyacrylate absorbs the liquid. If the “snow” looks dry, add a little more water and stir again. And so on until the contents of the container look like snow.
To make artificial snow look like real snow not only in appearance, but also to the touch, all you need to do is place it in the refrigerator. If the container is too large, go to the cold. The main thing is that the temperature is not below zero - in this case the water will freeze and our artificial snow will simply turn into ice.
Video on the topic
note
Sodium polyacrylate, a transparent gel adsorbent that absorbs liquid, is a toxic polymer that causes allergic reactions. Its effect on the human body has not been fully studied, so you should handle sodium polyacrylate with caution, avoiding prolonged contact with the skin if possible - use rubber gloves when making artificial snow from it.
The approach of spring is already noticeable, and I really want pleasant memories to remain from the frosty winter. To do this, try making snowballs, the technology and manufacturing methods of which directly depend on your personal wishes, degree of skill, purpose of crafts, as well as available Supplies.

You will need
- inflatable balls, PVA glue, decorative threads, sparkles, sequins, cotton wool
Instructions
Dilute PVA glue with water in a container, maintaining a 1:1 ratio. If there is no glue, cook a paste, which in its qualities is also ideal. To do this, dilute two tablespoons of potato starch in a small amount cold water, and then pour this mixture into 100 ml of boiling water and, without bringing to a boil, remove from heat.
Dry the resulting ball thoroughly and repeat the operation of winding and impregnation again. This will give your snowballs greater strength. After the second layer has dried, start decorating. For decoration you can use the following:
- Apply glue to the finished snowball and then roll it in glitter.
Stick it spot on super glue white or silver sequins. Sequins can be purchased in departments that sell sewing accessories.
Glue on top of the threads thin layer cotton wool, then your snowball will turn out “fluffy”, but this must be done very carefully so that the snowballs are soft and not prickly to the touch.
When winding the second layer, add lurex to the cotton threads. After drying, there will be no need to further decorate such a snowball, because it will already shine a little.
Video on the topic
A lazy person can not bother himself and simply buy a can of artificial or a kit for creating it in some store. But what's the interest in this? It’s much more fun to feel like a master of the elements and make snow yourself from scrap materials. Albeit artificial.

You will need
- - diaper (possibly several)
- - tap water
- - capacity 0.5 l
Instructions
Place in a container and add water (tap water is fine) in small portions. Do this until the material becomes snow-like and damp. In the end, it’s better to completely moisten it with a spray bottle, because there is a risk of overdoing it and resulting in wet, sticky, gray and dirty-looking snow.
Artificial snow is possible. To do this, find several, and then pour colored water into each of them (diamond green, beet juice or some other dye). To enhance the effect, you can add certain substances and oils associated with a particular color. For example, you can add pine oil to green snow, orange oil to snow, and mint oil to snow.
That's it, the snow is ready. All that remains is to use it for its intended purpose. When decorating your home, remember that it is better to place artificial snow on a plate or some kind of stand. Although sodium polyacrylate holds water well, it may well leave wet spots. And for the same reason, sometimes it is worth spraying it with water.
note
Make sure no one eats artificial snow.
An indispensable attribute of winter is beautiful snowflakes. You can “grow” an unusual snowflake at home using a minimum of ingredients. Children will especially enjoy the process of “growing” a homemade snowflake, although the result will pleasantly surprise not only kids, but also adults. How to make a snowflake from salt?

You will need
- 1. Half-liter glass jar,
- 2. Salt,
- 3. Hot water,
- 4. Long thread,
- 5. Fleecy wire or toothpicks and woolen threads.
Instructions
Pour into a jar hot water about 2/3 of the volume. First add a little boiling water to the bottom, then add all the remaining water. If you pour hot water in immediately, the jar may burst.
Master class “Snowy branch”
Audience: for children (child) 6-7 years old.
Subject:"Snowy Branch"
Purpose: interior decoration, holiday gift.
Target: development of children's creativity
Tasks:
Educational: To consolidate ideas about the structure of a tree; about the characteristics of growth. Expand your understanding of the variety of material and its distinctive features: foil, thin paper. AND natural materials: branches.
Developmental: Develop fine motor skills; develop mental processes: memory, thinking, speech; develop fantasy and imagination. Promote the development of interest in the world around us. Develop the ability to communicate in creativity characteristics real objects.
Educational: To cultivate accuracy, perseverance, and the ability to work collectively. Cultivate a friendly attitude towards nature and the surrounding world. Learn to notice the beauty of the world around you.
Integration educational areas: "Cognition", " Artistic creativity", "Reading fiction", "Socialization".
Required material: branch with branched ends; napkins or thin paper; silver foil; scissors; glue.
Progress:
Have a conversation with children about trees in different times of the year. Focus children's attention on trees in winter time of the year. You can read the poem:
Frost
Through the trees silvery
The veil was thrown over -
Snow-white, fluffy,
Lace beauty!
And the birch tree itself is sad
I couldn't find out on my own...
So skillfully decorated
Winter tree branches...
Step-by-step process for making crafts
1. Let’s prepare the materials we need:
.jpg)
2. Cut the napkin 6 cm wide.
.jpg)
3. Cut the foil 2-3 cm wide.
.jpg)
4. Fold the napkin in half and put foil in it.
.jpg)
5. We fold the resulting strip several times and begin cutting, leaving the base intact.
.jpg)
We will need about 15-20 such blanks (depending on the size of the branch).
6. Having greased the tip of the “tape” with glue, we begin to wrap our branch, starting from the ends.
.jpg)
7. When the next ribbon ends, its second end also needs to be lubricated with glue and secured, then take new tape and continue working.
.jpg)
.jpg)
8. In this way you need to design a whole branch. You can then decorate it with birds or winter berries.
.jpg)
9. The children really liked this work.
.jpg)
10. I hope that you also appreciated it.
.jpg)
You can bring real snow from outside, put it in a basin and pamper your children. But this magic will not last long as it will melt in a matter of minutes. To decorate the Christmas tree, window sills, candles and other details, you can use artificial snow, which is easily made at home. In some cases, you can even make snowballs from it. We have put together for you the best collection of methods for preparing artificial paraphernalia. Let's look at all the options in more detail.
Candles and talc
To make dry snow, prepare glitter (preferably gold, silver, blue or pearlescent). Also put it next to kitchen grater, fragrance-free baby talcum powder (powder), several paraffin candles white.
Place the candle in the refrigerator for half an hour or in the freezer for 10-15 minutes until it hardens well. After the time has passed, grate it on a medium-sized grater. To create a shimmering effect, add small glitter to the shavings (color of your choice).
The resulting composition leaves no traces, does not dissolve in water and does not change shape upon contact with it. Typically, this kind of artificial snow is used for decoration. New Year's balls and Christmas trees, painting windows and window sills.
Styrofoam
The easiest and most common way to make artificial snow at home. To do this, get a piece of foam from an appliance or electronics box (they have smaller granules). Place the layer on flat surface, take the fork and start moving it intensively back and forth. As a result, the “grains” will fall off; you need to collect them as they accumulate.In most cases, foam-based artificial snow looks unnatural. It is used to decorate spruce branches, the spruce tree itself, window sills, painting balls and filling them, creating small hail and firecrackers.
Paper towels (toilet paper)
Take the white ones paper towels or toilet paper, tear into small pieces. Grind into crumbs in a convenient way white natural soap, place the composition at the bottom of a ceramic or glass container. Place pieces of paper/towels on top.
Place the bowl in the microwave for 30-45 seconds, monitoring the condition of the paper fibers. They should become fluffier and raised. The soap, in turn, will acquire a softer and more pliable consistency.
After the expiration date, take out the mixture, pour in some filtered water and mix everything with a fork. Place in the refrigerator for 3 minutes, then grind again.
It is from this kind of snow that you can sculpt mini-snowmen, play snowballs, and decorate any surfaces and objects.
Eggshell
Boil several eggs with white (not red) shells. Clean them, remove the films. Place in a tight plastic bag, place on a hard surface and grind into powder with a rolling pin. Once the shell is ready, you can mix it with glitter and then start decorating. Artificial snow attached with PVA glue to spruce/Christmas tree branches, they decorate windows, creating various drawings. The composition is used to stuff transparent New Year's balls.
Baby diapers
No matter how strange it may sound, artificial snow can be made from disposable diapers or white diapers. The thing is that such attributes absorb moisture due to the sodium polyacrylate contained in the composition. In its swollen state, the drug looks like real snow.
To perform the procedure correctly, remove the cotton-like stuffing from the diaper/diapers. Tear it into very small particles, then place it in a deep bowl. Begin to slowly pour in cold purified water and at the same time knead the resulting mixture with your hands. In the end, you will get a decoration that is difficult to distinguish from real snow. The attribute is used to create snowballs, snowmen, and holiday decorations that involve the presence of peculiar snowdrifts.
Baking soda and shaving foam
Pour the soda into a small bottle so that it is convenient to mix it with other ingredients. Squeeze a bottle of foam into a deep container and at the same time add baking soda, then immediately stir. Proceed intermittently: pour in, mix, pour in again. For 1 can of foam there is one and a half packs of soda. When mixing is complete, place the mixture in the refrigerator for 5 minutes. Then take it out and add glitter for decoration. The peculiarity of this method is that the finished snow smells of frosty freshness if you choose foam with the appropriate aroma.
Polyethylene
Very often, housewives use pimply polyethylene, which is used to wrap Appliances during transportation for better cargo safety. Take 1 sq. m. of material, twist it into a tight tube, then grate it with fine divisions. Combine the resulting air mass with pearlescent glitter, add 3-5 packets of potato starch and a little filtered water. Stir until the mixture becomes homogeneous.
After this, dry it on a radiator or under direct sun rays. Shred a little with a fork, then start decorating. The composition looks very beautiful and natural on fluffy artificial Christmas trees and natural spruce trees. To properly attach artificial snow, coat the area to be treated with PVA and then sprinkle it with the compound.
Toothpaste
The method is more suitable for spraying on windows, mirrors, balls, and a Christmas tree. As a rule, a stencil soaked in water is applied to the surface for better adhesion. After this, the voids are filled with snow inclusions. It is necessary to spray very carefully, because the drops scatter into different sides. Buy the cheapest white one toothpaste without colored granules. Squeeze half the tube into the container, add a little filtered water to make the composition more liquid and creamy. Drop it in toothbrush, point it at the object you want to process. Run your finger upward along the bristles and release to create specks of splatter on the item.
Starch and soap
Grate a bar of white soap on a fine grater and mix it with 3 packets of potato or corn starch. Boil 200-250 ml. water, pour boiling water into the mixture, then beat the mixture with a whisk, forks or mixer until a thick foam forms.To make snowballs, take a foam ball, dip it in the mixture and dry it on the radiator. If you want to decorate windows or Christmas tree branches with the composition, just dip a toothbrush in the snow and cover the surface with blotting movements. You can dry the mixture and then knead it if you need the snow in powder form.
Salt
New Year's wreaths decorated with artificial snow have become very popular recently. Also, many people do not put up a spruce tree, but decorate the room with its individual branches. As a result, you get a kind of frost. To start the procedure, take an enamel pan, pour 5 liters of water into it and add 2 packs table salt. Place the pan on the fire, stir and heat until the mixture dissolves. When this happens, turn off the stove, put the branches in the container and wait 4-6 hours. During this time, the salt will be absorbed into the needles and form an original snow crust. At the end of the period, remove the branches and leave them to dry for half an hour.
Edible artificial snow
Experienced housewives pamper their children with artificial edible snow. They can be used to decorate festive table, in particular, New Year's, you just need to show imagination and perseverance. To add magic to baked goods, fruit salads or other desserts, simply pour some fluffy cream over them and sprinkle with powdered sugar. Boiled chicken protein, grated, is suitable for second courses.
It's easy to make artificial snow at home if you have some various ways. Use polyethylene, foam, eggshell, toothpaste, shaving foam mixture and baking soda, paraffin candles and talc. Treat your kids to some edible magic with powdered sugar and cream.
Video: how to make artificial snow with your own hands