DIY kitchen decor: affordable and stylish solutions in the photo. DIY kitchen decor: the best design ideas DIY kitchen decor ideas
Read also
Save money on a kitchen redesign with just paint, new handles, kitchen cabinet door decor, bright colors and your imagination. Here are 30 budget-friendly and colorful ideas that will help you decide to update your kitchen.
If your kitchen is already not new, with its own errors, add a few bright accents, which will “distract” the eyes of the guests. This advice only applies if the color of your kitchen cabinets is neutral.
4
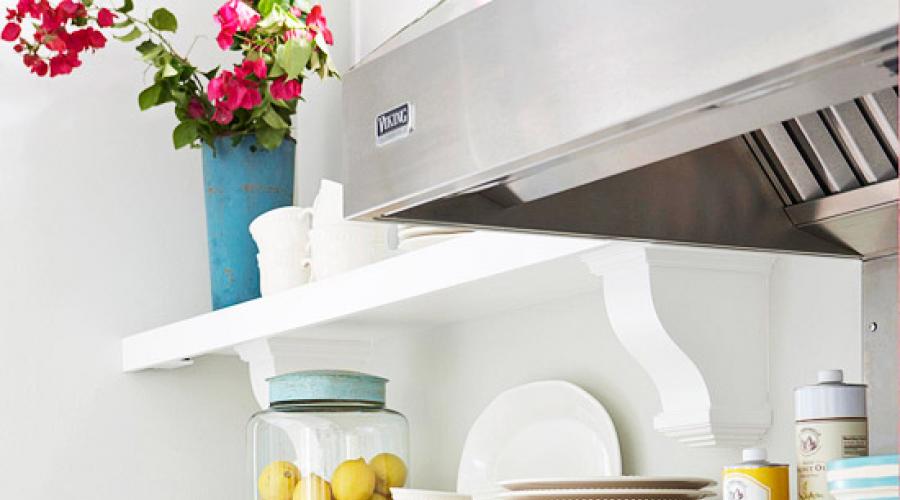
Open shelves will give the kitchen a lighter look. In this case, attention is focused on what is on the shelf more than on the shelves themselves. Add bright jars, dishes, flowers - and they will cover the old shelves for a long time.  2
2
Fresh colors
The best defense is attack. If you don’t have the opportunity to replace some kitchen cabinet or drawers, make it the accent of your kitchen by painting its surfaces bright defiant color! Please note that in the photo red appears in several details and is in harmony with the dark wooden surface.

Buy chalkboard paint and paint over the surface of your kitchen cabinet doors. On such a board you can write down a menu or a list of necessary purchases.
 1
1
White top, black bottom - it turns out that this combination also applies to kitchen surfaces. Paint the top line of cabinets white and the bottom line black. There should be a third color that will appear in both lines and combine them into the composition in this way.
 2
2
Sometimes the desire to change a kitchen cabinet is due only to the fact that it is in constant chaos. Use our tips for cleaning your kitchen cabinets and drawers - and they will immediately seem better to you.
 3
3
Glass doors give a great look to kitchen cabinets. To update such a cabinet, you can paint the back panel in bright color(for example, blue) and support this color with other decorative elements.
 6
6
By removing doors from several upper-level cabinets, you will make the kitchen appear larger. Paint the interior surfaces of an open cabinet a dark color to deepen the effect even further.
 11
11
For a small update to your kitchen furniture, replace traditional wooden handles to fashionable tubular ones.
 1
1
If your cabinet does not have doors, but you still want to hide unattractive dishes or pots from view, hang curtains. They will not only close several compartments from prying eyes, but will also allow you to easily get to the things you need.
 1
1
If the edges of the paint on your kitchen cabinets have rubbed off, don't worry! Many designers achieve this effect specifically to give the furniture a vintage look in the Provence style. All you need to do is deepen the distressed effect to make it look organic.
 4
4
White color on kitchen surfaces is now in fashion. In addition to cabinets, use white on textiles and curtains. But the walls in such a kitchen can be painted in a more dark tone, then the white will be even more shining.
 1
1
Blue and gray shades have an excellent smoothing effect, which is perfect for furniture with scratches and scuffs that need to be hidden.
 2
2
Kitchen cabinets get a dramatic makeover with trendy orange. Combined with a dark shade, this orange does not look provocative or childish.
 2
2
This is one example of how you can successfully combine several tips: using bright colors and decorative aging of furniture.
 4
4
A combination of wood of different shades and applied paint different colors good if the range of shades is small. In the example we see the transition from snow-white to mustard color.
 1
1
Vintage is in fashion not only in clothing, but also in the interior. Don’t rush to call your furniture old, but on the contrary, present it as a vintage find! To do this, you just need to repaint it in a fresh color and replace the handles.
 4
4
If you like the idea of glass doors on kitchen cabinet, but you’re not sure that you can keep your open shelves clean and tidy all the time? Then a solution using frosted glass is suitable for you. It also visually makes the interior more spacious and lighter, while hiding clutter on the shelves.

Molding can turn an ordinary cabinet into a small masterpiece. Paint it a contrasting color and attach it to special glue to the closet door.
 3
3
Several coats of stain can give your kitchen furniture the new kind! After painting it will be even deeper and richer.

Small wooden overlay with curly edges on the top shelf sets the tone for the entire kitchen in this photo. It displays ethnic motifs and country style, which make this kitchen very warm and cozy.
 4
4
If you want to update the look of the island, cover it with planks, creating a relief surface.

Yellow and red refer to cereals warm shades, and their combination amazingly transforms the interior. Paint the walls red, and the surfaces of the kitchen furniture yellow and your kitchen will become much “warmer”.
 2
2
Sideboards on modern kitchens are increasingly becoming a thing of the past. But if you honor traditions, use the top line of the kitchen to place sideboards. You can store sets, porcelain, and glasses behind the glass.
 2
2
While kitchen cabinet surfaces are great, white countertops are very impractical. Fortunately, the combination of a dark countertop and white surfaces looks very stylish.

Heavy meta
Looking for a modern and slightly urban design for your kitchen? Cover the surfaces of the kitchen cabinets with metallic paint - this will give the right type your kitchen.

Retro style in the kitchen can be created using a combination of the desired colors and decor with retro-style items. In this example, both techniques are used: soft yellow and light green perfectly convey the style of the past era, and gas stove an old-style teapot and cups only enhance this effect.
 1
1
Overhead horizontal and vertical wooden planks add texture to the kitchen cabinet, and the color and handles complement the overall composition.
 2
2
We used to tremblingly select handbags to match our shoes? and now it is considered bad manners. The same situation applies to flowers in the interior - successful combination different shades is valued much more than a plain paint job.

Create unique look kitchen cabinet with drawers, painting each drawer a different color. Of course, try to choose well-matching colors and shades.

At all times, the design of the kitchen was the main thing, unlike other rooms. It is in this room that guests are received, so create your own design and do not forget to take into account your wishes.
Whatever the size of the kitchen, it must have areas where: food is stored, a sink, a workplace, a stove, a dining table.

Ideas on how to arrange these zones are all different. Decorating the kitchen in an apartment with light shades helps to visually enlarge the space.

The kitchen set is purchased with ready-made sizes or made to order. Kitchen appliances are installed to help with food preparation processes.

Mounted working surface and a refrigerator. This frees up space for the sink, stove and all other furniture.

The door can be sliding or prepared arched design. Our article shows the most popular options and design solutions arrangement of this room.

Varieties of kitchen design
The modern design of the kitchen provides for the connection of this room with the rest, for example with the living room. Indeed, today, using a hood, and thanks to good ventilation, you can get rid of odors when preparing food.


More recently, they tried to block off the place where the work area was located from other rooms with partitions. And in the world of rapid development, the use of a bar counter is provided.

It is considered complete when there is a refrigerator next to it, dishwasher and drawers. There should be high chairs nearby near the tabletop. And on the other side they arrange work surfaces.

Stylish kitchen design will help highlight the overall design, and the room can fit perfectly into the overall interior.

Different kitchen design ideas
There are quite a lot of options for kitchen design and each of them is individual.

If you equip your kitchen area with shelves, you can create your own collection of dishes that will look good against the background of the general design idea. To make the room special, the work area is decorated with a mosaic apron and original hooks where you can hang towels.

If your kitchen does not have a pantry, then ideal option there will be drawers up to the ceiling. A writing board is placed on the doors. 
Facade finishing can be done on our own and not only working area, but also a refrigerator or pantry. It is better to build a microwave oven into kitchen set, or place it on a higher shelf.

The material for the countertop is selected from granite, it is not difficult to care for, and the sink should be spacious. For flooring They use tiles, they are easy to clean from dirt and dust.

The dining area is decorated with additional drawers where you can store dishes. The refrigerator is perfect place for decorative elements, the main thing is not to overdo it.


The room can be highlighted with a tablecloth with a pattern or ornament, a vase and various elements that will please your liking.

Decorating a small kitchen is sometimes a little more scrupulous because there is not much space, but you want to create a full-fledged room.

The arrangement of the kitchen interior is done very carefully. It is necessary to achieve comfort and at the same time take into account the interests of all family members. To decorate a kitchen with your own hands without having any idea how to do it, you just need to read the information in our article, and it can help you do everything right.

All you need is a little time and, of course, the desire to change something in your home.

Photos of the best kitchen design ideas


How to decorate the kitchen: more than once every woman has seriously thought about this question. There are many ways to decorate your favorite kitchen with your own hands, and this important point. After all, it is in it that the cooking process takes place, and you want it to be not just comfortable, but even pleasant. Reflected inner world housewives, and could inspire culinary conquests, at the same time it did not bother tired household members in the evenings with excessive brightness. What to do?
You can simply order professionals for kitchen renovation, design services, and let them search for and offer interesting ideas for the kitchen, choose from the proposed options what suits you, and no longer worry about how to decorate the kitchen with your own hands. But in this kitchen design there will be nothing personally yours; you will still have the need to update the kitchen with your own hands. This is natural, and you will start decorating with kitchen crafts by creating them with your own hands. Start looking for decor ideas and changing the kitchen interior with your own hands.
How to decorate a Kitchen?
- Classic ( natural materials, stained glass, bronze)

- Country classics (heavy solid furniture, natural materials)

- High-tech (minimalism and functionality)

- Exotic or ethno (authenticity and various design options)

Each of them suggests its own great friend interior ideas for your kitchen from a friend. When looking for DIY kitchen decor variations, original ideas and photos can easily be found on the Internet. You need to understand exactly what style you want to stick to and not mix it with others. Understanding how beautifully you would like to decorate your kitchen, look online at several master classes on decor, photos, DIY kitchens, a large number of original ideas, with video and photo materials.
What will help in decorating your kitchen space?
- DIY crafts for kitchen heaven. There are a lot of video lessons that will tell you how to decorate your kitchen so that its area is cozy and beautiful using homemade jewelry, and ideas useful in everyday use crafts. You can decorate your kitchen world, for example, with a kettle knitted kettle warmer. Or a decoupage knife stand.


- Photo. The simplest and most affordable decor that does not require investment for decorating your kitchen with your own hands, with or without framed photographs, and modular paintings. This can give an elusive coziness small kitchen in a private house. They can be updated regularly or depending on your mood, and this will be an unusual touch to the kitchen interior, which will be different every time. A composition of frames as DIY kitchen crafts are brilliant ideas for decorating a kitchen space.

- Panel. Any materials that come to mind can be used on it, the main thing is comfort in the kitchen and harmonious combination items. Create your favorite landscape or motivating picture on it. Let this element turn out to be not just a trinket, but also a beautiful reminder.


- Stencils. Interesting idea for kitchen decoration. Apply to prepared walls. You can even just write something beautifully. This approach will suit those who do not like to bother too much with drawing out the pattern.


Ideas for decorating your kitchen using a variety of textiles will also be interesting.

Do-it-yourself textile decor for the kitchen with photos is a popular topic on forums for handmade craftswomen. From these you can see that textiles are appropriate for:
- Towels
- Chair covers
- Tablecloths
- Potholders
- Napkins
- Curtains and drapes.
It's hard to imagine a kitchen without these elements, right? Perhaps you will end up with a particularly cozy kitchen, the photos of which will go around the entire Internet.
IMPORTANT: You should not use all of them in DIY kitchen crafts. synthetic fabrics, they can go out of their normal form if they come into contact with a surface with a temperature of 60 degrees.
Large pieces of furniture can also help make the kitchen cozier.
Are you wondering how to decorate your apartment kitchen with your own hands? Look at this aspect in a special way! Even a refrigerator can create beautiful interior kitchens, we simply decorate it with a smiley face, a zebra or an exotic flowerbed. Having ceased to be white, it will add previously unnoticeable accents. You don’t even have to bother and cover it with cute wallpaper. This small stroke will instantly give the room a new look.
- Comfortable
- Functionally
- Noticeable.
And an updated refrigerator will make you smile and lift your spirits.

Everyone enjoys a beautiful kitchen in an apartment or private home. If your DIY kitchen decor is successful, then the kitchen will undoubtedly become the most visited corner of your home. The pleasure of working in a kitchen with your own hands, surrounded by created beauty, is undoubtedly more pleasant than using a designer's vision and design ideas. In addition, only you yourself can create in your home the necessary microclimate and comfort in which you want to relax. Be the creator of your space and add things you love, keepsakes, or a keepsake collage.


Kitchen decoration is creative process. Don't limit yourself to template options. Become your own designer, search the Internet for design and finishing ideas. Do everything to make your favorite home interior a work of art. Decorating your kitchen with your own hands is much easier than it might seem. You just have to get started, and the process will captivate you. Question: how to make a kitchen cozy will be funny and ridiculous. The answer is simple: put your soul into it!—
In a private house there are many more options for decorating the premises; you can combine the design: combining elements of the façade and home interiors. Design ideas for the kitchen, including crafts for the kitchen that you made with your own hands, will be the basis of the decor ideas in original style- you can get it from family and friends, or, as a last resort, the Internet. But the most the best option– your own thoughts. Make a clear plan, draw a sketch of the desired room and go for it. Make your own decor for your favorite kitchen with photo cards of family members, hang it at the dining table, and every meal will become a special one - a moment of pleasant memories.


Interior ideas for the kitchen can vary greatly, use themed stickers, animal stencils - then you will instantly find yourself in a forest grove. Show your individuality without unnecessary modesty - this is your home, so you should definitely feel comfortable there.

Importance in design kitchen area furniture plays. Decorating tables and chairs with cute tablecloths or new covers will greatly transform the room. Choose fabrics that contrast with general color walls Maintain one accent piece in the room, the kitchen design will greatly benefit from this!

A large number of bright moments create a feeling of fragmentation. Look again for inspiration at kitchen images, photos of which are easy to find through search engines. If there are plant elements on the furniture, maintain such an ornament in other areas, but in light shades. For example: bright monograms on chairs and transparent patterns on wallpaper. Choose curtains to match the tablecloths and upholstery.

When your kitchen furniture has become dilapidated or you just don’t like it anymore, don’t rush to buy new ones, because, most likely, you can update it yourself. All you need for this is a couple of free hours or days, a well-thought-out idea for a remodel, some money and one of our instructions.
Method 1: Painting the kitchen with chalk paint
Do you want to update your kitchen set beyond recognition with your own hands? The best way to do this is to repaint the facades with chalk (mineral) paint. Why chalk?
- The fact is that this type of paint has a thicker consistency and increased adhesive properties, due to which it fits perfectly on any surface - even on laminated chipboard/MDF. Moreover, chalk paints eliminate the need for tedious sanding and sometimes even without primer.
Chalk paints are also good because they give the painted surface a texture similar to that obtained when painting wooden surface. Therefore, even the most ordinary kitchen with film facades will look much more noble after such an “update”.
- In Russia and the CIS countries you can buy chalk paints from designer Daria Geiler, foreign manufacturer Annie Sloan, Kazakh Vernenskaya Manufactory, etc. You can also make chalk paints yourself using recipes that are easy to find on the Internet.
Here are some photo examples of kitchens before and after restoration.
Photo of a kitchen with film facades before and after painting with Daria Geiler paint. Here the author of the alteration restored the peeling film on the facade near the stove, and then painted the furniture without removing or sanding the film

Old kitchen with veneer cabinets before and after painting with Annie Sloan paint. By the way, in this kitchen even the tiled floor was painted with chalk paint, and the patterns on it were painted using a homemade stencil


Inspired? Then it's time for a master class.
To paint the kitchen you will need:
- Primer (special for chalk paints or alkyd if the furniture was painted with oil stain);
- Chalk paints (preferably with a 10% margin);
- Matte moisture-resistant varnish (acrylic or polyurethane).
Useful tips
- Material consumption is calculated following the manufacturers' recommendations. It is especially important to correctly calculate paint consumption. If there is not enough of it, you will have to repaint the remaining areas with paint from another batch, which, due to the nature of production, will be slightly different in tone.
- Which varnish is better - polyurethane or acrylic? To ensure that the kitchen coating can withstand extreme loads, it is safer to use polyurethane varnish. However, if you rarely cook and do not have pets, acrylic varnish is perfect, especially since it dries faster, does not have a strong odor and is cheaper.
- Brushes: two synthetic brushes for primer and varnish, as well as one natural or synthetic brush about 4 cm wide (a natural brush gives a more pronounced texture);
- Degreaser, such as white spirit;
- Sandpaper with a grain of 100–180 microns;
- Ladder;
- Film and masking tape (to protect non-paintable parts);
- Screwdriver;
- Gloves.
How to paint a kitchen set:
Step 1. Preparation
First you need to remove the handles from the facades. Floor, walls, apron, countertop, glass inserts, fittings and other surfaces that you do not want to paint should be covered with film and masking tape. Next, clean all parts from grease (preferably with a degreaser), stains and dust.
- Do the facades need to be removed? It is not necessary to do this, but it is more convenient to paint this way.

Step 2: Primer and/or sanding
Sanding old paintwork, film or lamination is not necessary, but it is necessary to treat it with a primer in 2 layers. In this case, each layer of primer must be allowed to dry, and then the primed surfaces must be sanded to even out the coating and enhance paint adhesion.
- However, if the lamination has a strong gloss, then it is advisable to remove its top shiny layer with fine-grained sandpaper– this will make the coating even stronger.
- If you are not too picky about the result (for example, if the kitchen is temporary, very old or got for free), then you can do without a primer. All you need to do is: wash the facades from grease, then paint them in 2-3 layers and finally cover them with 1 layer of varnish.
- Do you want to achieve the most even and durable coating? Then it’s worth sanding the surfaces after each layer of primer, paint and varnish (except for the finishing layers).
- Before starting work, test the paint on any object.
- If you want to save money, paint only the fronts and visible parts of the frame, and the interior walls and shelves of the cabinets can be painted cheaper or left unchanged.

Step 3. Coloring
Once the primer is dry, begin applying paint in 2-3 layers, allowing each layer to dry completely (one coat chalk paint It only takes about 30 minutes to dry.)
- It may take 5-6 coats to cover a dark finish with white paint.
Step 4. Varnishing
When the finishing coat of paint has dried, you can begin applying the varnish in 2-3 thin (!) layers with a synthetic brush (not used). It is advisable to allow each layer to dry completely for about 24 hours.
Step 5. Finally, we return the fittings and facades to their places.
Voila, old kitchen like new!

Method 2. Pasting facades with self-adhesive film
The fastest, most affordable and easy way restoration of kitchen furniture - design of its surfaces self-adhesive film(self-adhesive wallpaper). Unlike painting, gluing film is also good because it allows you to return the look of the kitchen to its original state after some time. For those who live in rented apartment or just loves change, this method of updating the kitchen will help out with a bang.
- The service life of furniture covered with film will be 2-3 years in good condition.
- This remodeling method is most suitable for kitchens with solid facades without panels or relief details.
Below are photos of kitchens before and after film restoration.


It is possible to cover the kitchen with film only partially. For example, one of the tiers, the back of the set, the base or panels. Examples of such kitchen remodeling are presented in the following selection of photos.


If the facades of your set have glass inserts, then you can decorate only the back walls of the cabinets with film.

You can cut out patterns and designs from vinyl “self-adhesive” tape.


By the way, you can use film to update your apron, table top or table top, and appliances.


If the refrigerator is not built into the set and does not fit into the interior of the kitchen, simply cover it and the furniture facades with film of the same tone


To remodel your kitchen you will need:
- Vinyl self-adhesive paper (with reserve);
- Sharp scissors and a breadboard knife;
- Ruler and centimeter;
- Squeegee for smoothing with hard and soft sides;
- Lint-free rags.
- Screwdriver.
How to cover a kitchen with self-adhesive film with your own hands:
Step 1. Using a screwdriver, remove the handles from the facades; if you wish, you can also remove the facades themselves - this will make it more convenient to paste them over.
Step 2. Wipe all surfaces, including the ends (!), clean and dry, especially paying attention to grease deposits - it is better to remove it with a degreaser.
Step 3. We begin to glue the film. Remove part of the backing from the film and attach the canvas to the facade, leaving a free 3-5 cm on the top and sides - we will later wrap this excess onto the edges. Take a squeegee and start smoothing the film, pushing out the bubbles, gradually going down and peeling off the backing. Movements should be smooth and slow. Having reached the lower edge of the facade, step back 3-5 centimeters from it and cut the canvas.
- If you wish, you can pre-cut the canvas to the size of the facade with an allowance of 2.5-3 cm (for facades of standard thickness).
- The film sets completely only after a few hours, so don’t be afraid to make mistakes - all mistakes can be corrected.
- If there are small bubbles left on the film, they can be carefully pierced with a thin needle and smoothed out again.
- You can purchase the film in 2 colors to create a stylish contrast: light top - dark bottom.
Step 4. Now that the facade is almost completely covered with film, let's work on the edges and corners:
- First, cut the corner portion of the loose film at 45 degrees as shown in the photo below. This way you will have two “wings” along the two edges of the façade.

- Now carefully wrap the free edge of the film over one of the edges and smooth it out. Next, wrap the remaining corner onto the adjacent edge of the facade as shown in the next photo, and cut off the excess.

- Cover the second edge with film in the same way, but this time cut the corner at a right angle.

- Finally, press the seams tightly and repeat the process on the remaining corners.

Step 6. Using the described method, cover with film all the front parts of the headset, visible areas of the frame and the base. If desired, you can use vinyl to decorate the shelves and interior walls of cabinets. However, this is not at all necessary.
Step 7. On last stage put the facades back in place if you removed them, as well as the handles, making holes in the right places using a knife or awl.
You can also watch a visual master class on how to cover a kitchen with self-adhesive film in this video.
Method 3. Kitchen decoupage
Hand painting is very beautiful, but difficult or expensive. But even a beginner can decorate boring facades of a set or hide local damage (scratches, chips, stains, etc.) with drawings created using the decoupage technique. The result is guaranteed to be excellent! We offer ideas for kitchen decoupage in the following selection of photos.


Decoupage kitchen in shabby chic style


Decoupage buffet
Decoupage will help decorate not only the facades of the set, but also other kitchen furniture and even technology.


To work you will need:
- Three-layer napkins with a pattern or decoupage cards;
- 2-3 flat squirrel brushes (for applying glue and drawings on the glue, as well as varnish);
- Scissors;
- PVA glue;
- Pencil;
- Acrylic varnish (matte, glossy or with craquelure effect).
- For do-it-yourself kitchen decoupage, decoupage cards are more suitable than napkins - the designs on them fit perfectly together and can be large in size.
- The main thing in remaking furniture using the decoupage technique is right choice drawings. They should fit into the kitchen interior in color and style.

How to transform a kitchen using decoupage technique:
Step 1. First you need to degrease the selected area with alcohol or degreaser.
Step 2. Carefully separate the layer with the pattern from the napkin, then cut out the desired print from it. At this stage, you can “try on” the drawing on the facade and at the same time make a note where it should be located.
Step 3. Now we grease the back side of the cut out pattern with PVA glue and apply it to the facade in in the right place. Next, carefully smooth the napkin with a brush, moving it from the center to the edges, and blot the excess glue and remove it with a slightly damp rag.
Step 4. Glue all the remaining napkins in the same way.
Step 5. If desired, the kitchen decoupage can be finished with hand painting. Once the glue and paints have dried, the design can be sealed using acrylic or polyurethane varnish in 2-3 layers (allow the drawing to dry completely between layers).
Some more useful information
- Do you want to turn minimalist kitchen with continuous facades in classical? This is possible by gluing moldings or carved parts onto them and then painting them following our instructions.

Also, before painting the headset, wall cabinets can be supplemented with figured brackets (they can be bought ready-made or cut out yourself), and the base can be supplemented with baluster legs.


- For best result it is worth approaching the “update” of the kitchen comprehensively and, if necessary, changing not only the color of the facades, but also table top With an apron , curtains, dining table and chairs.
- Sometimes the thirst for change can only be satisfied by replacing/painting furniture handles.

- Of course, before painting the kitchen or covering it with vinyl, it needs to be repaired: tighten/change the fittings, glue and iron the peeling film a little, polish the scratches, and fill the chips, cracks and holes from furniture handles with furniture putty.
The kitchen is not just a convenient place for cooking. Noisy family breakfasts, romantic dinners and intimate gatherings with friends take place here. Therefore, its interior should not only be practical and cozy, but also stylish, attractive, and interesting. That's why we collected different ideas for the kitchen, with which you can either completely transform the room or add a few original touches to the finished design.
Idea No. 1: Decorating the walls
The easiest way to quickly change a boring kitchen design with your own hands is to repaint the walls. In order for the shade to harmonize with existing furniture and the rest of the decoration, it is advisable to choose colors from the neighboring spectrum. For example, beige kitchen can be repainted yellow or grass green. Bright red details - replace with a calmer one purple colour, and blue ones - to light blue, gray or soothing green.
If you are not sure that the new walls will suit the decor, you can leave the previous color as the main tone, and apply contrasting stripes, figures using stencils, or complement the interior with wall paintings. If you have no artistic talent, it doesn’t matter; you can decorate one of the walls with a finished fresco or photo wallpaper.
If the walls are lined with tiles, panels or other materials not intended for painting, various decoration techniques will come to the rescue, for example:
1. Interior stickers - budget decor that can be applied to almost any flat surface. The themes of the drawings are very different - you can either choose a neutral picture depicting kitchen utensils or still lifes, or a non-standard creative plot that will immediately attract attention.
2. A wall of plates - if you are an avid traveler and like to bring various souvenirs from distant countries, they will come in handy when decorating your kitchen. They can be hung above the wall dining table or place on small open shelves. But installations in modern style from white plates arranged in a pattern geometric shape, especially on dark wall. Thematic interiors will be complemented by plates painted in Gzhel, Khokhloma, with images of hunting, flowers or pastoral scenes.
However, you shouldn’t get hung up on plates - you can decorate the wall with any dishes - cups and saucers, pans, trays. It looks unusual and will definitely attract attention.

Idea No. 2: Remaking the kitchen apron
If the work wall in your kitchen is still tiled with inexpressive tiles or painted to match the rest of the walls, it’s time to turn it into a highlight of the interior. To do this, you can use a contrasting mosaic or tiles, imitation brickwork, wood or natural stone.

We also offer you several fashion trends for inspiration:
Mirror mosaic– a little sparkle and glamorous chic will decorate a kitchen decorated in white or other solid colors.
Wallpaper with a 3D effect can highlight the theme of the design. The main thing is to choose the right drawing. In order for the new apron to fit harmoniously into the design of the kitchen, make sure that its palette contains shades from the colors of the decoration, furniture and textile design. A more expensive, but also much more practical option is skinally with photo printing. If glass apron If you add lighting, the kitchen will be transformed just before your eyes.
If the interior has already used a lot of prints and patterns, it is better to choose a plain apron. But you can focus on the texture and unusual material. For example, a metal apron made of copper or of stainless steel. Its surface can be glossy and smooth, noble matte, decorated with patina or chased pattern. Metal aprons will fit perfectly into an interior where there are a lot of household appliances or fittings decorated in a steel color.
You can make your own kitchen decor in the style of an original mosaic. To decorate your apron with your own installation, prepare interesting fragments. It may be beautiful, but - alas, it has already served its purpose with chips and cracks, remains ceramic tiles, borders, moldings, small mosaics, etc. All this decor is attached with regular tile adhesive, and the seams are treated with grout. Afterwards, the apron can be varnished or each fragment can be painted by hand.
Idea No. 3: Updating the furniture
If you can't buy new furniture, you can update the kitchen interior with your own hands by repainting the facades of the existing set. To do this, the cabinets need to be removed, disassembled, and cleaned of the old coating with solvent or sandpaper. Next, the surfaces are primed and painted with any waterproof paint. The transformation of the facades will be completed by replacing the glass, for example, with frosted glass or with a sandblasted pattern, and the fittings with something more catchy and interesting.

A less labor-intensive option is to decorate the facades with the same vinyl stickers or self-adhesive film, painted with acrylic paints (you can also use stencils), decorate with moldings, ceramic overlays or stucco molding - the choice depends on the interior style.

Several accent pieces of furniture, decorated in retro or vintage style, will also help transform the interior.
For example:
1. A kitchen table with chairs or cabinet fronts can be decorated with decoupage pictures on any theme. To do this, you need to clean the surface with sandpaper, attach thin paper with the image you like with diluted PVA and carefully smooth it with a brush. And after drying, fix the work with acrylic varnish.

2. If there is old furniture in the apartment, do not rush to throw it away. “Grandma’s” sideboard, buffet or china cabinet can perfectly complement a kitchen-dining room in Provence, country, eclectic or vintage style. To do this, you need to sand it, removing any cracked varnish or paint, apply a primer and repaint it in any shade that suits the interior. You can decorate the interior walls and shelves using wallpaper or vinyl film. Don't forget to replace the handles, polish the old ones to a shine, or cover them with gold, copper, or silver paint.


3. Open shelves will take on a completely different look if, instead of the usual glass or lattice facade, they are covered with textile curtains, inner surface cover it with beautiful wallpaper, and attach a bright border from a piece of self-adhesive tape.

Idea No. 4: Changing the usual appearance of standard household appliances
The white color of the equipment will be an excellent background for painting or decoupage pictures. The refrigerator can be painted in the color of the facades using acrylic paint. To do this, you need to sand and prime the surface of the equipment, and then apply paint from aerosol can(it’s better not to use a brush to avoid streaks). Or you can not limit yourself to one refrigerator and repaint the entire household appliances(just don’t forget that the stove requires heat-resistant enamel). In this case, it is better to choose an accent shade, and not to match the color of the furniture.

Instead of paint, you can also use self-adhesive film with photo printing by carefully removing the paper backing and attaching the material with a pattern to the door or the entire surface of the refrigerator.


Of course, if the technology is new and does not need fundamental changes appearance, you can simply complement the design of the refrigerator with vinyl stickers, a pattern or creative inscription, turning it into a unique piece of furniture.


Idea No. 5: Wrap yourself in warm textiles
Hard to imagine cozy kitchen without curtains, tablecloths, various potholders, towels, napkins and other textile items. And it's not necessary. After all, having chosen bright colors and by combining all textile accessories in one color, you can create a stylish, fashionable and completely different-looking interior.

To radically transform the window in the kitchen, you can change not only the color, but also the shape of the curtains. For example, fabric Roman blinds with photo printing look great in modern interiors, and in the beloved country style - large nets or playful curtains with lace and small patterns, assembled in the shape hourglass. Thread curtains also look great, which you can decorate yourself with rhinestones, beads, and butterflies.
You can also update old chairs by sewing textile covers for them, decorating the seats with soft cushions and the backs with large bows.

Idea No. 6: Replace lighting fixtures
We associate light with warmth and comfort, so there should be a lot of it in the kitchen. But if the best option for the work area is hidden lighting, which is turned on when necessary, then the central lamp or sconce near the dining table needs to be made original and bright. Try replacing the usual chandelier with several pendant lamps.

DIY kitchen light design ideas
1. Replace an old lamp shade with an original cutlery pendant. To do this, small metal loops are screwed into a circle cut from chipboard or plywood. Then holes are drilled in the spoons/forks where the S-shaped pendants are inserted. Now all that remains is to hang the fixtures and attach a new lampshade to the chandelier.

2. Use glass or ceramic cups (with saucers) instead of the usual lampshades. To do this, you need to drill a hole in them in the center, thread the wire and attach the socket with a light bulb.
3. Also, instead of lampshades, you can use other dishes or kitchen tools– the main thing is that their material does not melt from close contact with incandescent lamps.


Idea No. 7: Selecting bright accessories
If the kitchen is decorated in neutral shades, with the help of well-chosen accessories you can radically transform its design without even resorting to renovation. To do this, select 1-3 accent colors and repeat them in the colors of curtains, dishes, tablecloths, and various kitchen small items.

You can decorate your kitchen in an original way with functional decor that will be useful in everyday use. Most shining example– jars of teas and spices. You shouldn’t hide them behind the fronts of cabinets; it’s better to decorate them beautifully and place them on small open shelves.

Do-it-yourself kitchen decor will also look impressive. You can paint a picture with colored semolina, salt or multi-colored spices. To do this, you need to select a drawing of a suitable size, print it on canvas or thick paper. Next, glue is applied to fragments of the same color, the material is poured and leveled thin layer. After drying, you can shake off the excess and move on to another color. Other “edible” panels made from coffee, wheat, rice grains, curly vermicelli, and corn are also made using the same adhesive method.


Roman curtains, also called Latin or Romanesque, were invented by sailors who sewed them according to the principle of fastening ship sails. These curtains...