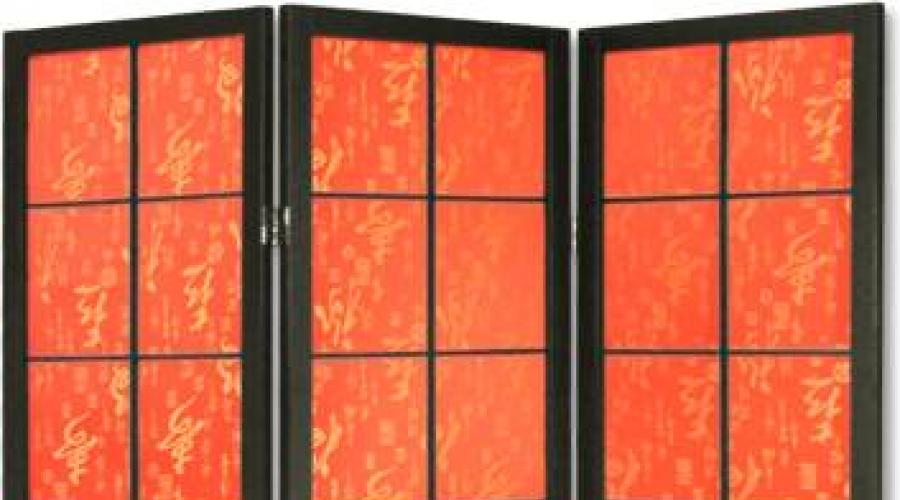
Screen drawing. How to make a screen partition for a room with your own hands. Classic-shaped screen made of wooden beams and fabric
Read also
- 2. French liaison. A screen can not only divide, but also unite. Installed in a wide partition between the windows, it becomes the center of attention, preventing the space from “falling apart” into pieces. A screen by Jean Cocteau, a couple of sheep and photographs of Pierre and Gilles bring an element of artistry to the rather conservative interior of this bedroom.
- 3. Collected works. Decorating screens with fake paintings is a long-standing tradition. Such an object is capable of not only modeling space, but also filling it with new meaning. For example, with the help of a screen depicting shelves with books, it is easy to turn any room into a reading room. And at the same time, emphasize that the owners of the house are intelligent people and are not indifferent to the written word.
- 4. Open book. To study in detail the skillful painting on the sashes of the Japanese screen, you need to place it at eye level. To do this, you will either have to sit on the floor or hang the screen on the wall. The plot must be “read” from right to left. It is advisable to dim the light - after all, Japanese houses twilight reigns. Then the gold on the screen will shimmer and not scream, and the colors will become soft and refined.
- 5. The third way. This half-empty hotel interior, designed in a neutral color scheme, had every chance to become one of those transit zones, which do not “catch” the eye in any way. The situation was saved by a screen, thanks to which the room acquired a new dimension. Of course, we are not so naive as to mistake the painting for a real landscape. And yet the city streets that go intoperspective, involuntarily lead one to think: where to move next - right, left or straight?
- 6. Give it your all! Such a screen will not be able to fulfill its original purpose - to intrigue and hide. But thanks to it, there will be no cluttered corners in your bedroom that need to be hidden from prying eyes. For greater practicality, you can insert a mirror into one of the doors of such a mini-wardrobe.
- 7. Divide and conquer! Should you make the kitchen isolated or combine it with the living room? The truth lies in the middle, and its name is a screen. For example, the owner of this Parisian loft uses a rare Claustra screen, invented in the 60s by the Cloutier brothers, as a partition.
- 8. Corner kick. This corner is a typical “dead zone” - the approach to it is blocked by armchairs and a table by the fireplace. The screen does not simply “justify” the existence of this nook. Its mirror doors reflect light and visually expand the space. The only problem is that the screen is located close to the head of the bed. Think carefully about whether such a neighborhood suits you: admiring your sleepy face in the morning is not fun for everyone!
- 9. Holy place. The age-old problem of how to use the space under the stairs was solved by designer Kelly Hoppen with the help of a screen. An openwork design made of black lacquer rings became the backdrop for the yellow “eared” chair. However, in this interior the screen solves not only decorative, but also spatial problems - it serves as a “watershed” between the dining and sofa areas.
- 10. Reliable rear. Sitting with your back to a door or window is extremely unpleasant. In this interior, the problem is solved by using a screen, which forms a kind of niche and gives a feeling of security. I can’t even believe that in front of us is not a cozy old mansion, but a modern open space.
- 11. Oh times, oh morals! Since screens first arrived in Europe, interest in them has waxed and waned. Another surge occurred during Art Deco, when screens made using varnish, metal and glass came into fashion. The photo shows a typical representative of that era, although it is not an antique, but a skillful stylization. The author of the object is contemporary American designer Thomas Fisant.
- 12. Everything is to the side. Sometimes screens take on the role of architectural elements (such as columns, niches, etc.), changing the proportions of the room and setting it in a solemn mood. Installed on either side of the bed, they form an alcove.
- 13. Up to 16 and older. As they say, comments are unnecessary. Before us is an object that is useful in all respects. It remains to add that such a screen will be useful not only in the nursery, but also in the office or, say, in the kitchen. If you don’t like chalk (it crumbles), insert a magnetic board with a special coating on which you can write with felt-tip pens into one of the doors.
- 14. The head of everything! The screen often acts as a headboard. Here this idea is taken to its logical conclusion: the doors are covered with the same fabric as the bed valance and the upholstery of the chair. But you can do it differently - play on the contrast, making the screen the central element of the interior.
Learning theory
Answering the question of how to make a screen with your own hands, we can say that in fact general view it looks something like this: you need to make frames, then stretch the material over them and connect the frames with hinges so that the screen can fold. In this case, usually the width of each screen sheet is about 50 centimeters, and their height is approximately 170-180 cm: if these dimensions are observed, this element of the interior will be easy and pleasant to use.
It is also worth noting that a classic screen, as a rule, should have three or four separate parts, which are usually made from canvases of the same size and pattern. To create a screen with your own hands, you will most likely need the following tools: a hacksaw, a drill, wire cutters and pliers. If you decide to create a model using metal structures, then you will need a hacksaw and a welding machine.
Let's try it in practice
In order for our conversation with you about how to make a screen with your own hands to take on a concrete character, you can write down the “recipe” for its “cooking”. So, you will need 6 pieces of wood, each about 2 meters long, and 6 shorter pieces that will make up the width of the screen. You will also need to purchase fabric of any color you like. In this case, you should start from the place where this screen will be located. For example, for a children's room you can choose a more cheerful and bright fabric that will create a playful mood in the baby.
In addition, to create a screen with your own hands, you will need to prepare 4 door hinges: if your accessory has three doors. Also don't forget about paint brush and varnish, which you will use to put the frames for the screen in order. It is worth noting that when performing this work you also cannot do without nails and a hammer or self-tapping screws. However, some experts use a furniture stapler and various elements decorative finishing.
The technique for doing the work will be as follows:
- You need to create a frame from bars. To do this, we make 3 wooden frames and then fasten them together with screws.
- By using door hinges We fasten the frames together. To ensure that the base for the screen is completely ready, coat it with varnish and let it dry thoroughly.
- Cutting the fabric required sizes, leaving 2 cm from each edge for the hem. Then we carefully stretch the resulting blanks onto the frames and nail them with a furniture stapler. It is very important that the fabric is stretched tightly and evenly. If desired, you can decorate the resulting screen with any decorative elements.
Otherwise, the hand-made screen is ready and you can put it in its place and enjoy its beauty and privacy.
________________________
Screen - partition is quite interesting and universal element decor, thanks to which you can easily zone the room. Therefore, if you would like to create in different rooms separate zones, then feel free to start making a screen - partition.
This kind of home screen - partition is quite simple to make, just prepare everything necessary materials and tools.
. Wooden blocks 2 m long, 6 pcs;
. Wooden blocks across the width of the room (measure the width of the room, dividing by 3) - 6 pcs;
. Cut thick fabric(choose colors to suit your taste or to match the interior);
. Brush;
. Door hinges - 4 pcs;
. Varnish;
. Furniture stapler;
. Glue;
. Self-tapping screws;
. Nails;
. Hammer;
. Decorative braid
Instructions for making screens - partitions
1. First you need to make a frame for the screen. We use prepared wooden blocks. From the prepared bars you need to prepare 3 wooden frames, connecting the bars together with screws.
2. We connect the frames with door hinges.
3. Using a brush, open the frames with varnish to add shine.
4. Cut 3 cuts from the prepared fabric for each frame in accordance with the dimensions of the frames.
5. Glue each piece of fabric with glue to one side of the frames, and then secure it with staples using a furniture stapler. Next, stretch the fabric and secure with staples on the other side of the frame. Make sure that the fabric is stuffed evenly and symmetrically.
6. The front side of the screen - partition is ready, now it is necessary to decorate it aesthetically inner side screens. To do this, use prepared braid, which you carefully stick to the cut edges of the fabric.
After this, all the main work is completed and your screen - partition is ready for use. If you wish, you can easily further decorate the screen by decorating it with appliqués, original inserts and photographs.
We are confident that a handmade screen or partition will become a wonderful decoration for your home. Creative success and good mood!
___________________________
The topic of this article is DIY screen.
As I already said in my article, you can zone a room different ways. Including using a screen.
This is very convenient option, allowing you to change space at the speed of light! Especially if you have several screens of different designs (or the base of the screen is the same, but the panels (filling) are different). After all, moods can also be different - and the world around should change accordingly!
Panels can be made from fabric, wood, plastic, stained glass.
The design of a screen should be based not only on the style and color of the interior, but also on the functions that our screen should perform. If you need to tightly fence off some part of the room, then you need to choose less transparent materials. It could be wood, opaque plastic, opaque fabric (or light, but very tightly gathered), possibly stained glass.
If you only want to visually separate part of the space, then you can limit yourself to transparent materials, or even make a screen with decorative holes.
And if necessary, you can safely put the screen in a corner and free up space, for example, for a party!
You can easily make a screen with your own hands. In addition, you will know for sure that no one else has a screen like yours! Thanks to this manual you can make it quite simple!
If you have children, this is a great opportunity to connect your child to creative process creations! Everyone will have fun and interesting! The main thing is to use a little imagination!
You can safely use almost everything you find at hand: bright scraps of colored fabric, old broken hairpins, pieces of leather (can be cut from an old bag), beads, beads, paints, various ropes, child’s drawings, photographs, etc.
And if you feel the strength to do it, go ahead!
So, to make a wooden frame we will need the following tools and materials:
- Directly ourselves wooden planks(we recommend taking pine ones 6 cm wide and about 2 cm thick). There should be 24 pieces: 1.70 m long - 12 pieces, 0.6 m long - 12 pieces. (or take 6 pieces of 1.2 m each).
- Designed for a screen with three doors.
- A simple pencil with a square.
- Wood glue with a paint brush.
- Varnish for wood.
- Sandpaper.
- The chisel is thin.
- Carpenter's vice - 4 pcs. (you can do less, but then the process itself will take longer).
- Hammer.
- Hacksaw.
- Wood screws (D = 3 mm, length can be 1.5 cm). Approximately 100 pcs.
- Screwdriver (if available).
- Steel corners - 12 pcs.
- Loops - 6 pcs. or 9 pcs. (depending on the type of loops)
First.
So, we take our wooden planks, retreat about 6 cm of edge on each side on both sides, mark a line parallel to the edge of the plank.
Note: These lines should be on one side of the plank.
Second.
Along these lines we make a notch with a hacksaw to the middle of the thickness of the plank.
Third.
We take a hammer and a thin chisel and make cuts (remove the wood by about half the thickness of the plank) to the line and the cut we marked.
Fourth.
We take two long strips and two short ones, apply glue to inner part cut and assemble the frame. We clamp the gluing areas with a carpenter's vice and wait until the glue dries.
We do the same with the rest of the planks.
Fifth.
It is necessary to sand the resulting frames sandpaper. Then coat them with wood varnish.
Sixth.
Now we take the corners and secure our frames in the corners with them.
In old merchant and aristocratic houses, with their enfilades of passage rooms, it was not always possible to find a secluded place for changing clothes, so a decorative screen was mandatory element furnishings. It was forgotten for a long time and undeservedly, but it still returned to modern interiors. We offer you a simple step-by-step master class on how to make a folding accessory with your own hands. Why buy when you can make a screen required size from scrap materials.
How to use screens at home to your advantage
A sliding partition can still be used to change clothes, especially if there are guests in the house and the bathroom is occupied. But overall it's a much more powerful thing because it can:
- zone the premises;
- create an intimate area for a breastfeeding mother;
- provide privacy for a family member preparing for an exam or simply wanting to relax;
- serve as a backdrop for a home photo shoot or the basis of a puppet theater;
- organize a fitting room for a fashion designer who sews houses to order.
The main advantage of the screen is its mobility. Place it here today, and there tomorrow, divide the room in a dozen ways. And when you no longer need it, put it in the pantry or on the balcony; the screen will take up almost no space.

Tools and materials for making screens
For self-made screens will require two main materials: frames and fabric stretched over them (silk, flock, taffeta). Frames can be made from wooden beams (not thick, preferably 3x3 cm, otherwise it will look rough), slats with a section of 6x2, and for those skilled in working with metal - from profile pipe rectangular section.
Decide how many sections you want to see in your screen and what size they will be. Keep in mind that narrow and low sections add mobility to the product. The frame should be drawn to scale and calculated required amount timber (pipe).
When choosing fabric, you should take into account the functionality of the screen, that is, the material should be:
- dense and opaque;
- pleasant to the eye and touch;
- in harmony with the wallpaper and furnishings of the room.
One of the recommended options is curtain fabric, decorative on both sides. When calculating its quantity, be sure to take into account hem allowances of 3-4 cm. These allowances should be folded twice so that there is no frayed edge left, and ironed.
Advice. If you know the batik technique - painting with paints on fabric - or want to try it, the screen will be an excellent opportunity to learn this exquisite art.
We will make the screen on wooden frame, so we will need the following tools:
- hacksaw;
- screwdriver and screws;
- furniture corners;

- piano or door hinges;
- stapler for furniture;
- stain, varnish and brushes for them;
- square, scissors, pencil.
And so that the finished screen does not scratch expensive parquet, you should purchase thrust bearings for its legs.
The simplest screen on legs - step-by-step instructions
If you are building a folding partition at home, then to protect the floor you need to cover it with something: hardboard, greenhouse film, or at least a thick layer of newspaper. The sequence of work is expected to be as follows:

Advice. If you take a thinner fabric, attach it in two layers - from the face and from the back of the screen - and between them lay out a heart or flower from LED strip, then when connected to the network we will receive a surprisingly festive accessory.
Decorative screen - other ideas
The screen can be assembled from ready-made stretchers. Two or three subframes connected with self-tapping screws make one sash.
The fabric can be stretched by wrapping it around the frame, which eliminates the steps with stain and varnish, since the wood simply will not be visible. But in this case, the fabric allowances need to be increased to 10 or even 15 cm, depending on the width of the beam. And before you attach furniture hinges, you need to carefully make holes in the fabric with an awl, otherwise the self-tapping screw may pull the thread, and the material will be hopelessly damaged.

A screen intended for a nursery can be decorated with fairy tale characters by sewing or gluing them onto the fabric using the applique technique.
Instead of fabric you can use thin plywood or cardboard, covering them with the remains of expensive wallpaper - in this case everything will be perfectly smooth.
IN ancient China the screen was called a “moving wall.” Putting it on and putting it away is a matter of two minutes. Build yourself such an assistant, and the issue of zoning even a one-room apartment will no longer bother you.
How to make a screen with your own hands: video
Screen for home: photo


So extra and interesting element decor, how a DIY screen made from scrap materials can fit perfectly into the interior. Thanks to screens of various designs, you can distribute the space at your discretion and hide your personal belongings from strangers.
As we have already mentioned, it is not at all necessary to immediately go to the store to purchase finished product– making such an interior element is not considered difficult, and thanks to the variety of design ideas, you can independently create an exclusive screen that will fit perfectly into the room. Below we will look various options manufacturing partitions.
Advantages and disadvantages of using screens
If there is limited space in an apartment or a specific room, there is a need for its proper distribution. Do additional wall indoors is not always possible, because you will have to make changes to the layout of the apartment, which will entail additional expenses. That is why many people choose convenient screens that are quite easy to install and, if necessary, dismantle.
The main advantages of using screens:
- Mobility. Some types of structures can be transported from place to place without any problems.
- Low cost for self-production.
- The ability to increase the functionality of the product with the help of additional shelves or hooks.
- Decorating the room, because the screen can be decorated in any way you wish.
- The ability to design a structure according to the exact dimensions of your room.

The disadvantages of screens include the following:
- poor sound insulation;
- unreliability of the fence.
Such designs have significantly fewer disadvantages. Moreover, they are not relevant for everyone.
What types of screens are there?
There are several varieties of products such as screens, so before choosing one or another model, you should decide on its purpose.
Table 1. Product types
| View, illustration | A comment |
|---|---|
| They are a reliable frame, the parts of which are fixed to each other using furniture hinges. Most often there are three-leaf or four-leaf screens, but this depends on the dimensions of the room. The average height of the finished product is about 180 centimeters. |
| The design is a single-piece sash, which is why it is considered less mobile compared to other types. Such screens most often delimit office rooms, kitchen and living room. In addition, such partitions are relevant in various cafes for the purpose of separating tables. |
| The product consists of many vertical slats, which are connected to each other by elastic inserts. The peculiarity of partitions of this type is that they can be given any shape. Therefore, they are often used in unusual designer interiors. The main advantage of screens of this type is ease of storage, because they are quite easily rolled up. |
| This is a type of folding screen. The peculiarity of the design is that it consists of two parts that are the same size and fold like a book. They are often used to allocate space for a locker room. |
| They are a product of any configuration through which you can see everything that is on the other side. Most often, fabric is stretched over the main part of the structure, different kinds grids Screens are installed only as decorative element, they are often used by photo studios when decorating a room. |
| Such screens have different appearance and the number of valves, their main feature is the lack of transparency. Therefore, it is precisely such designs that are used in cases where it is necessary to hide some part of the room from prying eyes. |


Prices for screens
Materials for making screens: how to choose?
At all times, screens were made of wood various breeds, and then the textile part was stretched onto the wooden frame. Nowadays all kinds of, and sometimes even unusual, materials are used to create structures.
Table 2. Types of materials used for the manufacture of partitions
| Material, illustration | A comment |
|---|---|
| In the manufacture of products, both sanded wood and connections of various slats and boards are used. Plywood is often used for such purposes, because such material has a budget cost and is easy to process. In addition, to make a screen you can use any old, unnecessary items (it could even be wooden doors or window frames). You can install such a partition both indoors and in the courtyard of your home. |
| This material is used to make a screen frame, after which the product can be covered with wood, fabric and even paper. You can order such a frame from a craftsman who has specialized equipment. It is worth noting that you should not make a solid metal screen, because it will not have a very attractive appearance and large mass. It is recommended to use thin metal rods for such purposes. The metal screen fits perfectly into the design winter garden with various plants. |
| PVC pipes are often used to make various frame structures, including partitions. The main ones positive quality compared to other products is light weight, so such a screen can be moved around the room without any problems. The designs are easy to maintain; you just need to wipe them with a damp cloth to remove dust. The products are often used outdoors to hide from the active rays of the sun in hot weather. |
| This is a popular material used to make various screens. Ready-made ones are available for sale decorative panels, which are quite simply fixed on the frame. The advantage of the structures is that they do not deform when exposed to moisture, high temperature, which is why they are often installed in showers. |
| The cheapest and most accessible material for the majority of the population, which is used in the manufacture of screens. The peculiarity is that it can be used to make any decorative design- you can quickly cut out parts of any shape from cardboard using stationery knife, and then secure them together. The only disadvantage of cardboard screens is their poor resistance to negative changes environment, so they are only suitable for apartments, and even there they require regular updating. |
| Various decorative screens are quite often made from such material, because similar designs They look aesthetically pleasing and unusual, and are also lightweight and mobile, making them quite easy to carry. It is worth noting that correct processing material will allow you to install the screen even on the street. |
| Most unusual way manufacturing partitions from the options presented above. The plates can be secured using various decorative threads, resulting in a kind of curtain. Such screens are used only for decorative purposes; they can be placed in an apartment, office, store or cafe. |


Making screens with your own hands from scrap materials
There are a huge number of schemes according to which you can assemble a partition yourself. In addition, the materials used during the work are considered accessible. Below we will present several simple but original options.
A simple version of a screen made of wood and fabric
This is a classic way of making partitions, and the material is stretched over the finished wooden structure once its assembly is complete. The product can have various configurations, including a folding shape, in the form of an accordion. It is important to choose a fabric of the desired texture and a certain shade, depending on where you plan to install the partition.

During the manufacturing process you will need the following:
- bars (12 pieces 2 centimeters wide and 170 centimeters long, 12 pieces 2 centimeters wide and 60 centimeters long);
- textile;
- stain and varnish;
- water-based coating agent;
- glue;
- elements for decoration;
- screwdriver;
- drill;
- door hinges;
- stapler;
- screws;
- sandpaper;
- saw.
Prices for the range of drills

Step-by-step instruction
Step one: it is necessary to mark the bars in order to make the frame. Therefore, you should measure 60 millimeters from the beginning of the plank using a measuring tape and a simple pencil, and then make a line. The same steps are repeated on other bars.

Step two: You will need to make cuts according to representative markings - to do this, you need to use a hand saw to leave indentations up to half of each block.

Step three: along the edges of each plank, it is necessary to remove the wood using a hammer and chisel, down to the base of the cut.

Step four: A layer of wood glue should be applied to the inside of the frame, and then the bars should be joined into a solid frame.

Prices for clamps
Clamps
Step five: When the glue has completely set, you will need to carefully sand the surface with sandpaper. After which it will be possible to apply the first layer of varnish to the frame structure.

Step six: Furniture hinges or corners must be secured to the structure as connections. They are fixed using a screwdriver and screws.

Step seven: When the frame of the screen is completely ready, it is necessary to proceed to the stage of creating its fabric part. You can choose any textile material; in this case, it is important to consider the location of the product. The fabric should be cut out based on the dimensions of the frame itself. You will definitely need to leave a few centimeters for hems. If a single piece of fabric is not available, you can use a combination of several different types, the main thing is that they are combined in structure, due to which finished design will look aesthetically pleasing.

Step eight: In order to fix the fabric on the slats, you will need a special stapler. It is necessary to fasten the material from the top, moving to the bottom of the structure. It should be taken into account that the textile must have a good degree of tension, otherwise it will quickly sag in the future.

Step nine: After securing the fabric to all frames, it is necessary to secure parts of the screen using furniture hinges. It is advisable to use two loops for each connection, this will make the screen much more convenient to fold and store.

Mobile screen made of cardboard tubes
Behind last years Particularly popular is the manufacture of various structures for the home from environmentally friendly and available materials— these include cardboard pipes. Film, linoleum, and textiles are wrapped around them for ease of storage, so you can purchase them for a nominal price in a hardware or textile store, because such pipes are waste and are sent for disposal. Sometimes they are given away free of charge subject to pickup, which allows you to significantly save your budget.

Despite the ease of manufacture, such a product will have good stability. During the work you will need:
- cardboard pipes of the desired length - at least 18 pieces;
- tight cord for connection;
- measuring tape;
- scissors;
- a simple pencil;
- drill;
- paint (if you plan to paint the screen).
Step-by-step instruction
Step one: It is necessary to align all pipes to the required height. So, if linoleum rolls were taken as the material, then they are usually cut into two parts, because the average height is about two to three meters. Some craftsmen prefer to cut pipes different heights, due to which the design acquires unusual look. Next, they need to be decomposed into flat surface, aligning to the bottom.

Step two: At the bottom of the pipe you need to make a mark at a distance of 20 centimeters (lowest point). Then you will need to leave the designation at a distance of 100 centimeters upward (top point). In the middle of the segment you should again put a mark (center point). All other pipes are marked in this way.

Step three: in the places where the marks were placed, you will need to make holes using a drill.

Step four: starting from the lowest points, thread a decorative cord through the holes.

Step five: then you need to tighten the pipes together so that the structure is tight. The finished screen can be installed in any room. It has an original appearance that resembles bamboo.

Lightweight cardboard screen: option for beginners
For quick creation A simple cardboard screen will require the following:
- cardboard sheets (you can take a single-color material or try to create a bright product with a combination of several shades);
- a simple pencil;
- scissors.
Table 3. Instructions for making a simple cardboard screen
| Steps, illustration | Description |
|---|---|
| On sheets of durable cardboard, you need to cut out fragments of the future screen according to the picture shown below the table. Exact dimensions depend on the size of the room and individual preferences. It is important to remember that there must be details even number. All cuts are made using scissors, taking into account the openings for the grooves. |
| Next, you need to connect the fragments using grooves, inserting them into each other. |
| Finished parts should be placed in lines, secured to each other in grooves. In this way, a multi-row structure can be formed. The result will be a decorative, but rather fragile partition. |


Prices for popular models of screwdrivers
Screwdrivers
Video - How to make a screen from cardboard
Screen for creating a photo zone with fabric drapery
The option for creating a screen was developed by the famous designer E. Teplitskaya, and such a design can be installed in your apartment or used to decorate a photo studio.
To create a partition you will need the following:
- metal parts for the base;
- fabric that can be draped (in in this case this is organza);
- threads and needles for sewing;
- decorative rope;
- textile markers;

In addition, you will need to prepare various decorative details for the future screen. These can be satin ribbons, pieces of fabric, laces, sparkles - anything that you think will fit organically into the design.
Step-by-step instruction
Step one: It is necessary to cut the fabric exactly according to the dimensions of the base of the screen. The width should be identical, and the length should be 20 centimeters greater than the height itself (for hem). Fabric for drapery needs to be pre-soaked in starch water - this will give it a denser structure.

Step two: the fabric should be fixed to a metal frame using special sewing needles. In this case, you should not overtighten the material; it should be arranged in folds.

Step three: using a textile marker must be drawn on the drapery various drawings. Beginners are recommended to make primitive ornaments in the form of small dots and sticks. At this stage it is worth including your imagination in your work.

Step four: The marker paint will need to be dried with hot air.

Step five: metal carcass It is also recommended to decorate the structures. You can use the same marker for such purposes, acrylic paints, various colored ribbons.

Decorative screen for a photo studio on a wooden frame with mesh
Such screens are used in photo studios to create unusual photographs. At the same time, you can make them yourself using the following materials and tools:
- fine mesh;
- wooden planks;
- self-tapping screws of different lengths;
- furniture hinges;
- scissors;
- waterproof paint;
- PVA glue;
- staples;
- drill;
- brush;
- wood paint.

Step-by-step instruction
Step one: it is necessary to determine the exact dimensions of the screen, and then mark the slats and assemble a solid frame from them (as in the previous case).

Step two: If necessary, you can paint the frame with paint or stain.


Use a furniture stapler
Stapler prices
Construction stapler
Step four: The excess mesh must be cut off with scissors.


Step six: The final stage will be decorating the mesh with paint. If desired, you can apply any patterns to the surface and then decorate it with sparkles.


Let's sum it up
Even such a simple interior element as a screen will allow you to use your Creative skills. Don't be afraid to experiment - designers prefer to combine different materials and decorations when making partitions, so you can get an unusual, but at the same time functional product.
Lately, you can often see homemade interior items made from pallets when visiting someone. These are structures used to transport goods. , it turns out, it’s not so difficult to make, and in terms of its quality it can even be better than that, which can be purchased in the store.
Video - DIY room partition
Original and functional decor does not always require buying expensive items right away. Today there are many options and ideas that can be implemented from scrap materials. From this article you will learn how to make a screen for a room, which will allow you to save your family budget.
The first screens appeared several decades ago in Japan. Due to the compactness and versatility of the item, it is also used in modern interior bedrooms, children's rooms, dressing rooms and studio apartments. The screen in the room performs several functions simultaneously:
- zoning;
- department small space of the total area;
- decoration.
The design of the screen can be varied and differ in the number of doors. The following types are distinguished:
- single-leaf;
- bivalve;
- tricuspid;
- four-leaf.
The special advantages of making a screen are not only minimum costs for its creation, but also the possibility of decorating various materials. As materials, you can use textile remnants from the design of curtains or curtains. Each sash can be made of different materials. If you need to quickly change the interior, then just paint the frame a different color.
You can use appliqués, embroidery, drawings and photographs as decoration.

You have the opportunity to bring to life the most different ideas, below are just a few of them:
- Sliding screen partition made of MDF. This option is the simplest and does not require much time and money. All you need to do is fasten the ready-made MDF boards. Since they already have decorative door hinges, there is no need to purchase them in addition, which saves money. The base is ready and you can start decorating it.
- Screen with frame. This option is more labor-intensive. The basis is a special frame made of wood or metal. Since the process with metal will be more labor-intensive, it will be necessary to use welding and special tools, then maybe you should give preference to wood. It is enough to select wooden beams, which are glued together with wood glue and reinforced with a corner. Before decorating the frame, its surface must be primed and painted. Thick cardboard, wrapping paper, floral paper, and textiles can be used as decoration materials.
- Screen in oriental style. To give oriental interior As a highlight, you can consider making it from bamboo. Thick stems are selected for the base, and thin stems for the wings. They are connected to each other using a jute cord. Light fabrics will give the interior some airiness and ease.
To increase functionality, just attach wheels to it.

Exact list the necessary tool will directly depend on the type of construction and material chosen for the decor and base. To make a simple wooden screen, you need to purchase the following materials:
- wooden beam;
- textile;
- threads;
- dye;
- putty;
- door hinges (2 pieces for each section).
The list of tools will include:
- paint brushes;
- fine sandpaper or sanding machine;
- screwdriver;
- hammer;
- roulette;
- pencil;
- saw;
- scissors;
- fasteners (screws, nails, decorative caps).
The type of material, paint color, screen size and number of doors are selected individually depending on the planned interior.

When creating a three-leaf screen from wooden blocks, you must adhere to the following sequence of work:
- Preparation of material for the base. It is necessary to cut 6 bars, 180 cm high and 6 pieces of 50 cm each (width is 15 cm). All workpieces are carefully processed with sandpaper or grinder until a smooth surface is obtained.
- The prepared elements for the base are laid out on the floor. Short bars should be located between long (main) ones. Using a screwdriver and screws, you can begin fastening on both sides. This scheme is used for each of the three sections.
- If there are uneven surfaces in the form of cracks on the surface of the wooden blocks, it is necessary to level it using putty. After drying, it must be thoroughly rubbed with sandpaper.
- In order for the paint to adhere well to the surface, it is necessary to apply a layer of primer to it. After this it is applied paint material in one or two layers.
- While the paint dries, you can begin cutting and preparing the fabric. It must be secured on both sides of each gate. For this, 6 patterns measuring 152x52 cm are prepared.
- The fabric can be secured to the base of the sash using any in a convenient way(elastic band, loops, construction stapler And so on).
- On last stage All doors are connected to each other using door hinges.
When processing bars for the base, you need to pay attention to the corners. To thoroughly paint the wood, it is recommended to apply the paint in 2 layers. For additional decor The screen and its greater functionality can be sewn onto the fabric with pockets.
SCREEN WITH SOFT LINING
1. Cut out the soft lining
Very pleasant impression produces a screen lined on both sides with a soft lining. The linings are cut out (again using a template) strictly according to the dimensions of the board. Cut out two pieces of fabric for upholstery with an allowance.
2. Attaching the soft pad
Place the board with its back side up on the table or floor, and on it - a soft lining cut to size. Check if it matches the shape of the board. If everything is in order, attach the lining around the perimeter with fabric glue, starting from the bottom edge of the board. In the same way, glue the lining to the front side of the board.
SOFT WASTE LINING
A soft lining can be made from scraps nonwoven fabric, for example, polyester left over from other work.
To do this, you need to attach them to each other, sew them with a herringbone stitch and cut them in the same way as a solid piece.
3. Final operations Covering the boards with fabric over the lining, gluing their edges with decorative tape, attaching hinges and connecting the boards to each other is carried out in the same way as stated above.
REMOVABLE COVER (COVER)
So that the covering of the screen can be washed or easily replaced, it is made removable and attached with pushpins or staples only to the lower edges of the screen boards.
1. Measurement of screen boards
They dismantle the screen. Measure the height and width of the sections. If the top of the boards is figured, a template of the appropriate shape is made. The thickness and total length of the top and side edges of the boards are also measured, starting from one of the lower corners through the upper edge and to the opposite lower corner.
2. Cut the fabric
Cut out two pieces of fabric of the same size for each board (for the front and back sides of the boards), adding a 1.5 cm seam allowance on the sides and at the top edge.
On the side of the bottom edge of the board, give an allowance of 5 cm, since the fabric will then need to be tucked and tacked. For each board, a narrow edge strip is cut out of fabric, the width of which is equal to the thickness of the boards plus an allowance of 1.5 cm for the seams on each side, and the length is the measured incomplete (without the bottom edge) perimeter of the boards plus 7 cm for the folds of the ends.
3. Sewing in the side edging
The side edging strip is pinned right side to the side and top edges of the back of the cover with a 1.5 cm seam allowance and basted. Turn it slightly right side out to check the position of the pattern. After making sure that the pattern is positioned correctly, fasten the side edging. To prevent the fabric from puffing up, cuts are made in the seam allowance at all corners and curves every 2.5 cm. In the same way, sew the side strip to the front of the cover.
4. Attaching the cover to the board
Turn the sewn cover right side out and put it on the board, pulling it down tightly so that there are no folds. Fold the side corners of the cover from the bottom edge of the board (as when packing a parcel), fold the edges of the front and back parts of the cover onto the bottom edge of the board, slightly tucking the upper visible edge. Once again making sure that the cover is tight, secure the folds to the bottom edge of the board with push pins or staples. A similar operation is performed with other sections (boards) of the screen. Decorate the visible edges of the boards with decorative tape. The sections are connected to each other on hinges.
 Mixed Color decorative rock for nails Rhinestones with “Northern…