What is the best way to insulate the ceiling in a private house? Do-it-yourself ceiling insulation in a private house Insulation of a finished ceiling in your home
Proper insulation of the ceiling in a private home will help prevent large heat loss through the roof. Just try to wisely decide on the choice of insulation and estimate the amount of work.
What is the best way to insulate?
There are several options for insulating the ceiling space. When choosing, pay attention to the characteristics of the insulation. He should not accumulate moisture, allow various fungi and molds to reproduce. Fire safety is also important. What material to choose for ceiling insulation in a private house?
Various methods of ceiling insulation:
- sawdust. This method has been known for a long time. This is the cheapest option for insulating a wooden ceiling in a private house. If there is a wood processing plant or sawmill nearby, you can take sawdust for free, or buy it for a symbolic price. Easy to use - pour onto wooden floors;
- expanded clay The material is heavy, so the ceilings cannot withstand it. But, if you don’t know how to insulate a concrete ceiling in a private house, then this is a good option;
- mineral wool. Ecological, non-flammable, breathable material. But, cotton wool must be protected from dampness, otherwise it will lose its properties;
- Styrofoam. Lightweight, inexpensive cellular insulation. Disadvantage - it can catch fire; rodents like the material.
The best way to insulate the ceiling is decided by each owner of a country cottage, based on the budget, preferences and type of residential building.
Cases of internal isolation
Heat conservation work is carried out exclusively from inside the building under the following circumstances:
- the attic area is used as a storage room;
- Communications and cables are laid in the attic.
Interior work in a private home requires greater responsibility and quality. Materials must be absolutely fireproof.
Most often, the choice of insulation is influenced by climatic conditions and the region of residence of the owner of the building.
We insulate from the outside
External insulation is an opportunity to capture the entire space at once. How to insulate the ceiling in a private house from the outside? Let's start with the attic. This will save you from wasting money. There is no need to disassemble ceilings and suspended ceiling space.
The sequence of insulating the ceiling outside a private house is as follows:
- empty the attic of debris. The surface must be perfect so that you don’t have to redo everything later. Check that there are no holes or cracks;
- measure the perimeter of the attic area, purchase polystyrene foam. Choose sheets of medium thickness;
- line the perimeter of the room with polystyrene foam. Fill any excess holes with foam.

If you don’t know how to insulate the ceiling in a private house from the outside, take mineral wool. The steps will be slightly different:
- assemble the frame, install the logs;
- cut glassine for laying a layer of thermal insulation. Secure the edges to the joists;
- Place cotton wool on top, but do not press;
- cover the entire structure with any floor covering.
The best way to insulate the ceiling in a private house from the outside is up to you to decide. If desired, you can install two layers of insulation for the ceiling.
Sequence of work for different insulation options
Work on insulation of a private house can be carried out from the outside and inside. The effect will be almost the same, but the materials used are different.
To know how to insulate the ceiling in a private house, you need to familiarize yourself with the characteristics of insulation materials. External works are carried out materials that do not allow steam to pass through, internal - absorbent.
The preference for a certain material depends on the type of attic floors. To avoid problems with attaching insulation to the structure of a private house, you need to know how you can insulate the ceiling in a private house.

Internal actions are performed in the following sequence:
- the frame is made;
- the design space is filled with environmental wool;
- To prevent the structure from falling apart, secure it with tile adhesive.
Heat is retained thanks to the many bubbles filled with air located inside the insulation.
Penoplex
Insulating the ceiling in a private house with penoplex is a good idea. The universal material will protect the house along the entire perimeter, including the ceiling.
When insulating the ceiling with penoplex, the technology is simple, even one person can do it. Advantages of the material:
- does not release heat;
- at the same time it does not allow the building to heat up in the heat;
- inexpensive.

Ceiling installation:
- clean the surface of old finishes;
- if there is a fungus, then remove it and treat it with an antiseptic;
- Apply plaster to a dry ceiling;
- create a base for support;
- penoplex can be cut well with a knife when cutting;
- Apply glue to the tiles in a strip along the perimeter and center;
- start fastening from the base. Do not press too hard, remove excess glue;
- fix with dowels, fill the joints with foam.
Ceiling insulation with penoplex is used in the attic area, on the inside of the roof.
Application of sawdust
The video on the website will show you step by step how to properly insulate a ceiling in a private house. There is a simple and inexpensive method of insulation - a solution of sawdust, water and cement.
What you will need:
- dry sawdust, at least 10 buckets;
- water (1.5 l);
- cement, ratio to sawdust 10:1.
The following actions are performed:
- pour in the water very slowly, gradually, be sure to stir;
- distribute sawdust and cement evenly in the solution;
- take a lump of the mixture and try to squeeze out the water. If all else fails, use simple ceiling insulation for your home.
If the sawdust is very fresh, then take more cement for better fixation.
If the floors are concrete
In cases where the ceilings of the building are made of concrete, insulation is carried out from the outside. This is explained by the fact that a protective coating for the roof is applied on top of the insulating material.
How to do it:
- completely clean and level the surface;
- create systems for draining water (monolithic screed);
- lay the insulation, leaving outlets at the edges;
- insulation can be used in a double layer;
- install the roof covering.
Important: if the roof is already protected, there is no need to dismantle it. In this situation, lay the insulation on the inside. There are step-by-step instructions in the photo on how to properly insulate the ceiling in a private house.
Tools
To correctly carry out ceiling insulation in a private house according to the scheme, you need to have certain tools:
- insulating material (optional);
- foam for installation;
- nails;
- wooden slats;
- hacksaw for wooden surfaces;
- hammer;
- construction knife;
- screwdriver

You have the necessary set of tools and insulation material. All that remains is to insulate the ceiling of a private house, and the advice of professionals will help.
Requirements
Any insulation must comply with the following standards:
- must be fire-resistant, not even smoke;
- if the floors are made of iron, then an additional layer of insulation is not needed;
Particular attention is paid to the joints on the outside of insulated walls. Cold air currents may enter
- through the gaps of the room, so cover the outside with another layer;
- Before work, watch videos, photos, read tips.
Read the articles on the site, follow the instructions, and insulating the ceiling in a private house with your own hands will not cause any difficulties.
To keep your home warm and cozy every season, you need to study all the nuances and imagine how to properly insulate the ceiling in a private home.
If activities occur from the outside of the building, make sure that no voids are created. Such formations are possible where insulating insulation is joined to floor beams or between slabs.
When laying mineral wool from the inside, on the contrary, leave voids. They will be needed to install spotlights. This way the lamps will not heat up.
If the material is laid in several layers, overlap the previous row at the joints with a whole slab.
The service life of the insulation depends on the correct installation of the waterproofing layer. Therefore, pay special attention to it.
Important: all work to preserve the heat of a country house is carried out only in the summer.
When using mineral insulation, never press it. Otherwise, heat will still be lost during operation. With such material, leave space (gaps) for the normal operation of spotlights. If this is not done, the insulation will heat up and the light bulbs will burn out. Or you can simply hang a chandelier or provide side lighting.
One of the problems in a private home is heat leakage through the ceiling. If in an apartment building there is a warm apartment above, then in our case there is only a cold attic overhead, or even just a street. How to insulate the ceiling from the inside in a private house if, for some reason, it is not possible to do this from the attic?
Selection of materials
Let's start with the insulation structure. It will be multi-layered; we have to do it sequentially:
- External steam and waterproofing insulation;
- Lathing for filling with heat-insulating material;
- Actually thermal insulation;
- Internal vapor barrier;
- Finally, the ceiling must be hemmed with any finishing material.
Vapor barrier
Glassine is most often used as a vapor barrier - an inexpensive material with quite acceptable consumer properties. However, if you need additional insurance against leaks, the best choice would be good old plastic film. It is absolutely impermeable to water and has a service life of at least fifty years.
Vapor barrier sheets are laid with overlap. If the ceiling is sloped (for example, in the attic), the film is laid in rows from bottom to top so that condensation cannot flow under the lower sheets. It is better to additionally seal the inner layer of vapor barrier with tape. This will ensure absolute tightness.
Why are all these measures needed? The worst enemy of mineral and ecowool insulation is condensation. Wet mineral wool greatly reduces its thermal insulation qualities. And the humidity indoors in winter is always much higher than outside (see).

Please note: if we are insulating a reinforced concrete floor from below, a top layer of vapor barrier is not needed. Between the moisture-impervious concrete and the insulation, the water simply has nowhere to come from.
Thermal insulating material
Two materials are most often used as insulation::
- Styrofoam. Aka polystyrene foam. The slabs in which it is sold are quite large; The recommended thickness for temperate climates is 5 centimeters, for Siberia and the Far East - 10.
The main advantage is that this insulation is non-hygroscopic, it does not dampen. If so, even with any fluctuations in humidity, the quality of the ceiling’s thermal insulation will not change (see).

- Mineral wool (glass wool, ecowool, basalt wool and other variations on the same theme). The material is noticeably cheaper than foam plastic with the same degree of thermal insulation provided.
In addition, it is considered more environmentally friendly: mineral fiber does not emit anything into the atmosphere, and heated debates about the possible harm to health continue regarding the properties of expanded polystyrene.
The debate about which material is better can also be endless. On any construction portal you can find convinced adherents of both insulation methods; Therefore, we will not impose a certain position on the reader.
Let’s just say that polystyrene foam changes its properties over time to a lesser extent, not only in a humid environment: mineral wool cakes over time. Even if perfect vapor barrier is provided.
If you choose polystyrene foam boards as thermal insulation, the inner layer of vapor barrier is also useless. It is enough to simply glue the seams between the plates with wide tape (see).

Sometimes the foam is simply placed on glue. From below it is covered with a layer of decorative plaster - and the ceiling is ready.
Lathing
Two types of lathing are used: wooden and galvanized profile.
The wooden one is a little cheaper and a little easier to install. But the galvanized profile does not deform with fluctuations in temperature and humidity, is not affected by fungus and does not serve as food for insects.

A nuance: if we are talking about insulating the ceiling of a wooden house from the inside, you can safely make the sheathing from a bar or slats. In fact, what is the point of making a suspended ceiling stronger and more durable than walls and ceilings? Of course, it is worth treating the material for the sheathing with an antiseptic.
Binder
Everything is in your hands here. The fastest way to hem the ceiling is with PVC wall panels. In addition, they are easy to clean.
However, drywall will provide a smooth surface without seams; you can build both a slatted ceiling and a suspended tiled ceiling... The choice of material is solely a matter of personal preference and the budget allocated for repairs.

Basic Operations
As an example, let's consider insulating the ceiling from the inside in a private house for the case where there are beams overhead with a plank ceiling attached to them. The climate is temperate; We will be insulated with mineral wool 50 mm thick.
- Armed with a stapler, we attach plastic film to the ceiling. It will completely stop the flow of moisture to the boards from the room and extend the life of our ceiling. An overlap of ten centimeters is required.
- We stuff the sheathing. We will hem the ceiling with PVC panels; a thin mounting rail is sufficient for them. But let's not forget about the thickness of the thermal insulation and take a 50x50 block.
We will stuff it across the future panels in increments of 60 centimeters: in this case, the panels will not sag, and the mineral wool will not have to be cut to width. Most rolls are of this size.
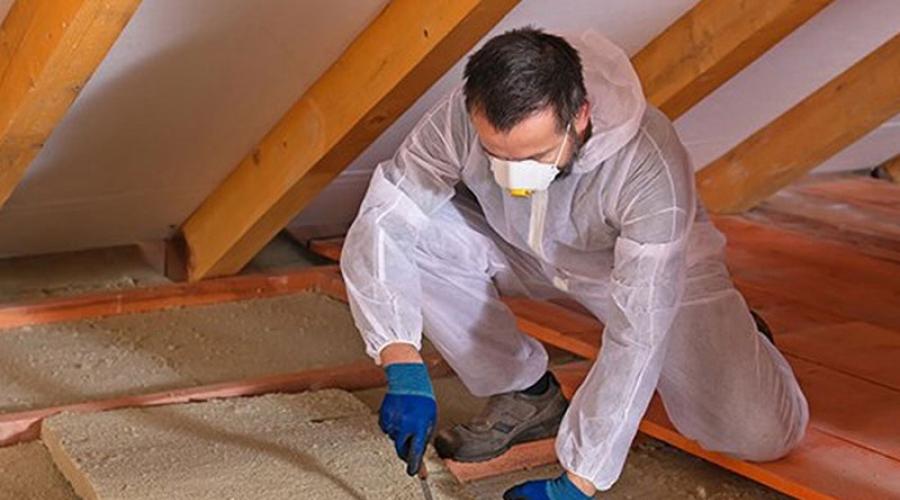
- We fill the gaps between the bars with mineral wool. It is better to wear textile gloves and protect your eyes and nose: cotton wool fibers are volatile.

- Armed with a stapler again, we hem the sheathing from below with a second layer of polyethylene. Additionally, we glue the connections of the sheets with adhesive tape: the greater the tightness we provide, the longer the insulation will retain its properties.
- Finally, the last stage: we hem the wall panels from below. We won’t focus on how this is done: installation methods have already been described hundreds of times.

Hemming panels to wooden sheathing is a fairly simple task.
Conclusion
Our goal has been achieved: the room is insulated from the inside. You don't have to be afraid of winter. The downside was that we lost about six centimeters of ceiling height. Unfortunately, the sacrifice was inevitable... Good luck with the repair!
Insulation of ceiling structures in a private house is one of the stages of arranging the ceiling, and far from the most difficult. All that needs to be done to complete this work is to understand the structure of the thermal insulation layer, select the optimal insulation for a particular situation and install it correctly. This article will discuss how to properly insulate a ceiling in a private home.
Choice of insulation
There is no need to think long about whether it is necessary to insulate the ceiling, because the answer is obvious. Thermal insulation is intended not only to retain heat within the building, but also to reduce heating costs. The fact is that thermal energy tends to leave the house, and the largest leaks always occur through ceiling and floor structures. The insulation of interfloor ceilings can be mediocre, but the ceiling, behind which there is an unheated attic, must be protected very well - otherwise most of the heat will escape through the roof.
When choosing insulation for the ceiling in a private home, you need to take into account a whole range of parameters, including:
- Thermal conductivity level - the lower this indicator, the less heat loss will be;
- Moisture absorption coefficient - the decrease in this parameter is directly proportional to the volume of moisture that can be absorbed into the insulation;
- Weight and density - the lower, the more convenient it will be to install the material;
- Flammability class - it is advisable to select products of category G1;
- Environmental friendliness.

For the manufacture of floors in private houses, either concrete or wood is used. Insulation of concrete structures can be carried out using bulk and sprayed materials, as well as slab products. Any type of insulation is suitable for working with wooden floors - as long as they have minimal thermal conductivity. Methods for installing insulation may differ, so each case must be considered individually.
Methods of ceiling insulation
Ceiling insulation in a private house can be done in two ways:
- Internal;
- External.
The methods are quite different, and each of them has a number of characteristic features. Both insulation options can be used either separately or together (in the latter case, the greatest efficiency is achieved). To insulate the ceiling in a private house with your own hands, it is worth considering both methods in more detail and understanding their inherent nuances.
Internal
When insulating the ceiling in a room, it is necessary to mount a frame on which the thermal insulation materials will be supported. This method is not very profitable - firstly, the useful volume of the room after installing all the elements is reduced, and secondly, installing the system under the ceiling is quite inconvenient, so the whole work will take more time and effort.

In order for the ceiling insulation inside the house to function normally, it is necessary to install a vapor barrier layer. The thing is that steam inevitably moves upward and tries to go outside the room. If this does not happen, then moisture vapor will lead to rotting of the insulation, as a result of which it will lose its properties.
External
With external insulation the situation is much simpler. In this case, there is no need to mount the frame, and any materials with a low degree of thermal conductivity can be used as insulation - sawdust, slag, ecowool, expanded clay, etc. This method of insulation is especially relevant for attic spaces that are not planned to be used as residential premises.

When arranging an attic in the attic, external insulation will be one of the stages of floor installation. Of course, this increases the complexity of installation - you will have to assemble a frame for the floor structure, which will later (after laying the insulation) be sewn up from the outside. You can sheathe the floor with any materials that are used to cover the floor - boards, durable plywood or OSB boards.
Installation of internal insulation of a concrete ceiling
It is much easier to install thermal insulation for concrete floors from the attic side - each stage of the work will be quite convenient. However, this is not always possible, so you have to insulate the ceiling in the house from the inside, forming a frame for thermal insulation materials under the ceiling.
For installation you need to prepare the following set of tools in advance:
- Hammer or drill (for drilling holes in the ceiling);
- Screwdriver and drill set;
- Building level;
- Cord and marker for marking.

Also, even before insulating the ceiling, you need to purchase all the building materials:
- A sufficient number of metal profiles for drywall (a good alternative would be wooden blocks of square section 40x40 mm);
- Hangers for profiles;
- Fastening elements (crabs are best suited for suspended ceilings);
- Thermal insulation material (foam boards or mineral wool, or roll insulation);
- Sheets for external cladding of the frame (plasterboard or plywood);
- Vapor barrier film.

Insulation of the ceiling from the inside in a private house is as follows:
- First you need to apply markings. In order for the structure to ultimately be in its place, the markings must take into account the features of the frame and the room. The frame itself consists of transverse and longitudinal posts, which are attached to each other using “crabs” and held on the ceiling by suspensions.
- To simplify the work, it is worth mounting the longitudinal posts in such a way that the pitch between them coincides with the width of the selected insulation. However, an excessive increase in pitch (over 80 cm) will also not lead to anything good - as a result, the rigidity of the structure will be insufficient.
- The marking itself is applied to all the walls along which the frame will be installed. The markings are applied in accordance with the cord, which is pulled between the corners and checked for alignment with a level. Having marked the walls, you need to go to the ceiling and make all the necessary marks on it.
- Now you need to mount the profiles. First of all, a guide metal profile is installed, which must be positioned in accordance with the markings on the walls.
- The next step is to install the hangers. These elements are usually located on the ceiling in increments of about 80-90 cm. Having decided on the mounting points, you need to drill the required number of holes in the ceiling.
- Now it’s time to form the frame by installing the longitudinal and transverse posts. Of course, when installing these profiles you need to follow the markings.
- The selected insulation is installed into the assembled frame. To keep it in place, you need to bend the edges of the hangers - they will ensure the fixation of the material during installation.
- Next you need to install a vapor barrier layer. You need to work with the film very carefully - it has a fragile structure and is very easy to damage with anything sharp. The vapor barrier film is carefully stretched between the frame posts and secured with double-sided tape.
- The last stage is covering the frame. Sheathing sheets must be fastened in such a way that there is a minimum gap between them. The optimal location of the sheets is perpendicular to the guides. The sheets are connected to each other in the middle of the profile. For fixation, self-tapping screws are used, the heads of which need to be slightly recessed into the thickness of the material. The distance between the screws for reliable fastening should be about 30 cm, and about 3-4 cm should be retreated from the corners of the sheet.

When insulating the ceiling with your own hands from inside the house, you need to ensure that there is a gap of at least 1 cm thick between the sheathing and the heat insulator. This gap is necessary to ensure normal ventilation of the structure.
Installation of external thermal insulation
External insulation of floors can have either a single-layer or multi-layer structure. However, regardless of the design of the insulation, you need to try to reduce its total weight, and this is true for any type of floor. If we are talking about bulk materials, then you also need to correctly determine the required layer thickness. For example, sawdust will require about 25 cm, while expanded clay requires a layer 15 cm thick for high-quality insulation.
To move around the attic, you should assemble a simple frame and place boards or slabs on it. It is best to mount the frame from wooden boards or beams. The latter will be an ideal option if the final structure has a small thickness.

The installation algorithm includes the following steps:
- First you need to decide on the installation step of the frame elements. It is best to start from the width of the selected insulation so that it is convenient to install.
- Next, you need to decide exactly how the transverse and longitudinal elements of the frame will be installed.
- The boards, in accordance with the finished diagram, are installed with their ends in place and fixed using metal corners and self-tapping screws.
External insulation can be carried out using a variety of thermal insulation materials - mineral wool, polystyrene foam or bulk insulation. You have to choose the material individually, depending on your financial capabilities and requirements. It is worth considering several options in more detail.
Styrofoam
Insulation with foam plastic boards is the simplest option. The foam has fixed dimensions, which makes it possible to avoid trimming by pre-assembling the frame taking this parameter into account. There are no special requirements for the dimensions of the slabs themselves - standard sheets can be a meter or half a meter wide, and this difference will not affect the quality of insulation.

Another thing is the brand of foam. If we are talking about insulating the attic floor, then the best option would be C25. The density of this brand is quite high, due to which low thermal conductivity is achieved. If necessary, you can purchase more expensive C35 foam or polyurethane foam - these materials are considered the most reliable.
Minvata
Another good option is materials based on mineral fibers. All these materials have excellent performance qualities, but they also have a common drawback - mineral wool is very hygroscopic. This suggests that when moisture gets in, the material absorbs it and loses most of its properties.

It is because of this drawback that the possibilities for using mineral wool are limited. However, this limitation can be circumvented, for which you will have to take care of high-quality waterproofing of the attic and ceiling so that the material does not have the opportunity to come into contact even with moisture vapor, not to mention direct contact.
Sawdust
One of the answers to the question of how to fill the ceiling in a house is sawdust. Sawdust is the cheapest thermal insulation material that is suitable for external insulation. However, low cost can be called perhaps the only advantage of this material. Sawdust is an organic material that can rot, so it must be mixed with lime before use.

You can also mix a solution consisting of 10 parts water, one part water and one part sawdust. When the ceiling is insulated with sawdust, the mixing process looks exactly the same as when mixing concrete. The resulting composition is used to completely fill the space in the frame. Before covering, the material must be left for some time to dry.
Expanded clay
The most convenient bulk insulation is expanded clay. It is a granular material having particles of different sizes. To maximize the insulation efficiency, when backfilling you need to alternate small granules with large ones - as a result, there will be fewer voids in the layer, and this will improve the quality of thermal insulation.

The insulation technology when using expanded clay is no different from any other bulk materials. First you need to install the formwork (frame), and then fill it with an even layer of granules.
Ecowool
The raw materials for the production of ecowool are not environmentally friendly materials, as the name might suggest, but various waste - newspapers, bags or cardboard. The components are treated with acid, due to which the finished material has minimal flammability and is well protected from biological influences.

Among the advantages of ecowool, it is worth noting, first of all, its low thermal conductivity, which provides good insulation, and the ability to transmit steam, due to which the material is not susceptible to fungus and mold. In addition, this material is very easy to install and is quite suitable for do-it-yourself insulation.
Insulating the ceiling with ecowool in a private house can be done using dry, wet and adhesive methods. The first method is quite simple - the material is simply placed in a frame and compacted. For the second and third methods, you need special equipment that allows you to spray ecowool on the desired areas.
Polyurethane foam
In modern construction, polyurethane foam is very popular, which, among other purposes, is also used for insulation. This material is available in the form of foam, which can be applied to any type of surface. A distinctive feature is the absence of the need for any fastenings - this insulation for the ceiling inside a country house independently sticks to everything it comes into contact with.
Among the main advantages of polyurethane foam, the following qualities are worth noting:
- Low flammability;
- No toxic emissions;
- Good chemical resistance;
- Low hygroscopicity;
- Long service life.

Sprayed polyurethane foam forms a solid layer that has no cracks or gaps, resulting in low thermal conductivity. However, steam can easily pass through the pores of the material, so there is no need to install a vapor barrier. To apply this insulation to the coating, it must first be dried (for concrete floors the permissible moisture level is 4%, and for wooden floors – 12%).
Areas that should not be insulated must be well covered before work (plastic film or thick fabric is quite suitable). Polyurethane foam is applied in layers, subject to constant control of the spray thickness. The next layer can be applied only after the previous one has completely hardened. Being the most expensive insulation, polyurethane is very easy to apply and perfectly performs its functions.
Conclusion
Ceiling insulation in a private house can be done in several ways. In some cases you will have to put in more effort, in others it will be easier, but you will have to pay more. The main thing is that for any conditions you can choose the best option that will be quite profitable and effective.


In accordance with the laws of physics, air rises when heated, so insulating the ceiling in a house with a cold roof is not a way to get rid of extra money, but a decision dictated by expediency. If you live in a private house, then you have directly encountered the problem of a cold ceiling in the room above which the attic is located. It is usually not heated, and its own thermal insulation is minimal to ensure normal temperatures during the cold season. As a result, there is a source of constant heat leakage above the living room.
You can insulate the ceiling in a private house from the inside or outside. Both options have their own advantages and disadvantages, the use of which is dictated by rationality, circumstances, technical nuances and other significant characteristics.
Insulating the ceiling from the outside with rolled material
Why insulate ceilings in private homes?
Installing insulation material that is optimal for a particular structure will provide a thermal barrier between the room and the attic. It will prevent the heated air from cooling, escaping through microcracks in concrete or natural pores in a wooden ceiling, raise the overall temperature in the room, protect floors and walls from freezing and save a considerable amount that is regularly spent on heating.
Features of ceiling insulation in a wooden house
When working with wooden buildings, primary attention should be paid to the final weight of the insulating layer. Excessively high mass increases the likelihood of collapse or cracks in the ceiling covering.
Some are trying to insulate the ceiling in a private house with a cold roof by reducing the insulation layer, but work standards require a certain value for each region in accordance with temperature and humidity indicators. As the thickness decreases, the thermal insulation properties decrease, and the meaning of laying insulation disappears.

Insulation of the ceiling in a wooden house from the inside
List of materials used for insulation
For thermal insulation, installers use materials that are divided into four large groups:
bulk– expanded clay, dry sawdust, ecowool;
roll– mineral wool and its varieties from other materials;
slab– sheets of compacted mineral wool, expanded polystyrene (foam), cork plates;
sprayed/self-leveling- penoizol.
When choosing insulation for the ceiling in a wooden house, you need to know which one has the best insulating properties. To do this, it is necessary to take into account a number of factors that influence the final result:
external or internal installation;
weather conditions and average annual temperature in a particular area, affecting the thickness of the layer;
the need and list of additional work;
time spent and project budget.
The combination of these features will indicate the rationality of using one or another type of thermal insulation.

The photo shows a bulk version of the ceiling insulation from the outside - thermal insulation with expanded clay
External insulation
In most cases, insulating the outside ceiling of a home is a more convenient way to prevent heat loss. It allows you to expand the list of insulating materials used, reduce the time spent on work and reduce, in comparison with internal installation, the cost of thermal insulation when insulating a house with finishing finishing.
On our website you can find contacts of construction companies that offer house insulation services. You can communicate directly with representatives by visiting the “Low-Rise Country” exhibition of houses.There are several options for insulating the ceiling from the outside:
The cheapest among all bulk insulator options. Thanks to the cheap cost of the material and minimal additional costs, the total cost of the work is the lowest among those described.
There are certain requirements for sawdust.
A minimum moisture content is required, otherwise mold will begin to form over time. To do this, the material is kept in a dry room for about a year before use.
Sawdust is mixed with fire retardants to reduce flammability.
Combining with antiseptic substances, fungicides and slaked lime will prevent the appearance of fungus and protect against rodents.
Insulating the ceiling in a house with sawdust is done in two ways. In the first, they are mixed with dry cement, followed by the addition of a small amount of water. Cement acts as a connecting material. The second method involves dry filling of sawdust without adding a connector, but due to the natural shrinkage of the material and the need for regular addition, it is not popular.

Ceiling insulated with sawdust
Expanded clay as insulation
The second most frequently used bulk material for insulation. Among its advantages:
acceptable price;
availability;
thermal insulation properties are above average.
However, the application has a number of limitations:
The own weight of expanded clay does not allow its use on thin wooden ceilings; concrete floors are desirable.
the material has low moisture resistance, so a vapor barrier must be laid as the first layer.
to ensure high-quality heat retention, you will need a layer more than 20 cm thick (in cold regions of the country it is increased to 50 cm).
When using expanded clay, experts use a mixture of large and small fractions to ensure a high percentage of filling the empty space. On top, a layer of material is filled with cement mortar 5–10 cm thick, which provides protection from moisture and serves as a floor covering.
External ceiling insulation with expanded clay
Ecowool
Modern insulation for the ceiling of a house, made from recycled cellulose, with the addition of fire retardants to provide fire resistance and boric acid, which serves as protection against fungus and harmful microorganisms. The main advantages of the material:
high-quality coverage of the entire floor space; thanks to the low weight of the individual parts, the cotton wool is easily blown into all the cracks;
the composition does not contain compounds harmful to humans;
low material consumption to ensure reliable thermal insulation.
The disadvantages include:
low resistance to moisture, you will have to spend money on laying a vapor barrier;
manual installation without special equipment is impossible or will be of poor quality;
ecowool is subject to shrinkage, so you will need to lay it with a margin of about 15%;
if crushed, it loses its thermal insulation qualities, so it is necessary to cover the ecowool with a layer of boards to ensure the ability to move around the attic.
Advice! Experts do not recommend using the material close to chimneys and other sources of high temperature, despite the addition of fire retardants to the composition. If this is not possible, then you will need to make additional fencing made of a fire-resistant coating that reflects heat.

Mineral wool as insulation
Insulating the ceiling in a wooden house with mineral wool has several advantages:
low cost of material;
high laying speed;
good thermal insulation properties.
There were some downsides:
shrinkage of cotton wool is 15–20%, so experts advise taking an appropriate supply.
the material is not moisture resistant and quickly absorbs water, which immediately increases its thermal conductivity. It will be necessary to lay an additional layer of waterproofing.
mineral wool cannot be crushed; the impermeability of the thermal barrier largely depends on the air contained between the fibers, so you will have to spend money on laying the outer covering so that you can move freely around the attic.
To insulate with mineral wool, workers must install wooden logs. They will allow you to delimit the space into sectors and will become the support of the future floor covering.

The photo shows the process of thermal insulation of a ceiling with mineral wool
Insulation with penoizol
Depending on the type of installation, penoizol is sprayed or poured. But to use this material, you will need to contact a specialized company, since the work uses specific equipment, plus, you need protective suits for workers and professional skills.
The advantages include:
high degree of penetration into all cracks and microcracks;
non-flammability;
environmental safety for humans;
not of interest to rodents;
the substance contains a large number of air bubbles, which provide high-quality insulation.
The disadvantages include the high cost and fragility of the material, which does not independently restore its shape in the event of mechanical damage.
Video description
Which insulation divides heat better, watch the video:
Advice! When working with penoizol, it is recommended to wait until it hardens completely; it has a slight shrinkage that will have to be compensated to prevent the formation of voids.

The process of thermal insulation of the ceiling with foam insulation
Internal insulation
A residential attic, a house for several owners, the presence of utilities in the attic and other situations that make external insulation impossible, require thermal insulation from the inside of the room. Bulk substances are not used for obvious reasons.
Video description
Insulating the ceiling from the inside, watch the video:
Sheet, roll or sprayed materials are used. When choosing insulation for the ceiling in a private house, you should pay attention to polystyrene foam boards or compressed mineral wool. They have the best ratio in the price/quality/speed category. Don’t forget about penoizol, which will be an excellent option if your budget increases.

The process of insulating the ceiling from the inside with foam plastic

Thermal insulation of the ceiling from the inside with polystyrene foam boards
What to choose - external or internal insulation
The choice between these types of work is based on a combination of factors:
in the absence of finishing, they are equal in the degree of thermal insulation;
if the renovation of the room is completed, you will have to remove the ceiling covering, which will increase the cost and time of work;
laying from the inside reduces shrinkage of the material, but increases the thickness of the ceiling, reducing the total volume of the room;
with internal insulation, the ceiling ceiling is not protected from low temperatures;
external insulation allows the use of a wider range of heat insulators.
Before insulating the ceiling in a private house, you need to carefully calculate all the pros and cons, only after that can you make a clear decision on what is best to use in your case.
Conclusion
When choosing a specific material for ceiling insulation, it is always better to seek professional help. Every business has its pitfalls and stumbling upon them, relying on one’s own strength, is a waste of time and money. It’s better to make repairs once and get a guaranteed high-quality result - this will save you from unnecessary expenses and provide your home with heat for many years to come.
High-quality insulation of the ceiling in the house allows you to retain heat in cool weather and prevent the room from heating up in hot weather. Insulating the ceiling in a private house means winning economically and increasing the level of comfort. But how to insulate a ceiling for less? The market offers a large selection of solutions for this.
First steps when insulating a ceiling: general rules
Insulating the ceiling is a necessary measure, despite the high labor costs. As a result, the owner will receive comfortable living conditions with low fuel consumption for heating in winter.
How to insulate the ceiling in a house? Main rules:
- Choosing an environmentally friendly and safe material.
- The insulation must be made of non-combustible material.
- The material must not only have high-level thermal insulation properties, but also not disturb natural humidity. That is, he must breathe.
- The material should not be exposed to moisture.
Note! Only compliance with all parameters guarantees high quality thermal insulation after work.
Preparatory work: selection of material
5 materials meet the above criteria. They are recommended for use when installing a thermal insulation layer on the ceiling of a private house with your own hands:
- Styrofoam. A polymer characterized by fire safety and lack of sensitivity to moisture.
- Penoizol. A polymer with a porous structure that has an unlimited service life.
- Mineral wool. Its peculiarity is that it absorbs moisture, so water in one form or another should not get on it. The most popular material.
- Ecowool. Saves heat no worse than its mineral counterpart. Produced on the basis of cellulose.
- Expanded clay. Made from clay - a natural component. The advantage is that rodents never breed in it. In addition, expanded clay is not afraid of moisture. Loose.
Only the last 2 materials are natural. But the rest also do not have a negative impact on human health.
You can create a warm ceiling using budget funds, which you always have in abundance at hand:
- Slag. Negatively affects the service life of floors. Emits a small amount of radiation.
- Sawdust. Over time, they are spoiled by insects, losing some of their properties.
- Dry grass. Promotes the establishment of insects and rodents.
Economical solutions have drawbacks, but they have the right to be used in non-permanent housing and outbuildings of the old type, where it is a pity to invest large amounts of money - dachas, old houses or in a bathhouse.

Installation of insulation: location options
The main heat loss in the house occurs through the ceiling of the last floor, above which there is an attic with a roof. Accordingly, there are 2 methods of installing insulation:
- Outer.
- Interior.
Both methods give the desired result. But there are differences. They depend not only on the installation features, but also on what materials are used. Namely:
- Vapor permeable.
- Waterproofing.
That is, this is how a material can work with moisture - absorb and let it through or repel it. For interior finishing, a vapor-permeable material is used, and for the exterior, water-repellent material is used.
It is used if there is no attic above the residential floor. Required:
- Install the frame. Typically made of wood, on the floor of the attic. The final design depends on the insulating material.
- Fill the frame with heat-insulating material.

At this point, the insulation layer can be left untouched. However, if the attic is periodically used for domestic purposes and you have to walk on its floor, then the insulating layer needs to be covered:
- Concrete.
- Plywood or clapboard.
Internal insulation
If there is a regularly used room above the living space, in the form of an attic or warehouse, it is advisable to use an internal insulating structure. Disadvantages of this method:
- Labor intensive.
- Reducing the height of the walls.
Note! When installing insulation internally, waterproofing will be required between the insulation and the ceiling. It is needed if a vapor-permeable material is used.
When building a new house, if the design did not provide for internal insulation, it is enough to make changes to the design. But for a house that has already been put into operation, this can become a problem, especially with a low ceiling height. And if the structure of a wooden ceiling can be changed, then a concrete ceiling cannot be changed.
To carry out the work, a frame is also formed, which is filled with insulation. The structure is then covered with plasterboard.

Note! The peculiarity of using cotton wool (mineral and eco) is that it cannot be compressed to reduce its thickness. It contains pores that reduce its thermal conductivity. Therefore, it should be used with caution for interior decoration.
Examples of work performed
Each material is unique and must be laid on the ceiling using its own, separate technology. Required materials and tools:
- Boards or metal profiles to form the frame.
- Insulation.
- Cutting tools.
- Fasteners
- Protection - glasses, respirator, gloves.
Nuances of the work being carried out:
- There should be no breaks in the vapor barrier film. Including between the seams. The purlins should be overlapped.
- In the frame, the distance between the slats should be 1-2 cm less than the width of the insulation sheet. The height of the frame is 1-2 cm higher than the thickness of the insulation to ensure air circulation to the waterproofing layer on top.
Below are ways to insulate the ceiling with popular insulation materials.

A bulk material that has gained popularity as a thermal insulating layer for floors. Lately it has been used as an inexpensive insulation material for ceilings. Characteristics:
- Not subject to oxidation, including combustion.
- Does not emit harmful substances.
- Does not attract rodents and does not become covered with fungus.
- Inferior to cotton wool and polystyrene foam in thermal insulation properties.
- Heavy. Use only on strong ceilings with support beams.
Installation technology:
- A layer of vapor barrier is laid on the floor of the attic. You can use regular film.
- The niches between the beams are filled with expanded clay. It is advisable to use fractions of different sizes to form several layers. Thickness - at least 20 cm. In cold climates - from 40 cm.
- The material is leveled.
- A vapor barrier is installed on top.
- Laying the floor.
An alternative material is foam glass. It retains heat better.

This material is called liquid foam. Special additives make it non-flammable and repel rodents. The disadvantage of the installation is that you need qualified workers with equipment who can properly insulate.
The technology is simple. Foam insulation with a layer thickness of 20-30 cm is poured onto the vapor barrier, which has been previously covered. If necessary, the floor can be mounted on top.

Insulating the ceiling with mineral wool is the most popular method. Easy to do with your own hands. Types of mineral wool:
- Slag-like. Made from blast furnace slag. Unsuitable material for insulation due to increased hygroscopicity and high thermal conductivity.
- Stone. Made from rock with the addition of clay. Has low thermal conductivity.
- Glass wool. Has the lowest thermal conductivity. It is characterized by low cost. Upon contact with human mucous membranes, it causes irritation.
Installation procedure:
- Lay a vapor barrier layer.
- Mount the frame.
- Place cotton wool.
- Attach waterproofing to the wool.

Polymer cellular material. Thermal insulating properties are similar to glass wool. Material properties:
- Low cost.
- Light weight.
- Flammable, with the release of toxic substances. When heated, they can also be released.
- Rodents can build a nest in it.
- Contributes to the greenhouse effect.
Installation options:
- Using a frame.
- On glue.

The foam is placed on the frame similar to the method with cotton wool. However, you should first apply liquid nails to the frame slats and the top of the foam. Installation with glue:
- Cleaning and washing the installation surface. You will need a primer.
- Apply glue to the top of the foam and press the sheet to the ceiling surface.
- The glued sheets are covered with a layer of plaster and then reinforced with reinforcing fiber. Plaster is also placed on top of it.