The better and safer way to insulate an attic roof. How to insulate an attic floor for winter living: do it yourself. Does external waterproofing “breathe”?
Even at the stage of designing and building a private house, the purpose of each room and its design are thought through. Sometimes over time you want to expand the existing squares without significant financial investments. This is easy to achieve by insulating from the inside. If the roof is already covered, installation work becomes somewhat more complicated. We invite you to get acquainted with the technologies used.
Read in the article
Video: how to insulate an attic for winter living if the roof is already covered
The lack of living space can be compensated for if you use the available squares wisely. When living in a private house, you should definitely turn it into a comfortable living space. For those who do not know how to insulate an attic for winter living, a video of the process will definitely help you understand all the intricacies.
We propose to consider in detail all stages of insulation from the inside, including preparation for installation work and selection of the appropriate one.

Preparing the attic room before starting insulation work
If the attic will be used as a living space, you should prepare for thermal insulation work. This room must meet certain requirements, which are prescribed in the relevant regulatory documents. Here, unlike the attic, the roof should have a slope, and the ceiling should not be lower than 2.5 m.
At the preparation stage you should decide on:
- the type of thermal insulation materials that will be used to insulate the attic. The level of heat loss and comfort of living in a given room will directly depend on this;
- communications that will be connected to the attics. To do this, you need to decide and correctly select suitable engineering solutions;
- how the load-bearing elements will be decorated.
Each of the listed points can have a serious impact on the order and quality of thermal insulation work from the inside. The choice of thermal and waterproofing insulation will affect the operational characteristics of the room. If there is insufficient thickness at the top, it will be cold; if there is too much, there is a high probability of condensation.

What tools will be needed to complete the work?
The choice of specific equipment and tools depends on the type of thermal insulation material. As a rule, for installation work from the inside you should prepare:
- scissors and a knife, which will be used to cut other materials;
- a construction stapler with staples of a suitable size, with which you can fix the panels;
- tools for working with the material from which the house is built. For wood you need a chisel, mallet, plane, and chisel;
In addition to thermal insulation material, to insulate the attic from the inside you should have:
- steam and;
- bars for installing sheathing, if its installation is provided for in the chosen method;
- hardware. It is worth purchasing screws and nails of different sizes;
- construction tape;
- mounting foam.

Choosing insulation for an attic roof
Manufacturers offer a wide range of thermal insulation materials. Each of them has its own distinctive features, which should be taken into account when choosing a mansard roof. We invite you to get acquainted with each of them to make it easier to choose the best option.

Styrofoam
A budget option, which is most often used when insulating an attic (and in vain). Easy to process and install with your own hands. Well suited for the attic, as it has low specific gravity and low thermal conductivity. But at the same time it has the biggest and most significant drawback: it is extremely flammable and rodents love it.

Extruded polystyrene foam
The performance characteristics of extruded polystyrene foam are comparable to the properties of polystyrene foam. However, the process of forming the thermal insulation coating is somewhat different, which will avoid the formation of gaps. The presence of stepped joints ensures reliable fixation of the elements and protects the attic from the penetration of cold from the outside. We would like to note that this material is also flammable and requires the most serious assessment to select it as insulation.

Mineral wool
Thermal insulator used everywhere. This is a natural material, which contains a certain amount of synthetic fibers to improve performance characteristics. It has an affordable price. It is sold in rolls or slabs, which greatly simplifies the installation process.

Glass wool
Insulation with longer fibers than mineral wool. This helps to improve elastic characteristics and sound insulation properties. In terms of hydrophobicity, it is somewhat inferior to its mineral analogue. It is characterized by low flammability. The absence of toxic substances in the composition makes it possible to use glass wool for internal thermal insulation of the attic.

Stone wool
The most expensive type of cotton wool used when performing. Consists of basalt fibers. Can be supplied in slab form. It is more expensive than its analogue - glass wool, but at the same time it allows you to form a higher-quality thermal insulation coating.

Ecowool
The basis of the material is paper - an environmentally friendly material. Before application, the composition is thoroughly crushed. After this, using special equipment, it is blown into the voids, thereby preventing the appearance of a draft.

Polyurethane foam
A modern thermal insulation material, ideal for insulating the attic from the inside. The technology used makes it possible to form a dense coating that has no cracks or gaps. By choosing this technology, you can not be afraid of drafts and cold for at least 30 years.

Penofol
One of the options for foamed polyethylene, widely used for insulating attics of modern buildings. The presence of a single- or double-sided coating provides high reflective characteristics and good sound insulation properties.

Review of the advantages and disadvantages of certain types of attic insulation
Each of the listed heat insulators can be used to insulate the attic roof of a private house and has its own advantages and disadvantages. We suggest that you familiarize yourself with the advantages of each type so that you can compare them with each other and give preference to a specific insulation.
Styrofoam, featuring an affordable price, has:
- low water absorption. Water that hits the surface will not be absorbed, but will simply flow down;
- light weight;
- low thermal conductivity.
The disadvantages include low vapor permeability. As a result, the attic can become hot and stuffy, and high humidity can cause mold to grow. Shrinkage of a wooden structure during operation can lead to the appearance of gaps between the foam boards. Often they start between sheets of insulation. Well, as mentioned above, in the event of a fire it instantly ignites and releases toxic gases.

To the benefits extruded polystyrene foam worth mentioning:
- low weight, which reduces the requirements for load-bearing structures;
- long service life if installation was carried out according to all rules;
- high compressive strength;
- the ability to perform installation work yourself. You just need to figure out how to properly insulate an attic roof with extruded polystyrene foam;
- resistance to rotting;
- possibility of applying a finishing coating to the heat insulation layer.
Among the disadvantages, increased flammability should be noted. Impregnation with fire retardants allows you to minimize this negative property.
To the main advantages mineral wool worth mentioning:
- availability;
- high heat and sound insulation properties;
- ease of installation work from the inside. The insulation is easy to cut and install. With its help, you can insulate a broken line from the inside;
- long service life;
- biological resistance. The material is unattractive to rodents;
- low specific gravity.
However, such insulation accumulates moisture quite well. When planning to insulate the attic from the inside using mineral wool, you should take care of the presence of high-quality hydro- and vapor barrier.
Main advantages glass wool are the absence of toxic substances and low flammability. When installed correctly, it can retain heat well inside the house.
Attention! When insulating an attic with glass wool, it is imperative to use personal protective equipment.
Stone wool reliable in operation and safe for others. It has a low thermal conductivity coefficient and almost zero flammability. Able to withstand significant external influences. The formed coating has good characteristics.

To the advantages ecowool worth mentioning:
- environmental friendliness, thanks to which it can be safely used to insulate the attic from the inside;
- good thermal insulation characteristics;
- formation of a dense layer that minimizes heat loss;
- the presence in the composition of borax, a natural antiseptic that protects wooden structures from rotting and mold;
- good sound insulation characteristics of a thin layer;
- maintaining characteristics for a long time. After ten years of operation, the thickness of the insulation remains unchanged.
Disadvantages include the complexity of application and high cost.
Polyurethane foam has high performance characteristics. The shrinkage of a wooden house is unable to affect the characteristics of the formed thermal insulation layer. The coating has optimal hardness and is not susceptible to moisture. During installation from the inside, you can refuse to form a vapor barrier layer.
The disadvantages include the need to use a special sprayer. This can become a serious problem for those who planned to do the insulation from the inside with their own hands, since such equipment is quite expensive. In addition, you must have sufficient knowledge and certain skills to independently apply a high-quality dense coating.
Penofol is in demand when insulating attics from the inside, since such insulation:
- Safe. It does not harm human health or the environment.
- Has a low level of thermal conductivity.
- Allows you to form a closed system of air bubbles with the required level of vapor permeability.
Attention! Insulating the attic with penofol requires significant financial investments.

Nuances of attic insulation with different roof geometry
The insulation of an attic roof has a number of features dictated by the specifics of the room itself. The complex design of the attic space requires a competent approach. Otherwise, it will be difficult to avoid the appearance of condensation.
How to insulate the roof of a house from the inside with your own hands if it has a rather complex geometry? The answer to this question is sought individually in each specific case. The choice is made in favor of hard insulation, since soft materials slip at a large angle of inclination. In this case, thermal insulation work from the inside is best done using slabs. The sheathing is mounted in such a way that the rafters are located at a distance that is 10–15 mm less than the width of the slabs. This will avoid the appearance of cracks through which the cold can penetrate into the room.
Attention! To create comfortable conditions, you should insulate the attic walls from the inside with your own hands, as well as other surfaces.
Considering that the rafters of a complex roof are cold bridges, after laying the slabs on top of the laid mats, a continuous layer of insulation is attached. Its thickness is much smaller than the main heat insulator. A vapor barrier is placed on top.

Is it necessary to install waterproofing under the insulation?
Presence in the pie being formed is mandatory. In this way, it is possible to prevent the formation of condensation or precipitation from seeping into the room. As a result, the service life increases and the reliability of the formed thermal insulation layer increases.
Most often, the choice is made in favor of waterproofing films: diffusion, super-diffusion, breathable, anti-condensation.

Insulating the attic from the inside with your own hands - main nuances, video
If you decide to carry out the installation work on your own, it’s time to find out how to properly insulate the roof from the inside, depending on the chosen thermal insulation material.

Do-it-yourself insulation of the attic from the inside with mineral wool: video of the process
If you decide to insulate the attic roof from the inside with your own hands using mineral wool, the work should be performed in the following sequence:
- Fastening waterproofing.
- Cut out the mineral wool. To do this, strips are cut, the width of which is 3–4 mm greater than the distance between the rafters.
- Laying mineral wool between the rafter beams end-to-end, but without overlap; it is secured using nylon threads or knitting wire wound on nails driven into the rafters.
- Attaching the vapor barrier.
- Finishing.
The following video about insulating an attic from the inside with mineral wool with your own hands will allow you to understand the process in more detail:
Insulating the attic with foam plastic
By choosing foam plastic, you can significantly reduce the cost of performing thermal insulation work. The main thing is to understand the technology of attic insulation with polystyrene foam. Installation work can be performed in the following sequence:
| Photo | Description of work |
 | Treat the wooden elements of the sheathing with a special compound to improve their performance characteristics and increase their service life. The composition must be suitable for indoor work. |
 | We measure the dimensions of the rafter beams and the distance between them to determine the parameters of the foam. |
 | Cut the foam sheets to size. |
 | We lay sheets of foam plastic between the beams and fix them with screws. |
 | We foam the formed joints and cavities between the beams and foam sheets. After hardening, cut off excess foam. If necessary, we lay a second layer. |
Insulation of the attic with polyurethane foam
Before starting thermal insulation work, the strength characteristics of the rafter system should be checked. Considering that polyurethane foam weighs more than polystyrene foam or mineral wool, supporting structures must be designed for a similar load.
Insulation of the attic with polyurethane foam from the inside is carried out as follows:
| Photo | Description of work |
 | Special equipment is being prepared with which the composition will be applied to the surface of the walls and ceiling of the attic. |
 | The composition is applied to the previously prepared base. A continuous coating of equal thickness is formed. |
 | The quality of the formed layer is controlled. |
Review of the main mistakes made when insulating an attic from the inside
It is not enough to simply learn how to properly insulate an attic from the inside with your own hands. You should definitely become familiar with the typical mistakes that many inexperienced builders make. This is especially true when performing work using insulation materials that easily absorb moisture. Experts recommend:
- Do not use a hygroscopic heat insulator to protect roofs with a slope of less than 13 degrees. In this case, there is a high risk of precipitation collecting on the roof surface with subsequent leaks, which can cause damage to the thermal insulation layer;
- be sure to provide an air gap between the roof and the insulation layer to dry and ventilate the heat-insulating layer;
- lay all the layers of the “pie”. The absence of vapor or waterproofing will negatively affect the final result;
- entrust the installation to specialists. Considering that such structures are mounted at an angle, many perform the installation poorly.
Having figured out how to insulate an attic roof and walls, you can safely begin doing the work yourself. If you have already insulated the attic yourself, share in the comments what you ended up with. The results of your work are interesting to us and our readers.
Properly executed insulation of the attic roof is the key to a comfortable atmosphere in this room, and a long service life of the interior decoration of the attic room. To keep you warm and cozy in winter, and in summer you are not disturbed by the heat and stuffy air, it is very important not only to choose the right thermal insulation materials, but also to install them in compliance with the technology. Today we will tell you how to insulate an attic roof with your own hands, which insulation materials are best suited for this purpose, and most importantly, how to avoid common installation mistakes that reduce all efforts to almost zero results. You will learn all the most important things about insulating an attic roof - the video clips attached to the article will clearly demonstrate all the intricacies of this work.
The insulation of an attic roof has its own characteristics, due to the fact that the walls of the living space are directly adjacent to the roof, or rather, they actually form a single whole with it. That is why it is customary to pay the closest attention to insulating the attic roof from the inside, which allows for a normal microclimate in the room. Before we start talking about how to insulate an attic roof from the inside, let's figure out what layers the so-called “roofing pie” consists of, and why it is so important to place these layers in the right sequence:
The diagram shows the correct order of arrangement of elements of the attic roof thermal insulation system
What is the reason for this particular arrangement of layers? Elementary laws of physics. Let's imagine that in winter a decent layer of snow fell, which, by the way, is a natural heat insulator. As a result of the life activity of people living in an attic house, warm air will rise from the inside to the surface of the roof. The snow covering it will melt. And as soon as the temperature outside drops below zero, a crust of ice forms, which no longer has any heat-insulating properties. The essence of proper insulation of an attic roof is to prevent snow from melting in winter and scorching heat from penetrating in summer.

Diagram of air movement in the under-roof space, and the operation of the vapor barrier when insulating the attic roof
You will learn more about the structure of the “roofing pie” and the principles of the proper operation of all its components from this educational video:
The best way to insulate an attic roof: choosing insulation
There are four most important criteria based on which it is necessary to choose high-quality insulation for an attic roof:
- Thermal conductivity;
- Moisture resistance;
- Fire safety;
- Ecological cleanliness.
The first parameter can be called decisive, since its thickness, number of layers, and most importantly, efficiency depend on how low the thermal conductivity of the material you choose is.
Important: Insulation for an attic roof with a thermal conductivity coefficient of no higher than 0.05 W/m*K can be considered sufficiently high quality and reliable.
The second indicator is also important, especially for an attic rafter system made of wood. The resistance of the insulation to moisture will allow you to worry less about the possibility of damage and rotting of the wood. Why fire safety of insulating materials is important is probably unnecessary to say. And finally, the environmental friendliness of the insulation in the case of attic rooms is also of great importance, especially if it is a bedroom or a children's room in the attic.

Comparative table of building and finishing materials indicating their thermal conductivity coefficient
As follows from the figure above, insulating an attic roof with ecowool is an excellent solution, since this mineral insulation meets all four criteria for choosing a material. However, it cannot be called the most affordable, so many craftsmen refuse to use ecowool in favor of cheaper, but no less effective insulation materials. For example, insulating an attic roof with polyurethane foam allows you to achieve the same excellent effect, while saving money. Among the effective mineral and polymer insulation materials one can also name:
- Basalt wool;
- Glass wool;
- Extruded polystyrene foam;
- Styrofoam.
By the way, it is the insulation of the attic roof with foam plastic that can be called the most economical and simple method. But it is worth remembering that foam does not allow steam to pass through, and besides, rodents often live in it. Expanded polystyrene can be called a more modern and technically advanced alternative to conventional foam. This video will help you choose the best insulation option for an attic roof:
How to properly insulate an attic roof with your own hands
Insulating an attic roof with your own hands is not at all difficult; for this you do not need to have the skills of a professional builder. The specifics of the thermal insulation installation work depend entirely on the type of insulating material you choose. If the attic roof is insulated using mineral wool or glass wool, the process will take slightly longer than in the case of polystyrene foam or polystyrene. The fact is that to achieve a good effect, cotton wool is laid in several layers, and requires additional vapor barrier, because it strongly absorbs moisture.

Technology for insulating an attic roof from the inside with mineral wool using the example of a sloping gable roof
The thickness of the attic roof insulation is directly proportional to the value of its thermal conductivity, that is, the denser and more reliable the material, the less it will be needed. Usually, during the installation of thermal insulation, an additional layer is made of cotton wool to cover the rafters. But many owners of residential attics are categorically not happy with this, since rafter beams can act as an important decorative element of the future interior of the attic room. If you consider yourself one of these owners, extruded polystyrene foam is preferable for you, a small layer of which is laid between the rafters.
Advice Before starting work on roof insulation, think over the future design of the attic space, and choose the type and method of laying thermal insulation that is best suited for your interior decoration option.
For everyone who wants to learn in detail how to insulate an attic roof, see the video below. This short film tells about the insulation of the roof of a wooden country house made of laminated veneer lumber with a gable roof using the most modern and high-quality thermal insulation material - extruded polystyrene foam.
1.Methodology for calculating the distance between rafters
2. Rafter structure for corrugated sheets
3. Rafter structure for ceramic tiles
4. Rafter structure for metal tiles
5. Rafter structure for ondulin
6. Rafter structure for slate covering
7. Rafters for single-pitched and gable roofs
The roof frame must be reliable and durable.
But without proper calculations this is difficult to achieve. In the process of carrying out calculations, they determine at what distance to place the rafters on the roof.
What can result from an incorrect or inaccurate calculation of the loads to which the truss structure will be subjected? The most negative consequences, ranging from deformation of the rafter legs and damage to the roof covering and ending with the collapse of the base of the roof frame. Therefore, when designing buildings, the list of mandatory calculations contains data on what the distance between the roof rafters should be.
There is a certain technique that allows you to calculate this value.
Method for calculating the distance between rafters
The distance between the rafters on the roof is called the rafter pitch. As a rule, the pitch of the rafter legs in a roof structure usually exceeds one meter, and the minimum gap ranges from 60 centimeters.
Calculation of the required number of rafters for a roof of a certain length and the pitch of the rafters is carried out as follows:
- before calculating the length of the rafters, measure the length of the slope along the eaves of the roof;
- the resulting value is divided by the selected distance between the rafters.
For example, the step is one meter, which means you need to divide by one, and if it is 60 centimeters, then the divisor will be equal to 0.6;
- then one is added to the result, and the result is rounded up.

Thus, through simple calculations, the number of rafters that need to be installed to construct one roof slope is determined.
After this, the length of the slope is divided by the resulting number of rafters, resulting in the value of the interaxial gap between the rafters, called the pitch.
For example, with a roof slope length of 25.5 meters and a step length of 0.6 meters, the calculation is performed as follows:
25.5: 0.6 = 42.5 + 1 = 43.5, after rounding to the nearest whole number the result will be 44 - this is the number of rafters required for the roof slope.
This simple technique, which allows you to determine at what distance the rafters for the roof are placed, does not take into account the characteristics of the roofing material used.
Rafter structure for corrugated sheets
The pitch of the rafter system when creating a roof from this material should be at least 600 millimeters, and the maximum pitch of rafters under corrugated sheeting should be no more than 900 millimeters.
When the gap is larger, then it is necessary to install cross-section boards with a large cross-section. In this case, the cross-section of the rafters themselves is selected in size
50x100 millimeters or 50x150 millimeters (read: “Installation and dimensions of roof rafters”).

To lay corrugated sheeting, a sheathing of boards 30x100 millimeters is required; it is installed in 500-mm increments or more, depending on the thickness of the roofing material and the height of the trapezoid.
When creating a sheathing for corrugated board, the board facing the cornice should be 10-15 millimeters thicker than the rest. The design of the sheathing must provide the possibility of passage for fastening such vertical elements as ventilation pipes, chimney, etc.
Rafter structure for ceramic tiles
The design features of rafters for laying ceramic tiles are due to the fact that the raw material for its production is clay - the material is quite heavy, its weight is 10 times greater than that of metal tiles.
Thus, the load on the load-bearing roof system per square meter of area is from 40 to 60 kilograms.
Rafters for such a frame system must be made from well-dried wood, the humidity of which does not exceed 15%. For their production, timber with a cross section of 50x150 millimeters or 60x180 millimeters (for reliability) is used.
In this case, the pitch of the rafter system is 80 – 130 centimeters, depending on the steepness of the roof slope. So, at an angle of inclination equal to 15 degrees, the distance between the rafters is 80 centimeters, and at 75 degrees – 130 centimeters.
When calculating the pitch between rafters, experts take into account their length.
If the length of the elements is maximum, the minimum distance between them must be maintained when performing work. With short rafters it should be as large as possible.
Safe movement on a roof with a slope of less than 45 degrees can be done if the rafter pitch does not exceed 80-85 centimeters.
 When arranging a ceramic roof, there is one more feature - this is a certain size of the sheathing step with which it is placed on the rafters. It depends on the type of shingles purchased.
The simplest way to calculate the pitch of the sheathing is to take into account that most tiles are 400 millimeters long, and the overlap when laying is from 55 to 90 millimeters.
Therefore, in this case, the pitch of the sheathing is equal to the length of the tile minus the amount of overlap, which is 310-345 millimeters (read: “Roof sheathing for metal tiles: installation and fastening”).
When the roof has several slopes as in the photo, the pitch of the sheathing and the number of rows of tiles are calculated for each pitch of the rafters separately.
Insulating an attic roof: video instructions
The rows are marked using a cord attached to a counter-lattice, which is located on opposite sides of the roof slope (read also the article: “Lathing step under corrugated sheeting”).
Rafter structure for metal tiles
When constructing suburban private real estate, metal tile roofing can be found most often.
This roofing material is similar to clay tile flooring, but has a number of advantages over it. Sheet metal tiles are easy to install, so you can build a roof in a shorter time; the rafter system for metal tiles is also not complicated.
Metal tiles are lighter than ceramic products; the difference in weight sometimes reaches 35 kilograms per square meter, depending on the thickness of the products (read also: “Design of a rafter system for metal tiles - design options, rafter spacing”).
Thanks to a significant reduction in the weight of the roof deck, it becomes possible to reduce the thickness of the elements of the rafter structure and the cross-sectional dimensions of the sheathing bars, and to increase the installation pitch of the rafters.
Under the metal tile covering, the rafter legs are mounted at a distance of 600 to 950 millimeters, while the cross-section of the construction material is 150 by 50 millimeters.
According to experts, in this case, if you place 150 millimeters thick insulation between the rafters, then such thermal insulation will create comfortable conditions for staying in the attic room. At the same time, for greater reliability, it is advisable to choose 200 mm insulation.

When installing rafters, to ensure ventilation of the space filled with insulation, holes with a diameter of 10-12 millimeters are drilled in the rafters near the upper roof.
The technology for creating a rafter system for metal tiles does not differ significantly from designs for other types of roofing materials.
The only peculiarity is that the upper support of the rafters is mounted on the ridge girder from above, and not on the side of the ridge beam. The presence of a free zone between the rafters ensures air circulation under the roof deck, and this, due to the use of metal material, reduces the risk of condensation.
When installing a roof in a wooden house, when it is planned to replace the mauerlat with the upper crown, if you incorrectly calculate at what distance the rafters are placed, it will be difficult to correct the error (read also: “How to calculate the rafters for the roof”).
Rafter structure for ondulin
When creating a roof from ondulin, the pitch of the rafter system should be at least 600 millimeters, and the maximum distance between the rafters should be no more than 900 millimeters.
For the rafter system, boards of 50x200 millimeters are selected and thereby provide an insignificant margin of safety, taking into account the rafter purlins.
On top of the counter-lattice and rafter structure, a lathing made of 40x50 millimeters of timber and an interaxial spacing of 60 centimeters is laid (read the article: “Ondulin or metal tiles - which is better”).
Rafter structure for slate covering
Slate is one of the most popular roofing materials. For its installation, choose rafters with a cross section of 50x100 or 50x150 millimeters. When deciding at what distance to install the rafters, you must proceed from the fact that the minimum value cannot be less than 600 millimeters, and the maximum - 800 millimeters (for more details: “How to install rafters on a house”).

To make the sheathing, use a wooden beam with a cross-section of 50x50 millimeters or a board 25x100 millimeters.
The sheathing pitch is selected depending on the slope angle of the roof slope. If it is insignificant, then it is enough for the sheet of material to rest on 4 bars with a pitch of 45 centimeters, and with a large slope, 3 bars with a pitch of 630 to 650 millimeters will be enough.
How to install a roof from corrugated sheets with your own hands, detailed video instructions:
Rafters for single-pitched and double-pitched roofs
When creating a rafter structure, you should remember the need to provide the system with an additional margin of safety, taking into account the pitch of the rafters.
The distance between the rafters of a pitched roof is chosen depending on the thickness of the wood and the roofing material - it can range from 60 to 140 centimeters. The thickness of the wood elements depends on the area and load on the roof (read: “Rafter system of a pitched roof, main advantages and characteristics”).
The distance between the rafters of a gable roof is made taking into account the size of the heat insulator that is laid between them. The approximate step between the rafter legs is 1-1.2 meters (read: “Rafter system of a gable roof and its components”). Rafters regulate the amount of roof overhang.
Insulating the attic from the inside if the roof is already covered
The desire of many owners of country houses to make maximum use of the space of the house forces them to pay attention to the attic. It often happens that it is easier to equip an attic than to expand the house by adding a residential building to it. Since the attic is part of the roof of the house, it is with the thermal insulation of the roof that the arrangement of the attic floor should begin. Let's look at how to properly insulate an attic with mineral wool and show detailed video instructions on the topic.
You should insulate the attic with mineral wool and equip the attic for a room if the roof of the house allows the ceiling in this room to be of sufficient height and it is possible to strengthen the interfloor ceilings so that it is safe to walk in the attic.
If these two conditions are met, then you can safely begin to independently insulate the attic with basalt mineral wool for living in the winter.
The best way to insulate an attic
First, let's consider the most important question - what is better to insulate the attic with foam plastic or mineral wool. Let's determine which thermal insulation material is suitable for proper insulation of the roof of the attic floor.
To do this, the following parameters should be taken into account: thermal conductivity coefficient, resistance to high temperatures and moisture, fire safety, environmental friendliness and low weight.
Most of the listed requirements are met by fiberglass or mineral wool. Unlike basalt insulation, Technoplex polystyrene foam does not withstand high temperatures and is a very flammable material.
Knauf glass wool and Rocklight basalt wool are fire-resistant and fireproof materials, and with high-quality vapor barrier, mineral wool will not be affected by moisture.

Comparison of building materials by thermal conductivity
Mineral wool is made from natural material – basalt. The material has a density from 18 to 45 kg/m³, has good heat-insulating and sound-absorbing properties.
Insulation of attic roofs from the inside, instructions and video
We reviewed various brands of mineral wool, their purpose and characteristics in the section “Inorganic Thermal Insulation”. Therefore, we will not dwell on this topic separately.
Methods for insulating the attic of a house with mineral wool
The attic is insulated in two ways: under the rafters and between them. The simplest way is to place mineral wool between the rafters. This method is used to insulate the roof even at the stage of building a house, but you can use the technology even after construction is completed.
You can carry out the work on thermal insulation of the attic yourself, if you have sufficient competence.
In addition to this method, there is also a technology for placing basalt insulation under the rafters.
This technology involves the construction of an additional frame for installing mineral wool, which entails an increase in costs. However, this method has an important advantage - the absence of cold bridges between the insulation and the rafters, which will protect the wood from possible wetting and rotting.
Insulating an attic with thermal insulation located under the rafters will be easier and more correct, but this will result in loss of room area.
In both cases, the use of a vapor barrier is used to cut off the humid air of a warm room from penetrating the basalt fiber and moistening it. You should also take care of the ventilation in the attic of the space between the roof and the insulation.
We insulate the attic with mineral wool with our own hands
1. Construction of the frame of the attic room
The mineral wool should be located oppositely between the frame guides; for this, the timber is installed at a width 1-1.5 cm smaller than the width of the insulation.
The thickness of the timber should be equal to or greater than the thickness of the thermal insulation in the attic. To do this, you should use a heat engineering calculator to calculate the thickness of mineral fiber insulation for the roof and attic of a private house.
Condensation often forms on a metal roof, so treating wood with an antiseptic is necessary to protect it from moisture.
2.
Laying mineral wool in the frame
Rocklight mineral wool or another brand is placed in the frame; the slabs should be spaced apart, without gaps. It is better to lay the slabs in two rows so that the second layer of mineral wool covers the joints of the first row. Don’t forget that when working with mineral wool, you should protect yourself from mineral wool microparticles floating in the air by wearing gloves, a respirator and other personal protective equipment.

Insulating the attic with mineral wool from the inside and outside
3.
Installation of a vapor barrier membrane
To protect glass wool or mineral wool from moisture, the entire structure should be covered with a superdiffuse membrane. The material is able to allow air to pass through, preventing the penetration of moisture particles and wetting of the mineral wool.
To do this, you should find out which side to lay the vapor barrier against the insulation, otherwise you may encounter serious problems when operating the attic.
4. Sheathing the frame with plasterboard
Before covering the frame, you should fill wooden slats with a thickness of 20-30 mm to create a gap between the false wall and the vapor barrier film.
This air will allow moisture to evaporate more efficiently from the surface of the film. Many people use foil penofol instead of vapor barrier; the material provides additional insulation, reflects heat and protects the mineral wool from moisture.

Photo. Do-it-yourself attic plasterboard cladding
5. Finishing plasterboard walls
The seams between the sheets of drywall are taped with masking tape and puttied.
After the rough layer has dried, the putty is sanded and the entire surface of the wall is primed. At the last stage, all walls in the attic are covered with finishing putty, covered with wallpaper or painted. Watch the video at the end of the article for all the stages of insulating an attic with mineral wool from the inside.
6. Laying the floor on the attic floor
After insulating the ceiling and walls, you should begin laying the final floor covering. A laminate or parquet board underlay is spread on the subfloor, and the flooring is laid on top.
Insulating an attic yourself with mineral wool is not a very difficult task, and if you have experience in working with construction tools, then the work can be done on your own.
The attic is the favorite home of poets, artists, artists and creative people. Thanks to new building materials, the attic floor can be used as a room under the roof as a living or utility room (zone) not only in summer, but also in winter (for winter living). Abroad, well-designed and decorated attics even fall into the category of bohemian housing.
In modern housing construction, an attic is not just an equipped warm attic, it is an effective way to increase the functional space of a residential building. It is noteworthy that, in accordance with urban planning standards, the attic is taken into account when determining the number of storeys of a building.
Advantages of an insulated attic:
- saving on the cost of materials during the construction of a residential building;
- arrangement of functional additional space;
- original appearance of a private house with an attic;
- reduction of heat loss through the under-roof space.
Disadvantages include: sloping ceilings, the need for additional insulation, difficulties with the rational organization of living space.
Most of the disadvantages of an attic are completely removable and, with the right approach, become advantages.
Preparing to insulate the attic
A specific feature of the attic is the presence of a sloping ceiling. Moreover, according to SNiP 2.08.01-89 “Residential Buildings”, the height of the attic floor cannot be lower than 2.5 m. It is allowed to reduce the height in an area not exceeding 50% of the total area of the room.
Other features of the attic include:
- dependence of heat loss on the material from which the house is built: wood, cellular concrete, brick or a combination of them;
- dependence of the attic engineering systems on the existing ones in the house. This leaves its mark on technical solutions for communications;
- variety of architectural forms: broken, single, gable roof;
- variety of design solutions. The material for the manufacture of load-bearing elements of the attic can be wood, metal, reinforced concrete;
- specifics of the location. The attic can be located within the building area or extend beyond its boundaries, supported by columns or a cantilevered interfloor ceiling.
Thus, when deciding how to insulate an attic for winter living, you need to proceed from the design features.
Please note that it is correct to carry out work on insulation of a residential building or apartment outside the premises, because... This approach ensures that the freezing point shifts towards the insulation mounted on the outside of the wall.
However, insulating the attic from the inside is a widespread option, because... all surfaces that are subject to insulation are located inside the attic (room) floor - ceiling, floor and walls. The exception is the pediment, which can be insulated as part of the attic insulation or along with the insulation of the entire house.
Factors affecting the thermal insulation of the attic
Professionals identify two key factors that have a significant impact on the level of heat loss and operational characteristics of the attic after insulation work has been completed.
- Firstly, it is a thermal insulation material. Taking into account the fact that the attic floor is the coldest room in the house, and it is intended to insulate the attic with your own hands, you need to carefully approach the choice of insulation.
- Secondly, it is a waterproofing film. It is precisely this that is designed to protect the insulation from moisture entering the attic premises from the outside (outside), through the roofing material, and from the inside, through the floor.
Which insulation for the attic is better to choose?
To insulate the attic of a house, you can use any heat-insulating material that has proven itself in practice.
Among the most popular materials are: cotton wool, polystyrene foam, polyurethane foam and their varieties. It should be remembered that insulation for the attic is selected taking into account factors inherent to a particular house and taking into account the level of skill of the person who will install the insulating material.
The characteristics that determine the suitability of insulation for use in a particular case are given in the table.
| Insulation | Stiffness (compressive strength) | Thermal conductivity | Hygroscopicity | Shrinkage | Weight | Installation on a broken roof | Price |
|---|---|---|---|---|---|---|---|
| Mineral wool (basalt insulation) | - | - | + | + | - | + | 100-140 rub/sq.m. |
| Glass wool (synthetic insulation) | - | - | + | + | - | + | 70-80 rub/sq.m. |
| Penofol (foil insulation) | - | - | - | - | - | + | 40-50 rub/sq.m. |
| Ecowool (cellulose insulation) | - | - | + | - | - | + | 23-35 rub/kg |
| Polyurethane foam (PU foam) | + | - | - | - | - | + | 170-212 rub/kg |
| Styrofoam | + | - | - | - | - | - | 2560-3200 rub/m3 |
| Expanded polystyrene (penoplex) | + | - | - | - | - | - | 3500-5000 rub/m3 |
Material prepared for the website www.site
How to insulate an attic from the inside
Features of the use of insulation of different types and types.
Soft thermal insulation materials:
- Insulating an attic with mineral wool requires careful selection and use of films. Thus, the main disadvantage of cotton wool can be eliminated - its hygroscopicity. The second, less significant disadvantage is slight rigidity, which can be eliminated by securely fixing the cotton wool, as well as the use of denser varieties. This prevents sagging of the wool. Nevertheless, thanks to the environmental friendliness of the components, insulating the attic with mineral wool from the inside continues to hold its leading position;
- Insulating an attic with glass wool is rarely done due to the fact that glass wool is an unsafe material from an environmental point of view. Plus, it creates installation difficulties;
- insulation of the attic with penofol. It is used when it is necessary to insulate without significant losses in the height of the room. In order for penofol to perform its functions, the material must be oriented with a foil layer into the room.
Rigid thermal insulation materials:
- insulation of the attic with polystyrene foam. An excellent and easy-to-install option, which has the disadvantage of incomplete adhesion of the sheets to the sheathing. Due to this, a space unfilled with insulation appears and the insulation efficiency decreases. In addition, polystyrene foam is flammable and releases toxic substances when burned. And finally, rigid insulation does not allow steam to pass through well. The popularity of polystyrene foam is due to its low price;
- Insulation of the attic with expanded polystyrene (penoplex) is similar to insulation with polystyrene foam. The difference lies in the presence of a tongue-and-groove fastening system, which, in fairness, does not play an important role in insulating the attic. And also in the greater density of the material itself.
Note that breathable soft insulation materials would be a good option if necessary to insulate a wooden attic.
Sprayed thermal insulation materials:
- insulation of the attic with ecowool. The material is 80% cellulose and 20% wood. Contains a natural antiseptic. This is a completely environmentally friendly material;
- insulation of the attic with polyurethane foam (PPU).
The widespread distribution of sprayed insulation is hampered by their high price, as well as the need to attract specialists and use special equipment. At the same time, as consumer reviews indicate, the price is justified by the high level of thermal insulation. After all, the sprayed material fills the smallest cracks and eliminates sources of heat loss.
The thickness of the attic insulation depends on: the type of roofing material, the height of the room, the presence of a heating system, the location of the insulation and its type.
Recommendation. If a chimney passes through the attic roof, basalt wool should be used. It begins to melt at a temperature of 1000 °C, and does not smolder like ecowool and does not melt like rigid insulation materials (foam plastic, penoplex).
Waterproofing and vapor barrier under insulation
Since wool is the leader among materials for attic insulation, and at the same time it is hygroscopic, there is a need to take care of the wool itself, protecting it with a hydro- and vapor barrier film. Otherwise, the cotton wool will get wet and lose its thermal insulation properties.
For insulation insulation the following are used:
- isospan (20-25 rubles/sq.m.). The vapor barrier film (membrane) has a double layer and surface roughness, which retains condensation;
- polyethylene film (3 rubles/sq.m.). The most affordable waterproofing material in terms of price. But this film does not have the ability to transmit steam;
- waterproofing membrane (30-45 rub./sq.m.). Many manufacturers offer roofing membranes that are distinguished by their ability to simultaneously retain moisture and allow steam to pass through.
- penofol (40-50 rub./sq.m.). Foil insulation.

Do-it-yourself attic insulation technology from the inside
Complex thermal insulation involves performing the following types of work:
- insulation of the attic roof;
- insulation of the attic ceiling;
- insulation of the attic floor;
- insulation of attic walls.
Each stage has its own characteristics, which we will dwell on in detail. Insulation of the attic from the inside is carried out if the roof is already covered.
Insulating the attic roof
It doesn’t matter what roofing material the rafter system is covered with. The main thing is that it effectively copes with the task of preventing water from entering the attic space. From the point of view of insulation, the type of roofing material does not matter - their thermal insulation properties are close to zero. This means that the most significant heat loss occurs through the roof. Therefore, work on insulating the room begins from the roof of the attic floor.

How to insulate an attic roof from the inside - step-by-step instructions
- installation of waterproofing film or membrane. This is a film that prevents water from entering the insulation, but does not prevent moisture from leaving it. Thanks to this, the insulation does not get wet. The film is mounted from the ridge to the eaves in such a way that water, if it gets through the roofing material or condenses on it, flows out over the film. Before installing the film, it is important to treat the wooden parts of the rafter system with a deep penetration primer;
- air gap. It is obtained by arranging the lathing. Allows the material to “breathe”;
- installation of insulation. Mineral wool (or rigid insulation) is laid between the rafters of the attic roof. If the rafter pitch is more than 600 mm. it is necessary to make additional lathing even before the stage of laying the waterproofing film.
The cotton wool is placed end-to-end between adjacent beams or metal profiles, so that there are no gaps. If any appear, you need to cut out a piece of cotton wool and close the gap.
Craftsmen recommend using mineral wool mats rather than rolled material, because... they are more dense. It is also recommended to lay the wool in two layers with an offset. To ensure that the cotton wool sits tightly in the intended place, it can be strengthened with rope or nails;
Advice. If you are insulating an attic ceiling with a slope length of more than three meters, you need to make wooden jumpers between the vertical beams of the sheathing. Because The cotton wool can “slip”.
- installation of vapor barrier film. The purpose of this film is not to let steam into the insulation. The optimal level of humidity is achieved by ventilating the room;
Note. To insulate the rafters, some craftsmen install thin insulation between the vapor barrier film and the finishing material.
When laying layers in a given order, it is important to ensure reliable adhesion of films and insulation to the ridge, valley, walls, window openings, etc.
- finishing material. Most often, sheets of plasterboard, MDF or wood (board, lining) are used to decorate the attic. The facing material is attached to the rafter system or frame made of profiles.
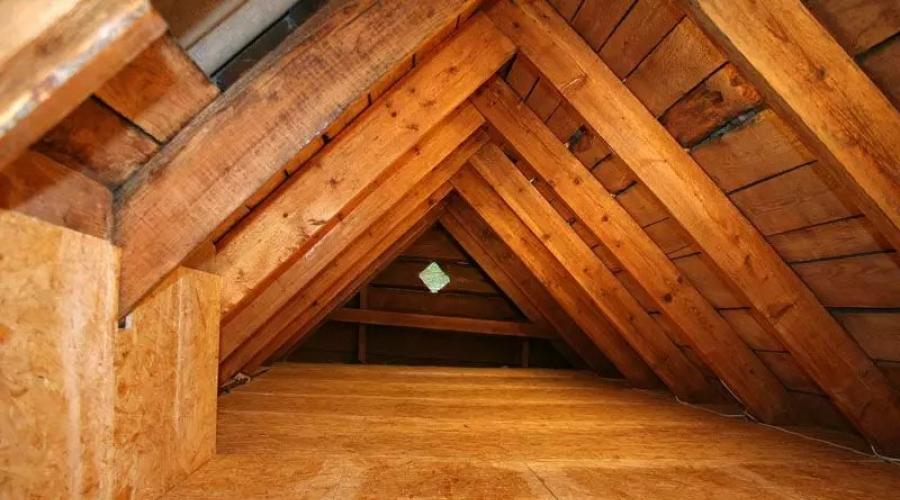
The attic is located under the roof of the house. The upper floors have greater contact with the external environment than the lower ones.
For this reason, heating in an uninsulated attic space will become useless.
Without high-quality thermal insulation of the attic, icicles can form. They appear as a result of emanating heat flows from inside the house, which cause the snow on the roof to melt.
Placing an attic will eliminate the penetration of heat from outside and retain warm air in the house.
Roof insulation prevents condensation formation. The difference in temperature between the attic and the street suggests the appearance of water droplets. Without proper insulation, there is a possibility of mold.
The technology for insulating an attic roof is not as simple as it might seem at first glance, and this article will be a visual aid for those who do not know how to insulate an attic roof from the inside with their own hands. If you are planning, be sure to read the article at the link.
In this article you will learn how to insulate an attic roof for winter living and how to choose the right insulation.
Before you start insulating the attic roof of a private house, you need to choose a suitable insulation for these purposes. Each type has a different number of layers and thickness of thermal insulation. There are several types of roofing thermal insulation materials for insulating the roof of an attic floor:
- Mineral wool. Certain rocks are used for its production. Among the advantages are increased fire resistance, good thermal insulation properties, maximum mildew resistance and rotting. The disadvantages are large mass and moisture permeability. Thermal insulation of an attic roof using mineral wool is not only cheap, but also practical. We talked about roof insulation with mineral wool in.
- Glass wool. Now outdated, but still quite well-known type of material. To obtain it, glass must be melted. It has excellent thermal insulation properties. Does not absorb moisture, is not afraid of fire, insects and rotting. The disadvantages include the penetration of glass microparticles into the human lungs, which can cause serious harm health. After some time it may begin to crumble into small particles.
- Polyurethane foam. Mainly consists of an inert gas phase. It is divided into two types - soft and hard. Very light, provides high-quality insulation heat and noise, not afraid of water. PPU is quite flammable. Read more.
- Expanded polystyrene. It is polystyrene foam. Available in foamed or extruded form. Its raw material is polystyrene granules. pros- environmentally friendly material, lightweight, moisture-resistant, has good heat and sound insulation properties. TO cons include lack of resistance to fire and destruction of foam under mechanical stress.
Calculation of insulation thickness
The thickness of insulation has different values in construction regions. High air temperatures require less insulation thickness. Areas with a predominance of low  temperatures - greater thickness of insulation.
Attic roofs have 3 types of enclosing structures:
- Attic floor
- Coating
- Gable walls
They have differences in heat resistance. Much less heat escapes through the walls of a building than through the coating.
The thickness of the material is selected individually depending on the type of structure.
NOTE!
The thickness of the attic roof insulation is calculated according to SNiP II-3-79 or according to the universal formula:
δ ut = (R - 0.16 - δ 1 /λ 1 - δ 2 /λ 2 - δ i /λ i)×λ ut
- δ ut - material thickness
- δ i - expresses the calculated thickness of the structure layer;
- R - thermal resistance of the structure for a certain area, (m²×°C/W)
- λ i - degree of thermal conductivity of the insulation layer of the structure, (W/m×°C),
- λ ut - coefficient of thermal conductivity of thermal insulation, W/(m °C).
An example of calculating the thickness of insulation
Let's assume that the attic cladding is done from the inside. In order: wood paneling, vapor insulation made of polyethylene film, mineral wool, air gap and roofing material. The formula indicates the thickness each layer, their thermal conductivity coefficient, and arithmetic operations are carried out to obtain the required thickness.
Roofing pie device
 The attic roof has several functional layers. The types of roofs with their structures vary in degree of complexity.
Collectively, the layers of the attic roof are called roofing pie(another scheme for insulating an attic roof).
There are 2 types of attic: exploited and cold. The roof structure is selected taking into account the choice of attic structure.
In the case of a cold attic layout, only the overlap.
If you plan to have an attic, you will need to do roof insulation.
It is in this case that a roofing pie is created.
The pie consists of:
- interior decoration,
- lathing,
- counter battens,
- insulation,
- ventilation gap,
- roofing material.
Carefully!
Insulating the attic roof from the inside
Insulation of the attic roof from the inside occurs in the following sequence of actions:
- It is recommended to start work from the lower edge of the roof. Waterproofing film laid out overlapping, the edges are secured with adhesive tape.
- Nailed to the rafters using nails counter racks. This is necessary to ensure ventilation gap and high-quality adhesion of the film to the roofing material.
- After this, it fits without gaps insulation. Can be used mineral wool.
- Free space is hemmed vapor barrier membrane.

Many owners of old houses are thinking about expanding their living space by adding an attic. However, they immediately wonder what to do if the roof is already covered, but the attic still needs to be insulated. In this case, the decision to carry out insulation work from the inside comes to the rescue.
Peculiarities
The process of insulating an attic from the inside cannot be called easy. To do this, you need to know the specifics of the roof structure, as well as understand whether your existing roof is suitable for insulation. Indeed, not every attic can be converted into an attic space, especially if the roof is already covered.

There are three situations in which the roof can be constructed:
- There is only a ventilation gap between the rafters and the sheathing. In this case, the roof is considered completely unsuitable for insulation. You will have to completely disassemble the roof structure to insulate it.
- A polyethylene film is laid between the sheathing and the rafters, acting as a vapor barrier. Such solutions can be considered optimal, and the roof can be considered fully prepared for subsequent insulation work.
- A diffusion membrane is laid between the rafters and the sheathing. Option similar to the previous one. The presence of a waterproofing layer is evidence that the roof is prepared for insulation from the inside.

Thus, the most important feature is the preparedness of the roof for further insulation.
Insulation materials
Thermal insulation of the roof of a private house, summer house, or cottage can be done using various means. There are liquid materials, elastic ones, and even those that have a relatively high density.
Before you start making your choice, be sure to pay attention to the roof structure. It often happens that not every material is universal, so it is better to be safe. The simplest example is the insulation of gable and sloping roofs: if almost any insulation is suitable for a simple gable structure, then not all of them are suitable for a sloping roof.

If we do not consider liquid insulation, the rest are sold in two forms - in slabs and in rolls. As you might guess, the slabs contain dense insulation, while the rolls contain fibrous insulation.
It should be noted that Not all options available on the market are suitable for insulation from the inside.. This is due to the fact that it is much more difficult to insulate the attic from the inside due to the existing rafters. This increases the need to level cold bridges.


Materials for internal thermal insulation should be considered in more detail.
Styrofoam
Ordinary polystyrene foam is one of the cheapest materials. It is sold in ready-made slabs, which makes it easy to use. Despite the fact that polystyrene foam is a budget thermal insulation solution, it has many advantages.

So, polystyrene foam is not hygroscopic - it absolutely does not absorb water and moisture. To increase water-repellent characteristics, it is enough to treat it with a special agent., which will clog the pores on the surface, and water will simply flow down the foam boards.
It should also be borne in mind that polystyrene foam has a very low weight due to the presence of a large number of voids between the granules that make it up. This makes it possible to handle the insulation work alone. Lightness has the further advantage of easing the load on the roof structure.


Polystyrene foam does not conduct heat well, as a result of which we can safely say that it perfectly insulates the attic. The ease of working with it is another significant advantage of the material: you can cut the material, cutting out pieces of the desired size, with an ordinary stationery knife.
However, there are also some disadvantages. Firstly, the foam does not “breathe” at all, which can cause condensation to form. Secondly, polystyrene foam is susceptible to damage by pests, in particular rodents. Third, wooden floors cannot be decorated with polystyrene foam, since over time the wood will shrink and gaps will appear between the foam boards.
How to insulate an attic with polystyrene foam is described in the following video.
Penoizol
Penoizol, or urea-formaldehyde foam, is a liquid version of polystyrene foam. The insulating solution is prepared immediately before use. Its difference from many other installation compositions, for example, polyurethane foam, is that during the hardening process it does not expand, maintaining its original appearance and condition.
The mass resembles white foam, similar in appearance to shaving foam.

Liquid foam is often used to insulate roofs and attics during the construction phase, but can also be used after the roof has been laid. Among other things, it can be used to additionally insulate the walls and floor of the attic.
The vapor permeability of the material, like that of its dense counterpart, is almost zero, which makes it imperative to take care of adequate roof ventilation. However, the material does not conduct heat, so it copes with its main function – thermal insulation – perfectly. So if you do all the work properly, thermal insulation using foam insulation will be a worthy and budget solution.

Extruded polystyrene foam or penoplex
Despite the fact that polystyrene foam and expanded polystyrene belong to the same group, the second is more practical. This is largely due to the specifics of installation. So, polystyrene foam covers the rafters, which results in better tightness. Expanded polystyrene boards are easily fixed to each other using glue. Due to its low weight, installation can be done independently.

The material has a long service life, but it does not rot and is not attacked by rodents. The only serious drawback is the flammability of the material. You will have to take care of additional insulation of the electrical wiring, because one spark can lead to a strong fire.
If no communications are planned for the attic, expanded polystyrene will be an excellent choice, especially considering that it can be covered with any finishing material. It is also compatible with wood, metal, and any roofing coverings.


Minvata
Mineral wool often acts as an alternative to penoplex. This material is a roll material, which is due to the ease of installation of heat insulators supplied in this way. Mineral wool has a fibrous structure, which fundamentally affects some of its properties.
So, mineral wool is an elastic material that is attached between the rafters. In this case, additional fastenings are not required, it is enough to just cut the wool slabs 2-3 cm wider than the portal into which the insulation will be inserted.

Rodents do not attack cotton wool, so you don’t have to worry about the integrity of the insulating layer. Mineral wool, however, belongs to the category of environmentally friendly insulation. Among other things, it guarantees excellent thermal insulation, despite the fact that it does not absorb moisture, and even if it gets wet, it will dry in record time. It is also better to use fibrous material if it is necessary to additionally soundproof the attic from surrounding street noise.
Read more about insulating the attic with mineral wool in the next video.
Glass wool
Glass wool is one of the varieties of mineral wool, but the difference is obvious. First of all, it is worth noting that the materials are made from different fibers. Fiberglass is used here. Thanks to this, the material is more elastic and durable. In addition, glass wool has better noise-absorbing characteristics. At the same time, it is hydrophobic - it absorbs moisture well, but dries poorly, as a result of which, when wet, it quickly loses its performance properties.

Many are afraid that the use of glass wool for thermal insulation purposes within a living space will lead to harmful consequences. Actually this is not true. If all finishing work is carried out correctly, no harm will be caused to health. On the contrary, glass wool is even safer than penoplex because it does not burn.
However, the material requires care when laying it. It will be necessary to take all safety measures, protecting the organs of vision, respiratory tract and skin from glass dust.

Stone wool
Among all insulating wools, stone wool is more expensive than its analogues, and all thanks to its special properties. Compared to others, it itself is safe and practically devoid of the disadvantages inherent in other samples. It is the most environmentally friendly of all, it is not afraid of elevated temperatures, since it does not ignite, and also does not deform under the influence of heat.
Stone wool perfectly blocks all extraneous sounds, while its sound-absorbing characteristics are an order of magnitude higher than those of other wools. Another advantage is the good vapor permeability of the material. It “breathes”, so condensation cannot form on it.

Stone wool can last for a long time. Such good performance properties are due not only to the strength properties of the material, but also to its ability to resist mechanical stress. Even if you squeeze it, it does not deform.
Cotton wool is sold in the form of soft slabs that can be easily cut into desired formats if necessary. The only existing drawback is the high price, but the material is worth the money.


Ecowool
Ecowool is very different from other wool in the form of sale. If other analogues are supplied in rolls or slabs, then ecowool is first crushed and then applied by spreading the material using special equipment. It is believed that this way it will better seal all existing cracks, forming a monolithic insulating coating.

There are two disadvantages here. Firstly, you need to apply ecowool using special tools. Secondly, the cost of the material cannot be called affordable either.


Polyurethane foam
Foamed polyurethane foam also needs to be applied using special devices, which are quite expensive.
To avoid unprofitable purchase expenses, it is easier to lease equipment - rent it.
The use of equipment and the application technology itself are quite complex, so when working with the material it is necessary to have at least some experience and knowledge on this issue.

Polyurethane foam is most similar to polyurethane foam because it has a similar operating principle. It expands in the same way when it hardens, completely closing all the cracks and gaps through which cold wind can penetrate or precious heat can escape. After hardening, the material becomes monolithic and smooth. This feature indicates that it does not absorb moisture, so you can do without the construction of additional hydro- and vapor barrier layers.

All this makes polyurethane foam an ideal choice, regardless of what material the roofing and ceilings are made of. The optimal solution when working with it is to invite a team of specialists who will complete the installation in a few hours using their own equipment, doing everything in compliance with technology.

Penofol
Penofol is the only foil insulation of its kind. It is produced in the form of slabs of polyethylene foam, coated with an aluminum layer on one or both sides. Aluminum reflects heat, returning it back into the room, so heat loss is minimized.
However, it is important to ensure that when laying, the foil side is facing inward and not outward.
Penofol is absolutely safe for humans and animals, although it is not a natural material. Thanks to the aluminum coating, it does not conduct heat, which gives grounds to assert the excellent thermal insulation properties of the material. Among other things, there may be no need to make a vapor barrier for this material, since if installed correctly, it copes well with vapor barrier itself due to its special texture.

If you plan to use the attic for permanent residence, then you will not regret choosing penofol.
Preparing the premises
Having decided to insulate the attic from the inside, you first need to properly prepare the room itself for work. Keep in mind that not every attic is suitable for insulation. Check whether the ceiling height is 2.5 m in more than 50% of the entire attic area. If not, then there’s no point in insulating it – you won’t be able to live here anyway.

Next, remove all existing sheathing material, exposing the rafters. The insulation will be installed either on top of them or between them. Check the condition of the roof, as well as the presence of vapor and waterproofing layers. Keep in mind that a roof with leaks must first be corrected, and only after that can you proceed to insulation work.
It is important that they are in good condition and have no cracks other than for ventilation.

Vapor barrier
When creating an attic floor for winter living, especially if the winters in your area are harsh, the first thing you need to do is check for a vapor barrier. As a rule, it is done immediately when the roof is installed, even if there are no plans to use the space under it as an additional room in the future. If there is no vapor barrier, then the roof will have to be redone from the outside, dismantling the roofing materials. Unfortunately, it is impossible to lay a vapor barrier layer from the inside, because it must lie between the rafters and the counter-lattice.
Various materials can be used to create a vapor barrier. All of them have their advantages and disadvantages, as well as specific combinations with insulating materials. All this must be kept in mind when moving on to insulation work, so it makes sense to dwell on vapor barrier materials in more detail.
In addition, this will help you make a choice if the roof of your house does not yet have a vapor barrier layer.

Polyethylene film
Despite the cheapness of the material, many builders strongly do not recommend using it. This is due to the fact that it is unsuitable for creating a vapor barrier layer in Russian realities. The material does not “breathe” at all: it does not let in not only moisture, but also air, and this creates problems with circulation and, accordingly, the greenhouse effect. Thus, condensate cannot evaporate and, flowing down, ends up on the thermal insulation.
Therefore, if your home has a vapor barrier made using polyethylene film, avoid purchasing water-absorbing insulation materials, such as glass wool.
Over time, the film tends to deteriorate and crack, so after a short period of time you will still have to completely disassemble everything in order to replace the fragile material that has served its purpose.

Glassine
Glassine is suitable for both steam and waterproofing, which is why it has received universal recognition. However, we will have to act in two directions here. Firstly, a layer of glassine will need to be laid between the roof and the counter-lattice, and secondly, on the insulation from the side of the room. If all work is done correctly, this will guarantee reliable protection and an optimal microclimate in the attic. On top, between the roofing and the counter-lattice, a double layer of glassine should be laid. Only then can the optimal effect be achieved.
Glassine is mostly needed to protect the insulation from moisture, so any material can be chosen as an insulation material. Try to choose options that do not deform under the influence of temperature changes, and are also not susceptible to rodent attacks. Both cotton wool and penoplex options are perfect.

Ruberoid
Ruberoid has been used as a vapor barrier since the times of the USSR, so in old houses you can find just such material between the roof and rafters. Nevertheless, If possible, such a layer will need to be dismantled. This is due to the fact that roofing felt is a rotting material, and in accordance with the standards it cannot be used for hydro- and vapor barrier in buildings with a long service life.


If it is decided to leave the roofing felt, then you should not expect good vapor barrier qualities from it. For this it is better to lay an additional layer of special vapor barrier material, at least the same plastic film.
It is worth keeping in mind that condensation may accumulate on the roofing felt on the inside, which will lead to the insulation getting wet. So, if the insulation is temporary (for example, it is carried out in the winter, and in the spring it is planned to redo everything), then foam plastic can also be combined with roofing felt.

Izospan
The material isospan consists of polypropylene. It is one of the most recommended for the construction of vapor barriers due to the fact that it was developed only for these purposes.
Izospan collects condensation and subsequently prevents it from getting on the insulation. The double-sided texture of the material is responsible for this. On one side it is smooth, and on the other it is a little rough. On the rough side, condensate droplets are retained and evaporate. With the help of isospan, not only the roof, but also the walls of the attic are vapor-insulated.

Depending on the properties of isospan, the labeling varies. The most expensive, but also materials with energy saving effect FB, FS, FD, FX are considered effective. They have a foil coating that reflects heat back into the room, thereby reducing heat loss to almost nothing. At the same time, the special texture still prevents condensation from rolling off and damaging the insulation.

Waterproofing membrane
You should not attribute to waterproofing membranes all the same properties that are inherent in specialized vapor barrier films. Indeed, both of them collect and evaporate condensate, but the main task of waterproofing membranes is to protect the house from moisture, and not from steam. In addition, waterproofing membranes have a wider range of applications: from insulating attics and basements to protecting swimming pools.

Waterproofing membranes are available in different types. There is diffusion, super-diffusion, and also anti-condensation, which is more suitable than others for a vapor barrier role. If you find one of these membranes after disassembling the cladding material, consider yourself very lucky.
You can lay any insulation without fear that it will get wet and quickly lose its quality. In addition, the microclimate in the attic will be excellent.

Penofol
Penofol is both an insulating and vapor barrier material. However, it can only be laid when a waterproofing membrane is found between the roof and rafters.
The reflective foil surface itself will collect condensation and help it evaporate, but the second “bare” side should be well protected from moisture. Only in this case will the variety cope with both steam and thermal insulation.

Material consumption
The calculation of the material is made at the stage of inspecting the roof for damage. Here it is important to take into account the pitch between the rafters and the distance between the vapor barrier and the internal space. The number and thickness of the slabs depends on the internal space: whether the thermal insulation will be laid in one layer or in several. The size of the slabs depends on the distance between the rafters.
Please note that if the pitch between the rafters is more than 60 cm, then you will need to prepare additional lathing yourself to make fastening the thermal insulation possible.
As for sprayed insulation, in this case it will be necessary to calculate the volume. You will first need to clarify such data as the expected thickness of the thermal insulation layer, the perimeter of the rooms and the height of the walls, as well as the density of the insulation. We must not forget about the presence of windows and doors. It is best to use a special calculator.


Insulation scheme
Since when insulating an attic, the roof is mainly insulated, it makes sense to consider the layering scheme only for it.
If you start from the outside, the pie will look like this:
- There is roofing material on top that is not touched. Underneath it there is a sheathing and a counter-lattice, which serve as a frame.
- Next comes a layer of hydro- and vapor barrier, which is also the original one.
- A layer of insulation is laid under the waterproofing. Depending on the width of the step between the rafters, additional sheathing can be constructed here.
- A vapor barrier layer is attached to the side of the room to protect the insulation.
- Finally, finishing is done.

How to insulate with your own hands?
To insulate an attic with your own hands from the inside, you need to keep in mind the plan for placing the layers one after another, and also follow the following step-by-step instructions:
- It is necessary to retreat slightly from the existing waterproofing layer, leaving an air opening. This will allow the insulation to “breathe”.
- After this, the insulation is installed. Depending on the material, it can be laid between the rafters or on them, or sprayed. How it is necessary to handle this or that insulation material is written in the instructions for it.
- Next, install a vapor barrier film. If a gap between it and the insulation is possible, then the connection to the walls, ceiling and, in the case of an attic, to the floor should be airtight. Otherwise, condensation will form on the side of the film that faces the insulation, but this should not happen.
- At the last stage, finishing is carried out. You can choose from many options, but usually purchase drywall, lining or MDF boards.

- It is better to buy cotton insulation not in rolls, but in mats, so they will not require time to “track”;
- to insulate the floor you need to choose polystyrene foam or other inexpensive material;
- the insulation does not require additional fastening, but if necessary, you can use nails, adhesive tape or a construction stapler for this.