Make a self-leveling floor with cement. What does the self-leveling floor consist of and is it possible to make the mixture with your own hands? Dry screed - clean and simple installation
Read also
To improve the quality of the coating and simplify the work on installing the floor, builders and apartment owners are increasingly using a self-leveling mixture for self-leveling floors.
Such compositions are easy to prepare and work with, as a rule, do not require special skills and are affordable. The building materials market surprises with the variety of SCM for self-leveling floors, of varying quality and characteristics. Let's consider the specifics of using the mixture, what the self-leveling floor consists of, and the main properties of the pouring result.
Types of mixtures for screed
Depending on the room in which the work is planned, as well as what result is needed, different compositions are recommended for use.

Mixtures for self-leveling floors for finishing and rough filling differ in the thickness of the possible layer, drying time, strength and, of course, price.
It is customary to distinguish between types of mixtures using the following criteria:
- fill layer thickness;
- type of diluent: aqueous or solvent;
- electrical conductivity coefficient;
- layer texture;
- base binder.
Most of the basic properties of the mixture for self-leveling floors depend on the main binder
| Basic component | Scope of application | pros | Minuses |
|---|---|---|---|
| Gypsum | Rooms with low humidity (up to 70%) | The thickness of the leveling layer can reach 10 cm, which makes it possible to hide very significant differences in height at the base; Low thermal conductivity; Budget cost. |
The readiness period and drying period are longer than that of cement mortar; They lose strength at high humidity. |
| Cement | No limits | Fast coating ready time; Not susceptible to high humidity; High strength. |
High price; Thin layer filling up to 5cm. |
| Epoxy resin or methyl methacrylate | Without restrictions, most often for non-residential premises. | Daily availability of coating; Excellent design and decorative capabilities; Can be applied over 3D layouts; Increased wear resistance. |
Not suitable for leveling significant surface defects; Toxic when working; High solution consumption: more than 1.5 kg per 1 m2. |
| Polyurethane (polyaspartates) | Most often used in private construction. | High strength; non-slip, abrasion-resistant; Suitable for filling inclined surfaces without the formation of sagging. | Not resistant to mechanical damage; Long readiness cycle; High price |
Related article: Fireplace stove: romantic and practical
Work stage

The rough screed is poured in a thick layer
Among other things, the mixture for self-leveling floors should be distinguished according to the stage of work it carries out. For the main or black screed, levelers are used. These mixtures are poured over beacons with a large layer thickness.
Used to eliminate gross defects in ceilings and height differences. This type of fill dries quickly. You can save on volume by laying reinforcing mesh in a layer.

The top fill should be no more than 5 cm thick
The top leveling fill for decorative finishing is carried out with appropriate compounds in a thin layer of no more than 5 mm.
The mixtures are expensive and are used as final leveling.
The solution sets quickly, but final hardening comes with time.
Some types of mixtures are poured as a decorative coating, usually an epoxy fill for 3D floors.
It is important to understand that finishing mixtures can be applied to virtually any base, as indicated on the packaging. But when using a certain brand of self-leveling floor composition for a screed, you will have to use a finishing fill of the same brand.
Compositions

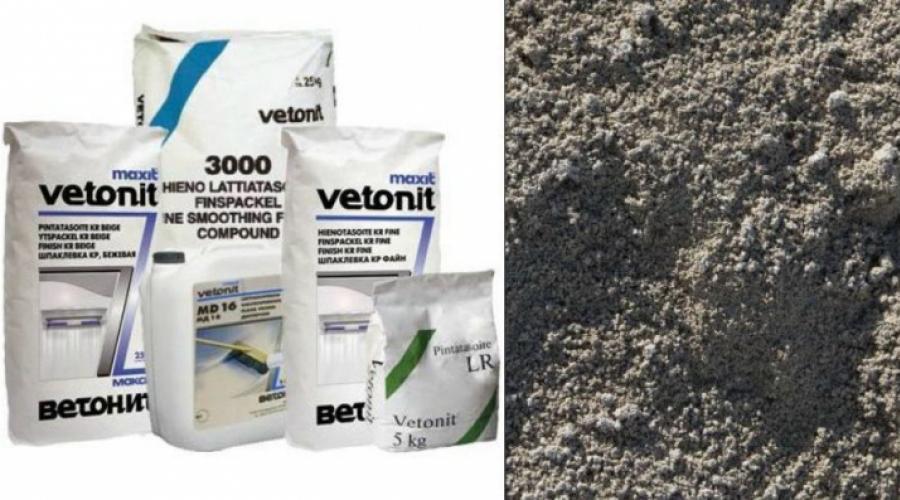
The binder component of the mixture is mixed with mineral additives
Many people will decide that everything is simple, just mix the floor mixture with your own hands and save money. In theory, self-leveling flooring is not complicated in composition. Moreover, most manufacturers do not hide the elements of the mixture and write them on the packaging.
As mentioned above, there is always one binder component, to which various mineral fillers, additives, additives and, of course, sand are added.

All these components perform their function and are mixed in a certain proportion. And even if you find the proportions and recipe, which manufacturers usually hide, there will still be a lot of fine edges. What sand? Which faction? What to mix and in what order.
In the end, it is unlikely that you will be able to save money. Rather, spend extra on ready-made dry construction mixture.
It is quite possible to prepare less complex mixtures for rough screeds yourself.


| Brand of solution | Cement | Water | Sand |
|---|---|---|---|
| 150 | 1 | 0,55 | 3 |
| 200 | 1 | 0,48 | 2,8 |
| 300 | 1 | 0,4 | 2,4 |
Bonk 08/17/2015 - 10:34
Need advice from a specialist or practitioner.
There is a lot of good raw cement of the M500 brand without additives.
On a concrete floor of 40 sq.m with a height difference of up to 5 cm, it is necessary to make a leveling screed and/or a self-leveling floor of maximum strength.
I don’t want to run into the “left” self-leveling floor. And the cement must be disposed of.
Please recommend a recipe for an armor-piercing screed or self-leveling floor.
As I understand it, you need fine sifted sand (I have it, I’ll sift it), ADDITIVES, and the correct water-cement ratio.
Ursvamp 08/17/2015 - 14:39
Well, for greater strength - fiberglass, it also costs a penny. Add during kneading. Check with the store to see if it will go into cement mortar. Don’t take glass fiber, only specialists can do this - there are problems with both silanes and chemistry in the future.
Ursvamp 08/17/2015 - 14:41
The screed must be maintained the first time - do not let it dry out, but also do not fill it with water, there should be no sun or draft. Moisten the screed for a week. It ripens for a month.
Bonk 08/17/2015 - 17:32
UrsvampI bought the cement myself - Mordovian cement in bags of 2 tons on a pallet, packed in film.
If the cement is really alive, and the sample proves this, then the recipe is as follows:
Ordinary washed sand, what to sow there - it will be a rough screed. If you can find ground gravel, it will be good.
Next is an additive for preparing cast concrete, I don’t know where you’ll find it. I use ready-made mixtures, they are cheap. This additive is complex, it contains a moisture-retaining agent, a plasticizer, and an air additive.
Well, for greater strength - fiberglass, it also costs a penny. Add during kneading. Check with the store to see if it will go into cement mortar. Don’t take glass fiber, only specialists can do this - there are problems with both silanes and chemistry in the future.
I poured concrete last year and this year - ROCK!
Gravel - fine granite (plum pit). Added another 1% Penetron admix. And a glass of liquid soap to reduce the water-cement ratio.
Ready-made mixtures are cheap (WHAT?) - are they just a source of sand?
Or are you taking it because of the additives?
Tell us more about the additives - what they are and why.
I have enough good cement. Good clean sand, quarry sand.
Increase the mobility of the mixture, reduce the water-cement ratio - add a little liquid soap.
What exactly is a plasticizer? PVA, acrylic dispersion?
Air additive - what is it?
Is the moisture-retaining agent CMC?
I can create moisture by simply closing the basement doors. After the initial setting, I can pour a little water on top.
I don't want fiber. There is a prejudice. As a last resort - a thin metal mesh. But I don’t see much point in this.
Who has worked with self-leveling floors - how hard and strong are they? Can it be used as an "industrial floor"?
Or does it create a relatively soft, flat surface for laying a harder surface - tiles, laminate, etc.?
Gurian II 08/17/2015 - 17:54
The most important thing is where will you cast? 😛
quaserfirst 08/17/2015 - 18:14
BonkSulfite-alcohol stillage
What exactly is a plasticizer?
alexaa1 08/17/2015 - 18:25
The screed should be with expanded clay. Because
Expanded clay fraction 5-10 mm is just that.
There is also expanded clay sand - there is a fraction of up to 5 mm.
quaserfirst 08/17/2015 - 18:39
alexaa1Someone like.
A screed consisting of cement and sand is bound to crack by default.
Ursvamp 08/17/2015 - 19:04
BonkIf I want, purchased cast concrete turns out to be even glossy. Paint and that's it. But under the load, the foundation under this screed is important. If the base is concrete, it must be dusted with a vacuum cleaner and primed with styrene acrylate emulsion.
Now you just need to level the floor - get a flat, smooth surface - an “industrial floor”.
The plasticizer makes the semi-dry mass plastic, that is, the amount of water during mixing is reduced, which increases the strength of the resulting concrete. It’s better to buy a ready-made additive in a store, rather than experiment with all kinds of stuff like soap and other household items.
I take, from what I remember, ready-made mixtures Petrolit and Forward. I like the last one the most. One day I flew in and bought shit, it was a case, I don’t remember the name. They slipped in a regular DSP.
Gravel - fine granite (plum pit)
Ursvamp 08/17/2015 - 19:05
alexaa1I don't have to.
A screed consisting of cement and sand is bound to crack by default.
alexaa1 08/17/2015 - 19:29
Ursvamp
I don't have to.
In my apartment, the screed resembles a turtle shell.
In the previous one, a layer of expanded clay was poured onto which the solution was supplied through a hose - nothing cracked.
In addition, I personally mixed about 20 cubic meters of concrete in a trough + plastered several of my buildings.
Therefore, I understand what can be done at a mere cost / with expanded clay filler / and it will be monolithic. Or use supermixes at an order of magnitude higher price.
The second is used by European renovation professionals to eat bread with caviar. People fall for this because European-quality renovation is a game: whoever invests more is cooler and more respected.
Bonk 08/17/2015 - 20:40
Ursvamp
Crushed gravel (crushed stone) goes into a small screed, the fraction is smaller than rice. Apparently it has better adhesion than sand. Maybe they use slag there, and with it the concrete is even stronger due to the active surface of the slag flakes.In some cases, a polymer emulsion is added to the solution. Small amounts strengthen the resulting concrete.
Thanks for the tips.
Ursvamp 08/17/2015 - 20:59
Don't listen to home excrement specialists with their soaps and Fairies in solutions. 😊 Do everything according to science - and there will be happiness!
Nikolaich T4 08/17/2015 - 21:35
UrsvampThat's right! fairies in the screed are evil! because, on the contrary, it makes the mortar more airy and it does not set right away, fairies can (but not necessarily) be used only for masonry or plaster mortar.
Don't listen to home excrement specialists with their soaps and Fairies in solutions. 😊 Do everything according to science - and there will be happiness!
For the screed, only good (fresh) cement, coarse washed sand 1k2 or 1k3, simple plasticizer C3 and polypropylene fiber are very desirable! Fsyo! although it is even more correct to make a “concrete” screed with the finest crushed stone fraction.
Gurian II 08/18/2015 - 09:02
On a concrete floor of 40 square meters with a height difference of up to 5 cm, it is necessary to make a leveling screed and/or self-leveling floor of maximum strength. If the average layer is considered to be 2.5 cm, then you will need 1 cubic meter of mixture. You don’t want to run into a “left” self-leveling floor . And the cement must be disposed of.
What do you need???
and here you are already discussing mixtures like children...
again about the mixture - where will you cast it?
- in a house, apartment, cottage
- in a garage, shed
- on open air
For the warm season and enclosed spaces, covering with film is enough (so that the water evaporates more slowly)
quaserfirst 08/18/2015 - 09:40
Gurian II
So, in the warm season, and especially indoors, plasticizers are NOT NEEDED, they only slow down the concrete hardening process.
They are added only when there are temperature changes in unheated rooms - so that the water does not freeze and crystallize, destroying the bond of the concrete.
Bonk 08/18/2015 - 10:11
Gurian IIFor understanding.
Eh, I think you don’t fully understand everything, so you can make mistakes:
- putty, this is filling up holes and chipping off bumps before painting/laying floors, etc.
- screed is a leveled layer of wet concrete mixture along the beacons
- self-leveling floor is a floor filled with a watery concrete mixture, and due to the fact that the liquid, in the absence of vibrations and gravity, levels itself out.
What do you need???
Again, keep in mind that the layer of screed or self-leveling floor must be at least 5 cm, otherwise the screed will burst. This means that you add another 5 cm to the deepest hole of 5 cm - otherwise, where the bumps go to 0, the screed may burst.In connection with this, another question - where will you cast?
- on the “ground” or on concrete floors? Calculate how much weight you will have, otherwise you will collapse even more...
Vacation home. Ground floor. The walls are FBS concrete blocks.
The concrete floor of the basement is almost level with the ground level.
Those. in front of the gate there is a concrete slab level with the ground, a steel threshold of five to seven centimeters, inside the concrete is poured to approximately the same level as outside. Those. I won’t raise the floor inside, just level out the bumpiness.
The concrete was cast, focusing on the reinforcement, which I aligned exactly according to the laser level. Those. When casting, I used two boards 3.5 cm thick, along which I moved the rule.
Below everything is carefully compacted with a vibrating platform in the wet: first a leveling layer of sand, then a 15 cm layer of sand to exceed the maximum level of rising hot water, vinyl waterproofing and a separator, a 15 cm layer of coarse gravel (rupture of the capillary suction of moisture), a vinyl separator, 10 cm of foundation insulation penoplex, on top of it there are gaskets and a double steel grid of 12 and 14 mm with drilling into concrete walls to a depth of 25 cm.
The blocks were treated with Penetron; Penetron Admix was added to the concrete during mixing and vibrated with a deep vibrator. The concrete slab-floor must adhere monolithically to the concrete walls (powerful reinforcement and penetrating penetron), dramatically increase the area of the foundation (40 sq.m of slab is added to 9 sq.m of tape), and become the floor in the basement (industrial purpose).
When casting, I did not try to perfectly smooth the surface of the concrete; the main thing was to ensure the same thickness of the concrete slab. Most likely there is a smooth hole in the middle (or maybe not), concreting began from the walls, where the reinforcement clearly set the level.
Therefore, the task is to create an even, STRONG horizontal surface using as thin a layer as possible (and in the middle of the room it may not be thin, it hasn’t been shot with a laser yet). It is desirable that it also be a durable industrial floor.
You can, of course, buy many, many bags of expensive self-leveling flooring.
But having more than one and a half tons of good M500 cement, it will somehow not be economical.
Gurian II 08/18/2015 - 11:14
For understanding.....Then, in essence, your floor is already done.
I don’t think that you have bumps there that could break your legs, do you? The industrial floor doesn't care about small unevenness - it just needs to be painted regularly. Unless you're caught up in the modern mania for making everything smooth.
You should consider the following point - to make the new floor durable, you will actually have to cast a new concrete slab flush with your threshold of 5-7 cm.
Bonk 08/18/2015 - 12:18
Gurian IIHere I want specifics. What specific treatment? What a hardener. What kind of paint?
your floor is already done.
To make it industrial you need to impregnate it with a hardener and paint it with concrete paint. This is enough for trucks to drive on it.to make the new floor durable, you will actually have to cast a new concrete slab flush with your 5-7cm threshold.
And if you make a thin screed, it will constantly burst, fly off and collect dust from the main floor. And you will constantly be filling holes and cracks.The strength of an industrial floor is achieved by treating it before it gets dirty
I do not rule out the option of leveling the surface in spots along the beacons, mixing cement with sand in an acrylate dispersion. Or a cement self-leveling floor so that the height difference approaches one centimeter.
Followed by finishing pouring a thin layer of self-leveling cement floor, painting or filling with colored chips. Or for laying porcelain stoneware.
Or finishing with an epoxy floor.
Now the differences are such that too much epoxy or cement self-leveling floor will be needed.
To make the floor strong so that it does not burst, you can also use a thin reinforcing mesh. At least with shooting, at least without.
I'm asking for advice because... there is no PERSONAL experience of such technologies.
I used a stapler to shoot a polymer mesh along a vertical wooden wall, coating it with tile adhesive. Monolith, no cracks. This is how I sealed openings in light partitions.
Gurian II 08/18/2015 - 15:12
because there is no PERSONAL experience of such technologies.Until yesterday I didn’t have one either, because... I pissed and read a bunch of literature, flooded the floor in the garage already during the snow and rain. We are all human 😊
I do not rule out the option of leveling the surface in spots along the beacons, mixing cement with sand in an acrylate dispersion. Or a cement self-leveling floor so that the height difference approaches one centimeter. Followed by finishing pouring a thin layer of self-leveling cement floor, painting or filling with colored chips. Or for laying porcelain stoneware. Or finishing with an epoxy floor. Now the differences are such that too much epoxy or cement self-leveling floor will be needed.You don't understand the main thing - the more thin layers, the faster the concrete collapses. This is not plaster - people don’t walk on it and don’t drive on it with wheels. Do you want to make some kind of layer cake?
The main problem with concrete is that it becomes dusty and cracks over time, and if there is a thin layer, then in whole pieces. Then you try to cover up the cracks - it’s all to no avail.
- if it’s a garage, then fill the slab cm. 5, level and paint
- if it’s a barn (a warehouse for all sorts of rubbish), then you can simply paint it
See BY LOAD
In my garage there is a car weighing up to 3.5 tons, my slab is at least 10 cm, in the central pit it’s all 20. The plasticizer was added because the frosts started at night and I fell in love with the time. I painted it with paint on the concrete until it was worn - and that was it.
What specific treatment? What a hardener. What kind of paint?
Ursvamp 08/18/2015 - 15:28
quaserfirstconfuses.
Don't you confuse plasticizer with anti-frost additives for an hour?
Ursvamp 08/18/2015 - 15:34
If you prepare the screed for heavy loads, you will have to add a thickness of up to 50 in thin places, and a steel mesh. Treat the surface to be poured carefully. Fiber is highly desirable. In general, the requirements for a screed are expressed in strength characteristics for the proposed load, then we look at what strength will be obtained in one or another version. This is according to science.
In general, such requirements should be taken into account immediately when casting the slab; it is simpler and cheaper.
Gurian II 08/18/2015 - 17:04
Don't you confuse plasticizer with anti-frost additives for an hour?I’m not confusing anything - plasticizers are intended for construction in the fresh air - the concrete/cement traveled an unknown amount of time in a mixer, they brought it and dumped it in a pit at a construction site, the Uzbeks, along with the earth, left the concrete in troughs, lifted it to the floor, and there they drained it with water because... It was already starting to harden, we somehow mixed it with shovels and... we can fill the floor.
confuses.
Plasticizers primarily prevent the evaporation of water, because rapid evaporation of water leads to destruction of concrete. All other super-properties are bullshit.
I talked to experts - for HOME use this is unnecessary and a waste of money. But due to the fact that we have a mania for supposedly “technological innovations”, people are hogging it.
The main thing in concrete is maintaining proportions and timing.
And it’s precisely time that is lacking in home construction - in 2-3 hours until the first batch has hardened, you need to mix about a cube or 2, then level it all out, rub it in, cover it with film and leave it for a month. But if you didn’t have time or didn’t keep the proportions - ALL THE WORK WAS FORWARD.
So I ordered a ready-made mixer.
Ursvamp 08/18/2015 - 17:19
The plasticizer reduces the amount of water in the mixture - one, makes the mixture easy to spread - two, the mixture does not need to vibrate - three.
I personally wouldn’t trade ready-cast concrete for anything, because it’s convenient and durable. This is for small objects. On large ones - the same thing but from a ready-made mixer, plus fiber.
quaserfirst 08/18/2015 - 18:50
Gurian IIThe plasticizer is designed to increase the mobility of the concrete mixture with a minimum of water in the mixture. Compacts concrete. In the fresh air or in a smoky sculptor’s workshop - it doesn’t matter.
I’m not confusing anything - plasticizers are intended for construction in the fresh air
Bonk 08/18/2015 - 20:19
Gurian III know that it is advisable to pour concrete “in one piece”, giving it an IMMEDIATELY smooth surface by grouting on a long stick.
You don't understand the main thing - the more thin layers, the faster the concrete collapses. Do you want to make some kind of layer cake?
The main problem with concrete is that it becomes dusty and cracks over time, and if there is a thin layer, then in whole pieces.
What do you want on the ground floor? That’s why you dance:
- if it’s a workshop, then level the holes, and then lay tiles on top or fill them with epoxy
See BY LOADThe treatment is simple - the next day after pouring, go through it with a float and smooth out the bumps.
There are a lot of hardeners (Inte, to help) - Litorin, for example. When you were in Soviet department stores, you probably noticed that the concrete floors there are smooth, as if covered with varnish and do not collect dust, although thousands of people walk on them.Concrete paints FOR INDUSTRIAL ROOMS/FLOORS - there are only two of them: red and gray 😊
The reality is that I do everything alone. And I am an ordinary person, not a robot, not a Stakhanovite.
In total, I laid 23 cubic meters of materials into the floor of the basement floor - sand, gravel, insulation, reinforced concrete.
The main thing for me was to cast a monolithic foundation slab under the house, which would take the weight of the house and significantly reduce the pressure on the ground per unit area. There was no time for grease to smooth the surface of the concrete. I passed the rule, and that’s enough. Since it rained in small portions (concrete mixer 130 liters), at the junctions of the sections of the previous day there were differences up to the size of a gravel pebble.
But my concrete turned out amazing - the very next day you’ll scratch it, what kind of grout is there, what kind of cracks are there. Individual pebbles left lying on the surface, which seem to easily fly off when hit with a construction hammer, you have to fight off - as if glued with superglue, if only they themselves split.
There was no strength to check the exact plane. To achieve an accurate plane, it was necessary to work with a vibrating screed along pre-set guides, followed by ironing and grouting.
The purpose of the floor is a workshop.
Therefore, I won’t show off. Most likely, according to the beacons, I will “fill out the holes” with a 1:3 solution of acrylic or PVA dispersion.
And then - either laying the cheapest porcelain tiles, up to 300 rubles per sq. m. What tile size would you recommend? 30x30, 40x40, 60x60?
Or polyurethane self-leveling floor Polymerstone-2. I calculated it and it turns out to be 662 rubles/sq.m. per circle.
The self-leveling floor impresses with its seamlessness, it’s easy to clean, you can choose a beautiful blue color.
Porcelain tiles are durable, “eternal”, they don’t care about welding, if necessary, you can replace individual tiles (make a spare).
I think so.
Gee 08/18/2015 - 20:21
If a person wants to have sex, then you can google the polymer concrete recipe, or you can throw bustylate or kmts into the PCS.
Bonk 08/18/2015 - 20:57
Gee
Screed on a mesh, can be polypropyl or glass.
On top is 10 mm of Stupino McFlow or MBR-300 injection molding.
If a person wants to have sex, then you can google the polymer concrete recipe, or you can throw bustylate or kmts into the PCS.
Why do I need MBR-300 (Compressive strength (grade) 300 kgf/cm2 (30.0 MPa) when I have honest Mordovcement M500?
Why do I need a “grid screed” if I choose porcelain stoneware?
Is it really impossible to write once to the point, without banter, without advertising templates?
Well, what is the MBR-300?
Portland cement grade is lower than mine.
Fractionated (sifted) sand up to 1 mm - my sand is no worse, fine, clean, NOT RIVER, i.e. The grains of sand are not rounded by rolling, there is a sieve, a vibrator - I can sow half a ton of sand.
A complex of modifying additives - it’s a great mystery what they put in there.
A guy on YouTube compared 4-5 tile adhesives, including homemade cement + sand + PVA - for the strength of adhesion and retention of tiles on metal objects (he had a pipe).
So, oddly enough, some cheap tile adhesive worked the strongest, and the leader was cement + sand + PVA.
I will agree to follow the smart advice if you convincingly show me that I should forget about the already purchased high-quality sand and Mordovian cement, and I need to buy a lot of bags of MBR-300 with miraculous modifying additives.
Well, so where to stop?
Polymerstone-2 - you need to wait 28 days until the concrete has completely set, so that by this time it is dry, with a humidity of 4%, otherwise the polyurethane floor may peel off.
Gres porcelain tiles in Leroy generally cost 152 rubles/sq.m., you can install them without waiting 28 days.
Bonk 08/18/2015 - 21:02
GeeI'm done with the stumps. I brought out all the big ones.
if you want to have sex
There's a bit of small stuff left around the edges of the area, but it's not a problem, I'll take it out.
Now they play the role of a green screen between neighbors.
Ursvamp 08/18/2015 - 21:02
BonkThey seem to weaken the concrete completely. And the use is only for primary strength and as a water repellent. I don't see the point.
I'm planning an acrylic or PVA dispersion, which will be on sale.
Ursvamp 08/18/2015 - 21:05
It turns out everything has changed, porcelain tiles are already in use. 😳
Bonk 08/18/2015 - 21:10
UrsvampNot concrete, but cement mortar. Portland cement M500 + fine sand.
They seem to weaken the concrete completely.
Acrylic or PVA dispersion - essentially polymerizing adhesives, work as plasticizers (reduce the “fragility” of the material), and should fill MICRO cracks, of which many naturally form in cement mortar (and concrete too).
Tile adhesives are made like this - polymer adhesive is added to the mixture.
Where do the rumors about the weakening of concrete with polymer dispersions come from (not PVA glue, but PVA dispersion).
Gee 08.18.2015 - 21:21
You don’t have to bother with granite at all, the glue is fine and that’s it
Prose writer 08/18/2015 - 21:26
The only plasticizer I used was liquid glass. The properties of concrete change when mixed in seconds 😊 Concrete becomes completely different - sticky, corrosive + water-repellent properties are acquired. I poured about a liter into about 70-80 liters of mixture.
Bonk 08/18/2015 - 21:37
UrsvampIt hasn't changed.
It turns out everything has changed, porcelain tiles are already in use. 😳
I choose, I consider, I figure out how best to make the final floor covering.
Everything is written in the topic, you just need to read it.
October 15 - closing of the cement working season.
Cement mixtures need to stand for at least a week without frost; they will gain their 28-day strength even with frost, but longer. Just make sure that in the first seven days the freshly laid cement mortar does not get exposed to sub-zero night temperatures.
If I start laying porcelain tiles now, I’ll have time before frost.
There is no need to clear the ENTIRE floor surface, as when pouring polyurethane. And I already have some hard-to-move junk there.
You can work with polyurethane up to 5 degrees Celsius (but you have to wait for the concrete and mortar base to dry completely).
So I’m starting to look towards porcelain stoneware.
Moreover, the material is simple, proven, without surprises.
There is no need to sand the floor underneath with a mosaic machine.
What tile size would you recommend - 30x30 or 60x60?
Porcelain tile Estima Standard matte 60x60.
Nikolaich T4 08/18/2015 - 21:39
Most likely, according to the beacons, I will “fill out the holes” with a 1:3 solution of acrylic or PVA dispersion.Why don’t you use “acrylic or PVA dispersion” for everything? did you get the upper hand? IT'S ALL JUST A PRIMER!!! which needs to be treated with the existing floor before laying a new one, but needs to be diluted. The mixture is made only with water using a superplasticizer to reduce the water-cement ratio and workability of the solution, and basalt or polyprop helps a lot against cracking. fiber
Nikolaich T4 08/18/2015 - 21:41
I’m not confusing anything - plasticizers are intendedYou are definitely confusing and misleading people!
Ursvamp 08/18/2015 - 21:42
BonkNo. Tile adhesive has great adhesion to surfaces and quickly gains primary strength. And its compressive strength is much less than that of simple cement mortar.
And after setting, tile adhesive turns out stronger than just cement mortar.
Nikolaich T4 08/18/2015 - 21:47
Prose writerIt is not a plasticizer in any way, only waterproofing! at the same time the layer becomes more fragile
The only plasticizer I used was liquid glass.
Stas 08.18.2015 - 21:57
Nikolaich T4Two thirds of the answers here are not 😊 They pour everything that is at hand and everything that a “familiar builder” suggests 😊 😊 Forumhouse was closed or something... 😊 Or Google banned Roskomnadzor... 😊
It is not a side
Ursvamp 08/18/2015 - 22:01
About polymer additives:
7.4.2. Properties of hardened mortar and concrete
7.4.2.1. Strength.
In general, modified mortar and concrete show a significant increase in tensile and flexural strength, but their compressive strength does not increase compared to conventional mortar and concrete. This is explained by the high tensile strength of the polymer itself and the general strengthening of the bonds between cement and aggregates. The strength properties of modified mortar and concrete are influenced by various factors interacting with each other: properties of the materials used - latexes, cements and aggregates, control factors for selecting the composition of the mixture (i.e. polymer-cement and water-cement ratios, ratio of binder to pore volume, etc. .), exposure methods and control methods.
Influence of material properties. The properties of polymers in latexes mainly depend on the amount of monomer in the copolymers, as well as the type and amount of plasticizers. Properties of latexes, such as mechanical and chemical stability, air release, and normal drying drying, depend on the type and amount of surfactants and defoamers and the size of dispersed polymer particles. Ohama studied the effect of the monomer ratio in PEVA and SBR latexes on the strength of modified solutions (7.18).
The amount of monomer affects the strength of latex-modified mortars to the same extent as the polymer-cement ratio. The maximum strength of a solution modified with PEVA is achieved with a bound ethylene content of 13%. The strength of a solution modified with SBR increases with increasing content of bound styrene. Similar results were obtained by Cherkinsky et al.
The tensile strength of dry SBR latex film increases dramatically as the bound styrene content increases. There is a clear relationship between the strength of this film and the flexural strength of the mortar modified with SBR, with a polymer-cement ratio of about 10% (7.19). The effect of the plasticizer content (i.e. dibutyl phthalate) in PVA latex on the strength of the solution modified by it is shown in 7.20.
Just like a solution modified with SBR, the strength of a solution modified with polyvinyl acetate (with different plasticizer contents) decreases with increasing plasticizer content.
Typically, the mechanical and chemical stability of latexes improves with increasing content of surfactants chosen as stabilizers. Stabilized latexes can effectively disperse without coagulation in modified mortar and concrete. On the other hand, excessive amounts of surfactants can have a negative effect on the strength of modified mortar and concrete by reducing the strength of the latex film, retarding cement hydration and excessive air entrainment. Therefore, latexes used as cement modifiers must have optimum surfactant content to ensure high strength of the modified mortar and concrete. The optimum surfactant content ranges from 5 to 30% by weight of the total solids content. Figure 7.21 shows the relationship between the surfactant content of latexes and the flexural strength of modified mortars.
Surfactants are usually added to latexes to prevent excessive air entrainment. Figure 7.22 shows the effect of an emulsion-type silicone defoamer on the air content and compressive strength of modified mortars. An increased content of defoamer leads to a pronounced decrease in air content and an increase in compressive strength. It is important to select defoamers and surfactants, both stabilizers and emulsifiers, so that they do not adversely affect the hydration of the cement.
Polyethylene glycol nonylphenyl ether and silicone emulsion are good surfactants and defoamers, respectively, but large amounts of sodium alkylbenzene sulfate, a popular emulsifier, cause retarded cement hydration and prolong setting times.
The size of dispersed polymer particles in latexes can influence the strength of modified mortar and concrete to some extent. Reist et al. and Brocard found that PVA (polyvinyl acetate) modified mortar achieved maximum strength at particle sizes of 1 to 5 µm and 2 to 5 µm. Wagner et al observed an increase in compressive and tensile strength of a PVDC-modified solution with decreasing particle size
It is obvious that the molecular weight of latex polymers does not affect the strength of the modified mortar and concrete.
The type of cement does not have a noticeable effect on the strength of modified systems, with the exception of high-alumina cement (7.23). Figure 7.24 shows the effect of sand fineness modulus on the strength of modified mortars. Flexural strength and compressive strength increase with increasing particle size modulus, i.e., the size of sand particles, as for an unmodified solution.
The development of tensile and flexural strengths is of greater importance than compressive and shear strengths, with the exception of those for PVA-modified concrete. Most modified mortars and concretes show maximum strength at polymer-cement ratios from 10 to 20% and from 20 to 30% with dry curing and combined water and dry storage conditions, and with water curing - at polymer-cement ratios from 5 to 15% and from 15 to 25%. Some modified systems have a minimum strength at a polymer-cement ratio of 5 to 10%, regardless of curing conditions. A number of systems show a sharp decrease in strength with increasing polymer-cement ratio, also regardless of curing conditions. In general, most modified mortars and concretes kept under favorable conditions have high strength properties at a polymer-cement ratio of 20-30%, after which the strength may decrease. Up to this value, polymers influence the improvement of the microstructure of mortar or concrete, but a further increase in the polymer-cement ratio leads to breaks in the microstructure, which reduce strength. The use of low polymer-cement ratios (below 5%) is ineffective as this leads to low strength. Therefore, in practice, a polymer-cement ratio ranging from 5 to 20% is used.
As can be seen from table. 7.9, for a given concrete composition, a significant decrease in the water-cement ratio associated with an increase in the polymer-cement ratio leads to an increase in the strength of most modified systems.
Air entrainment has a significant effect on the strength of modified systems (see 7.22).
Wagner extended the theory of Powers and Brownyard to ordinary cement pastes and developed a general formula for predicting the compressive strength of latex-modified mortars using the water-cement ratio and entrained air content:
R^ = Ci + C2/(B/U)+C3A,
where /?сж is the compressive strength of latex-modified solutions; WIC - water-cemeity ratio; A is the volume of entrained air in percent; C\, Cr and Cz constants.
However, this equation was obtained under special conditions of completely eliminating water loss during aging, and it is very difficult to apply in practice.
In order to develop equations for predicting the compressive strength of modified mortars and concretes, various factors must be taken into account: polymer-cement ratio, water-cement ratio and air content. Extending Talbat's theory of pores in conventional cement mortars and concretes, Ohama determined the binder-pore volume a and pore volume-binder p relationships and proposed an empirical equation using calamus to predict the compressive strength of latex-modified mortars and concretes.
For most modified mortars and concretes, as confirmed in the work of Wagner. From these data it is obvious that the curing conditions for mortars are more important than for concrete, due to the difference in water-holding capacity due to the size of their samples.
Water resistance of modified systems, assessed. when the strength changes after immersion in water, will be discussed in paragraph 7.4.2.4, including the lowest water resistance of systems modified with PVA. Immersion in water followed by dry exposure causes a sharp decrease in the strength of all modified systems. This effect on strength is apparently reversible due to the recovery of strength during dry storage after water immersion, as found by Ohama and Frondistu-Yiannas and Shah.
Typically, the compressive strength of concrete modified with SBR and PEVA does not change significantly with additional curing and becomes almost constant at the age of 182 days, regardless of the size of the sample. Compressive strength at this age increases sharply with increasing polymer-cement ratio and becomes 2-3 times higher before dry aging, i.e. after 7 days of wet aging. The main reason is that the hydration of cement in modified concretes progresses throughout the dry curing period due to the high water-holding capacity resulting from the formation of a polymer film. This efficient development of strength is one of the advantages of modified concrete over conventional cement concrete. Compressive strength tends to increase with increasing surface area to volume ratio of the sample, i.e., with decreasing sample size, regardless of the polymer-cement ratio. A similar trend is observed in unmodified concrete.
The possibility of cracks and cavities forming in a sample increases with increasing its volume, i.e., with increasing its size. A method has been developed for obtaining high strength by heat treatment of modified systems using thermoplastic copolymers with special thermal properties. Copolymers are made from two monomers that form a homopolymer with different transition points above and below ambient temperature. The exceptional flexural and compressive strengths obtained using this method are presented in 7.34. Optimal strength properties with this special exposure are achieved in the temperature range of 70-120? C. The mechanism for achieving such high strength can be explained by the intensive formation of a permanent polymer film and the pore filling effect.
Relationship between surface hardness and compressive strength. The surface hardness of modified systems is generally slightly higher than that of a conventional cement system, depending on the type of polymer and the polymer-cement ratio. It is recognized that there is a certain relationship between surface hardness and compressive strength of most modified systems (7.35).
Bonk 08/18/2015 - 22:30
Nikolaich T4
Why don’t you use “acrylic or PVA dispersion” for everything? did you get the upper hand? IT'S ALL JUST A PRIMER!!
Ursvamp 08/18/2015 - 22:45
BonkIt’s generally unclear what the person is talking about. testing completely different mixtures, his tiles bounced off the same way. Does it prove that different mixtures are hammered differently?
Video I mentioned earlier:
Betocontact is the physical separation of layers, creating a developed surface for subsequent mixtures and improving the adhesion of the layer itself to the surface. That is, if you have an addiction to PVA, then there is clearly too much cement there. Then you need to take hydrophobic PVA and mix quartz sand into it.
Ursvamp 08/18/2015 - 23:19
For example, coating mineral soil on metal beams and columns is a topical thing. But first they must be covered with insulating primer on the org. solvents. Because the PVA solution is water, and even with an acidic reaction, which will rust the surface of the beam until it dries, that is, the adhesion will weaken. Yes, it will be possible to apply such a polymer cement on the ground in a thick layer. This is actually required as a fire-prevention measure and at the same time for a beautiful finish.
© 2020 This resource is a cloud storage of useful data and is organized with donations from users of the site forum.guns.ru who are interested in the safety of their information
Before installing the finishing floor coverings, it is necessary to carry out work to level the base. Modern building materials provide the opportunity to achieve an ideal, even surface in different ways. The range of materials and technologies is quite large: from the construction of floorings from sheet materials of sufficient strength to the production of “wet” screeds using cement-sand mixtures or self-leveling (self-leveling) compounds. What is better: self-leveling floor or cement screed? To decide on the advisability of using one or another base, it is necessary to understand their features and subtleties of application.
Screed and self-leveling floors differ from each other according to several criteria:
- time costs and labor intensity of work;
- cost of materials and labor;
- compatibility with the material of the top finishing flooring;
- Possibility of use at various height differences.
The feasibility of using a self-leveling floor is high when it is necessary to perfectly level the surface and carry out work in the shortest possible time. Self-leveling flooring is not suitable for use with large differences in height and for laying finishing materials such as tiles, stone, porcelain stoneware. Despite the relatively low labor intensity, the cost of installation and material for a self-leveling floor are high compared to a concrete screed.
Concrete screed perfectly levels the surface, its cost is relatively cheap, however, the process of leveling the floor is labor-intensive and time-consuming. Concrete screed involves the need to deliver many bags of cement and sand to the site being repaired and mixing the mortar manually. Therefore, when carrying out repair work in a multi-storey building, it is necessary to understand that the high location of the object increases the cost of the cement screed due to the need to lift the material to the floor. Cement screed dries quite slowly and the rate of hardening directly depends on the thickness of the layer. 
Concrete floor screed
Brief information about the features of concrete screed
Over time, cracks and scratches appear on the concrete surface, which inevitably leads to the need to level the flooring. It is impossible to efficiently install or replace laminated or parquet flooring or linoleum without restoring the concrete screed. The minimum thickness of pouring the concrete mixture when eliminating deficiencies in the existing concrete screed is 30 millimeters.
TIP: The surface of the concrete screed must be additionally sanded if relatively thin linoleum is to be laid. However, sanding costs extra money.
Specialists make concrete screeds using beacons; it is this technology that allows you to maintain the required level throughout the entire room. The need to use beacons and manually level the mixture with a special tool also makes the process labor-intensive and classifies the screeding process as low-tech.
IMPORTANT: Experienced specialists note the positive aspect of using a screed - elements of the “warm floor” system can be immediately laid inside it.
The advantage of a concrete screed: it can be used to install a heated floor system
Brief information about the features of self-leveling floors
Self-leveling flooring, which is a self-leveling gravitational composition, is used for surfaces with small differences in height. This type of substrate can withstand heavy loads, including high wear resistance and does not wear out.
Composition of working mixtures and their features
The physico-chemical properties of the materials that make up the cement-sand screed and self-leveling mixture determine the differences in the implementation of floor pouring technologies.
"Wet" cement screed
The traditional composition for wet cement-sand screed consists of three components: sifted sand, cement and water. Its preparation is carried out by the masters themselves by kneading immediately before use. At the same time, the proportions of elements are also regulated situationally, so the human factor plays an important role here. There is a ready-made dry mixture for cement-sand screed, which is only diluted with water. This mixture contains a small amount of profile modifiers. Modifiers increase the manufacturability of installation and improve the performance characteristics of cement-sand screed, namely:
- improve the mobility of the solution;
- increase the initial setting period of the diluted mixture;
- increase the moisture resistance of the floor;
- increase the strength of the coating and its abrasion;
- increase resistance to deformation under temperature influences, which is important when additionally using “warm” floor technology.
IMPORTANT: With or without the use of modifiers, the process of laying cement-sand mixtures requires the processing of large volumes of materials, as well as significant effort to achieve the effect of a flat surface.
Semi-dry cement screed
By choosing a ratio of components in which the mixture is dominated by a larger amount of sand and relatively little water, it is possible to achieve the effect of rapid hardening of the prepared solution. Semi-dry screed has reduced strength; it often crumbles and splits, and cannot withstand heavy weight loads. This method is most often used in apartments with a small amount of lightweight furniture, during accelerated renovations.
Dry cement screed
When dry screeding, no water is used at all, since a dry mixture is used to fill the floors. This backfill is leveled mechanically and sheet materials - plywood or gypsum fiber - are placed on top. With its low weight, this screed is suitable for use in private houses on wooden floors.
TIP: “Wet” screed, as it is more durable, is more often used in non-residential premises (garages, retail spaces), other types of screed are preferable for apartments and houses with a relatively small area.
Dry screed is most suitable for use in apartments with a flat floor base
Self-leveling self-leveling screed
Compositions for self-leveling floors are manufactured factory-made in the form of dry mixtures or suspensions; they cannot be prepared independently. The mobile liquid consistency of the finished solution allows it to spread freely and level due to gravitational forces. Classification of self-leveling floors is made in accordance with the composition of the mixture. Mineral or polymer compounds can be included in the finished mixture, and therefore self-leveling floors are conventionally divided into:
- epoxy;
- polyurethane;
- epoxy-polyurethane;
- methyl methacrylate.
Polyurethane compounds are characterized by increased elasticity and moisture resistance; they are designed for use under conditions of significant loads and surface compression/expansion, as well as vibration and temperature changes.
An impact-resistant surface is obtained by using epoxy compounds. These two-component compounds are also impact-resistant and can withstand high-intensity mechanical impacts.
Epoxy-polyurethane mixtures are distinguished by strength, resilience and elasticity, and in fact, combine the positive characteristics of mono-component epoxy and polyurethane mixtures.
If a high speed of hardening of the composition is required, it is necessary to use methyl methacrylate compositions - two hours after pouring it is possible to move on the floor surface.
Polyurethane floor screedFeatures of coatings due to the compositions used
In addition to the main operational characteristics, when choosing the type of screed, it is necessary to evaluate other important parameters: time and method of preparation, installation, and other installation operations. These factors affect the final result, cost and time spent on floor repairs.
Cement-sand screed
The technological feature of this type of composition is its thick consistency and poor ductility. This necessitates the use of trowels, graters and rules, as well as significant physical effort to distribute the mass over the floor surface. In order to facilitate the application process, it is practiced to add modifiers to the mixture. If installation is carried out quickly and there are no factory modifiers, it is possible to add concentrated detergent to the composition - it also increases the plasticity of the mixture. When there are large differences in heights, the “beacon” laying technology is used; it is characterized by a general increase in the cost of work and additional labor costs.
IMPORTANT: The cement-sand screed solution is prepared immediately before use using cement sand and a variable amount of water. The quality and composition of the solution is complete. Depends
from the human factor and the skill of the performer - incorrect use of the proportions of materials when mixing the mixture can lead to
to its fragility and cracking.
Scope of application of cement-sand screed
Due to the pronounced roughness of the surface of the cement-sand screed, it is used as a basis for laying linoleum, parquet, laminate, floor boards, and carpet.
For technical or industrial premises, cement screed is sometimes used as a finishing coating. The top layer of the screed is strengthened for its further use using ironing technology, in which cement laitance is squeezed onto the surface of the mortar and dry cement or other powder toppings are rubbed into it, which compact the outer layer of the screed and strengthen it. The surface thus reinforced can withstand the use of heavy equipment, including forklifts.
For residential premises, the minimum thickness of the screed is 3-4 centimeters. To prevent mechanical damage and cracking, it is practiced to place a reinforcing metal or polymer mesh inside the composition. After 12 hours after pouring the cement-sand screed solution, it is possible to carefully move along its surface in soft shoes. Nominal strength is achieved after 14 days, after which installation of decorative finishing materials is possible. The final hardening of the solution occurs within 90 days. When using wood materials as a finishing floor covering, it is necessary to take into account the moisture content of the base, namely, the base must be completely dry.
Floor surface polishing machineScreed using self-leveling floor
Installation of self-leveling floors is carried out without “beacons”; the filling technology is simple and does not require significant specialist efforts. Due to the fluidity of the solution and its ability to self-level and quickly dry, the installation process is fast and efficient.
Scope of application of self-leveling floors
The quality of the resulting surface of self-leveling floors allows you to lay absolutely any decorative coating on top. Often, self-leveling floors are left as a finishing coating due to its attractive appearance and the possibility of various decoration methods during the installation process.
Polymer self-leveling screed has a rich color palette; in addition, glitter, flock and other decorative decorations can be used. So-called 3D floors are gaining popularity. An impressive appearance and a variety of fantasy images are achieved by installing a high-resolution printed vinyl image in the middle layer, and filling it with a layer of transparent polyurethane or epoxy component on top.
Tip: Using a similar technology, it is also possible to produce some interior items, in particular tables, whose design will repeat the design of the floors.
Self-leveling floors are popular for food, chemical, and pharmaceutical premises, as well as in gyms and fitness clubs, public institutions, and kitchens in catering establishments, that is, where sterility and cleanliness, ease of maintenance and disinfection of surfaces are important.
For domestic premises, self-leveling floors are indispensable in bathrooms, kitchens - in areas where there are pronounced temperature fluctuations and high humidity.
After 3 hours after pouring the self-leveling mixture, you can already move on its surface, and after three days it is advisable to begin laying the decorative material.
The minimum permissible thickness for pouring the mixture is 0.5-1 mm, but generally, pouring is done at 3.5-5 mm. But with a minimum pouring thickness, floors are only suitable for home use, and for industrial use the thickness is calculated in accordance with the expected loads.
The process of pouring self-leveling floorFeatures of the use of various screeds in practice
The advisability of using one or another type of screed or a combination of them depends on several factors.
An indicator for the use of cement-sand screed is the complex terrain of the floor, namely:
- large differences in height between floor slabs;
- significant unevenness, potholes;
- large angle of inclination of the plates.
These defects require the installation of a thick layer of screed, therefore, the advantage of using cement-sand mortars in this case is undeniable.
If it is necessary to achieve significant heat-saving characteristics of floors, for example, interfloor, perilite, expanded clay or polystyrene foam balls are added to the cement-sand screed. Heat-saving functions are not characteristic of self-leveling floors and heat-saving indicators cannot be achieved by adding any additives.
Advice: It is believed that you can make a self-leveling floor yourself, without resorting to the services of specialists.
The stages of surface preparation for all types of screed can be characterized as follows:
- cleaning floor slabs or existing rough fill;
- surface dust removal;
- treatment with primer compounds to ensure better adhesion.
Combined screed method
If it is necessary to achieve a smooth floor surface with a highly deformed working surface, experts recommend using a combined method - first, make a layer of concrete screed over the entire surface or parts of it, and install a self-leveling floor on top. This method saves money by 40% compared to using only self-leveling floors on complex surfaces.
Combined method of using concrete screed and self-leveling floorApproximate cost calculation for screed
Self-leveling floors and screeds are designed to level the surface, but at the same time they differ in properties and cost. For clarity, it is possible to give an example of a conditional calculation of the costs of installing coatings, based on the conditional area of the object of 100 square meters.
Initial data
Let's calculate a situation in which it is necessary to level the floor of 1009 square meters with a coating whose thickness will be equal to 10 centimeters. Three options seem possible:
- A mixture of high-quality sand concrete. Its average cost is 150 rubles per 50 kg, that is, 3 rubles per 1 kilogram;
- Cement screed with modifiers– the average price is 180 rubles per 25 kilogram, namely 7.2 rubles per kilogram;
- Composition for self-leveling floor– approximately 230 rubles per 20 kilograms (more than 11 rubles per kg).
For 10 square meters of object you will need:
- 2 kilograms per square meter of sand concrete, and its total cost will be 60 thousand rubles;
- 1.8 kilograms of modified screed, the total cost of this material will be 129,600 rubles;
- 1.6 kilograms per square meter of mixture for self-leveling floor, but, with a significant cost of one kilogram, 184,000 rubles will be spent on the material.
Based on the above calculations, it is obvious that when the thickness of the surface leveling is large, it is necessary to combine a cement-sand screed and a self-leveling floor.
Surface quality
For tiles, porcelain stoneware and stone, the mirror surface provided by the use of self-leveling floors is absolutely unnecessary.
Therefore, self-leveling flooring is used before laying the following materials:
- linoleum;
- laminate;
- parquet;
- carpet
It is these materials that require all the properties of a self-leveling floor, since they provide the final ideal appearance of the repaired floor.
Medium thicknesses for leveling
At medium differences, namely 2-3 centimeters, it is necessary to make a decision based on the current situation at the repair site, as well as in accordance with the intended design.
So, if you only need to lay linoleum or laminate and do it as quickly as possible, it is advisable to make a self-leveling floor. If it is necessary to install heated floors, then a cement-concrete screed is used, and at the request of the customer, an additional self-leveling floor is used.
In any case, one of the important determining factors in choosing the type of screed is time and the amount of money.
Advice: If you need to quickly make a high-quality coating and there is no goal to save money, self-leveling floors will be the ideal solution.
Final alignment
For high-quality finishing leveling with a thickness of 1-3 millimeters, only a self-leveling floor is used. It is important to keep in mind that any other screed will not adhere to the base and will crack due to the thinness of the layer.
Finished coating for laying laminateLet's sum it up
For quick orientation when using types of screed, depending on the coating and leveling thickness, we present a general table.
Parquet, laminate, linoleum, carpet, other material requiring a flat surfaceTile, mosaic, stone, other material that requires a rough surfaceThin layer of fill from 0-5.mm Self-leveling floor Self-leveling floor The average filling layer is from 5-30.mm Self-leveling floor/screedModified screed The filling layer is thick, there is a significant difference in heights and defects - 30-200.mm Combined method - screed with self-leveling floorAny type of screed
Video: subtleties and secrets of self-leveling floors and liquid screeds
To improve the quality of the coating and simplify the work on installing the floor, builders and apartment owners are increasingly using a self-leveling mixture for self-leveling floors.
Such compositions are easy to prepare and work with, as a rule, do not require special skills and are affordable. The building materials market surprises with the variety of SCM for self-leveling floors, of varying quality and characteristics. Let's consider the specifics of using the mixture, what the self-leveling floor consists of, and the main properties of the pouring result.
Depending on the room in which the work is planned, as well as what result is needed, different compositions are recommended for use. 
Mixtures for self-leveling floors for finishing and rough filling differ in the thickness of the possible layer, drying time, strength and, of course, price.
It is customary to distinguish between types of mixtures using the following criteria:
- fill layer thickness;
- type of diluent: aqueous or solvent;
- electrical conductivity coefficient;
- layer texture;
- base binder.
Most of the basic properties of the mixture for self-leveling floors depend on the main binder
| Basic component | Scope of application | pros | Minuses |
|---|---|---|---|
| Gypsum | Rooms with low humidity (up to 70%) | The thickness of the leveling layer can reach 10 cm, which makes it possible to hide very significant differences in height at the base; Low thermal conductivity; Budget cost. | The readiness period and drying period are longer than that of cement mortar; They lose strength at high humidity. |
| Cement | No limits | Fast coating ready time; Not susceptible to high humidity; High strength. | High price; Thin layer filling up to 5cm. |
| Epoxy resin or methyl methacrylate | Without restrictions, most often for non-residential premises. | Daily availability of coating; Excellent design and decorative capabilities; Can be applied over 3D layouts; Increased wear resistance. | Not suitable for leveling significant surface defects; Toxic when working; High solution consumption: more than 1.5 kg per 1 m2. |
| Polyurethane (polyaspartates) | Most often used in private construction. | High strength; non-slip, abrasion-resistant; Suitable for filling inclined surfaces without the formation of sagging. | Not resistant to mechanical damage; Long readiness cycle; High price |
Work stage
 The rough screed is poured in a thick layer
Among other things, the mixture for self-leveling floors should be distinguished according to the stage of work it carries out. For the main or black screed, levelers are used. These mixtures are poured over beacons with a large layer thickness.
Used to eliminate gross defects in ceilings and height differences. This type of fill dries quickly. You can save on volume by laying reinforcing mesh in a layer.
 The top fill should be no more than 5 cm thick
 The top leveling fill for decorative finishing is carried out with appropriate compounds in a thin layer of no more than 5 mm.
The mixtures are expensive and are used as final leveling.
The solution sets quickly, but final hardening comes with time.
Some types of mixtures are poured as a decorative coating, usually an epoxy fill for 3D floors.
It is important to understand that finishing mixtures can be applied to virtually any base, as indicated on the packaging. But when using a certain brand of self-leveling floor composition for a screed, you will have to use a finishing fill of the same brand.
Compositions
 The binder component of the mixture is mixed with mineral additives
Many people will decide that everything is simple, just mix the floor mixture with your own hands and save money. In theory, self-leveling flooring is not complicated in composition. Moreover, most manufacturers do not hide the elements of the mixture and write them on the packaging.
As mentioned above, there is always one binder component, to which various mineral fillers, additives, additives and, of course, sand are added.
 All these components perform their function and are mixed in a certain proportion. And even if you find the proportions and recipe, which manufacturers usually hide, there will still be a lot of fine edges. What sand? Which faction? What to mix and in what order.
In the end, it is unlikely that you will be able to save money. Rather, spend extra on ready-made dry construction mixture.
It is quite possible to prepare less complex mixtures for rough screeds yourself.
Before purchasing a mixture, evaluate your capabilities, both financial and physical, if you carry out the work yourself. To learn how to fill such floors, watch this video:
And a few simple tips to help you decide on a purchase:

The evenness of the prepared floor directly affects the service life of the decorative coating, so you should not save at this stage.